ibm · ibm program directory ... 6.4.2 log on the server machines ... dirmaint is distributed...
TRANSCRIPT

IBMProgram Directory for
IBM z/VM Directory Maintenance Facility Feature
Function Level 510
Program Number 5741-A05
for Use withz/VM Version 5
Document Date: September 2004
GI11-4798-00

Note!
Before using this information and the product it supports, be sure to read the general information under “Notices” on page 53.
This program directory, dated September 2004, applies to z/VM Directory Maintenance Facility Feature Function Level 510(DirMaint), Program Number 5741-A05.
A form for reader's comments appears at the back of this publication. When you send information to IBM, you grant IBM anonexclusive right to use or distribute the information in any way it believes appropriate without incurring any obligation to you.
Copyright International Business Machines Corporation 1995, 2004. All rights reserved.Note to U.S. Government Users — Documentation related to restricted rights — Use, duplication or disclosure is subject torestrictions set forth in GSA ADP Schedule Contract with IBM Corp.
Contents
Summary of Changes . . . . . . . . . . . . . . . . . . . . . . . . . . . . . . . . . . . . . . . . . . . . . . . . . vDirMaint Web Information . . . . . . . . . . . . . . . . . . . . . . . . . . . . . . . . . . . . . . . . . . . . . v
1.0 Introduction . . . . . . . . . . . . . . . . . . . . . . . . . . . . . . . . . . . . . . . . . . . . . . . . . . . 11.1 Program Description . . . . . . . . . . . . . . . . . . . . . . . . . . . . . . . . . . . . . . . . . . . . . . . 11.2 Enhancements for z/VM Directory Maintenance Facility Feature . . . . . . . . . . . . . . . . . . . . . 2
2.0 Program Materials . . . . . . . . . . . . . . . . . . . . . . . . . . . . . . . . . . . . . . . . . . . . . . . 32.1 Basic Machine-Readable Material . . . . . . . . . . . . . . . . . . . . . . . . . . . . . . . . . . . . . . . 32.2 Optional Machine-Readable Material . . . . . . . . . . . . . . . . . . . . . . . . . . . . . . . . . . . . . 32.3 Program Publications . . . . . . . . . . . . . . . . . . . . . . . . . . . . . . . . . . . . . . . . . . . . . . 3
2.3.1 Basic Program Publications . . . . . . . . . . . . . . . . . . . . . . . . . . . . . . . . . . . . . . . . 32.3.2 Base Program Publications . . . . . . . . . . . . . . . . . . . . . . . . . . . . . . . . . . . . . . . . 32.3.3 Softcopy Publications . . . . . . . . . . . . . . . . . . . . . . . . . . . . . . . . . . . . . . . . . . . 4
2.4 Microfiche Support . . . . . . . . . . . . . . . . . . . . . . . . . . . . . . . . . . . . . . . . . . . . . . . . 42.5 Publications Useful During Installation and Service . . . . . . . . . . . . . . . . . . . . . . . . . . . . . 4
3.0 Program Support . . . . . . . . . . . . . . . . . . . . . . . . . . . . . . . . . . . . . . . . . . . . . . . . 63.1 Preventive Service Planning . . . . . . . . . . . . . . . . . . . . . . . . . . . . . . . . . . . . . . . . . . 63.2 Statement of Support Procedures . . . . . . . . . . . . . . . . . . . . . . . . . . . . . . . . . . . . . . . 6
4.0 Program and Service Level Information . . . . . . . . . . . . . . . . . . . . . . . . . . . . . . . . . . 74.1 Program Level Information . . . . . . . . . . . . . . . . . . . . . . . . . . . . . . . . . . . . . . . . . . . 74.2 Service Level Information . . . . . . . . . . . . . . . . . . . . . . . . . . . . . . . . . . . . . . . . . . . . 74.3 Cumulative Service . . . . . . . . . . . . . . . . . . . . . . . . . . . . . . . . . . . . . . . . . . . . . . . 7
5.0 Installation Requirements and Considerations . . . . . . . . . . . . . . . . . . . . . . . . . . . . . . 85.1 Hardware Requirements . . . . . . . . . . . . . . . . . . . . . . . . . . . . . . . . . . . . . . . . . . . . 85.2 Program Considerations . . . . . . . . . . . . . . . . . . . . . . . . . . . . . . . . . . . . . . . . . . . . 8
5.2.1 Operating System Requirements . . . . . . . . . . . . . . . . . . . . . . . . . . . . . . . . . . . . . 85.2.2 Other Program Product Requirements . . . . . . . . . . . . . . . . . . . . . . . . . . . . . . . . . . 85.2.3 Program Installation/Service Considerations . . . . . . . . . . . . . . . . . . . . . . . . . . . . . . 8
5.3 DASD Storage and User ID Requirements . . . . . . . . . . . . . . . . . . . . . . . . . . . . . . . . . . 95.3.1 Required DASD Storage for DirMaint . . . . . . . . . . . . . . . . . . . . . . . . . . . . . . . . . 105.3.2 Required DASD Storage for DirMaint Based on Source Directory Size . . . . . . . . . . . . . . 135.3.3 Optional DASD Storage for DirMaint . . . . . . . . . . . . . . . . . . . . . . . . . . . . . . . . . . 145.3.4 Optional DASD Storage for DirMaint Based on Source Directory Size . . . . . . . . . . . . . . 155.3.5 User ID Directory Information . . . . . . . . . . . . . . . . . . . . . . . . . . . . . . . . . . . . . . 16
6.0 Installation Instructions . . . . . . . . . . . . . . . . . . . . . . . . . . . . . . . . . . . . . . . . . . . 176.1 VMSES/E Installation Process Overview . . . . . . . . . . . . . . . . . . . . . . . . . . . . . . . . . . 176.2 Completing Your Installation of DirMaint . . . . . . . . . . . . . . . . . . . . . . . . . . . . . . . . . . 17
Copyright IBM Corp. 1995, 2004 iii

6.3 Tailor the DirMaint Server Machines . . . . . . . . . . . . . . . . . . . . . . . . . . . . . . . . . . . . 196.3.1 Tailor the DirMaint Installation . . . . . . . . . . . . . . . . . . . . . . . . . . . . . . . . . . . . . 20
6.4 Place DirMaint Into Production . . . . . . . . . . . . . . . . . . . . . . . . . . . . . . . . . . . . . . . . 236.4.1 Copy the Server Code to the Server Minidisks . . . . . . . . . . . . . . . . . . . . . . . . . . . . 236.4.2 Log On the Server Machines . . . . . . . . . . . . . . . . . . . . . . . . . . . . . . . . . . . . . . 236.4.3 Obtaining DirMaint HELP . . . . . . . . . . . . . . . . . . . . . . . . . . . . . . . . . . . . . . . . 24
7.0 Service Instructions . . . . . . . . . . . . . . . . . . . . . . . . . . . . . . . . . . . . . . . . . . . . . 257.1 VMSES/E Service Process Overview . . . . . . . . . . . . . . . . . . . . . . . . . . . . . . . . . . . . 267.2 Servicing DirMaint . . . . . . . . . . . . . . . . . . . . . . . . . . . . . . . . . . . . . . . . . . . . . . . 26
7.2.1 Prepare to Receive Service . . . . . . . . . . . . . . . . . . . . . . . . . . . . . . . . . . . . . . . 267.2.2 Receive the Service . . . . . . . . . . . . . . . . . . . . . . . . . . . . . . . . . . . . . . . . . . . 287.2.3 Apply the Service . . . . . . . . . . . . . . . . . . . . . . . . . . . . . . . . . . . . . . . . . . . . . 297.2.4 Update the Build Status Table . . . . . . . . . . . . . . . . . . . . . . . . . . . . . . . . . . . . . 307.2.5 Build Service Objects . . . . . . . . . . . . . . . . . . . . . . . . . . . . . . . . . . . . . . . . . . 327.2.6 Additional Service Steps . . . . . . . . . . . . . . . . . . . . . . . . . . . . . . . . . . . . . . . . . 32
7.3 Optional Service Steps (depending on what was installed) . . . . . . . . . . . . . . . . . . . . . . . 347.3.1 Servicing the Uppercase English Files . . . . . . . . . . . . . . . . . . . . . . . . . . . . . . . . . 34
7.4 Test the New DirMaint Service . . . . . . . . . . . . . . . . . . . . . . . . . . . . . . . . . . . . . . . . 347.5 Place Serviced DirMaint into Production . . . . . . . . . . . . . . . . . . . . . . . . . . . . . . . . . . 34
7.5.1 Copy the Server Code to the Production Minidisks . . . . . . . . . . . . . . . . . . . . . . . . . 357.5.2 Copy the DirMaint Production Code to MAINT's Minidisks . . . . . . . . . . . . . . . . . . . . . 357.5.3 Reinitialize the Server Machines . . . . . . . . . . . . . . . . . . . . . . . . . . . . . . . . . . . . 37
Appendix A. Local Modification Example: $EXEC File . . . . . . . . . . . . . . . . . . . . . . . . . . 39
Appendix B. Applying a Recommended Service Upgrade (RSU) For DirMaint . . . . . . . . . . . . 42B.1 Apply DirMaint RSU . . . . . . . . . . . . . . . . . . . . . . . . . . . . . . . . . . . . . . . . . . . . . . 43
B.1.1 Prepare Your System for Service Refresh . . . . . . . . . . . . . . . . . . . . . . . . . . . . . . 43B.1.2 Receive the Preapplied, Prebuilt Service . . . . . . . . . . . . . . . . . . . . . . . . . . . . . . . 45B.1.3 Process Additional Service . . . . . . . . . . . . . . . . . . . . . . . . . . . . . . . . . . . . . . . 46
B.1.3.1 Build the New Service Level . . . . . . . . . . . . . . . . . . . . . . . . . . . . . . . . . . . 47
Appendix C. Creating a Product Parameter File (PPF) Override . . . . . . . . . . . . . . . . . . . . 48
Appendix D. Disabling DirMaint . . . . . . . . . . . . . . . . . . . . . . . . . . . . . . . . . . . . . . . . 52
Notices . . . . . . . . . . . . . . . . . . . . . . . . . . . . . . . . . . . . . . . . . . . . . . . . . . . . . . . . 53Trademarks and Service Marks . . . . . . . . . . . . . . . . . . . . . . . . . . . . . . . . . . . . . . . . . . 54
Reader's Comments . . . . . . . . . . . . . . . . . . . . . . . . . . . . . . . . . . . . . . . . . . . . . . . . 55
iv DirMaint Program Directory

Figures
1. Basic Material: Unlicensed Publications . . . . . . . . . . . . . . . . . . . . . . . . . . . . . . . . . 32. Program Publications: New Editions . . . . . . . . . . . . . . . . . . . . . . . . . . . . . . . . . . . 43. Publications Useful During Installation / Service on z/VM Version 5 . . . . . . . . . . . . . . . . . 44. PSP Upgrade and Subset ID . . . . . . . . . . . . . . . . . . . . . . . . . . . . . . . . . . . . . . . . 65. Component IDs . . . . . . . . . . . . . . . . . . . . . . . . . . . . . . . . . . . . . . . . . . . . . . . 66. DASD Storage Requirements for (Required) Target Minidisks . . . . . . . . . . . . . . . . . . . . 107. DASD Storage Requirements for Required DIRMAINT Disks Based on Source Directory Size . . 138. DASD Storage Requirements for (Optional) Target Minidisks . . . . . . . . . . . . . . . . . . . . . 149. DASD Storage Requirements for Optional DIRMAINT Disks Based on Source Directory Size . . 15
10. DirMaint 510 Supplied Sample Files . . . . . . . . . . . . . . . . . . . . . . . . . . . . . . . . . . . 19
Summary of Changes
The following describes the different revision indicators used and the timeframe when they were inserted:
� The -00 suffix level is September 2004.
DirMaint Web Information
The DirMaint web page can be visited at URL:
www.ibm.com/eserver/zseries/zvm/related/dirmaint
There you will find:
� Additional useful information, hints, and tips.
� A postscript version of the DirMaint 510 program directory available for downloading.
� A PDF version of the DirMaint 510 program directory available for viewing.
� The ability to subscribe to future updates.
Figures v

vi DirMaint Program Directory

1.0 Introduction
This program directory is intended for the system programmer responsible for program installation andmaintenance. It contains information concerning the material and procedures associated with theinstallation of DirMaint. You should read all of this program directory before installing the program andthen keep it for future reference.
When you are ready to install DirMaint, read section 3.1, “Preventive Service Planning” on page 6. Thissection tells you how to find any updates to the information and procedures in this program directory.
The program directory contains the following sections:
� 2.0, “Program Materials” on page 3 identifies the basic and optional program materials anddocumentation for DirMaint.
� 3.0, “Program Support” on page 6 describes the IBM support available for DirMaint.
� 4.0, “Program and Service Level Information” on page 7 lists the APARs (program level) and PTFs(service level) incorporated into DirMaint.
� 5.0, “Installation Requirements and Considerations” on page 8 identifies the resources andconsiderations for installing and using DirMaint.
� 6.0, “Installation Instructions” on page 17 provides detailed installation and customization instructionsfor DirMaint.
� 7.0, “Service Instructions” on page 25 provides detailed servicing instructions for DirMaint.
� Appendix A, “Local Modification Example: $EXEC File” on page 39 provides a local modificationexample for DirMaint.
� Appendix B, “Applying a Recommended Service Upgrade (RSU) For DirMaint” on page 42 providesdetailed RSU installation instructions for DirMaint.
� Appendix C, “Creating a Product Parameter File (PPF) Override” on page 48 provides instructions onoverriding the VMSYS file pool name for DirMaint.
� Appendix D, “Disabling DirMaint” on page 52 provides a description of disabling DirMaint 510, whenDirMaint is not licensed.
1.1 Program Descriptionz/VM Directory Maintenance Facility Feature provides:
� Commands to allow general users to control those portions of their directory entry not directly affectingtheir privileges or resources, relieving the system administrators of this chore;
� Commands to allow system administrators to easily make updates to the directory affecting userprivileges and resource allocations, improving productivity;
� Integrity checking and verification services to avoid accidental damage to the directory or overlappingof DASD allocations.
Copyright IBM Corp. 1995, 2004 1

1.2 Enhancements for z/VM Directory Maintenance Facility FeatureThe following enhancements were made in DirMaint FL 510; compared to DirMaint FL 410:
� Publications library refresh
� Introduction of DirMaint-RACF connector
� Addition of DASD management commands, e.g. DASD DASDM
� Support for SMAPI
� Introduction of FLASHCOPY for CLONEDISK commands for faster results
� Five new user exits.
The following enhancements were made in DirMaint FL 410; compared to DirMaint 1.5.0:
� z/VM Directory Maintenance Facility Feature is pre-installed disabled on z/VM.
� z/VM Directory Maintenance Facility Feature service is now available on the stacked RSU.
The following enhancements were made in DirMaint 1.5.0; compared to DirMaint 1.4.0:
� VMSES/E Enablement for installation and service
� Publications library refresh
� Improved networking support
� Distributed administration
� Providing separate commands to manipulate every directory statement reducing the need forget/replace
� Provide six new user exits and twenty-six new system exits
� Changing the way DASD allocation is done based on size of disk to minimize fragmentation
� No longer holds a work unit lock if the work unit fails
� Conditionally eliminate printed password warning notices
� Purge old reader file notices
� Supporting set password as being already in the warning period
� Elimination of the 15 minute wait between consecutive VM minidisk requests
� Exploiting DFSMS/VM copy function if DFSMS is installed
� No longer arbitrarily upper case directory file information
� Support alternate source and alternate object directories
2 DirMaint Program Directory

2.0 Program Materials
An IBM program is identified by a program number and a feature code. The program number for DirMaintis 5741-A05.
The program announcement material describes the features supported by DirMaint. Ask your IBMmarketing representative for this information if you have not already received a copy.
The following sections identify:
� The basic and optional program materials available with this program
2.1 Basic Machine-Readable Material
DirMaint is distributed pre-installed as part of the z/VM Version 5 system deliverables. Therefore there areno basic machine readable materials. DirMaint is a priced feature, so it is installed disabled. You mustorder z/VM Directory Maintenance Facility Feature to enable and use the product. Refer to theappropriate z/VM Version 5 software announcement for information on ordering z/VM Version 5 and itsfeatures.
2.2 Optional Machine-Readable Material
There are no optional machine-readable materials for DirMaint.
2.3 Program Publications
The following sections identify the basic and optional publications for DirMaint.
2.3.1 Basic Program Publications
One copy of the following is included when you order the basic materials for DirMaint.
2.3.2 Base Program Publications
Figure 2 identifies the base program publications associated with DirMaint.
Figure 1. Basic Material: Unlicensed Publications
Publication Title Form Number
Program Directory for IBM z/VM Directory Maintenance Facility Feature GI11-4798
Copyright IBM Corp. 1995, 2004 3

2.3.3 Softcopy Publications
The DirMaint publications are supplied softcopy as part of the IBM e(logo)Server zSeries OnlineLibrary: z/VM Collection CD-ROM in BookManager and Adobe Portable Document Format (PDF). Onecopy of the z/VM Collection CD-ROM is included when you order the basic materials for z/VM Version 5.
In addition, the DirMaint softcopy publications, including this program directory, are available in AdobePortable Document Format from the z/VM internet library home page on the World Wide Web; the URL forthis home page is:
www.ibm.com/eserver/zseries/zvm/library
The z/VM publications can be ordered separately, for a fee, using the specific publication number throughthe IBM Publication Center at:
www.ibm.com/shop/publications/order
The Publications Center is a world wide central repository for IBM product publications and marketingmaterial. Furthermore, a large number of publications are available online in various file formats (e.g.Adobe PDF), which can currently be downloaded free of charge.
2.4 Microfiche Support
No program source materials or viewable program listings are provided for DirMaint.
2.5 Publications Useful During Installation and Service
The publications listed in Figure 3 may be useful during the installation of DirMaint.
Figure 2. Program Publications: New Editions
Publication Title Form Number
Directory Maintenance Facility Tailoring and Administration Guide SC24-6135
Directory Maintenance Facility Command Reference SC24-6133
Directory Maintenance Facility Messages SC24-6134
Figure 3 (Page 1 of 2). Publications Useful During Installation / Service on z/VM Version 5
Publication Title Form Number
Directory Maintenance Facility Tailoring and Administration Guide SC24-6135
z/VM: VMSES/E Introduction and Reference GC24-6130
z/VM: Service Guide GC24-6117
4 DirMaint Program Directory

Figure 3 (Page 2 of 2). Publications Useful During Installation / Service on z/VM Version 5
Publication Title Form Number
z/VM: CP Planning and Administration SC24-6043
z/VM: CP Commands and Utilities Reference SC24-6081
z/VM: CMS Commands and Utilities Reference SC24-6073
z/VM: CMS File Pool Planning, Administration, and Operation SC24-6074
z/VM: System Messages and Codes - CP GC24-6119
z/VM: System Messages and Codes - CMS and REXX/VM GC24-6118
z/VM: System Messages and Codes - AVS, Dump Viewing Facility, GCS, TSAF, and VMSES/E GC24-6120
Program Materials 5
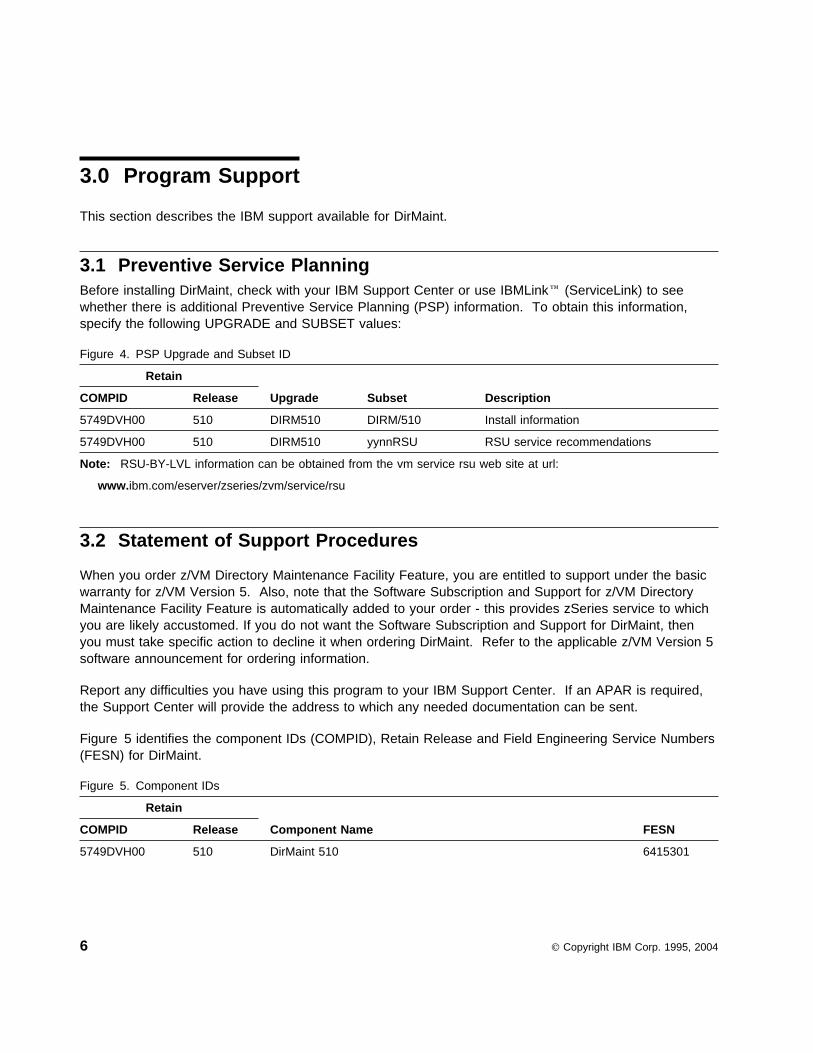
3.0 Program Support
This section describes the IBM support available for DirMaint.
3.1 Preventive Service PlanningBefore installing DirMaint, check with your IBM Support Center or use IBMLink (ServiceLink) to seewhether there is additional Preventive Service Planning (PSP) information. To obtain this information,specify the following UPGRADE and SUBSET values:
3.2 Statement of Support Procedures
When you order z/VM Directory Maintenance Facility Feature, you are entitled to support under the basicwarranty for z/VM Version 5. Also, note that the Software Subscription and Support for z/VM DirectoryMaintenance Facility Feature is automatically added to your order - this provides zSeries service to whichyou are likely accustomed. If you do not want the Software Subscription and Support for DirMaint, thenyou must take specific action to decline it when ordering DirMaint. Refer to the applicable z/VM Version 5software announcement for ordering information.
Report any difficulties you have using this program to your IBM Support Center. If an APAR is required,the Support Center will provide the address to which any needed documentation can be sent.
Figure 5 identifies the component IDs (COMPID), Retain Release and Field Engineering Service Numbers(FESN) for DirMaint.
Figure 4. PSP Upgrade and Subset ID
Retain
Upgrade Subset DescriptionCOMPID Release
5749DVH00 510 DIRM510 DIRM/510 Install information
5749DVH00 510 DIRM510 yynnRSU RSU service recommendations
Note: RSU-BY-LVL information can be obtained from the vm service rsu web site at url:
www.ibm.com/eserver/zseries/zvm/service/rsu
Figure 5. Component IDs
Retain
Component Name FESNCOMPID Release
5749DVH00 510 DirMaint 510 6415301
6 Copyright IBM Corp. 1995, 2004
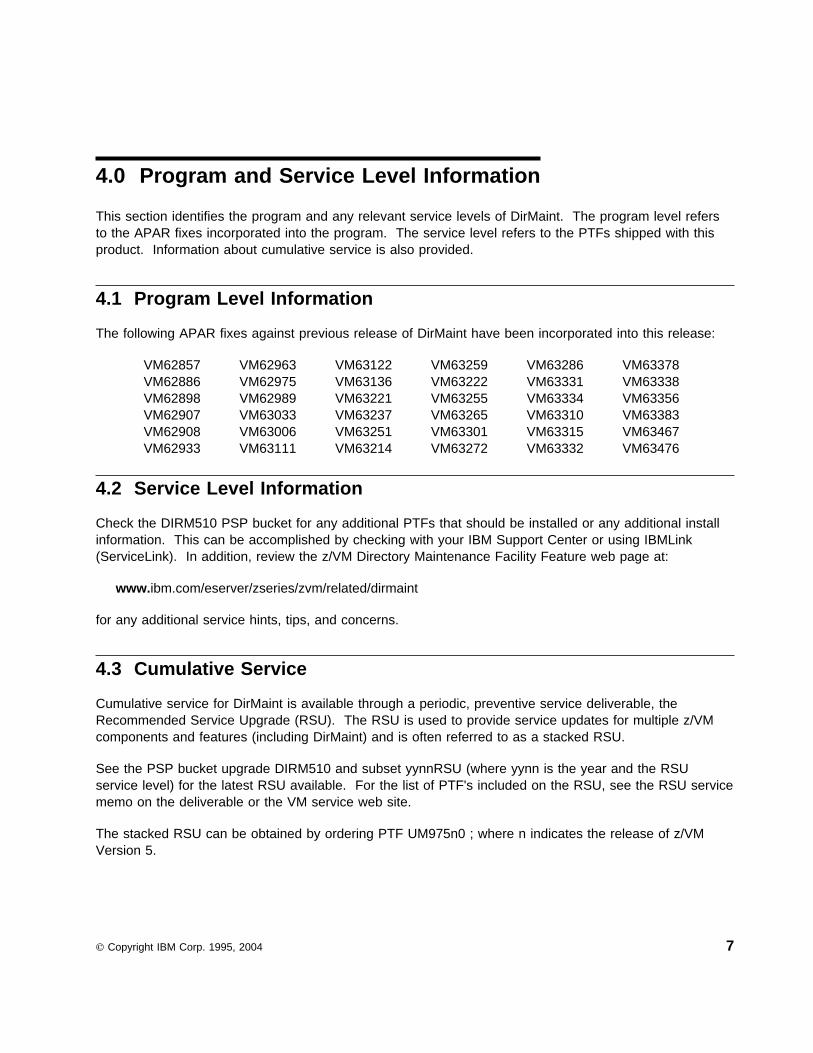
4.0 Program and Service Level Information
This section identifies the program and any relevant service levels of DirMaint. The program level refersto the APAR fixes incorporated into the program. The service level refers to the PTFs shipped with thisproduct. Information about cumulative service is also provided.
4.1 Program Level Information
The following APAR fixes against previous release of DirMaint have been incorporated into this release:
VM62857VM62886VM62898VM62907VM62908VM62933
VM62963VM62975VM62989VM63033VM63006VM63111
VM63122VM63136VM63221VM63237VM63251VM63214
VM63259VM63222VM63255VM63265VM63301VM63272
VM63286VM63331VM63334VM63310VM63315VM63332
VM63378VM63338VM63356VM63383VM63467VM63476
4.2 Service Level Information
Check the DIRM510 PSP bucket for any additional PTFs that should be installed or any additional installinformation. This can be accomplished by checking with your IBM Support Center or using IBMLink(ServiceLink). In addition, review the z/VM Directory Maintenance Facility Feature web page at:
www.ibm.com/eserver/zseries/zvm/related/dirmaint
for any additional service hints, tips, and concerns.
4.3 Cumulative Service
Cumulative service for DirMaint is available through a periodic, preventive service deliverable, theRecommended Service Upgrade (RSU). The RSU is used to provide service updates for multiple z/VMcomponents and features (including DirMaint) and is often referred to as a stacked RSU.
See the PSP bucket upgrade DIRM510 and subset yynnRSU (where yynn is the year and the RSUservice level) for the latest RSU available. For the list of PTF's included on the RSU, see the RSU servicememo on the deliverable or the VM service web site.
The stacked RSU can be obtained by ordering PTF UM975n0 ; where n indicates the release of z/VMVersion 5.
Copyright IBM Corp. 1995, 2004 7

5.0 Installation Requirements and Considerations
The following sections identify the system requirements for installing and activating DirMaint.
5.1 Hardware Requirements
There are no special hardware requirements for DirMaint.
5.2 Program Considerations
The following sections list the programming considerations for installing and activating DirMaint.
5.2.1 Operating System Requirements
DirMaint 510 supports the following VM operating systems:
� z/VM Version 5
5.2.2 Other Program Product Requirements
No other products are required for DirMaint.
5.2.3 Program Installation/Service Considerations
This section describes items that should be considered before you install or service DirMaint.
� VMSES/E is required to install and service this product.
� If multiple users install and maintain licensed products on your system, there may be a problemgetting the necessary access to MAINT's 51D disk. If you find that there is contention for write accessto the 51D disk, you can eliminate it by converting the Software Inventory from minidisk to Shared FileSystem (SFS). See the VMSES/E Introduction and Reference manual, section 'Changing theSoftware Inventory to an SFS Directory', for information on how to make this change.
� RSUs will be supplied as necessary. Service between RSUs can be obtained via CORrective service.
� A section of the Directory Maintenance Facility Tailoring and Administration Guide entitled "DirectoryEntries for the DirMaint Machines" provides useful background information on the server directories.
8 Copyright IBM Corp. 1995, 2004

5.3 DASD Storage and User ID Requirements
Sections 5.3.1, “Required DASD Storage for DirMaint” on page 10 and 5.3.2, “Required DASD Storage forDirMaint Based on Source Directory Size” on page 13 lists the user IDs and minidisks that are required toinstall and service DirMaint. Sections 5.3.3, “Optional DASD Storage for DirMaint” on page 14 and 5.3.4,“Optional DASD Storage for DirMaint Based on Source Directory Size” on page 15 lists the user IDs andminidisks that are optional for DirMaint.
Important Installation Notes:
Note - z/VM Automated Service Procedure
If you modify any of the IBM-supplied default user IDs, minidisk addresses, or SFS directorynames associated with DirMaint and you plan on using the z/VM automated service procedure (theSERVICE and PUT2PROD commands) to service your z/VM system, then you must create a PPFoverride for the SERVP2P $PPF file.
You must also use the VMFUPDAT command to update the VM SYSSUF Software Inventory file,so that your PPF override for SERVP2P is used for automated service processing. For moreinformation about PPF overrides, see the z/VM:VMSES/E Introduction and Reference.
� The user IDs and minidisks shown in Figure 6 on page 10 through Figure 9 on page 15 arealready defined when you install z/VM Version 5 because DirMaint is preinstalled on the systemDDR.
� 5VMDIR10 is a default user ID and can be changed. If you choose to change the name of theinstallation user ID you need to create a Product Parameter Override (PPF) to reflect this change.See Appendix C, “Creating a Product Parameter File (PPF) Override” on page 48 for an exampleof creating a PPF override.
� If you chose to change the installation user ID, you must ensure that all the default virtual minidiskaddresses for DirMaint are unique on the new installation user ID. You will have to create a PPFoverride to change any minidisk address conflicts. Use of the shared file system will help reducethese conflicts. However, any disk with *NONSFS listed in the SFS 4K block column of Figure 6on page 10 must remain a minidisk.
� The DIRMSAT user ID and minidisk resources are only required if you plan on using a DirMaintSatellite server machine. This server is only necessary if you plan on maintaining multiple objectdirectories on a single system or within a Cross System Extension (CSE) cluster. If this is notyour environment, then there is no need to obtain the DIRMSAT user ID or any of the resources itowns.
� The DIRMAINT 15D minidisk is only required if you plan on using a DirMaint Satellite server(DIRMSAT) machine. Otherwise, the 15D minidisk should not be defined for the DIRMAINT userID.
Installation Requirements and Considerations 9

5.3.1 Required DASD Storage for DirMaint
The table in Figure 6 contains the required DASD for the 5VMDIR10, MAINT, and DirMaint server userIDs in order to install and service DirMaint 510.
Important DASD Notes:
� Most of the minidisks are already defined on the z/VM System deliverables. If you need to add aminidisk then it MUST be CMS formatted.
� It is not recommended that the 5VMDIR10 492, 491, 41F, or 11F minidisks, or any disks ownedby DirMaint servers reside in a shared file system directory. In the event of shared file systemproblems, it may be impossible to make any directory changes. And it is possible that one ormore directory changes, such as allocating more DASD space, may be necessary to make theshared file system operational again. The DIRMAINT 15D minidisk must not reside in a sharedfile system directory.
� The DIRMAINT 1AA, and 1FA, the DATAMOVE 1AA, and the DIRMSAT 1AA minidisks are in therequired list since they are strongly recommended.
– The 1AA minidisks are used to maintain history files for debugging purposes. If your systemhas an ESM (external security manager) that allows for authorized virtual machines to writelog records into the ESM audit trail, then you may wish to omit the 1AA minidisks in favor ofthe ESM's audit trail.
– If you have a DIRMAINT 1.4.0 112 minidisk, you can use that disk in place of the DIRMAINT1FA minidisk by customizing the DVHPROFA DIRMAINT file.
Figure 6 (Page 1 of 3). DASD Storage Requirements for (Required) Target Minidisks
Minidiskowner(user ID)
DefaultAddress
Storage inCylinders FB-512
BlocksSFS 4KBlocks
Usage
DASD CYLS Default SFS Directory Name
5VMDIR10 2B2 3390 13 18720 2340 Contains all of the base code shipped withDirMaintVMSYS:5VMDIR10.DIRM.OBJECT
5VMDIR10 2B1 3390 10 14400 1800 Contains optional source files VMSYS:5VMDIR10.DIRM.SOURCE
Notes:
1. Cylinder values defined in this table are based on a 4k block size. FB-512 and SFS block values are derivedfrom the 3390 cylinder values in this table.
2. *NONSFS in the SFS 4K block column means that disk cannot be installed to the shared file system and mustremain a minidisk.
3. Cylinder values for the 2B1 minidisk are based on the source files in packed format. In order to createupdates and assemble the files they will need to be unpacked. Disk sizes unpacked will be approximatelydouble that which is shown in this table.
10 DirMaint Program Directory

Figure 6 (Page 2 of 3). DASD Storage Requirements for (Required) Target Minidisks
Minidiskowner(user ID)
DefaultAddress
Storage inCylinders FB-512
BlocksSFS 4KBlocks
Usage
DASD CYLS Default SFS Directory Name
5VMDIR10 2C2 3390 2 2880 360 Used for DirMaint sample files VMSYS:5VMDIR10.DIRM.SAMPLE
5VMDIR10 2C4 3390 1 1440 180 Used for user local modifications forDirMaintVMSYS:5VMDIR10.DIRM.LOCALMOD
5VMDIR10 2D2 3390 50 72000 9000 Contains serviced files VMSYS:5VMDIR10.DIRM.DELTA
5VMDIR10 2A6 3390 4 5760 720 Contains AUX files and version vectortable that represents your test levelof DirMaintVMSYS:5VMDIR10.DIRM.APPLYALT
5VMDIR10 2A2 3390 4 5760 720 Contains AUX files and version vectortable that represent your production levelof DirMaintVMSYS:5VMDIR10.DIRM.APPLYPROD
5VMDIR10 29D 3390 9 12960 1620 Contains American English help files forDirMaintVMSYS:5VMDIR10.DIRM.HELP
5VMDIR10 29E 3390 1 1440 180 Test disk for DirMaint code belongingon MAINT's 19EVMSYS:5VMDIR10.DIRM.MAINT19E
5VMDIR10 492 3390 10 14400 *NONSFS Test disk for DirMaint servers, alsocontains sample directories and othersystem files and new source files.Also servers 192 disk
5VMDIR10 491 3390 10 14400 *NONSFS Production disk for DirMaint servers, alsoservers 191 disk
5VMDIR10 41F 3390 8 11520 *NONSFS Test disk for DirMaint interface code
Notes:
1. Cylinder values defined in this table are based on a 4k block size. FB-512 and SFS block values are derivedfrom the 3390 cylinder values in this table.
2. *NONSFS in the SFS 4K block column means that disk cannot be installed to the shared file system and mustremain a minidisk.
3. Cylinder values for the 2B1 minidisk are based on the source files in packed format. In order to createupdates and assemble the files they will need to be unpacked. Disk sizes unpacked will be approximatelydouble that which is shown in this table.
Installation Requirements and Considerations 11

Figure 6 (Page 3 of 3). DASD Storage Requirements for (Required) Target Minidisks
Minidiskowner(user ID)
DefaultAddress
Storage inCylinders FB-512
BlocksSFS 4KBlocks
Usage
DASD CYLS Default SFS Directory Name
5VMDIR10 11F 3390 8 11520 *NONSFS Production disk for DirMaint interfacecode also servers 11F disk
5VMDIR10 191 3390 9 12960 1620 5VMDIR10 user ID's 191 minidisk VMSYS:5VMDIR10.
MAINT 19E 3390 1 1440 180 Production disk for DirMaint userexec.
DATAMOVE 155 3390 9 12960 *NONSFS Server's A-disk
DIRMSAT 155 3390 9 12960 *NONSFS Server's A-disk
DIRMAINT 1AA 3390 9 12960 *NONSFS Contain CONSOLE and TRANSLOG files
DATAMOVE 1AA 3390 9 12960 *NONSFS Contain CONSOLE and TRANSLOG files
DIRMSAT 1AA 3390 9 12960 *NONSFS Contain CONSOLE and TRANSLOG files
DIRMAINT 15D 3390 1 1440 *NONSFS Intersystem locking diskRequired when using Satellite servers
DIRMAINT 1FA 3390 9 12960 *NONSFS Temporary storage for arriving spool files
DATAMOVE 1FA 3390 9 12960 *NONSFS Temporary storage for arriving spool files
DIRMSAT 1FA 3390 9 12960 *NONSFS Temporary storage for arriving spool files
Notes:
1. Cylinder values defined in this table are based on a 4k block size. FB-512 and SFS block values are derivedfrom the 3390 cylinder values in this table.
2. *NONSFS in the SFS 4K block column means that disk cannot be installed to the shared file system and mustremain a minidisk.
3. Cylinder values for the 2B1 minidisk are based on the source files in packed format. In order to createupdates and assemble the files they will need to be unpacked. Disk sizes unpacked will be approximatelydouble that which is shown in this table.
12 DirMaint Program Directory

5.3.2 Required DASD Storage for DirMaint Based on Source DirectorySize
The following table contains the required DASD for the DIRMAINT server whose disk size is based on thesource directory size.
Figure 7. DASD Storage Requirements for Required DIRMAINT Disks Based on Source Directory Size
Minidiskowner(user ID)
DefaultAddress Calculation for Storage in Cylinders Usage
DIRMAINT 155 Two Times the Source Directory Size DIRMAINT server's A-disk
DIRMAINT 1DF Two times the Source Directory Size Contains the primarydirectory files
DIRMAINT 1DB Three Times the Source Directory Size Contains the USERBACKUP file
Notes:
1. It is not recommended that any disks owned by DirMaint servers reside in a shared file system directory. Inthe event of shared file system problems, it may be impossible to make any directory changes. And it ispossible that one or more directory changes, such as allocating more DASD space, may be necessary tomake the shared file system operational again.
2. All the disks defined in this table MUST be CMS formatted.
Installation Requirements and Considerations 13

5.3.3 Optional DASD Storage for DirMaint
The following table contains the optional DASD for the 5VMDIR10, MAINT, and DirMaint server user IDsin order to install optional source, install and service Uppercase English help files, copy American Englishhelp files to MAINT's 19D minidisk, and for DirMaint backup minidisks.
Figure 8. DASD Storage Requirements for (Optional) Target Minidisks
Minidiskowner(user ID)
DefaultAddress
Storage inCylinders FB-512
BlocksSFS 4KBlocks
Usage
DASD CYLS Default SFS Directory Name
5VMDIR10 502 3390 9 12960 1620 Contains Upper Case English help files forDirMaintVMSYS:5VMDIR10.DIRM.HELPU
MAINT 19D 3390 9 12960 1620 Production disk containing AmericanEnglish help files for DirMaint
MAINT 402 3390 9 12960 1620 Production disk containing Upper CaseEnglish help files for DirMaint
DIRMAINT 2AA 3390 9 12960 *NONSFS Contains a backup of theCONSOLE and TRANSLOG files.
DATAMOVE 2AA 3390 9 12960 *NONSFS Contains a backup of theCONSOLE and TRANSLOG files.
DIRMSAT 2AA 3390 9 12960 *NONSFS Contains a backup of theCONSOLE and TRANSLOG files.
Notes:
1. Cylinder values defined in this table are based on a 4k block size. FB-512 and SFS block values are derivedfrom the 3390 cylinder values in this table.
2. *NONSFS in the SFS 4K block column means that disk cannot be installed to the shared file system and mustremain a minidisk.
3. All the disks defined in this table MUST be CMS formatted.
14 DirMaint Program Directory

5.3.4 Optional DASD Storage for DirMaint Based on Source DirectorySize
The following table contains the optional DASD for the DIRMAINT server whose disk size is based on thesource directory size.
Figure 9. DASD Storage Requirements for Optional DIRMAINT Disks Based on Source Directory Size
Minidiskowner(user ID)
DefaultAddress Calculation for Storage in Cylinders Usage
DIRMAINT 2DF Two Times the Source Directory Size Contains a backup of thesecondary directory files
DIRMAINT 2DB Three Times the Source Directory Size Contains a backup of theUSER BACKUP file
Notes:
1. It is not recommended that any disks owned by DirMaint servers reside in a shared file system directory. Inthe event of shared file system problems, it may be impossible to make any directory changes. And it ispossible that one or more directory changes, such as allocating more DASD space, may be necessary tomake the shared file system operational again.
2. All the disks defined in this table MUST be CMS formatted.
Installation Requirements and Considerations 15

5.3.5 User ID Directory Information
User directory statements supplied in the 5VMDIR10 PRODPART file have user IDs that have privilegeclasses other than G. These privilege classes are required for the following reasons:
� The 5VMDIR10 install ID must have class E privilege for enabling z/VM Directory Maintenance FacilityFeature.
� The DIRMAINT virtual machine must have class B privilege for any of the following:
– Use of MSGNOH
– Use of DIAGNOSE X'3C'
– Use of DIAGNOSE X'84'
– Use of DIAGNOSE X'A0' if RACF or other ESM (External Security Manager) is installed
– Use of DIAGNOSE X'D4' for SECLABEL use
� The DIRMAINT virtual machine must have class D privilege to issue the CP QUERY ALLOCcommand for determining system owned space. The DIRMAINT server will map these as usedextents.
Note: There are risks associated with granting any user ID class D authority. You may prefer tocreate a separate class for the CP QUERY command and grant the DIRMAINT user ID authority tothat class. See the z/VM: CP Planning and Administration for additional information on moving acommand to a new class.
� The DATAMOVE virtual machine must have class B privilege for any of the following:
– Use of MSGNOH
– Use of DIAGNOSE X'D4' for SECLABEL use
� The DIRMSAT virtual machine must have class B privilege for any of the following:
– Use of MSGNOH
– Use of DIAGNOSE X'3C'
– Use of DIAGNOSE X'84'
– Use of DIAGNOSE X'D4' for SECLABEL use
Alternate privilege classes may be required if CP's user Class Restructure support has been used toredefine the system privileges. Some of these classes may not be required if RACF/VM, or an equivalentexternal security manager, is installed and the appropriate permissions have been granted to the servicemachines to issue the necessary commands and diagnose instructions.
16 DirMaint Program Directory

6.0 Installation Instructions
Have you Licensed DirMaint?
DirMaint is pre-installed on z/VM Version 5, using VMSES/E, in a DISABLED state. If, and only if,you have a license for DirMaint 510 proceed with the installation to enable it for use.
Deploying Linux on z/VM
If you plan to deploy Linux on z/VM see the z/VM: Getting Started with Linux on zSereis publication forinformation on installing and setting up DirMaint and Linux virtual servers.
This chapter describes the installation methods and the step-by-step procedures to install and activateDirMaint. The step-by-step procedures are in two-column format. The steps to be performed are in bold,large numbers. Commands for these steps are on the left-hand side of the page in bold print. Additionalinformation for a command may exist to the right of the command.
Each step of the installation instructions must be followed. Do not skip any step unless otherwisedirected to. Throughout these instructions, the use of IBM-supplied default minidisk addresses and userIDs is assumed. If you use different user IDs, minidisk addresses, or SFS directories to install DirMaint,adapt these instructions as needed for your environment.
6.1 VMSES/E Installation Process Overview
The following is a brief description of the main steps to complete the installation of DirMaint.
� Set DirMaint to the ENABLED state.
This will allow DirMaint to run.
� Perform Post-installation Tasks
Information about file tailoring and initial activation of the program is presented in 6.3, “Tailor theDirMaint Server Machines” on page 19.
� Place DirMaint Files into Production
Once the product files have been tailored and the operation of DirMaint is satisfactory, the productfiles are copied from the test BUILD disk(s) to production BUILD disk(s).
For a complete description of VMSES/E commands, refer to VMSES/E Introduction and Reference.
6.2 Completing Your Installation of DirMaint
To complete the installation of DirMaint:
Copyright IBM Corp. 1995, 2004 17

1 Log on to the MAINT user ID.
2 Establish write access to the Software Inventory Disk (MAINT 51D) if it is notalready linked in write mode.
Note: If the MAINT 51D minidisk was accessed R/O, you will need to havethe user who has it linked R/W link it as R/O. You then can issue thefollowing command to obtain write access to it. Do not use mw mode. Donot continue with these procedures until a R/W link is established to the 51Dminidisk.
link maint 51d 51d maccess 51d d
The MAINT 51D disk is where the VMSES/Esystem level software inventory files reside.
3 Set DirMaint to the enabled state.
service dirm enable This command will perform the following:
� Set DirMaint as ENABLED in VMSES/E andwithin CP
� Update the CP system configuration file(SYSTEM CONFIG) on the CP primary (defaultCF1) parm disk.
What's Next?
Continue with 6.3, “Tailor the DirMaint Server Machines” on page 19.
Notes:
1. If, in the future, you are no longer licensed for DirMaint 510, you mustfollow the instructions in Appendix D, “Disabling DirMaint” on page 52 todisable DirMaint.
18 DirMaint Program Directory

6.3 Tailor the DirMaint Server MachinesThis section is required. You will initialize the server machines with the DirMaint code. Additionally youwill tailor the server machines for your operating environment. After completion of this section, DirMaintwill be installed in test mode. This means the RUNMODE= entry in the CONFIG DATADVH file on the41F minidisk will be set to testing. In this mode the DIRMAINT server will not place the source directoryonline. Any commands you issue to the DIRMAINT server are for test purposes only. When testing usingthe instructions found in Appendix E of the Directory Maintenance Facility Tailoring and AdministrationGuide (or the DirMaint web site), DirMaint will be in test mode only unless you change the RUNMODE=entry.
The following table describes:
� Sample files provided with DirMaint that have been installed to the 2C2 samples disk.� The tailorable system file name of the sample file which the DirMaint servers will recognize and use.� The minidisk where the DirMaint servers will look for the system file.� The purpose of the system file.
For example, the CONFIG SAMPDVH sample file was copied as the CONFIG DATADVH system file onthe 41F minidisk and is the DirMaint servers configuration file.
Figure 10 (Page 1 of 2). DirMaint 510 Supplied Sample Files
Sample File Name Configuration File Name disk File Description
ACCESS SAMPDVH ACCESS DATADVH 29E Provides location of user interface disk to theDIRMAINT EXEC.
AUTHDASD SAMPDVH AUTHDASD DATADVH 1DF Provides authorization of DASD requests for theDirMaint servers.
CONFIG SAMPDVH CONFIG DATADVH 41F Configuration file for the DirMaint servers.
DATAMOVE SAMPDVH DATAMOVE DATADVH 492 Defines key time events for the DATAMOVE server.
DIRMAINT SAMPDVH DIRMAINT DATADVH 492 Defines key time events for the DIRMAINT server.
DIRMMAIL SAMPDVH DIRMAINT NEWMAIL 41F A file containing mail like information on the DirMaintproduct.
DIRMSAPI EXECSAMP DIRMSAPI EXEC 41F Sample of how to use the DirMaint applicationprogramming interface. Copy this to any disk you wishto run it from.
DIRMSAT SAMPDVH DIRMSAT DATADVH 492 Defines key time events for the DIRMSAT server.
DVHNAMES SAMPDVH DVHNAMES DATADVH 492 Defines key system administration and support playersand how to communicate with them.
DVHPROFD SAMPDVH DVHPROFA DIRMAINT 492 Defines the disks which the DIRMAINT server willaccess when initialized.
DVHPROFM SAMPDVH DVHPROFM DATADVH 492 Defines the disks which the DATAMOVE server willaccess when initialized.
DVHPROFS SAMPDVH DVHPROFA DIRMSAT 492 Defines the disks which the DIRMSAT server willaccess when initialized.
Installation Instructions 19

Warning!
Notes:
1. IN2PROD EXEC, which runs when placing the DirMaint code into production, will copy the systemfiles located on the 41F and 492 test disks to the 11F and 491 production disks. To avoid possiblyback leveling these files, you should only make changes to these files on the 41F and 492 testdisks.
2. You should never change the CONFIG DATADVH file. Changes you desire to make to theconfiguration files should be accomplished using override files as described in the DirectoryMaintenance Facility Tailoring and Administration Guide manual.
6.3.1 Tailor the DirMaint Installation
Note!
This section will require 5VMDIR10 to have write access to the DIRMAINT 1DF disk. Beforecontinuing, please make sure this disk is linked appropriately.
Figure 10 (Page 2 of 2). DirMaint 510 Supplied Sample Files
Sample File Name Configuration File Name disk File Description
150CMDS SAMPDVH 150CMDS DATADVH 41F List of commands, command part handler routine,whether or not password authentication is required forprocessing the command, and the command set classfor DIRMAINT 150A compatibility mode.
140CMDS SAMPDVH 140CMDS DATADVH 41F List of commands, command part handler routine,whether or not password authentication is required forprocessing the command, and the command set classfor DIRMAINT 140A compatibility mode.
EXTENT SAMPDVH EXTENT CONTROL 1DF Provides device specific information for the DirMaintservers.
PROFILE EXECSAMP PROFILE EXEC 492 Sample PROFILE EXEC for the DirMaint servers.
1 Log on to 5VMDIR10 if you are not already logged on to it.
2 Access the disk where the IN2PROD EXEC resides.
access 492 e
3 The file DVHPROFA DIRMAINT (located on the 5VMDIR10 492 minidisk)must have a filetype matching the user ID running the DIRMAINT server. Ifyours is not DIRMAINT, then rename this file to have a filetype matching theDIRMAINT server user ID. The file DVHPROFA DIRMSAT (only necessary ifusing a satellite server, located on the 5VMDIR10 492 minidisk) must have a
20 DirMaint Program Directory

filetype matching the user ID running the DIRMSAT server. If yours is notDIRMSAT, then rename this file to have a filetype matching the DIRMSATserver user ID.
4 Access certain DirMaint server and 5VMDIR10 test build minidisks whichcontain your production tailorable system files using the IN2PROD exec.
in2prod access_new 5VMDIR10 {DIRM | DIRMSFS}
IN2PROD will access the DIRMAINT 1DF disk asfilemode J, the 5VMDIR10 492 disk as filemode K,and the 5VMDIR10 41F disk as filemode L.
Use DIRM if installing to minidisks or DIRMSFS ifinstalling to SFS.
5 The DIRMAINT, DATAMOVE, and DIRMSAT user ID's were created with apassword of NOLOG on the z/VM Version 5 system deliverable. Update theappropriate directory statements with valid passwords prior to continuing withthe test instructions.
6 Create the USER INPUT file on the DIRMAINT 1DF disk. Your currentmonolithic directory must be copied to the DIRMAINT 1DF as USER INPUTfor DirMaint's use. The 1DF disk was accessed as file mode J previously.The USER INPUT file must be a RECFM F LRECL 80 file when located onthe 1DF disk.
7 If migrating from DirMaint 1.5.0 or FL410, copy the following files to yourz/VM 5.1.0 installation:
� Any files listed in Figure 10 on page 19 which you have modified.
� All CONFIGnn DATADVH files you created.
� Files for which no sample is supplied, such as:
AUTHFOR CONTROL DVHLINK EXCLUDE PROFILE XEDIT PWMON CONTROL RPWLIST DATA
� See Appendix F of the Directory Maintenance Facility Tailoring andAdministration Guide (or the DirMaint web site) which lists all tailorablesystem files for DirMaint, what they are used for, and where anadministrator can find more information.
8 See "Data Files" section of the "Tailoring the DIRMAINT Service Machine"chapter in the Directory Maintenance Facility Tailoring and Administration
Installation Instructions 21

Guide for further details on configuring and tailoring each of the files that youjust copied, along with any other relevant files which need to be configured,and for setting up the DirMaint server machine environments for your testingpurposes.
Return here when you have completed all tailoring and setup work for theDirMaint servers.
What's Next?
You have now finished tailoring the DirMaint virtual machines. Continue with instructions found inAppendix E of the Directory Maintenance Facility Tailoring and Administration Guide (or the DirMaintweb site). When complete, return to 6.4, “Place DirMaint Into Production” on page 23 to place thenew DirMaint code into production.
22 DirMaint Program Directory

6.4 Place DirMaint Into Production
Important note
This procedure should only be done when you have successfully tested DirMaint installation.
Placing the DirMaint code into production is a two step process:
� First the test code is moved from the test build disks to the server production minidisks.
� Then general user code is placed on the MAINT 19E minidisk making it available to all users.
6.4.1 Copy the Server Code to the Server Minidisks
This step will be accomplished by using the PUT2PROD EXEC, which will call the DirMaint IN2PRODEXEC. It will use the PPF name specified on the P2PPPF tag in the VM SYSSUF file. If the ppfnamebeing used is different, you will have to change VM SYSSUF by using the VMFUPDAT SYSSUFcommand. To find out more information on the PUT2PROD and VMFUPDAT commands refer to thez/VM: VMSES/E Introduction and Reference.
Warning!
The IN2PROD EXEC, called by PUT2PROD, will copy the system files located on the 41F and 492test disks to the 11F and 491 production disks. To avoid possibly back leveling these files, youshould only make changes to these files on the 41F and 492 test disks.
1 Log on to MAINT, if you are not already logged on to it.
2 If any of the DirMaint server machines, DIRMAINT, DATAMOVE, DIRMSTATor 5VMDIR10 are logged on then you need to log them off. (You can use theQ NAMES command to see what user IDs are logged on. You can use theFORCE command to log off any user ID.)
3 Copy code from the test minidisks to the production minidisks.
put2prod dirm
6.4.2 Log On the Server Machines
This step will have you bring up the DirMaint server machines.
1 You need to make sure that RUNMODE= is set to operational in youroverride file (CONFIGnn DATADVH) to the CONFIG DATADVH file. If youran the test instructions in the DirMaint Tailoring and Administration then your
Installation Instructions 23

CONFIGnn DATADVH file would reside on DIRMAINT's 155 minidisk; unlessyou moved it to the 41F minidisk (owned by user ID 5VMDIR10).
If you need to update your override file you can log on to the DIRMAINT userID. You will need to hit the enter key twice in order to be able to enter theCMS XEDIT command to update your override file. Once you havecompleted your update you can run DVHBEGIN, then RLDDATA and finally#CP DISC to disconnect from this user ID.
2 Issue the following commands to reinitialize each DirMaint server. This mustbe done from a DirMaint privileged user (such as the MAINT user ID).
dirm cp ipl cms parm autocrdirm datamove cp ipl cms parm autocrdirm satellite cp ipl cms parm autocr
If the DIRMAINT server is currently not running,then you will need to log it on and only issue thecommands to reinitialize the DATAMOVE andDIRMSAT servers (skip the first command).
You may need to correct the system to IPL tomatch the name of the CMS saved system, orchange it to IPL by device address rather than bysystem name. It should match the IPL statementyou included in the DIRMAINT machine's directoryentry, or the IPL statement included in the profileused by the DIRMAINT machine's directory entry.
6.4.3 Obtaining DirMaint HELPIn order to obtain DirMaint American English help, either of the following must be issued:
� DIRM HELP
� HELP DVHAMENG
In order to obtain DirMaint Uppercase English help, either of the following must be issued:
� DIRM HELP
� HELP DVHUCENG
The z/VM Directory Maintenance Facility Feature product is nowinstalled and built on your system.
24 DirMaint Program Directory

7.0 Service Instructions
Note - z/VM Automated Service Procedure
The preferred method for installing service to DirMaint is to use the z/VM automated serviceprocedure (use of the SERVICE and PUT2PROD commands).
If you have chosen to use the automated procedure to apply preventive (RSU) and CORrective serviceto your z/VM system, you need to follow the service instructions documented in the z/VM: Guide forAutomated Installation and Service manual, instead of those presented here.
RSU Warning
If applying a DirMaint RSU, go to the instructions in Appendix B, “Applying a Recommended ServiceUpgrade (RSU) For DirMaint” on page 42. You will return to a step in this chapter as specified in thatappendix.
This section of the Program Directory contains the procedure to install CORrective service to DirMaintwith VMSES/E.
To become more familiar with service using VMSES/E, you should read the introductory chapters in theVMSES/E Introduction and Reference. This manual also contains the command syntax for the VMSES/Ecommands listed in the procedure.
Notes:
1. Each step of the servicing instructions must be followed. Do not skip any step unlessotherwise directed to. All instructions showing accessing of disks or SFS directories assumes theuse of default minidisk addresses or SFS directory names. If different minidisk addresses are used,change the instructions appropriately.
2. The 5VMDIR10 user ID should be a privileged DirMaint user in order to issue restricted commands tothe DIRMAINT server during these instructions. The AUTHFOR CONTROL file contains a list ofprivileged user IDs.
3. If the service instructions are not completed at one time, you can link and access the MAINT 51Dminidisk in R/W mode, then issue VMFSETUP and continue with the step where you left off.
4. Appendix F of the Directory Maintenance Facility Tailoring and Administration Guide (or the DirMaintweb site) lists all tailorable system files for DirMaint, what they are used for, and where anadministrator can find more information.
Copyright IBM Corp. 1995, 2004 25
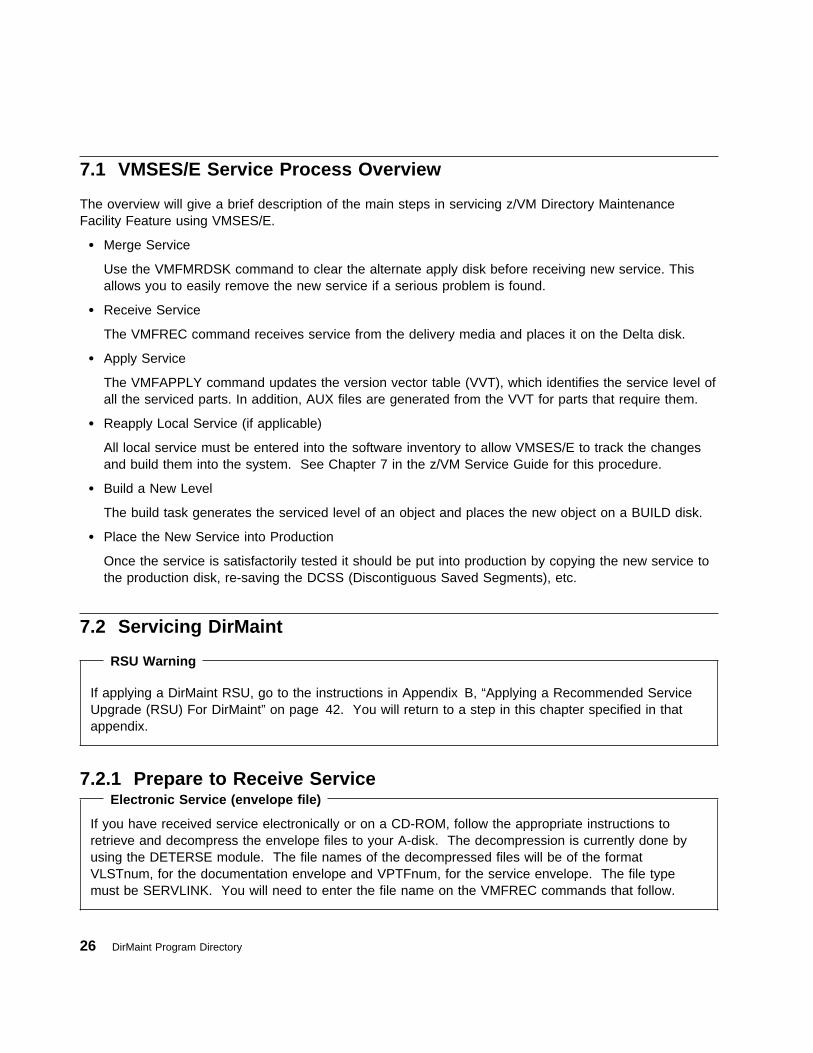
7.1 VMSES/E Service Process Overview
The overview will give a brief description of the main steps in servicing z/VM Directory MaintenanceFacility Feature using VMSES/E.
� Merge Service
Use the VMFMRDSK command to clear the alternate apply disk before receiving new service. Thisallows you to easily remove the new service if a serious problem is found.
� Receive Service
The VMFREC command receives service from the delivery media and places it on the Delta disk.
� Apply Service
The VMFAPPLY command updates the version vector table (VVT), which identifies the service level ofall the serviced parts. In addition, AUX files are generated from the VVT for parts that require them.
� Reapply Local Service (if applicable)
All local service must be entered into the software inventory to allow VMSES/E to track the changesand build them into the system. See Chapter 7 in the z/VM Service Guide for this procedure.
� Build a New Level
The build task generates the serviced level of an object and places the new object on a BUILD disk.
� Place the New Service into Production
Once the service is satisfactorily tested it should be put into production by copying the new service tothe production disk, re-saving the DCSS (Discontiguous Saved Segments), etc.
7.2 Servicing DirMaint
RSU Warning
If applying a DirMaint RSU, go to the instructions in Appendix B, “Applying a Recommended ServiceUpgrade (RSU) For DirMaint” on page 42. You will return to a step in this chapter specified in thatappendix.
7.2.1 Prepare to Receive ServiceElectronic Service (envelope file)
If you have received service electronically or on a CD-ROM, follow the appropriate instructions toretrieve and decompress the envelope files to your A-disk. The decompression is currently done byusing the DETERSE module. The file names of the decompressed files will be of the formatVLSTnum, for the documentation envelope and VPTFnum, for the service envelope. The file typemust be SERVLINK. You will need to enter the file name on the VMFREC commands that follow.
26 DirMaint Program Directory

The ppfname used throughout these instructions is 5VMDIR10, which assumes you are using the PPFsupplied by IBM for DirMaint. If you have your own PPF override file for DirMaint, you should use yourfile's ppfname instead of 5VMDIR10. The ppfname you use should be used throughout the rest of thisprocedure, unless otherwise stated.
1 Log on to the DirMaint service user ID 5VMDIR10
2 Establish write access to the Software Inventory Disk (MAINT 51D) if it is notalready linked in write mode.
Note: If the MAINT 51D minidisk was accessed R/O, you will need to havethe user who has it linked R/W link it as R/O. You then can issue thefollowing commands to obtain write access to it. Do not use mw mode.
link maint 51d 51d maccess 51d d
The MAINT 51D disk is where the VMSES/Esystem level software inventory files reside.
3 Have the DirMaint CORrective tape mounted and attached to 5VMDIR10 as181. If you have a CORrective service envelope (SERVLINK) file make surethat is it available on the A-disk or any minidisk or SFS directory accessed asC.
4 Receive the documentation. VMFREC, with the INFO option, loads thedocumentation and displays a list of all the products on the media.
a If receiving the service from tape
vmfrec info This command will load the service memo to the191 disk.
b If receiving the service from an envelope file
vmfrec info (env vlstnum This command will load the service memo to the191 disk.
5 Check the receive message log ($VMFREC $MSGLOG) for warning and errormessages.
vmfview receive Also, make note of which products andcomponents have service. To do this, use the PF5key to show all status messages which identify thecomponents with service.
6 Read the product memo (5VMDIR10 MEMO) before going on.
Service Instructions 27
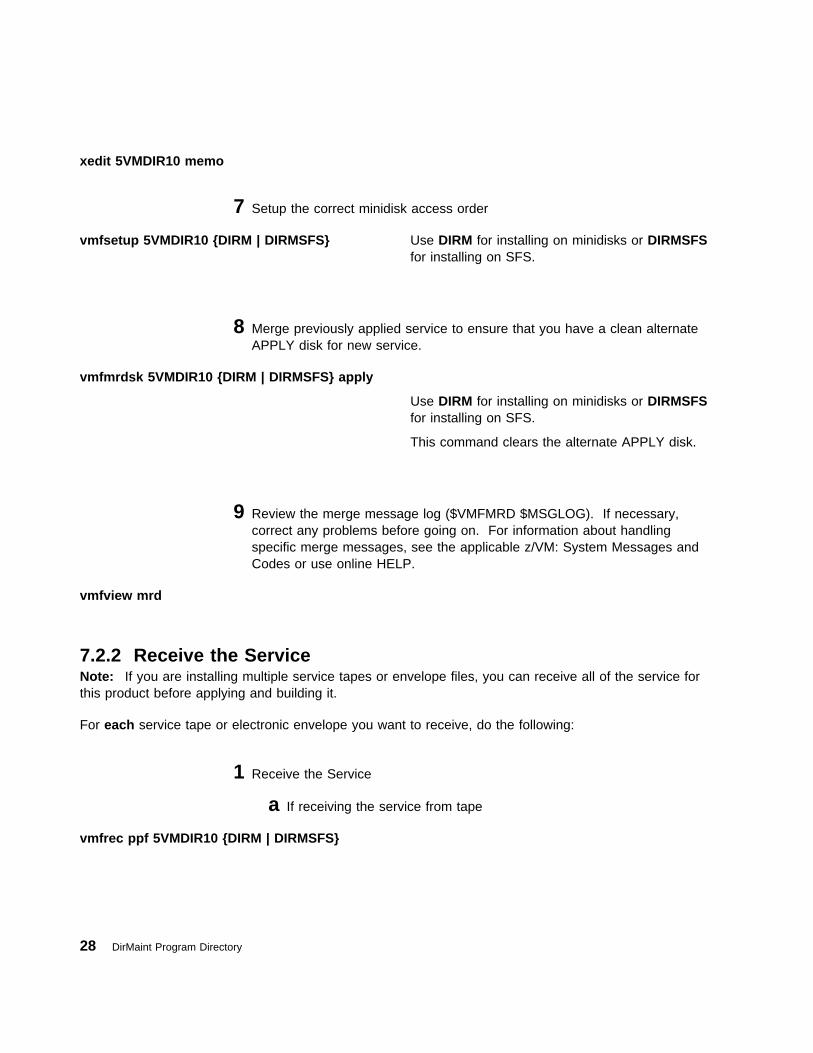
xedit 5VMDIR10 memo
7 Setup the correct minidisk access order
vmfsetup 5VMDIR10 {DIRM | DIRMSFS} Use DIRM for installing on minidisks or DIRMSFSfor installing on SFS.
8 Merge previously applied service to ensure that you have a clean alternateAPPLY disk for new service.
vmfmrdsk 5VMDIR10 {DIRM | DIRMSFS} apply
Use DIRM for installing on minidisks or DIRMSFSfor installing on SFS.
This command clears the alternate APPLY disk.
9 Review the merge message log ($VMFMRD $MSGLOG). If necessary,correct any problems before going on. For information about handlingspecific merge messages, see the applicable z/VM: System Messages andCodes or use online HELP.
vmfview mrd
7.2.2 Receive the ServiceNote: If you are installing multiple service tapes or envelope files, you can receive all of the service forthis product before applying and building it.
For each service tape or electronic envelope you want to receive, do the following:
1 Receive the Service
a If receiving the service from tape
vmfrec ppf 5VMDIR10 {DIRM | DIRMSFS}
28 DirMaint Program Directory

Use DIRM for installing on minidisks or DIRMSFSfor installing on SFS.
This command receives service from your servicetape. All new service is loaded to the DELTA disk.
b If receiving the service from an envelope file
vmfrec ppf 5VMDIR10 {DIRM | DIRMSFS} (env vptfnum
Use DIRM for installing on minidisks or DIRMSFSfor installing on SFS.
This command receives service from your serviceenvelope. All new service is loaded to the DELTAdisk.
2 Review the receive message log ($VMFREC $MSGLOG). If necessary,correct any problems before going on. For information about handlingspecific receive messages, see the applicable z/VM: System Messages andCodes or use online HELP.
vmfview receive
7.2.3 Apply the Service1 Apply the new service
vmfapply ppf 5VMDIR10 {DIRM | DIRMSFS} Use DIRM for installing on minidisks or DIRMSFSfor installing on SFS.
This command applies the service that you justreceived. The version vector table (VVT) isupdated with all serviced parts and all necessaryAUX files are generated on the alternate applydisk.
Note: If you receive a return code of 4 this mayindicate that you have local modifications that needto be reworked so make sure you review theVMFAPPLY message log as documented in thenext step.
Service Instructions 29

2 Review the apply message log ($VMFAPP $MSGLOG). If necessary, correctany problems before going on. For information about handling specific applymessages, see the applicable z/VM: System Messages and Codes or useonline HELP.
vmfview apply
Note
If you get the message VMFAPP2120W then re-apply any local modifications before building thenew DirMaint.
For further information on the local modification process, refer to the "Reworking Local Serviceand Modifications" chapter of the z/VM: Service Guide. Follow the steps that are applicable toyour local modification.
The following substitutions need to be made in the service guide when creating a localmodification to DirMaint:
� zvm should be 5VMDIR10
� compname should be DIRM or DIRMSFS (minidisk or SFS).
� fm-local should be the filemode where the 2C4 is accessed
If you have changed any of the installation parameters through a PPF override, you need tosubstitute your changed values where applicable.
Keep in mind that when you get to the "Return to the Appropriate Section to Build RemainingObjects" or "Rebuild Remaining Objects" step in the z/VM Service Guide, you should returnback to this program directory at 7.2.4, “Update the Build Status Table.”
7.2.4 Update the Build Status Table1 Update the Build Status Table with serviced parts.
vmfbld ppf 5VMDIR10 {DIRM | DIRMSFS} (status
Use DIRM for installing on minidisks or DIRMSFSfor installing on SFS.
This command updates the build status table.
30 DirMaint Program Directory

Note
If the $PPF files have been serviced you will get the following prompt:
VMFBLD276 I VMFBLD processing started
VMFBLD2185R The following source product parameter files have been serviced:
VMFBLD2185R 5VMDIR1 $PPF
VMFBLD2185R When source product parameter files are serviced, all product
parameter files built from them must be recompiled using VMFPPF
before VMFBLD can be run.
VMFBLD2185R Enter zero ( ) to have the latest levels of the source product
parameter files copied to your A-disk and exit VMFBLD so you can
recompile your product parameter files with VMFPPF
Enter one (1) to continue only if you have already recompiled your
product parameter files with VMFPPF
VMFBLD2188I Building 5VMDIR1 $PPF on 191 (A) from level $PFnnnnn
0 Enter a 0 and complete the following stepsbefore you continue.
vmfppf 5VMDIR10 {DIRM | DIRMSFS} Note: If you've created your own PPFoverride then use your PPF name instead of5VMDIR10.
You should recompile all overrides to ensurethey are at the proper level for future use.
copy 5VMDIR10 $ppf a = = d (olddate replaceerase 5VMDIR10 $ppf a
Note: Do not use your own PPF name inplace of 5VMDIR10 for the COPY and ERASEcommands.
vmfbld ppf 5VMDIR10 {DIRM | DIRMSFS} (status1
Re-issue the VMFBLD command to completeupdating the build status table. Use your PPFname, if you have an override. When youreceive the prompt that was previouslydisplayed, enter a 1 to continue.
Service Instructions 31

2 View the build status messages and see what objects need to be built.
vmfview build
7.2.5 Build Service Objects1 Rebuild DirMaint serviced parts.
vmfbld ppf 5VMDIR10 {DIRM | DIRMSFS} (serviced
Use DIRM for installing on minidisks or DIRMSFSfor installing on SFS.
2 Review the build message log ($VMFBLD $MSGLOG). If necessary, correctany problems before going on. For information about handling specific buildmessages, see the applicable z/VM: System Messages and Codes or useonline HELP.
vmfview build
7.2.6 Additional Service Steps1 Copy all CONFIG* DATADVH files from production disks back to test disks
prior to placing the latest service into production.
in2prod test_config 5VMDIR10 {DIRM | DIRMSFS} This step ensures any modifications made to theCONFIG* DATADVH configuration files since thelast time service was applied exists on the testbuild disks prior to following the next intoproduction steps.
Use DIRM for installing on minidisks or DIRMSFSfor installing on SFS.
32 DirMaint Program Directory

2 Update the DirMaint tailorable system files from latest service of the sampletailorable system files. The IN2PROD exec will only replace files if it candetermine the current level matches a serviced level, or is at a base level.
Note
The update_files option of IN2PROD requires write access to theDIRMAINT 1DF minidisk. Therefore the DIRMAINT server must beshutdown in order to complete this step.
in2prod update_files 5VMDIR10 {DIRM | DIRMSFS}
IN2PROD will update the tailorable system files onthe 5VMDIR10 492, 41F, and 29E minidisks, andthe DIRMAINT 1DF minidisk.
Use DIRM for installing on minidisks or DIRMSFSfor installing on SFS.
3 Remove obsolete files from the DELTA disk using the IN2PROD EXEC. TheIN2PROD exec uses a default ppfname of 5VMDIR10 and a defaultcompname of DIRM. If either the ppfname or compname being used isdifferent, you will have to tell the IN2PROD exec the names you are using.To find out more information on the IN2PROD EXEC issue in2prod {? |help}.
in2prod clean_up ppfname compname (count nn age nn action Erase|Test
IN2PROD will remove PTF part files on the 2D2DELTA disk which have been obsoleted by morerecent service. Parameters with the CLEAN_UPoption are as follows:
count nnnn is in the range of 1 to 10 indicating thenumber of duplicate files kept; the default is 2.
age nnnn is in the range of 0 to 60 indicating thenumber of months to keep duplicate files; thedefault is 18.
action Erase|TestErase will cause obsolete files to be erasewhile Test will create files on the A-diskshowing which files would be erased.
Service Instructions 33

7.3 Optional Service Steps (depending on what was installed)
7.3.1 Servicing the Uppercase English Files1 Re-build Uppercase English serviced parts
vmfbld ppf 5VMDIR10 {DIRMU | DIRMUSFS} (serviced setup
Use component name DIRMU if help files areinstalled on minidisks or DIRMUSFS if help filesare installed in SFS
The SETUP option sets up the minidisk/directoryaccess order using the :MDA section of the PPF.
7.4 Test the New DirMaint ServiceAt this point you can test the service that was applied. Continue with instructionsfound in Appendix E of the Directory Maintenance Facility Tailoring andAdministration Guide (or the DirMaint web site) for the minimum steps necessaryfor ensuring that your new code is functional. When your testing is complete,return to 7.5, “Place Serviced DirMaint into Production” to place the service intoproduction.
7.5 Place Serviced DirMaint into Production
Important note
Notes:
1. This procedure should only be done when you have successfully tested the new service. Onceyou perform this step you can not easily back off to your previous production code. See the"Removing Service Levels" chapter in the z/VM Service Guide for further details regarding backingoff service levels.
2. Make sure the RUNMODE= entry of your override file to the CONFIG DATADVH file (on the 41Fminidisk) has been set to operational.
Placing the DirMaint code into production is a two step process:
� First the test code is moved from the test build disks to the server production minidisks.
� Then the general user code is placed onto the MAINT 19E minidisk making the new DirMaint codeavailable to all users.
34 DirMaint Program Directory

7.5.1 Copy the Server Code to the Production MinidisksThis step will be accomplished by using the IN2PROD EXEC. The IN2PROD exec uses a defaultppfname of 5VMDIR10 and a default compname of DIRM. If either the ppfname or compname being usedis different, you will have to tell the IN2PROD exec the names you are using. To find out moreinformation on the IN2PROD EXEC issue in2prod {? | help} after accessing the 492 minidisk.
Note: If you have arrived here from testing the DIRMAINT server, then the 5VMDIR10 user ID shouldhave write access to the 491 and 11F minidisks when it is logged on. If this is not the case, then theDIRMAINT server will first have to be logged off.
1 Log on to 5VMDIR10, if you are not already logged on to it.
2 Access the disk where the IN2PROD EXEC resides
access 492 e
3 Use the IN2PROD exec to copy code from the 492 and 41F test minidisks tothe 491 and 11F production minidisks.
in2prod prod 5VMDIR10 {DIRM | DIRMSFS} Use DIRM for installing on minidisks or DIRMSFSfor installing on SFS.
logoff
7.5.2 Copy the DirMaint Production Code to MAINT's MinidisksThis step needs to be performed so that the new DirMaint code is available togeneral users to use.
1 Log on as MAINT
Note: The following steps should be done from the MAINT user ID so thatthe appropriate CMS shared segment can be saved.
2 Copy the system Y-disk code to MAINT's 19e disk
a If servicing using minidisks
link 5VMDIR10 29e addr rraccess addr eaccess 19e fvmfcopy * * e = = f (prodid 5VMDIR10%DIRM replace olddate
addr is any free disk address on the MAINT userID
Note: DirMaint users require files to be placed onthe 19E disk.
Service Instructions 35
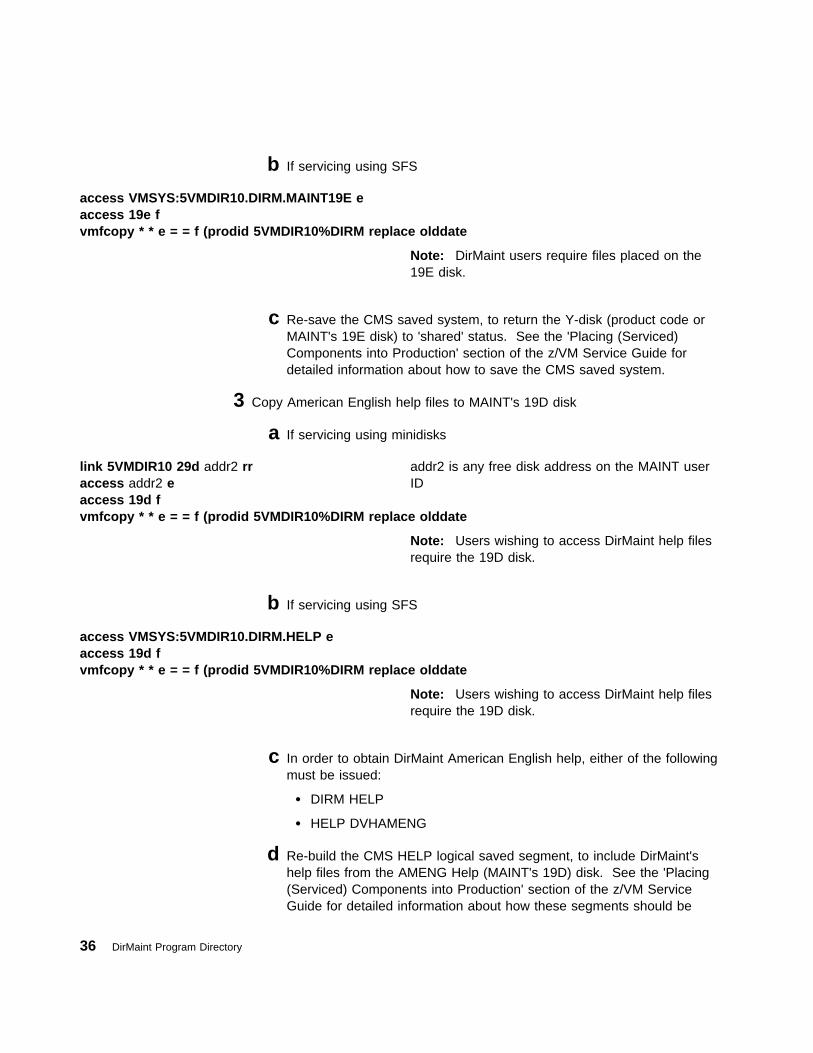
b If servicing using SFS
access VMSYS:5VMDIR10.DIRM.MAINT19E eaccess 19e fvmfcopy * * e = = f (prodid 5VMDIR10%DIRM replace olddate
Note: DirMaint users require files placed on the19E disk.
c Re-save the CMS saved system, to return the Y-disk (product code orMAINT's 19E disk) to 'shared' status. See the 'Placing (Serviced)Components into Production' section of the z/VM Service Guide fordetailed information about how to save the CMS saved system.
3 Copy American English help files to MAINT's 19D disk
a If servicing using minidisks
link 5VMDIR10 29d addr2 rraccess addr2 eaccess 19d fvmfcopy * * e = = f (prodid 5VMDIR10%DIRM replace olddate
addr2 is any free disk address on the MAINT userID
Note: Users wishing to access DirMaint help filesrequire the 19D disk.
b If servicing using SFS
access VMSYS:5VMDIR10.DIRM.HELP eaccess 19d fvmfcopy * * e = = f (prodid 5VMDIR10%DIRM replace olddate
Note: Users wishing to access DirMaint help filesrequire the 19D disk.
c In order to obtain DirMaint American English help, either of the followingmust be issued:
� DIRM HELP
� HELP DVHAMENG
d Re-build the CMS HELP logical saved segment, to include DirMaint'shelp files from the AMENG Help (MAINT's 19D) disk. See the 'Placing(Serviced) Components into Production' section of the z/VM ServiceGuide for detailed information about how these segments should be
36 DirMaint Program Directory

saved on your system. (Note that you will need to use (all instead of(serviced on the VMSES/E VMFBLD command when re-building anysegments.)
4 If the Uppercase English help files have been installed, place the files intoproduction from 5VMDIR10's 502 disk to MAINT's 402 disk
a If installing using minidisks
link 5VMDIR10 502 addr rraccess addr eaccess 402 fvmfcopy * * e = = f (prodid 5VMDIR10%DIRM replace olddate
addr is any free disk address on the MAINT userID
b If installing using SFS
access VMSYS:5VMDIR10.DIRM.HELPU eaccess 402 fvmfcopy * * e = = f (prodid 5VMDIR10%DIRM replace olddate
c In order to obtain DirMaint Uppercase English help, either of thefollowing must be issued:
� DIRM HELP
� HELP DVHUCENG
7.5.3 Reinitialize the Server Machines
The server machines must be reinitialized in order for them to use the new production code.
Issue the following commands to reinitialize each DirMaint server. This must be done from a DirMaintprivileged user (such as the MAINT user ID).
dirm cp ipl cms parm autocrdirm datamove cp ipl cms parm autocrdirm satellite cp ipl cms parm autocr
If the DIRMAINT server is currently not running,then you will need to log it on and only issue thecommands to reinitialize the DATAMOVE andDIRMSAT servers (skip the first command).
Service Instructions 37

You may need to correct the system to IPL tomatch the name of the CMS saved system, orchange it to IPL by device address rather than bysystem name. It should match the IPL statementyou included in the DIRMAINT machine's directoryentry, or the IPL statement included in the profileused by the DIRMAINT machine's directory entry.
You have now finished servicing z/VM Directory MaintenanceFacility Feature
38 DirMaint Program Directory

Appendix A. Local Modification Example: $EXEC File
Note!
Notes:
1. This example provides an example for updating the DVHPXR exec part. You should substitute thefile name of the part you are modifying for DVHPXR in the instructions. Since the output of theinstructions is to create an EXEC file type with an abbreviation of EXC, you should substitute theabbreviation of the file type you are modifying for EXC. See chapter 7 of the z/VM Service Guidefor further information on local modifications.
2. If you use the automated service procedures you can use the LOCALMOD exec to put on a localmodification for DirMaint. To do so, use the instructions in the Appendix titled "Apply A LocalModification" in the Guide for Automated Installation and Serivce manual. All you will need toprovide is the file name and file type of the part you want to modify.
For further information on the local modification process, refer to the "Installing Local Service" chapter ofthe z/VM Service Guide. Some of the steps may be in a different order so you can cross reference theexample against the z/VM Service Guide to help with the correct order.
1 Log on to the DirMaint service user ID 5VMDIR10
2 Establish write access to the Software Inventory Disk (MAINT 51D) if it is notalready linked in write mode.
Note: If the MAINT 51D minidisk was accessed R/O, you will need to havethe user who has it linked R/W link it as R/O. You then can issue thefollowing commands to obtain write access to it. Do not use mw mode.
link maint 51d 51d maccess 51d d
The MAINT 51D disk is where the VMSES/Esystem level software inventory files reside.
3 Set up the required access order
vmfsetup 5VMDIR10 {DIRM | DIRMSFS} compname is DIRM if using minidisks or DIRMSFSif using SFS
4 Create/Edit the AUXLCL file for the part to update
Note: This step can be skipped when applying a local modification to a fullpart replacement part.
Copyright IBM Corp. 1995, 2004 39

xedit dvhpxr auxlcl fmlocal (noprof====> input UPDATE1 LCL LCL0001 * comment====> file
fmlocal is the fm of the local modification (2C4)minidisk or directory
5 XEDIT Source file to create the update file
Note: You do not need the XEDIT control (ctl) option when editing a full partreplacement part.
xedit dvhpxr $exec (ctl dvhvm====> fm fmlocal
fmlocal is the fm of the local modification (2C4)minidisk or directory
6 Make your desired changes
7 Issue the XEDIT file command when changes are completed
====> file
8 Use EXECUPDT to generate an interpretive exec with the changes
Notes:
a. The source parts on the 2B1 minidisk that EXECUPDT will be issuedagainst must first be unpacked.
b. This step can be skipped when applying a local modification to a full partreplacement part.
copyfile dvhxpr $exec * = = = (unpack olddexecupdt dvhpxr exec * (ctl dvhvm outmode a hist sid nocomments
9 Copy the updated exec to the LOCALMOD disk
vmfrepl dvhpxr exec 5VMDIR10 DIRM = exec a ($select ftabbr cex logmod l0001 outmode localmoderase dvhpxr * a
vmfrepl also updates the local service level(VVTLCL) of the software inventory and the$SELECT file to create a record of the localmodification.
40 DirMaint Program Directory

10 Build the DirMaint product by issuing VMFBLD
vmfbld ppf 5VMDIR10 {DIRM | DIRMSFS} (serviced
Use DIRM for installing on minidisks or DIRMSFSfor installing on SFS.
Appendix A. Local Modification Example: $EXEC File 41

Appendix B. Applying a Recommended Service Upgrade(RSU) For DirMaint
Note - z/VM Automated Service Procedure
The preferred method for installing service to DirMaint is to use the z/VM automated serviceprocedure (use of the SERVICE and PUT2PROD commands).
If you have chosen to use the automated procedure to apply preventive (RSU) and CORrective serviceto your z/VM system, you need to follow the service instructions documented in the z/VM: Guide forAutomated Installation and Service manual, instead of those presented here.
Note!
You should first read through the RSU hard copy memo contained with the deliverable beforecontinuing with these instructions.
The RSU is structured to install all PTFs included on the RSU plus the files containing the preappliedservice and prebuilt objects. All PTF-related files are loaded to the delta disk. The file containing thepreapplied service, i.e. containing the results of VMFAPPLY, is loaded to the alternate apply disk and thecontents of the files containing prebuilt objects are loaded to the appropriate build disks.
Points to consider about using the Product Service Upgrade procedure are:
� This process will not alter any of your tailored flat files (files serviced by full part replacement onlysuch as CONFIG DATADVH) in any way. Sample files which may have been updated using updatefiles will need to have those updates reapplied.
� Planning must be done (such as determining any disk size changes, and determining what service, ifany, on your existing system is not contained on the RSU) prior to actually loading the service fromthe RSU. These tasks will be discussed.
The following is an overview of what tasks need to be performed during the PSU procedure:
� Prepare System
In this task, you will receive the documentation contained on the RSU and determine the DASDrequired to install the RSU.
� Merge Service
Use the VMFMRDSK command to clear the alternate apply disk before receiving the RSU. This allowsyou to easily remove the new service if a serious problem is found.
� Receive Service
The VMFINS command receives service from the RSU and places it on the Delta disk.
42 Copyright IBM Corp. 1995, 2004

� Apply Additional Service
The VMFAPPLY command updates the version vector table (VVT), which identifies the service level ofall the serviced parts. In addition, AUX files are generated from the VVT for parts that require them.These steps are used to reapply service that was not contained on the RSU.
� Reapply Local Service (if applicable)
All local service must be entered into the software inventory to allow VMSES/E to track the changesand build them into the system.
� Build New Levels
The build tasks generates the serviced level of an object and places the new object on a BUILD disk.
� Place the New Service into Production
Once the service is satisfactorily tested it should be put into production by copying the new service tothe production disk, re-saving the DCSS (Discontiguous Saved Segments), etc.
B.1 Apply DirMaint RSU
B.1.1 Prepare Your System for Service Refresh
The ppfname used throughout these instructions is 5VMDIR10, which assumes you are using the PPFsupplied by IBM for DirMaint. If you have your own PPF override file for DirMaint you should use yourfile's ppfname instead of 5VMDIR10. The ppfname you use should be used throughout the rest of thisprocedure.
Electronic Service (envelope file)
If you have received the RSU electronically or on CD-ROM, follow the appropriate instructions toretrieve and decompress the envelope file to your A-disk. The decompression is currently done byusing the DETERSE MODULE. The file name of the decompressed file will be of the format:
� RPTFnum for the service envelope
The file type for this file must be SERVLINK. You will need to enter the file name on the VMFRECcommands that follow.
1 Log on to the z/VM Directory Maintenance Facility Feature service user ID5VMDIR10
2 Establish write access to the Software Inventory Disk (MAINT 51D) if it is notalready linked in write mode.
Note: If the MAINT 51D minidisk was accessed R/O, you will need to havethe user who has it linked R/W link it as R/O. You then can issue thefollowing commands to obtain write access to it. Do not use mw mode.
Appendix B. Applying a Recommended Service Upgrade (RSU) For DirMaint 43

link maint 51d 51d maccess 51d d
The MAINT 51D disk is where the VMSES/Esystem level software inventory files reside.
3 Mount the RSU tape on the tape drive as virtual device 181. You must use181. If you have the RSU in an envelope (SERVLINK) file make sure that isit available on the A-disk or any minidisk or SFS directory accessed as C.
4 Receive the documentation:
Receive the documentation on the RSU. This step will also load thecumulative Apply Status Table (DIRM SRVAPPS) which identifies allpreapplied service contained on the RSU. These files are loaded to the 51Ddisk.
a If receiving the RSU from tape
vmfins install info (nomemo
b If receiving the RSU from an envelope file
vmfins install info (nomemo env rptfnum
5 Determine DASD sizes for disks to receive service:
In order to receive the service from the RSU, you need to have adequatespace available on the alternate APPLY, DELTA, and BUILD disks. Therequired sizes are identified in the DirMaint documentation (5VMDIR10MEMO D) received in the previous step.
6 Setup the correct minidisk access order
vmfsetup 5VMDIR10 {DIRM | DIRMSFS} Use DIRM for installing on minidisks or DIRMSFSfor installing on SFS.
7 Merge the APPLY disks for DirMaint:
Next, you must prepare your system to receive the service from the RSU. Todo this, you must first clear the alternate apply disk for receipt of the servicefrom the RSU.
Enter the VMFMRDSK command to merge the alternate apply disk to theapply disk. This will clear the alternate apply disk.
vmfmrdsk 5VMDIR10 {DIRM | DIRMSFS} apply
44 DirMaint Program Directory

Use DIRM for installing on minidisks or DIRMSFSfor installing on SFS.
8 Invoke the VMFPSU command to identify any local modifications.
vmfpsu 5VMDIR10 {DIRM | DIRMSFS} Use DIRM for installing on minidisks or DIRMSFSfor installing on SFS.
This command produces an output file thatcontains information about the service on the RSUcompared against the service and localmodifications on your system. The file name is5VMDIR10 PSUPLAN. If local modifications touchparts that have been serviced, the DVH$PSU$$SELECT file will be created or updated to forcethe rebuild of those parts.
B.1.2 Receive the Preapplied, Prebuilt Service1 Refresh the DirMaint service disks by loading new service from the RSU:
a If receiving the RSU from tape
vmfins install ppf 5VMDIR10 {DIRM | DIRMSFS} (nomemo nolink
Use DIRM for installing on minidisks or DIRMSFSfor installing on SFS.
b If receiving the RSU from an envelope file
vmfins install ppf 5VMDIR10 {DIRM | DIRMSFS} (nomemo nolink env rptfnum
Use DIRM for installing on minidisks or DIRMSFSfor installing on SFS.
9 :VMFINS2767I Reading VMFINS DEFAULTS B for additional options
VMFINS276 I VMFINS processing started
VMFINS26 1R Do you want to create an override for :PPF 5VMDIR1 DIRM :PRODID
5VMDIR1 %DIRM?
Enter (No), 1 (Yes) or 2 (Exit)
�B C
2 Check the install message log ($VMFINS $MSGLOG) for warning and errormessages. If necessary, correct any problems before going on. For
Appendix B. Applying a Recommended Service Upgrade (RSU) For DirMaint 45

information about handling specific install messages, see the applicable z/VM:System Messages and Codes or use online HELP.
vmfview install
B.1.3 Process Additional Service1 Apply additional service:
The VMFAPPLY command is used to reapply service that was not containedon the RSU just installed for the component.
Applying service with preapplied, prebuilt service will reapply any reach-aheadservice that may be on the system or indicate that there are no reach-aheadPTFs to be applied.
vmfapply ppf 5VMDIR10 {DIRM | DIRMSFS}
Use DIRM for installing on minidisks or DIRMSFSfor installing on SFS.
Messages VMFAPP2122E and VMFAPP2109R willbe displayed only if you have reach-ahead servicethat needs to be reapplied.
VMFAPP2122E THE SET OF PTFS IN THE APPLY STATUS TABLE (5VMDIR10 SRVAPPS) ON THE2A2 (G) DISK IS NOT A SUBSET OF THE PTFS IN THE HIGHEST LEVEL APPLYSTATUS TABLE ON THE 2A6 (F) DISK. THIS IS AN INCONSISTENT STATE
VMFAPP2109R VMFAPPLY WILL AUTOMATICALLY CORRECT THE PROBLEM IDENTIFIED BYMESSAGE 2122E BY INCLUDING THE MISSING PTFS IN THE CURRENT APPLYLIST. ENTER (1) TO CONTINUE; (0) TO QUIT.
1
If you receive these messages, enter 1 forVMFAPPLY to reapply the reach-ahead service.
2 Check the apply message log ($VMFAPP $MSGLOG) for warning and errormessages. If necessary, correct any problems before going on. Forinformation about handling specific apply messages, see the applicable z/VM:System Messages and Codes or use online HELP.
vmfview apply
46 DirMaint Program Directory

3 If necessary, rework local service
The 5VMDIR10 PSUPLAN (output from running the VMFPSU command in aprevious step), can be used to indicate what local service or modifications areaffected by the RSU. If a PTF is applied and it contains service to a part forwhich you have a local modification, you will need to rework the localmodification. Refer to the z/VM Service Guide.
B.1.3.1 Build the New Service Level
The last task is to rebuild all objects that were affected by reach-ahead service that was reapplied, localmodifications, and saved segments. Choose one of the following sections to proceed with based onwhether there is any reach ahead service or local modifications to be reapplied.
� If there is reach-ahead service or a local modification that needs to be reapplied, continue with step7.2.4, “Update the Build Status Table” on page 30.
� If there is no reach ahead service (the VMFAPPLY step indicated no additional PTF's have beenapplied) or local modifications to be reapplied, then all objects or parts have been built and received tothe test build disks during the receive of the RSU. Installation of the RSU is complete. It is notnecessary to do the build step since there will not be any objects or parts flagged to be built.Continue with step 7.3, “Optional Service Steps (depending on what was installed)” on page 34.
Appendix B. Applying a Recommended Service Upgrade (RSU) For DirMaint 47

Appendix C. Creating a Product Parameter File (PPF)Override
This section provides information to help you create a product parameter file (PPF) override. The exampleused in this section shows how to change the shared file system (SFS) file pool where DirMaint filesreside.
Note: Do not modify the product supplied 5VMDIR10 $PPF or 5VMDIR10 PPF files to change theVMSYS file pool name or any other installation parameters. If the 5VMDIR10 $PPF file is serviced, theexisting $PPF file will be replaced, and any changes to that file will be lost; by creating your own $PPFoverride, your updates will be preserved. This should be done after the install planning step, do notreissue that step.
48 Copyright IBM Corp. 1995, 2004

The following process describes changing the default file pool name from VMSYS to MYPOOL1:
1 Log on to the DirMaint service user ID 5VMDIR10
2 Establish write access to the Software Inventory Disk (MAINT 51D) if it is notalready linked in write mode.
Note: If the MAINT 51D minidisk was accessed R/O, you will need to havethe user who has it linked R/W link it as R/O. You then can issue thefollowing commands to obtain write access to it. Do not use mw mode.
link maint 51d 51d maccess 51d d
The MAINT 51D disk is where the VMSES/Esystem level software inventory files reside.
3 Create a new $PPF override file, or edit the override file created via the'Make Override Panel' function.
xedit overname $PPF fm2 overname is the PPF override file name (such as"MYDIRM") that you want to use.
fm2 is an appropriate file mode. If you create thisfile yourself, specify a file mode of A.
If you modify an existing override file, specify a filemode of A or D, based on where the file currentlyresides (A being the file mode of a R/W 191minidisk, or equivalent; D, that of the MAINT 51Dminidisk).
4 Create the override list by inserting the following:
:OVERLST. DIRMSFS DIRMUSFS
5 Create (or modify as required) the Variable Declarations (:DCL.) section foreach override used when installing and servicing DirMaint. DIRMSFS is usedto install and service DirMaint, a sample :DCL. section is shown in step 5a.DIRMUSFS is used to service DirMaint Uppercase English help files, asample :DCL. section is shown in step 5b on page 50.
a. Create (or modify as required) the Variable Declarations (:DCL.) sectionfor the DIRMSFS override area, so that it resembles the :DCL. sectionshown below.
Appendix C. Creating a Product Parameter File (PPF) Override 49
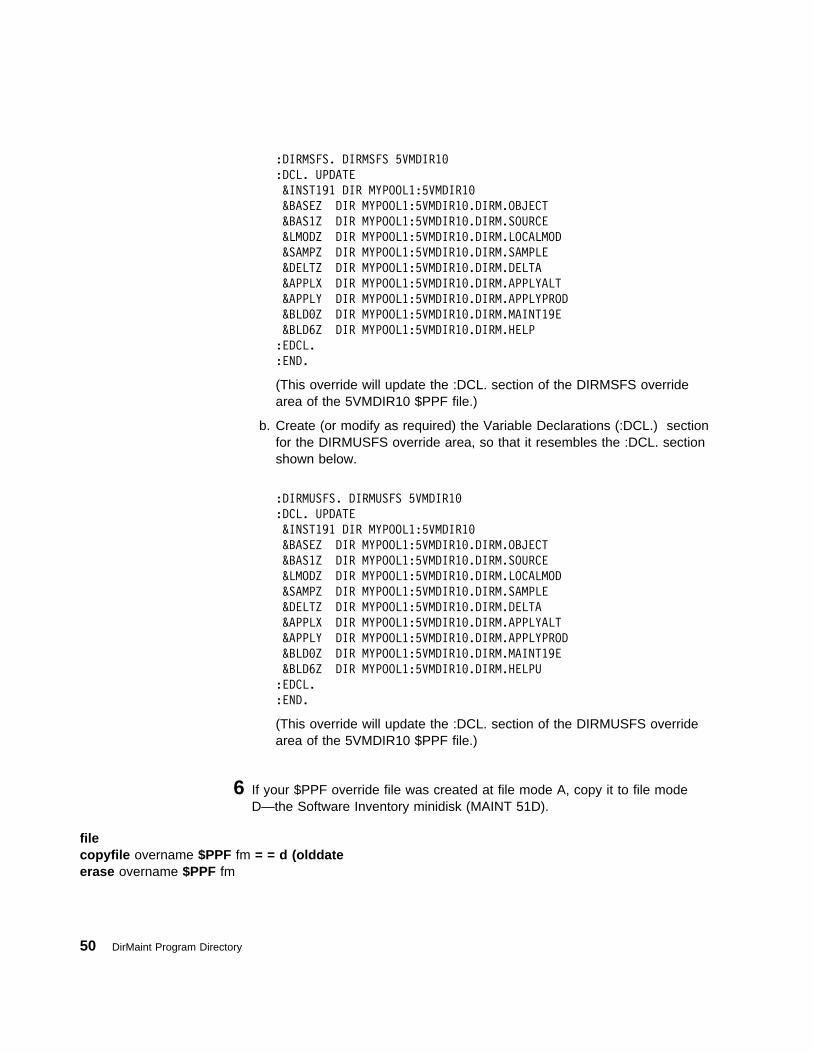
:DIRMSFS. DIRMSFS 5VMDIR1
:DCL. UPDATE
&INST191 DIR MYPOOL1:5VMDIR1
&BASEZ DIR MYPOOL1:5VMDIR1 .DIRM.OBJECT
&BAS1Z DIR MYPOOL1:5VMDIR1 .DIRM.SOURCE
&LMODZ DIR MYPOOL1:5VMDIR1 .DIRM.LOCALMOD
&SAMPZ DIR MYPOOL1:5VMDIR1 .DIRM.SAMPLE
&DELTZ DIR MYPOOL1:5VMDIR1 .DIRM.DELTA
&APPLX DIR MYPOOL1:5VMDIR1 .DIRM.APPLYALT
&APPLY DIR MYPOOL1:5VMDIR1 .DIRM.APPLYPROD
&BLD Z DIR MYPOOL1:5VMDIR1 .DIRM.MAINT19E
&BLD6Z DIR MYPOOL1:5VMDIR1 .DIRM.HELP
:EDCL.
:END.
(This override will update the :DCL. section of the DIRMSFS overridearea of the 5VMDIR10 $PPF file.)
b. Create (or modify as required) the Variable Declarations (:DCL.) sectionfor the DIRMUSFS override area, so that it resembles the :DCL. sectionshown below.
:DIRMUSFS. DIRMUSFS 5VMDIR1
:DCL. UPDATE
&INST191 DIR MYPOOL1:5VMDIR1
&BASEZ DIR MYPOOL1:5VMDIR1 .DIRM.OBJECT
&BAS1Z DIR MYPOOL1:5VMDIR1 .DIRM.SOURCE
&LMODZ DIR MYPOOL1:5VMDIR1 .DIRM.LOCALMOD
&SAMPZ DIR MYPOOL1:5VMDIR1 .DIRM.SAMPLE
&DELTZ DIR MYPOOL1:5VMDIR1 .DIRM.DELTA
&APPLX DIR MYPOOL1:5VMDIR1 .DIRM.APPLYALT
&APPLY DIR MYPOOL1:5VMDIR1 .DIRM.APPLYPROD
&BLD Z DIR MYPOOL1:5VMDIR1 .DIRM.MAINT19E
&BLD6Z DIR MYPOOL1:5VMDIR1 .DIRM.HELPU
:EDCL.
:END.
(This override will update the :DCL. section of the DIRMUSFS overridearea of the 5VMDIR10 $PPF file.)
6 If your $PPF override file was created at file mode A, copy it to file modeD—the Software Inventory minidisk (MAINT 51D).
filecopyfile overname $PPF fm = = d (olddateerase overname $PPF fm
50 DirMaint Program Directory
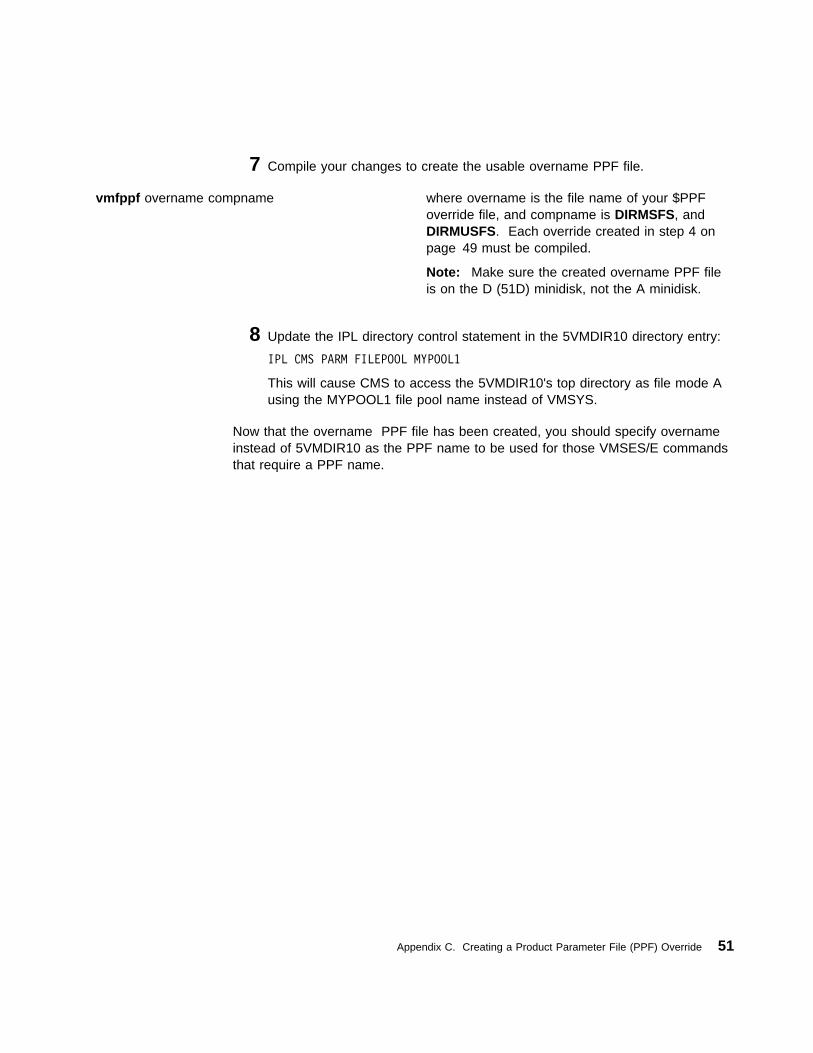
7 Compile your changes to create the usable overname PPF file.
vmfppf overname compname where overname is the file name of your $PPFoverride file, and compname is DIRMSFS, andDIRMUSFS. Each override created in step 4 onpage 49 must be compiled.
Note: Make sure the created overname PPF fileis on the D (51D) minidisk, not the A minidisk.
8 Update the IPL directory control statement in the 5VMDIR10 directory entry:
IPL CMS PARM FILEPOOL MYPOOL1
This will cause CMS to access the 5VMDIR10's top directory as file mode Ausing the MYPOOL1 file pool name instead of VMSYS.
Now that the overname PPF file has been created, you should specify overnameinstead of 5VMDIR10 as the PPF name to be used for those VMSES/E commandsthat require a PPF name.
Appendix C. Creating a Product Parameter File (PPF) Override 51

Appendix D. Disabling DirMaint
If you had previously licensed and enabled DirMaint 510 for use, and no longer are licensed for DirMaint,you need to explicitly disable it. Perform the following steps to disable DirMaint.
1 Log on to the MAINT user ID.
2 Retreive a copy of your current DirMaint user ID directory along withpasswords, using the following DirMaint commands. The file USERWITHPASS will be sent to your virtual card reader (you will want to takeappropriate security precautions with this file as it contains passwords). Youcan read in this file using the CMS RECEIVE command and name it whateveryou want. This should now be used as your CP user directory.
dirm disabledirm user withpass
3 You should log off all of the DirMaint server machines; DIRMAINTDATAMOVE and DIRMSTAT.
4 If the Software Inventory disk (51D) was accessed R/O (read only) thenestablish write access to the Software Inventory disk.
Note: If the MAINT 51D minidisk was accessed R/O, you will need to havethe user that has it accessed R/W link it R/O. You then can issue thefollowing commands to obtain R/W access to it.
link MAINT 51d 51d mraccess 51d d
The 51D minidisk is where the VMSES/E SoftwareInventory files and other product dependent filesreside.
5 Set DirMaint to the disabled state.
service dirm disable This command will perform the following:
� Set DirMaint as DISABLED in VMSES/E andwithin CP.
� Update the CP system configuration file(SYSTEM CONFIG) on the CP primary (defaultCF1) parm disk.
52 Copyright IBM Corp. 1995, 2004

Notices
IBM may not offer the products, services, or featuresdiscussed in this document in other countries. Consultyour local IBM representative for information on theproducts and services currently available in your area.Any reference to an IBM product, program, or service isnot intended to state or imply that only that IBMproduct, program, or service may be used. Anyfunctionally equivalent product, program, or service thatdoes not infringe any IBM intellectual property right maybe used instead. However, it is the user's responsibilityto evaluate and verify the operation of any non-IBMproduct, program, or service.
IBM may have patents or pending patent applicationscovering subject matter described in this document.The furnishing of this document does not give you anylicense to these patents. You can send licenseinquiries, in writing, to:
IBM Director of Licensing
IBM Corporation
North Castle Drive
Armonk, NY 1 5 4-1785
U.S.A.
For license inquiries regarding double-byte (DBCS)information, contact the IBM Intellectual PropertyDepartment in your country or send inquiries, in writing,to:
IBM World Trade Asia Corporation
Licensing
2-31 Roppongi 3-chome, Minato-ku
Tokyo 1 6, Japan
The following paragraph does not apply to theUnited Kingdom or any other country where suchprovisions are inconsistent with local law:INTERNATIONAL BUSINESS MACHINESCORPORATION PROVIDES THIS PUBLICATION “ASIS” WITHOUT WARRANTY OF ANY KIND, EITHEREXPRESS OR IMPLIED, INCLUDING, BUT NOTLIMITED TO, THE IMPLIED WARRANTIES OFNON-INFRINGEMENT, MERCHANTABILITY ORFITNESS FOR A PARTICULAR PURPOSE. Somestates do not allow disclaimer of express or impliedwarranties in certain transactions, therefore, thisstatement may not apply to you.
This information could include technical inaccuracies ortypographical errors. Changes are periodically made tothe information herein; these changes will beincorporated in new editions of the publication. IBMmay make improvements and/or changes to theproduct(s) and/or the program(s) described in thispublication at any time without notice.
Any references in this information to non-IBM Web sitesare provided for convenience only and do not in anymanner serve as an endorsement of those Web sites.The materials at those Web sites are not part of thematerials for this IBM product and use of those Websites is at your own risk.
IBM may use or distribute any of the information yousupply in any way it believes appropriate withoutincurring any obligation to you.
Licenses of this program who wish to have informationabout it for the purpose of enabling: (i) the exchange ofinformation between independently created programsand other programs (including this one) and (ii) themutual use of the information which has beenexchanged, should contact:
IBM Corporation
Mail Station P3
2455 South Road
Poughkeepsie, NY 126 1-54
U.S.A.
Such information may be available, subject toappropriate terms and conditions, including in somecases, payment of a fee.
The licensed program described in this document andall licensed material available for it are provided by IBMunder terms of the IBM Customer Agreement, IBMInternational Program License Agreement or anyequivalent agreement between us.
Any performance data contained herein was determinedin a controlled environment. Therefore, the resultsobtained in other operating environments may varysignificantly. Some measurements may have beenmade on development-level systems and there is noguarantee that these measurements will be the same
Copyright IBM Corp. 1995, 2004 53

on generally available systems. Furthermore, somemeasurement may have been estimated throughextrapolation. Actual results may vary. Users of thisdocument should verify the applicable data for theirspecific environment.
Information concerning non-IBM products was obtainedfrom the suppliers of those products, their publishedannouncements or other publicly available sources.IBM has not tested those products and cannot confirmthe accuracy of performance, compatibility or any otherclaims related to non-IBM products. Questions on thecapabilities on non-IBM products should be addressedto the suppliers of those products.
All statements regarding IBM's future direction or intentare subject to change or withdrawal without notice, andrepresent goals and objectives only.
This information may contain examples of data andreports used in daily business operations. To illustratethem as completely as possible, the examples includethe names of individuals, companies, brands, andproducts. All of these names are fictitious and anysimilarity to the names and addresses used by anactual business enterprise is entirely coincidental.
COPYRIGHT LICENSE:
This information may contain sample applicationprograms in source language, which illustratesprogramming techniques on various operating platforms.
You may copy, modify, and distribute these sampleprograms in any form without payment to IBM, for thepurposes of developing, using, marketing or distributingapplication programs conforming to IBM applicationprogramming interfaces. These examples have notbeen thoroughly tested under all conditions. IBM,therefore, cannot guarantee or imply reliability,serviceability, or function of these programs.
Trademarks and Service Marks
The following terms are trademarks of the InternationalBusiness Machines Corporation (IBM) in the UnitedStates, or other countries, or both:
BookManagere(logo)ServerDFSMS/VMDirMaintIBMIBMLinkRACFzSeriesz/VM
Linux is a trademark of Linus Torvalds in the UnitedStates, other countries, or both.
Other company, product, and service names may betrademarks or service marks of others.
54 DirMaint Program Directory

Reader's Comments
Program Directory for z/VM Directory Maintenance Facility Feature Function Level 510
You may use this form or the VM Feedback page (Contact z/VM) on the z/VM Web site at:
www.ibm.com/eserver/zseries/zvm/forms/
to comment about this document, its organization, or subject matter.
Please understand that your feedback is of importance to IBM, but IBM makes no promise to always provide aresponse to your feedback. When you send comments to IBM, you grant IBM a nonexclusive right to use or distributeyour comments in any way it believes appropriate without incurring any obligation to you.
For each of the topics below please indicate your satisfaction level by circling your choice from the rating scale. If astatement does not apply, please circle N.
RATING SCALE
very very not
satisfied <=====================> dissatisfied applicable
1 2 3 4 5 N
Satisfaction
Ease of product installation 1 2 3 4 5 N
Contents of program directory 1 2 3 4 5 N
Installation Verification Programs 1 2 3 4 5 N
Time to install the product 1 2 3 4 5 N
Readability and organization of program directory tasks 1 2 3 4 5 N
Necessity of all installation tasks 1 2 3 4 5 N
Accuracy of the definition of the installation tasks 1 2 3 4 5 N
Technical level of the installation tasks 1 2 3 4 5 N
Ease of getting the system into production afterinstallation
1 2 3 4 5 N
If this product was ordered as part of a package, what type of package was ordered?
System Delivery Offering (SDO)
Other - Please specify type: . . . . . . . . . . . . . . . . .
Is this the first time your organization has installed this product?
Yes No
Copyright IBM Corp. 1995, 2004 55

Were the people who did the installation experienced with the installation of VM products?
Yes No
If yes, how many years? __
If you have any comments to make about your ratings above, or any other aspect of the product installation, pleaselist them below:
Please provide the following contact information:
Name and Job Title
Organization Address Telephone
Thank you for your participation.
Please send the completed form to (or give to your IBM representative who will forward it to the z/VM DirectoryMaintenance Facility Feature Development group):
IBM CorporationDept G321701 North StreetEndicott, NY 13760
56 DirMaint Program Directory


IBM
Program Number: 5741-A05
Printed in U.S.A.
GI11-4798-