mygetinteractive.commygetinteractive.com/3ds_max_2015_lmt/creating_material.docx · web viewin this...
TRANSCRIPT

Let Me Try!
Creating MaterialIn this tutorial, you will create brass material and assign it to a flower pot, as shown in the image below.
Creating the Project FolderCreate a new project folder with the name c07_tut2 at \Documents\3dsmax2015 and then save the file with the name c07tut2.
Opening the FileIn this section, you will open the file.
1. Open the Windows Explorer and then browse to the c07_3dsmax_2015_tut folder and copy the Lakerem2.jpg file from this folder to the location
\Documents\3dsmax2015\c07_tut2\ sceneassets\images.

Let Me Try!
2. Choose Open from the Application menu; the Open File dialog box is displayed. In this dialog box, browse to the location \Documents\c07_3dsmax_2015_tut and select the c07_tut2_start.max file in it. Choose the Open button to open the file, refer to the image below.
3. Choose Save As from the Application menu; the Save File As dialog box is displayed. Browse to the location \Documents\3dsmax2015\c07_tut2\scenes. Save the file with the name c07tut2.max at this location.
Let Me Try!
Creating Brass Material for the Flower Pot
In this section, you will create the brass material for the flower pot by using the Compact Material Editor tool.
1. Select flower pot in a viewport and choose the Material Editor tool from the Main Toolbar; the Material Editor dialog box is displayed.
2. Select one of the empty sample slots in the Material Editor dialog box. In the Material Name drop-down list of this dialog box, enter brass.
3. By default, the Standard material is displayed on the Material Type button and you need to use the same for creating the brass material.
Next, you need to set parameters for the Standard material.
4. In the Shader Basic Parameters rollout, select the Metal shader option from the drop-down list; the Metal Basic Parameters rollout is displayed. Select the 2-Sided check box.
5. In the Metal Basic Parameters rollout, choose the Diffuse color swatch to change the color of the material; the Color Selector dialog box is displayed. Set the values as follows:
Red: 253 Green: 159 Blue: 37
Now, choose the OK button to close this dialog box.
6. In the Specular Highlights area, set the values as follows:
Specular Level: 80 Glossiness: 75
Next, you need to assign the Reflection map from the Maps rollout to get a realistic effect.
7. Expand the Maps rollout in the Material Editor dialog box; a list of maps is displayed.
8. Select the Reflection check box to make it active. Choose the Reflection map button that is labeled as None on the right of the Reflection spinner; the Material/Map Browser dialog box is displayed. Select the Bitmap map from the Maps > Standard rollout and choose the OK button; the Select Bitmap Image File dialog box is displayed.
As the project folder is already set, the images folder is displayed in the Look in drop-down list of this dialog box.
9. Select the file Lakerem2.jpg from this dialog box and choose the Open button; the image is displayed in the selected sample slot, as shown in the image below.

Let Me Try!
10.Choose the Go to Parent tool from the Material Editor dialog box. In the Maps rollout, set the value 50 in the Reflection spinner.
11.Make sure that flower pot is selected in the viewport and the brass material is selected in the Material Editor dialog box.
12.Choose the Assign Material to Selection button; the brass material is assigned to flower pot.
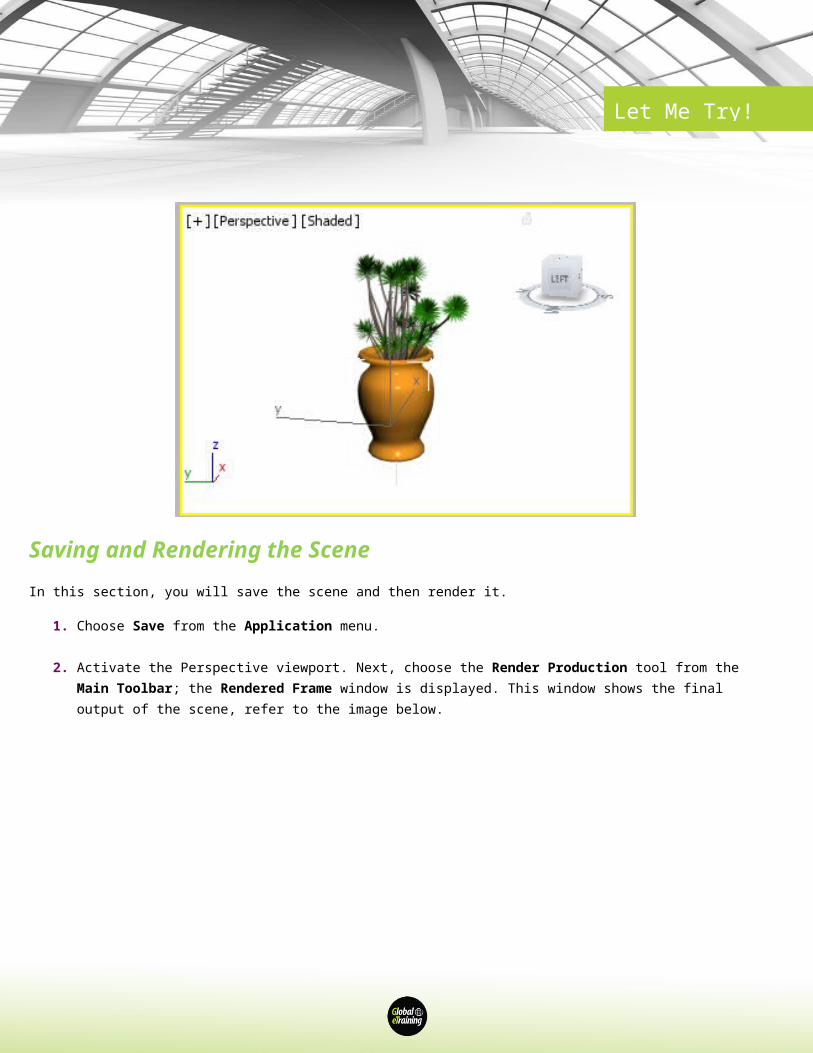
13.Choose the Show Shaded Material in Viewport button; the brass material is displayed on flower pot in the Perspective viewport, as shown in the image below.
Saving and Rendering the Scene
Let Me Try!
In this section, you will save the scene and then render it.
1. Choose Save from the Application menu.
2. Activate the Perspective viewport. Next, choose the Render Production tool from the Main Toolbar; the Rendered Frame window is displayed. This window shows the final output of the scene, refer to the image below.