034motorsport rear differential carrier mount insert kit, b8 audi … · 034motorsport rear...
TRANSCRIPT
034Motorsport Rear Differential Carrier Mount Insert Kit, B8 Audi A4/S4/RS4, A5/S5/RS5, Q5/SQ5 & C7 Audi A6/S6/RS6,
A7/S7/RS7, Billet Aluminum
The installation of your 034Motorsport Billet Aluminum Rear Differential Carrier Mount Insert Upgrade for the B8 Audi
A4/S4/RS4, A5/S5/RS5, Q5/SQ5 & C7 Audi A6/S6/RS6, A7/S7/RS7 is a relatively simple process that will take
approximately 30-45 minutes to complete
Supplied Parts:
034Motorsport Rear Differential Carrier Mount Inserts (2)
Tools Needed:
Hands (Opposable Thumbs Are Optional)
18mm Socket
Torque Wrench
Silicone Lubricant (Recommended)
Ramps, Lift, or Jack & Jackstands
Jack or Transmission Jack to Support Rear Differential
Step 0 - Raise the vehicle securely on jackstands, ramps, or a lift, in order to gain access to the rear differential carrier
mounts. Make sure you have all tools necessary for installation of the differential carrier mount inserts.
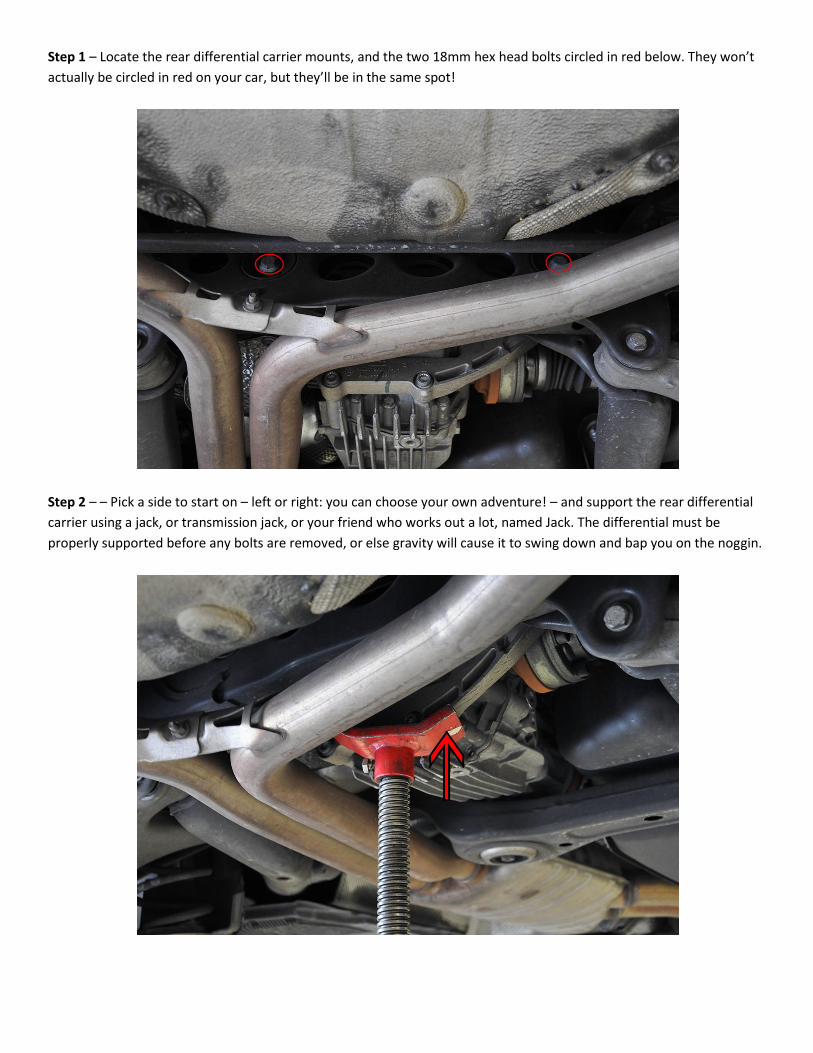
Step 1 – Locate the rear differential carrier mounts, and the two 18mm hex head bolts circled in red below. They won’t
actually be circled in red on your car, but they’ll be in the same spot!
Step 2 – – Pick a side to start on – left or right: you can choose your own adventure! – and support the rear differential
carrier using a jack, or transmission jack, or your friend who works out a lot, named Jack. The differential must be
properly supported before any bolts are removed, or else gravity will cause it to swing down and bap you on the noggin.

Step 3 – Using the 18mm socket and your superhuman strength, loosen the hex head bolt going through the rear
differential carrier bushing. Make sure the carrier is properly supported, and remove the bolt completely.
Step 4 – Observe the rear differential carrier mount, and take note of the large voids in the rubber. They are there to
limit NVH transfer into the cabin, but also allow for performance-hindering drivetrain slop. These voids are what the
Rear Differential Carrier Mount Insert Kit is designed to fill, reducing unwanted twist in the rear differential mount.
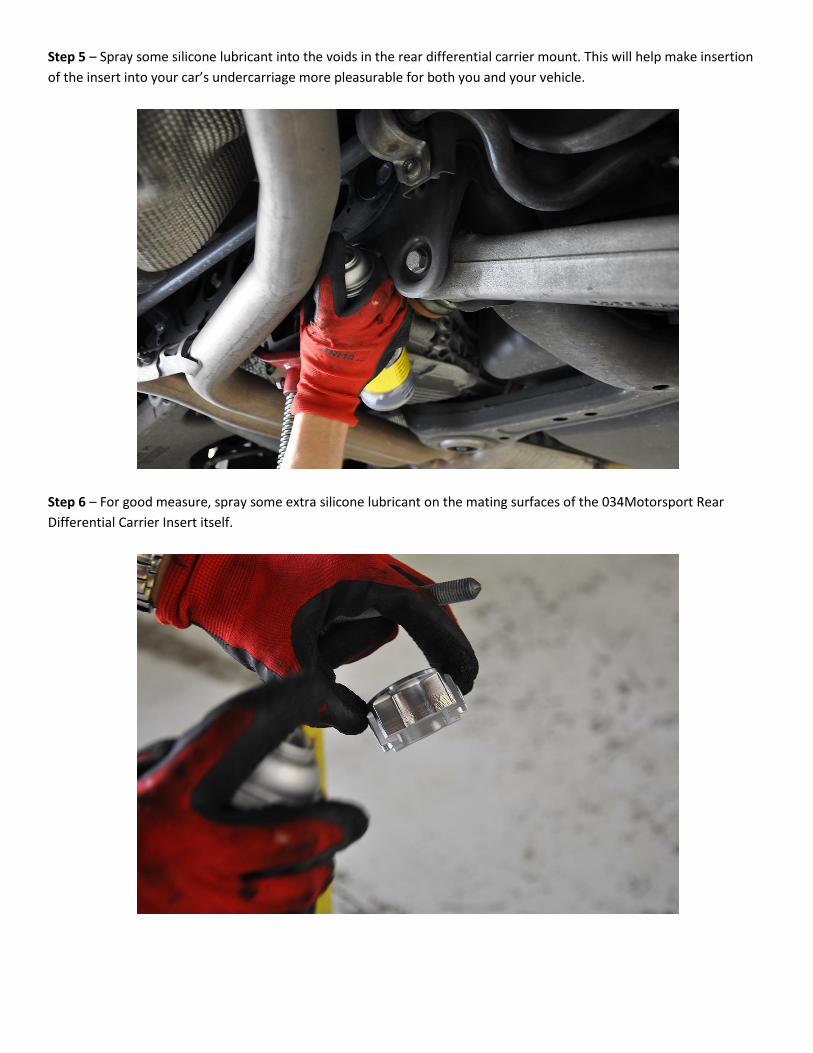
Step 5 – Spray some silicone lubricant into the voids in the rear differential carrier mount. This will help make insertion
of the insert into your car’s undercarriage more pleasurable for both you and your vehicle.
Step 6 – For good measure, spray some extra silicone lubricant on the mating surfaces of the 034Motorsport Rear
Differential Carrier Insert itself.
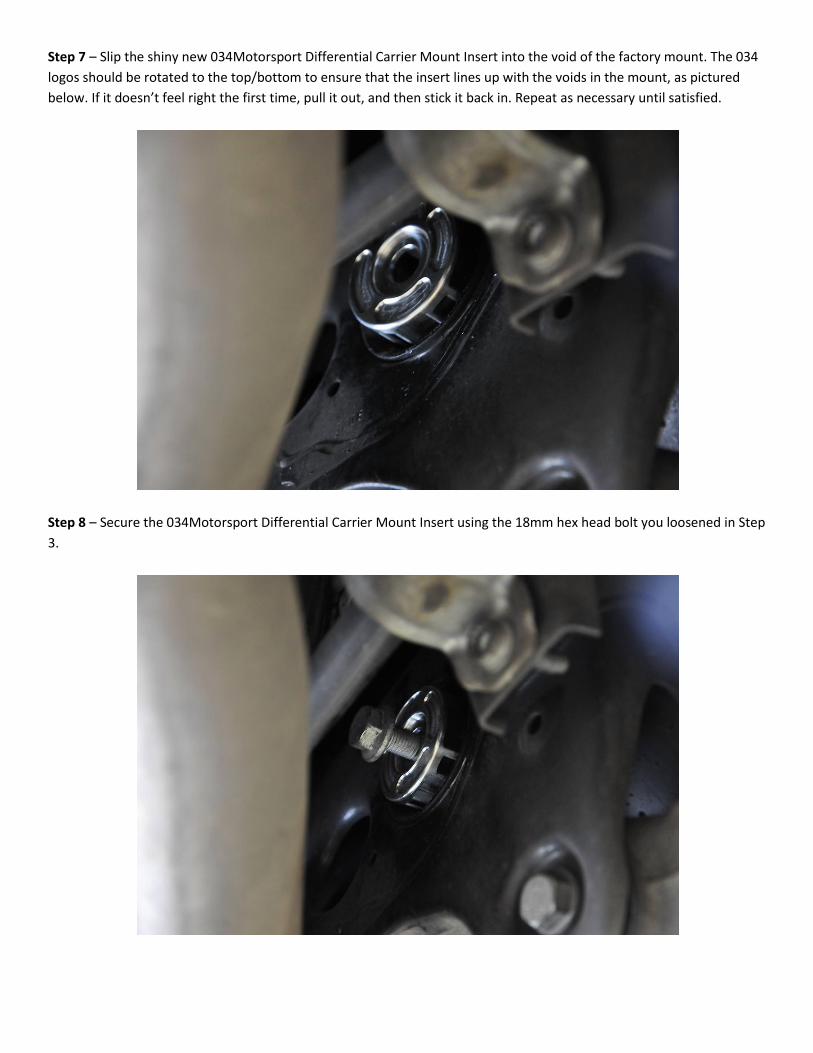
Step 7 – Slip the shiny new 034Motorsport Differential Carrier Mount Insert into the void of the factory mount. The 034
logos should be rotated to the top/bottom to ensure that the insert lines up with the voids in the mount, as pictured
below. If it doesn’t feel right the first time, pull it out, and then stick it back in. Repeat as necessary until satisfied.
Step 8 – Secure the 034Motorsport Differential Carrier Mount Insert using the 18mm hex head bolt you loosened in Step
3.

Step 9 – Torque the crossmember to rear differential carrier bolt to 55 Nm using a torque wrench. Do not overtighten
the bolt!
Step 10 – When tightening, make sure that the bolt head fits into the machined locating recess in the Differential Carrier
Mount Insert, as pictured below.

Step 11 – Repeat the installation process on the other side of the rear differential carrier. You may need to move the
jack, transmission jack, or your friend named Jack to better support the other side of the rear differential carrier.
Step 12 – Marvel at your work! Put your tools away, lower your vehicle, and enjoy the upgrade! You should notice more
positive clutch engagement, smoother shifts, and more consistent hard launches.