1 of 8 curved bar pillar light mount - pure fj cruiser
TRANSCRIPT
1 of 8
Curved Bar Pillar Light Mount
Thank you for your purchase of DBCustomz’ Curved Bar Pillar Light Mount! This product was carefully
crafted to ensure a perfect fit with your vehicle. The instructions below are provided to allow for an
easier installation. We encourage you to refer to these regularly for optimal efficiency.
TOOLS REQUIRED
(1) Drill
(1) 7/32” drill bit (for wood, steel or plastic)
(1) T-30 Torx (6-point star) drive bit
(1) Permanent Marker (to mark holes)
HARDWARE INCLUDED
(12) 1 ¼” T-30 Torx head screws
(2) ½” plastic spacers – OPTIONAL
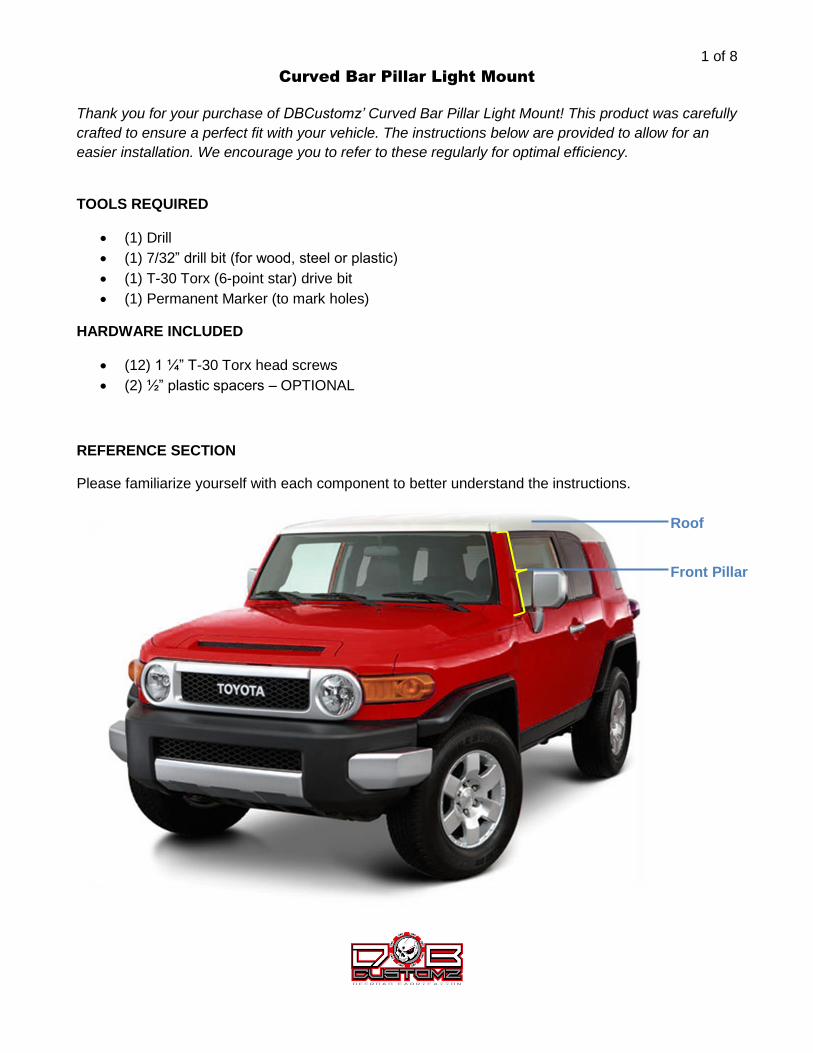
REFERENCE SECTION
Please familiarize yourself with each component to better understand the instructions.
Roof
Front Pillar

2 of 8
Curved Bar Pillar Light Mount
LIGHT MOUNT INSTALLATION INSTRUCTIONS
1) Beginning with the Driver’s side, position the Light Mount on the front driver’s pillar, parallel to the
roof, with about 1/16” showing from the top.
Mark the center of the 6 holes with a permanent marker. Remove the Light Mount.
2) Beginning with the top right hole mark, bore a 1” hole using the 7/32” drill bit. Make sure to keep
the drill bit straight as you bore the hole.
TIP: In order to make sure you don’t drill too deep, use masking tape to mark off 1” on your drill bit
before you begin drilling.
3 of 8
Curved Bar Pillar Light Mount
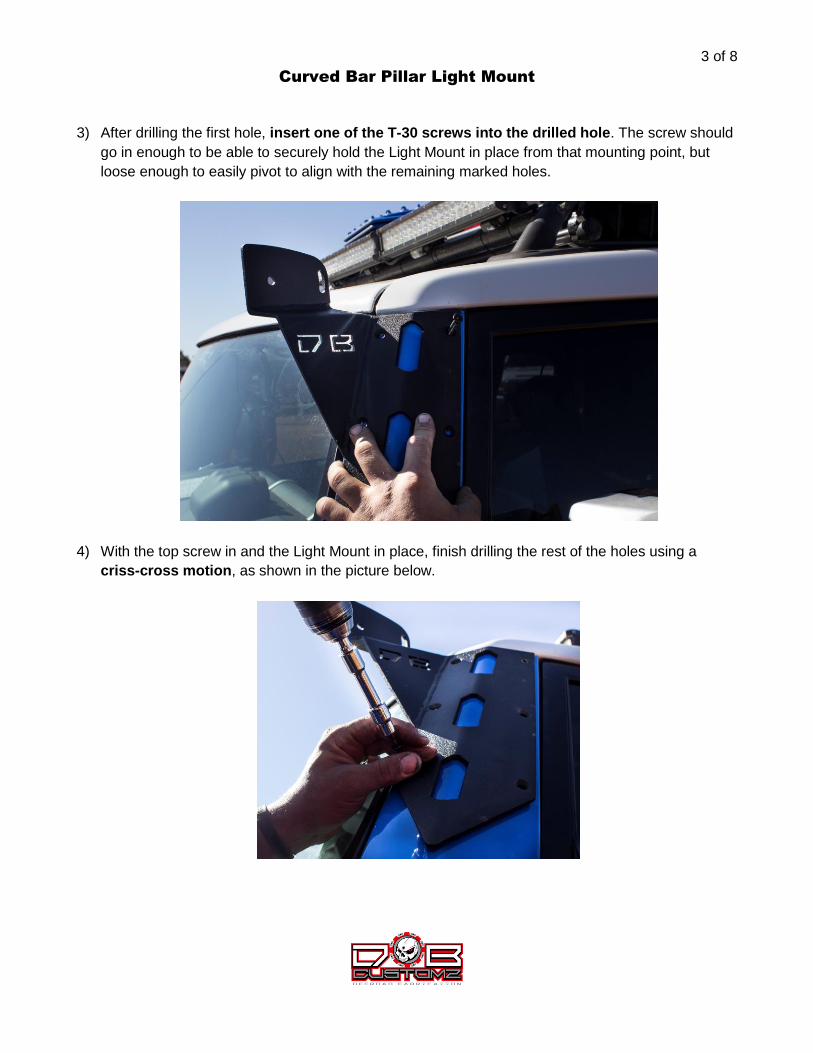
3) After drilling the first hole, insert one of the T-30 screws into the drilled hole. The screw should
go in enough to be able to securely hold the Light Mount in place from that mounting point, but
loose enough to easily pivot to align with the remaining marked holes.
4) With the top screw in and the Light Mount in place, finish drilling the rest of the holes using a
criss-cross motion, as shown in the picture below.

4 of 8
Curved Bar Pillar Light Mount
5) Once all holes are drilled, insert the remaining T-30 screws, following the same criss-cross
motion. The screws should be loose enough to allow alignment adjustments with the other holes.
6) Once the Driver’s Pillar Light Mount installation is set up, repeat the same process with the
Passenger’s side.
CURVED LED BAR INSTALLATION INSTRUCTIONS
7) Before you install the Curved LED Light Bar, loosen the previously installed T-30 screws so that
1/8” is showing from the top. This will make help to aligning the Light Bar easier.

5 of 8
Curved Bar Pillar Light Mount
8) Mount the Light Bar with the studs bolted in.
9) Once the Light Bar is mounted, torque the T-30 screws in.
6 of 8
Curved Bar Pillar Light Mount
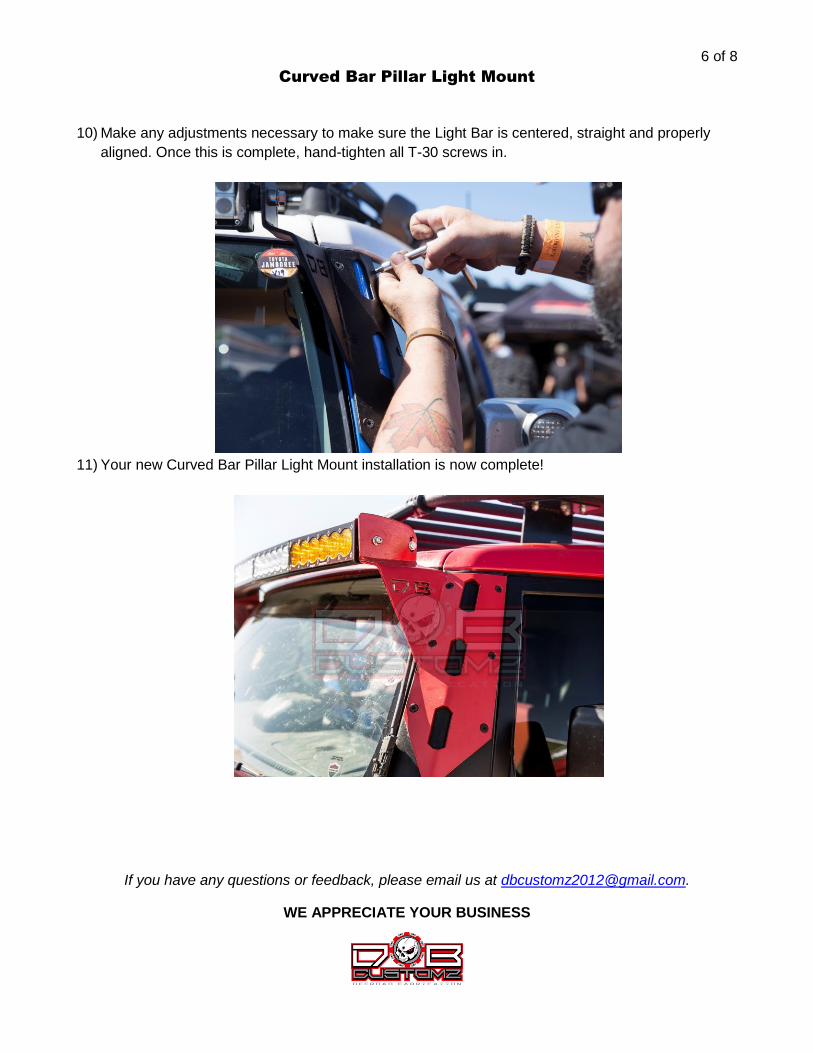
10) Make any adjustments necessary to make sure the Light Bar is centered, straight and properly
aligned. Once this is complete, hand-tighten all T-30 screws in.
11) Your new Curved Bar Pillar Light Mount installation is now complete!
If you have any questions or feedback, please email us at [email protected].
WE APPRECIATE YOUR BUSINESS