1 web-enabled decision support systems access tables: building data foundation prof. name...
TRANSCRIPT

1
Web-Enabled Decision Support Systems
Access Tables: Building Data Foundation
Prof. Name [email protected] (123) 456-7890University Name

2
Overview
6.1 Introduction 6.2 Hands-On Tutorial: Creating Access Tables in the Datasheet View 6.3 Hands-On Tutorial: Creating Access Tables in the Design View 6.4 Field Data Types 6.5 Field Properties 6.6 The Lookup Wizard 6.7 Defining a Primary Key 6.8 Creating Access Tables by Using Import Wizard 6.9 Working with Table Properties 6.10 In-Class Assignment 6.11 Summary

3
Introduction
Access stores and relates its data in tables Fundamental and foundational element of relational databases Datasheet View
– Two-dimensional grid Columns: data fields
Rows: records
The Student Table of the University Database

4
Creating Access Tables
Methods of creating Access tables:– Datasheet View
– Design View
– Table Wizard
– Import Wizard
– Link Table
New Table Dialog Box

5
Overview
6.1 Introduction 6.2 Hands-On Tutorial: Creating Access Tables in the Datasheet View 6.3 Hands-On Tutorial: Creating Access Tables in the Design View 6.4 Field Data Types 6.5 Field Properties 6.6 The Lookup Wizard 6.7 Defining a Primary Key 6.8 Creating Access Tables by Using Import Wizard 6.9 Working with Table Properties 6.10 In-Class Assignment 6.11 Summary

6
Hands-On Tutorial:Creating Tables in the Datasheet View
One of the simplest and quickest ways to build new tables in Access– Manually enter data in the Datasheet View
– Limitations: Primary key definition
Data types and validation
How-to: Create Tables in the Datasheet View
1. Open Access using the Start menu.
2. Choose File | New from the Main menu to open the New File Task Pane. Choose the Blank database option to create a new database file.
3. Select the Table item in the Object Bar and choose the Create table by entering data option in the Database Window.

7
Hands-On Tutorial: Creating Tables in the Datasheet View (cont.)
4. Enter the first record in the table as shown below. Double-click the column headings to rename them.
5. Enter the remaining records in the subsequent rows of the grid.
6. Save table as “tblCollege” by choosing File | Save As from Main menu. Click No to ignore the warning regarding the lack of a primary key.
Creating the College Table in Datasheet View

8
Overview
6.1 Introduction 6.2 Hands-On Tutorial: Creating Access Tables in the Datasheet View 6.3 Hands-On Tutorial: Creating Access Tables in the Design View 6.4 Field Data Types 6.5 Field Properties 6.6 The Lookup Wizard 6.7 Defining a Primary Key 6.8 Creating Access Tables by Using Import Wizard 6.9 Working with Table Properties 6.10 In-Class Assignment 6.11 Summary

9
The Design View
The Design View is a comprehensive, powerful, and flexible tool to create tables– Design Grid (top half)
Define fields, data types, and descriptions
– Field Properties (bottom half) Set validation and appearance preferences
The Department Table in Design View

10
Hands-On Tutorial: Creating Tables in the Design View
How-to: Create Tables in Design View
1. Double-click the Create table in Design View option in the Database Window to open a new table in the Design View.
2. Specify the fields of the department table on individual rows in the Design Grid.
3. Select the DeptID row by clicking on the row selector. Right-click and choose the Primary Key option to assign DeptID as a primary key.
4. Save the table as “tblDepartment”.

11
Overview
6.1 Introduction 6.2 Hands-On Tutorial: Creating Access Tables in the Datasheet View 6.3 Hands-On Tutorial: Creating Access Tables in the Design View 6.4 Field Data Types 6.5 Field Properties 6.6 The Lookup Wizard 6.7 Defining a Primary Key 6.8 Creating Access Tables by Using Import Wizard 6.9 Working with Table Properties 6.10 In-Class Assignment 6.11 Summary

12
Field Data Types
Each column of a table is designed to contain a specific data type
Access offers 10 different data types:– Text, Memo, Number, Date/Time, Currency, AutoNumber, Yes/No, OLE
Object, Hyperlink, and Lookup
Proper selection of data types at the design stage can greatly affect the performance and functionality of a database– Considerations for selecting field data types:
Storage space
Application requirements

13
Access’ 10 Data Types
Text– Default data type
– For alphanumeric data Not used in calculations
Memo– Large text data
– Up to 65,536 bytes (~18 pages of text)
Number– For arithmetic operations
Date/Time– Dates, times, and combinations of the two
Currency– Money values

14
Access’ 10 Data Types (cont.)
AutoNumber– Automatically generates sequential numbers
– Mainly used for primary key fields
Yes/No– Boolean data
Yes/No, True/False, and On/Off
– 1 bit per field
OLE Object– Object Linking and Embedding
– Complex data from other Windows-based applications
Hyperlink– Links in Uniform Resource Locator (URL) format
Lookup– Foreign keys

15
Overview
6.1 Introduction 6.2 Hands-On Tutorial: Creating Access Tables in the Datasheet View 6.3 Hands-On Tutorial: Creating Access Tables in the Design View 6.4 Field Data Types 6.5 Field Properties 6.6 The Lookup Wizard 6.7 Defining a Primary Key 6.8 Creating Access Tables by Using Import Wizard 6.9 Working with Table Properties 6.10 In-Class Assignment 6.11 Summary

16
Field Properties
Every data field has its own properties that control:– Storage
– Formatting
– Validation
Field Size– Length of text and numeric data types
– Types: Byte, integer, long integer, single, double, replicationID
Format– On-screen and printed data displays
– For all data types (excluding OLE Object)
– Particular options for Number, Date/Time, and Yes/No data types
17
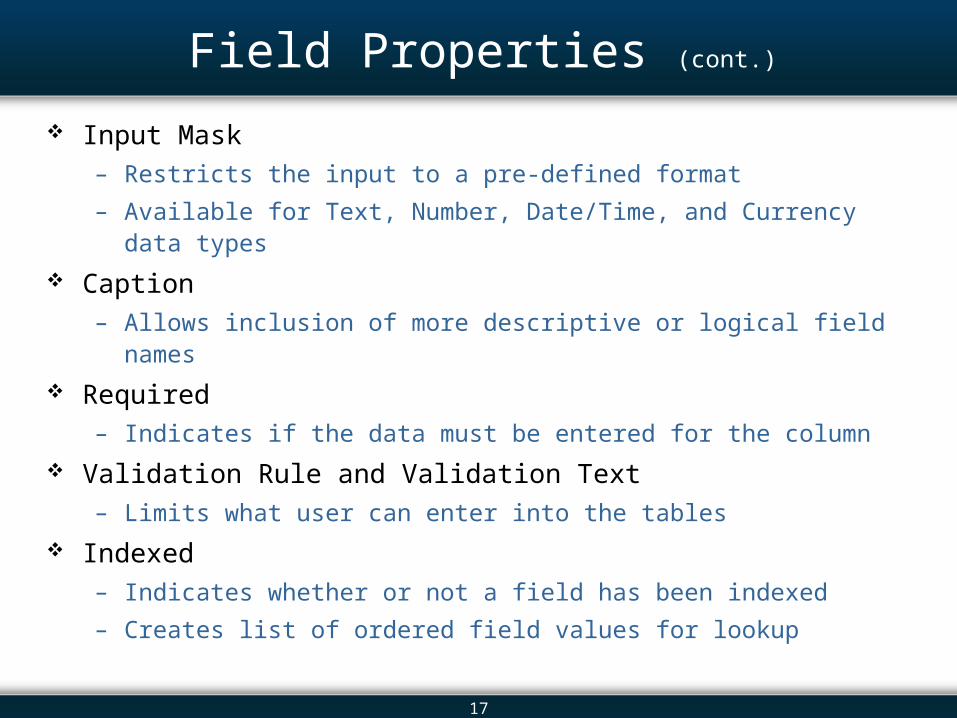
Field Properties (cont.)
Input Mask– Restricts the input to a pre-defined format
– Available for Text, Number, Date/Time, and Currency data types
Caption– Allows inclusion of more descriptive or logical field names
Required– Indicates if the data must be entered for the column
Validation Rule and Validation Text– Limits what user can enter into the tables
Indexed– Indicates whether or not a field has been indexed
– Creates list of ordered field values for lookup

18
Using the Input Mask Wizard
Goal:– Mask a phone number field in the format: “(xxx) xxx-xxxx”
How-to: Use the Input Mask Property and Input Mask Wizard
1. Open the tblDepartment table in the Design View, and click on the Phone field to view its field properties.
2. Locate and click on the build button (…) to invoke the Input Mask Wizard.
Invoking the Input Mask Wizard from the Field Properties

19
Using the Input Mask Wizard (cont.)
3. Select the Phone Number option under Input Mask list. Click inside the Try It text box to test the format.
The Input Mask Wizard:Selecting the Mask

20
Using the Input Mask Wizard (cont.)
4. Accept the default values for the next two pages of the wizard and click the Finish button to close the wizard.
The Input Mask Wizard: Selecting the Placeholder Character

21
Hands-On Tutorial: Using Validation
Goal:– Validate the date entered by the user in the DOB (date of birth) field of the
student table.
How-to: Use Required, Validation Rules and Text Properties1. Open the student table in the Design View. Click on the DOB field to
reveal its properties in the Field Properties.
2. Set the Required property to Yes.
3. Set the Validation Rule and the Validation Text properties as shown: Validation Rule: > Date()-(365*16) Validation Text: “Student age must be at least 16 or more!”

22
Hands-On Tutorial: Using Validation (cont.)
4. Save the changes made to the table, and verify the Validation Rule and Validation Text properties by entering erroneous data in the student table.
Using Validation Rule and Validation Text Properties

23
Expression Builder
The Expression Builder dialog box uses existing object names and many built-in functions to build expressions – Invoke by clicking the Build button found at the end of the Validation Rule
property entry.
Expression Builder Dialog Box

24
New Validation Rules
When saving a table with a new validation rule, Access asks if we would like to validate the existing data in the table– If we answer No, only new data entered or existing data when updated will
be checked against the validation rule
Prompt for Testing the Existing Data for the New Validation Rule

25
Hands-On Tutorial: Creating a Table Index
How-to: Create an Index on a Table Field1. Open the student table in the Design View and click on the Class field to
view its field properties.
2. Locate the Indexed property and change its value to Yes.
Setting-up an Indexed Property

26
The Indexes Dialog Box
We can use the Indexes dialog box to view, add, or delete field indexes – To invoke the Indexes dialog box, click the Indexes button on the Database
toolbar.
The Indexes Dialog Box

27
Overview
6.1 Introduction 6.2 Hands-On Tutorial: Creating Access Tables in the Datasheet View 6.3 Hands-On Tutorial: Creating Access Tables in the Design View 6.4 Field Data Types 6.5 Field Properties 6.6 The Lookup Wizard 6.7 Defining a Primary Key 6.8 Creating Access Tables by Using Import Wizard 6.9 Working with Table Properties 6.10 In-Class Assignment 6.11 Summary

28
The Lookup Wizard
The Lookup Wizard helps us to “look-up” field values from field values of the same or other table – Useful tool for foreign key fields
– Helps avoid violations of referential integrity constraint
– Simplifies the data entry process
– Invoke via the 10th option in the data type drop-down list
Setting-up the Lookup Data Type
29
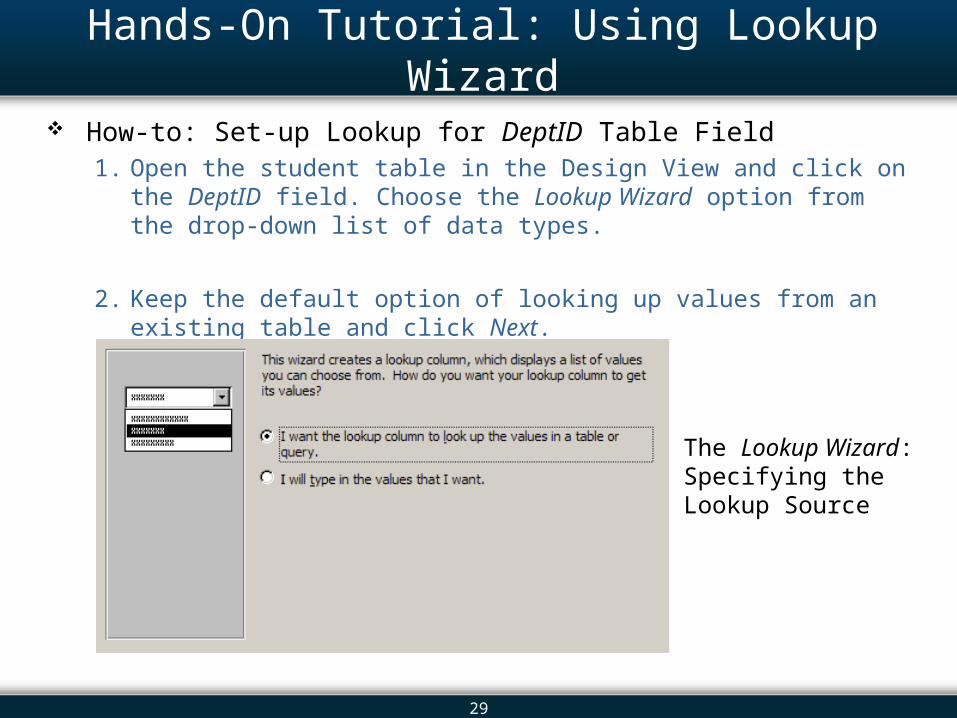
Hands-On Tutorial: Using Lookup Wizard
How-to: Set-up Lookup for DeptID Table Field1. Open the student table in the Design View and click on the DeptID field.
Choose the Lookup Wizard option from the drop-down list of data types.
2. Keep the default option of looking up values from an existing table and click Next.
The Lookup Wizard: Specifying the Lookup Source

30
Hands-On Tutorial: Using Lookup Wizard (cont.)
3. Select the department table and click Next.
4. Select the DeptID and Name fields from the list of Available Fields to the list of Selected Fields.
The Lookup Wizard: Selecting a Lookup Field

31
Hands-On Tutorial: Using Lookup Wizard (cont.)
5. Accept the default sorting selection on the next page and click Next.
6. Accept the Hide key column check box selection and click Finish.
The Lookup Wizard: Hiding theKey Column

32
Hands-On Tutorial: Using Lookup Wizard (cont.)
7. Verify the Datasheet View with a lookup on the DeptID field.
Lookup for DeptID Field in the Datasheet View

33
Hands-On Tutorial: Using Lookup Wizard (cont.)
8. Verify the Design View of the student table.
Lookup Tab in the Design View

34
The Lookup Tab
Lookup Tab properties:– Display Control:
Dictates the type of control that must be used to display the lookup values Options: Combo Box, List Box, and Text Box
– Row Source Type and Row Source: Specifies the source type and actual source of the lookup field
– Bound Column: Specifies the column that will provide the actual lookup values

35
Overview
6.1 Introduction 6.2 Hands-On Tutorial: Creating Access Tables in the Datasheet View 6.3 Hands-On Tutorial: Creating Access Tables in the Design View 6.4 Field Data Types 6.5 Field Properties 6.6 The Lookup Wizard 6.7 Defining a Primary Key 6.8 Creating Access Tables by Using Import Wizard 6.9 Working with Table Properties 6.10 In-Class Assignment 6.11 Summary

36
Primary Keys
A primary key is the set of one or more fields that uniquely identifies a record
– Distinguishes one record from another
– Each table in a relational database must have a primary key
– Access displays a “key symbol” on the row selector for the primary key field(s)
– Access automatically creates an index, called the PrimaryKey index, on primary key fields
37
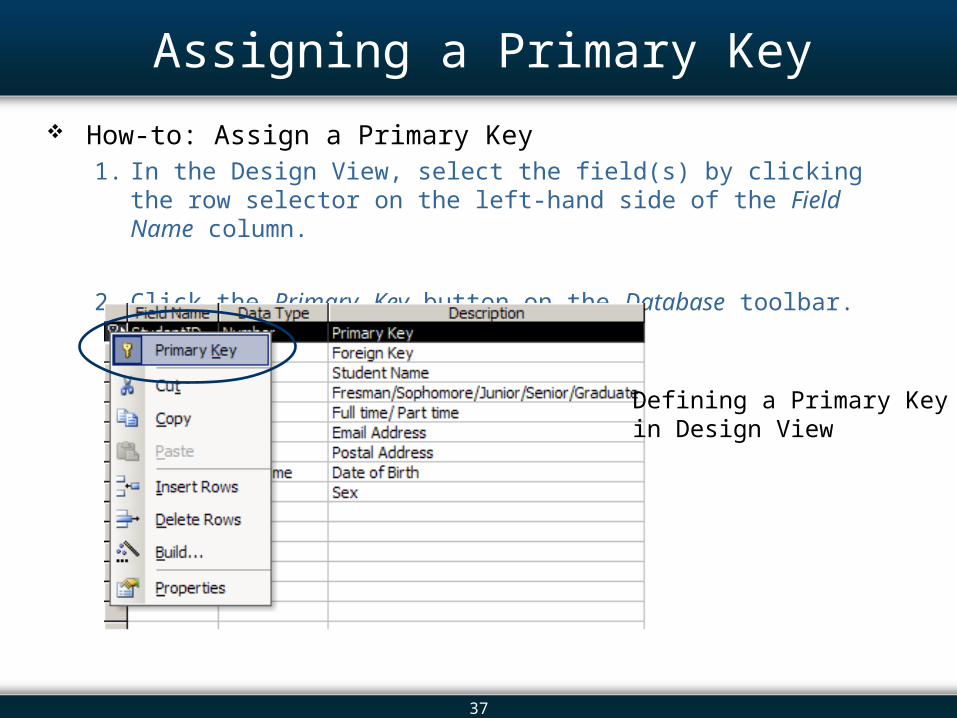
Assigning a Primary Key
How-to: Assign a Primary Key1. In the Design View, select the field(s) by clicking the row selector on the
left-hand side of the Field Name column.
2. Click the Primary Key button on the Database toolbar.
Defining a Primary Key in Design View
38
Overview
6.1 Introduction 6.2 Hands-On Tutorial: Creating Access Tables in the Datasheet View 6.3 Hands-On Tutorial: Creating Access Tables in the Design View 6.4 Field Data Types 6.5 Field Properties 6.6 The Lookup Wizard 6.7 Defining a Primary Key 6.8 Creating Access Tables by Using Import Wizard 6.9 Working with Table Properties 6.10 In-Class Assignment 6.11 Summary

39
The Import Wizard
The Import Wizard option allows us to import large amounts of existing data from external files directly into Access tables
– Examples of external files: Excel files
Text files
– Used when manual entering of data is infeasible

40
Using the Import Wizard
How-to: Import Data Using the Import Wizard1. To invoke the Import Wizard, right-click anywhere in the Database Window
and select the Import option from the short-cut menu.
2. Select the “CourseTable.xls” Excel file provided on the book website: www.dssbooks.com.
3. Accept the default selection and click Next.
4. Assign the first row in the Excel sheet as the column heading in the Access table.

41
Using the Import Wizard (cont.)
5. Import the course data to a new table.
Creating Access Tables Using Import Wizard

42
Using the Import Wizard (cont.)
6. The next page allows us to: Modify field names Create indexes on fields Skip a column from importing
Selecting the Fields to Create in the Import Wizard

43
Using the Import Wizard (cont.)
7. Specify the primary key of the table.
8. Name the new table.
Defining a Primary Key in the Import Wizard

44
Overview
6.1 Introduction 6.2 Hands-On Tutorial: Creating Access Tables in the Datasheet View 6.3 Hands-On Tutorial: Creating Access Tables in the Design View 6.4 Field Data Types 6.5 Field Properties 6.6 The Lookup Wizard 6.7 Defining a Primary Key 6.8 Creating Access Tables by Using Import Wizard 6.9 Working with Table Properties 6.10 In-Class Assignment 6.11 Summary

45
Working with Table Properties
Like a table field, a table itself has its own properties – Control the behavior and appearance of the table
– To view the table properties, open the table in the Design View and then click the Property button on the toolbar
The Table Properties Dialog Box for the Student Table

46
Overview
6.1 Introduction 6.2 Hands-On Tutorial: Creating Access Tables in the Datasheet View 6.3 Hands-On Tutorial: Creating Access Tables in the Design View 6.4 Field Data Types 6.5 Field Properties 6.6 The Lookup Wizard 6.7 Defining a Primary Key 6.8 Creating Access Tables by Using Import Wizard 6.9 Working with Table Properties 6.10 In-Class Assignment 6.11 Summary

47
In-Class Assignment
The marketing department of a firm wants to create a database with detailed information about its customers– Create a table that includes the following personal information about each
customer: Address, phone number, and email
– Make the following modifications to the table: Record identification number, full name, address, zip code, phone number, and
fax number for each customer. Make each of these fields required fields. Assign an appropriate field as a primary key of the table.
Use the Input Mask Wizard to appropriately mask the phone number and fax number fields.

48
In-Class Assignment (cont.)
The department researchers are also interested in demographic characteristics of the customers– They plan to scan the data in the database based on particular age ranges
and gender Add additional fields for these characteristics. Set the default value of the field
Gender to “M”. The values to be entered in the Age field should be between 1 and 100. Display an error message for inappropriate age values.
Create indexes on the Age and Gender fields to facilitate an efficient search based on these fields.

49
Overview
6.1 Introduction 6.2 Hands-On Tutorial: Creating Access Tables in the Datasheet View 6.3 Hands-On Tutorial: Creating Access Tables in the Design View 6.4 Field Data Types 6.5 Field Properties 6.6 The Lookup Wizard 6.7 Defining a Primary Key 6.8 Creating Access Tables by Using Import Wizard 6.9 Working with Table Properties 6.10 In-Class Assignment 6.11 Summary

50
Summary
Tables are fundamental elements of a relational database and act as data foundation objects.
Tables can be built using following options: – Creating a table in Datasheet View.
– Creating a table in Design View.
– Creating a table by using Table Wizard.
– Creating a table by using Import Wizard.
The field data type dictates what kind of data can reside in the field.

51
Summary (cont.)
Field properties control the behavior of a field and its data. – The following are a few important field properties:
Format: controls how to display data. Input Mask: controls how to input data. Validation Rule: controls what data can be stored. Indexed: allows setting an index on a field for searching. Lookup Wizard: allows looking up values from other fields.
Table properties control the behavior of a table. – We can use the validation rules to control how data is entered or modified
at the record level.

52
Additional Links
Review more sample Access tables from database files on the book website: http://www.dssbooks.com.
Refer MS Access 2003: The Complete Reference by Virginia Andersen for more details on Access tables.
Also refer Access 2003 Bible by Cary N. Prague, Michael R. Irwin, and Jennifer Reardon.
Also see: http://msdn.microsoft.com/ for useful tips on Access tables