10 february 20041 event monitoring and event file maintenance
TRANSCRIPT

10 February 2004 1
Event Monitoring and
Event File Maintenance
10 February 2004 2
Event Monitoring and Maintenance
• Provides real-time viewing of activity on the access control network
• Provides functions for managing event collection and storage
10 February 2004 3
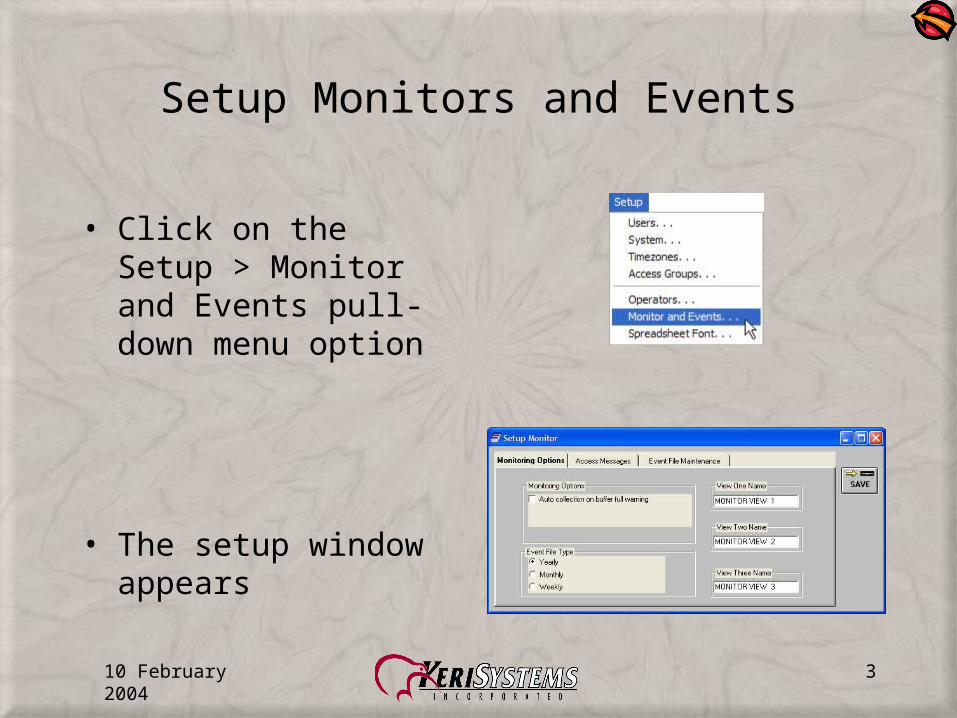
Setup Monitors and Events
• Click on the Setup > Monitor and Events pull-down menu option
• The setup window appears
10 February 2004 4
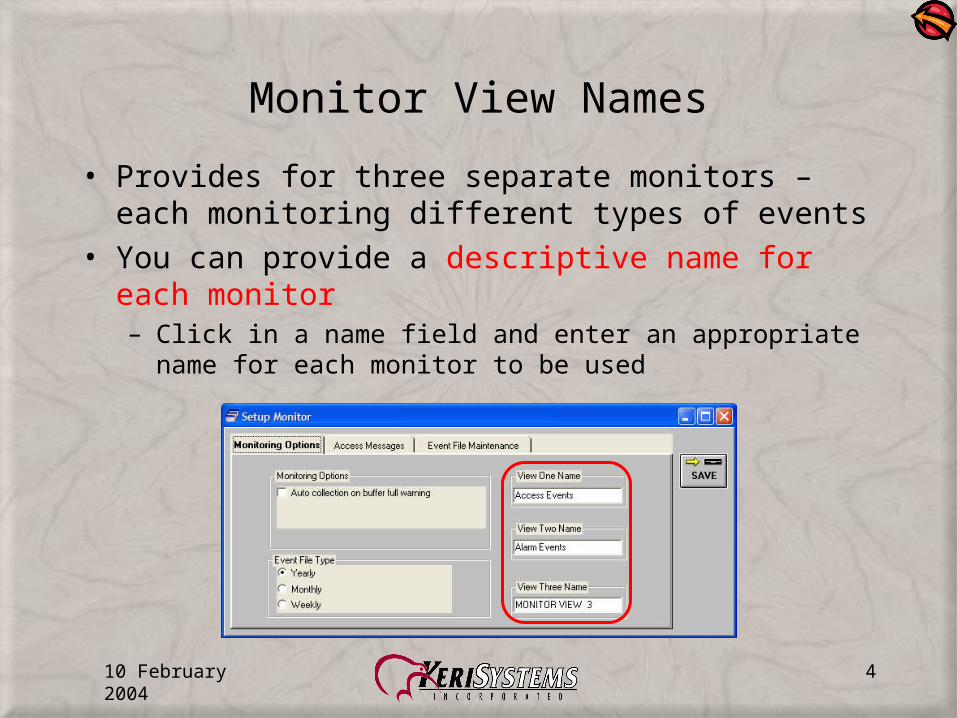
Monitor View Names
• Provides for three separate monitors – each monitoring different types of events
• You can provide a descriptive name for each monitor– Click in a name field and enter an appropriate name for each
monitor to be used
10 February 2004 5
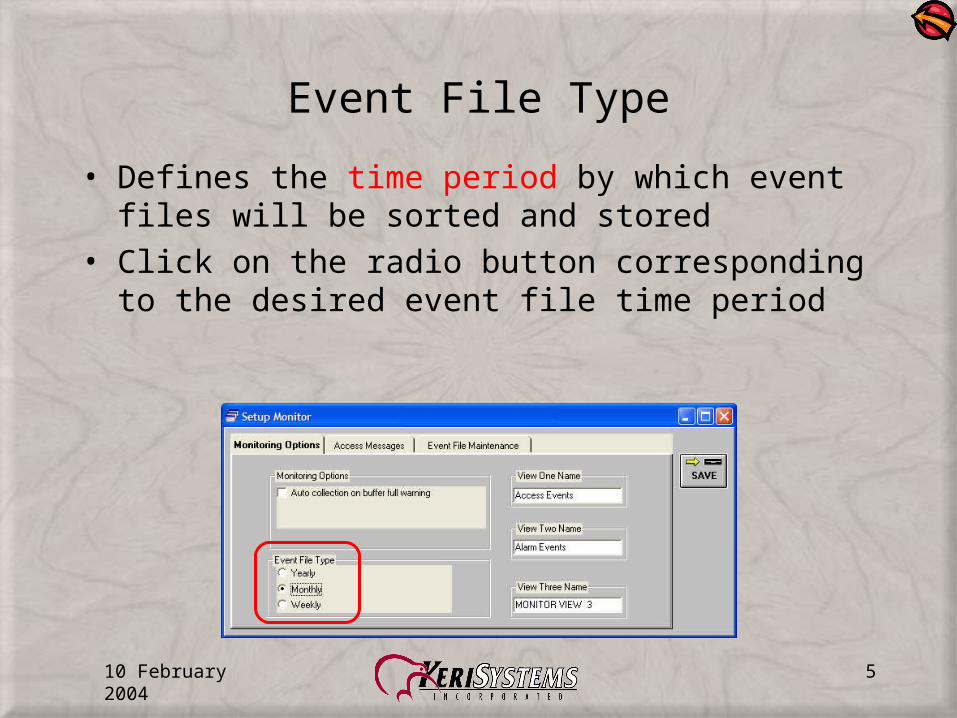
Event File Type
• Defines the time period by which event files will be sorted and stored
• Click on the radio button corresponding to the desired event file time period
10 February 2004 6
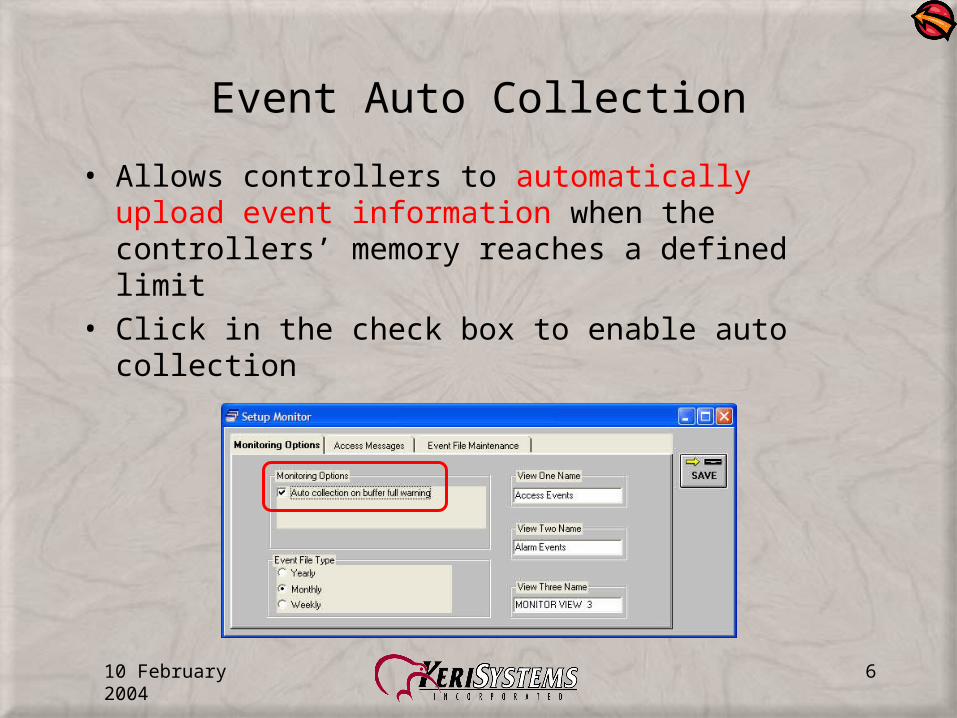
Event Auto Collection
• Allows controllers to automatically upload event information when the controllers’ memory reaches a defined limit
• Click in the check box to enable auto collection
10 February 2004 7
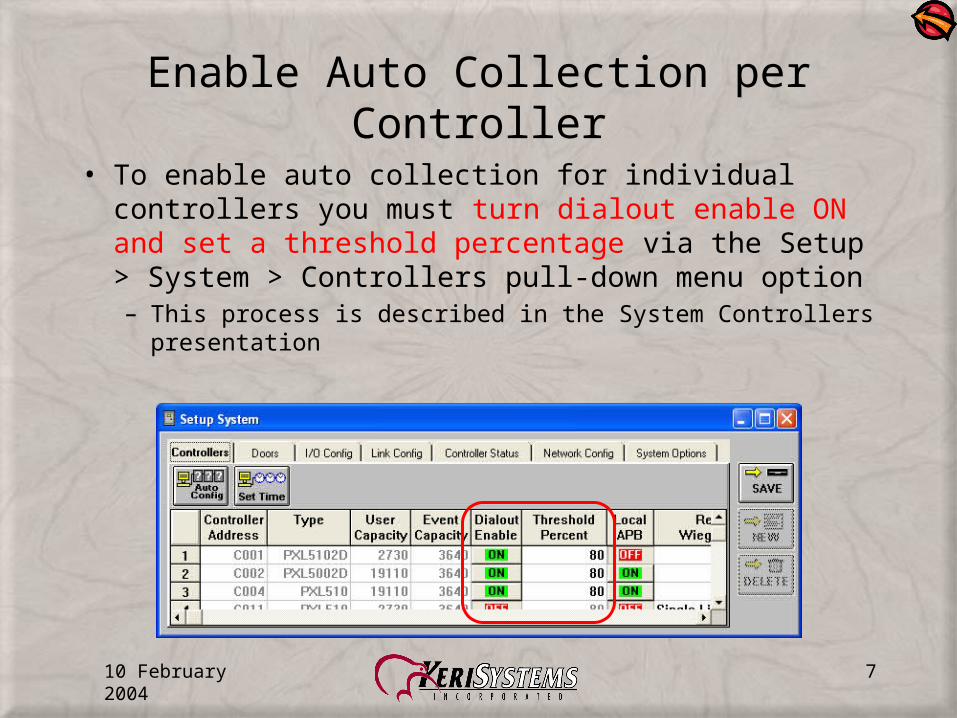
Enable Auto Collection per Controller
• To enable auto collection for individual controllers you must turn dialout enable ON and set a threshold percentage via the Setup > System > Controllers pull-down menu option– This process is described in the System Controllers
presentation
10 February 2004 8
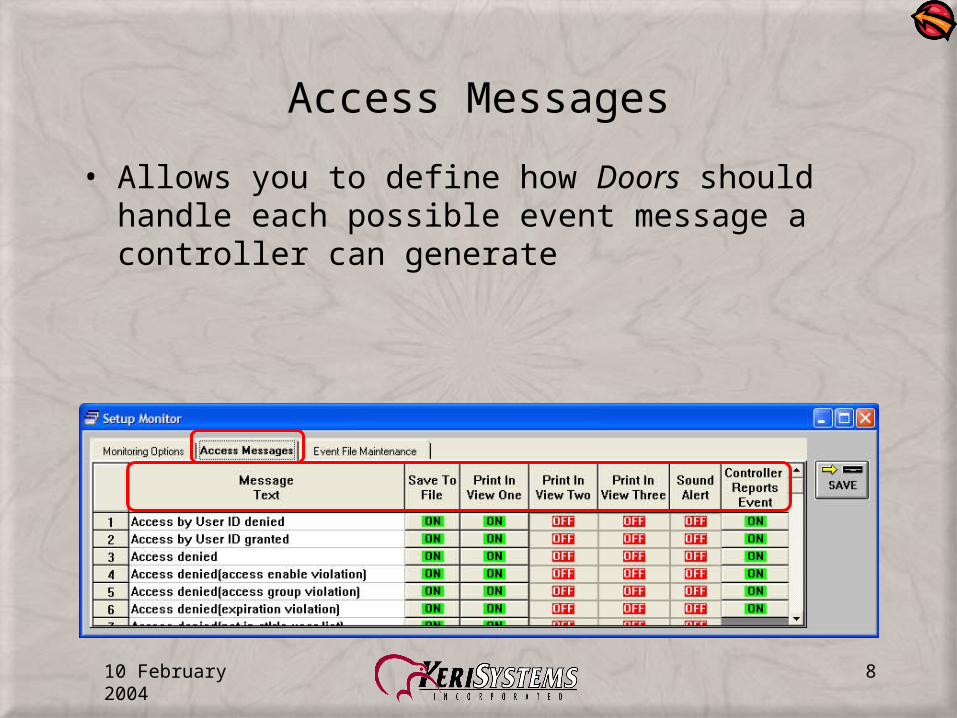
Access Messages
• Allows you to define how Doors should handle each possible event message a controller can generate
10 February 2004 9
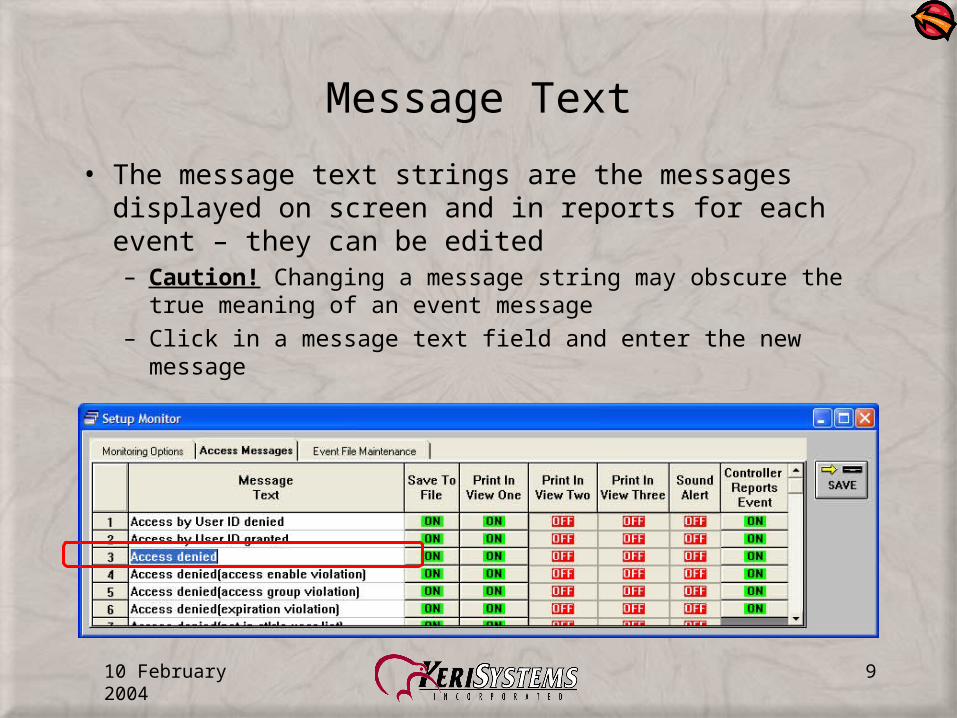
Message Text
• The message text strings are the messages displayed on screen and in reports for each event – they can be edited– Caution! Changing a message string may obscure the true
meaning of an event message– Click in a message text field and enter the new message
10 February 2004 10
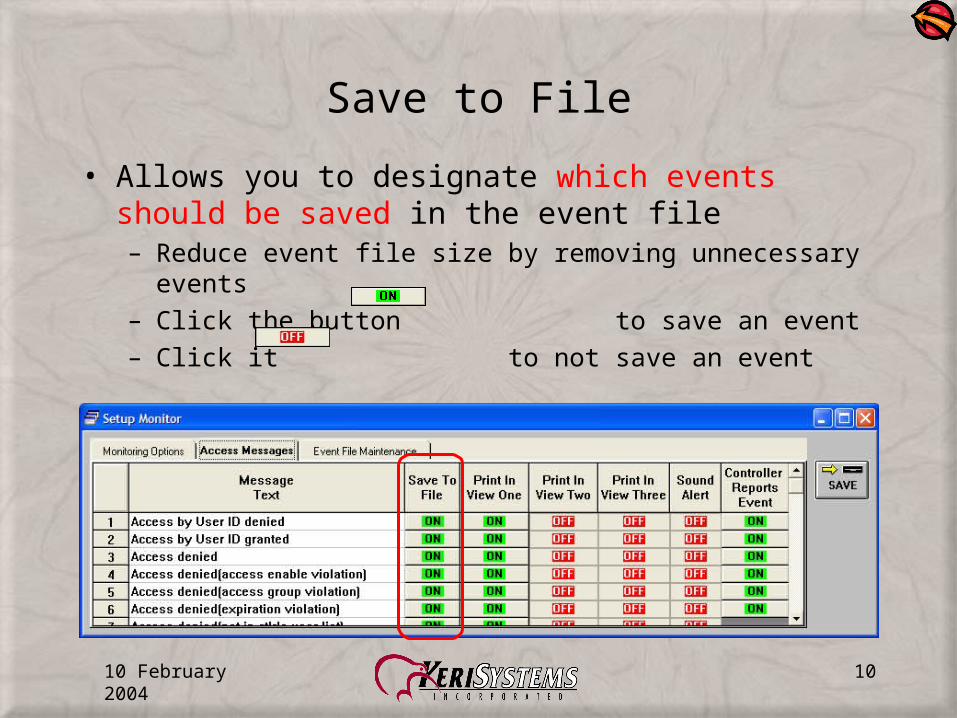
Save to File
• Allows you to designate which events should be saved in the event file– Reduce event file size by removing unnecessary events– Click the button to save an event – Click it to not save an event
10 February 2004 11
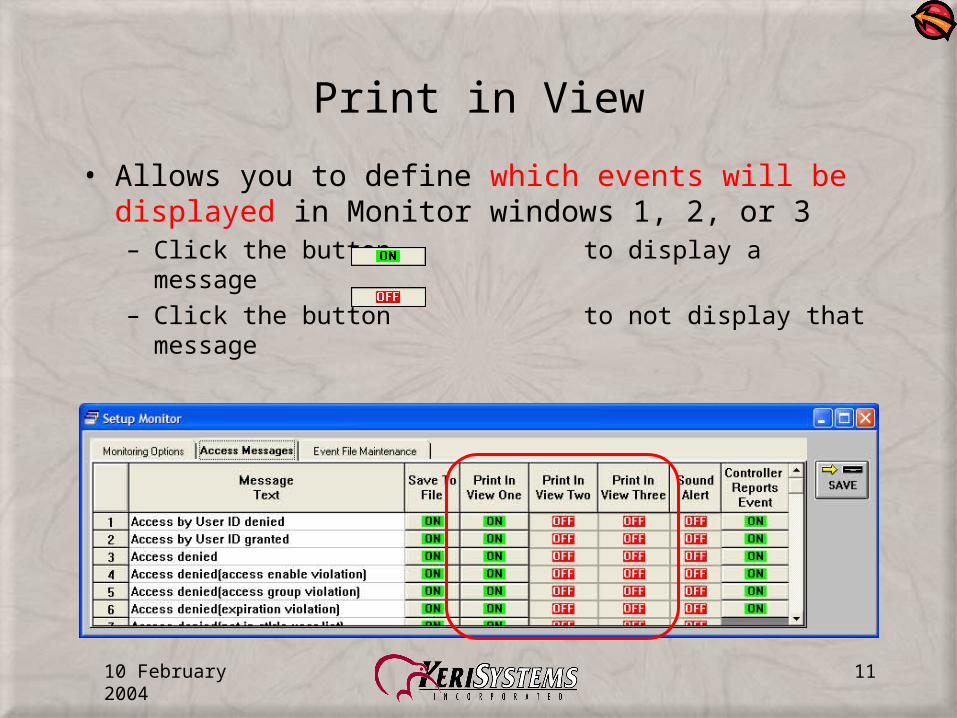
Print in View
• Allows you to define which events will be displayed in Monitor windows 1, 2, or 3– Click the button to display a message – Click the button to not display that message
10 February 2004 12
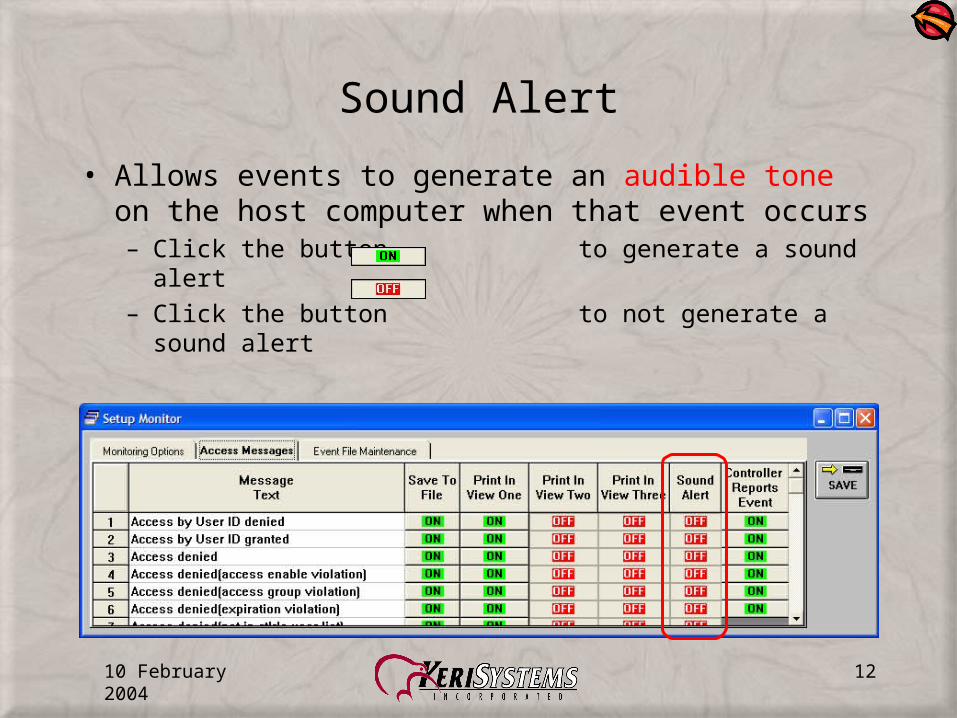
Sound Alert
• Allows events to generate an audible tone on the host computer when that event occurs– Click the button to generate a sound alert– Click the button to not generate a sound alert
10 February 2004 13
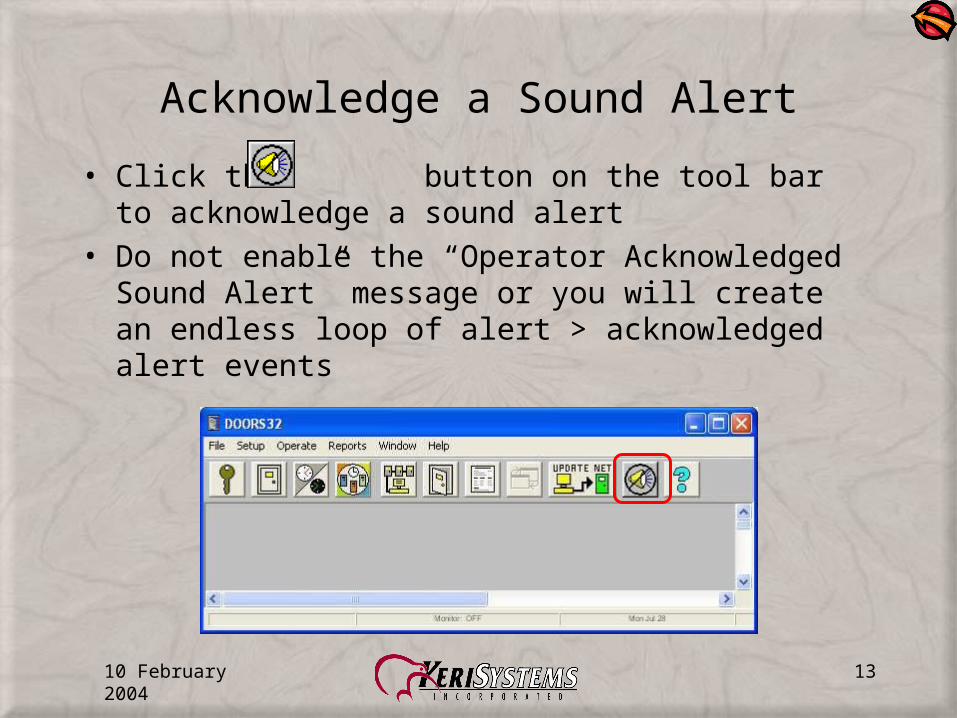
Acknowledge a Sound Alert
• Click the button on the tool bar to acknowledge a sound alert
• Do not enable the “Operator Acknowledged Sound Alert” message or you will create an endless loop of alert > acknowledged alert events
10 February 2004 14
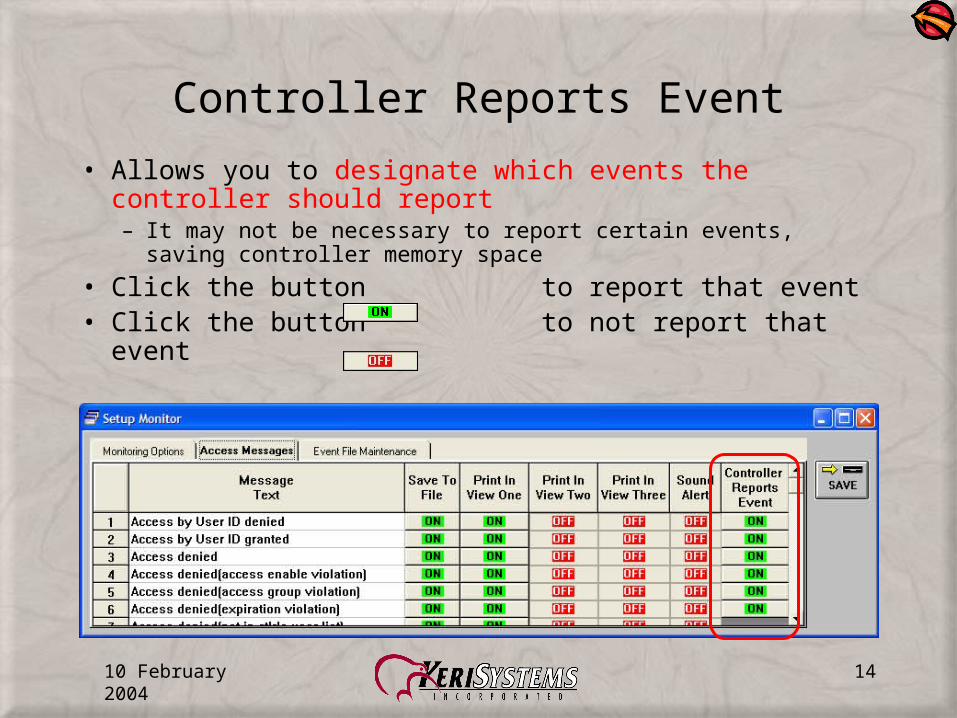
Controller Reports Event
• Allows you to designate which events the controller should report– It may not be necessary to report certain events, saving
controller memory space
• Click the button to report that event• Click the button to not report that event
10 February 2004 15
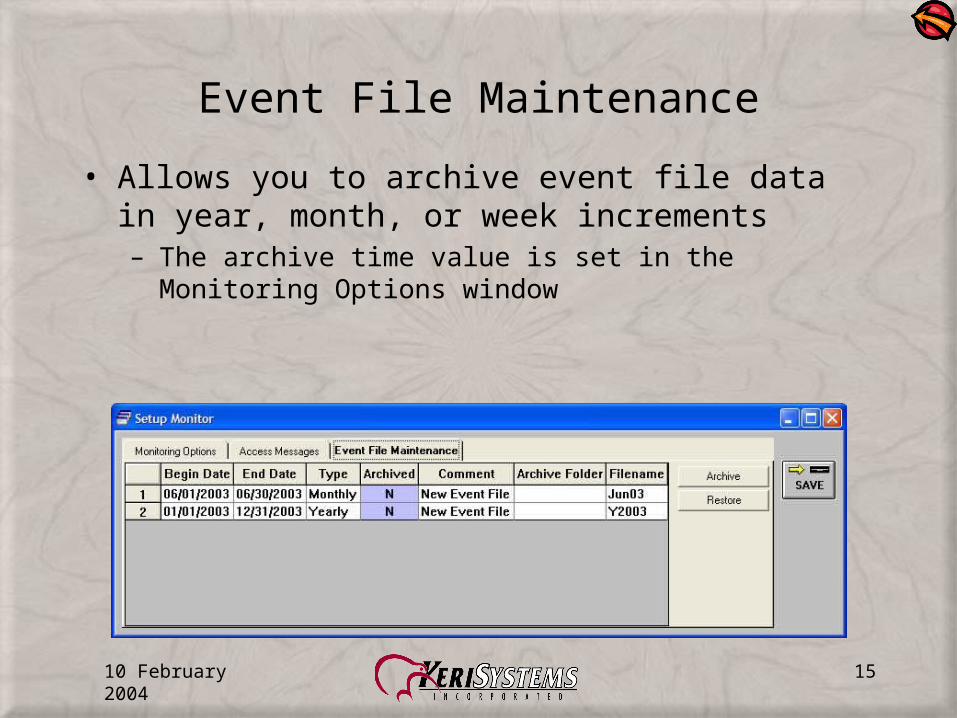
Event File Maintenance
• Allows you to archive event file data in year, month, or week increments– The archive time value is set in the Monitoring Options
window
10 February 2004 16
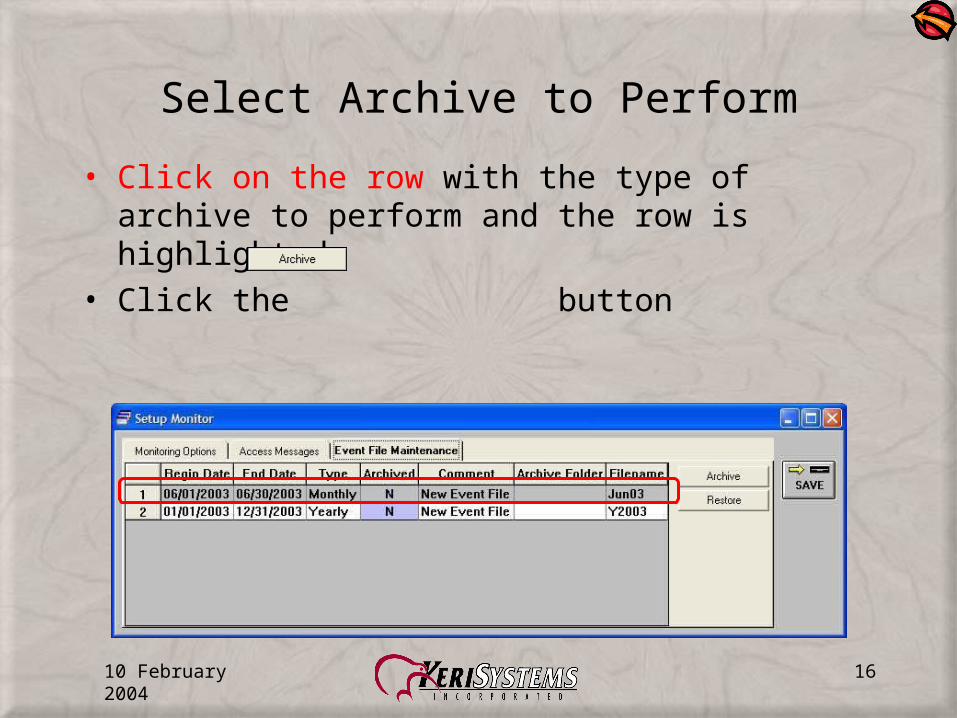
Select Archive to Perform
• Click on the row with the type of archive to perform and the row is highlighted
• Click the button
10 February 2004 17
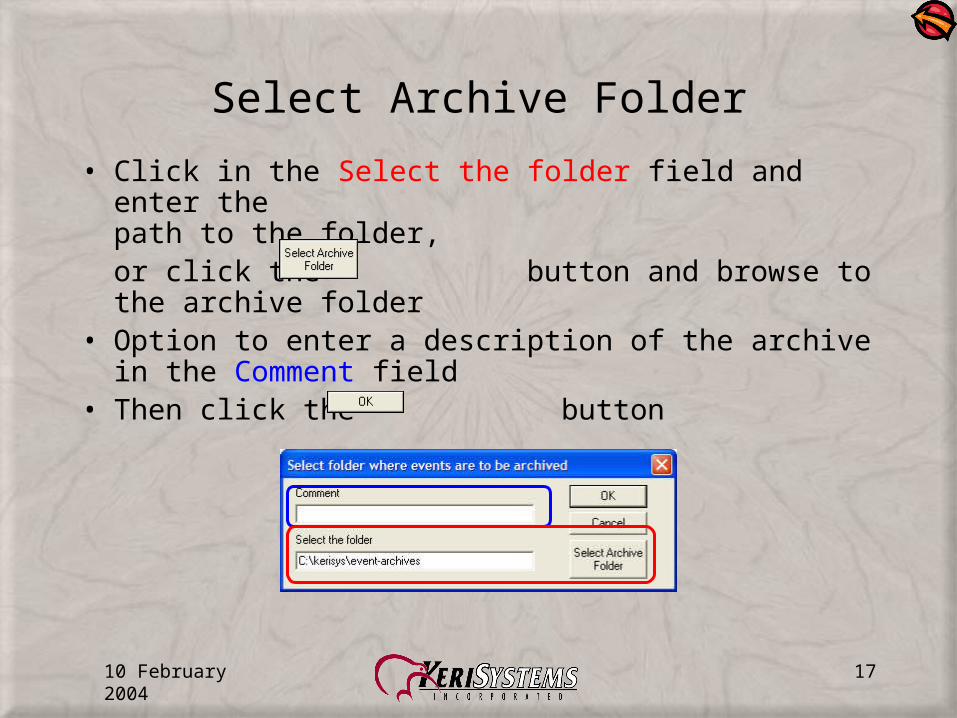
Select Archive Folder
• Click in the Select the folder field and enter the path to the folder, or click the button and browse to the archive folder
• Option to enter a description of the archive in the Comment field
• Then click the button
10 February 2004 18
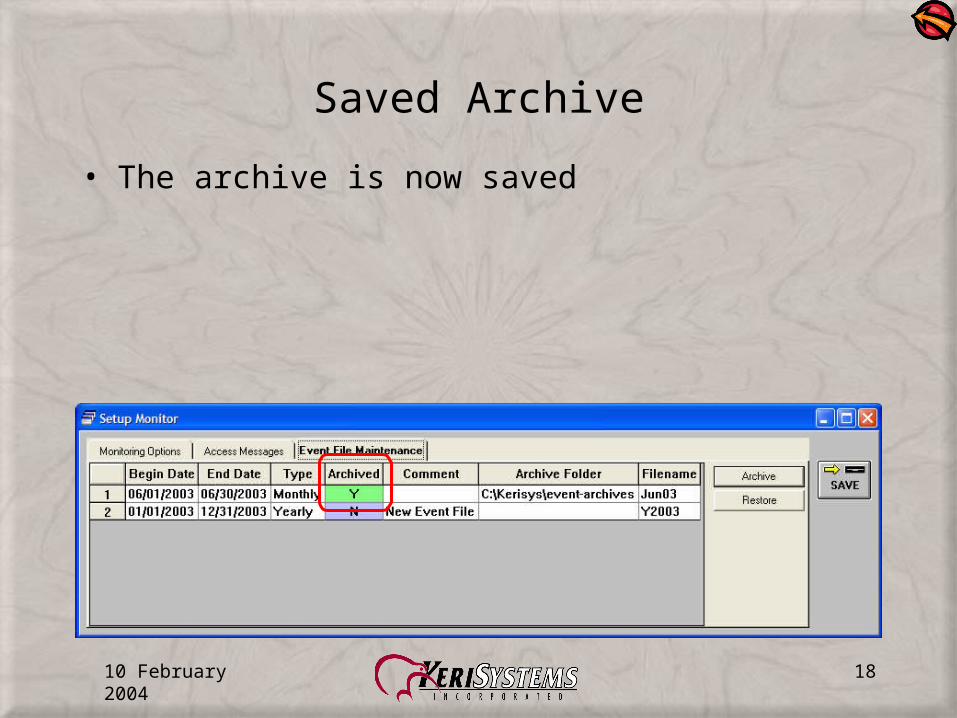
Saved Archive
• The archive is now saved
10 February 2004 19
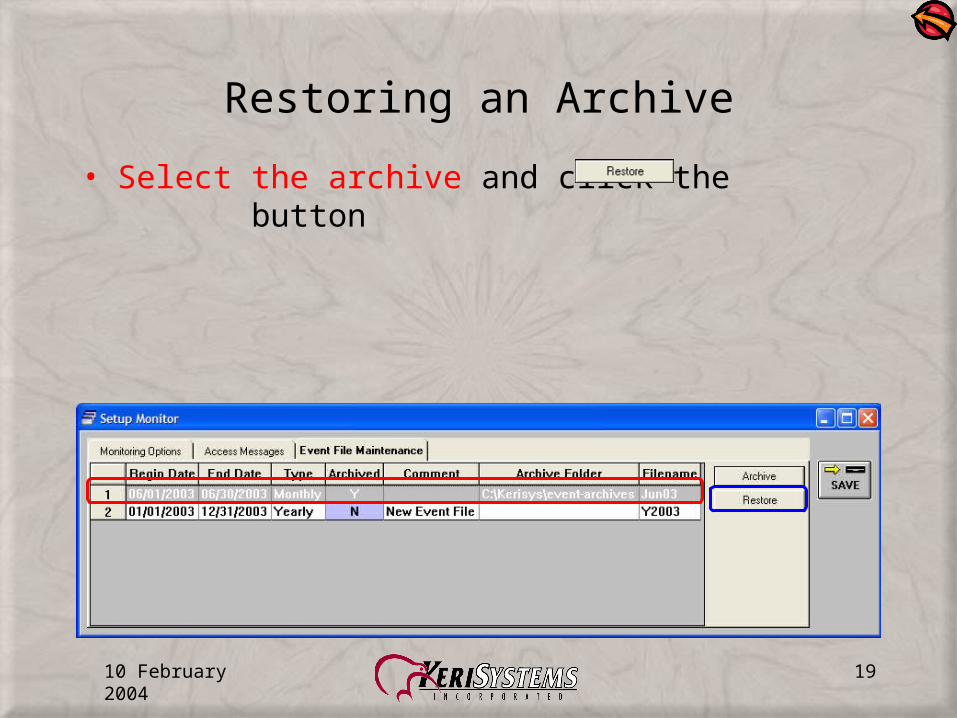
Restoring an Archive
• Select the archive and click the button

10 February 2004 20
Browse to Archive Folder
• Browse to the folder in which the archive is stored• Once the folder is found, click the button

10 February 2004 21
Archive Restored
• The archive is restored to Doors
10 February 2004 22
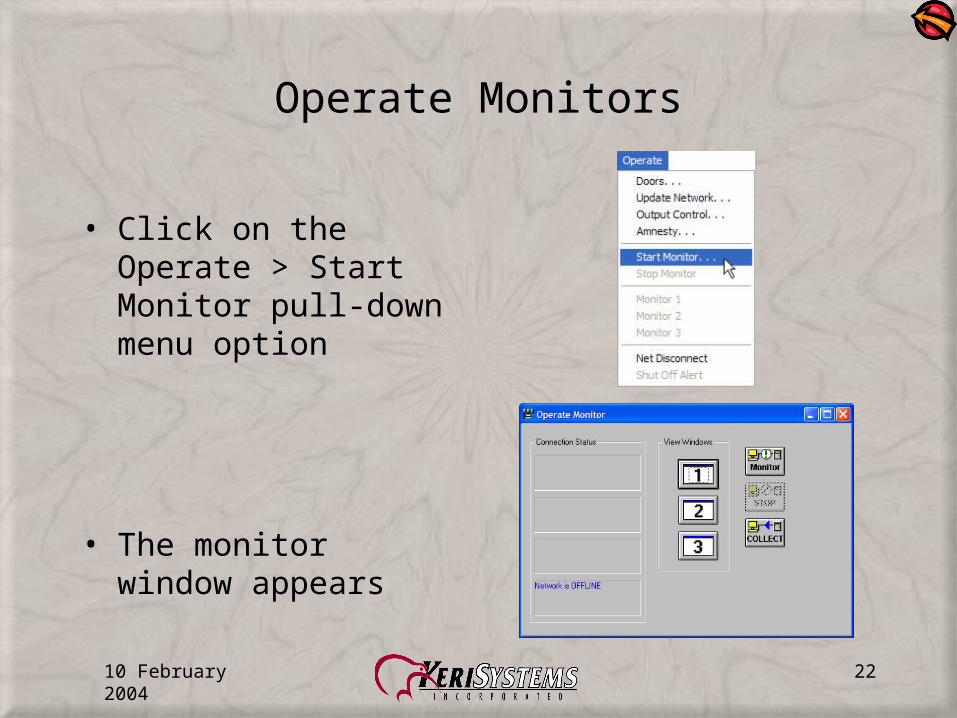
Operate Monitors
• Click on the Operate > Start Monitor pull-down menu option
• The monitor window appears
10 February 2004 23
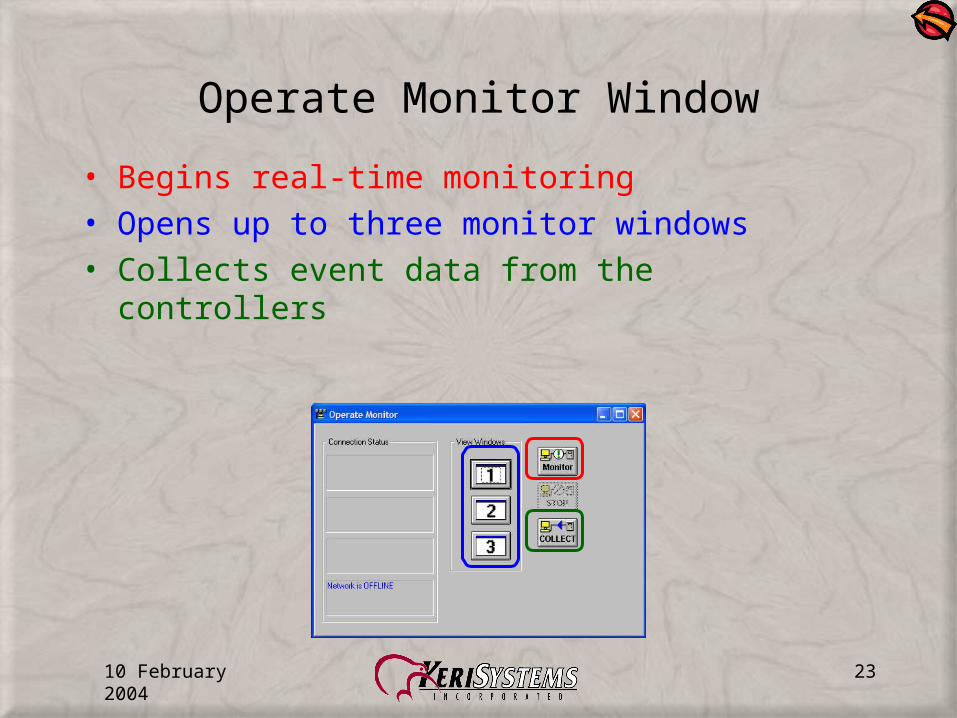
Operate Monitor Window
• Begins real-time monitoring• Opens up to three monitor windows• Collects event data from the controllers
10 February 2004 24
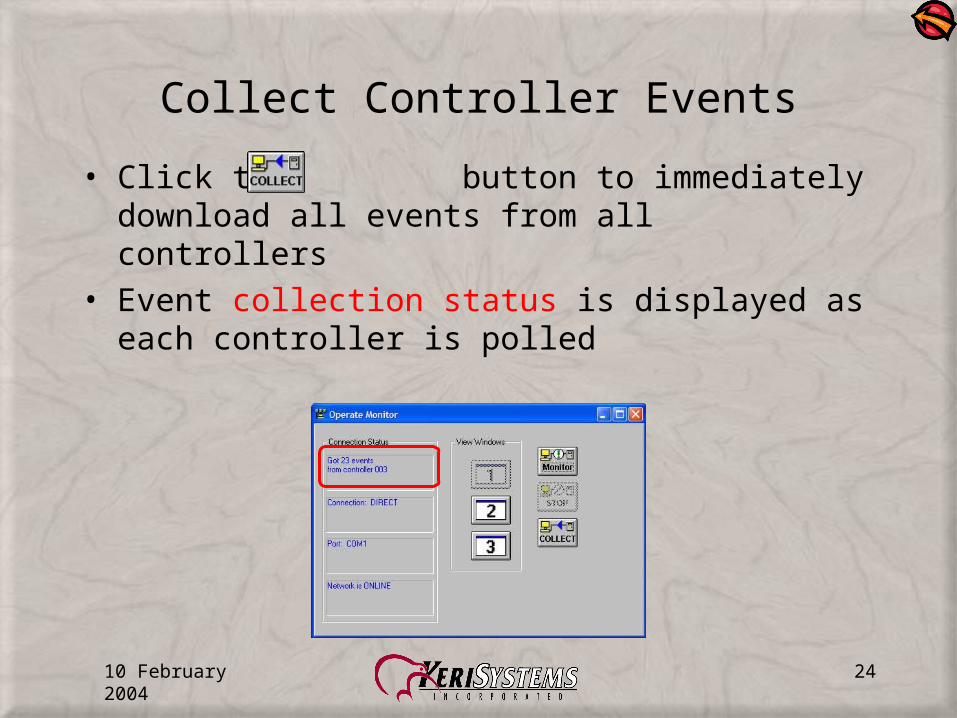
Collect Controller Events
• Click the button to immediately download all events from all controllers
• Event collection status is displayed as each controller is polled

10 February 2004 25
Opening a Monitor Window
• Click one of the three window icons to open that window
• Click the button to begin real-time monitoring
10 February 2004 26
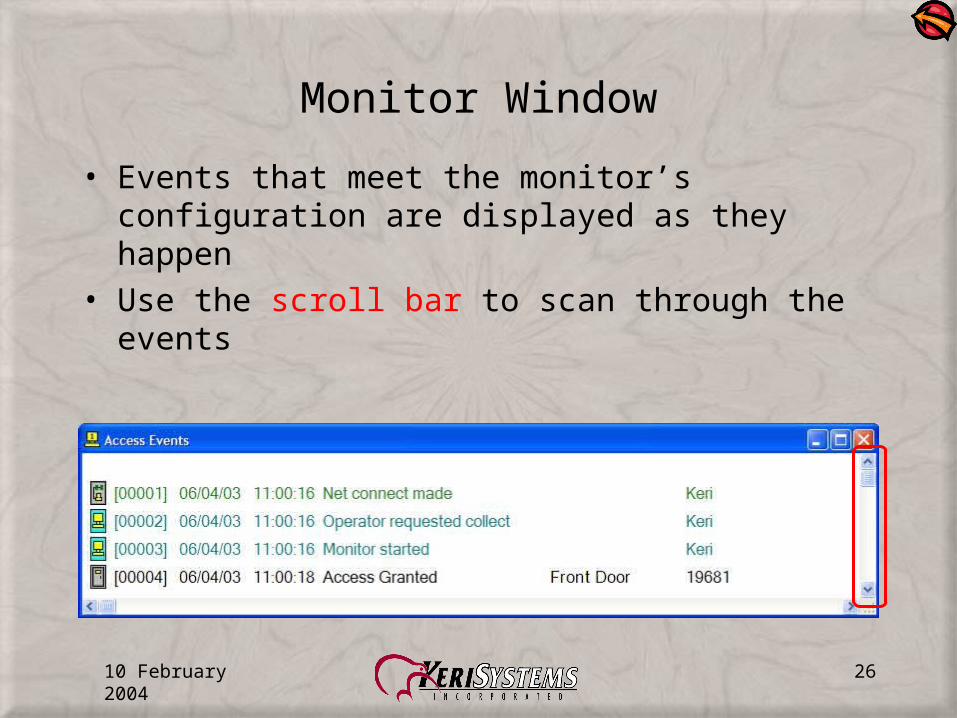
Monitor Window
• Events that meet the monitor’s configuration are displayed as they happen
• Use the scroll bar to scan through the events

10 February 2004 27
Monitor Communication Status
• Displays the following information– Number of events collected– Connection type– Communication port– Online/offline status
10 February 2004 28
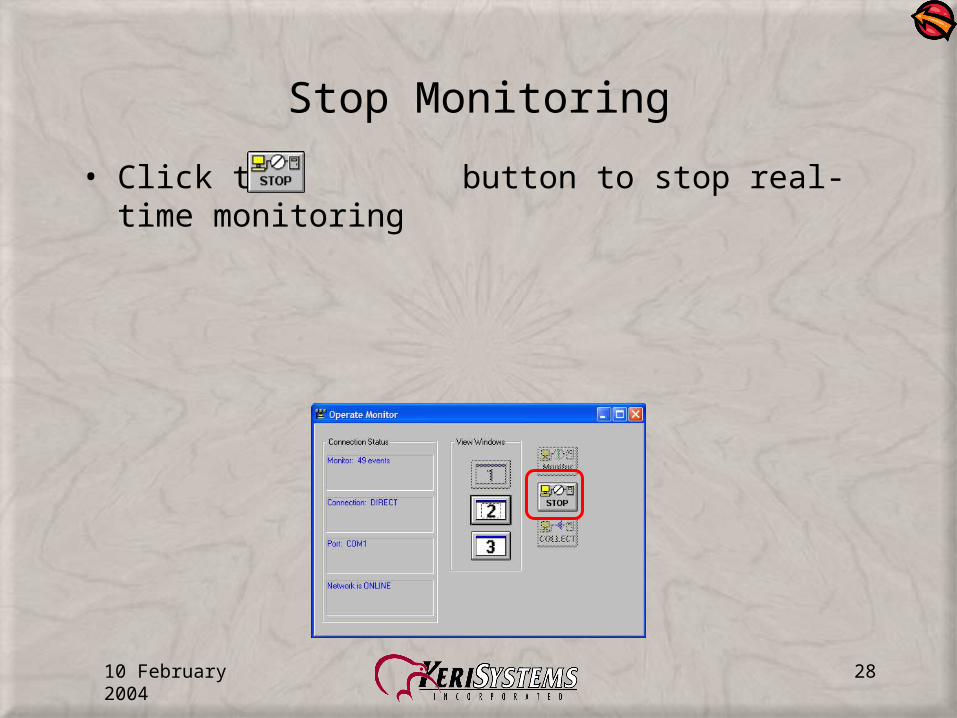
Stop Monitoring
• Click the button to stop real-time monitoring
10 February 2004 29
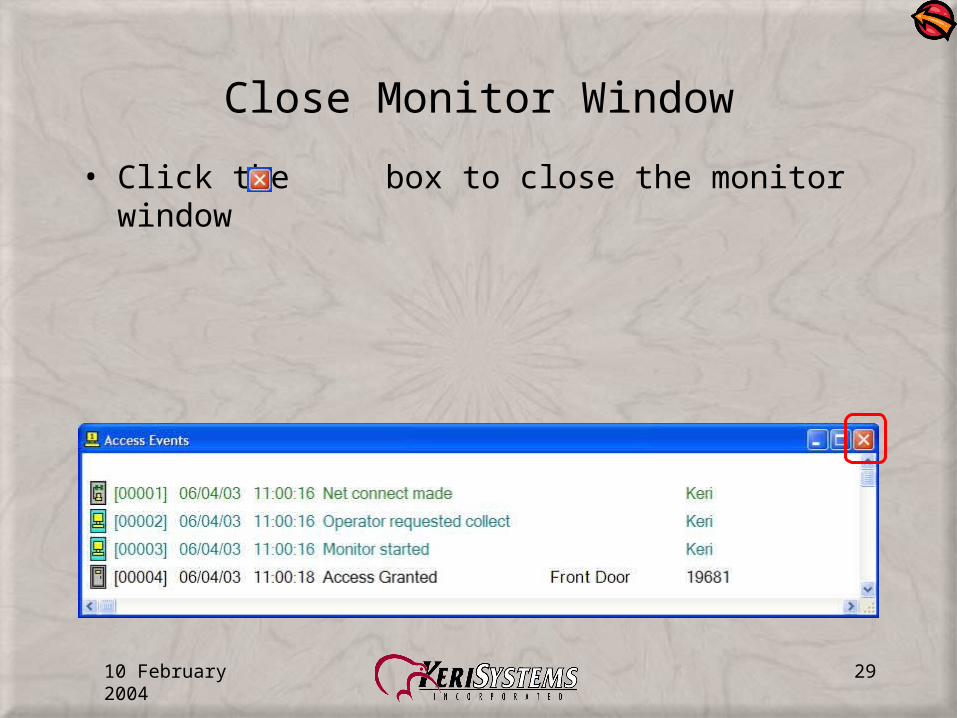
Close Monitor Window
• Click the box to close the monitor window