162.243.241.183162.243.241.183/textalu requirements document.docx · web viewsame as...
TRANSCRIPT

Login Screen:
Users can login as “Admin” or as “store”. Admin takes you to m.textalu.com dashboard. “store” takes you to the different number input screens.
After login, it defaults user to the screen below (left screen). Then user can click menu icon to switch between screens. Screen on left allows store customers to input their phone number to check in, and screen to the right allows store manager to input number and dollars spent on the right.
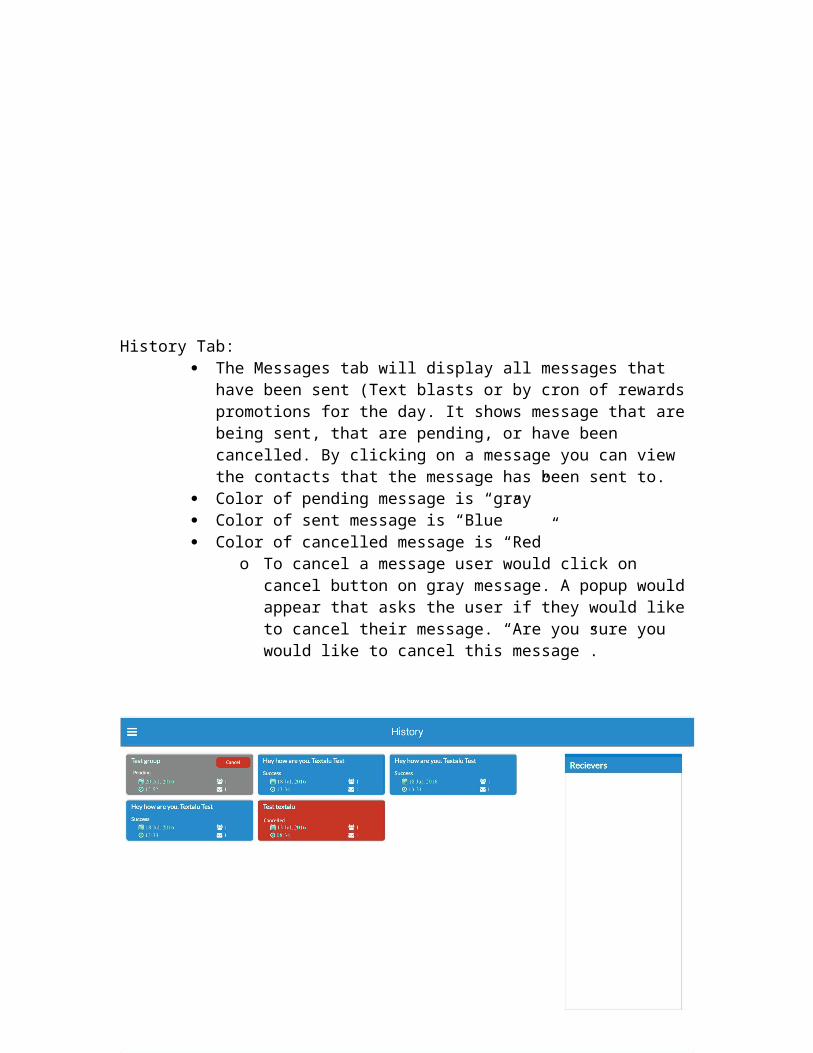
History Tab: The Messages tab will display all messages that have been sent (Text
blasts or by cron of rewards promotions for the day. It shows message that are being sent, that are pending, or have been cancelled. By clicking on a message you can view the contacts that the message has been sent to.
Color of pending message is “gray” Color of sent message is “Blue” Color of cancelled message is “Red”
o To cancel a message user would click on cancel button on gray message. A popup would appear that asks the user if they would like to cancel their message. “Are you sure you would like to cancel this message”.

Rewards Tab:
There are three options for users to create messages that would be sent to their clients.
Option #1 Inactive Customers: Admin clicks on the “+” sign to add a new condition for which to send an message to. They can say send a message if user has not visited the store in 30 days, or 45 days or 60 days. Cron job runs daily at 9am. If user has not visited in 30 days send them this message
Option #2 Frequent Visits: Users that visit a specific number of times can get rewards. User would click “+” to add a new condition. So if the user has visited “5” times send the text promotion the message that is entered. For example in “returning customers” column below. If the user has entered there number three times at the store. They would receive a message that says “You’ve earned yourself 20% off your next yogurt. Come….”
Option #3 Points Based Reward: In admin settings page the admin will define how many points per dollar each client will get. This is so when the user enters the clients phone number and dollars spent it will add the number of points the user has earned (dollars X points per dollar).

Opt-In Settings:
For opt-in settings. Same as web.textalu.com. User would select a number to assign to their store. They could then select a key word that users would text to join the club. They would also set a message that users would receive once they text this opt-in key to that number. User would then get that message (after standard “Yes” confirmation text). User will only get this text once. So if they text “Join” more than once to this number they will get “You have already joined this text club.”

Settings Screen:
The settings tabs that were added are “Rewards Settings, Opt-in Settings, and Number Entry Screen.
Rewards Settings:

Admin is able to enter how many points user should get per dollar. This value is only used on the number entry screen that allows the admin to enter the number of points as well.
This is the admin number entry screen. Admin enters the mobile number and the number of dollars the user spent on the transaction. When the store manager clicks “Register. It adds a visit (1 visit) to clients total visit and adds the number of points the client has earned. Above admin set the client earns 15 points per dollar. So the client would earn 210 points (14x15).
Settings -> Number entry screen:

On the “Number Entry Screen” option in settings tab, user is taken to the display below. Here the user must upload their store logo. Logo will then be displayed when the user logs in to the number entry (client side) and goes to number entry screen. Customers purchasing at the store see this screen. So they see the logo and then enter their number on the screen.
If user had uploaded “Textalu” Logo. This is how screen would look.

Contacts Screen:
Admin can edit and create and edit all fields for a contact. The only required field is mobile number and name if entering manually. For users that join from instore screen, their name will be saved as “InStore’ClientNumber’”, for the number 194 customer, their name would be “InStore194”. For Opt-int clients they are saved as “Optin194”. Last visit is the date of the last time they entered their number in the instore system. This is used for the inactive rewards column. It checks how many days it has been since customer visited. Number of visits is the number of times client has been in the store. Join date is the date that their number joined the textalu database. Points is if admin is using point entry method for clients. Admin can add “email” and birthday if they wish. If clients are uploaded their name would be “Upload’unique number’”, unless they upload contact list with names.

Other Requirements:
1. text “stop” to be set to inactive. Client will receive no more messages.2. Count every message into client analytics including “confirmation texts” and
responses from clients. 3. Send maximum of 6 messages per month to each client.