192-062 - mitered molding
TRANSCRIPT
8/6/2019 192-062 - Mitered Molding
http://slidepdf.com/reader/full/192-062-mitered-molding 1/6
Mitee MolinSimplifiesTaitional doos
quickly. These matched bits will “cop
joint cleanly, sculptin one sie to
the othe. But these bit sets ae expe
an they elive only a shot stub t
when main a pai of oos fo a
of fine caseo, you’ll ant the
stenth of a full tenon an motise
hee the sticin intesects in th
nes, you’ll have to choices, a co
a mite.
A cope, o sculpte, joint is ex
by han an equies a cetain a
of han-tool poficiency. It also ea oue ith a seep that match
pofile of the sticin.
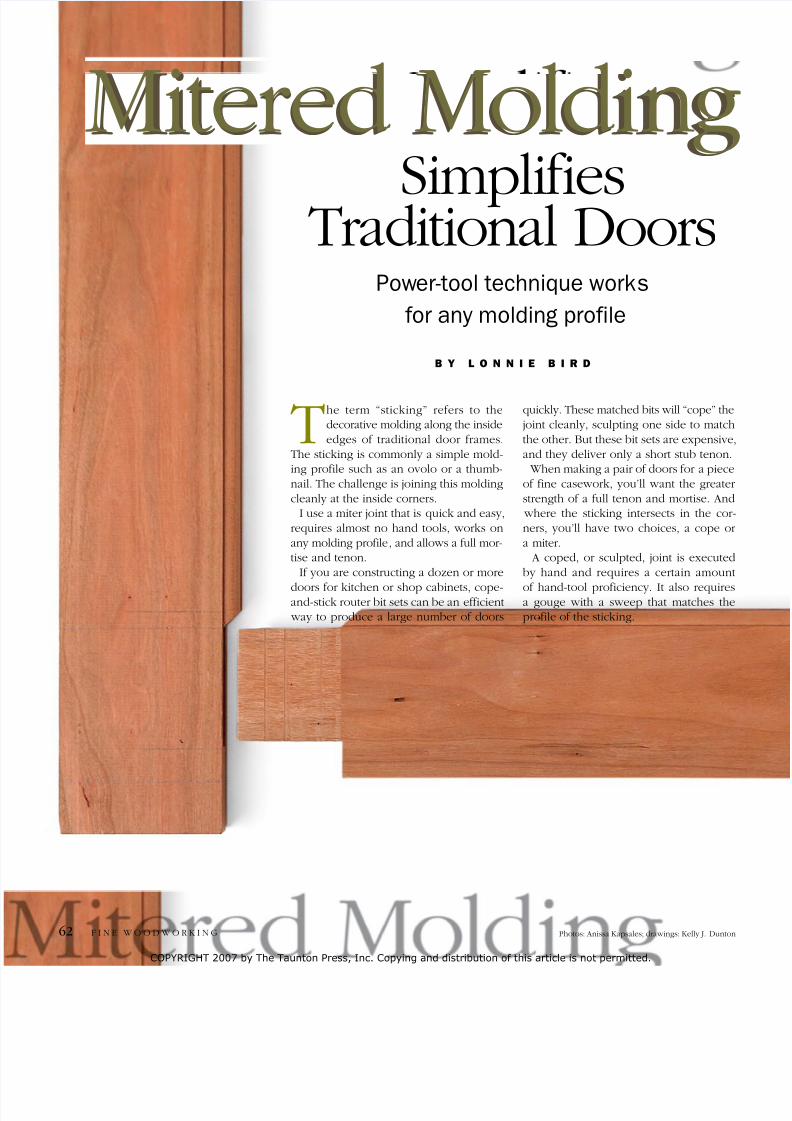
The tem “sticin” efes to the
decorative molding along the inside
ees of taitional oo fames.
The sticin is commonly a simple mol-
in pofile such as an ovolo o a thumb-
nail. The challene is joinin this molin
cleanly at the insie cones.
I use a mite joint that is quic an easy,
equies almost no han tools, os on
any molding profile, and allows a full mor-
tise an tenon.
If you ae constuctin a ozen o moe
oos fo itchen o shop cabinets, cope-an-stic oute bit sets can be an efficient
ay to pouce a lae numbe of oos
Power-tool technique works
for any molding profile
B Y L O N N I E B I R D
Mitee Molin
F I N E w O O d w O r k I N g62 Photos: Anissa kapsales; ains: kelly J
COPYRIGHT 2007 by The Taunton Press, Inc. Copying and distribution of this article is not permitted.

8/6/2019 192-062 - Mitered Molding
http://slidepdf.com/reader/full/192-062-mitered-molding 2/6
Panel OPtiOns
Panels can be flat (above) or beveled along
the edges with a raised field ( right). When
compared to a raised panel, a flat panel
appears somewhat plain, which looks
appropriate on a simple piece of furniture.
Although flat on the outside, flat panels in
solid wood are typically beveled on the inside.
This allows for a thicker, stronger panel. Either
way, panels are a great place to show off
beautiful, wide, figured stock or veneer.
FLAT PANEL
BEVELED PANEL
The mite is the easie metho, binin any
pofile toethe at a clean 45° line. Mitee
sticking is a traditional technique that has been
use by funitue caftsmen fo seveal hun-
e yeas; it is time-teste. You on’t nee
special tools o costly bits. Also, mitein al-
los the use of pofiles that cannot be cope,
such as a qui bea o an oee.
Thee may be a concen that seasonal oo
movement coul cause a ap to appea at the
mite an sho liht. I haven’t ha this pob-
lem because the rails on furniture are typically
nao an the movement is minimal in such
nao pieces.
Taitionally, sticin is mitee usin a
chisel uie by a bloc. My metho is faless time-consumin: The mites ae cut ef-
ficiently an accuately ith a tablesa an a
anatOmY Of a mOrtise-anD-tenOn
JOint with mitereD sticking
RailTenon
Mortise
Groove forpanel
MiterDecorativeprofile
(sticking)
Stile
Fillet
Panel
PanelSticking
Sticking
SMALL DOOR LARGE DOOR
3 ⁄ 8-in. or ½
radius
¼-in. or5 ⁄ 16-in. radius
The term “sticking” refers to
the decorative profile around
the inside edges of doors.
Sticking profiles are usually
simple, such as the ovolo
and thumbnail, and are sizedin proportion to the door.
For example, large doors
for a secretary may have a
thumbnail profile of 3 ⁄ 8 in. or
a ½-in. radius, while a ¼-in.
or 5 ⁄ 16-in. radius looks more
appropriate on the small
door of a spice cabinet.
the right PrOPOrtiOns
Design the
sticking
www.finewoodworking.com J U L Y / A U g U S T 2 0 0 7
COPYRIGHT 2007 by The Taunton Press, Inc. Copying and distribution of this article is not permitted.

8/6/2019 192-062 - Mitered Molding
http://slidepdf.com/reader/full/192-062-mitered-molding 3/6
Clamp the
pieces together
for accuracy.
Mark the length
of the finisheddoor on the stiles.
Then mark the rail
width, the sticking
width, and the end
of the mortise.
Scribe the mortise. A marking gauge m
it easy to score the sides of the mortise.
Transfer the lines to the edges. Use a
square to bring the layout marks to the e
of the stiles.
combination blae. Once you’ve mastee this
nique, you’e sue to fin othe uses fo it. Fo
ple, I use it to apply a qui bea to the insieof cabinet face fames an to join the complex
of a seat boa fo a es alley. This is a ve
technique that offes a lot of flexibility.
Lay out the door height, the molding profile,and the mortisesThe fist step to poucin a oo ith mitee
in is to mill the stoc so that all the fame me
ae the same thicness. diffeences can mae
cult to alin the sticin hee it joins in each c
I alays mill a couple of exta pieces of stoc f
hen settin up the tablesa an oute table.
Once you’ve mille the fame stoc, you’eto lay out the joiney. Althouh the layout po
petty staihtfoa, thee ae a couple of thi
keep in mind. First, because the sticking at the m
is emove afte mitein, the ail lenth bete
shoules of the tenons must be incease to
pensate fo the imensional chane. The ince
lenth is equal to the size of the sticin time
Also, the mortise depth must be increased by the
laY out
the
stiles
aDJust fOr
missing
sticking
The sticking
is cut away at
the mortises,
so pay special
attention
during layout.
Add length to
the rail and
depth to the
mortise.
Mortise
Sticking width
Shoulderwidth
3 ⁄ 8 in.
Extra length removedafter assembly
Depth addedto mortise
for stickingwidth
F I N E w O O d w O r k I N g64
COPYRIGHT 2007 by The Taunton Press, Inc. Copying and distribution of this article is not permitted.

8/6/2019 192-062 - Mitered Molding
http://slidepdf.com/reader/full/192-062-mitered-molding 4/6
Create the decorative profile. Leaving the
fence in place but adjusting the bit height, Bird
makes two passes. The first scores the profile
so the final cut can be made without tearout.
Groove the rails and stiles. Using a slot-
cutter, run the groove all the way through on
the rails. But on the stiles, be sure to stop and
start the groove in the mortise.
Complete the
shoulder. Kee
the tablesaw f
in the same po
raise the bladeflip the stile on
to cut the rem
of the shoulde
Use a dado s
cut the tenon
miter gauge, in
junction with a
graduated cros
ending at the r
fence, allows y
cut the cheek
establish the s
der at the sam
in ith to compensate fo the loss of epth afte
mitein (see ain, facin pae).
I bein layout ith the stiles left too lon. In fact,
I leave the stiles lon until I have finishe the fame
an I actually am eay to fit the oo to an openin.
This ensues that the ens of the motises on’t blo
out while I am cutting them and assembling the joints.
Fist, I ma the oveall heiht of the oo. This is the
most critical dimension if the door is going to fit. Next,I ma the ith of the top an bottom ails. Finally,
I ma lines fo the haunch an the ith of the ail
sticin hee it intesects the stile.
As a eneal ule, I on’t lay out the ails. Instea,
I use the stiles themselves an some simple math to
calculate the oveall lenth of the ails. Then I can
set up the tablesa to cut the tenons ith no layout
neee.
Cut the mortises first, then move on to the tenonsMy motise-an-tenon methos ae faily outine. A
hollo-chisel motise maes easy o of the mo-
tises, but a ill pess o oute an chisels ae ooalternatives. I use a dado set on the tablesaw to cut the
tenons. Once the motise-an-tenon joiney is com-
plete, you ae eay to shape the sticin pofile on
the stiles an ails.
Shape the molding profile and cut the groovesI cut both the sticin pofile an the ooves on the
oute table. with the sticin, to ensue the coect
rout the ProF
anD GrooVes
For the Panel
Chop the
mortises.
A hollow-chisel
mortiser is a
quick and
efficient way to
tackle mortises.
Cut the
JoinerY
PROFILE
THE EDG
CUT THE
GROOVE
Fence
Workp
1 ⁄ 16-in. rad
Groove,by ¼ in.
J U L Y / A U g U S T 2 0 0 7 www.finewoodworking.com
COPYRIGHT 2007 by The Taunton Press, Inc. Copying and distribution of this article is not permitted.
8/6/2019 192-062 - Mitered Molding
http://slidepdf.com/reader/full/192-062-mitered-molding 5/6
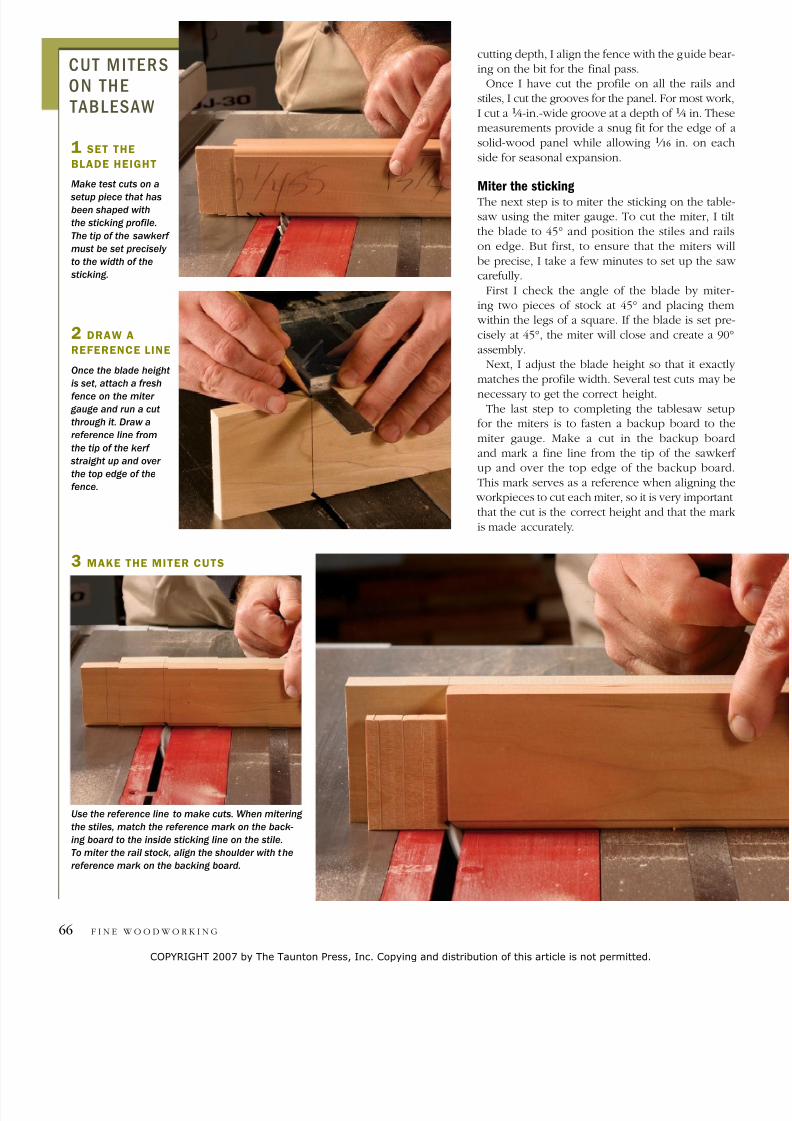
Use the reference line to make cuts. When mitering
the stiles, match the reference mark on the back-
ing board to the inside sticking line on the stile.
To miter the rail stock, align the shoulder with the
reference mark on the backing board.
Once the blade height
is set, attach a fresh
fence on the miter
gauge and run a cut
through it. Draw a
reference line from
the tip of the kerf
straight up and over
the top edge of the
fence.
Make test cuts on a
setup piece that hasbeen shaped with
the sticking profile.
The tip of the sawkerf
must be set precisely
to the width of the
sticking.
cutting depth, I align the fence with the guide
in on the bit fo the final pass.
Once I have cut the pofile on all the ai
stiles, I cut the grooves for the panel. For most
I cut a 1 ⁄ 4-in.-ie oove at a epth of 1 ⁄ 4 in.
measuements povie a snu fit fo the e
soli-oo panel hile alloin 1 ⁄ 16 in. on
sie fo seasonal expansion.
Miter the sticking The next step is to mite the sticin on the
sa usin the mite aue. To cut the mite
the blae to 45° an position the stiles an
on ee. But fist, to ensue that the mite
be pecise, I tae a fe minutes to set up th
caefully.
Fist I chec the anle of the blae by
in to pieces of stoc at 45° an placin
ithin the les of a squae. If the blae is s
cisely at 45°, the mite ill close an ceate
assembly.
Next, I ajust the blae heiht so that it e
matches the pofile ith. Seveal test cuts m
necessay to et the coect heiht.The last step to completin the tablesa
fo the mites is to fasten a bacup boa
mite aue. Mae a cut in the bacup
an ma a fine line fom the tip of the sa
up an ove the top ee of the bacup b
This ma seves as a efeence hen alini
workpieces to cut each miter, so it is very imp
that the cut is the coect heiht an that the
is mae accuately.
2 Draw a
reference line
3 make the miter cuts
Cut miters
on the
tablesaw
1 set the
blaDe height
F I N E w O O d w O r k I N g66
COPYRIGHT 2007 by The Taunton Press, Inc. Copying and distribution of this article is not permitted.

8/6/2019 192-062 - Mitered Molding
http://slidepdf.com/reader/full/192-062-mitered-molding 6/6
Slide the rails and stiles together. A beautiful fit depends on accurate layout,
tablesaw setup, and careful chisel work.
Finish by hand. Use a chise
the rest of the sticking away
Cut close to the sticking li
Cutting freehand on a bands
you can eliminate almost all
the sticking.
Transfer the sticking line. On the front
of the stock, the profile is the reference,
but you can use a marking gauge to scribe
that line on the back of the stock.
with the setup complete, you can mae the mite
cuts on both the ails an the stiles. when mitein
the stiles, alin the sticin layout ma ith the
line on the bacin boa. Fo the ails, line up the
shoule ith the line on the fence. when main
multiple oos, I clamp a thin stic to the bacin
boa to seve as a stop.
Eliminate sticking at the jointBefoe assemblin the oo, you’ll have to emove
the sticking where the joint comes together. I scribe
a line with a marking gauge on the back of the stock
to seve as a efeence ma.
On the face of the stoc, the insie ee of the
sticin seves as a efeence point. You can cut
aay most of the sticin ith a bansa an fin-
ish the cut by caefully pain to the line ith a
chisel.
At this point, if you have complete you cuts
an layout caefully an accuately, the stiles an
rails should come together perfectly. Once you have
lue up the oo, you can tim it to fit the cacase
openin. •
Lonnie Bird teaches woodworking in Dandridge, Tenn.
You can view his class schedule at www.lonniebird.com.
remoVe the stiCKinG
at the Joint
Scribe a line from the miter
cut to the end of the stock.
Sawkerf
BACKOF STILE
J U L Y / A U g U S T 2 0 0 7 www.finewoodworking.com