20 fun experiments you can do at home
DESCRIPTION
Fun experiments to do at homeTRANSCRIPT
20 Fun
Experiments you
can do at home
By Nikhar Saraswat
© Copyright 2015. All rights reserved. This document is geared
towards providing reliable information in regards to the topic and
issue covered. The publication is sold with the idea that the
publisher is not required to render accounting, officially
permitted, or otherwise, qualified services. If advice is necessary,
legal or professional, a practiced individual in the profession shall
be ordered.
- From a Declaration of Principles which was accepted and approved equally by a Committee of the American Bar Association and a Committee of Publishers and Associations.
In no way is it legal to reproduce, duplicate, or transmit any part of this document in either electronic means or in printed format. Recording of this publication is strictly prohibited and any storage of this document is not allowed unless with written permission from the publisher. All rights reserved.
The information provided herein is stated to be truthful and consistent, in that any liability, in terms of inattention or otherwise, by any usage or abuse of any policies, processes, or directions contained within is solely and completely the responsibility of the recipient reader. Under no circumstances will any legal responsibility or blame be held against the publisher for any reparation, damages, or monetary loss due to the information herein, either directly or indirectly.
Respective authors own all copyrights not held by the publisher.
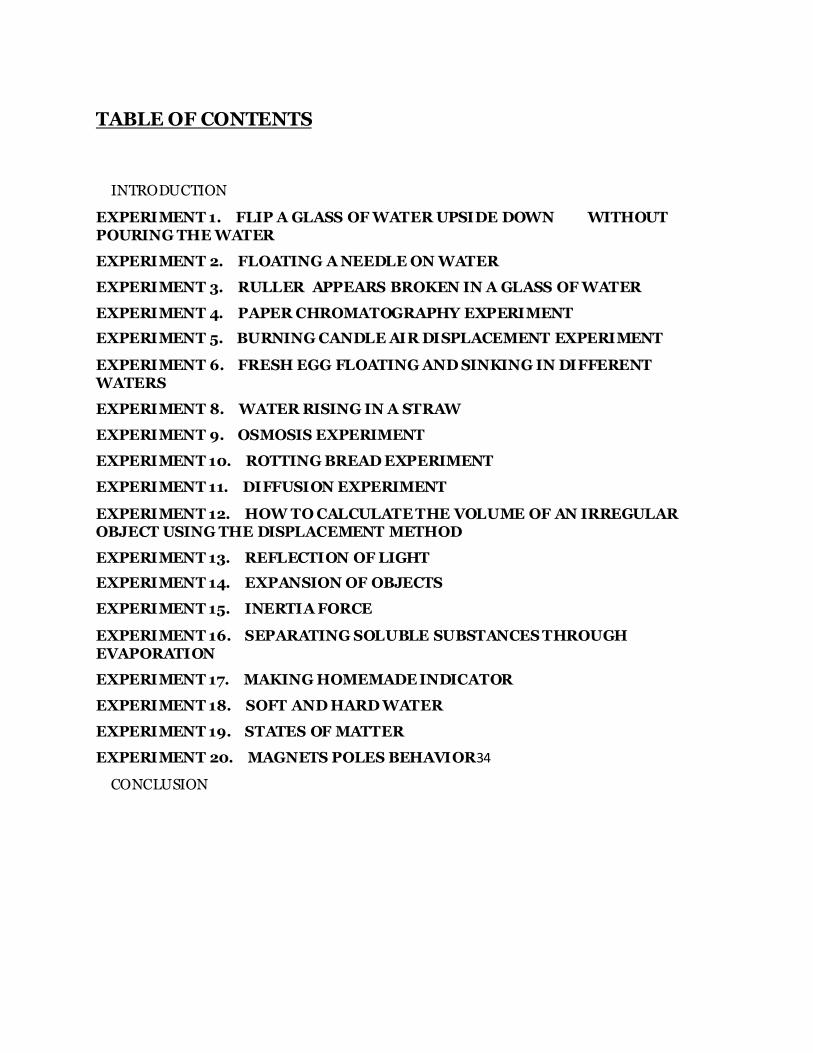
TABLE OF CONTENTS
INTRODUCTION
EXPERIMENT 1. FLIP A GLASS OF WATER UPSIDE DOWN WITHOUT POURING THE WATER
EXPERIMENT 2. FLOATING A NEEDLE ON WATER
EXPERIMENT 3. RULLER APPEARS BROKEN IN A GLASS OF WATER
EXPERIMENT 4. PAPER CHROMATOGRAPHY EXPERIMENT
EXPERIMENT 5. BURNING CANDLE AIR DISPLACEMENT EXPERIMENT
EXPERIMENT 6. FRESH EGG FLOATING AND SINKING IN DIFFERENT WATERS
EXPERIMENT 8. WATER RISING IN A STRAW
EXPERIMENT 9. OSMOSIS EXPERIMENT
EXPERIMENT 10. ROTTING BREAD EXPERIMENT
EXPERIMENT 11. DIFFUSION EXPERIMENT
EXPERIMENT 12. HOW TO CALCULATE THE VOLUME OF AN IRREGULAR OBJECT USING THE DISPLACEMENT METHOD
EXPERIMENT 13. REFLECTION OF LIGHT
EXPERIMENT 14. EXPANSION OF OBJECTS
EXPERIMENT 15. INERTIA FORCE
EXPERIMENT 16. SEPARATING SOLUBLE SUBSTANCES THROUGH EVAPORATION
EXPERIMENT 17. MAKING HOMEMADE INDICATOR
EXPERIMENT 18. SOFT AND HARD WATER
EXPERIMENT 19. STATES OF MATTER
EXPERIMENT 20. MAGNETS POLES BEHAVIOR34
CONCLUSION
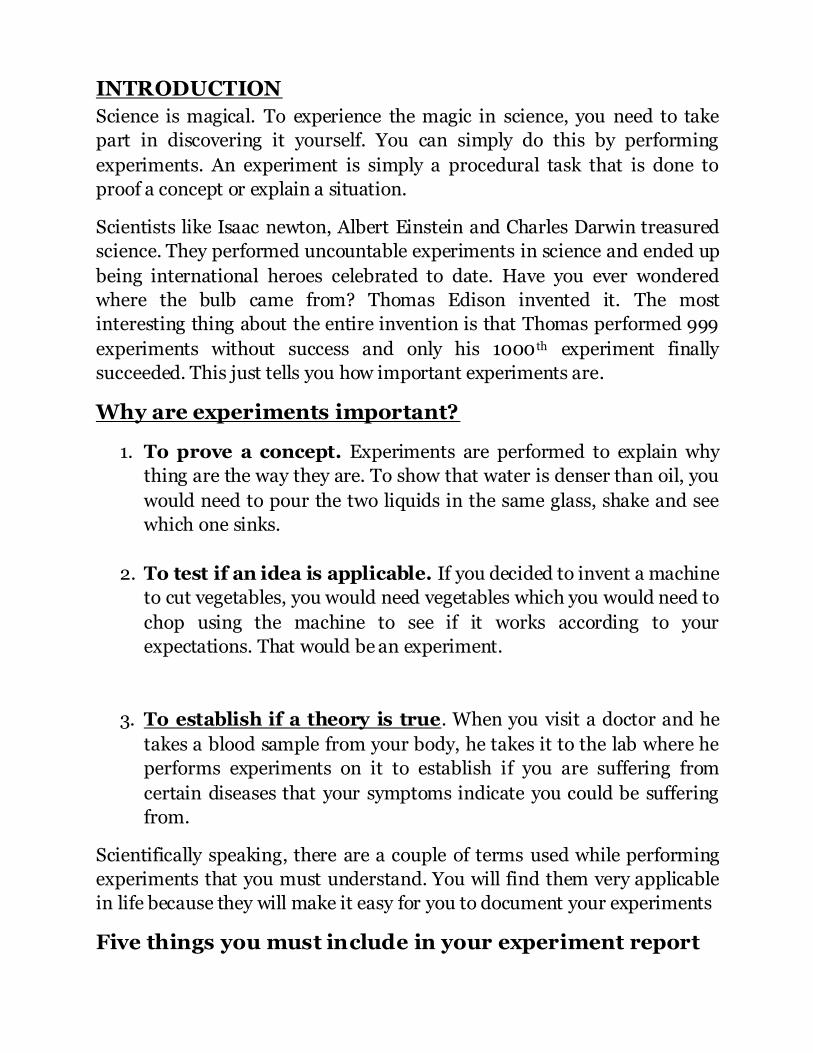
INTRODUCTION
Science is magical. To experience the magic in science, you need to take
part in discovering it yourself. You can simply do this by performing
experiments. An experiment is simply a procedural task that is done to
proof a concept or explain a situation.
Scientists like Isaac newton, Albert Einstein and Charles Darwin treasured
science. They performed uncountable experiments in science and ended up
being international heroes celebrated to date. Have you ever wondered
where the bulb came from? Thomas Edison invented it. The most
interesting thing about the entire invention is that Thomas performed 999
experiments without success and only his 1000th experiment finally
succeeded. This just tells you how important experiments are.
Why are experiments important?
1. To prove a concept. Experiments are performed to explain why
thing are the way they are. To show that water is denser than oil, you
would need to pour the two liquids in the same glass, shake and see
which one sinks.
2. To test if an idea is applicable. If you decided to invent a machine
to cut vegetables, you would need vegetables which you would need to
chop using the machine to see if it works according to your
expectations. That would be an experiment.
3. To establish if a theory is true. When you visit a doctor and he
takes a blood sample from your body, he takes it to the lab where he
performs experiments on it to establish if you are suffering from
certain diseases that your symptoms indicate you could be suffering
from.
Scientifically speaking, there are a couple of terms used while performing
experiments that you must understand. You will find them very applicable
in life because they will make it easy for you to document your experiments
Five things you must include in your experiment report
1. Apparatus
2. Requirements
3. Setup /Procedure
4. Results
5. Inference
Experiments are fun. They sharpen your mind and give you a memorable
proof of concepts. Without experiments science would be so hard to
understand.
This book contains 20 interesting experiments you can perform at home to
experience science.
The apparatus and requirements used in these experiments are common
domestic appliances or simple items found in your home. You don’t have to
worry about accidents because these are FRIENDLY EXPERIEMENTS.
EXPERIMENT 1. FLIP A GLASS OF WATER UPSIDE
DOWN WITHOUT POURING THE WATER
You always pour water from a glass by flipping it upside down but this time
round the water will not pour! Try this out.
Apparatus
1. A simple glass
2. A card board. (A flat card made of paper would do just fine)
Requirements
1. Water
Procedure
1) Pour water in to the glass until its ¾ full
2) Cover the glass top with your cardboard
3) Place your palm over the cardboard and flip the glass over making
sure that it is held perfectly in an upside down position.
4) Remove the palm from the card and watch what happens!
Results
The water didn’t pour. The card remained in place. There was an empty
space above the water inside the glass.
Inferences
Maybe you thought a ghost replaced your hand but that was not the case.
The water did not pour because of air pressure. May be you have had heard
of air pressure before but didn’t know what that was. Well, here is the truth
about air pressure.
The air around you is not just idle air. It has got some pressure in it because
there are other layers of gasses sitting on it. This pressure is so important
because it helps you breath easily!
Air pressure acting upwards underneath the card is more than the total
pressure of water in the glass, weight of the card and the air trapped inside
the glass. The external air pressure being greater than the total pressure
offered by the gravitational pull on the glass keeps the card in place.
That tells you that indeed, the air around you is under pressure and that the
pressure is really not negligible as you may have thought.
EXPERIMENT 2. FLOATING A NEEDLE ON WATER
Metal is denser than water and it will always sink in water. I am about to
show you that this is not always the case.
Apparatus
1. A bowl of tap water- (don’t use purified water like bottled water or
Water from purifiers as this water has been modified)
2. A thin ply of tissue paper
3. A basic sewing needle
Procedure
1) Place the thin ply tissue gently on the water surface
2) Place the needle gently on the thin ply tissue
3) Leave the bow undisturbed as you watch and wait for two to five
minutes.
Results
After some time, the tissue soaks in water and sinks but the needle remains
floating on the water.
Inferences
This tells you that there must be some kind of skin on the water on which
the needle was lying on and yes you are right. But to sound more like a
scientist you call that skin Surface Tension.
Surface tension is usually as a result of cohesive forces between the water
molecules. In simple terms, water molecules tend to pull each other equally
and in all directions. However, because at the surface of the water the
molecules have an exposed surface, they pull sideways forming a somehow
strong invisible web known as surface tension.
Watch natural effects of surface tension here:
Visit a natural water body like a pool or a dam and seat by its banks on a
cool quiet day. Watch its surface closely for skidding insects. You may be
lucky to notice an insect comfortably standing on the water surface
without sinking
Take a walk one early morning when there is dew on vegetation around
you. Observe the water droplets on the leaves and see that it is shaped as a
perfect ball and does not even wet the leaves.
EXPERIMENT 3. RULLER APPEARS BROKEN IN A
GLASS OF WATER
After this experiment you will be left wondering whether your eyes are as
true as you have always thought them to be. Go ahead and see for yourself.
Apparatus
1. A clear glass
2. A ruler ( any other straight object may be used)
Requirements
1. water
Procedure
2. Pour water in to the glass until it is ¾ full
3. Place it on a flat surface in a well-lit area
4. Insert the ruler in the glass
5. Observe the ruler from any side of the glass
6. Observe the ruler from the glass top
7. Remove the ruler from it and inspect it closely
Results
On observing the ruler from any side of the glass, it appears broken. When
0bserved from the glass top, it appears bent but on removing it from the
water and looking at it critically, it is just as it was at the beginning of the
experiment.
Inferences
The real cause of this visual illusion is what scientists call Density
difference. Before I can explain what this means, I would like to bring to
your attention an important fact. Here it is “Air is a fluid”.
When you poured water in to the glass and thought it was half empty, well
you were wrong but don’t worry because you are not alone. Many people
always think it is usually half empty.
The other half is usually overflowing with air though invisibly. As we
agreed before, air is a fluid. The difference between air and water is that
water is denser than air.
The ruler “breaks” at the interface of the two fluids because you are
observing from a region oh high density to a region of low density or vice
vasa.
The same way your fingers appear shorter in water, or a spoon appears
closer to the surface than it really is.
Moral lesson of this experiment:
If someone tells you to jump in to a pool that appears shallow because you
can actually see its base, think again because what you can see is
apparent depth. It could be much deeper than you could even imagine.
EXPERIMENT 4. PAPER CHROMATOGRAPHY
EXPERIMENT
Did you know that any paint is made up of many colors that would be
separated using a simple absorbent paper? Well, before you can agree, do it
yourself. Here is how to go about it.
Apparatus
1. A pestle and motor( You could also improvise, take a small glass or
ceramic bowl and a wooden serving spoon with a fairly round handle)
2. A Dropper (A straw would do just fine)
3. A sieve
4. A glass
Requirements
1. Piece of tissue or a filter paper( any absorbent paper will be good)
2. A handful flower petals
3. Surgical or general purpose spirit
Procedure
1. Crash the flower petals in your motor using the pestle.
2. Add 1 full bottle-lid of spirit to the crashed flowers and continue
crashing to form a pulp.
3. Strain the pulp using the sieve to collect about 10 drops of a colored
liquid.
4. Place your tissue or filter paper over a glass mouth.
5. Insert the straw in the colored liquid and block the top of the straw
with your thumb.
6. Carefully lift a drop of the colored liquid using the straw and drop it at
the center of your filter paper.
7. Wait for two minutes for the color to spread. Meanwhile, clean the
straw and dry it completely.
8. Pick a drop of spirit and drop it right at the middle of the colored
patch.
9. Wait for ten minutes before dropping a second drop at the center of the
colured patch.
10. Wait for ten more minutes and observe.
Results
Upon placing the drop of paint, it spreads uniformly across the surface of
the paper. Upon adding spirit on to the colured region, the paint spreads
farther forming concentric rings of various colors.
Inferences
This experiment Cleary proofs that indeed a color is made up of many more
colors. The spirit was used because it’s a better solvent than water
otherwise water would still be used but may not bring rings as clear as the
ones obtained with spirit.
Note that the color that is on the outermost ring is the most soluble while
that closest to the center is the least soluble.
After this experiment, you must remember to do the following:
1. Immediately, clean the apparatus used with a lot of water and soap
to avoid staining them
2. Place the paper chromatogram in the sun to dry and frame it. It is
one of the most beautiful natural pieces of art you could ever have.
EXPERIMENT 5. BURNING CANDLE AIR
DISPLACEMENT EXPERIMENT
This is the best way to play with fire. You will actually learn volumes and
not get hurt. Enjoy.
Apparatus
1. A shallow plate
2. A clear glass
Requirements
1. A candle (Your candle must be shorter than the glass)
2. A matchbox
Procedure
1. Light the candle and pour some molten wax on the plate.
2. Place the candle on the molten wax so that it sticks to the plate.
3. Gently fill the plate with water and make sure the candle remains
stack to the plate. You can hold it with one hand as you pour the
water.
4. Cover the burning candle with the glass.
5. Observe what happens.
Results
The candle continues to burn for a few minutes, fades off gradually and
then go off completely. As soon as the candle is off, water is sucked up the
glass.
Inferences
What actually happened is that the burning candle consumed oxygen which
makes about 21% of the air in the glass. As oxygen diminished so did the
flame until all the oxygen was consumed and the flame went off. With the
space that the consumed oxygen was occupying now empty, water gushed
in to the glass to replace it.
The space can’t remain empty because the air pressure outside the glass
would not allow vacuum to exist naturally. It is actually as a result of the air
pressure action that water is pushed in to the glass.
This experiment confirms that combustion uses up oxygen and again that
air pressure is a naturally existing force.
EXPERIMENT 6. FRESH EGG FLOATING AND
SINKING IN DIFFERENT WATERS
Before you can consume your fresh egg in an omelet or may be use it to
make a scrumptious pancake, here is an interesting way you could use it to
proof scientific facts.
Apparatus
1. A glass
2. A spoon
Requirements
1. Four table spoons of salt
2. Fresh water
3. A fresh egg (One that is not expired)
Procedure
1. Pour some water in to the glass until it is half full.
2. Gently place your egg in the glass and observe.
3. Remove the egg from the glass and add the salt in to the glass.
4. Stir with the spoon to dissolve as much salt as is possible.
5. Gently place the egg in to the salty water and observe.
Results
When placed in fresh water the egg sinks but on adding salt to the water the
egg floats.
Inference
Fresh water is less dense than salty water. That is why in fresh water the
density of the egg slightly exceeds that of the water and thus the egg sinks.
However, on adding salt, the density of the water increases beyond that of
the egg and therefore the egg floats.
EXPERIMENT 7. PLANT GROWING TOWARDS A
HOLE
This experiment will not only answer some of the questions you have in
mind but it will also improve your skills in agriculture. You will need to do
some planting and you may also have to wait for two weeks to observe the
results.
Apparatus
1. Two containers
2. one carton
3. A nail
4. A hammer
Requirements
1. Soil
2. 2 corn seeds
3. 2 bean seeds
4. A pair of scissors
5. water
Procedure
1. Make four holes on the bottom of each container using the nail.
2. Plant a corn seed and a bean seed in each of the two containers and
water them sparingly.
3. Make 2cm square hole on one side of the carton.
4. Cover one of the containers with the carton ensuring that the
container is placed at center of the cartoon.
5. Leave the other container uncovered.
6. Make sure that the two setups are placed away from any form of
disturbance.
7. Water the two plants after every two days for the next two weeks and
observe the result at the end of the final week.
Results
The four plants germinate. The plants in the open container are green and
healthy with green stems of ordinary length. They also exhibit upright
growth. The plants from the covered setup are discolored (Not green). Their
stems are unusually long and they tend to bend towards the hole.
Inference
You just confirmed that light is not necessary for germination but it is vital
for the formation of chlorophyll in plants. Chlorophyll is the substance
that makes plants green. You have also witnessed that plants will always
tend to grow toward a source of light. This behavior is known as
Phototaxis.
EXPERIMENT 8. WATER RISING IN A STRAW
You wouldn’t imagine that this simple experiment demonstrates how
plants are able to absorb water from the soil. Be keen to note how natural
this is.
Apparatus
1. Clear glass
2. Clear straw
Requirements
1. Water
2. Ink or food color
Procedure
1. Pour water in to the glass until it is ¾ full.
2. Place a drop of ink or a pinch of food color in to the water and stir to
distribute the color evenly.
3. Insert a straw in the colored water and observe.
Results
The level of water in the straw tends to be higher than that in the glass.
Inference
This is as a result of a scientific phenomenon known as capillarity. If you
are wondering what capillarity is, I hope this helps. Capillarity is the ability
of liquids to rise in thin tubes against gravity and without the assistance of
any external forces whatsoever.
It is so important for you to witness this because you now know how plants
take up water from the soil though this is not the only way.
EXPERIMENT 9. OSMOSIS EXPERIMENT
Did you know that nature tries to create equilibrium whatever the cost?
This experiment proves just how serious this can be.
Apparatus
1. 2 glasses
2. Knife
Requirements
1. 4 table spoons full of salt
2. Water
3. 2 potatoes
Procedure
1. Peel the potatoes carefully and chop them into four halves.
2. Put water in one glass and add the salt.
3. Stir to dissolve as much salt as possible.
4. Place two potatoes pieces in the salty water.
5. Pour fresh water in the second glass and place the remaining two
pieces of potatoes in the glass.
6. Leave the experiment for 10 hours.
7. Remove the potatoes from each of the two glasses and observe.
Results
The potato pieces from salty water becomes soft and flaccid .The potato
pieces from fresh water becomes hard and rigid.
Inferences
Osmosis is to blame .So what exactly is osmosis? This is basically the
movement of water from a region of high concentration to a region of low
concentration across a semipermeable membrane. What exactly happened
was that water from the potatoes moved in to the very salty water to try and
dilute it hence the potatoes became soft and flaccid since they lost so much
water. On the other hand in the second experiment, water moved from the
glass in to the potatoes to try and dilute the minerals in the potatoes. This
made the potato pieces to swell and become rigid.
EXPERIMENT 10. ROTTING BREAD EXPERIMENT
When people eat food that has gone bad they may have aching stomach,
diarrhea, vomiting, nausea, bloody stool and sometimes can even cause
death. This experiment is to help you discover how food goes bad and how
to prevent that.
Apparatus
1. 3 saucers
2. Fridge
Requirements
1. 3 slices of bread
2. Water
Procedure
1. Place each slice of bread on its own saucer.
2. Pour a spoonful of water on one slice of bread and place it on the shelf.
3. Place the second slice of bread plan as it is on the shelf.
4. Place the third slice of bread in the fridge (preferably freezer
compartment).
5. Leave the experiment for a week.
6. Examine the three slices closely making sure to smell each of them.
Results
The wet slice has a lot of blue- green material growing on it. It also has a
rotting pungent odor. The plain slice does not have much of the green
material and does not smell as much rotten as the wet slice. The third slice
from the fridge smells fresh and has no blue-green material on it.
Inferences
The blue-green material is actually known as molds. Molds grow from
fungi. Fungi are microorganisms that are found everywhere. There are
definitely some on your skin as you are reading this! But you don’t have to
worry about that. I will tell you why in a moment.
The fungi can only glow in to molds, which are poisonous and toxic, if they
are exposed to the right conditions for growth. These conditions are:
a. Availability of moisture
b. Warmth
c. Nutrients
The reason why they won’t glow on your warm moist skin is because your
skin is so tough and is not even a substrate. The mold was rampant on the
wet slice because the moisture facilitated their growth. The other plain slice
had molds though not as much but since there is water vapor in the air, and
due to the fact that it was exposed to room temperature, mold grew on it
too. The final slice did not have molds because it was in a very cold
environment.
The reason why you are told to place foodstuff in a cool dry place is to
discourage the fungi from growing on them.
EXPERIMENT 11. DIFFUSION EXPERIMENT
Like children disperse everywhere in the field during play time, so is
diffusion. There is a more scientific way however of observing this
phenomenon in action. This experiment will take you through successfully.
Apparatus
a. A medium clear Bowl
b. A straw
Requirements
a. Water
b. A drop of colored ink
Procedure
1. Pour water in the medium bowl.
2. Pick a drop of ink using a straw and place it in the water carefully at
the bottom of the bowl.
3. Observe the movement of the colored ink.
Results
The ink disperses in water and colors the water evenly. This occurs without
stirring the liquid.
Inference
The ink dispersed in the process of diffusion. Scientifically, diffusion is
the process by which molecules move from a region of high concentration
to a region of low concentration .This explains why you are able to smell
mangos several meters away while shopping in a store.
EXPERIMENT 12. HOW TO CALCULATE THE
VOLUME OF AN IRREGULAR OBJECT USING THE
DISPLACEMENT METHOD
Volume simply means how much material something is made up of or how
much it can hold. Imagine someone asked you how much ceramic is used to
make your tea mug? The best way to calculate its volume would be to
perform this experiment.
Apparatus
1. Calibrated jug
2. A large bowl
3. A ceramic mug (or any other irregular object
Requirements
1. Water
2. A pen and a writing pad
Procedure
1. Place the jug in the bowl.
2. Pour water in to the jug until it’s full to the brim.
3. Gently place the ceramic mug in the measuring jug until it sinks.
4. Lift the measuring jug from the bowl carefully so as not to spill any
more water.
5. Remove the ceramic mug and empty the measuring jug.
6. Measure the volume of water that overflows in to the bowl and record
it on your notepad.
Results
When the ceramic mug is placed in the jug, water overflows and stops once
the mug sinks.
Inference
The volume you wrote down on your notepad is the actually volume of the
ceramic that has been used to make your tea mug. In this experiment you
have just proved that matter occupies space. That is why the mug displaced
all the water occupying the space in which it sunk.
You are so close to knowing how to find the density of a material! If you
were to weigh the weight of your object you can calculate the density by
dividing the obtained mass by the obtained volume. However, you must
note that if you decide to use cm3 as your unit of measurement, the weight
should be in grams.
For larger objects you may want to take the volume in M3. Be sure to
convert the mass in to kilograms too.
EXPERIMENT 13. REFLECTION OF LIGHT
Mirrors help you to see how you look. Without a mirror you would never
have seen yourself. Wouldn’t that be sad? But how do mirrors function?
This experiment will give you a good idea of how this happens.
Apparatus
1. A mirror
2. A torch
Procedure
1. Hold a lit touch facing downwards
2. Place the mirror below its light and tilt it towards a dark wall
3. Observe what happens
Results
The wall becomes bright as though the torch was point in its direction.
Inference
The reason why the wall is lit is because of reflection. Reflection is
scientifically defied as the bouncing back of light. Light may be considered
as a wave. When waves meet a barrier, they bounce back.
The ability of light to bounce back is what makes it possible for you to view
yourself in a mirror. If you tried looking in to a mirror in the dark, you
would not see anything because there is no light coming from you.
EXPERIMENT 14. EXPANSION OF OBJECTS
Do you know why electric cables sag in hot weather? Before I can give you
the story behind it you need to see something for yourself. It’s all in this
experiment.
Apparatus
1. A Nail
2. A Hammer
3. A Metal Can
4. A pair of pliers
Requirements
1. A source of heat
Procedure
1. Make a hole on the back of the metal can using the nail.
2. Pull the nail out of the hole making sure that you twist it to enlarge
the hole just for the nail to move through it easily.
3. Hold the nail safely with the pliers and heat it until tis red hot.
4. Try putting it through the hole in the can.
5. Dip the nail in water until it cools completely.
6. Try putting it through the hole.
Results
The nail does not go through the hole after it’s heated.
Inference
Heat causes matter to expand. There is a more scientific way of explaining
this that focuses on molecular energy and vibrations but we will get to that
in our more complex experiments.
A simple way to explain what happened is that the nail expanded after
heating and thus could not go through the hole. However, upon cooling it, it
returned to its original size and was able to go through the hole once again.
EXPERIMENT 15. INERTIA FORCE
Do you ever wonder why when the car you are traveling in suddenly stops;
you tend to be thrown to the front? This happens because of the inertia
force. For you to understand what inertia is all about you need to perform
this simple experiment.
Apparatus
1. A block of wood
2. A bottle top
Procedure
1. Place the bottle top on the block of wood.
2. Move the block at a very high speed on a flat surface and then stop
suddenly.
3. Observe what happens to the bottle top.
Results
The bottle top tends to be thrown to the front. It actually tends to continue
moving even after the block of wood has stopped.
Inference
This occurs due to the force of inertia. Inertia is scientifically described as
the tendency of a moving object to resist stopping or a stagnant object to
resist movement.
Evidently, the bottle top ignores the fact that the block has stopped moving
and it continues moving by its own. Inertia may be advantageous but one of
the most feared effects of inertia is the tendency to proliferate the effects of
a collision in car accidents. That is why all vehicles are fitted with safety
belts to counter inertia force that is always present in case of an accident.
EXPERIMENT 16. SEPARATING SOLUBLE
SUBSTANCES THROUGH EVAPORATION
Have you ever wondered where table salt comes from? It comes from salty
water. How is it possible to separate the salt from water or to make sugar
from sugarcane syrup? This experiment will show you just how simple this
is.
Apparatus
1. A cooking pan
2. A heat source
3. A glass
4. A spoon
5. Sieve
Requirements
1. Salt
2. Water
Procedure
1. Fill the glass with water until it is half full
2. Add two spoons of salt and stir to dissolve as much salt as possible
3. Sieve the salty solution in to the cooking pan making sure to remove
all the salt that does not dissolve.
4. Heat the pan and leave the salty solution to evaporate to dryness.
5. Observe the base of the cooking pan keenly.
Results
On heating the pan the salty solution boils and eventually evaporates
leaving a white powdery substance behind.
Inference
This white substance is the salt that had dissolved in the water. This
method of separating substances is known as evaporation it may also be
used to increase the concentration of dissolved substances.
EXPERIMENT 17. MAKING HOMEMADE
INDICATOR
If you have been dismissing those bougainvillea or hibiscus flowers as
simple decorations, well here is an experiment to show you just how.
Apparatus
1. Motor and pestle (you could improvise by using a bowl and a rounded
rolling pin).
2. Sieve
3. Glass
Requirements
1. A handful of hibiscus or bougainvillea flowers
2. General purpose spirit
Procedure
1. Add the petals in the motor and class them using a pestle.
2. Add some spirit and continue crashing to obtain a deep colured
solution.
3. Sieve to separate the solution from the petals.
4. Place the deep colored solution the glass.
Results
On crashing the petals a deep colored purple solution was obtained
Inferences
I must begin by informing you that an indicator is a substance that is
used to distinguish between acids and bases. There are some strips that are
known as litmus paper that are used in laboratories as indicator but if you
have no access to them you must have another way of telling which is one is
an acid and which one is a base.
The deep colored solution that you obtained would work just fine. With
bases, it would turn to deep purple. Some even say it becomes darker. With
acids on the other hand, it turns in to a warm-red color.
EXPERIMENT 18. SOFT AND HARD WATER
Did you know that we have soft and hard water? These terms may sound
technical but to understand what the difference between the two water
types is, carry on with this experiment.
Apparatus
1. Two clear glasses
2. A spoon
3. A cooking pan
4. A heat source
Requirements
1. Water
2. Salt
3. Powder detergent
Procedure
1. Add water to the two glasses until they are ¾ full.
2. Add one spoon of salt to one glass and stir to dissolve all the salt.
3. Add a pinch of powered detergent to each of the two glasses and stir to
see how much foam is formed in each of them.
4. Pour the salty solution in to the cooking pan and heat for one minute.
5. Return the solution to the glass and stir to see how much foam is
formed.
Results
1. The salty water forms a scam on its surface instead of foam. On
warming it forms foam. The fresh water forms form without heating.
Inferences
Hard water is water that contains a lot of dissolved minerals. It does not
leather easily. Soft water is water with little or no minerals at all. Heating
hard water softens it making it easier to use for cleaning purposes.
EXPERIMENT 19. STATES OF MATTER
There are only three states of matter; solids liquids and gasses. Most
substances go through the three states of matter but there are some that
skip the liquid phase. At this level we are only going to focus on those that
go through the three states. Here is an experiment to show you what states
of matter are.
Apparatus
1. Cooking pan with a lid
2. A source of heat
Requirements
1. Ice cubes
Procedure
2. Place the ice cubes in the cooking pan.
3. Heat the pan until the ice cubes turn in to water.
4. Continue heating with the cover in place.
5. Lift the lid and collect the droplets of water on it.
6. Place the droplets collected in the freezer and leave for 30 minutes.
Results
On heating the ice cube they melt to form a liquid. On further heating the
liquid starts to boil and steam is seen to rise from the boiling water. On
freezing the droplets from the lead, ice is obtained.
Inferences
The ice cubes are in a state of matter known as solid. On heating they
change from solid to liquid in a process known as melting. On further
heating the liquid turns in to a gas (water vapor) in a process known as
evaporation.
The droplets on the lid were from the vapor. They formed on the lid in a
process known as condensation because the lid was cool. on further

cooling( in the freezer) the liquid turned in to solid in a process known as
freezing.
This process is a cycle. We began with solid ice cubes and we have been able
to get our ice cubes back.
EXPERIMENT 20. MAGNETS POLES BEHAVIOR
Well well, do you have two magnets? If not, you can buy them from your
nearest store and if they don’t have, look for an old spoilt electronic device
that nobody uses any more. Break it and obtain the speaker. That dark grey
ring is actually a magnet! Extract it carefully and break it in to two halves.
Now you have your two magnets! Let’s proceed with the magic tricks of
magnets.
Apparatus
1. Two magnets
2. A campus
3. A thread
4. felt pen
Procedure
1. Tie one of the magnets with a thread and suspend it in the air.
2. Fling it with your finger and wait for it stop swing
3. Note which side points to the north and label it N and which one
points to the south and label it S
4. Repeat the three steps with the second magnet
5. Place two north poles of the two magnets close together and observe
6. Place the two south poles close together and observe
7. Place the south pole close to the north pole and observe
Results
Any like poles repel, unlike poles attract.
Inference
You have just proved one law of magnetism that states: “like poles
attract while unlike poles repel.” this behavior is exhibited because
dipole resist change in orientation. This may sound complex to understand
but as homework, read more about magnets. Its lots of fun.
CONCLUSION
I hope you have enjoyed these experiments. You have definitely learnt a lot
and as a matter of fact you may want to consider yourself a scientist. A good
way to remind you about these experiments is to record them and save
them as video clips.
You may also want to teach others how to perform these experiments.
Sharing your knowledge only makes you brighter. Furthermore, a candle
does not lose its light by lighting another.
Thank You, and more…
Thank you for spending your time to read this book, I hope now
you hold a greater knowledge about 20 FUN EXPERIMENTS
YOU CAN DO AT HOME.
Also,
There are like-minded individuals like you who would like to learn
about 20 FUN EXPERIMENTS YOU CAN DO AT HOME,
this information can be useful for them as well. So, I would highly
appreciate if you post a good review on the platform where you
purchased this book, and if you share it on your social media
(Facebook, Instagram, etc.).
Not only does it helps me make a living, but it helps others obtain
this knowledge as well. So, I would highly appreciate it!!