2010 ppt poster instructions - emich.edu · creating a poster in powerpoint 2010 1 | p a ge 2 / 1 0...
TRANSCRIPT
Creating a Poster in PowerPoint 2010
1 | P a g e 2 / 1 0 / 2 0 1 1
View the ‘Best Practices in Poster Design’ located at http://www.emich.edu/training/poster before you begin creating a poster. Then in PowerPoint: (A) set up the poster size and orientation, (B) add and manipulate text, graphics, tables, graphs, (C) package your work for transport, and (D) print on a plotter.
A. Set Up Your Poster
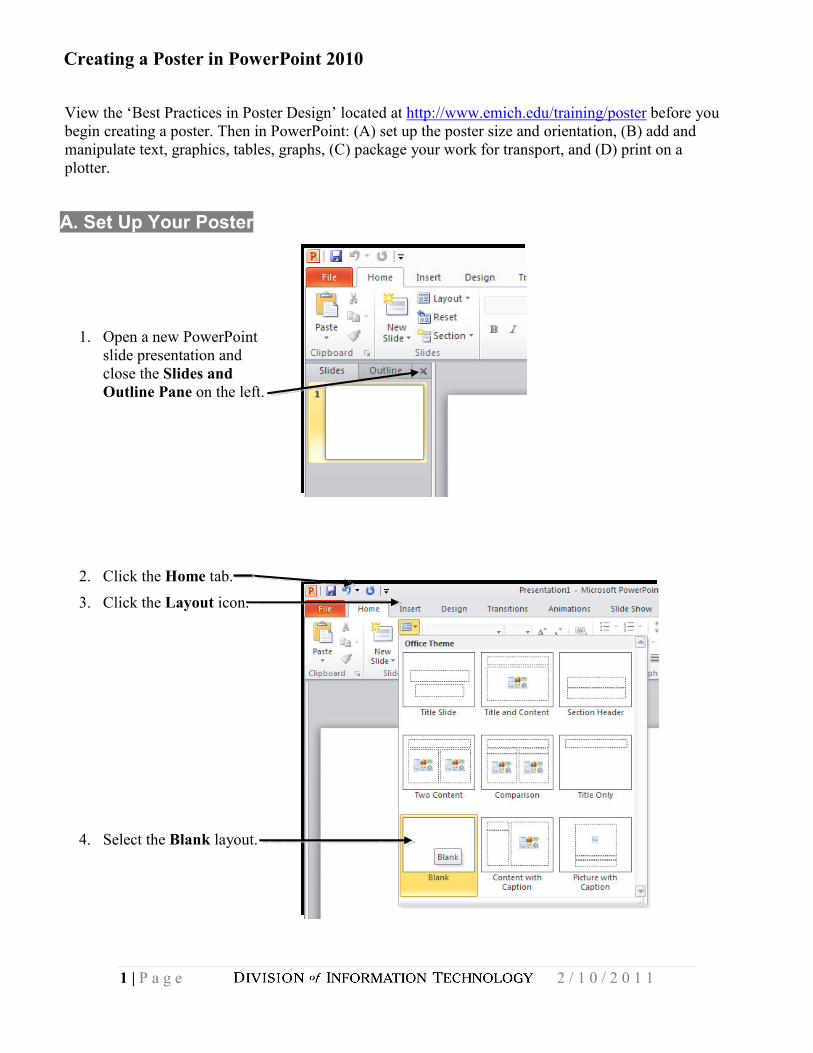
1. Open a new PowerPoint slide presentation and close the Slides and Outline Pane on the left.
2. Click the Home tab.
3. Click the Layout icon.
4. Select the Blank layout.
Creating a Poster in PowerPoint 2010
2 | P a g e 2 / 1 0 / 2 0 1 1
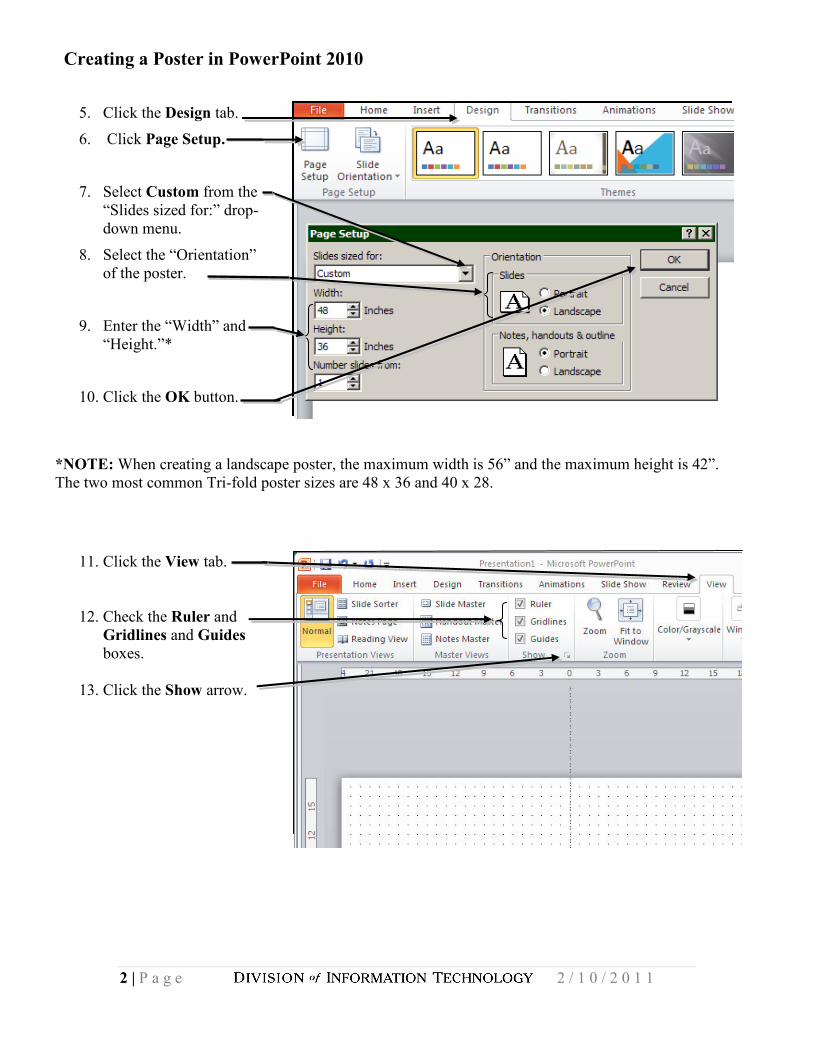
5. Click the Design tab.
6. Click Page Setup.
7. Select Custom from the “Slides sized for:” drop-down menu.
8. Select the “Orientation” of the poster.
9. Enter the “Width” and “Height.”*
10. Click the OK button.
*NOTE: When creating a landscape poster, the maximum width is 56” and the maximum height is 42”. The two most common Tri-fold poster sizes are 48 x 36 and 40 x 28.
11. Click the View tab.
12. Check the Ruler and Gridlines and Guides boxes.
13. Click the Show arrow.
Creating a Poster in PowerPoint 2010
3 | P a g e 2 / 1 0 / 2 0 1 1
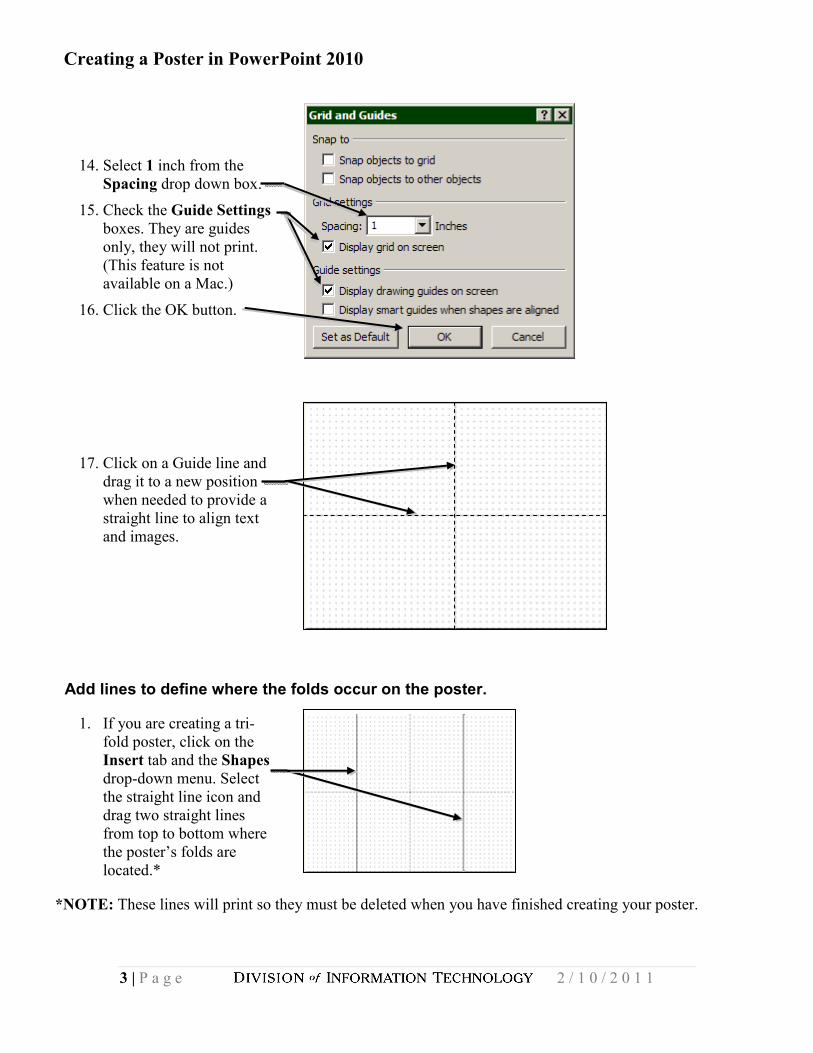
14. Select 1 inch from the Spacing drop down box.
15. Check the Guide Settings boxes. They are guides only, they will not print. (This feature is not available on a Mac.)
16. Click the OK button.
17. Click on a Guide line and drag it to a new position when needed to provide a straight line to align text and images.
Add lines to define where the folds occur on the poster.
1. If you are creating a tri-fold poster, click on the Insert tab and the Shapes drop-down menu. Select the straight line icon and drag two straight lines from top to bottom where the poster’s folds are located.*
*NOTE: These lines will print so they must be deleted when you have finished creating your poster.
Creating a Poster in PowerPoint 2010
4 | P a g e 2 / 1 0 / 2 0 1 1
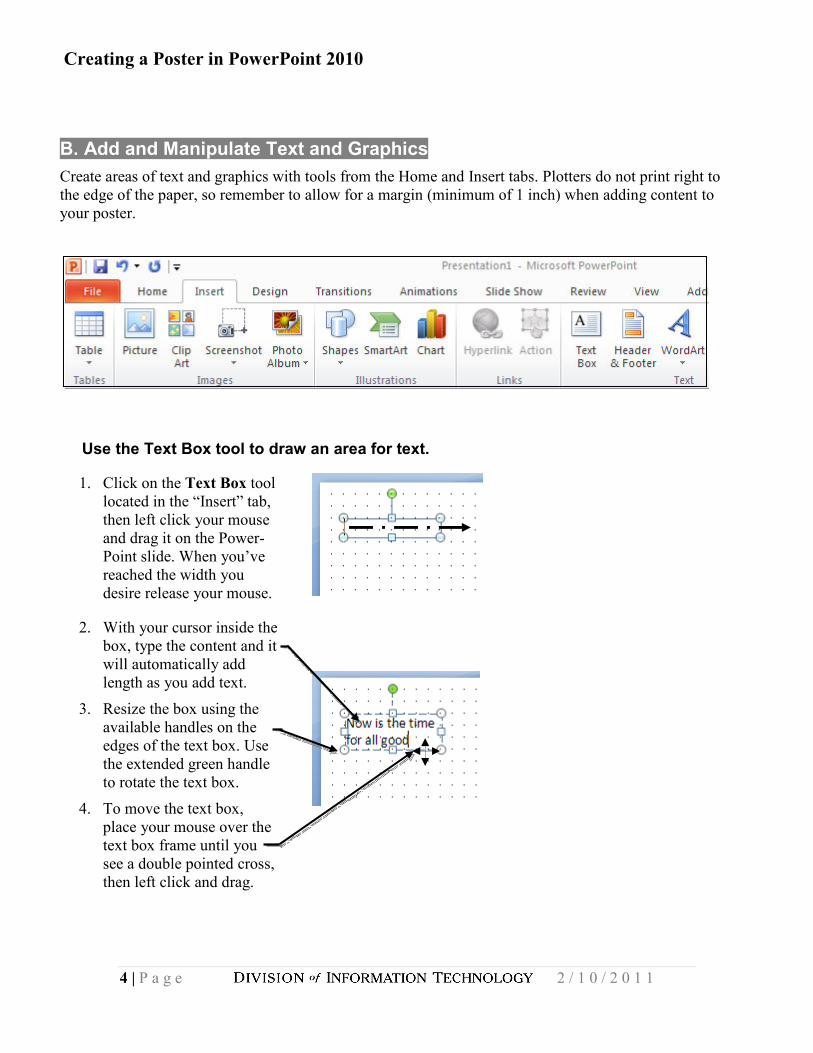
B. Add and Manipulate Text and Graphics
Create areas of text and graphics with tools from the Home and Insert tabs. Plotters do not print right to the edge of the paper, so remember to allow for a margin (minimum of 1 inch) when adding content to your poster.
Use the Text Box tool to draw an area for text.
1. Click on the Text Box tool located in the “Insert” tab, then left click your mouse and drag it on the Power-Point slide. When you’ve reached the width you desire release your mouse.
2. With your cursor inside the box, type the content and it will automatically add length as you add text.
3. Resize the box using the available handles on the edges of the text box. Use the extended green handle to rotate the text box.
4. To move the text box, place your mouse over the text box frame until you see a double pointed cross, then left click and drag.
Creating a Poster in PowerPoint 2010
5 | P a g e 2 / 1 0 / 2 0 1 1
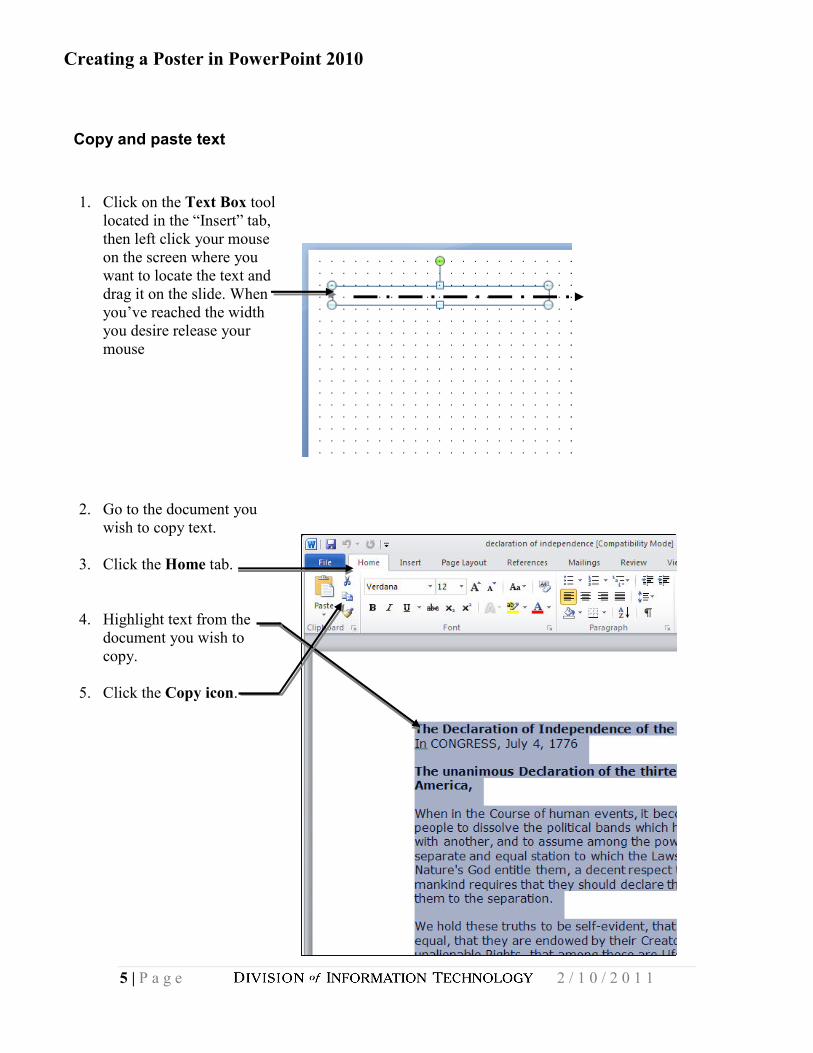
Copy and paste text
1. Click on the Text Box tool located in the “Insert” tab, then left click your mouse on the screen where you want to locate the text and drag it on the slide. When you’ve reached the width you desire release your mouse
2. Go to the document you wish to copy text.
3. Click the Home tab.
4. Highlight text from the document you wish to copy.
5. Click the Copy icon.
Creating a Poster in PowerPoint 2010
6 | P a g e 2 / 1 0 / 2 0 1 1
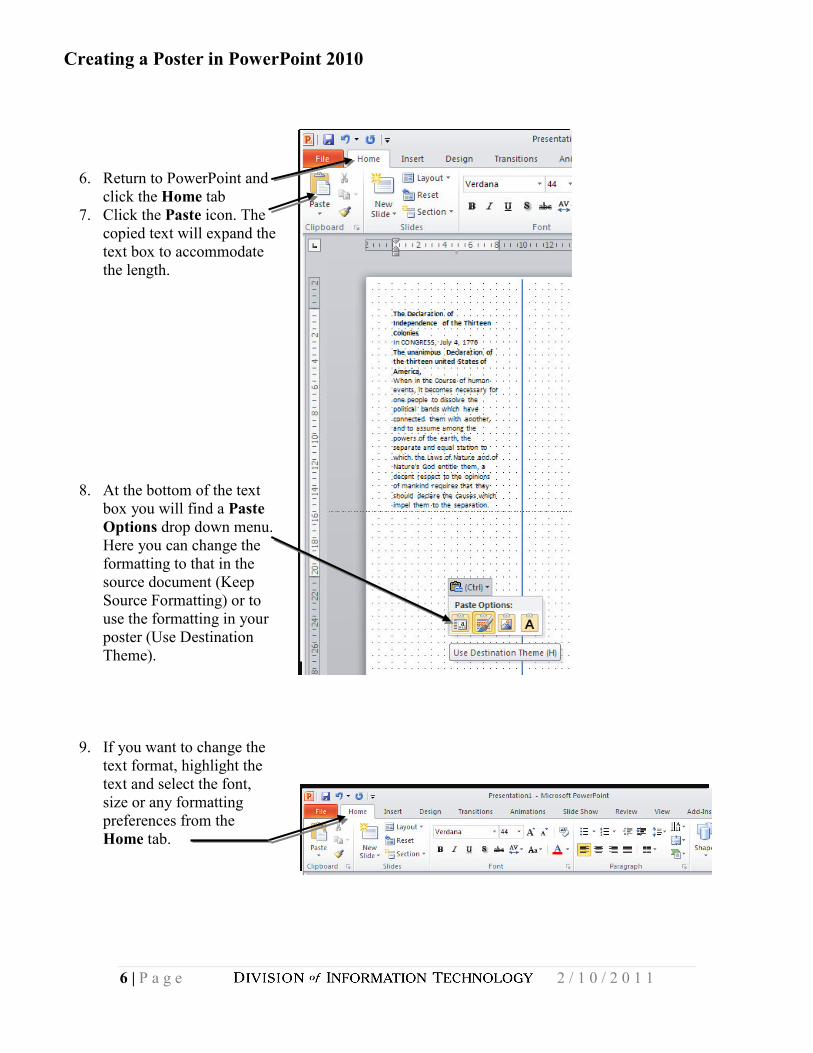
6. Return to PowerPoint and click the Home tab
7. Click the Paste icon. The copied text will expand the text box to accommodate the length.
8. At the bottom of the text box you will find a Paste Options drop down menu. Here you can change the formatting to that in the source document (Keep Source Formatting) or to use the formatting in your poster (Use Destination Theme).
9. If you want to change the text format, highlight the text and select the font, size or any formatting preferences from the Home tab.
Creating a Poster in PowerPoint 2010
7 | P a g e 2 / 1 0 / 2 0 1 1
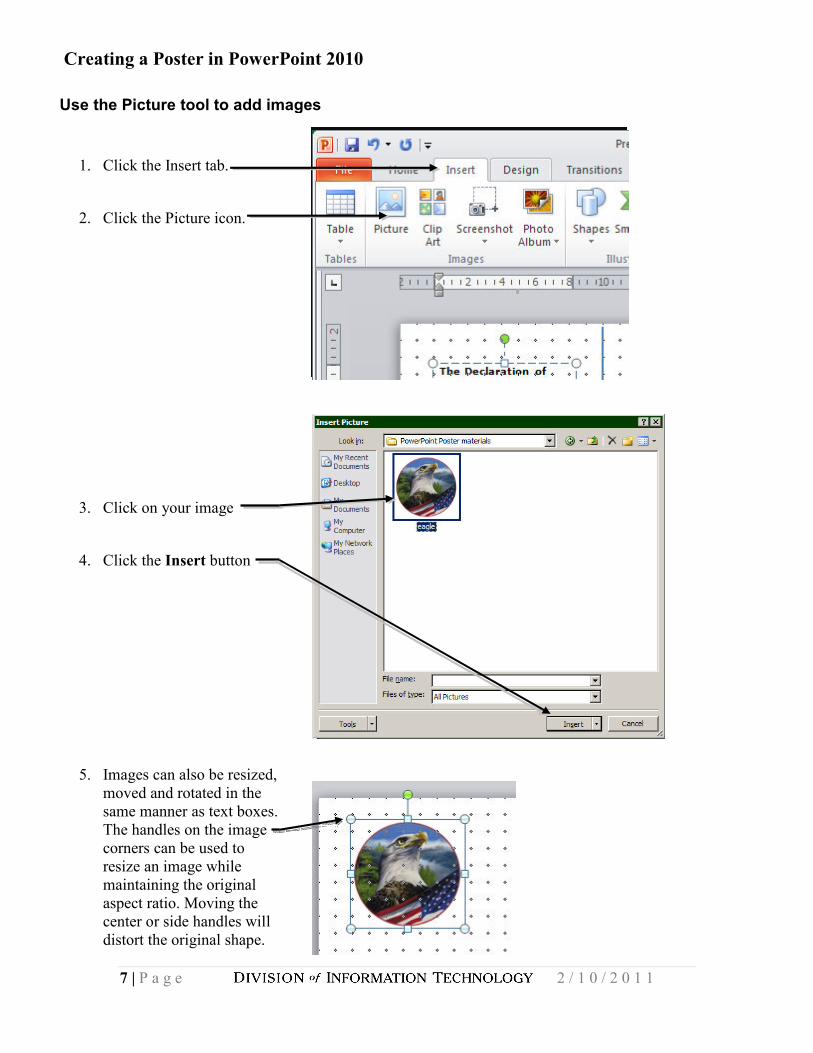
Use the Picture tool to add images
1. Click the Insert tab.
2. Click the Picture icon.
3. Click on your image
4. Click the Insert button
5. Images can also be resized,
moved and rotated in the same manner as text boxes. The handles on the image corners can be used to resize an image while maintaining the original aspect ratio. Moving the center or side handles will distort the original shape.
Creating a Poster in PowerPoint 2010
8 | P a g e 2 / 1 0 / 2 0 1 1
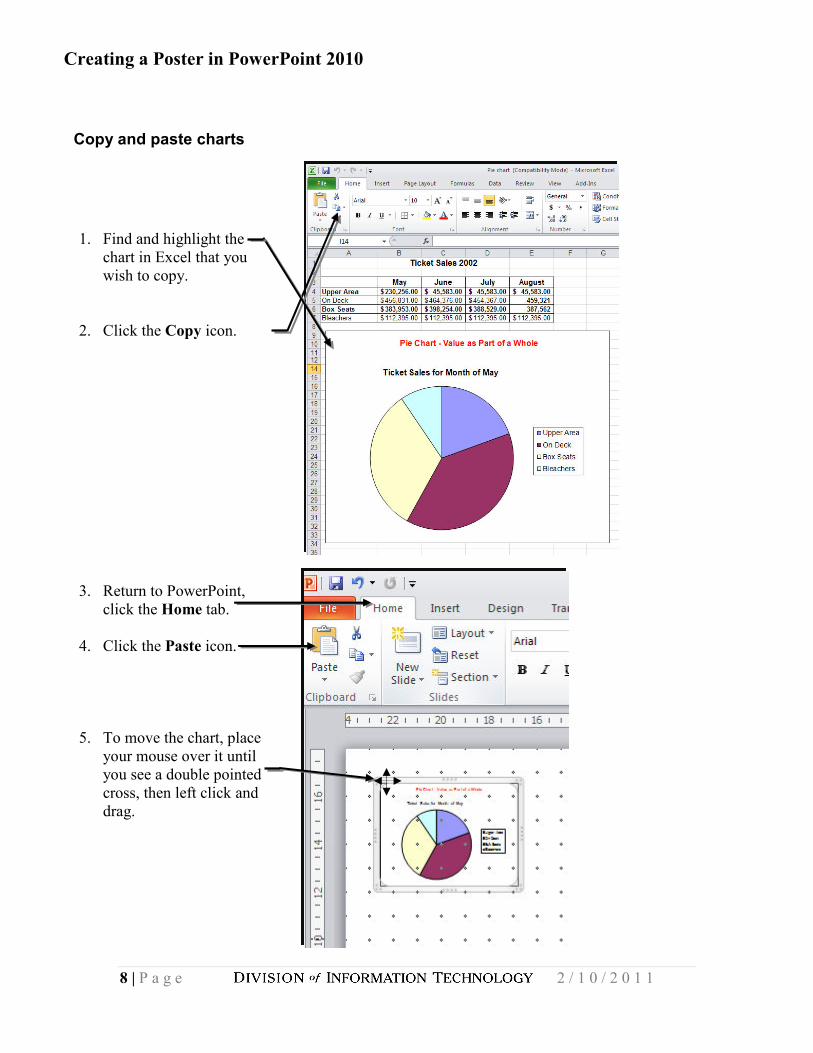
Copy and paste charts
1. Find and highlight the chart in Excel that you wish to copy.
2. Click the Copy icon.
3. Return to PowerPoint,
click the Home tab.
4. Click the Paste icon.
5. To move the chart, place your mouse over it until you see a double pointed cross, then left click and drag.
Creating a Poster in PowerPoint 2010
9 | P a g e 2 / 1 0 / 2 0 1 1
Continue building your poster with the options available from the Home and Insert tabs.
Check Your Progress
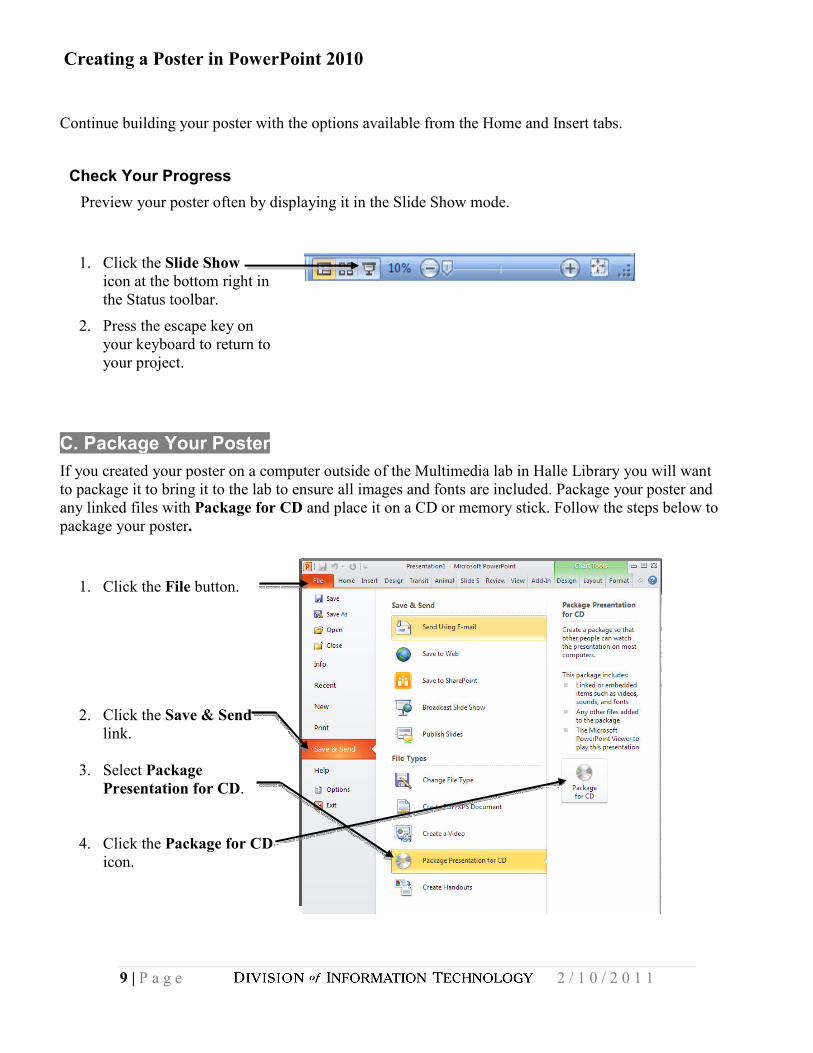
Preview your poster often by displaying it in the Slide Show mode.
1. Click the Slide Show icon at the bottom right in the Status toolbar.
2. Press the escape key on your keyboard to return to your project.
C. Package Your Poster
If you created your poster on a computer outside of the Multimedia lab in Halle Library you will want to package it to bring it to the lab to ensure all images and fonts are included. Package your poster and any linked files with Package for CD and place it on a CD or memory stick. Follow the steps below to package your poster.
1. Click the File button.
2. Click the Save & Send link.
3. Select Package Presentation for CD.
4. Click the Package for CD icon.
Creating a Poster in PowerPoint 2010
10 | P a g e 2 / 1 0 / 2 0 1 1
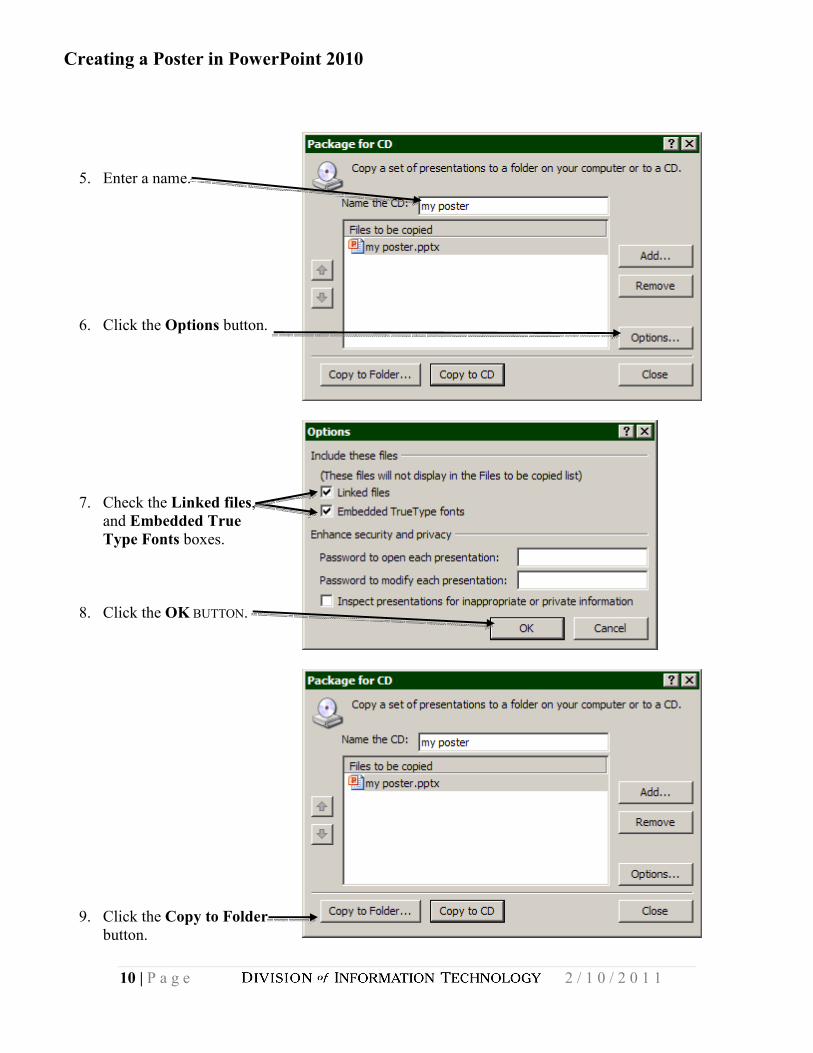
5. Enter a name.
6. Click the Options button.
7. Check the Linked files, and Embedded True Type Fonts boxes.
8. Click the OK BUTTON.
9. Click the Copy to Folder button.
Creating a Poster in PowerPoint 2010
11 | P a g e 2 / 1 0 / 2 0 1 1
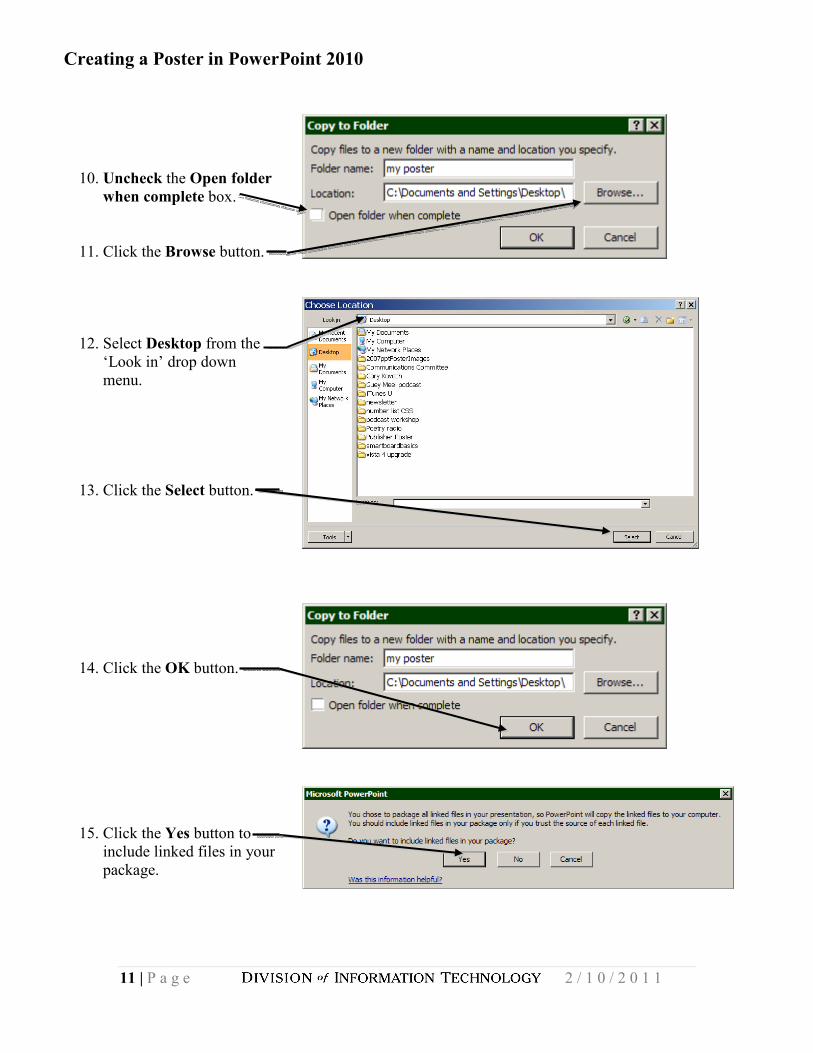
10. Uncheck the Open folder when complete box.
11. Click the Browse button.
12. Select Desktop from the ‘Look in’ drop down menu.
13. Click the Select button.
14. Click the OK button.
15. Click the Yes button to include linked files in your package.
Creating a Poster in PowerPoint 2010
12 | P a g e 2 / 1 0 / 2 0 1 1
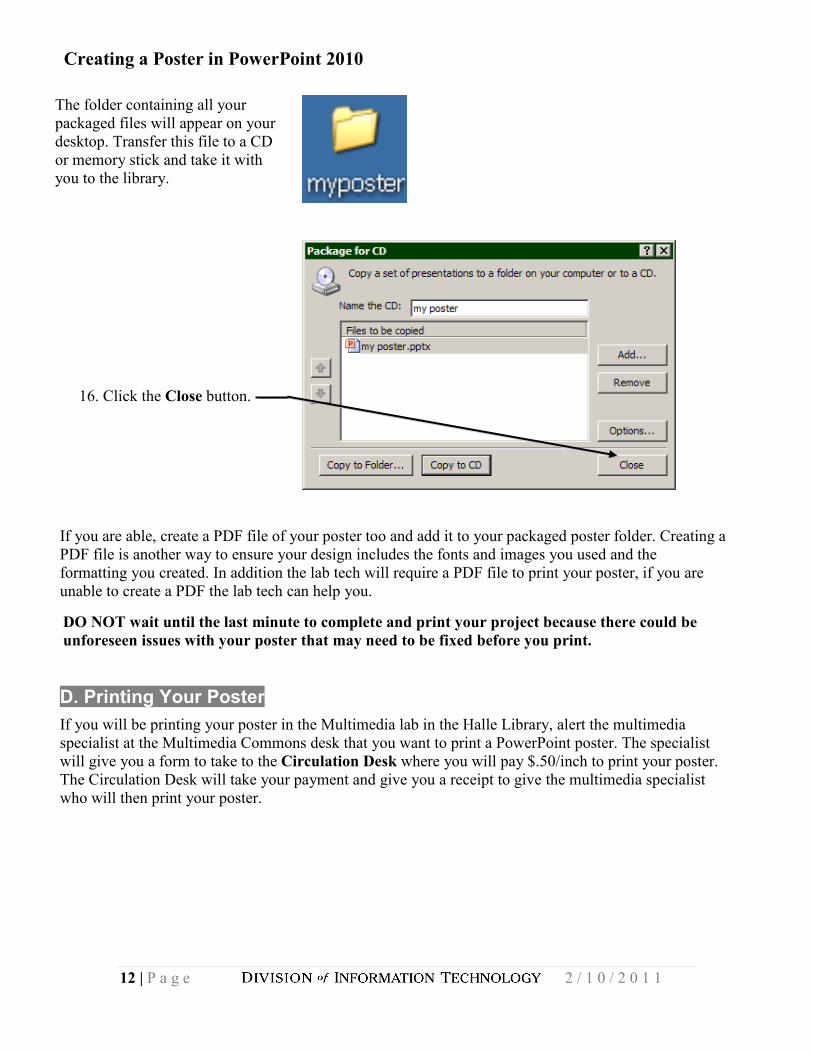
The folder containing all your packaged files will appear on your desktop. Transfer this file to a CD or memory stick and take it with you to the library.
16. Click the Close button.
If you are able, create a PDF file of your poster too and add it to your packaged poster folder. Creating a PDF file is another way to ensure your design includes the fonts and images you used and the formatting you created. In addition the lab tech will require a PDF file to print your poster, if you are unable to create a PDF the lab tech can help you.
DO NOT wait until the last minute to complete and print your project because there could be
unforeseen issues with your poster that may need to be fixed before you print.
D. Printing Your Poster
If you will be printing your poster in the Multimedia lab in the Halle Library, alert the multimedia specialist at the Multimedia Commons desk that you want to print a PowerPoint poster. The specialist will give you a form to take to the Circulation Desk where you will pay $.50/inch to print your poster. The Circulation Desk will take your payment and give you a receipt to give the multimedia specialist who will then print your poster.