4th axis pocket
DESCRIPTION
poket 4 axis milllTRANSCRIPT
4th Axis PocketTutorial
By Hunter Bloch & Michael Johnson
Abstract:In this tutorial you will learn how to set up the SolidWorks drawings and Mastercam
code needed to mill a pocket using the 4th axis on the Haas mill. This is an intermediate tutorial and requires some knowledge of SolidWorks and Mastercam X2 to complete.
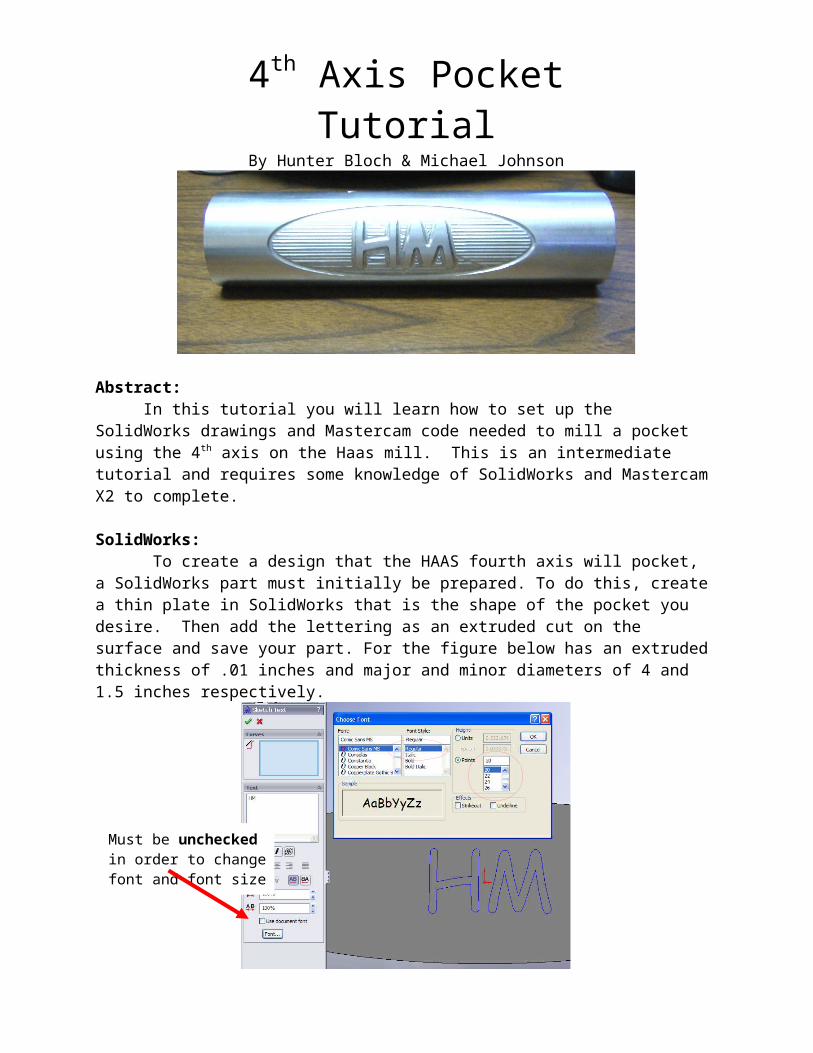
SolidWorks: To create a design that the HAAS fourth axis will pocket, a SolidWorks part must initially
be prepared. To do this, create a thin plate in SolidWorks that is the shape of the pocket you desire. Then add the lettering as an extruded cut on the surface and save your part. For the figure below has an extruded thickness of .01 inches and major and minor diameters of 4 and 1.5 inches respectively.
Must be unchecked in order to change font and font size

Saving: Open a new drawing and insert your pocket part into it with only the lettering view
visible. Save the new drawing as a (.dxf) file so that it can be loaded easily into Mastercam. Mastercam recognizes the actual drawing better when projecting the design.
Mastercam:Load the saved .dxf file into Mastercam. It should show both your pocket contour
and any lettering you have added.Select the Haas Mill under machine type from the drop down menu at the top of the
screen. It is displayed as C:/MCAMX/CNC_MACHINES/HAAS_MILL.MMD . It is extremely important to tell Mastercam what machine you plan to use otherwise the code will not be correct.
In the operations tree on the left hand side, expand the properties menu and select stock setup. Select the cylindrical part under “Shape” and fill in the dimensions of your part. Make sure to check the display box on the left hand side of the properties window. Our stock size was 2 inches in diameter and 10 inches in length. Make sure that when selecting a stock size and in your design that there is space allowed for the chuck to grip onto and in the case of larger parts, room to cut off of the end for the axis support. The settings should look like the following:
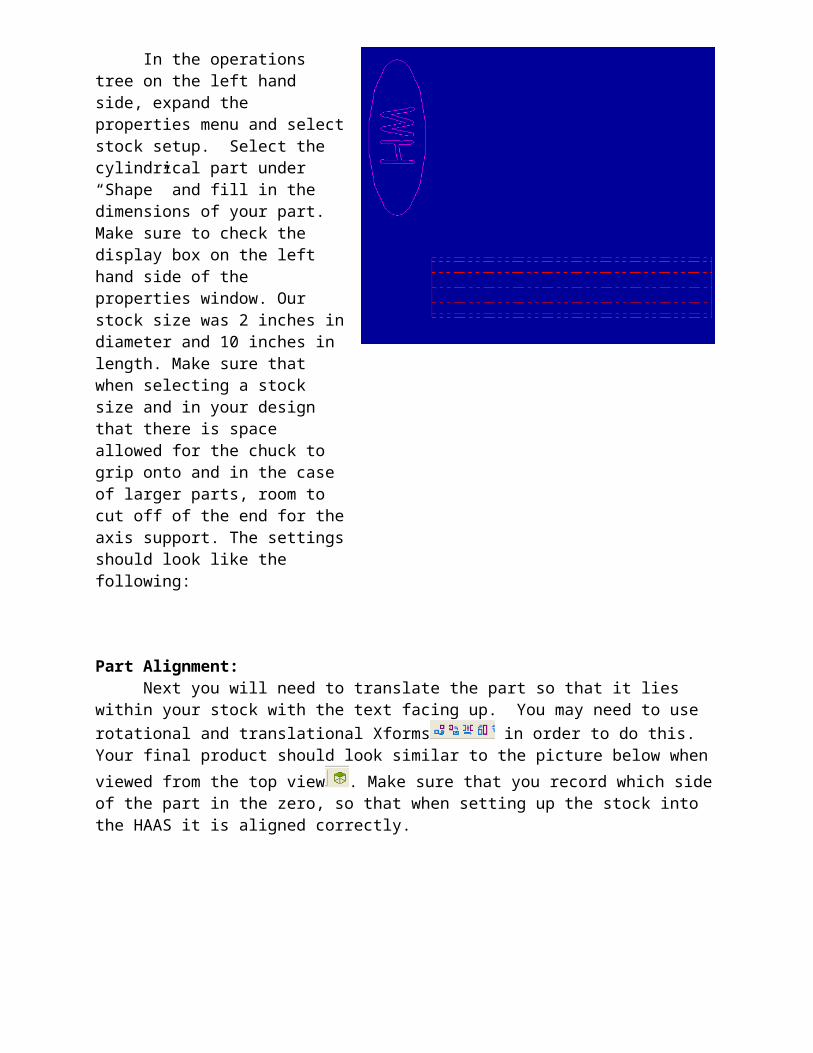
Part Alignment:Next you will need to translate the part so that it lies within your stock with the text
facing up. You may need to use rotational and translational Xforms in order to do this. Your final product should look similar to the picture below when viewed from the top
view . Make sure that you record which side of the part in the zero, so that when setting up the stock into the HAAS it is aligned correctly.
Pocketing:To create the pocket right click the red arrow on your operations tree on the left
and scroll over the Mill tool paths and select pocket from the drop down menu. This will bring up your Chaining window, make sure the chain option is selected along with the inside parameter option. Use your cursor to select the outside pocket contour than any lettering you may have in the middle, and now click the check mark.
The Pocket window should now pop up. Select the desired size end mill that you are going to use on your part through the part library. You can set the feed rates and spinal speeds

the same as you would for machining a flat plate but you must chose a ball end mill. Don’t click the check mark or exit the pocket tool paths just yet.
Axis Substitution:
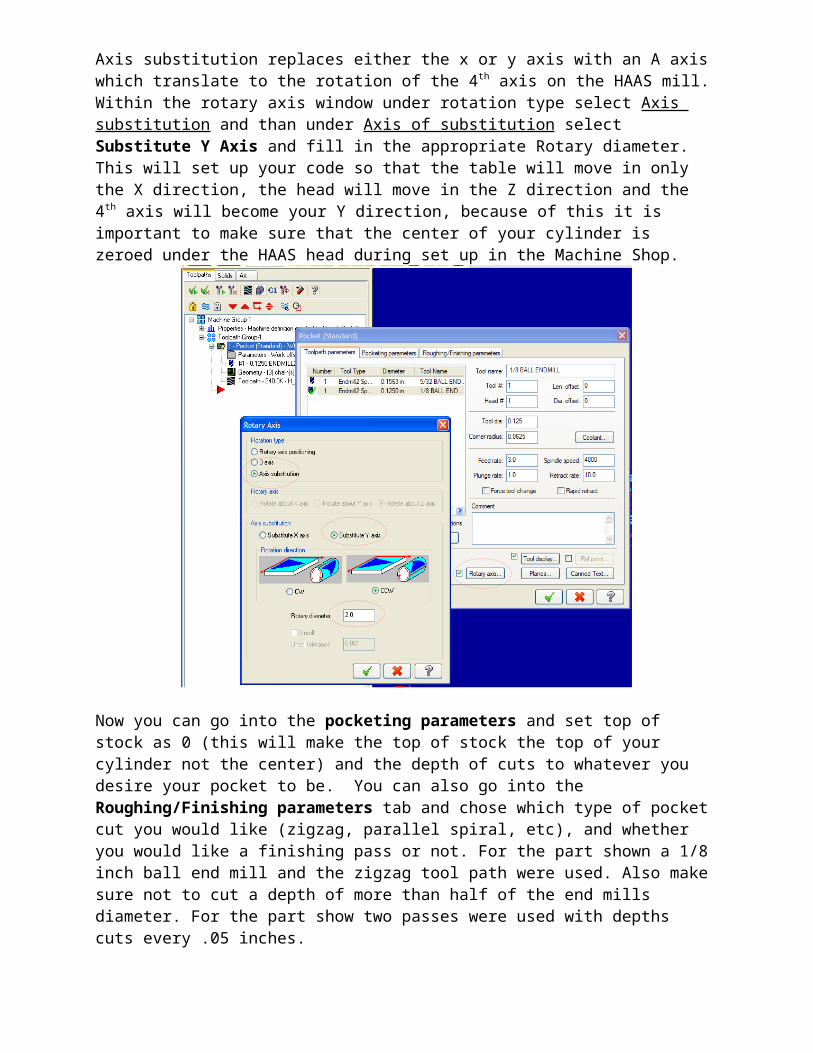
Still inside of the pocket tool path parameters window select check box and click on the rotary axis button. Axis substitution replaces either the x or y axis with an A axis which translate to the rotation of the 4th axis on the HAAS mill. Within the rotary axis window under rotation type select Axis substitution and than under Axis of substitution select Substitute Y Axis and fill in the appropriate Rotary diameter. This will set up your code so that the table will move in only the X direction, the head will move in the Z direction and the 4th axis will become your Y direction, because of this it is important to make sure that the center of your cylinder is zeroed under the HAAS head during set up in the Machine Shop.
Now you can go into the pocketing parameters and set top of stock as 0 (this will make the top of stock the top of your cylinder not the center) and the depth of cuts to whatever you desire your pocket to be. You can also go into the Roughing/Finishing parameters tab and chose which type of pocket cut you would like (zigzag, parallel spiral, etc), and whether you would like a finishing pass or not. For the part shown a 1/8 inch ball end mill and the zigzag tool path were used. Also make sure not to cut a depth of more than half of the end mills diameter. For the part show two passes were used with depths cuts every .05 inches.

Verifying your tool paths: (very important)There is a slight error between Mastercam and the HAAS mill in our machine shop,
when viewing your tool paths through the verify operations tool it must come out upside down to the actual pocket image you want for your part. This is illustrated in the pictures below. The first picture is the correct view that will create the desired pocket when machined (even though it is upside down). The second will produce a mirrored image when produced on the HAAS.
Testing: Now that the code is finished have a mentor or Russ review what you have done. After
that if there is still confusion about what the HAAS will cut out. Chuck up a felt tip pen and check the design on a low spindle speed and feed rate, making sure to offset the zero of the stock so the pen will not jam into the part.