513 learn to knit cover-v4 - · pdf filetypes of seams for in level one garment production....
TRANSCRIPT

This short course was developed as a resource material for the trainer. Thismodule is one in a series of nine, which covers all competences standardTypes of Seams for in level one Garment Production. Due to the demandSTRU has developed this short course for the community and other stakeholder to have better knowledge and skills in producing quality garments.Furthermore the course aim is to create a link for training those unskilledpeople in the community to have the opportunity to learn the basicconstruction skills in garment production.
GARMENT PRODUCTIONTypes of Fasteners
p o box 1097, waiganinational capital districtpapua new guinea.
tel: (675) 323 2633fax: (675) 323 0944
RATIONALE
The development of this short course was sponsored by the ADB-PNGEMPLOYMENT ORIENTED SKILLS DEVELOPMENT PROJECT (EOSDP) andproduced by curriculum officers at the SKILLS TRAINING RESOURCES UNIT(STRU)
NOT FOR SALE
TH007ix
OCCUPATIONAL SKILLS DEVELOPMENT
SHORT COURSEFor
Papua New Guinea Non-Formal Sector
EMPLOYMENT ORIENTED SKILLS DEVELOPMENT PROJECT - SKILLS TRAINING RESOURCE UNIT 1
Types of fasteners
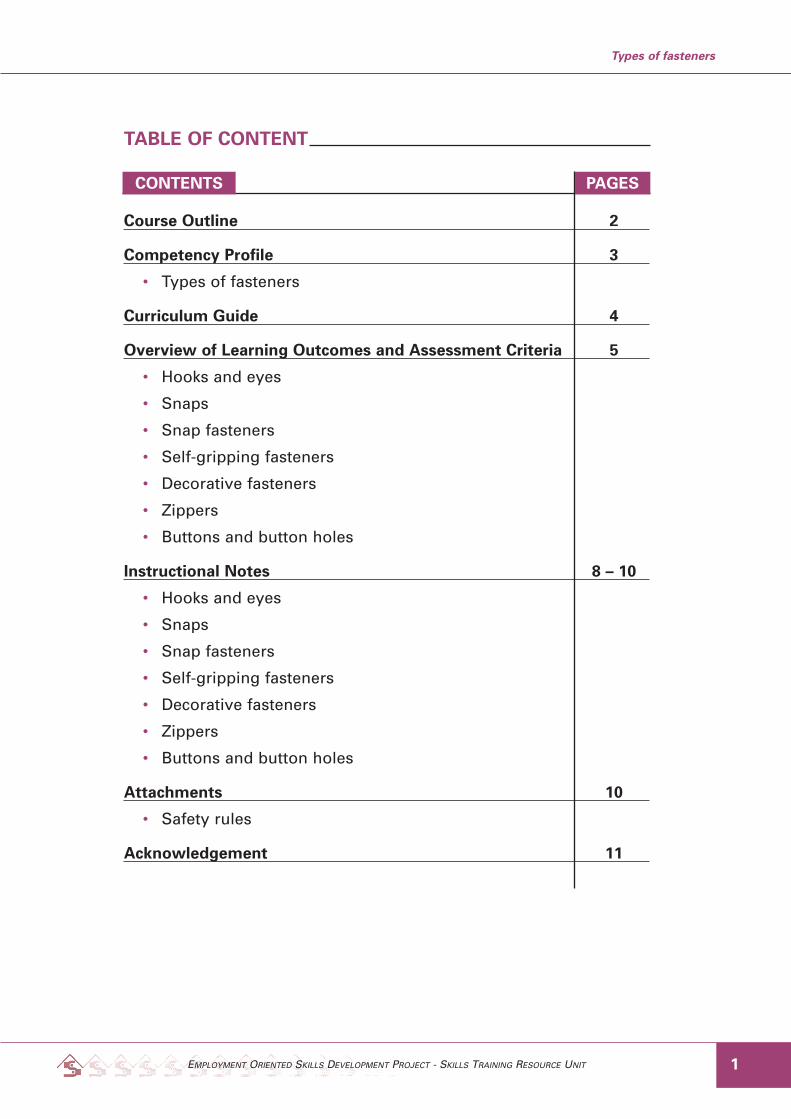
TABLE OF CONTENT
Course Outline 2
Competency Profile 3
• Types of fasteners
Curriculum Guide 4
Overview of Learning Outcomes and Assessment Criteria 5
• Hooks and eyes
• Snaps
• Snap fasteners
• Self-gripping fasteners
• Decorative fasteners
• Zippers
• Buttons and button holes
Instructional Notes 8 – 10
• Hooks and eyes
• Snaps
• Snap fasteners
• Self-gripping fasteners
• Decorative fasteners
• Zippers
• Buttons and button holes
Attachments 10
• Safety rules
Acknowledgement 11
CONTENTS PAGES
EMPLOYMENT ORIENTED SKILLS DEVELOPMENT PROJECT - SKILLS TRAINING RESOURCE UNIT
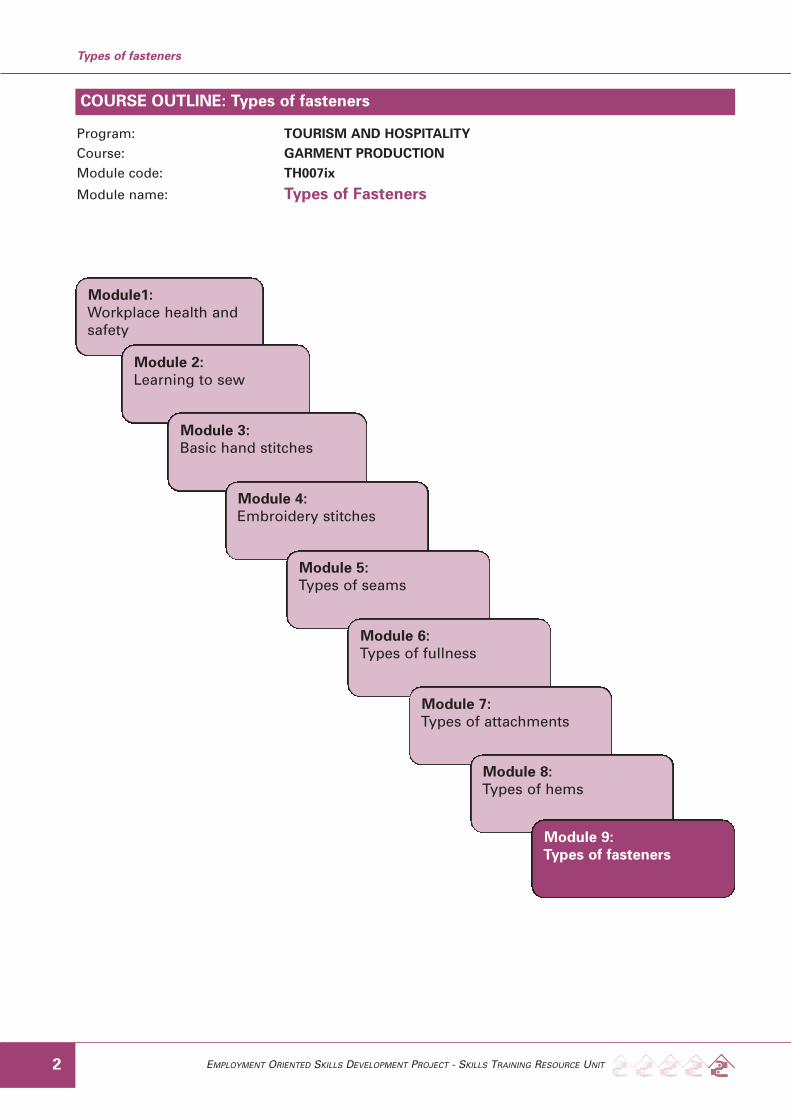
Program: TOURISM AND HOSPITALITYCourse: GARMENT PRODUCTIONModule code: TH007ix
Module name: Types of Fasteners
Types of fasteners
2
Module1:Workplace health andsafety
Module 2:Learning to sew
Module 3:Basic hand stitches
Module 4:Embroidery stitches
Module 5:Types of seams
Module 6:Types of fullness
Module 7:Types of attachments
Module 8:Types of hems
Module 9:Types of fasteners
COURSE OUTLINE: Types of fasteners

EMPLOYMENT ORIENTED SKILLS DEVELOPMENT PROJECT - SKILLS TRAINING RESOURCE UNIT
Duty Task
3
Types of fasteners
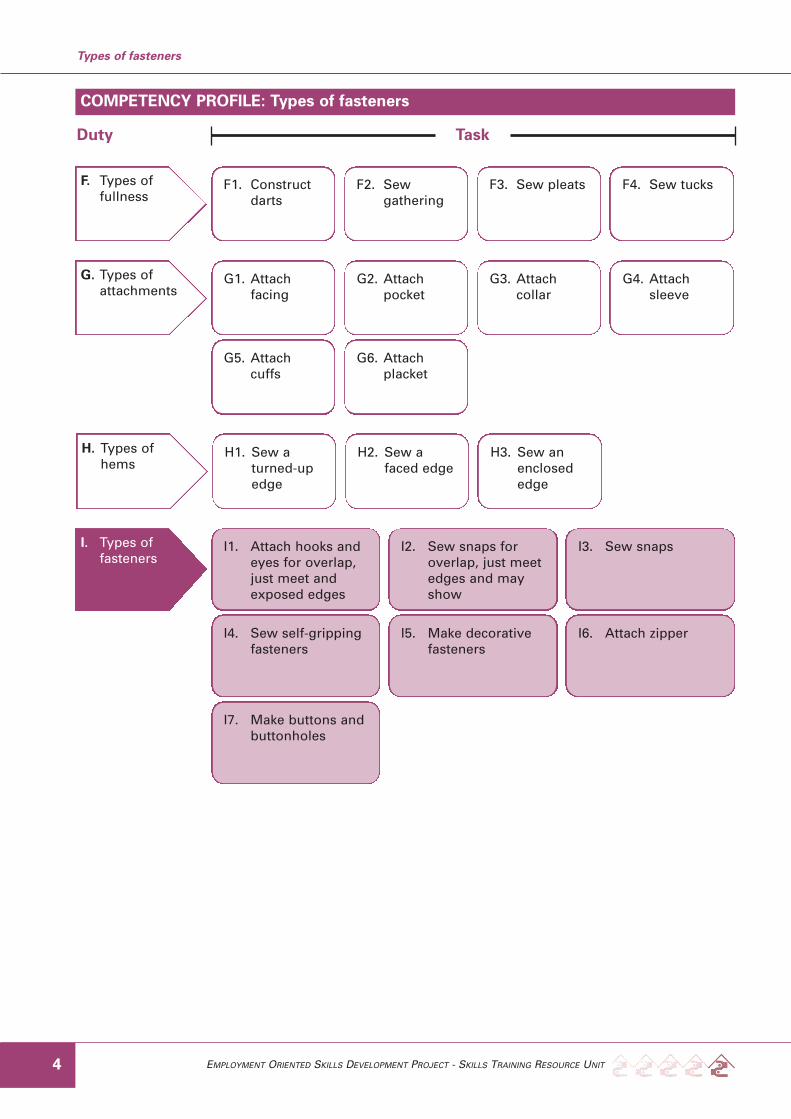
COMPETENCY PROFILE: Types of fasteners
A. Workplacehealth andsafety
A1. Safetyregulations
A2. Hazards/Risks
A3. Contingencymeasures
B. Introductionto sewing
B1. Definesewing
B2. Identifytools andsupplies
B3. Sewingmachineoperation
B4. Sewingarea
C. Basichand stitches
C1. Tackingstitch
C2. Runningstitch
C3. Back stitch C4. Slip stitch
C5. Overcastingstitch
C6. Blanketstitch
C7. Buttonholestitch
D. Embroiderystitches
D1. Chainstitch
D2. Stem stitch D3. Satin stitch D4. Crossstitch
D5. Herringbonestitch
D6. Lazy daisystitch
D7. Frenchknot stitch
D8. Cretanstitch
E. Types ofseams
E1. Open seam E2. Frenchseam
E3. Flat felledseam
EMPLOYMENT ORIENTED SKILLS DEVELOPMENT PROJECT - SKILLS TRAINING RESOURCE UNIT
Types of fasteners
4
Duty Task
COMPETENCY PROFILE: Types of fasteners
F4. Sew tucksF. Types offullness
F1. Constructdarts
F2. Sewgathering
F3. Sew pleats
G4. Attachsleeve
G. Types ofattachments
G1. Attachfacing
G2. Attachpocket
G3. Attachcollar
G5. Attachcuffs
G6. Attachplacket
H. Types ofhems
H1. Sew aturned-upedge
H2. Sew afaced edge
H3. Sew anenclosededge
I. Types offasteners
I1. Attach hooks andeyes for overlap,just meet andexposed edges
I2. Sew snaps foroverlap, just meetedges and mayshow
I3. Sew snaps
I4. Sew self-grippingfasteners
I7. Make buttons andbuttonholes
I5. Make decorativefasteners
I6. Attach zipper
EMPLOYMENT ORIENTED SKILLS DEVELOPMENT PROJECT - SKILLS TRAINING RESOURCE UNIT 5
Types of fasteners
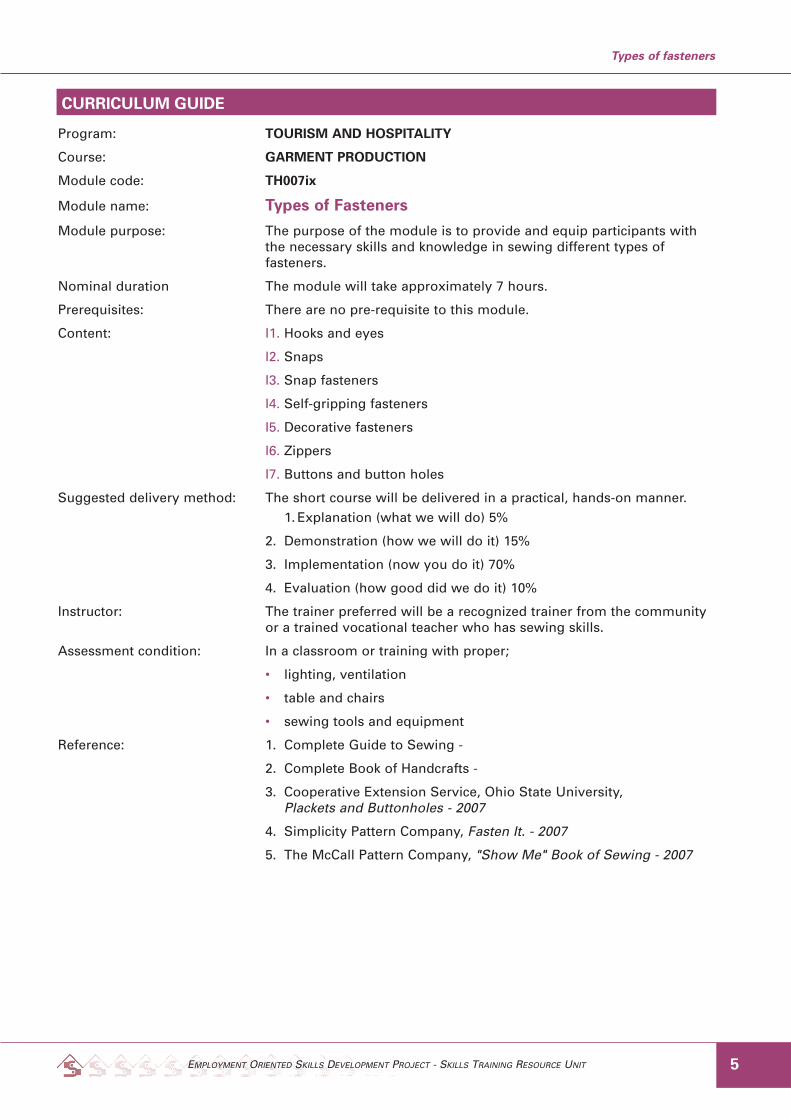
Program: TOURISM AND HOSPITALITY
Course: GARMENT PRODUCTION
Module code: TH007ix
Module name: Types of Fasteners
Module purpose: The purpose of the module is to provide and equip participants withthe necessary skills and knowledge in sewing different types offasteners.
Nominal duration The module will take approximately 7 hours.
Prerequisites: There are no pre-requisite to this module.
Content: I1. Hooks and eyes
I2. Snaps
I3. Snap fasteners
I4. Self-gripping fasteners
I5. Decorative fasteners
I6. Zippers
I7. Buttons and button holes
Suggested delivery method: The short course will be delivered in a practical, hands-on manner.1. Explanation (what we will do) 5%
2. Demonstration (how we will do it) 15%
3. Implementation (now you do it) 70%
4. Evaluation (how good did we do it) 10%
Instructor: The trainer preferred will be a recognized trainer from the communityor a trained vocational teacher who has sewing skills.
Assessment condition: In a classroom or training with proper;
• lighting, ventilation
• table and chairs
• sewing tools and equipment
Reference: 1. Complete Guide to Sewing -
2. Complete Book of Handcrafts -
3. Cooperative Extension Service, Ohio State University,Plackets and Buttonholes - 2007
4. Simplicity Pattern Company, Fasten It. - 2007
5. The McCall Pattern Company, "Show Me" Book of Sewing - 2007
CURRICULUM GUIDE

Overview of Learning Outcomes and AssessmentCriteria
On successfully completion of the course theparticipants will be able to identify different typesof fasteners and demonstrate procedures insewing fasteners onto the garments.
APPENDIX 1: Training and Assessment Guide(Learning Outcome)
Learning outcome I1.1:• Sew samples of hook and eye for edges that
overlap, just meet and edges that are exposed.
Teaching strategy:Learning activities for the participants mustinclude the instructor to;1.1 Identify the type of the fastener.1.2 Explain where the hook and eye can be used
on a garment.1.3 Identify tools and supplies to use.1.4 Demonstrate steps in attaching the hook and
eye on a garment.
Assessment condition:In a classroom situation or a training hall wherethe participants are provided with;• teaching notes • sample of hook and eye• hand sewing needle• thread• complete garment
Assessment criteria:The participants have;1.1.1 Named the types of fasteners.
a. edges that overlapb. just meet edgesc. exposed edges
1.1.2 Showed where the hook and eye can beapplied.
1.1.3 Listed tools and supplies to use.1.1.4 Sewed samples of hooks and eyes on a
garment.
Assessment method:• Oral question• Observation• Short answer questions
APPENDIX 2: Training and Assessment Guide(Learning Outcome)
Learning outcome I2.1:• Sew samples of snaps for edges that overlap,
just meet and that may show.
Teaching strategy:Learning activities for the participants mustinclude the instructor to;2.1 Identify the type of the fastener.2.2 Explain where the snaps can be used on
garments.2.3 Identify tools and supplies to use.2.4 Demonstrate steps in attaching the snaps on
a garment .
Assessment condition:In a classroom situation or a training hall wherethe participants are provided with;• teaching notes • sample of snaps• hand sewing needle• thread• complete garment
Assessment criteria:The participants have;2.1.1 Named types of fasteners.2.1.2 Outlined where snaps can applied on a
garment.2.1.3 Listed tools to use.2.1.4 Applied procedures in attaching the snaps.
Assessment method:• Oral question• Observation• Short answer questions
EMPLOYMENT ORIENTED SKILLS DEVELOPMENT PROJECT - SKILLS TRAINING RESOURCE UNIT
Types of fasteners
6
Task I1: Hooks and eyes.
Suggested minimum instructional time: 1 hour
Task I2: Snaps.
Suggested minimum instructional time: 1 hour

APPENDIX 3: Training and Assessment Guide(Learning Outcome)
Learning outcome I3.1:• Sew a sample of snaps fasteners on a garment.
Teaching strategy:Learning activities for the participants mustinclude the instructor to;3.1 Identify the type of the snap fasteners.3.2 Explain where the snaps can be used on
garments.3.3 Identify tools and supplies to use.3.4 Demonstrate steps in attaching the snaps
fasteners on a garment .
Assessment condition:In a classroom situation or a training hall wherethe participants are provided with;• teaching notes • sample of snap fasteners• hand sewing needle• thread• complete garment
Assessment criteria:The participants have;3.1.1 Named the fastener.3.1.2 Outlined where the snaps fasteners can be
applied on garments.3.1.3 Listed tools and supplies to use.3.1.4 Attached snaps fasteners on a garment.
Assessment method:• Oral question• Observation• Short answer questions
APPENDIX 4: Training and Assessment Guide(Learning Outcome)
Learning outcome I4.1:• Sew a sample of self-gripping fasteners on a
garment.
Teaching strategy:Learning activities for the participants mustinclude the instructor to;4.1 Identify the type of the fastener.4.2 Explain where the grip fasteners can be
applied on garments.4.3 Identify tools and supplies to use.4.4 Demonstrate steps in sewing self-gripping
fasteners on a garment.
Assessment condition:In a classroom situation or a training hall wherethe participants are provided with;• teaching notes • sample of self-gripping fasteners• hand sewing needle• thread• complete garment
Assessment criteria:The participants have;4.1.1 Named the fastener.4.1.2 Outline where the self-gripping fasteners
can be applied.4.1.3 Listed tools and supplies to use.4.1.4 Attached self-gripping fasteners on a gament.
Assessment method:• Oral question• Observation• Short answer questions
EMPLOYMENT ORIENTED SKILLS DEVELOPMENT PROJECT - SKILLS TRAINING RESOURCE UNIT 7
Types of fasteners
Task I4: Self-gripping fasteners.
Suggested minimum instructional time: 1 hour
Task I3: Snap fasteners.
Suggested minimum instructional time: 1 hour
APPENDIX 5: Training and Assessment Guide(Learning Outcome)
Learning outcome I5:1• Sew sample of decorative fasteners.
Teaching strategy:Learning activities for the participants mustinclude the instructor to;5.1 Identify the type of the decorative fastener.5.2 Identify the type of garment the decorative
fasteners can be applied on. 5.3 Identify tools and supplies to use.5.4 Demonstrate steps in making the decorative
fasteners. 5.5 Explain where the decorative fasteners can
be used on garments.
Assessment condition:In a classroom situation or a training hall wherethe participants are provided with;• teaching notes • sample of decorative fasteners• hand sewing needle• thread• complete garment
Assessment criteria:The participants have;5.1.1 Named the fastener.5.1.2 Outlined where the decorative fasteners can
be applied on garments.5.1.3 Listed tools and supplies to use.5.1.4 Made decorative fasteners.5.1.5 Attached the decorative fasteners on a
garment.
Assessment method:• Oral question• Observation• Short answer questions
APPENDIX 6: Training and Assessment Guide(Learning Outcome)
Learning outcome I6:1• Attach a zipper on a garment.
Teaching strategy:Learning activities for the participants mustinclude the instructor to;6.1 Identify the types of zippers.6.2 Explain where the zippers can be used on
garments.6.3 Identify tools and supplies to use.6.4 Demonstrate steps in attaching the zipper on
a garment.
Assessment condition:In a classroom situation or a training hall wherethe participants are provided with;• teaching notes • sample of zippers• hand sewing needle• sewing machine• thread• complete garment
Assessment criteria:The participants have;6.1.1 Named types of zippers.6.1.2 Outlined where the zippers can be applied.6.1.3 Listed tools and supplies to use 6.1.4 Attached zipper on the garment.
Assessment method:• Observation• Oral questioning• Short answer questions
EMPLOYMENT ORIENTED SKILLS DEVELOPMENT PROJECT - SKILLS TRAINING RESOURCE UNIT
Types of fasteners
8
Task I6: Insert zipper.
Suggested minimum instructional time: 1 hour
Task I5: Decorative fasteners.
Suggested minimum instructional time: 1 hour

APPENDIX 7: Training and Assessment Guide(Learning Outcome)
Learning outcome I7:1• Make buttons and button holes.
Teaching strategy:Learning activities for the participants mustinclude the instructor to;7.1 Identify the type of the buttons and button
holes.7.2 Explain where the buttons and buttons holes
can be used on garments.7.3 Identify tools and supplies to use.7.4 Demonstrate steps in making the buttons.7.5 Demonstrate steps in making the button holes.
Assessment condition:In a classroom situation or a training hall wherethe participants are provided with;• teaching notes• samples of buttons and button holes• hand sewing needle• sewing machine• thread• complete garment
Assessment criteria:The participants have;7.1.1 Named the type of the buttons and button
holes.7.1.2 Outlined where the buttons and button
holes can be applied.7.1.3 Listed tools and supplies to use.7.1.4 Made buttons.7.1.5 Maded button holes.
Assessment method:• Observation• Oral questioning• Short answer questions
APPENDIX 8: INSTRUCTIONAL NOTES
INTRODUCTION
Fasteners are used on garments mainly to keepplackets closed, but they sometimes substitute forbuttons. The most common fasteners are snaps,and hooks and eyes. Some are decorative andadd to the appearance of the garment.Your choice of fastener depends on the fabric youwill use, the kind of opening, and the type ofgarment. For example, a delicate fabric may callfor covered snaps while rugged active wearneeds a heavy duty snap fastener.
CLOSURE BASICS
To close and fasten most garments, one edge ofthe opening laps over the other. On women'sgarments the right side laps over the left; men'slap left over right. Most fasteners have two parts-one part is sewn to the overlap, the other to theunderlap.The following directions are for attachingfasteners to women's clothes. Remember toreverse the positions when sewing for men. Also,be aware that right side and left side refer to thesides that are on the right and left when you arewearing the garment.
HOOKS AND EYES
Hooks and eyes are hidden fasteners. They canbe used to hold edges together or overlapped.Hooks and eyes are available in several sizes andcolors to match different fabrics. Hooks comewith either loops or straight eyes (fig. 1). Mostmust be sewn in place, but no-sew hooks andeyes are also available. The no-sew versionsmust be clamped in place. Always follow theinstructions in the package.
EMPLOYMENT ORIENTED SKILLS DEVELOPMENT PROJECT - SKILLS TRAINING RESOURCE UNIT 9
Types of fasteners
Task I7: Buttons and button holes.
Suggested minimum instructional time: 1 hour
I1: Hooks and eyes
Figure 1
Hook
Loop
Straight
DetailFigure 2

For edges that overlap:
1. Complete the garment before sewing on thefasteners.
2. Select a hook and straight eye that is right forthe fabric. Place the hook on the wrong side 1/8inch from the edge of the overlap (fig. 2). Sewit in place with a few tacking or buttonholestitches through the holes and across the endto hold it flat. The stitches should not show onthe outside of the garment.
3. Close the placket and align the overlap. Markthe position for the eye with pins. Sew the eyeto the underlap.
4. If the opening is wide as for a waistband, usetwo sets of hooks and eyes or a skirt/pantshook.
For edges that just meet:
1. Complete the garment before sewing on thefasteners.
2. Select a hook and loop eye that is right for thefabric. Sew it on as in step 2 above.
3. Close the placket to align the edges. Mark theeye position with pins.
4. Let the eye extend slightly beyond thegarment's edge. Tack in place with stitchesthrough the holes. Make a few stitches alongthe sides of the loop to hold it flat.
For edges that are exposed:
If the fastener area of the garment will be exposed,such as a back neckline opening, you may want touse a short crocheted chain or buttonhole loopinstead of an eye. Do not use this method in anarea of strain.
CROCHETED CHAIN
EMPLOYMENT ORIENTED SKILLS DEVELOPMENT PROJECT - SKILLS TRAINING RESOURCE UNIT
Types of fasteners
10
Figure 4a
Figure 4b
Figure 4c
Figure 4d
Figure 4e
Figure 4f
Figure 4g
Figure 3
Detail

1. Attach the hook as in figure 3. Align thegarment edges and mark with pins where thechain should begin and end.
2. Use a double thread with a knot. Bring thethread up through one of the markings. Take atiny stitch to secure the thread (fig. 4).
3. Leave a loop large enough for your fingers toslip through (4a). Slip your thumb and firstfinger through the loop. Pull the threadthrough the loop to make a second loop (4b).Tighten the first loop as you pull (4c). Repeatthese steps (4d and e) until the chain is theright length.
4. Run the needle through the last loop to lockthe chain (4f).
5. Tack the finished loop securely to the othermark (4g). There should be some slack in theloop.
BUTTONHOLE LOOP
1. Attach the hook as in figure 3. Close theplacket and mark with pins where the loopshould begin and end.
2. Use a double thread with a knot. Insert theneedle through the mark at one end of theloop. Take a stitch through the mark at theother end, allowing a little slack.
3. Take another stitch at the first end and fastenthe thread securely. Use four strands of threadextending from one mark to the other withsome slack. These form the core of the loop.
4. Cover the core with the buttonhole stitch (fig.5). Fasten the last stitch in the fabric.
Snaps are metal fasteners (fig. 6) that come inseveral sizes for lightweight to heavy fabrics.They can be covered with matching fabric if themetal snap is too obvious.Use snaps on overlapping edges where there willbe little strain. Sometimes they can be used whenthere is no overlap by the hanging snap method.
For edges that overlap:
1. Complete the garment before sewing on thesnap.
2. Sew the ball of the snap to the overlap about1/8 inch from the edge (fig. 7). Make severaltacking stitches through each hole, then runthe thread under the snap to the next hole.Stitches should not show on the outside of thegarment.
3. Rub chalk on the ball and close the placket.The chalk will mark the place for the socket.
4. Sew the socket in place the same way.
For edges that just meet:
1. Complete the garment before sewing on thesnap.
2. Sew the ball of the snap to the finished edgeof the garment by sewing through only onehole (fig. 8). This is called a hanging snap.
3. Sew the socket in place as shown.
EMPLOYMENT ORIENTED SKILLS DEVELOPMENT PROJECT - SKILLS TRAINING RESOURCE UNIT 11
Types of fasteners
Figure 5
Figure 6
I2: Snaps
Figure 7
Figure 8
Figure 9
thread blanket-stitched loop
ball socket

EMPLOYMENT ORIENTED SKILLS DEVELOPMENT PROJECT - SKILLS TRAINING RESOURCE UNIT
For snaps that may show:
1. Complete the garment before sewing on thesnap.
2. Cut two circles of matching fabric or lining.The circles should be twice the diameter of thesnap.
3. Run a gathering stitch along the outside edgeof one circle (fig. 9a). Place the socket of thesnap face down in the center of the circle (9b).Draw up the thread (9c) and tack it securely tothe underside of the snap (9d).
4. Cover the ball of the snap the same way. 5. Sew the snap in place on the garment as in
figure 7. Opening and closing the snap willopen the center hole
No-sew snap fasteners can be used in place ofbuttons and buttonholes on Western-look casualwear, jeans, children's clothes, and other activewear. Snap fasteners are sold packaged withdirections and an applicator (fig. 10), or you canbuy the pliers-like tool separately. Both plain anddecorative styles are strong and long wearing.1. Complete the garment before attaching fasteners.2. Mark the place for the ball part of the fastener
on the overlap side of the garment (fig.11). 3. Follow the package directions to attach. 4. Close the placket to mark the place where the
socket part of the fastener goes. 5. Attach the socket part. Gripper tape is an easy-to-apply and decorativeuse of snap fasteners. It is good for sportswearand infant sleepwear. The fasteners have beenapplied to strips of cloth tape. Simply, machine
stitch the socket side of the tape to the underlapof the garment and the ball side to the overlap.Be sure to line up the snaps carefully.
Self-gripping fasteners can be sewn on by handor by machine (fig. 12). These fasteners are madeof tiny, firm, polyester hooks on one piece andsoft, nylon loops on the other. Together, they gripwith strength, but peel apart easily. The size ofthe fastener indicates its holding strength. Self-gripping fasteners are packaged in several shapes(fig. 13) and come in fashion colors.1. To conceal stitches, sew fasteners to the facing
before joining the facing to the garment. Sewthe hook piece on the side of the placket thatwill face away from the body.
2. Secure fasteners in place with pins or gluestick before stitching.
3. Sew fasteners directly to the facing using 12 to15 machine stitches per inch, or sew by hand.
If you apply fasteners after the garment is complete,hide the stitching on the outside with buttons or trim.
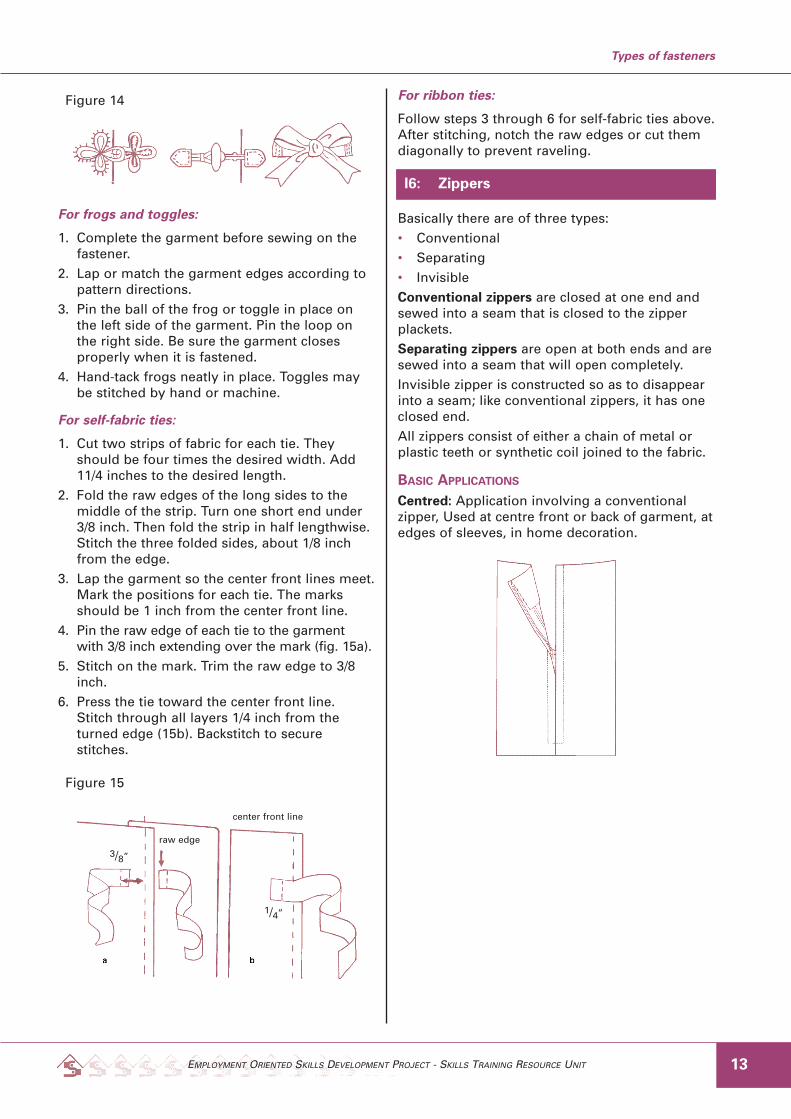
Some popular decorative fasteners are frogs,toggles, and ties (fig.14). Use them instead ofbuttons. Frogs can be bought or handmade. Youusually see them on oriental-style jackets and oncapes, velvet jackets, or quilted vests. Toggles canbe used on all kinds of outerwear. Ties make aneasy closure for all types of clothing. You can useribbon or matching fabric.
Types of fasteners
12
Figure 10
Figure 11
I3: Snap fasteners
I4: Self-gripping fasteners
Figure 12
Figure 13
I5: Decorative fasteners
loops hooks
handstitched neckline style
EMPLOYMENT ORIENTED SKILLS DEVELOPMENT PROJECT - SKILLS TRAINING RESOURCE UNIT
For frogs and toggles:
1. Complete the garment before sewing on thefastener.
2. Lap or match the garment edges according topattern directions.
3. Pin the ball of the frog or toggle in place onthe left side of the garment. Pin the loop onthe right side. Be sure the garment closesproperly when it is fastened.
4. Hand-tack frogs neatly in place. Toggles maybe stitched by hand or machine.
For self-fabric ties:
1. Cut two strips of fabric for each tie. Theyshould be four times the desired width. Add11/4 inches to the desired length.
2. Fold the raw edges of the long sides to themiddle of the strip. Turn one short end under3/8 inch. Then fold the strip in half lengthwise.Stitch the three folded sides, about 1/8 inchfrom the edge.
3. Lap the garment so the center front lines meet.Mark the positions for each tie. The marksshould be 1 inch from the center front line.
4. Pin the raw edge of each tie to the garmentwith 3/8 inch extending over the mark (fig. 15a).
5. Stitch on the mark. Trim the raw edge to 3/8inch.
6. Press the tie toward the center front line.Stitch through all layers 1/4 inch from theturned edge (15b). Backstitch to securestitches.
For ribbon ties:
Follow steps 3 through 6 for self-fabric ties above.After stitching, notch the raw edges or cut themdiagonally to prevent raveling.
Basically there are of three types:• Conventional• Separating• InvisibleConventional zippers are closed at one end andsewed into a seam that is closed to the zipperplackets.Separating zippers are open at both ends and aresewed into a seam that will open completely.Invisible zipper is constructed so as to disappearinto a seam; like conventional zippers, it has oneclosed end.All zippers consist of either a chain of metal orplastic teeth or synthetic coil joined to the fabric.
BASIC APPLICATIONS
Centred: Application involving a conventionalzipper, Used at centre front or back of garment, atedges of sleeves, in home decoration.
13
Types of fasteners
Figure 14
I6: Zippers
Figure 15
center front line
raw edge
3/8”
1/4”
EMPLOYMENT ORIENTED SKILLS DEVELOPMENT PROJECT - SKILLS TRAINING RESOURCE UNIT
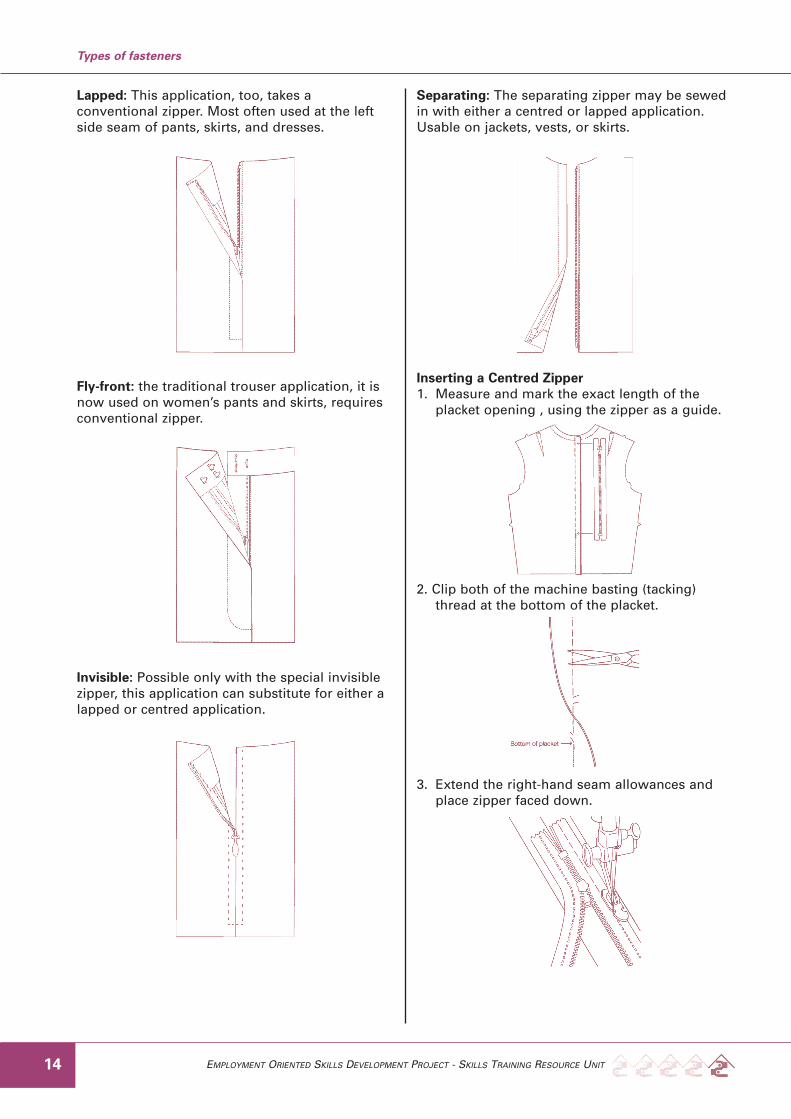
Lapped: This application, too, takes aconventional zipper. Most often used at the leftside seam of pants, skirts, and dresses.
Fly-front: the traditional trouser application, it isnow used on women’s pants and skirts, requiresconventional zipper.
Invisible: Possible only with the special invisiblezipper, this application can substitute for either alapped or centred application.
Separating: The separating zipper may be sewedin with either a centred or lapped application.Usable on jackets, vests, or skirts.
Inserting a Centred Zipper1. Measure and mark the exact length of the
placket opening , using the zipper as a guide.
2. Clip both of the machine basting (tacking)thread at the bottom of the placket.
3. Extend the right-hand seam allowances andplace zipper faced down.
Types of fasteners
14
EMPLOYMENT ORIENTED SKILLS DEVELOPMENT PROJECT - SKILLS TRAINING RESOURCE UNIT
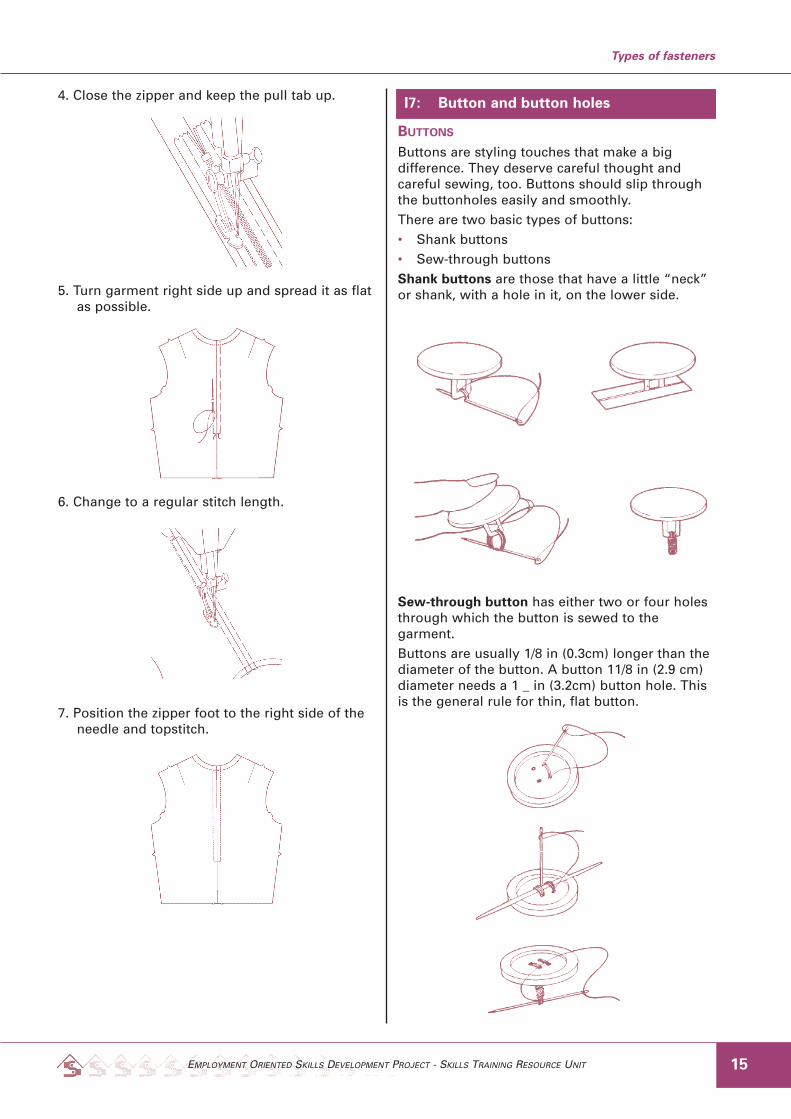
4. Close the zipper and keep the pull tab up.
5. Turn garment right side up and spread it as flatas possible.
6. Change to a regular stitch length.
7. Position the zipper foot to the right side of theneedle and topstitch.
BUTTONS
Buttons are styling touches that make a bigdifference. They deserve careful thought andcareful sewing, too. Buttons should slip throughthe buttonholes easily and smoothly.There are two basic types of buttons:• Shank buttons• Sew-through buttonsShank buttons are those that have a little “neck”or shank, with a hole in it, on the lower side.
Sew-through button has either two or four holesthrough which the button is sewed to thegarment.Buttons are usually 1/8 in (0.3cm) longer than thediameter of the button. A button 11/8 in (2.9 cm)diameter needs a 1 _ in (3.2cm) button hole. Thisis the general rule for thin, flat button.
15
Types of fasteners
I7: Button and button holes

EMPLOYMENT ORIENTED SKILLS DEVELOPMENT PROJECT - SKILLS TRAINING RESOURCE UNIT
Fabric buttons made to match the garment arethe answer when suitable ready-made buttonscannot be found.
To make fabric buttons
1. Select a ring of the diameter required for thefinished button. Cut a circle of fabric slightlyless than twice the diameter of ring.
2. Using double thread, sew around fabric circlewith small running stitches close to the edge.Leave thread and needle attached to fabric atthe end of stitching.
3. Place the ring in the centre of fabric circle.Gather fabric around the ring by pulling on theneedle and thread until the hand stitches bringthe cut edges of fabric together.
4. Secure gathered-up fabric around ring bypulling up hand stitches tightly. Fasten withseveral short backstitches.
5. Decorate button by taking small backstitchesaround and close to ring, through both fabriclayers. Use buttonhole twist layers. Attachbutton to garment with a thread shank.
ButtonholesAll of the many buttonhole methods arevariations of two basic types, bound and worked.The method you choose for a garment willdepend on the design of that garment.• Bound buttonholes are made by stitching
strips of fabric to the buttonhole location inany of several ways.
• Machine-worked buttonhole consist of twoparallel rows of zigzag stitches
• Hand-worked buttonholes are made byfinishing a cut in the fabric with handbuttonhole stitches.
Machine-worked buttonholes are open only afterstitching is complete.
Determining and testing buttonhole lengthThe length of the buttonhole opening shouldequal the diameter of the button plus its height.On a bound buttonhole, the measurement will bethe total length of the buttonhole from end to end.On a worked buttonhole, however , because ofthe finishing that is allowed at each end, thespace allowed for must be 1/8 inch greater thatthe actual size.To check buttonhole length, make a slash in ascrap of a garment fabric equal to the lengthdesired for the buttonhole opening. If the buttonslips easily, buttonhole length is correct.
Types of fasteners
16

Measuring for a bound and worked buttonholes Buttonholes are basically slits cut through thefabric. The raw edges of a slit may be finishedwith fabric (bound buttonhole), or may be workedover with thread by machine or by hand (workedbuttonhole) Buttonholes are usually horizontal orvertical; occasionally, to carry out a design, theymay be diagonal.The three key placement points for button-holesare:• the fullest part of the bust at the neck• the fullest part of the bust waist• the waist
EMPLOYMENT ORIENTED SKILLS DEVELOPMENT PROJECT - SKILLS TRAINING RESOURCE UNIT 17
Types of fasteners
Diameter
Measuring for a bound buttonhole
Measuring for a worked buttonhole
Height
Height1/8” (3mm) tofinish ends
Diameter
1
Horizontal
Vertical
2
3
4
EMPLOYMENT ORIENTED SKILLS DEVELOPMENT PROJECT - SKILLS TRAINING RESOURCE UNIT
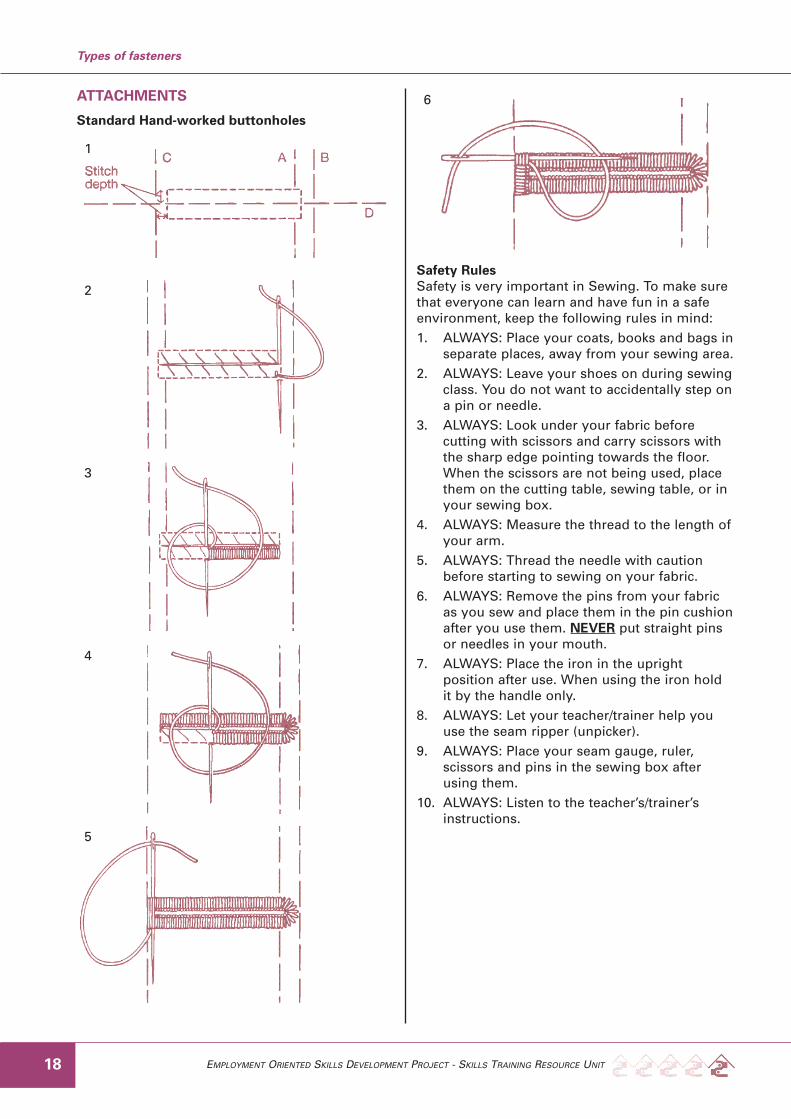
ATTACHMENTS
Standard Hand-worked buttonholes
Safety RulesSafety is very important in Sewing. To make surethat everyone can learn and have fun in a safeenvironment, keep the following rules in mind:1. ALWAYS: Place your coats, books and bags in
separate places, away from your sewing area.2. ALWAYS: Leave your shoes on during sewing
class. You do not want to accidentally step ona pin or needle.
3. ALWAYS: Look under your fabric beforecutting with scissors and carry scissors withthe sharp edge pointing towards the floor.When the scissors are not being used, placethem on the cutting table, sewing table, or inyour sewing box.
4. ALWAYS: Measure the thread to the length ofyour arm.
5. ALWAYS: Thread the needle with cautionbefore starting to sewing on your fabric.
6. ALWAYS: Remove the pins from your fabricas you sew and place them in the pin cushionafter you use them. NEVER put straight pinsor needles in your mouth.
7. ALWAYS: Place the iron in the uprightposition after use. When using the iron holdit by the handle only.
8. ALWAYS: Let your teacher/trainer help youuse the seam ripper (unpicker).
9. ALWAYS: Place your seam gauge, ruler,scissors and pins in the sewing box afterusing them.
10. ALWAYS: Listen to the teacher’s/trainer’sinstructions.
Types of fasteners
18
3
4
5
6
1
2

This short course module, developed in Papua New Guinea, is based on the competency-based trainingmodel.The Skill Training Resource Unit (STRU) of Employment Oriented Skills Development Project (EOSDP)in conjunction with Department (TVET) division and the implementing agency Department forCommunity Development Services wish to express their thanks to the people who have contributed inproducing the module.We hope it will provide basic knowledge and skills for the informal and the formal sectors especially thewomen, men and the youth to be employed or self-employed through having better skills for tomorrow.
EMPLOYMENT ORIENTED SKILLS DEVELOPMENT PROJECT - SKILLS TRAINING RESOURCE UNIT 19
Types of fasteners
Acknowledgement

p o box 1097, waiganinational capital districtpapua new guinea.
tel: (675) 323 2633fax: (675) 323 0944
The development of this short course wassponsored by the ADB-PNGEMPLOYMENT SKILLS DEVELOPMENTPROJECT (EOSDP) and produced bycurriculum officers at the SKILLSTRAINING RESOURCES UNIT (STRU)