7nox file7nox user manual 2 document control revision history this document is version controlled...
TRANSCRIPT

7NOX
User Manual for Site Device
Book after-hours air conditioning in commercial buildings with ease.

7NOX User Manual
2
Document Control
Revision History
This document is version controlled via the use of revision numbers. The revision
numbers will be incremented each time the document is changed. A minor
revision will be indicated by a change to the number to the right of the point,
such as from 1.1 to 1.2. Normally the document will only be formally re-distributed
when the major version changes, indicated by a change in the number to the left
of the point, such as from 1.2 to 2.0.
Revision Date By Comments
1 16/08/2018 Opsys Solution Ltd Release
Document Release
Name Title

7NOX User Manual
3
Table of Contents
Document Control ............................................................................................................ 2
Revision History ............................................................................................................... 2
Table of Contents .............................................................................................................. 3
Getting Started .................................................................................................................. 4
Specifications .................................................................................................................... 5
Hardware Dimension ........................................................................................................ 6
Webpage Configuration ................................................................................................. 7
Log into Device Interface .............................................................................................. 10
Configure Network.......................................................................................................... 11
Configure 7NOX App ..................................................................................................... 12
Upload a Firmware ......................................................................................................... 13
Configure System Settings ............................................................................................. 14

7NOX User Manual
4
Getting Started
Welcome to the user manual of 7Nox. The purpose of this user manual is to help
the user to set up 7Nox site device. The site device is configurable via its internal
webpage.

7NOX User Manual
5
Specifications
Electrical
Input Micro USB connector
Voltage (V, nominal): 5 VDC
Current (A, nominal): 2.5 A
Environmental
Operating Temperature 0°C to 50°C
Hardware
Device type Raspberry Pi 3 Model B+
Processor Broadcom BCM2837B0,
Cortex-A53 64-bit SoC @ 1.4GHz
Memory 1GB LPDDR2 SDRAM
SD Flash Card 16GB / 32GB
Notes
• This product should only be connected to an external power supply rated
at 5V/2.5 A DC.

7NOX User Manual
6
Hardware Dimension
Attribute Value
Colour Grey
Dimensions 106.5 x 90 x 32 mm
Body Material ABS, Polycarbonate
Mounting Type DIN Rail hook

7NOX User Manual
7
Webpage Configuration
Each device contains an interactive web server, accessible from any Internet-
compatible PC on the local network and compatible with recent version of
Internet explorer (version 11 or later, required) or Chrome (Version 67.0.3396.99,
required). It is factory programmed with a default IP address of 192.168.20.90
and a Class C subnet mask of 255.255.255.0 (/24).
To configure the adapter, attach it to a computer with an Ethernet connection
and a standard web browser. For initial configuration, the PC chosen for the
procedure should temporarily have its IP address.

7NOX User Manual
8
Perform the following steps to configure the adapter:
1. Go to Control Panel
2. Select Network and Sharing Centre
3. Select Change adapter settings

7NOX User Manual
9
4. Right click on network adapter and select Properties
5. Double click on Internet Protocol Version 4 (TCP/IPv4) and apply the
settings. The example below suggests an IP address for the PC of
192.168.20.43, but the final quad of the address could be any value from 3
to 254 – except for 90 which is used by 7Nox site device. After the IP
address of the PC has been set to the same subnet as the adapter, a
browser can access the adapter via tis default IP address.
7NOX User Manual
10
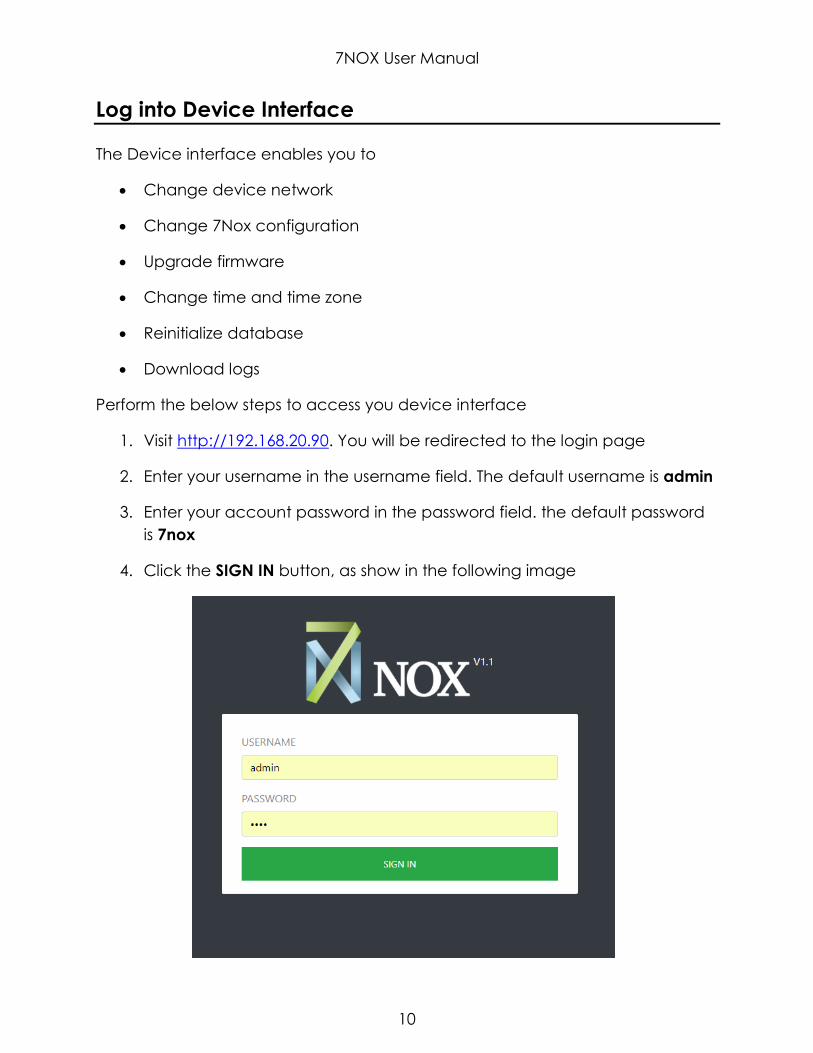
Log into Device Interface
The Device interface enables you to
• Change device network
• Change 7Nox configuration
• Upgrade firmware
• Change time and time zone
• Reinitialize database
• Download logs
Perform the below steps to access you device interface
1. Visit http://192.168.20.90. You will be redirected to the login page
2. Enter your username in the username field. The default username is admin
3. Enter your account password in the password field. the default password
is 7nox
4. Click the SIGN IN button, as show in the following image

7NOX User Manual
11
Configure Network
Perform the following steps to configure 7NOX for Network:
1. Login to your account.
2. Select Network in the left-menu, as shown in the following image:
3. Configure the below settings on the right-hand side:
a. DHCP: Click the button to turn on DHCP.
b. IP Address: Enter the IP address.
c. Gateway: Enter the gateway.
d. Primary DNS: Enter the primary DNS.
4. Click the Submit button.
Note:
After Changes, Click the Reboot Device button to reboot the device.

7NOX User Manual
12
Configure 7NOX App
Perform the following steps to configure 7NOX app:
1. Login to your account.
2. Select 7NOX App in the left-menu, as shown in the following image:
3. Configure the below settings on the right-hand side:
a. Bacnet ID: Enter the Bacnet ID.
b. Bacnet Port: Enter the Bacnet port.
c. Log Mode: Enter the log mode.
d. Site ID: Enter the site ID.
e. URL: Enter the URL.
Site ID and URL are provided by the 7Nox support team at the time of
implementation
4. Click the Submit button.
Note:
After Changes, Click the Reboot Device button to reboot the device.

7NOX User Manual
13
Upload a Firmware
Perform the following steps to upload a firmware:
1. Login to your account.
2. Select Firmware in the left-menu, as shown in the following image:
3. Click the Choose File button on the right-hand side and select the file that
you want to upload.
Note:
After firmware upgrade, Click the Reboot Device button to reboot the
device.

7NOX User Manual
14
Configure System Settings
Perform the following steps to configure system settings:
1. Login to your account.
2. Select System in the left-menu, as shown in the following image:
3. Configure the below settings on the right-hand side:
a. Automatic Time Sync: Click this button to turn on Automatic Time
Sync.
b. System Time: The time of your system is displayed here.
c. Time Zone: Click the drop-down arrow and select your time zone.
4. Click the Submit button.
5. To download the logs, Click Download Logs
6. To reinitialize the database, Click Reinit Database
Note:
After Changes, Click the Reboot Device button to reboot the device.