a beginner’s guide to woodworking
TRANSCRIPT

1
A Beginner’s Guide to Woodworking: Email: [email protected]
Austin Caldwell When it comes to carpentry or woodworking of any kind, there are many benefits. Woodworking is a great stress reliever and is a useful trade to know. From learning how to understand the wood to learning the different techniques to create a masterpiece, there are several skills involved in the process. These skills take years to master, but they are worth it. Wood is the most useful building material; it can be used for almost anything. Want to build a table? Wood. A chair? Wood. A shelf, maybe a countertop, or cabinets? All can be built with wood. Though wood paired with other materials such as metal or epoxy and resin compliments any project and leads to a more masterful creation. The best thing about woodworking is that not only is it fun, but it’s an art that is able to be used to fulfil a need, unlike other types of art.
Wood Types The first step in woodworking is understanding the different wood types. This is a
difficult skill to learn but is very important. With many projects, you will want to know whether the wood needed is hardwood or softwood.
Softwood is wood from gymnosperm trees. Examples of these are conifers and amborellas. Pine is the most commonly used type of softwood. Many projects can be done with pinewood. In fact, as you become a more experienced woodworker, you might use it for the secondary wood in a lot of projects which will be explained later on.
Hardwood come from dicot trees. Typically, hardwood trees are found in the tropical forests, but they are not exclusive to that climate. The most common type of hardwood that people think of is oak. The hardwoods found in tropical environments are typically very expensive but are beautiful in any project. Hardwoods are used as primary wood in woodworking projects.
There is also a type of wood called plywood. Plywood is wood pieces placed on top of each other in rotating angles and glued together. It is often used as a secondary wood as well. Plywood can be used for many types of woodworking projects and is a good type of wood to use when learning basic skills such as using a table saw or learning how to make any basic joints such as a box joint.
Primary versus Secondary Primary wood, the wood that is seen on the project is always the nicest wood used in any piece. To explain I will use a drawer as an example. If you look
Figure 1
2
at the picture labeled “Figure 1” you can see that the main wood, which is most likely a red oak is used for the face of the drawers. Then the arrow points to the inside of the drawer where they use soft maple, and the other arrow points to the birch plywood which they say is used to the dust panel between each drawer and the bottoms of the drawers. In this example, there are two types of secondary wood. The soft maple and the birch plywood. These are considered secondary, because they are just used for structure, and are not always seen. The primary wood is the red oak because it is not only for the structure of the drawers, but it is used to make the drawers look amazing. The purpose of secondary wood is to save money. Hardwood is very expensive, whereas softwoods are much cheaper, and plywood is very inexpensive.
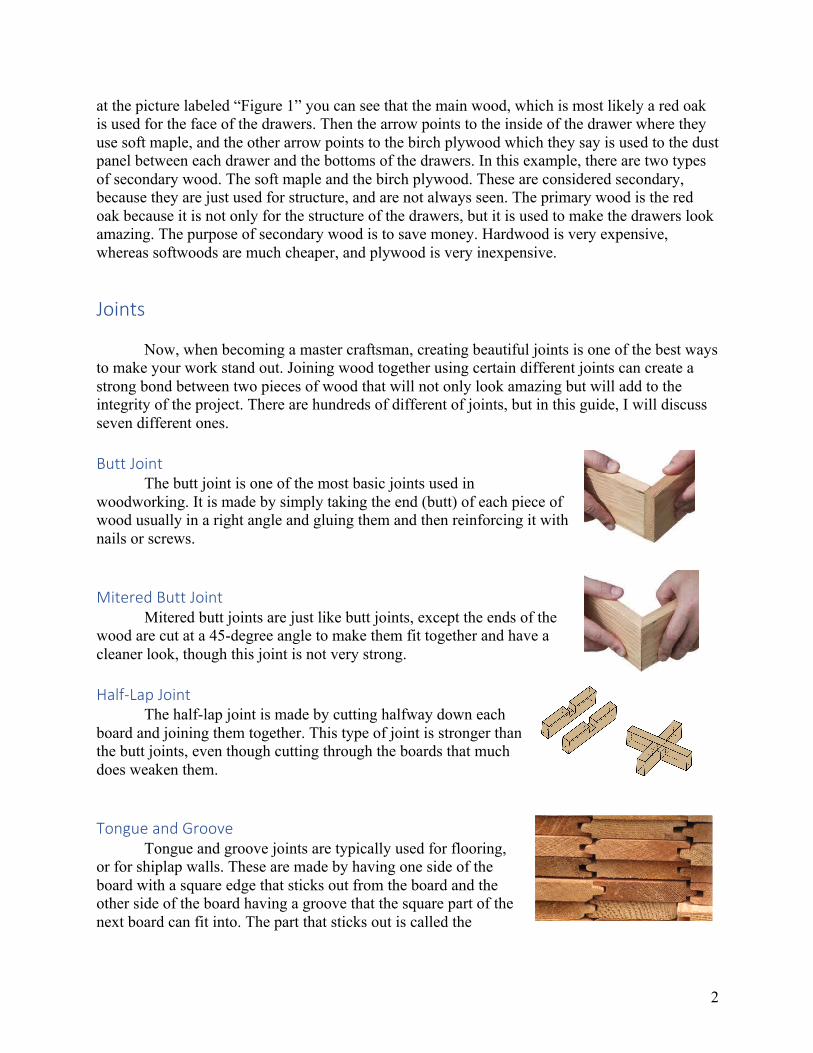
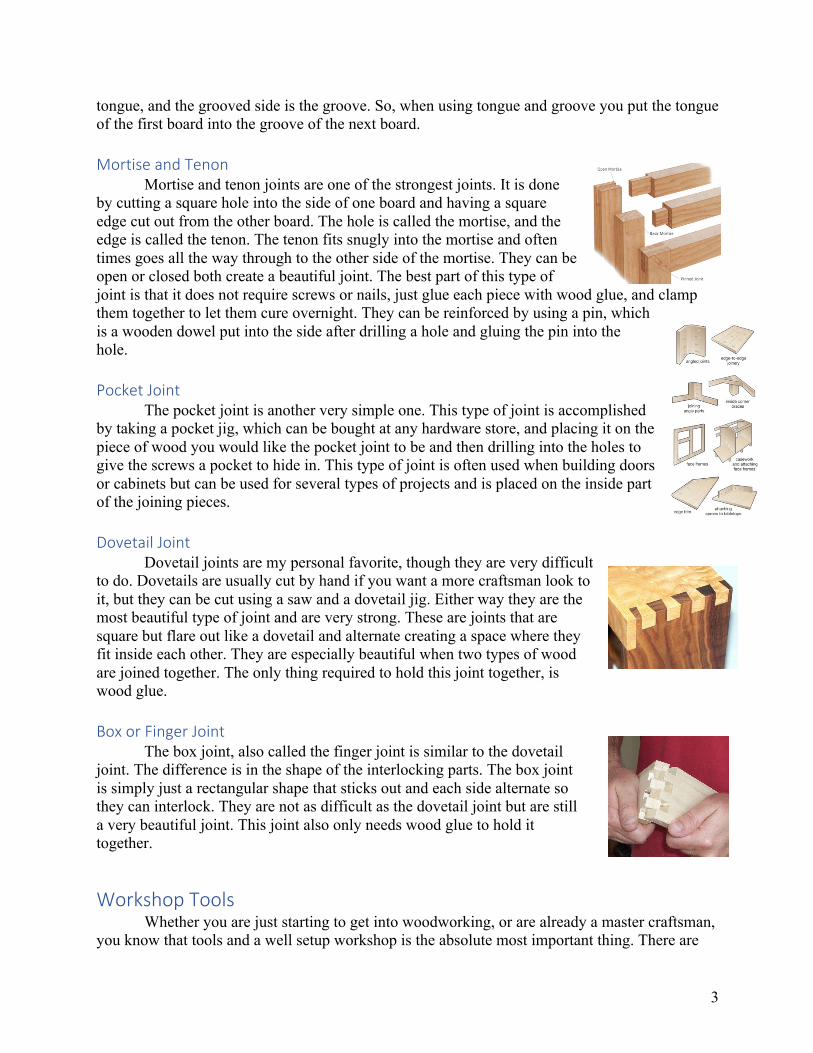
Joints Now, when becoming a master craftsman, creating beautiful joints is one of the best ways to make your work stand out. Joining wood together using certain different joints can create a strong bond between two pieces of wood that will not only look amazing but will add to the integrity of the project. There are hundreds of different of joints, but in this guide, I will discuss seven different ones. Butt Joint The butt joint is one of the most basic joints used in woodworking. It is made by simply taking the end (butt) of each piece of wood usually in a right angle and gluing them and then reinforcing it with nails or screws. Mitered Butt Joint Mitered butt joints are just like butt joints, except the ends of the wood are cut at a 45-degree angle to make them fit together and have a cleaner look, though this joint is not very strong. Half-Lap Joint The half-lap joint is made by cutting halfway down each board and joining them together. This type of joint is stronger than the butt joints, even though cutting through the boards that much does weaken them. Tongue and Groove Tongue and groove joints are typically used for flooring, or for shiplap walls. These are made by having one side of the board with a square edge that sticks out from the board and the other side of the board having a groove that the square part of the next board can fit into. The part that sticks out is called the
3
tongue, and the grooved side is the groove. So, when using tongue and groove you put the tongue of the first board into the groove of the next board. Mortise and Tenon Mortise and tenon joints are one of the strongest joints. It is done by cutting a square hole into the side of one board and having a square edge cut out from the other board. The hole is called the mortise, and the edge is called the tenon. The tenon fits snugly into the mortise and often times goes all the way through to the other side of the mortise. They can be open or closed both create a beautiful joint. The best part of this type of joint is that it does not require screws or nails, just glue each piece with wood glue, and clamp them together to let them cure overnight. They can be reinforced by using a pin, which is a wooden dowel put into the side after drilling a hole and gluing the pin into the hole. Pocket Joint The pocket joint is another very simple one. This type of joint is accomplished by taking a pocket jig, which can be bought at any hardware store, and placing it on the piece of wood you would like the pocket joint to be and then drilling into the holes to give the screws a pocket to hide in. This type of joint is often used when building doors or cabinets but can be used for several types of projects and is placed on the inside part of the joining pieces. Dovetail Joint Dovetail joints are my personal favorite, though they are very difficult to do. Dovetails are usually cut by hand if you want a more craftsman look to it, but they can be cut using a saw and a dovetail jig. Either way they are the most beautiful type of joint and are very strong. These are joints that are square but flare out like a dovetail and alternate creating a space where they fit inside each other. They are especially beautiful when two types of wood are joined together. The only thing required to hold this joint together, is wood glue. Box or Finger Joint The box joint, also called the finger joint is similar to the dovetail joint. The difference is in the shape of the interlocking parts. The box joint is simply just a rectangular shape that sticks out and each side alternate so they can interlock. They are not as difficult as the dovetail joint but are still a very beautiful joint. This joint also only needs wood glue to hold it together.
Workshop Tools Whether you are just starting to get into woodworking, or are already a master craftsman, you know that tools and a well setup workshop is the absolute most important thing. There are

4
many tools a skilled craftsman should have and having them can improve the quality of your work as well as make it much easier. The Miter Saw When it comes to basic cross cutting of wood, the miter saw is your go to. The miter saw is a saw can also be called a drop saw and is used to make simple crosscuts on wood. It can be tilted and turned to make angled cuts as well. The Table Saw The table saw is a woodworker’s best friend, it is used in woodworking projects more than any other type of saw. The table saw can be used for a range of things such as ripping wood, creating certain joints. The table saw blade can also be tilted to create angled cuts and can be adjusted to make different sized rips in wood. Ripping wood for those who do not know is when you slide the wood across the table saw cutting along the grain of the wood. It is often used for cutting down large slabs of wood and for making sure wood is even all the way down the grain which is especially handy when using reclaimed wood. The Bandsaw The bandsaw is another important saw to have in your workshop. It can be used to make rounded and irregular cuts on wood. Bandsaws can also be used to cut slabs of wood into thinner slabs. The bandsaw is a great tool that also can be used for more than just wood. It can cut metal and some plastics as well. The Track Saw Track saws are great saws to use especially when cutting large slabs of wood that can’t fit on a table saw, such as large sheets of plywood or live edge slabs. This type of saw is basically a circular saw attached to a track which allows for straight cuts along the wood. The Backsaw Lastly there is the backsaw. The backsaw is a saw with a stiff back to it that is used for precision cutting especially in creating joints in wood. Specific joints include the dovetail, and tenons. They can also be used to cut grooves in wood. They are often used to just make small cuts side by side into the wood that make it easier for the woodworker to chisel it out. Chisels Chisels are important for creating joints and making simple, yet beautiful markings on wood. They can also be used just to fix small
5
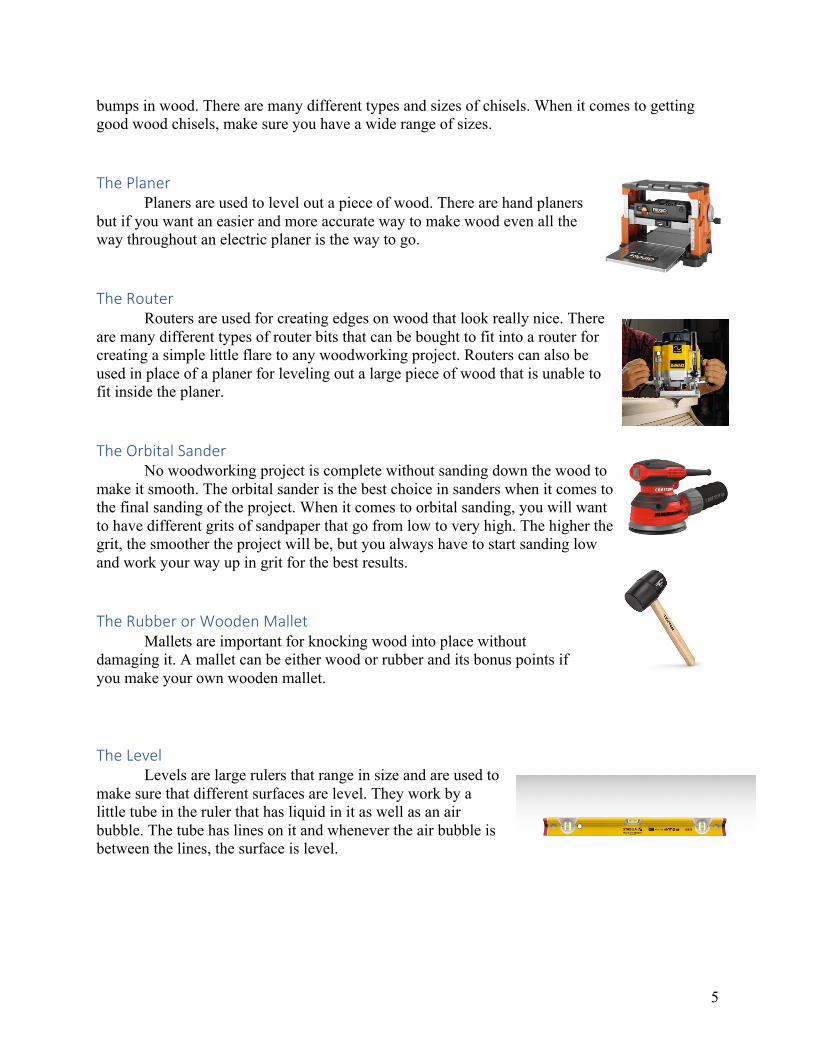
bumps in wood. There are many different types and sizes of chisels. When it comes to getting good wood chisels, make sure you have a wide range of sizes. The Planer Planers are used to level out a piece of wood. There are hand planers but if you want an easier and more accurate way to make wood even all the way throughout an electric planer is the way to go. The Router Routers are used for creating edges on wood that look really nice. There are many different types of router bits that can be bought to fit into a router for creating a simple little flare to any woodworking project. Routers can also be used in place of a planer for leveling out a large piece of wood that is unable to fit inside the planer. The Orbital Sander No woodworking project is complete without sanding down the wood to make it smooth. The orbital sander is the best choice in sanders when it comes to the final sanding of the project. When it comes to orbital sanding, you will want to have different grits of sandpaper that go from low to very high. The higher the grit, the smoother the project will be, but you always have to start sanding low and work your way up in grit for the best results. The Rubber or Wooden Mallet Mallets are important for knocking wood into place without damaging it. A mallet can be either wood or rubber and its bonus points if you make your own wooden mallet. The Level Levels are large rulers that range in size and are used to make sure that different surfaces are level. They work by a little tube in the ruler that has liquid in it as well as an air bubble. The tube has lines on it and whenever the air bubble is between the lines, the surface is level.

6
Tape measure Finally, there is the tape measure, this of course is extremely important for every project, because without it the entire thing would come crashing down in failure. Measuring tapes ensure that everything is the right length and width and height.
This of course is not all that would be needed when setting up the perfect shop, but they are important when it comes to working your way towards being a master craftsman.
Workshop Layout Every woodworker needs a good workshop, and there’s no better workshop than a well-organized one. When it comes to setting up a workshop as a woodworker, the most important thing is making sure you have plenty of space to work with and move around in. A good-sized workshop has enough room for large power tools, such as a table saw, as well as enough space for a workbench. A workbench is the most important part of a workshop. A workbench is simply just a table where a lot of your manual woodworking will take place. There are several different types of workbenches that can be used and several building plans for them if you choose to build your own. When setting up your workshop, considering the flow of work is very important. Beginning with wood storage. Storing wood is best done near the entrance of the workshop. This makes moving wood in or out of the shop much easier in the long run, especially when you have large slabs or wood. When it comes to wood storage, the best way to keep it organized and out of the way is by using a wood or lumber rack. One of the best ways to maximize efficiency is to have your miter saw beside the wood storage. Along with having your miter saw beside the wood storage, you should keep your planer and table saw close by as well. These three tools are often used one after the other, so keeping them close will allow for a greater workflow. When it comes to where to put the workbench, it is best located against a wall. This allows for wall cabinets to be stored above it that can hold tools that you would be using at your workbench. Organizing your tools above the workbench makes finding them easier in the future and keeps them from piling up on your workbench. A great way to maximize workflow, is to have an assembly table in the center of the shop. This allows you to have a place to place wood after is has been cut and allows you to have a clean space for putting together your project. Above I said that the table saw should be near the miter saw, it does not have to be right beside it, in fact it is better for it to be close by and have space on every side of it to allow for movement of wood. Having it at the end of your assembly table allows for the wood to be pushed through the table saw and go on to the assembly table. This keeps the shop neat and organized. To the right is a drawing of an ideal layout. There are many things to learn over the course of becoming a good woodworker. As a beginner, it may even be difficult to get all the tools needed to make stunning piece but do not let that stop you from learning. Many tools can be used as substitutes for the more expensive power tools. These may even be preferable to some woodworkers. Either way, woodworking is a great trade, or even hobby for any person.