a guide on cleaning your computer case, keyboard, mouse and monitor
TRANSCRIPT
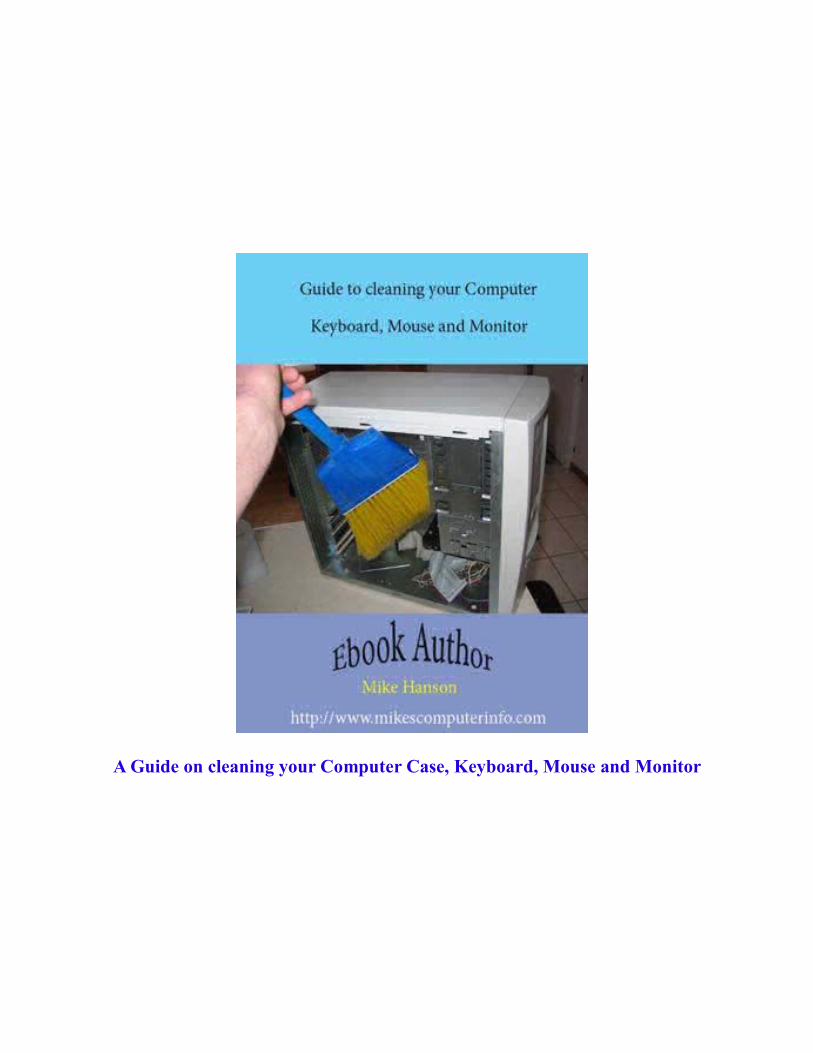
A Guide on cleaning your Computer Case, Keyboard, Mouse and Monitor

Terms of use
The Author does not represent or endorse the accuracy or reliability of any advice, opinion, statement, or other information written in this E-book . You acknowledge that any reliance upon any such opinion, advice, statement, memorandum, or information shall be at your sole risk. The Author reserves the right, in his sole discretion, to correct any errors or omissions in any portion of this E-book at any time. The E-Book is protected by copyright as a collective work and/or compilation, pursuant to U.S. copyright laws, international conventions, and other copyright laws. The contents of the E-Book are only for your personal, non-commercial use. All materials contained on in this E-Book are protected by copyright, and are owned or controlled by the Author or the party credited as the provider of the Content. You will abide by any and all additional copyright notices, information, or restrictions contained in any Content in the E-Book. You may download and make one [copy/copies] of the Content of this E-Book for personal, noncommercial use only, provided that you maintain all copyright and other notices contained in such Content. Copying or storing of any Content for other than personal, noncommercial use is expressly prohibited without the prior written permission from the Author or the copyright holder identified in the individual Contents copyright notice.
Disclaimer
Any trademarks, service marks, product names or named features are assumed to be the property of their respective owners, and are used only for reference. There is no implied endorsement if we use one of these terms. Although the Author and publisher have made every reasonable attempt to achieve complete accuracy of the content in this Guide, they assume no responsibility for errors or omissions. Also, you should use this information as you see fit, and at your own risk.
Copyright Notice
Copyright © 03/26/2008 Mike Hanson. All rights reserved worldwide.
Introduction
This a Guide to cleaning your Computer, it is what I do to clean my Computers. When you handle any electrical components there is a risk of getting an electrical shock, so be very careful when following this Guide. Never work on any electrical components when they are still connected to an electrical source, such as an electrical outlet. Always unplug the electrical component from the electrical source.When dealing with a Computer there is a risk of static electricity on you harming an electronic component inside of the computer or by cleaning accessories attached to the computer while they are still plugged into the computer, such as a Keyboard, Mouse or Monitor. Once the Power Cord is unplugged there is no Electricity running through the computer, there are some parts in the Power Supply that hold an Electrical charge so do not stick anything but the small plastic tube that comes with the can of compressed air into the Power Supply Box. Before you touch anything inside the computer case touch the Metal Frame to discharge any static electricity you may have. You should wear Safety Glasses when using the canned air. Be sure that you read this Guide before attempting to clean your computer, if after reading the Guide you feel that you are comfortable with the steps taken to clean the computer, start cleaning!

Table of Contents:
➢ The tools, supplies and work bench you can use.
➢ Disconnecting the cables from the computer.
➢ Untangling the cables.
➢ Work Bench and cleaning the outside of the case.
➢ Removing the case panels.
➢ Cleaning the inside of the Computer Case.
➢ Reinstalling the Case Panels.
➢ Cleaning the Keyboard and Mouse.
➢ Cleaning your Monitor and hooking everything back up.
➢ Power Supply Precautions
➢ About the Author: Mike Hanson

The tools, supplies and work bench you can use:
Here is what I use to clean my computers:
➢ A can of Compressed Air, they sell for $5.00 to $15.00 depending on the size. Insert the small tube into the nozzle of the can and then take a small piece of tape and tape it to the nozzle. Sometimes they have a tendency to fly off the nozzle, you do not want it to fly off into the Power Supply.
➢ Some Cotton Swabs.➢ A bottle of Rubbing Alcohol.➢ Optional: A vacuum cleaner with a crevice tool.➢ A clean work surface, such as the Kitchen Counter top, you do not want to be standing on a
carpeted floor while doing this.➢ Some cloth rags, paper towels and water.➢ A nonmagnetic Phillip's screw driver.➢ A Flashlight.➢ Tweezer➢ Optional: Anti-Static Cleaning Wipes to clean your Monitor and your TV screens, worth the
money. I also use these to clean the case panels, keyboard, mouse and the plastic around the monitor.
➢ Safety Glasses

Disconnecting the cables from the Computer:
Here is a picture of the back of my computer with the cables still connected.
The first cable you will disconnect is the Power Cord, the one connected to the electrical outlet. After that is unplugged you can safely disconnect the other cables. I usually start with the top cables and work my way down, laying them on the floor in an orderly fashion. Also unplug the Electrical Cord to the Monitor.
Untangling the cables:
If some of the cables are tangled this is a good time to untangle them. Picture of all the cables disconnected from the back of the computer. When you take them off start with the top one, the Power Supply cord and then keep going down. Also as you unplug them, untangle them from other cables and then lay them on the floor in the order you unplugged them. This will make it easier when it comes time to plug them back in. : )

Work Bench and cleaning the outside of the case:
Now take the computer case out to the clean Kitchen Counter top, stand it upright just as it was when it was connected to the cables. Now you should put those Safety Glasses on.
Now you should take a damp towel and clean the outside of the case, just clean the sides, top, front and bottom of the case. Next use the can of compressed air and spray the back of the case, including the Power Supply fan opening, stick the little tube in between the fan blades and spray around the inside of the Power Supply. The Power Supply still has High Voltage Electricity in it so only use the small plastic tube that comes with the can of compressed air inside the Power Supply Box, do not over spray just a few short bursts.
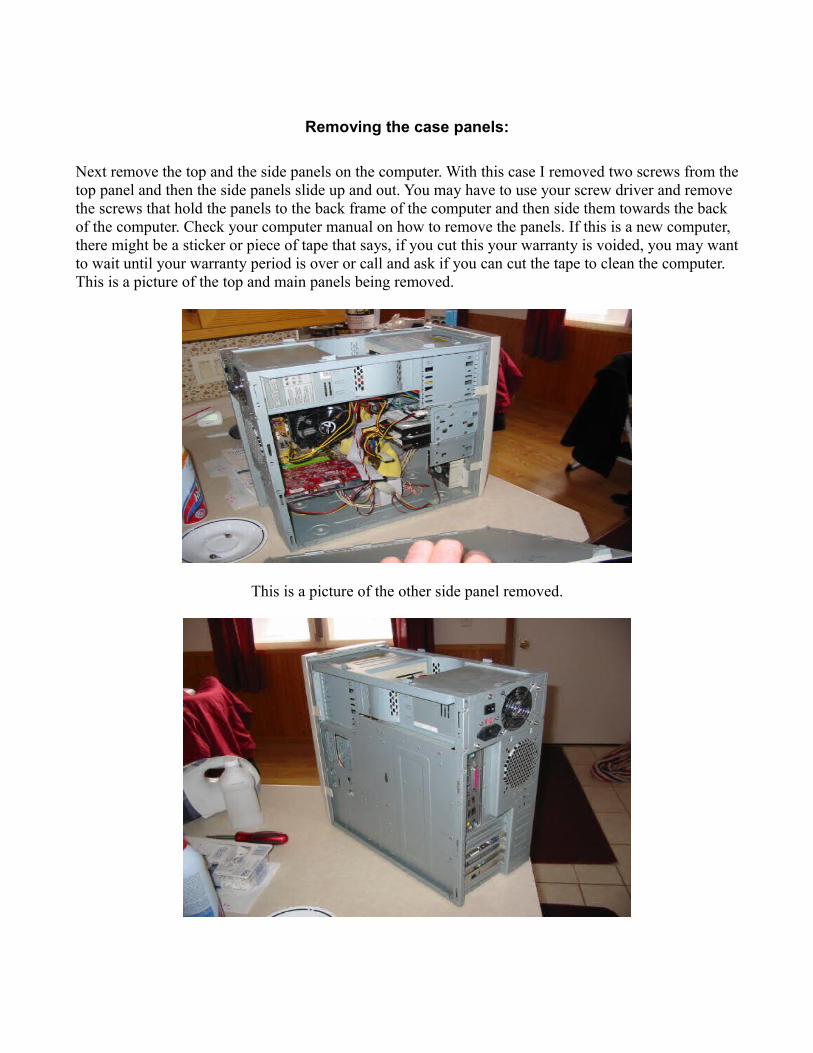
Removing the case panels:
Next remove the top and the side panels on the computer. With this case I removed two screws from the top panel and then the side panels slide up and out. You may have to use your screw driver and remove the screws that hold the panels to the back frame of the computer and then side them towards the back of the computer. Check your computer manual on how to remove the panels. If this is a new computer, there might be a sticker or piece of tape that says, if you cut this your warranty is voided, you may want to wait until your warranty period is over or call and ask if you can cut the tape to clean the computer. This is a picture of the top and main panels being removed.
This is a picture of the other side panel removed.

Cleaning the inside of the Computer Case:
Start with spraying the fan or fans in the Power Supply, blow out all the accessible areas of the Power Supply, here is a picture of the fan on the back of the computer.
Next spray the heat sinks fan and fins the silver things under the fan, pictured below. You can use your flashlight to see the fins better and what needs more spraying. Sitting on top the CPU there is a heat sink and then on top of that is the fan. The heat sink sits right on top of the CPU and draws the heat up off the CPU into the fins, the fan pulls air up through the fins cooling them, this keeps the CPU operating at a cooler temperature. If the CPU overheats the computer will start rebooting or just start acting weird. If it gets way to hot it will ruin the CPU and the computer will not boot at all. So it is very important to make sure the spaces between those fins are cleaned out.
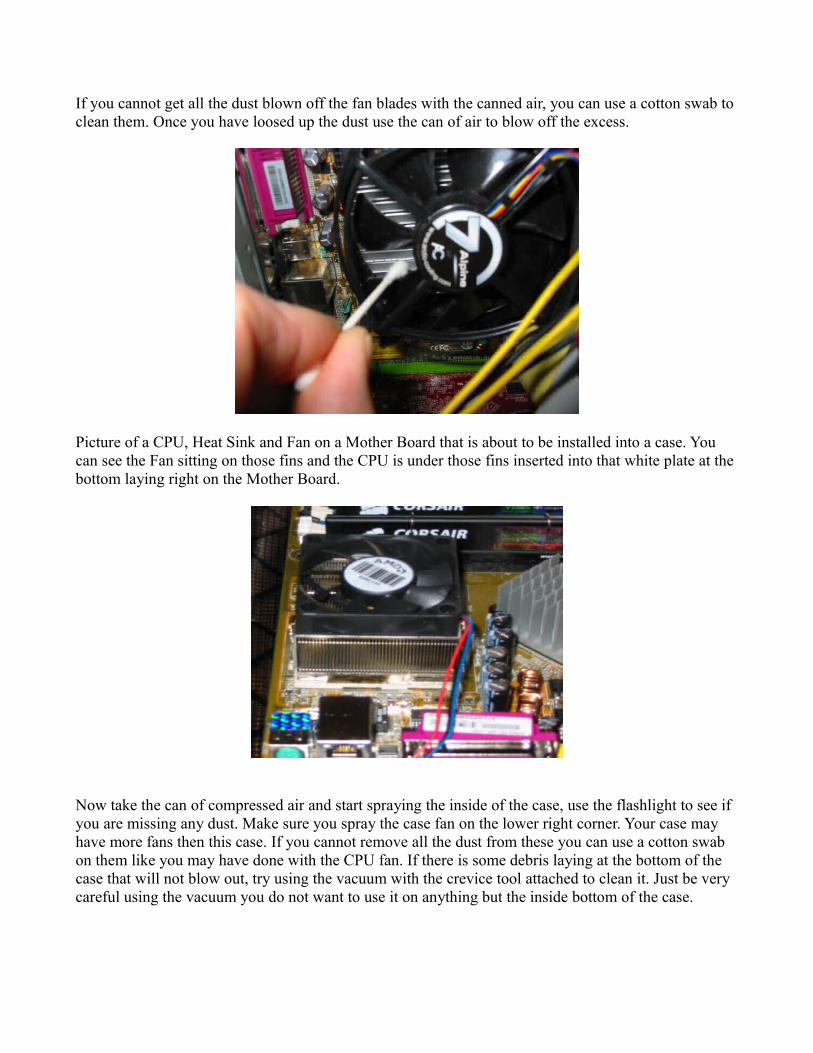
If you cannot get all the dust blown off the fan blades with the canned air, you can use a cotton swab to clean them. Once you have loosed up the dust use the can of air to blow off the excess.
Picture of a CPU, Heat Sink and Fan on a Mother Board that is about to be installed into a case. You can see the Fan sitting on those fins and the CPU is under those fins inserted into that white plate at the bottom laying right on the Mother Board.
Now take the can of compressed air and start spraying the inside of the case, use the flashlight to see if you are missing any dust. Make sure you spray the case fan on the lower right corner. Your case may have more fans then this case. If you cannot remove all the dust from these you can use a cotton swab on them like you may have done with the CPU fan. If there is some debris laying at the bottom of the case that will not blow out, try using the vacuum with the crevice tool attached to clean it. Just be very careful using the vacuum you do not want to use it on anything but the inside bottom of the case.
Make sure that you do not dislodge or unplug any wires inside the case, most are pretty hard to unplug. But there are some very small wires with small connectors that can come loose fairly easy, so be careful.
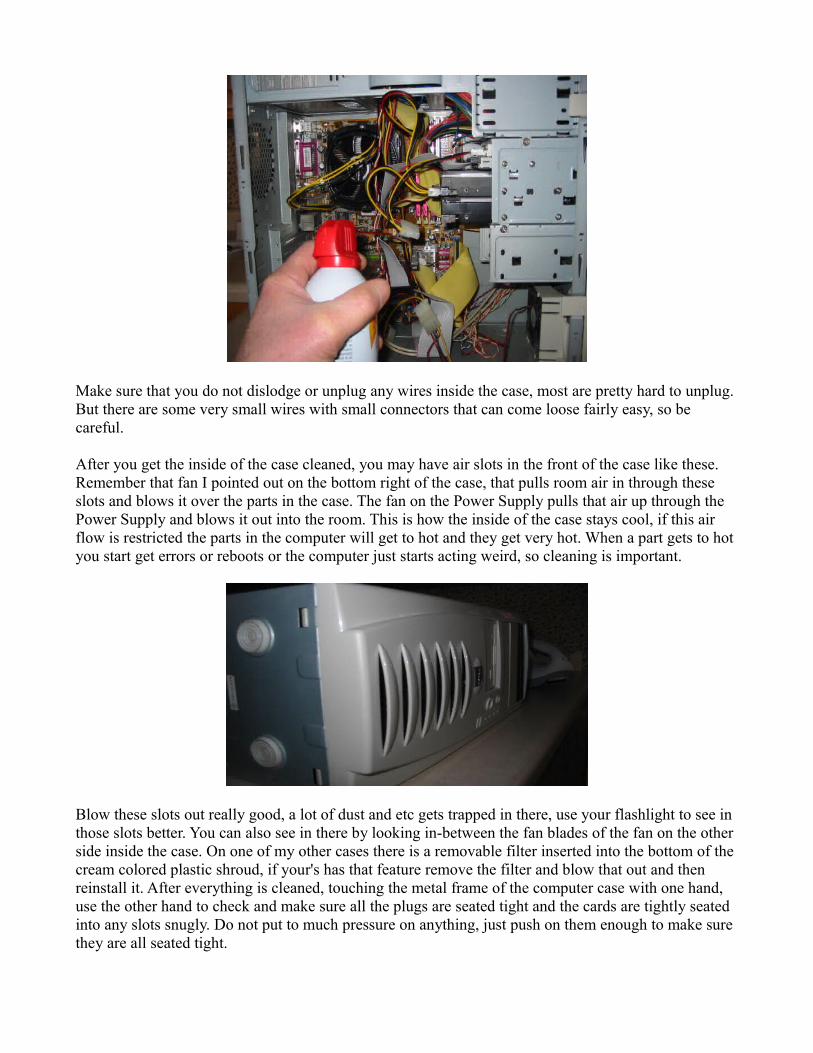
After you get the inside of the case cleaned, you may have air slots in the front of the case like these. Remember that fan I pointed out on the bottom right of the case, that pulls room air in through these slots and blows it over the parts in the case. The fan on the Power Supply pulls that air up through the Power Supply and blows it out into the room. This is how the inside of the case stays cool, if this air flow is restricted the parts in the computer will get to hot and they get very hot. When a part gets to hot you start get errors or reboots or the computer just starts acting weird, so cleaning is important.
Blow these slots out really good, a lot of dust and etc gets trapped in there, use your flashlight to see in those slots better. You can also see in there by looking in-between the fan blades of the fan on the other side inside the case. On one of my other cases there is a removable filter inserted into the bottom of the cream colored plastic shroud, if your's has that feature remove the filter and blow that out and then reinstall it. After everything is cleaned, touching the metal frame of the computer case with one hand, use the other hand to check and make sure all the plugs are seated tight and the cards are tightly seated into any slots snugly. Do not put to much pressure on anything, just push on them enough to make sure they are all seated tight.
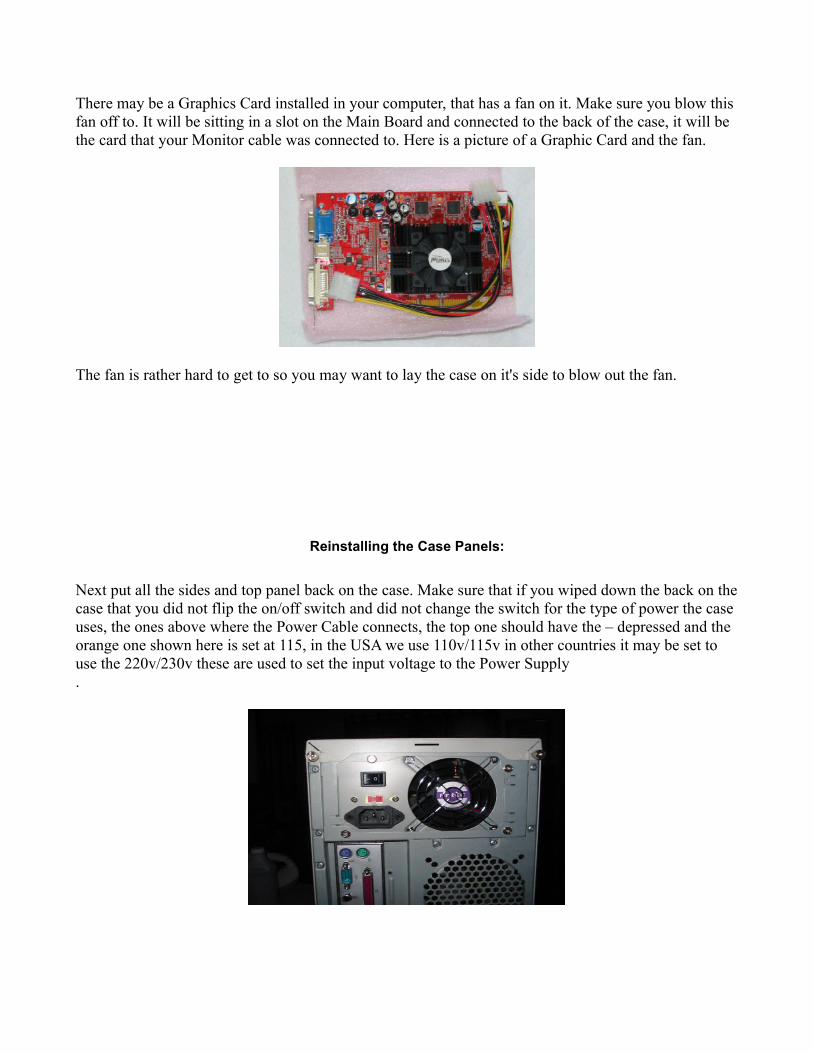
There may be a Graphics Card installed in your computer, that has a fan on it. Make sure you blow this fan off to. It will be sitting in a slot on the Main Board and connected to the back of the case, it will be the card that your Monitor cable was connected to. Here is a picture of a Graphic Card and the fan.
The fan is rather hard to get to so you may want to lay the case on it's side to blow out the fan.
Reinstalling the Case Panels:
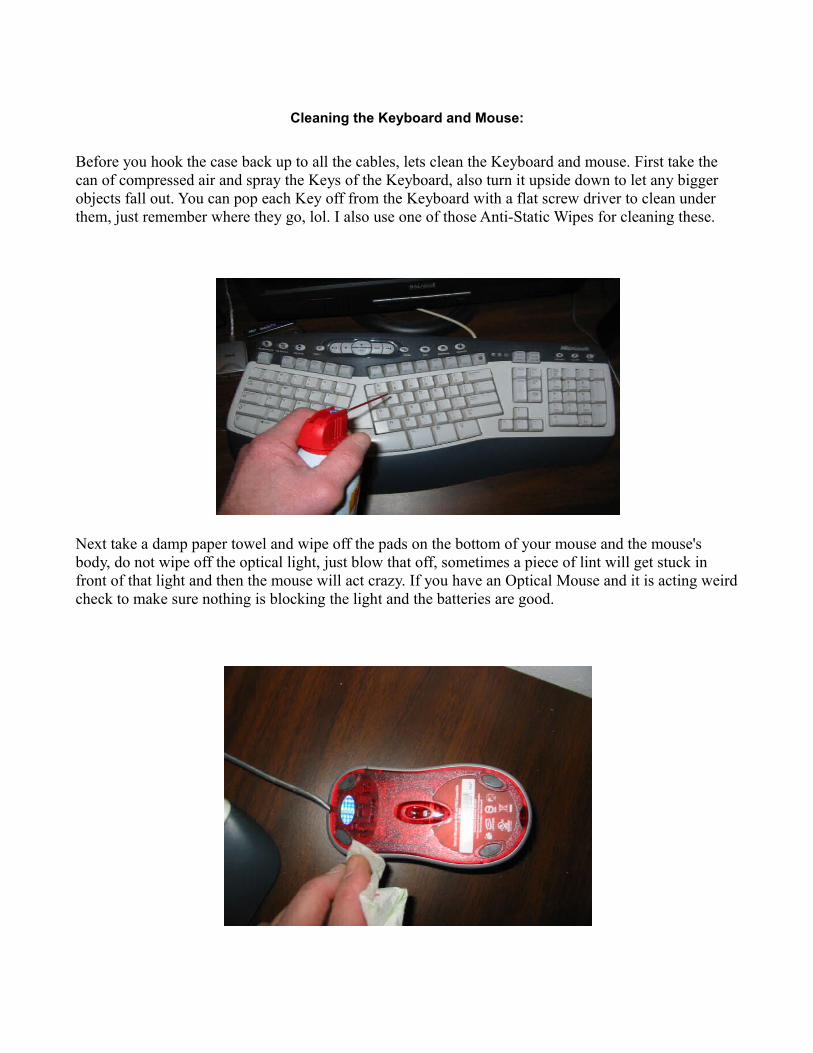
Next put all the sides and top panel back on the case. Make sure that if you wiped down the back on the case that you did not flip the on/off switch and did not change the switch for the type of power the case uses, the ones above where the Power Cable connects, the top one should have the – depressed and the orange one shown here is set at 115, in the USA we use 110v/115v in other countries it may be set to use the 220v/230v these are used to set the input voltage to the Power Supply.
Cleaning the Keyboard and Mouse:
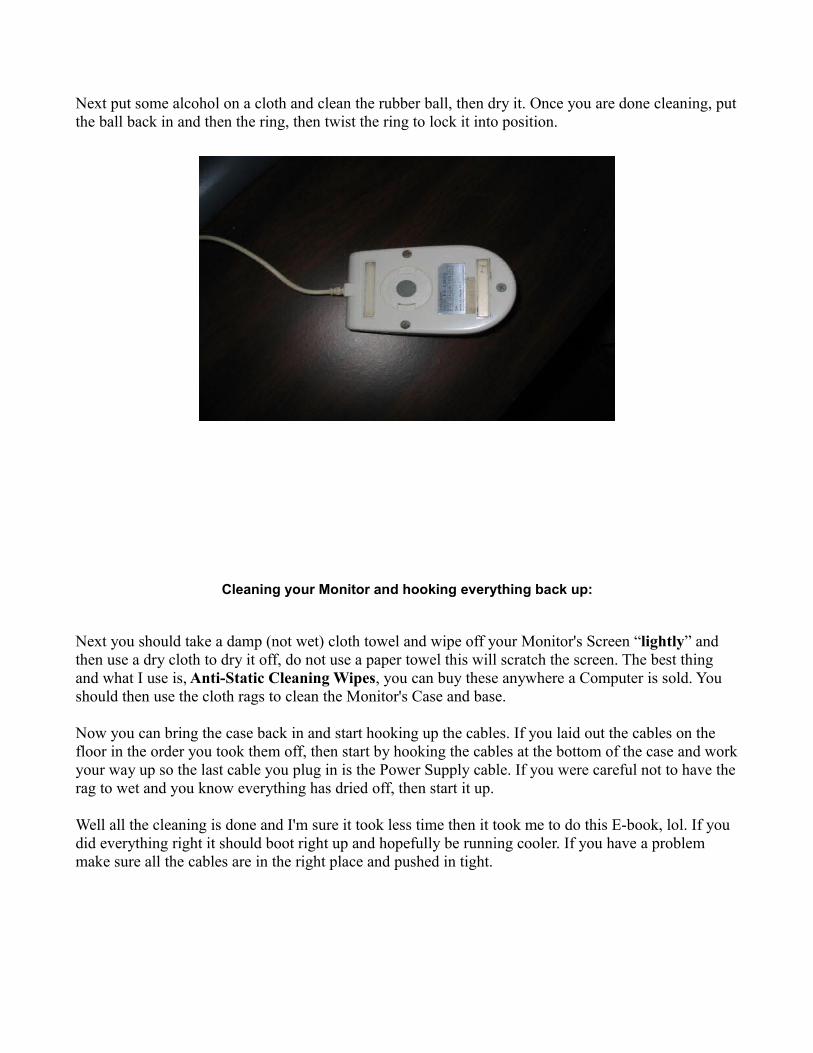
Before you hook the case back up to all the cables, lets clean the Keyboard and mouse. First take the can of compressed air and spray the Keys of the Keyboard, also turn it upside down to let any bigger objects fall out. You can pop each Key off from the Keyboard with a flat screw driver to clean under them, just remember where they go, lol. I also use one of those Anti-Static Wipes for cleaning these.
Next take a damp paper towel and wipe off the pads on the bottom of your mouse and the mouse's body, do not wipe off the optical light, just blow that off, sometimes a piece of lint will get stuck in front of that light and then the mouse will act crazy. If you have an Optical Mouse and it is acting weird check to make sure nothing is blocking the light and the batteries are good.

If you have the ball type mouse, remove the ball by turning the retainer ring that is around the ball, then remove the rubber ball.
Then take a cotton swab and clean off the three plastic rollers that the ball rests on in the mouse body. These get lint built up on them from the rubber ball and makes the mouse act slow and weird. If you
dip the swab in some alcohol, then take it and run it across the face of the roller. Then you may be able to take a tweezer and grab the lint and pull it off, you'll be amazed at how much lint is on the rollers,
lol.
Next put some alcohol on a cloth and clean the rubber ball, then dry it. Once you are done cleaning, put the ball back in and then the ring, then twist the ring to lock it into position.
Cleaning your Monitor and hooking everything back up:
Next you should take a damp (not wet) cloth towel and wipe off your Monitor's Screen “lightly” and then use a dry cloth to dry it off, do not use a paper towel this will scratch the screen. The best thing and what I use is, Anti-Static Cleaning Wipes, you can buy these anywhere a Computer is sold. You should then use the cloth rags to clean the Monitor's Case and base.
Now you can bring the case back in and start hooking up the cables. If you laid out the cables on the floor in the order you took them off, then start by hooking the cables at the bottom of the case and work your way up so the last cable you plug in is the Power Supply cable. If you were careful not to have the rag to wet and you know everything has dried off, then start it up.
Well all the cleaning is done and I'm sure it took less time then it took me to do this E-book, lol. If you did everything right it should boot right up and hopefully be running cooler. If you have a problem make sure all the cables are in the right place and pushed in tight.
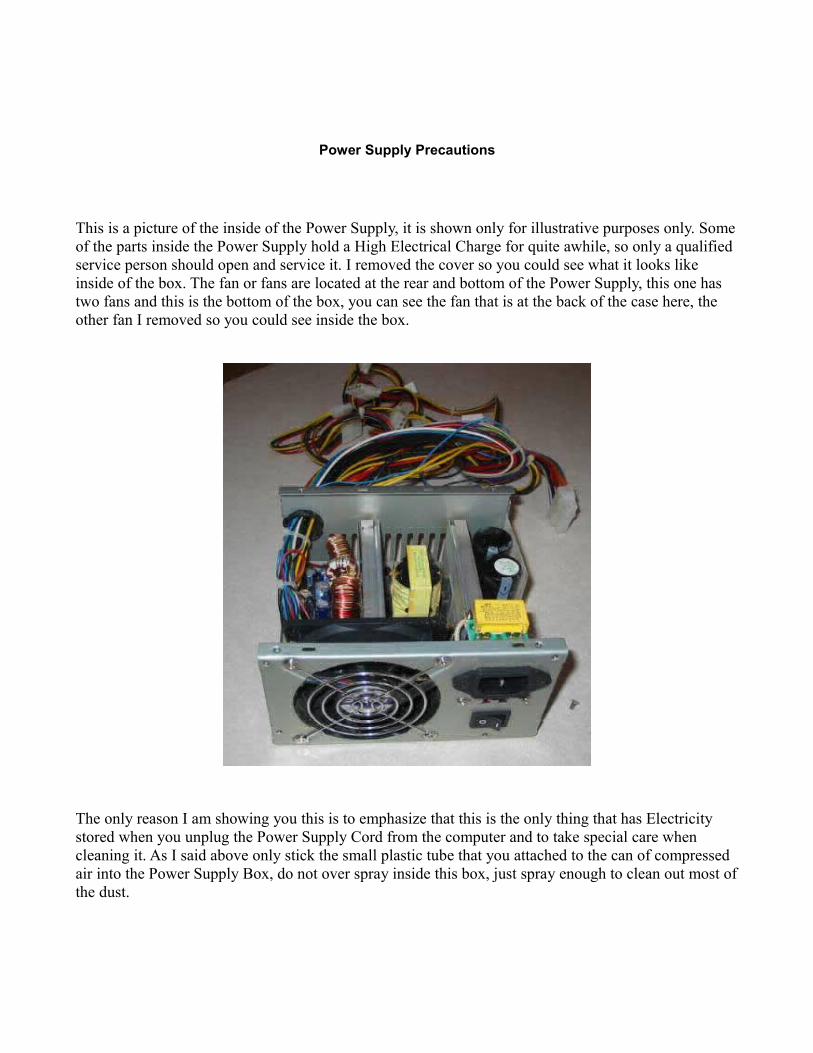
Power Supply Precautions
This is a picture of the inside of the Power Supply, it is shown only for illustrative purposes only. Some of the parts inside the Power Supply hold a High Electrical Charge for quite awhile, so only a qualified service person should open and service it. I removed the cover so you could see what it looks like inside of the box. The fan or fans are located at the rear and bottom of the Power Supply, this one has two fans and this is the bottom of the box, you can see the fan that is at the back of the case here, the other fan I removed so you could see inside the box.
The only reason I am showing you this is to emphasize that this is the only thing that has Electricity stored when you unplug the Power Supply Cord from the computer and to take special care when cleaning it. As I said above only stick the small plastic tube that you attached to the can of compressed air into the Power Supply Box, do not over spray inside this box, just spray enough to clean out most of the dust.

About the Author: Mike Hanson
I have been working on Computers since the days of DOS, that was before Windows. I have upgraded, rebuilt and built my own Computer's many, many, times. I also have my own Websites Mikescomputerinfo.com and Myprojectvehicle.com, I started the Websites after I took and passed a Total Webmaster Certification Program at my local Community College in the year 2000, that is also when I started Mikescomputerinfo.com. I have worked with many different Operating Systems, DOS, Windows 3.1, 95, 98, XP Home, XP Pro, Vista Ultimate Beta, Mandrake Linux, Ubuntu Linux 7.10 and Unix that runs on the website server.
Also far as writing skills, I have been writing content for my website for the last eight years. The tools that I use for developing my website have improved over the years. I finally was able to buy Adobe PhotoShop CS3 and Dreamweaver CS3 which are the web standards and are very expensive. I use Swish 2.0 for my Flash elements and Script Forest Menu for my Java menus. I do most of my coding by hand even though Dreamweaver is a WYSIWYG editor, the design view does come in handy when you need to identify a complicated table layouts. I hope you enjoyed the Guide and it was helpful.
Please feel free to make a Donation of a couple bucks for the E-book if it helps you, it took over 40 hours to make it, lol. Donation Page
This another page on my site, I will be making an E-Book for this also but that will take some time: Your Computer running slow.
If you have any questions or comments use the Contact Mike form under Message in the Java Menu: Mikescomputerinfo.com
Copyright © 03/26/2008 Mike Hanson. All rights reserved worldwide