a light intro to 3-d modeling with blender
TRANSCRIPT

A light intro to 3-D Modeling with Blender
Scott Janousek May 13, 2015

A light intro to 3-D Modeling with Blender // Scott Janousek // [email protected] // www.scottjanousek.com // Creative Commons
Intro

A light intro to 3-D Modeling with Blender // Scott Janousek // [email protected] // www.scottjanousek.com // Creative Commons
Three pieces of material
Buddha (explanatory)
LED Star (explorative)
3-D printed name plate (instructional walkthrough)

A light intro to 3-D Modeling with Blender // Scott Janousek // [email protected] // www.scottjanousek.com // Creative Commons
Please copy the folder on the USB flash drive to the desktop on your
computer station

A light intro to 3-D Modeling with Blender // Scott Janousek // [email protected] // www.scottjanousek.com // Creative Commons
Scott Janousek
Scott or “S.J.”

A light intro to 3-D Modeling with Blender // Scott Janousek // [email protected] // www.scottjanousek.com // Creative Commons
Digital ↔ Physical

A light intro to 3-D Modeling with Blender // Scott Janousek // [email protected] // www.scottjanousek.com // Creative Commons
Software, Hardware Digital Fabrication

A light intro to 3-D Modeling with Blender // Scott Janousek // [email protected] // www.scottjanousek.com // Creative Commons
Passionate about intersection of art, science and technology.

A light intro to 3-D Modeling with Blender // Scott Janousek // [email protected] // www.scottjanousek.com // Creative Commons
@scottjanousek
www.scottjanousek.com

A light intro to 3-D Modeling with Blender // Scott Janousek // [email protected] // www.scottjanousek.com // Creative Commons
I work a lot with parametric modelers for mechanical things (e.g. SolidWorks).
Mesh/“organic” polygonal modelers for 3-D scanning, as well as complicated surface modeling.

A light intro to 3-D Modeling with Blender // Scott Janousek // [email protected] // www.scottjanousek.com // Creative Commons
Questions before we begin?

A light intro to 3-D Modeling with Blender // Scott Janousek // [email protected] // www.scottjanousek.com // Creative Commons
Hands-on with Blender (=~ 15 minutes)

A light intro to 3-D Modeling with Blender // Scott Janousek // [email protected] // www.scottjanousek.com // Creative Commons
http://vimeo.com/16292363 (watch later!)
40 Year Old 3-D Computer Graphics (Pixar, 1972)

A light intro to 3-D Modeling with Blender // Scott Janousek // [email protected] // www.scottjanousek.com // Creative Commons

A light intro to 3-D Modeling with Blender // Scott Janousek // [email protected] // www.scottjanousek.com // Creative Commons
“Mesh Modeler” Open Source
Free Lots of features & functionality
Active user community
Why use blender?

A light intro to 3-D Modeling with Blender // Scott Janousek // [email protected] // www.scottjanousek.com // Creative Commons
Quick notes

A light intro to 3-D Modeling with Blender // Scott Janousek // [email protected] // www.scottjanousek.com // Creative Commons
Blender has many features

A light intro to 3-D Modeling with Blender // Scott Janousek // [email protected] // www.scottjanousek.com // Creative Commons
Blender has many modes

A light intro to 3-D Modeling with Blender // Scott Janousek // [email protected] // www.scottjanousek.com // Creative Commons
Blender has many keyboard shortcuts

A light intro to 3-D Modeling with Blender // Scott Janousek // [email protected] // www.scottjanousek.com // Creative Commons
Blender has many properties, panels, and UI elements

A light intro to 3-D Modeling with Blender // Scott Janousek // [email protected] // www.scottjanousek.com // Creative Commons
3 button mouse is essential

A light intro to 3-D Modeling with Blender // Scott Janousek // [email protected] // www.scottjanousek.com // Creative Commons
Blender can be daunting, but it is powerful and free.

A light intro to 3-D Modeling with Blender // Scott Janousek // [email protected] // www.scottjanousek.com // Creative Commons
Crash Course in Blender

A light intro to 3-D Modeling with Blender // Scott Janousek // [email protected] // www.scottjanousek.com // Creative Commons
Ways to launch the Blender
1. /Applications/Blender/Blender.app
2. Double click app to launch Blender
3. Hit Command-Spacebar then type “Blender”

A light intro to 3-D Modeling with Blender // Scott Janousek // [email protected] // www.scottjanousek.com // Creative Commons
“Birds Eye View” of the GUI

A light intro to 3-D Modeling with Blender // Scott Janousek // [email protected] // www.scottjanousek.com // Creative Commons
Exercises

A light intro to 3-D Modeling with Blender // Scott Janousek // [email protected] // www.scottjanousek.com // Creative Commons
Digital -> Physical
Custom Text Name Plate Exercise

A light intro to 3-D Modeling with Blender // Scott Janousek // [email protected] // www.scottjanousek.com // Creative Commons
In this interactive walkthrough, you’ll model your own custom nameplate for animation
(digital), and 3-D printing purposes (physical).

A light intro to 3-D Modeling with Blender // Scott Janousek // [email protected] // www.scottjanousek.com // Creative Commons
Exercise Goals
Learn basic blender tools and manipulation within the UI
Learn to use Text within Blender
Learn how to animate Your Name Plate
Learn how to export and reimport to a 3-D printer your nameplate

A light intro to 3-D Modeling with Blender // Scott Janousek // [email protected] // www.scottjanousek.com // Creative Commons
Delete the default box on the 3-D view of Blender.

A light intro to 3-D Modeling with Blender // Scott Janousek // [email protected] // www.scottjanousek.com // Creative Commons
Adding your name text

A light intro to 3-D Modeling with Blender // Scott Janousek // [email protected] // www.scottjanousek.com // Creative Commons
Goto Add->Add Text Object to Scene.

A light intro to 3-D Modeling with Blender // Scott Janousek // [email protected] // www.scottjanousek.com // Creative Commons
Hit 7 on the numpad to get to Top View.

A light intro to 3-D Modeling with Blender // Scott Janousek // [email protected] // www.scottjanousek.com // Creative Commons
Hit Tab to enter into “Edit” mode, or select from the bottom menu.

A light intro to 3-D Modeling with Blender // Scott Janousek // [email protected] // www.scottjanousek.com // Creative Commons
While in Edit mode, type in your name.

A light intro to 3-D Modeling with Blender // Scott Janousek // [email protected] // www.scottjanousek.com // Creative Commons
Change the Font type, and size (if desired).

A light intro to 3-D Modeling with Blender // Scott Janousek // [email protected] // www.scottjanousek.com // Creative Commons
Load up the Adobe Garamond Font from the resources folder.

A light intro to 3-D Modeling with Blender // Scott Janousek // [email protected] // www.scottjanousek.com // Creative Commons
Now the properties are changed (e.g. size & font loaded).

A light intro to 3-D Modeling with Blender // Scott Janousek // [email protected] // www.scottjanousek.com // Creative Commons
Change to top view (numpad 7). Move the text to the center of the stage.

A light intro to 3-D Modeling with Blender // Scott Janousek // [email protected] // www.scottjanousek.com // Creative Commons
Text object is now transformed into manipulated mesh poly for extrusion.
A light intro to 3-D Modeling with Blender // Scott Janousek // [email protected] // www.scottjanousek.com // Creative Commons
Adding the back plate

A light intro to 3-D Modeling with Blender // Scott Janousek // [email protected] // www.scottjanousek.com // Creative Commons
Be in top view (numpad 7), and add a Plane object via Add->Plane.

A light intro to 3-D Modeling with Blender // Scott Janousek // [email protected] // www.scottjanousek.com // Creative Commons
Select and move the plane while in Transform (e.g. translate). Constraining axis helps.

A light intro to 3-D Modeling with Blender // Scott Janousek // [email protected] // www.scottjanousek.com // Creative Commons
The plane is now positioned in the correct place.

A light intro to 3-D Modeling with Blender // Scott Janousek // [email protected] // www.scottjanousek.com // Creative Commons
Now change to edges mode and select just the right side of the plane.

A light intro to 3-D Modeling with Blender // Scott Janousek // [email protected] // www.scottjanousek.com // Creative Commons
Now, with the edge selected pull it to the right until it’s big enough.

A light intro to 3-D Modeling with Blender // Scott Janousek // [email protected] // www.scottjanousek.com // Creative Commons
Here’s another isomorphic perspective.

A light intro to 3-D Modeling with Blender // Scott Janousek // [email protected] // www.scottjanousek.com // Creative Commons
Now control-tab to and select Face meshing.

A light intro to 3-D Modeling with Blender // Scott Janousek // [email protected] // www.scottjanousek.com // Creative Commons
Once selected, then use the Transform->Extrude region button, and pull the z-axis handle up to make the backplate have depth.

A light intro to 3-D Modeling with Blender // Scott Janousek // [email protected] // www.scottjanousek.com // Creative Commons
Now select the text in the scene, and extrude that up (since it’s also a mesh now).
A light intro to 3-D Modeling with Blender // Scott Janousek // [email protected] // www.scottjanousek.com // Creative Commons
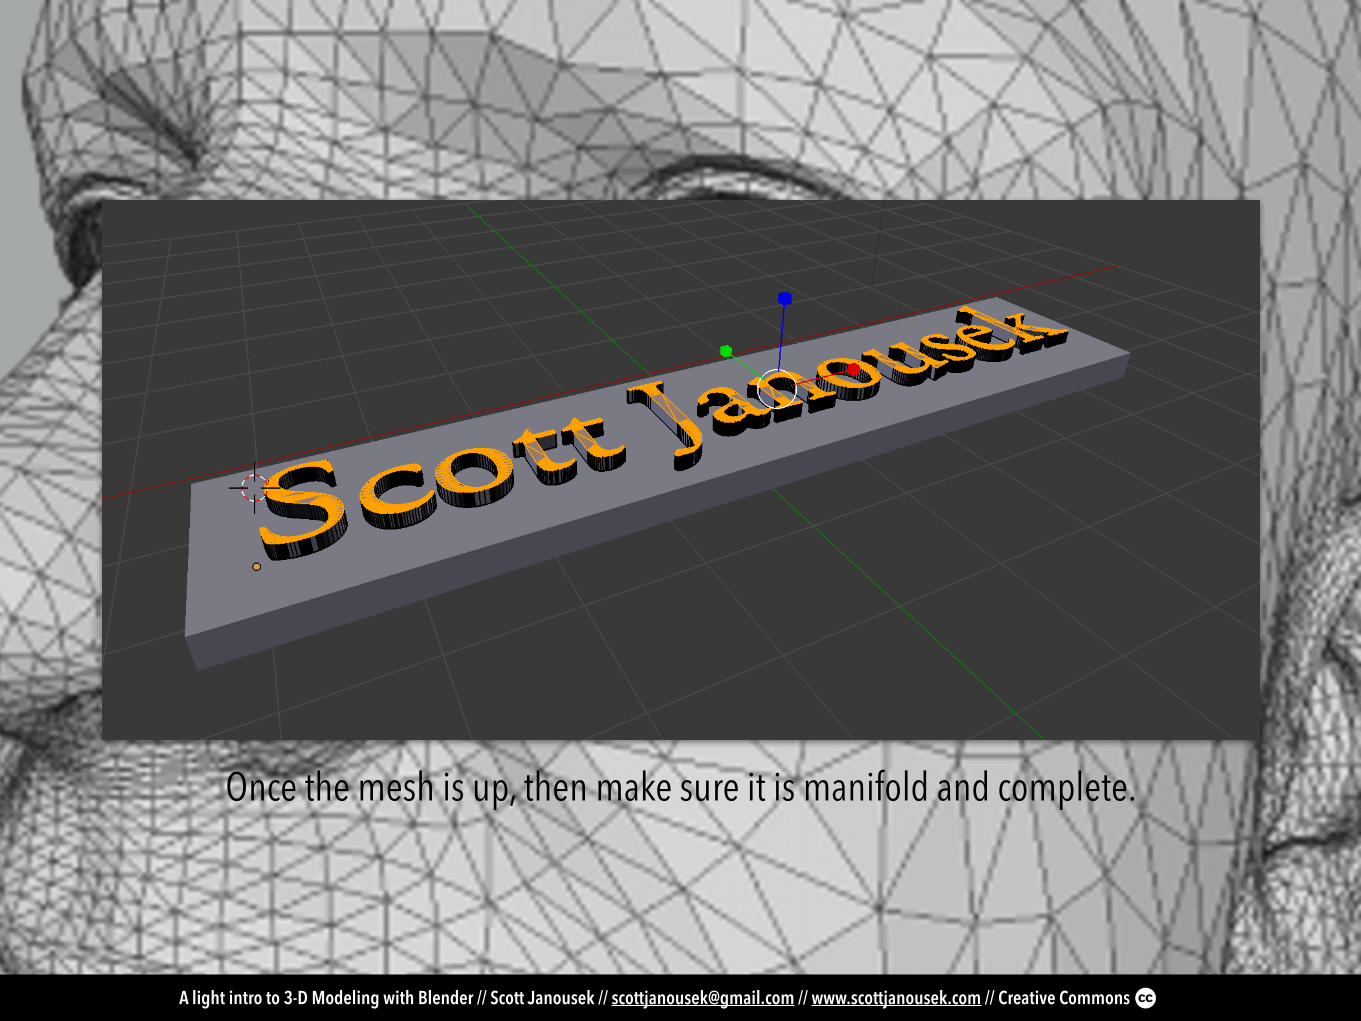
Once the mesh is up, then make sure it is manifold and complete.

A light intro to 3-D Modeling with Blender // Scott Janousek // [email protected] // www.scottjanousek.com // Creative Commons
Add a bevel modifier to the nameplate back.
A light intro to 3-D Modeling with Blender // Scott Janousek // [email protected] // www.scottjanousek.com // Creative Commons
Exporting the nameplate to .obj (or .stl)

A light intro to 3-D Modeling with Blender // Scott Janousek // [email protected] // www.scottjanousek.com // Creative Commons
Exporting to .stl

A light intro to 3-D Modeling with Blender // Scott Janousek // [email protected] // www.scottjanousek.com // Creative Commons
Exporting to .obj

A light intro to 3-D Modeling with Blender // Scott Janousek // [email protected] // www.scottjanousek.com // Creative Commons
Lighting, Cameras, and Animation

A light intro to 3-D Modeling with Blender // Scott Janousek // [email protected] // www.scottjanousek.com // Creative Commons
Changing the lighting

A light intro to 3-D Modeling with Blender // Scott Janousek // [email protected] // www.scottjanousek.com // Creative Commons
Adjusting the lamp to Constant falloff.

A light intro to 3-D Modeling with Blender // Scott Janousek // [email protected] // www.scottjanousek.com // Creative Commons
Adjusting the lamp’s energy property.

A light intro to 3-D Modeling with Blender // Scott Janousek // [email protected] // www.scottjanousek.com // Creative Commons
Adjusting the lamp further.

A light intro to 3-D Modeling with Blender // Scott Janousek // [email protected] // www.scottjanousek.com // Creative Commons
Adding movement via the timeline

A light intro to 3-D Modeling with Blender // Scott Janousek // [email protected] // www.scottjanousek.com // Creative Commons
Move the text into the plane hierarchy so it moves along with it.

A light intro to 3-D Modeling with Blender // Scott Janousek // [email protected] // www.scottjanousek.com // Creative Commons
Adding keyframes in the timeline view for animating the nameplate.

A light intro to 3-D Modeling with Blender // Scott Janousek // [email protected] // www.scottjanousek.com // Creative Commons
Changing the camera

A light intro to 3-D Modeling with Blender // Scott Janousek // [email protected] // www.scottjanousek.com // Creative Commons
Adjust the camera settings (if needed).

A light intro to 3-D Modeling with Blender // Scott Janousek // [email protected] // www.scottjanousek.com // Creative Commons
Larger camera, and rotated and moved to get more of nameplate in render scene.

A light intro to 3-D Modeling with Blender // Scott Janousek // [email protected] // www.scottjanousek.com // Creative Commons
Rendering
A light intro to 3-D Modeling with Blender // Scott Janousek // [email protected] // www.scottjanousek.com // Creative Commons
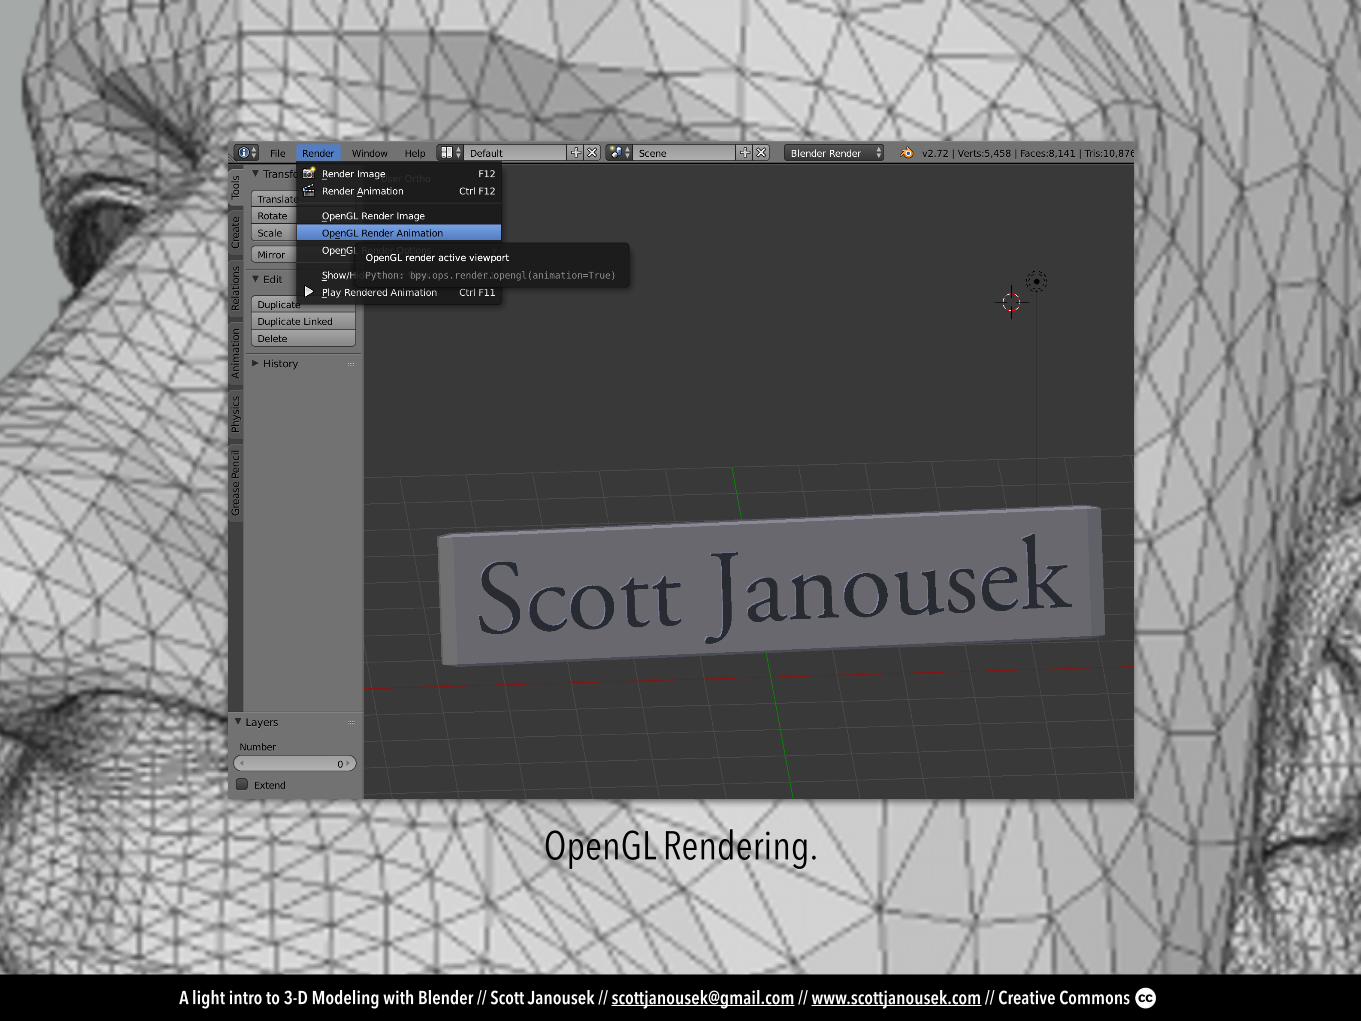
OpenGL Rendering.

A light intro to 3-D Modeling with Blender // Scott Janousek // [email protected] // www.scottjanousek.com // Creative Commons
3-D Printing the nameplate

A light intro to 3-D Modeling with Blender // Scott Janousek // [email protected] // www.scottjanousek.com // Creative Commons
Formlabs Form1+ SLA (liquid resin + laser 3-D printer)

A light intro to 3-D Modeling with Blender // Scott Janousek // [email protected] // www.scottjanousek.com // Creative Commons
PreForm Software with imported .obj (gray resin)

A light intro to 3-D Modeling with Blender // Scott Janousek // [email protected] // www.scottjanousek.com // Creative Commons
PreForm Software with imported object (clear resin)

A light intro to 3-D Modeling with Blender // Scott Janousek // [email protected] // www.scottjanousek.com // Creative Commons
Ceramic Buddha to 3-D model

A light intro to 3-D Modeling with Blender // Scott Janousek // [email protected] // www.scottjanousek.com // Creative Commons
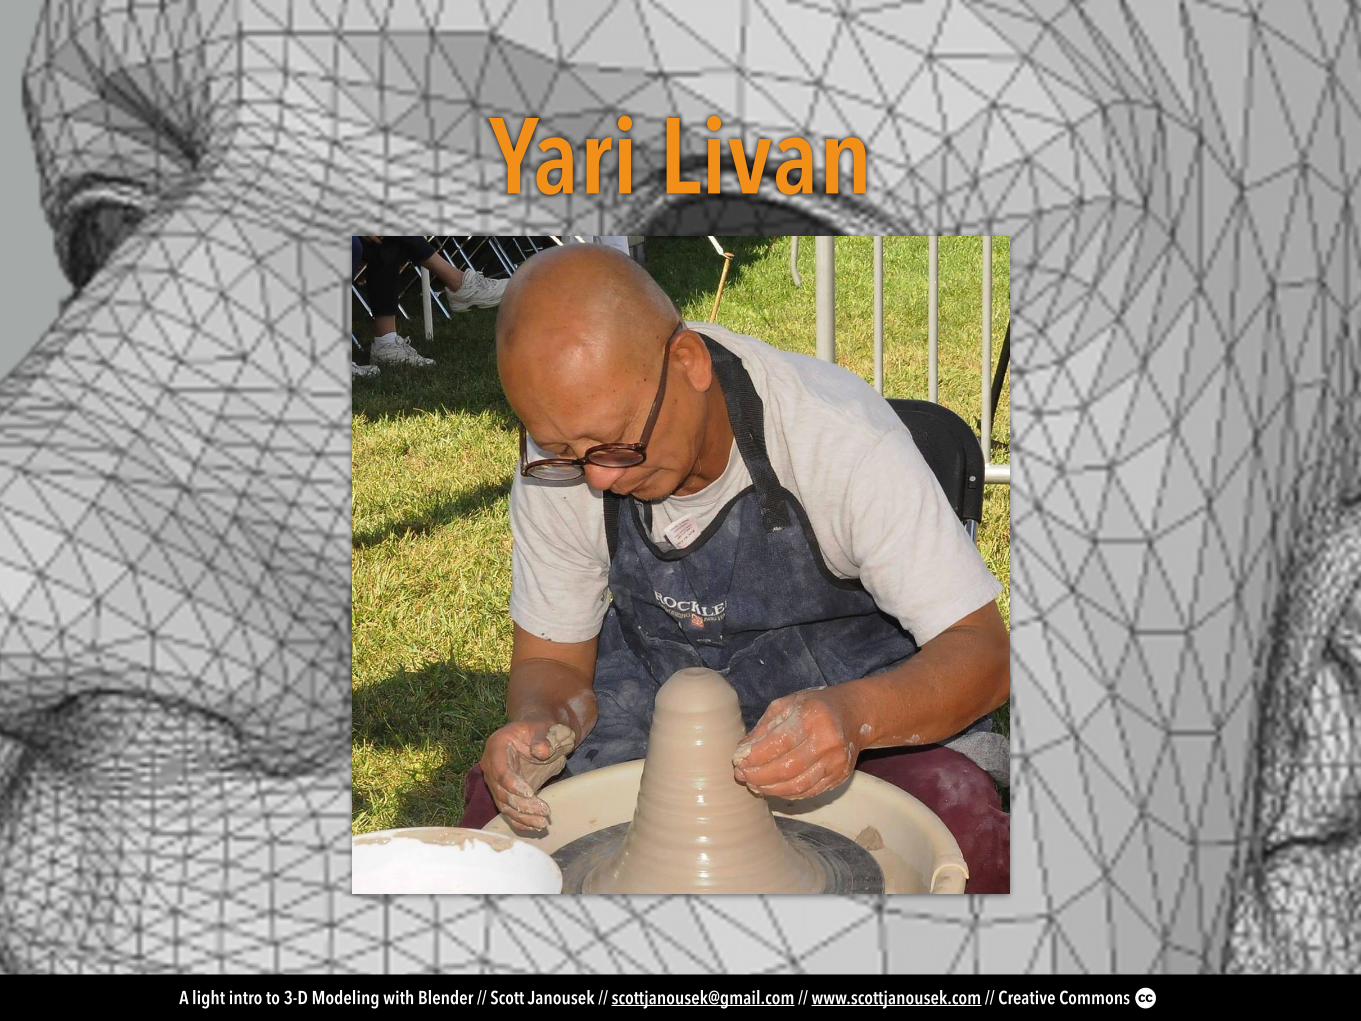
Project - Yari Statue
Was approached by a friend to help Yari - a sculptural artist from New England that makes religious influenced Cambodian art.
This was pro-bono work.
A light intro to 3-D Modeling with Blender // Scott Janousek // [email protected] // www.scottjanousek.com // Creative Commons
Yari Livan

A light intro to 3-D Modeling with Blender // Scott Janousek // [email protected] // www.scottjanousek.com // Creative Commons
The Buddha Statue

A light intro to 3-D Modeling with Blender // Scott Janousek // [email protected] // www.scottjanousek.com // Creative Commons
Goal
To 3-D laser scan the original ceramic buddha at small scale, export mesh, scale it 5-7’ tall, CNC it out of a material, and then cast it in bronze or another metal using a custom forge.

A light intro to 3-D Modeling with Blender // Scott Janousek // [email protected] // www.scottjanousek.com // Creative Commons
3-D laser scanning

A light intro to 3-D Modeling with Blender // Scott Janousek // [email protected] // www.scottjanousek.com // Creative Commons
3-D laser scanning

A light intro to 3-D Modeling with Blender // Scott Janousek // [email protected] // www.scottjanousek.com // Creative Commons
3-D laser scanning

A light intro to 3-D Modeling with Blender // Scott Janousek // [email protected] // www.scottjanousek.com // Creative Commons
3-D laser scanning

A light intro to 3-D Modeling with Blender // Scott Janousek // [email protected] // www.scottjanousek.com // Creative Commons
3-D laser scanning

A light intro to 3-D Modeling with Blender // Scott Janousek // [email protected] // www.scottjanousek.com // Creative Commons
3-D laser scanning

A light intro to 3-D Modeling with Blender // Scott Janousek // [email protected] // www.scottjanousek.com // Creative Commons
3-D printing the Buddha

A light intro to 3-D Modeling with Blender // Scott Janousek // [email protected] // www.scottjanousek.com // Creative Commons
3-D Printed Replica (resin)

A light intro to 3-D Modeling with Blender // Scott Janousek // [email protected] // www.scottjanousek.com // Creative Commons
Magnetic Levitation + 3-D printed Buddha

A light intro to 3-D Modeling with Blender // Scott Janousek // [email protected] // www.scottjanousek.com // Creative Commons
Animating the Buddha in Blender

A light intro to 3-D Modeling with Blender // Scott Janousek // [email protected] // www.scottjanousek.com // Creative Commons

A light intro to 3-D Modeling with Blender // Scott Janousek // [email protected] // www.scottjanousek.com // Creative Commons
Import the 3-D scan mesh into Blender.

A light intro to 3-D Modeling with Blender // Scott Janousek // [email protected] // www.scottjanousek.com // Creative Commons
Find the Yari .obj file in the resources folder.

A light intro to 3-D Modeling with Blender // Scott Janousek // [email protected] // www.scottjanousek.com // Creative Commons
Import the 3-D scan mesh into Blender, and set geometry to origin (it is off).

A light intro to 3-D Modeling with Blender // Scott Janousek // [email protected] // www.scottjanousek.com // Creative Commons
Scale the buddha down, translate Scale, “s” and make it smaller to fit in scene.

A light intro to 3-D Modeling with Blender // Scott Janousek // [email protected] // www.scottjanousek.com // Creative Commons
Zoom to Buddha (via mouse wheel, or shift-c.)

A light intro to 3-D Modeling with Blender // Scott Janousek // [email protected] // www.scottjanousek.com // Creative Commons
Adjust the z-axis of the buddha by translate z-axis only, and set it to “2.0”, or use mouse to adjust.

A light intro to 3-D Modeling with Blender // Scott Janousek // [email protected] // www.scottjanousek.com // Creative Commons
Reduce the # of keyframes a bit.

A light intro to 3-D Modeling with Blender // Scott Janousek // [email protected] // www.scottjanousek.com // Creative Commons
Add a keyframe to start rotation.

A light intro to 3-D Modeling with Blender // Scott Janousek // [email protected] // www.scottjanousek.com // Creative Commons
Add a second keyframe to rotate.

A light intro to 3-D Modeling with Blender // Scott Janousek // [email protected] // www.scottjanousek.com // Creative Commons
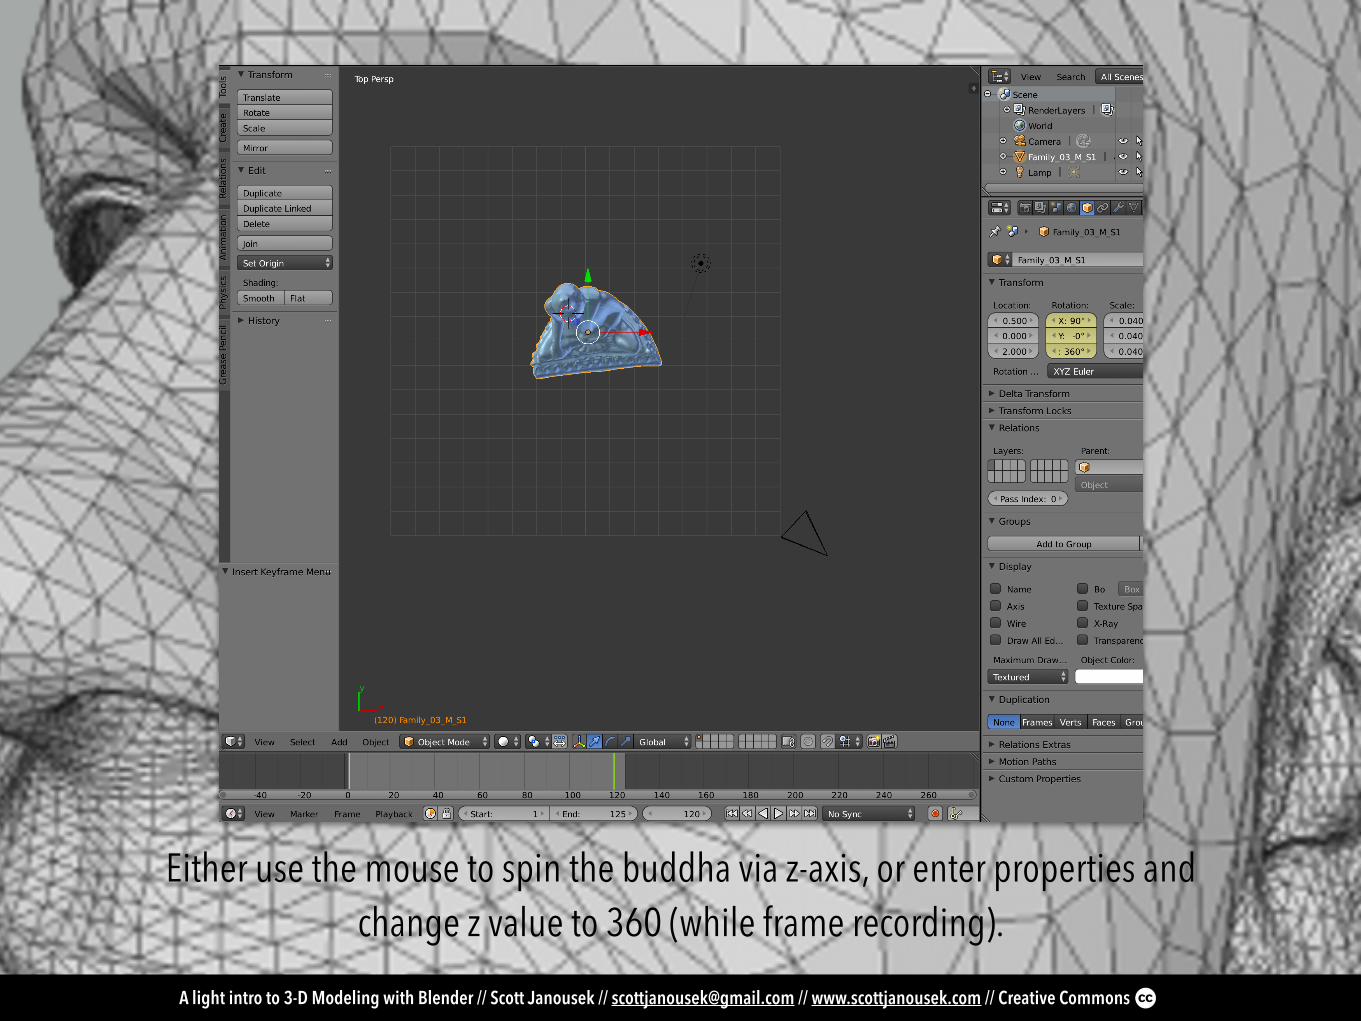
Now actually do the rotational transformation on the object in the last keyframe. Do this in numbed 7 top view to be more precise.
A light intro to 3-D Modeling with Blender // Scott Janousek // [email protected] // www.scottjanousek.com // Creative Commons
Either use the mouse to spin the buddha via z-axis, or enter properties and change z value to 360 (while frame recording).

A light intro to 3-D Modeling with Blender // Scott Janousek // [email protected] // www.scottjanousek.com // Creative Commons
Trim the values from the start and end frames so there is no delay, and the buddha spins freely.

A light intro to 3-D Modeling with Blender // Scott Janousek // [email protected] // www.scottjanousek.com // Creative Commons
Insert keyframes on 0, 60 and 120. Value for 0 something like 2, value for frame 60 like 4, and value for last frame back to 2 again (i.e. “hovering in place”).

A light intro to 3-D Modeling with Blender // Scott Janousek // [email protected] // www.scottjanousek.com // Creative Commons
Change the lamp to constant light source.

A light intro to 3-D Modeling with Blender // Scott Janousek // [email protected] // www.scottjanousek.com // Creative Commons
Point the camera at the buddha, and tweak focal length to =~ 35mm and up the size to =~ 75 to get the object in frame. Keep as perspective mode.

A light intro to 3-D Modeling with Blender // Scott Janousek // [email protected] // www.scottjanousek.com // Creative Commons
Render the image.

A light intro to 3-D Modeling with Blender // Scott Janousek // [email protected] // www.scottjanousek.com // Creative Commons
Render the animation, and export to a movie.

A light intro to 3-D Modeling with Blender // Scott Janousek // [email protected] // www.scottjanousek.com // Creative Commons
Rendered.

A light intro to 3-D Modeling with Blender // Scott Janousek // [email protected] // www.scottjanousek.com // Creative Commons
Controlling an LED Star with Blender

A light intro to 3-D Modeling with Blender // Scott Janousek // [email protected] // www.scottjanousek.com // Creative Commons

A light intro to 3-D Modeling with Blender // Scott Janousek // [email protected] // www.scottjanousek.com // Creative Commons
Work in progress …

A light intro to 3-D Modeling with Blender // Scott Janousek // [email protected] // www.scottjanousek.com // Creative Commons
Blender side (Virtual)

A light intro to 3-D Modeling with Blender // Scott Janousek // [email protected] // www.scottjanousek.com // Creative Commons
Create an Iso Sphere.

A light intro to 3-D Modeling with Blender // Scott Janousek // [email protected] // www.scottjanousek.com // Creative Commons
Select all the faces (control-tab).

A light intro to 3-D Modeling with Blender // Scott Janousek // [email protected] // www.scottjanousek.com // Creative Commons
Add a Subsurface Mesh modifier to the iso sphere.

A light intro to 3-D Modeling with Blender // Scott Janousek // [email protected] // www.scottjanousek.com // Creative Commons
Add a Subsurface Mesh modifier to the iso sphere.

A light intro to 3-D Modeling with Blender // Scott Janousek // [email protected] // www.scottjanousek.com // Creative Commons
Drop the iso sphere down in facet size.

A light intro to 3-D Modeling with Blender // Scott Janousek // [email protected] // www.scottjanousek.com // Creative Commons
Add another iso sphere into the scene.

A light intro to 3-D Modeling with Blender // Scott Janousek // [email protected] // www.scottjanousek.com // Creative Commons
Change the lighting to semi and constant source.

A light intro to 3-D Modeling with Blender // Scott Janousek // [email protected] // www.scottjanousek.com // Creative Commons
Experimenting with Material and Textures.

A light intro to 3-D Modeling with Blender // Scott Janousek // [email protected] // www.scottjanousek.com // Creative Commons
Adding keyframe animation.

A light intro to 3-D Modeling with Blender // Scott Janousek // [email protected] // www.scottjanousek.com // Creative Commons
Modifying camera properties.

A light intro to 3-D Modeling with Blender // Scott Janousek // [email protected] // www.scottjanousek.com // Creative Commons
Test Render.

A light intro to 3-D Modeling with Blender // Scott Janousek // [email protected] // www.scottjanousek.com // Creative Commons
Blender UI Code (Python T.B.D)

A light intro to 3-D Modeling with Blender // Scott Janousek // [email protected] // www.scottjanousek.com // Creative Commons
Physical Side (hardware + poly LED star)

A light intro to 3-D Modeling with Blender // Scott Janousek // [email protected] // www.scottjanousek.com // Creative Commons
Arduino sketch code to control the sphere (power on/off).

A light intro to 3-D Modeling with Blender // Scott Janousek // [email protected] // www.scottjanousek.com // Creative Commons
The Star and the Arduino that will be controlling it.

A light intro to 3-D Modeling with Blender // Scott Janousek // [email protected] // www.scottjanousek.com // Creative Commons

A light intro to 3-D Modeling with Blender // Scott Janousek // [email protected] // www.scottjanousek.com // Creative Commons
Summary

A light intro to 3-D Modeling with Blender // Scott Janousek // [email protected] // www.scottjanousek.com // Creative Commons
What are your questions? (=~ 15 minutes)

A light intro to 3-D Modeling with Blender // Scott Janousek // [email protected] // www.scottjanousek.com // Creative Commons
Thank you.

A light intro to 3-D Modeling with Blender // Scott Janousek // [email protected] // www.scottjanousek.com // Creative Commons
@scottjanousek
www.scottjanousek.com