accounting introduction & overview - c.ymcdn.com fileaccounting – introduction & overview...
TRANSCRIPT
1
Accounting – Introduction & Overview
ACCOUNTING INTRODUCTION & OVERVIEW All accounting transactions will be located within the Ecommerce menu. From this menu, you can manage donation,
dues and membership, and store order transactions, configure your global commerce options and run exports of
accounting transactions out of the system. This notes document will help you:
Gain an overall understanding of how the Ecommerce options work
Gain an understanding of General Ledger Accounts and where to configure them appropriately
Configure the Account Matrix
Configure your global Commerce Options
Configure your invoice templates
The accounting Ecommerce module is designed to record invoices and payments. Some important things to know about
the Ecommerce module are:
It will not replace your accounting software such as QuickBooks or Peachtree.
To balance your books, you’ll export the information from YourMembership.com into your accounting software to update the income General Ledger Account totals in your accounting software.
The only function that interacts automatically with your banking system is credit card payments processing.
General Ledger Accounts General Ledger Accounts track and summarize changes in financial position as transactions are posted during an
accounting period. All general ledger account codes entered into YourMembership.com should mirror the ones that you
have in your main accounting software (QuickBooks, Peachtree, etc.).
For each item that you will be accepting payment for online, there is a corresponding GL Code/Item Name and/or
QuickBooks Class that need to be configured. If you do not have this information, request it from your accountant.
Below are examples of most commonly used items that will need to be configured with a corresponding GL Code/Item
Name or QuickBooks Class.
Donation Funds If your organization will be managing a donation fund and accepting payments online, it will need to be added to the
system and configured with the appropriate general ledger information. To ensure that your donation fund(s) is linked
to the correct GL Code/Item Name and/or QuickBooks Class:
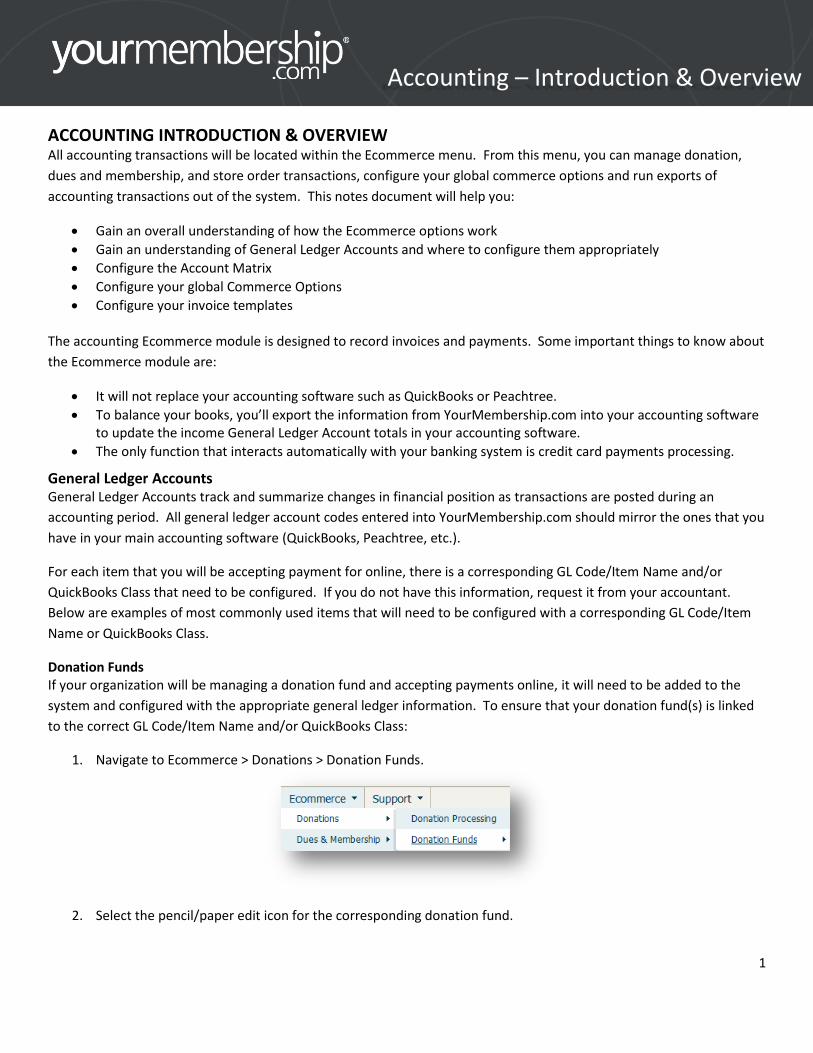
1. Navigate to Ecommerce > Donations > Donation Funds.
2. Select the pencil/paper edit icon for the corresponding donation fund.
2
Accounting – Introduction & Overview
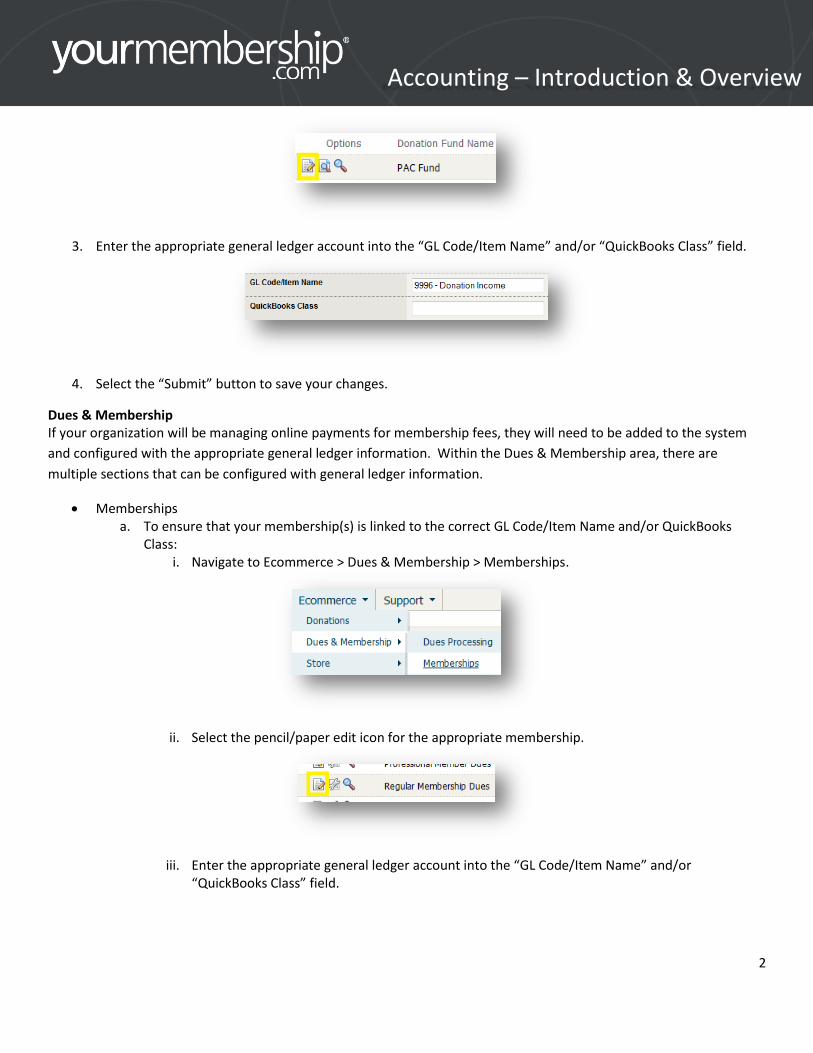
3. Enter the appropriate general ledger account into the “GL Code/Item Name” and/or “QuickBooks Class” field.
4. Select the “Submit” button to save your changes.
Dues & Membership If your organization will be managing online payments for membership fees, they will need to be added to the system
and configured with the appropriate general ledger information. Within the Dues & Membership area, there are
multiple sections that can be configured with general ledger information.
Memberships a. To ensure that your membership(s) is linked to the correct GL Code/Item Name and/or QuickBooks
Class: i. Navigate to Ecommerce > Dues & Membership > Memberships.
ii. Select the pencil/paper edit icon for the appropriate membership.
iii. Enter the appropriate general ledger account into the “GL Code/Item Name” and/or “QuickBooks Class” field.
3
Accounting – Introduction & Overview
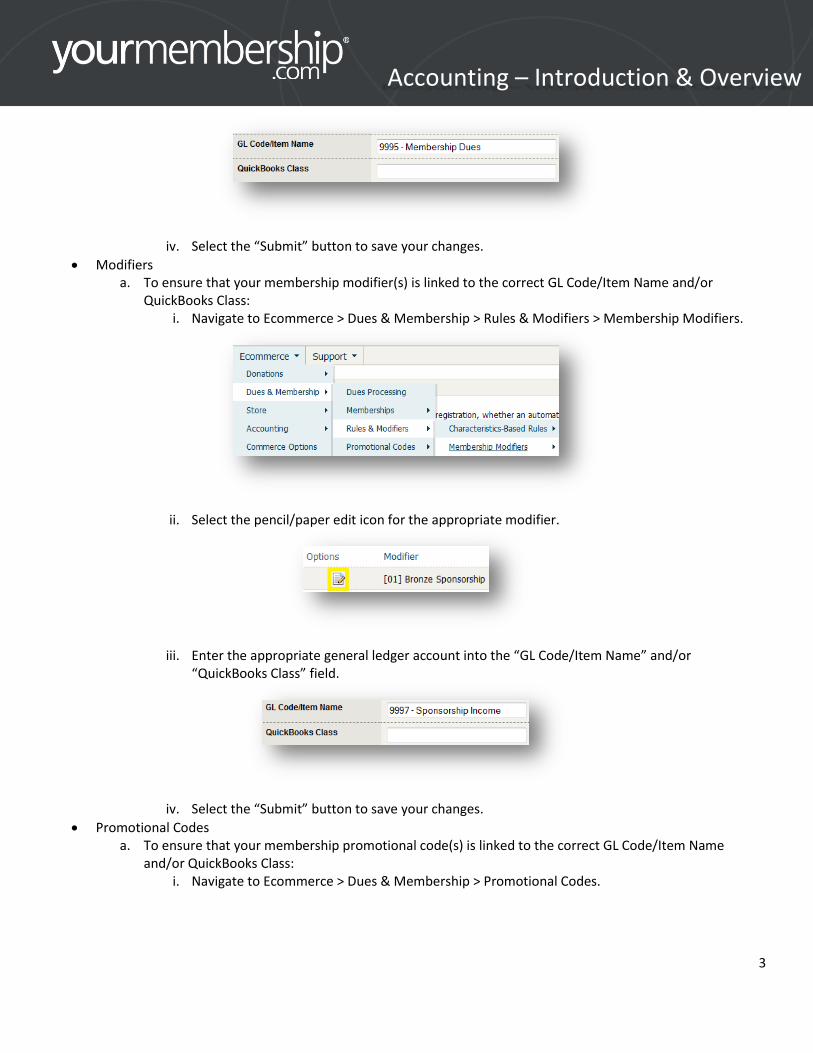
iv. Select the “Submit” button to save your changes.
Modifiers a. To ensure that your membership modifier(s) is linked to the correct GL Code/Item Name and/or
QuickBooks Class: i. Navigate to Ecommerce > Dues & Membership > Rules & Modifiers > Membership Modifiers.
ii. Select the pencil/paper edit icon for the appropriate modifier.
iii. Enter the appropriate general ledger account into the “GL Code/Item Name” and/or “QuickBooks Class” field.
iv. Select the “Submit” button to save your changes.
Promotional Codes a. To ensure that your membership promotional code(s) is linked to the correct GL Code/Item Name
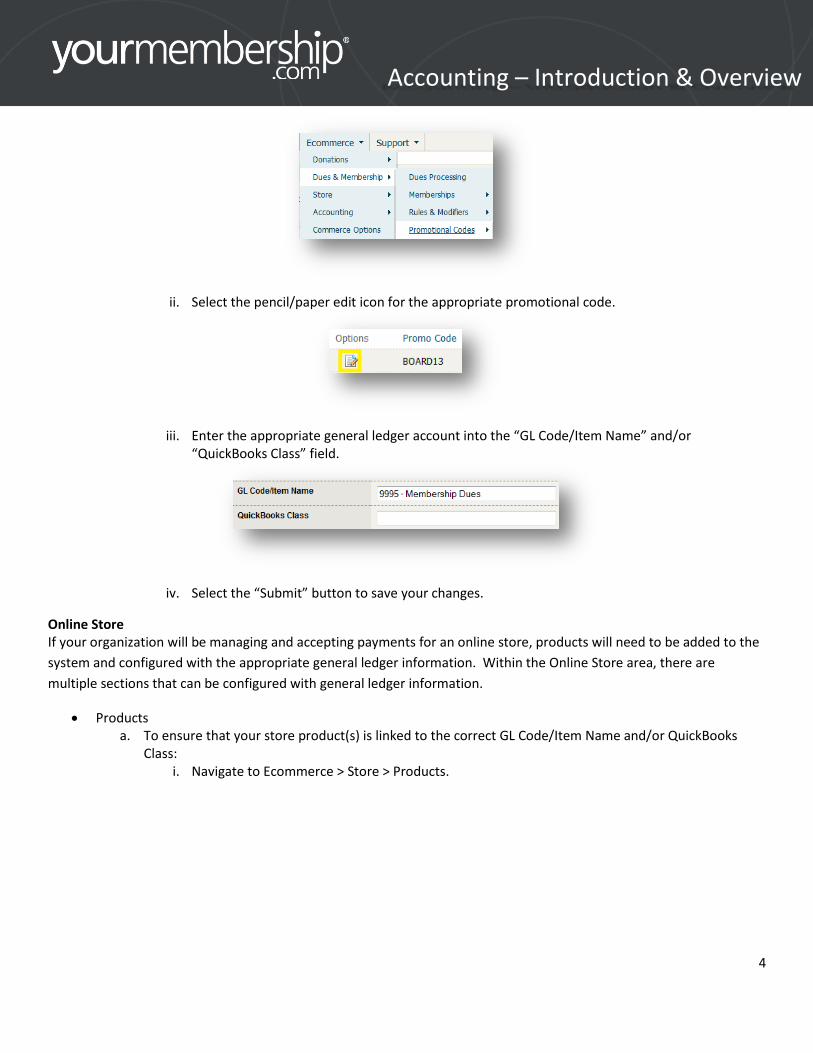
and/or QuickBooks Class: i. Navigate to Ecommerce > Dues & Membership > Promotional Codes.
4
Accounting – Introduction & Overview
ii. Select the pencil/paper edit icon for the appropriate promotional code.
iii. Enter the appropriate general ledger account into the “GL Code/Item Name” and/or “QuickBooks Class” field.
iv. Select the “Submit” button to save your changes.
Online Store If your organization will be managing and accepting payments for an online store, products will need to be added to the
system and configured with the appropriate general ledger information. Within the Online Store area, there are
multiple sections that can be configured with general ledger information.
Products a. To ensure that your store product(s) is linked to the correct GL Code/Item Name and/or QuickBooks
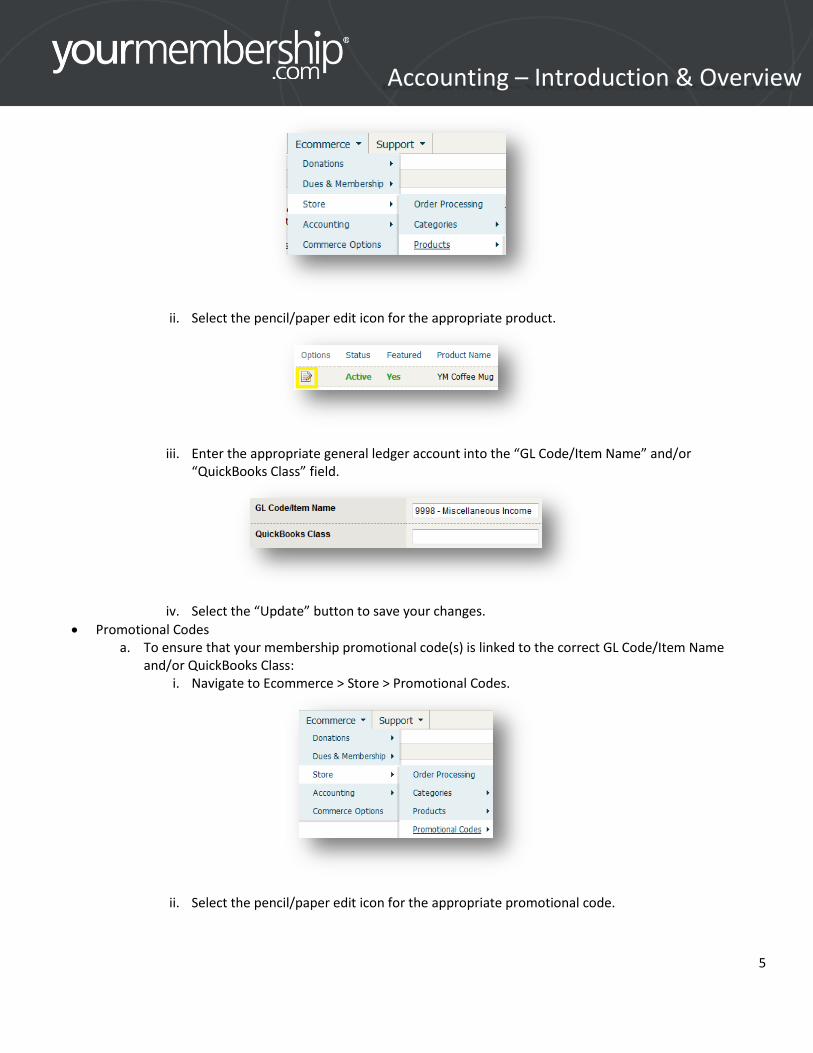
Class: i. Navigate to Ecommerce > Store > Products.
5
Accounting – Introduction & Overview
ii. Select the pencil/paper edit icon for the appropriate product.
iii. Enter the appropriate general ledger account into the “GL Code/Item Name” and/or “QuickBooks Class” field.
iv. Select the “Update” button to save your changes.
Promotional Codes a. To ensure that your membership promotional code(s) is linked to the correct GL Code/Item Name
and/or QuickBooks Class: i. Navigate to Ecommerce > Store > Promotional Codes.
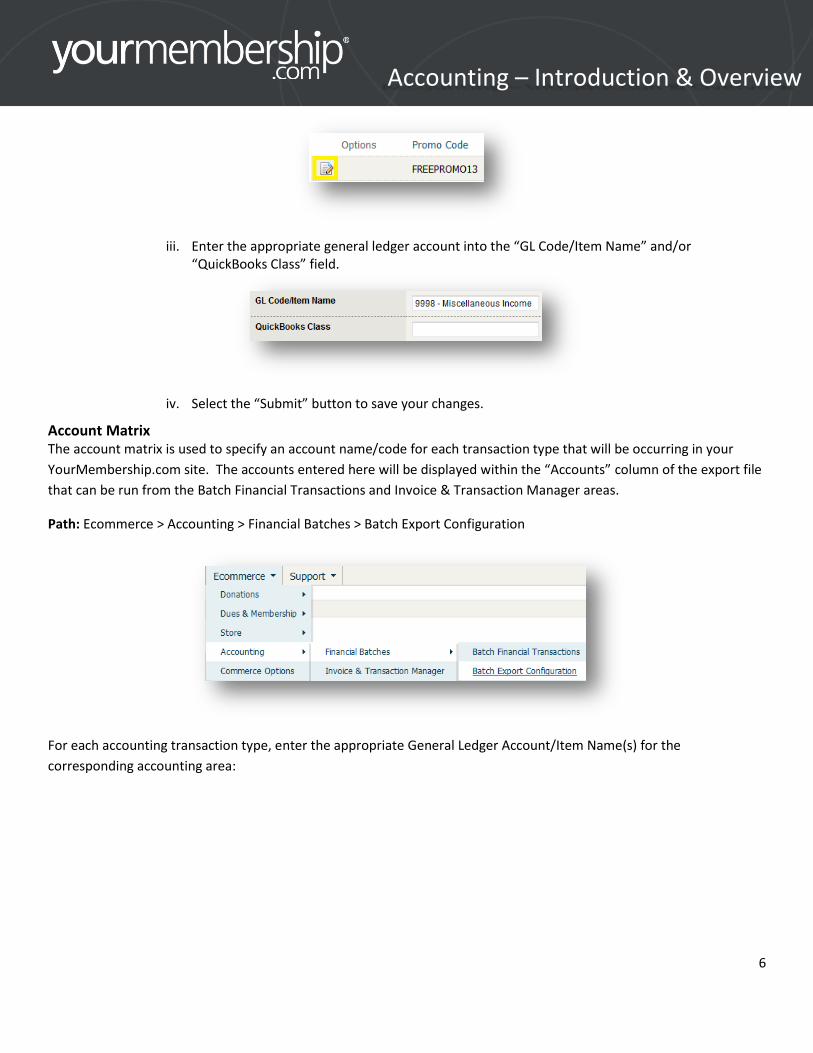
ii. Select the pencil/paper edit icon for the appropriate promotional code.
6
Accounting – Introduction & Overview
iii. Enter the appropriate general ledger account into the “GL Code/Item Name” and/or “QuickBooks Class” field.
iv. Select the “Submit” button to save your changes.
Account Matrix The account matrix is used to specify an account name/code for each transaction type that will be occurring in your
YourMembership.com site. The accounts entered here will be displayed within the “Accounts” column of the export file
that can be run from the Batch Financial Transactions and Invoice & Transaction Manager areas.
Path: Ecommerce > Accounting > Financial Batches > Batch Export Configuration
For each accounting transaction type, enter the appropriate General Ledger Account/Item Name(s) for the
corresponding accounting area:
7
Accounting – Introduction & Overview
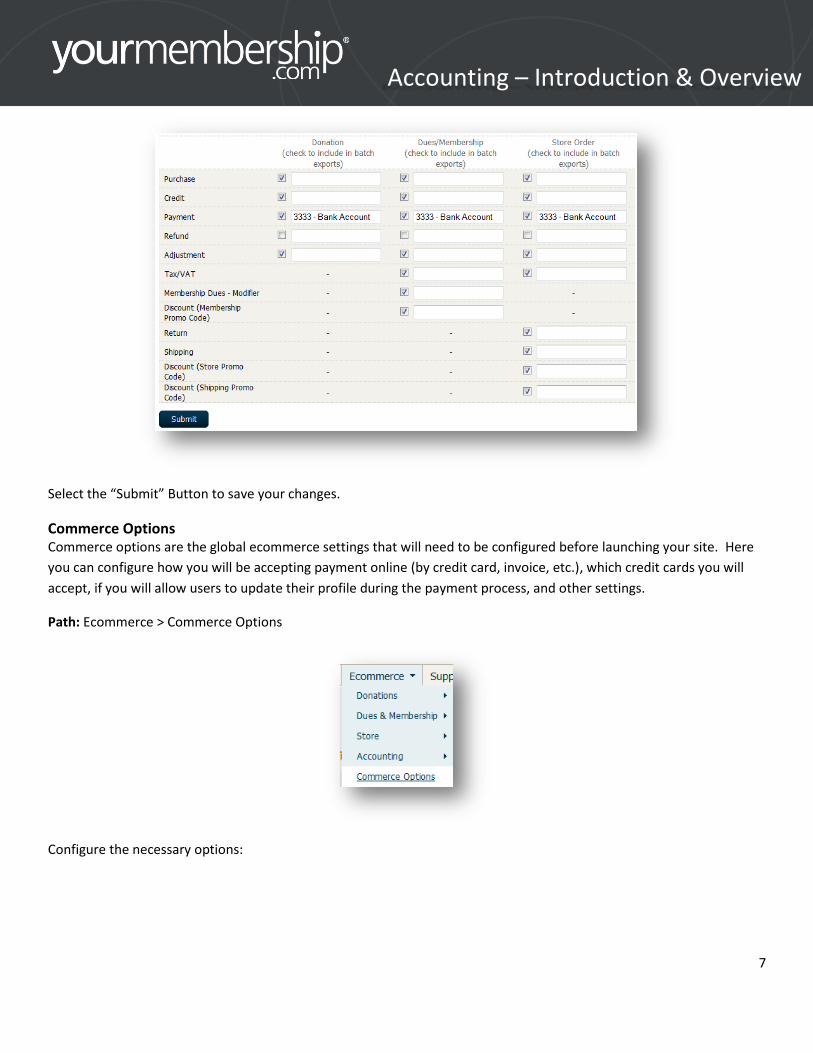
Select the “Submit” Button to save your changes.
Commerce Options Commerce options are the global ecommerce settings that will need to be configured before launching your site. Here
you can configure how you will be accepting payment online (by credit card, invoice, etc.), which credit cards you will
accept, if you will allow users to update their profile during the payment process, and other settings.
Path: Ecommerce > Commerce Options
Configure the necessary options:
8
Accounting – Introduction & Overview
9
Accounting – Introduction & Overview
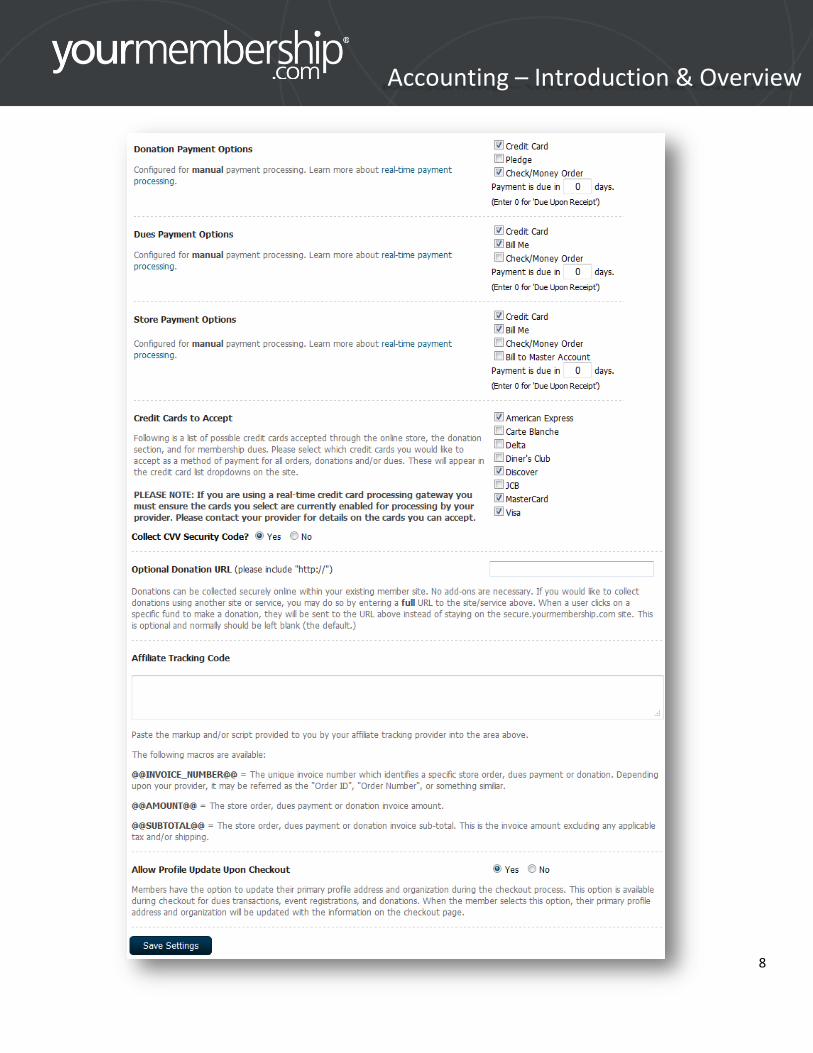
Donation Payment Options – utilize the corresponding checkboxes and settings to configure how users will be able to pay for donation transactions online.
a. Credit Card – if selected, users will be able to pay by credit card when making an online donation. b. Pledge – if selected, users will be able to pledge when making an online donation. c. Check/Money Order – if selected, users will be able to pay by invoice when making an online donation. d. Payment is due in “x” days. (Enter 0 for ‘Due Upon Receipt’) – utilize this textbox to enter a default
payment due timeframe. The system will use the number of days entered to automatically generate a payment due date that will be applied to all donation transactions created in the system.
i. For example, if payment is due within 30 days and a user creates a donation invoice on July 1, a payment due date of July 30 will be generated and displayed on the corresponding invoice.
ii. If 0 is entered into this field, the text “Due Upon Receipt” will display on the corresponding donation invoice.
Dues Payment Options – utilize the corresponding checkboxes and settings to configure how users will be able to pay for membership dues transactions online.
a. Credit Card – if selected, users will be able to pay by credit card when making an online membership payment.
b. Bill Me – if selected, users will be able to pay by invoice when making an online membership payment. The user will see the text “Bill Me” during the online payment process.
c. Check/Money Order – if selected, users will be able to pay by invoice when making an online membership payment. The user will see the text “Check/Money Order” during the online payment process.
d. Payment is due in “x” days. (Enter 0 for ‘Due Upon Receipt’) – utilize this textbox to enter a default payment due timeframe. The system will use the number of days entered to automatically generate a payment due date that will be applied to all membership transactions created in the system.
i. For example, if payment is due within 30 days and a user creates a membership invoice on July 1, a payment due date of July 30 will be generated and displayed on the corresponding invoice.
ii. If 0 is entered into this field, then the text “Due Upon Receipt” will display on the corresponding membership invoice.
Store Payment Options – utilize the corresponding checkboxes and settings to configure how users will be able to pay for store order transactions online.
a. Credit Card – if selected, users will be able to pay by credit card when making an online store payment. b. Bill Me – if selected, users will be able to pay by invoice when making an online store payment. The user
will see the text “Bill Me” during the online payment process. c. Check/Money Order – if selected, users will be able to pay by invoice when making an online store
payment. The user will see the text “Check/Money Order” during the online payment process. d. Bill to Master Account – if selected, and the user is linked to a master account, users will have the ability
to select their master account to be billed when making an online payment. e. Payment is due in “x” days. (Enter 0 for ‘Due Upon Receipt’) – utilize this textbox to enter a default
payment due timeframe. The system will use the number of days entered to automatically generate a payment due date that will be applied to all store transactions created in the system.
i. For example, if payment is due within 30 days and a user creates a store invoice on July 1, a payment due date of July 30 will be generated and displayed on the corresponding invoice.
ii. If 0 is entered into this field, then the text “Due Upon Receipt” will display on the corresponding store invoice.
10
Accounting – Introduction & Overview
Credit Cards to Accept – utilize the corresponding checkboxes to select which credit cards you would like to accept as a method of payment for all orders, donations and/or dues. Users will be given these options during the credit card payment process.
a. Collect CVV Security Code? i. Yes – if selected, the user will be prompted to enter the credit card CVV code located on the
back of the credit card during the online payment process. ii. No – if selected, the user will not be prompted to enter the credit card CVV code located on the
back of the credit card during the online payment process.
Optional Donation URL – if you will not be managing an online donation fund through your site but wish to direct users to a third party website to donate, enter the appropriate URL here.
Affiliate Tracking Code – will only be utilized if you are using an outside affiliate site and users are driven to your YourMembership.com site to make a purchase. The third party will provide you with the tracking code to embed into this configuration area.
Allow Profile Update Upon Checkout – utilize this option if you wish to allow signed in members to update their profile information during the checkout process.
a. Yes – if selected, a checkbox will be displayed during the online checkout process, prompting users to update their profile with any changes they made to their contact information during the checkout process.
b. No – if selected, a checkbox will not be displayed during the online checkout process, prompting users to update their profile with any changes they made to their contact information during the checkout process.
Invoice Templates For each transaction type within the system (donation, dues and membership and store orders) you can
create/customize the corresponding invoice template that will be generated for that transaction. By default, a general
invoice template will be applied to each of the invoice templates.
To edit an invoice template:
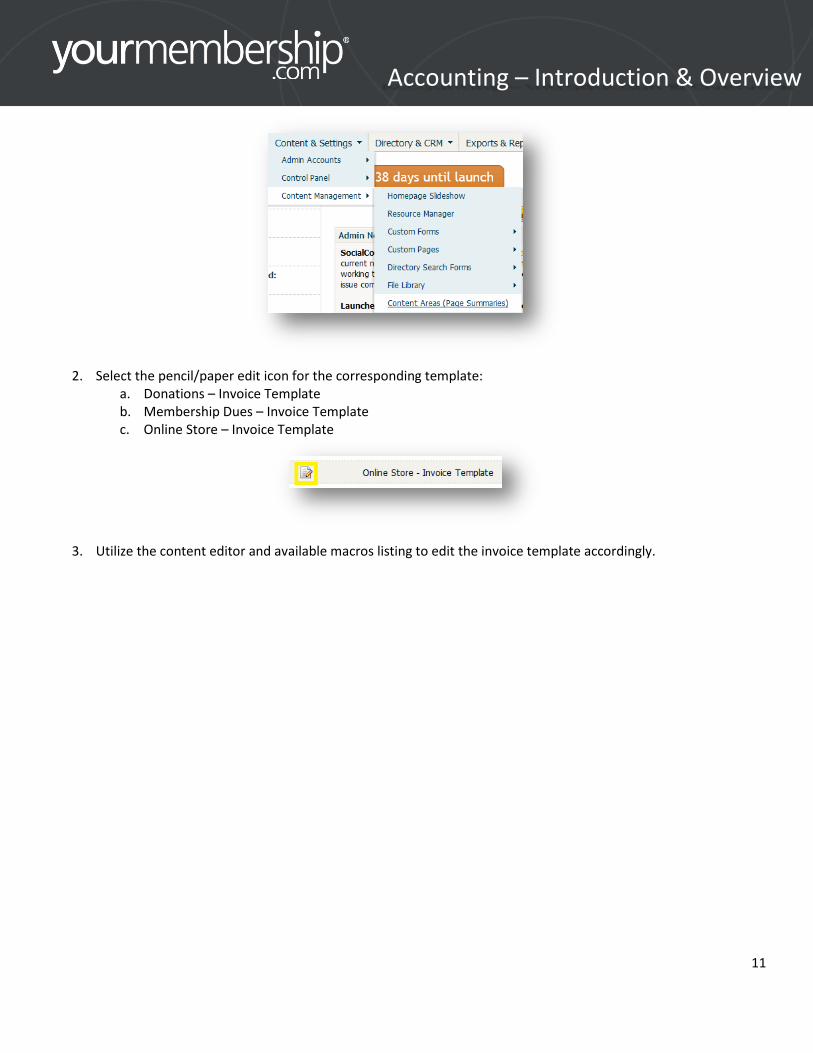
1. Navigate to Content & Settings > Content Management > Content Areas (Page Summaries).
NOTE: If you are using a real-time credit card processing gateway, you must ensure the cards you
select are currently enabled for processing by your provider. Please contact your provider for details on
the cards you can accept.
NOTE: The affiliate tracking code system will allow you to create traceable links that you can provide to
your affiliates and, when selected, will start tracking users sent to your site. In addition, you'll place the
tracking code on your checkout page that will record all referrals that made it through the checkout
process. This method will help ensure that all affiliates get proper credit for their referrals and users
will not have to remember to provide a code.
11
Accounting – Introduction & Overview
2. Select the pencil/paper edit icon for the corresponding template: a. Donations – Invoice Template b. Membership Dues – Invoice Template c. Online Store – Invoice Template
3. Utilize the content editor and available macros listing to edit the invoice template accordingly.
12
Accounting – Introduction & Overview
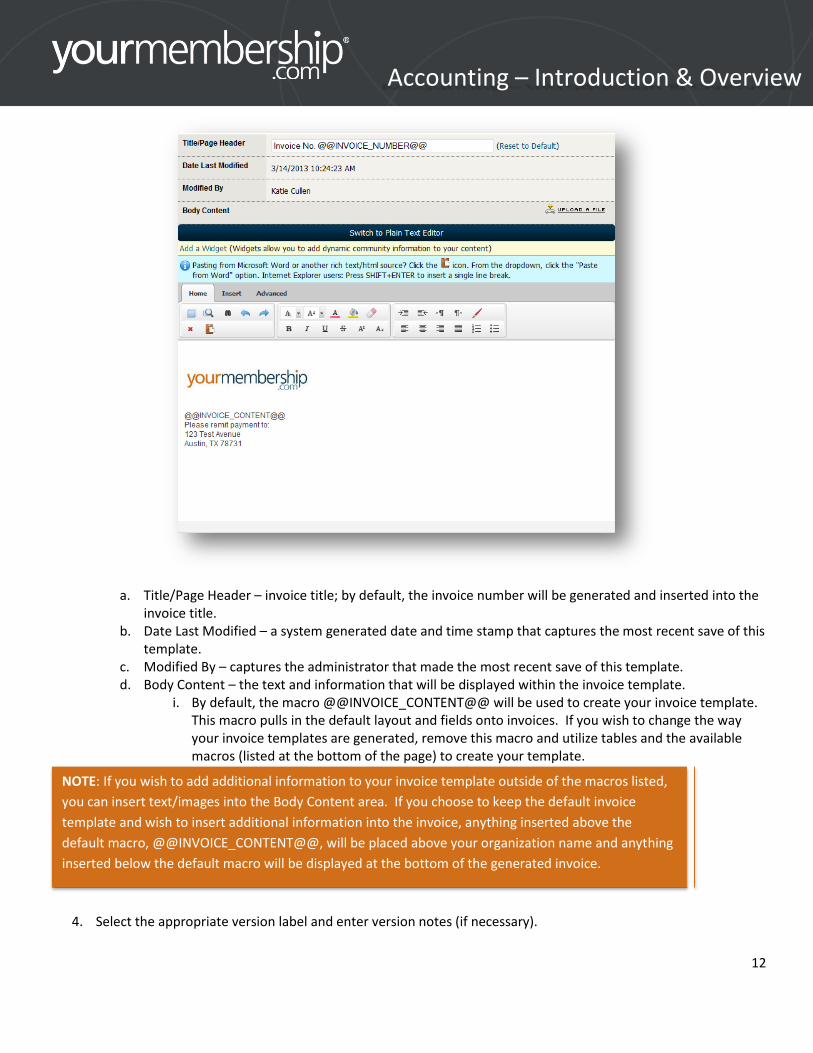
a. Title/Page Header – invoice title; by default, the invoice number will be generated and inserted into the invoice title.
b. Date Last Modified – a system generated date and time stamp that captures the most recent save of this template.
c. Modified By – captures the administrator that made the most recent save of this template. d. Body Content – the text and information that will be displayed within the invoice template.
i. By default, the macro @@INVOICE_CONTENT@@ will be used to create your invoice template. This macro pulls in the default layout and fields onto invoices. If you wish to change the way your invoice templates are generated, remove this macro and utilize tables and the available macros (listed at the bottom of the page) to create your template.
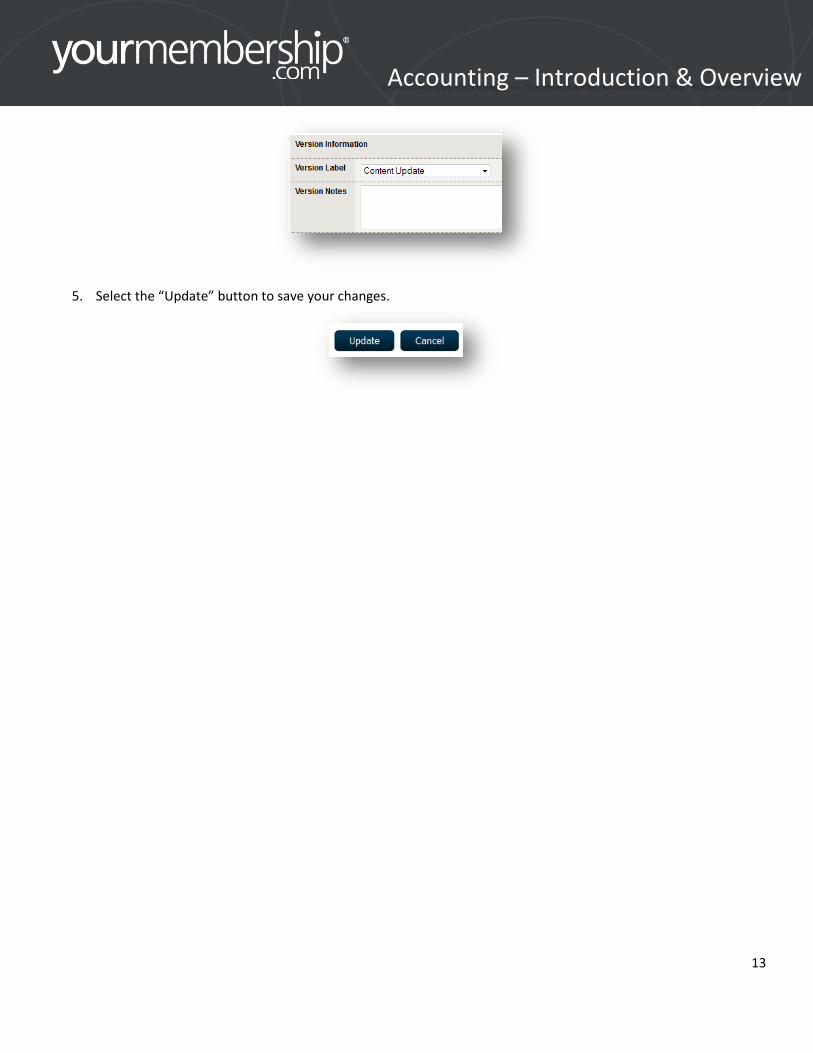
4. Select the appropriate version label and enter version notes (if necessary).
NOTE: If you wish to add additional information to your invoice template outside of the macros listed,
you can insert text/images into the Body Content area. If you choose to keep the default invoice
template and wish to insert additional information into the invoice, anything inserted above the
default macro, @@INVOICE_CONTENT@@, will be placed above your organization name and anything
inserted below the default macro will be displayed at the bottom of the generated invoice.
13
Accounting – Introduction & Overview
5. Select the “Update” button to save your changes.