adabas audit data retrieval v7r2 release notes and update
TRANSCRIPT

Adabas Audit Data Retrieval
Release Notes and Update Instructions
March 22, 2021
Document number: AAR-B97-V7R2-RN-EN-20210322
Product / Component / Add-on Maintenance level / Build FMID
Adabas Audit Data Retrieval V7R2-00 (PIR0436) SIR7200
BSA (Beta Systems Architecture) 1771-02 (PBS4297) RBS7100
Beta 23 (_beta browse) V7R2 (NEW) RBF7200
Beta Systems DCI Software AG Alt-Moabit 90d D-10559 Berlin
www.betasystems-dci.com
Support Contact Information
Telephone Germany: 0800-BETASYS (or 0800-2382797)
Telephone International: +49 (0)6321 499 15 108

BSA V7R1 level 1771-02 (PBS4297) Adabas Audit Data Retrieval level V7R2-00 (PIR0436)
Adabas Audit Data Retrieval V7R2 Release Notes and Update Instructions – March 22, 2021 2
Contents
Introduction ................................................................................................. 3 Licensing information ................................................................................. 5 General installation instructions ................................................................. 7 Pre-installation checklists ......................................................................... 12 Installation REXX ..................................................................................... 16 SMP/E terms and concepts ...................................................................... 52 BSA installation and maintenance jobs .................................................... 55 Beta 23 installation and maintenance jobs ............................................... 59 Product installation and maintenance jobs ............................................... 61 BSA and product customization and activation ........................................ 63 Verification ................................................................................................ 66
AAR-B97-V7R2-RN-EN-20210322

BSA V7R1 level 1771-02 (PBS4297) Adabas Audit Data Retrieval level V7R2-00 (PIR0436)
Adabas Audit Data Retrieval V7R2 Release Notes and Update Instructions – March 22, 2021 3
Introduction
These release notes contain detailed installation and update instructions for the following product levels:
Product / Component / Add-on Maintenance level / Build FMID
Adabas Audit Data Retrieval V7R2-00 (PIR0436) SIR7200
BSA (Beta Systems Architecture) 1771-02 (PBS4297) plus additional PTFs RBS7100
Beta 23 (_beta browse) V7R2-00 (NEW) RBF7200 Adabas Audit Data Retrieval V7R2 requires:
• z/OS V2.3 or later with DFSORT (64 bit) or Syncsort (64 bit)
• BSA V7R1
• Beta 23 (_beta browse) V7R2
Separate CSI recommended
We recommend that you install Adabas Audit Data Retrieval together with BSA and Beta 23 in a separate CSI. The software is made available as a ZIP archive, which includes all the folders and files that are necessary to install the software. "General installation instructions" on page 7 provides a general description of the installation process, including the transfer and unpacking of the installation datasets.
"Installation REXX" on page 16 guides you through the installation REXX. The installation process will go smoother if you have the information that will be requested ready-at-hand (see "Pre-installation checklists" on page 12).
The installation is SMP/E based. If you're not familiar with SMP/E, you may find some useful information in "SMP/E terms and concepts" on page 52.
The installation REXX tailors appropriate installation jobs according to your specifications. The tables in the following sections show which installation jobs you have to run:
• "BSA installation and maintenance jobs" on page 55
• "Beta 23 installation and maintenance jobs" on page 59
• "Product installation and maintenance jobs" on page 61
• "BSA and product customization and activation" on page 63
For detailed information on these jobs, you can refer to the Installation and System Guide of BSA and Adabas Audit Data Retrieval.
This document
Requirements
Standard installation medium
Installation instructions

BSA V7R1 level 1771-02 (PBS4297) Adabas Audit Data Retrieval level V7R2-00 (PIR0436)
Adabas Audit Data Retrieval V7R2 Release Notes and Update Instructions – March 22, 2021 4
Adabas Audit Data Retrieval has a numeric two-digit identifier, which is used in the names of libraries, panels, programs, etc.
The product identifier of Adabas Audit Data Retrieval is 97. Adabas Audit Data Retrieval requires a valid B97.G7 license (see "Licensing information" on page 5). Following is the list of manuals available for BSA and Adabas Audit Data Retrieval at the time of release of this document.
Title Document number
Adabas Audit Data Retrieval
Adabas Audit Data Retrieval Administrator Guide Adabas Audit Data Retrieval Installation and System Guide Adabas Audit Data Retrieval Messages and Codes
BSA
BSA Service Manager Manual BSA Installation and System Guide BSA Messages and Codes
AAR-V7R2-ADM-EN-20210322 AAR-V7R2-INS-EN-20210322 AAR-V7R2-MSG-EN-20210322
BSA-V7R1-BSM-EN-20210322 BSA-V7R1-INS-EN-20210322 BSA-V7R1-MSG-EN-20210322
Product identifier
Product license
Product documentation

BSA V7R1 level 1771-02 (PBS4297) Adabas Audit Data Retrieval level V7R2-00 (PIR0436)
Adabas Audit Data Retrieval V7R2 Release Notes and Update Instructions – March 22, 2021 5
Licensing information
A license file that includes appropriate license articles must be available if you want to run Adabas Audit Data Retrieval.
For a new installation, the license file must be available at the latest when the installation job B97DBFOR runs. Please contact support if you need a new license file. To be able to generate a valid license file for you, Software AG needs to know:
• Your name and the name of your company
• The CPU type (tttt - the last four digits of the serial number) and the number of configured processors (cccc)
You will find this information in the product STC startup message 9151I CPU INFORMATION - TYPE: tttt ID: nnnn LPAR: l TLCPU: tccc CLCPU: cccc SLCPU: sccc
Alternatively, you can also send Software AG the output of the console command D M=CPU: IEE174I 10.50.45 DISPLAY M 510 PROCESSOR STATUS ID CPU SERIAL 00 + 01BCXCtttt 01 + 01BCXCtttt 02 +A 01BCXCtttt 03 +I 01BCXCtttt CPC ND = 00XXXX.S08.IBM.XX.00000XXXBCXC CPC SI = XXXX.XXX.IBM.XX.000000000XXXBCXC
Transfer the license file to a PS dataset or to a member of a PO dataset on the z/OS host. File transfer must be in text mode, which means that the file will be converted to EBCDIC.
Important: Do not modify the license file in any other way because this would invalidate it.
The following DCB attributes for the receiving dataset on the z/OS host:
Dataset organization: PO or PS
Record format: FB, VB, U
Logical record length: Minimum value is determined by the longest record in the license file (LRECL=512 recommended)
Overview
Obtaining a license file
File transfer to host

BSA V7R1 level 1771-02 (PBS4297) Adabas Audit Data Retrieval level V7R2-00 (PIR0436)
Adabas Audit Data Retrieval V7R2 Release Notes and Update Instructions – March 22, 2021 6
Messages are written to log the result of the license check, which is carried out during product start.
If the license check is successful, the messages look like this: IRM9009I USED LICENSE ORDER: 'B97.G7 '... IRM9008I BETA97 LICENSE PRODUCT NAME: B97.G7 - Beta 97 G7...
License check will fail without a valid B97.G7 license and Adabas Audit Data Retrieval will not start.
The following messages indicate that the license check has failed: IRM9009I USED LICENSE ORDER: 'B97.G7 '... IRM9004I B97.G7 HAS BEEN LICENSED FOR CUSTOMER: ... IRM9001E Beta 97 G7 NOT ACTIVE - INVALID INSTALLATION ID ... REASON = 2011 )
For detailed information on updating a license file, see "License check handling" in BSA Installation and System Guide.
License check messages
Further information

BSA V7R1 level 1771-02 (PBS4297) Adabas Audit Data Retrieval level V7R2-00 (PIR0436)
Adabas Audit Data Retrieval V7R2 Release Notes and Update Instructions – March 22, 2021 7
General installation instructions
This section provides a general description of the installation steps that have to be carried out by all new and existing users of BSA and Adabas Audit Data Retrieval.
Recommendation: First-time users should read all of this section before they begin. Knowing about the procedure as a whole and knowing about the information requested at each step will make the installation or upgrading process a lot smoother. The software is made available as a ZIP archive, which includes all the folders and files that are necessary to install the software. Unzip the installation archive under Windows, and then run the setup program of the product, which transfers the installation datasets to the z/OS host. Folder names and file names are self-explanatory. BSA and product installation on the z/OS mainframe is based on SMP/E.
The SMP/E installation jobs are tailored by the installation REXX. The installation process involves these steps:
1. Downloading and unzipping the installation archive on a Windows PC
2. Running the setup program on the Windows PC with automatic transfer of Adabas Audit Data Retrieval and/or BSA installation datasets to the z/OS host
3. Unpacking the installation datasets on the z/OS host
4. Running the Beta installation REXX on the z/OS host with tailoring of BETA97.CNTL and BSA.CNTL
5. Submitting the SMP/E installation jobs for BSA and/or Adabas Audit Data Retrieval according to your installed level
Each step is described in more detail below. By default, the setup program uses ftp for data transfer to the host, which assumes that IBM FTP server is available.
About 250 MB of temporary space is required on the PC. Space require-ments on the z/OS host depend on the number of components you will be installing.
Who should read this?
Standard installation medium
SMP/E-based installation
Step overview
Requirements
BSA V7R1 level 1771-02 (PBS4297) Adabas Audit Data Retrieval level V7R2-00 (PIR0436)
Adabas Audit Data Retrieval V7R2 Release Notes and Update Instructions – March 22, 2021 8
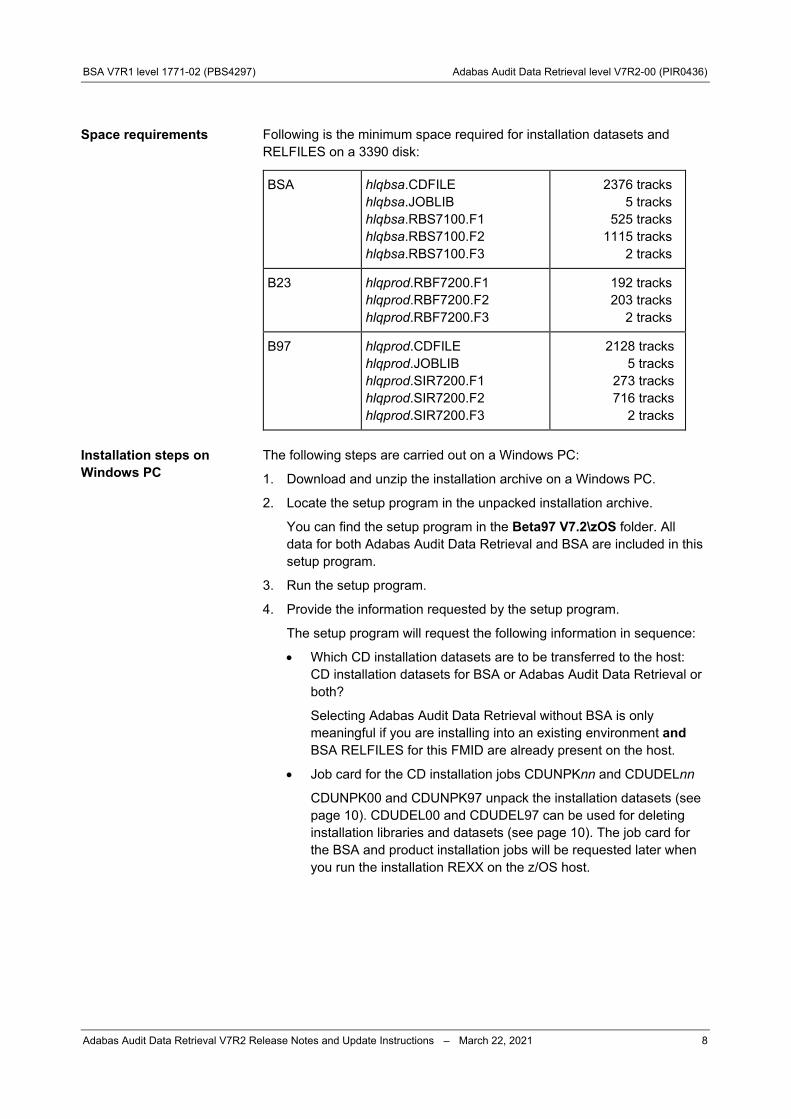
Following is the minimum space required for installation datasets and RELFILES on a 3390 disk:
BSA hlqbsa.CDFILE hlqbsa.JOBLIB hlqbsa.RBS7100.F1 hlqbsa.RBS7100.F2 hlqbsa.RBS7100.F3
2376 tracks 5 tracks
525 tracks 1115 tracks
2 tracks
B23 hlqprod.RBF7200.F1 hlqprod.RBF7200.F2 hlqprod.RBF7200.F3
192 tracks 203 tracks
2 tracks
B97 hlqprod.CDFILE hlqprod.JOBLIB hlqprod.SIR7200.F1 hlqprod.SIR7200.F2 hlqprod.SIR7200.F3
2128 tracks 5 tracks
273 tracks 716 tracks
2 tracks The following steps are carried out on a Windows PC:
1. Download and unzip the installation archive on a Windows PC.
2. Locate the setup program in the unpacked installation archive.
You can find the setup program in the Beta97 V7.2\zOS folder. All data for both Adabas Audit Data Retrieval and BSA are included in this setup program.
3. Run the setup program.
4. Provide the information requested by the setup program.
The setup program will request the following information in sequence:
• Which CD installation datasets are to be transferred to the host: CD installation datasets for BSA or Adabas Audit Data Retrieval or both?
Selecting Adabas Audit Data Retrieval without BSA is only meaningful if you are installing into an existing environment and BSA RELFILES for this FMID are already present on the host.
• Job card for the CD installation jobs CDUNPKnn and CDUDELnn
CDUNPK00 and CDUNPK97 unpack the installation datasets (see page 10). CDUDEL00 and CDUDEL97 can be used for deleting installation libraries and datasets (see page 10). The job card for the BSA and product installation jobs will be requested later when you run the installation REXX on the z/OS host.
Space requirements
Installation steps on Windows PC

BSA V7R1 level 1771-02 (PBS4297) Adabas Audit Data Retrieval level V7R2-00 (PIR0436)
Adabas Audit Data Retrieval V7R2 Release Notes and Update Instructions – March 22, 2021 9
• High-level qualifier for BSA and Adabas Audit Data Retrieval installation datasets
The high-level qualifier of BSA must be different from the high-level qualifier of Adabas Audit Data Retrieval. The high-level qualifiers specified here are used for transferred installation datasets and unpacked datasets. Specify new unique HLQs to avoid allocation errors during unpacking. The high-level qualifiers for SMP/E and tailored CNTL libraries, databases, etc. will be requested later when you run the installation REXX on the z/OS host.
• Volser and device type for the installation datasets or SMS
For automatic transfer via ftp:
• Numeric or symbolic IP address of the z/OS host and ftp port number (default: 21)
• Credentials (The password must be entered twice.)
Alternatively, you can also transfer the datasets manually (see page 10).
The setup program transfers the installation datasets to the z/OS host.
Depending on whether you selected BSA or Adabas Audit Data Retrieval or both, the following datasets will be present after transfer:
Dataset Description
hlqbsa.CDFILE Packed dataset (super file) that contains the BSA installation data
hlqbsa.JOBLIB Partitioned dataset that contains the installation jobs CDUNPK00 and CDUDEL00
hlqprod.CDFILE Packed dataset (super file) that contains the Adabas Audit Data Retrieval installation data
hlqprod.JOBLIB Partitioned dataset that contains the installation jobs CDUNPK97 and CDUDEL97
Data transfer

BSA V7R1 level 1771-02 (PBS4297) Adabas Audit Data Retrieval level V7R2-00 (PIR0436)
Adabas Audit Data Retrieval V7R2 Release Notes and Update Instructions – March 22, 2021 10
If you are experiencing difficulties with the setup program's automatic file transfer, you can also transfer the required files manually. To do this, choose option Transfer files to z/OS manually in the setup program and specify a destination folder for the files that are to be transferred.
The setup program creates the ftp script ftp.txt, which contains all the necessary information on the files that need to be transferred (source files, target datasets and their attributes, and transfer modes). You can run this script directly in your ftp client if you provide appropriate values for the placeholders <IPADDRESS>, <PORT>, <USERNAME> and <PASSWORD>.
For example, under Windows, open a command box, change to the destination folder, and then enter the following command: ftp -s:ftp.txt
You can also use another suitable file transfer facility instead of ftp.
Important: For security reasons, you should delete the contents of the destination folder from your PC after the transfer, or at least remove your credentials from ftp.txt. The following steps are carried out on the z/OS host:
1. Unpack the super file(s).
hlqbsa.JOBLIB(CDUNPK00) extracts installation data from the BSA super file hlqbsa.CDFILE.
hlqprod.JOBLIB(CDUNPK97) extracts installation data from the Adabas Audit Data Retrieval super file hlqprod.CDFILE.
The result will be a collection of installation libraries and datasets whose format is usable as input for the installation process. For example, hlqbsa.DATA and hlqprod.DATA are libraries whose members contain the MCS statements (one per product and per additional facility or add-on).
If extraction leads to allocation errors
Job CDUNPKnn will end in error if it encounters a dataset of the same name during data extraction, for example, relicts of a previous or incomplete installation. In this case, run CDUDELnn first to delete offending datasets.
hlqbsa.JOBLIB(CDUDEL00) deletes all extracted BSA installation datasets.
hlqprod.JOBLIB(CDUDEL97) deletes all extracted Adabas Audit Data Retrieval installation datasets.
You can ignore RC=8 if this is caused by message "IDC3012I ENTRY datasetname NOT FOUND", which means that one or more of the datasets to be deleted were not present. Afterwards, run CDUNPKnn to unpack again.
Manual file transfer to the z/OS host
Installation steps on the z/OS host

BSA V7R1 level 1771-02 (PBS4297) Adabas Audit Data Retrieval level V7R2-00 (PIR0436)
Adabas Audit Data Retrieval V7R2 Release Notes and Update Instructions – March 22, 2021 11
2. Run the installation REXX.
Choose the installation REXX from the appropriate library depending on which installation jobs are to be tailored.
If only BSA: EXEC 'hlqbsa.REXX(INSTALL)'
If Adabas Audit Data Retrieval with BSA: EXEC 'hlqprod.REXX(INSTALL)'
Follow the instructions displayed by the installation REXX. After you have provided all the requested information, the installation REXX will tailor a new BETA97.CNTL and/or BSA.CNTL from which you will submit the installation jobs required for your level.
Note: Don't interrupt the REXX after the tailoring of the Adabas Audit Data Retrieval jobs. Follow instructions until the end to ensure that BSA jobs are tailored as well.
After the installation REXX has finished tailoring the CNTL members, you can run the jobs required for your level according to the tables in these sections in sequence:
• "BSA installation and maintenance jobs" on page 55
• "Beta 23 installation and maintenance jobs" on page 59
• "Product installation and maintenance jobs" on page 61
• "BSA and product customization and activation" on page 63 The following BSA V7 modules must be loaded from an APF-authorized library:
BST01ARI BST00ATH BST01CMD BST01MST BST01RFF BST01SFF BST01SSI BST00STH BST01SVC BST01XCF BST00XIN BST09XIN B02UXSIN
Separate BETA.APFLOAD recommended
The installation REXX asks you for the name of the library that you want to use for the modules requiring APF authorization.
Although it is possible to use the same library for authorized and non-authorized modules, using a separate library for authorized modules is recommended. The BSA and product modules requiring APF authorization are automatically placed into this separate library during installation. The standard name of this library is BETA.APFLOAD. See BSA Installation and System Guide for more information on the advantages and disadvantages of using the same or different libraries.
Tailored installation jobs
Note on APF authorization
BSA V7R1 level 1771-02 (PBS4297) Adabas Audit Data Retrieval level V7R2-00 (PIR0436)
Adabas Audit Data Retrieval V7R2 Release Notes and Update Instructions – March 22, 2021 12
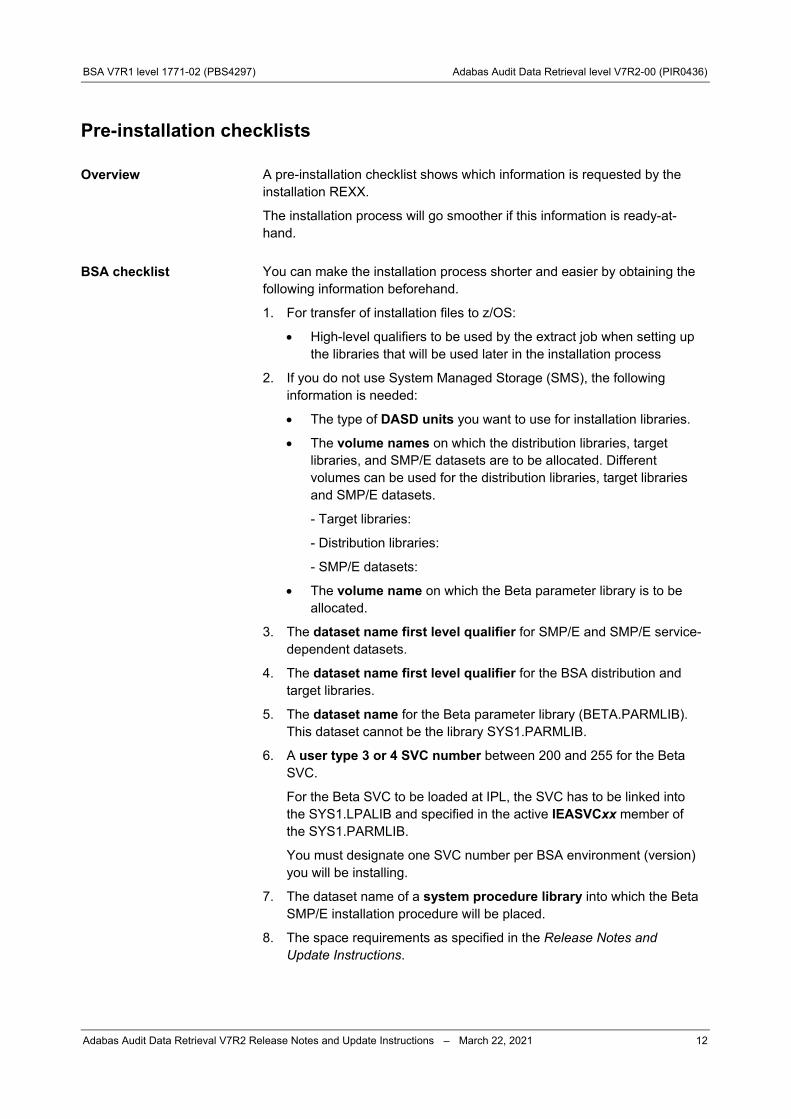
Pre-installation checklists
A pre-installation checklist shows which information is requested by the installation REXX.
The installation process will go smoother if this information is ready-at-hand. You can make the installation process shorter and easier by obtaining the following information beforehand.
1. For transfer of installation files to z/OS:
• High-level qualifiers to be used by the extract job when setting up the libraries that will be used later in the installation process
2. If you do not use System Managed Storage (SMS), the following information is needed:
• The type of DASD units you want to use for installation libraries.
• The volume names on which the distribution libraries, target libraries, and SMP/E datasets are to be allocated. Different volumes can be used for the distribution libraries, target libraries and SMP/E datasets.
- Target libraries:
- Distribution libraries:
- SMP/E datasets:
• The volume name on which the Beta parameter library is to be allocated.
3. The dataset name first level qualifier for SMP/E and SMP/E service-dependent datasets.
4. The dataset name first level qualifier for the BSA distribution and target libraries.
5. The dataset name for the Beta parameter library (BETA.PARMLIB). This dataset cannot be the library SYS1.PARMLIB.
6. A user type 3 or 4 SVC number between 200 and 255 for the Beta SVC.
For the Beta SVC to be loaded at IPL, the SVC has to be linked into the SYS1.LPALIB and specified in the active IEASVCxx member of the SYS1.PARMLIB.
You must designate one SVC number per BSA environment (version) you will be installing.
7. The dataset name of a system procedure library into which the Beta SMP/E installation procedure will be placed.
8. The space requirements as specified in the Release Notes and Update Instructions.
Overview
BSA checklist
BSA V7R1 level 1771-02 (PBS4297) Adabas Audit Data Retrieval level V7R2-00 (PIR0436)
Adabas Audit Data Retrieval V7R2 Release Notes and Update Instructions – March 22, 2021 13
9. The Beta installation procedure lets you install two different load libraries: the default names are BETA.APFLOAD for all modules that need APF authorization, and BSA.LOAD for all the remaining BSA modules. Every product installation procedure installs its own library (BETAnn.LOAD) in addition.
Adabas Audit Data Retrieval checklist
The installation REXX will request the following information:
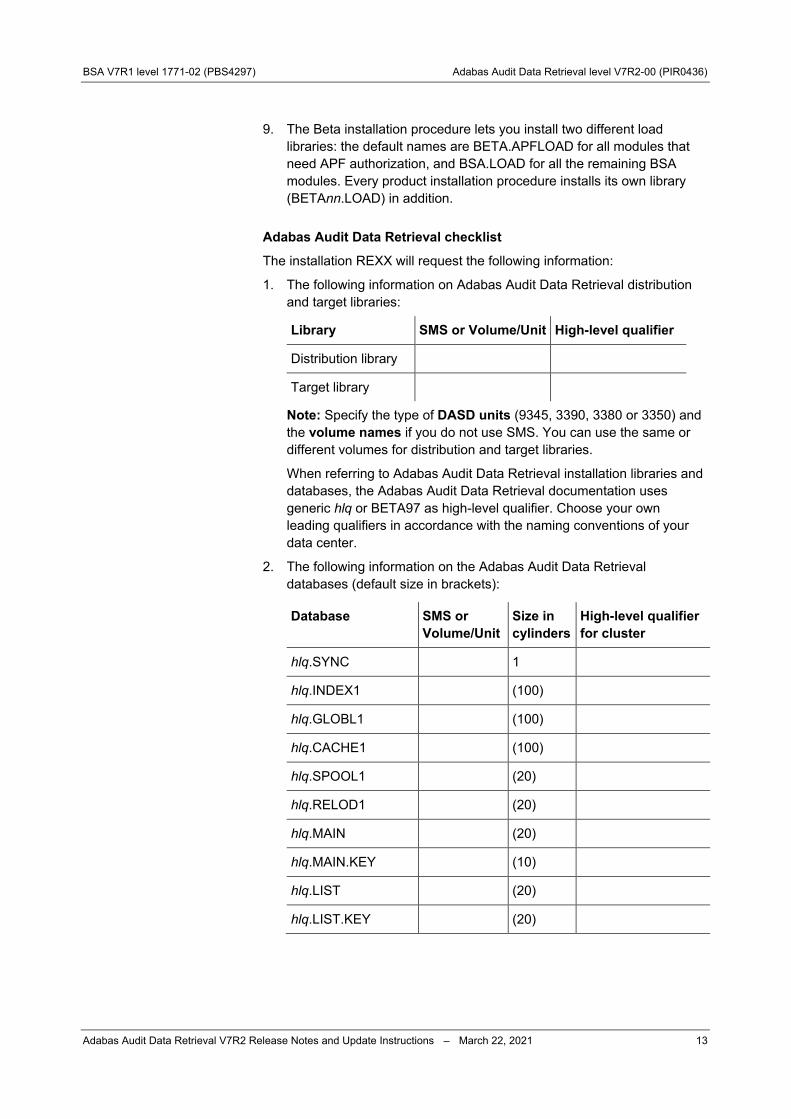
1. The following information on Adabas Audit Data Retrieval distribution and target libraries:
Library SMS or Volume/Unit High-level qualifier
Distribution library
Target library
Note: Specify the type of DASD units (9345, 3390, 3380 or 3350) and the volume names if you do not use SMS. You can use the same or different volumes for distribution and target libraries.
When referring to Adabas Audit Data Retrieval installation libraries and databases, the Adabas Audit Data Retrieval documentation uses generic hlq or BETA97 as high-level qualifier. Choose your own leading qualifiers in accordance with the naming conventions of your data center.
2. The following information on the Adabas Audit Data Retrieval databases (default size in brackets):
Database SMS or Volume/Unit
Size in cylinders
High-level qualifier for cluster
hlq.SYNC 1
hlq.INDEX1 (100)
hlq.GLOBL1 (100)
hlq.CACHE1 (100)
hlq.SPOOL1 (20)
hlq.RELOD1 (20)
hlq.MAIN (20)
hlq.MAIN.KEY (10)
hlq.LIST (20)
hlq.LIST.KEY (20)

BSA V7R1 level 1771-02 (PBS4297) Adabas Audit Data Retrieval level V7R2-00 (PIR0436)
Adabas Audit Data Retrieval V7R2 Release Notes and Update Instructions – March 22, 2021 14
Database SMS or Volume/Unit
Size in cylinders
High-level qualifier for cluster
hlq.ARC (60)
hlq.ARC.KEY (25)
hlq.MSG (20)
hlq.MSG.KEY (10)
hlq.LOG (20)
hlq.NOTES (10)
hlq.NOTES.KEY (5)
hlq.SFR (10)
hlq.SFR.KEY (3)
hlq.LGF (20)
hlq.LGF.KEY (10)
If databases cannot be placed on fail-safe storage (physical mirroring or Raid 5), you can use software mirroring. Make sure that original and mirror database are placed on different volumes.
3. VTAM network ID
4. A subsystem ID for the Adabas Audit Data Retrieval started task
5. The name of the PS dataset or PO dataset member that contains your license file
6. The name of the Adabas Audit Data Retrieval started task procedure

BSA V7R1 level 1771-02 (PBS4297) Adabas Audit Data Retrieval level V7R2-00 (PIR0436)
Adabas Audit Data Retrieval V7R2 Release Notes and Update Instructions – March 22, 2021 15
7. The dataset name of a system procedure library into which the two Adabas Audit Data Retrieval started task procedures will be placed
8. An unused port number where to listen for incoming requests from Adabas Audit Data View (AAV) and the name of the TCP/IP started task (TCP/IP stack) to be used
9. An unused SMF user record number between 128 and 255 (128..1151 if version 1) for the writing of SMF records (The SMF record number should be used exclusively for Adabas Audit Data Retrieval SMF records.)

BSA V7R1 level 1771-02 (PBS4297) Adabas Audit Data Retrieval level V7R2-00 (PIR0436)
Adabas Audit Data Retrieval V7R2 Release Notes and Update Instructions – March 22, 2021 16
Installation REXX
This section guides you through the installation REXX when installing Adabas Audit Data Retrieval with BSA.
The installation REXX requests information that is required for the tailoring of the SMP/E installation jobs. Follow the instructions displayed by the panels of the installation REXX and provide the requested information in the designated fields. A pre-installation checklist shows which information is requested by the installation REXX.
The installation process will go smoother if this information is ready-at-hand (see "Pre-installation checklists" on page 12). To install Adabas Audit Data Retrieval with BSA, start the installation REXX from the hlqprod.REXX library. For example, if you have specified BETAINST.BSA and BETAINST.B97 when unpacking the super files, enter the following command under ISPF option 6: EXEC 'BETAINST.B97.REXX(INSTALL)'
Alternatively, use ISPF option 3.4 to display the contents of BETAINST.B97.REXX and enter the line command EX in front of the INSTALL member.
Note: Running BETAINST.BSA.REXX(INSTALL) goes only through the BSA parts of the Installation REXX, without the product part.
Overview
Pre-installation checklists
Starting the REXX

BSA V7R1 level 1771-02 (PBS4297) Adabas Audit Data Retrieval level V7R2-00 (PIR0436)
Adabas Audit Data Retrieval V7R2 Release Notes and Update Instructions – March 22, 2021 17
Panel PEBSA0A0 explains how to navigate through the panels of the installation REXX.
The installation REXX goes through the following parts:
BSA part 1 PEXXX000 through PEBSA51A
Requests the information described in the BSA checklist and ends with the selection of the product
Product part PEXXX0A0 through PEXXX9B0
Requests the information described in the product checklist and ends with the tailoring of the product installation jobs
BSA part 2 PEBSA51A through PEBSA9B0
Resumes offering you several BSA facilities (which you don't want) and ends with the tailoring of the BSA installation jobs
The panels are shown with the panel ID in the top-left corner of the panel. (You can turn this display on or off using the primary command PANELID.)
Expect certain minor variations in the displayed panels depending on whether you are running the installation REXX for the first time or whether you are using SMS.
You can press PF1 (HELP) in any panel of the installation REXX for additional information.
Panel navigation
BSA V7R1 level 1771-02 (PBS4297) Adabas Audit Data Retrieval level V7R2-00 (PIR0436)
Adabas Audit Data Retrieval V7R2 Release Notes and Update Instructions – March 22, 2021 18
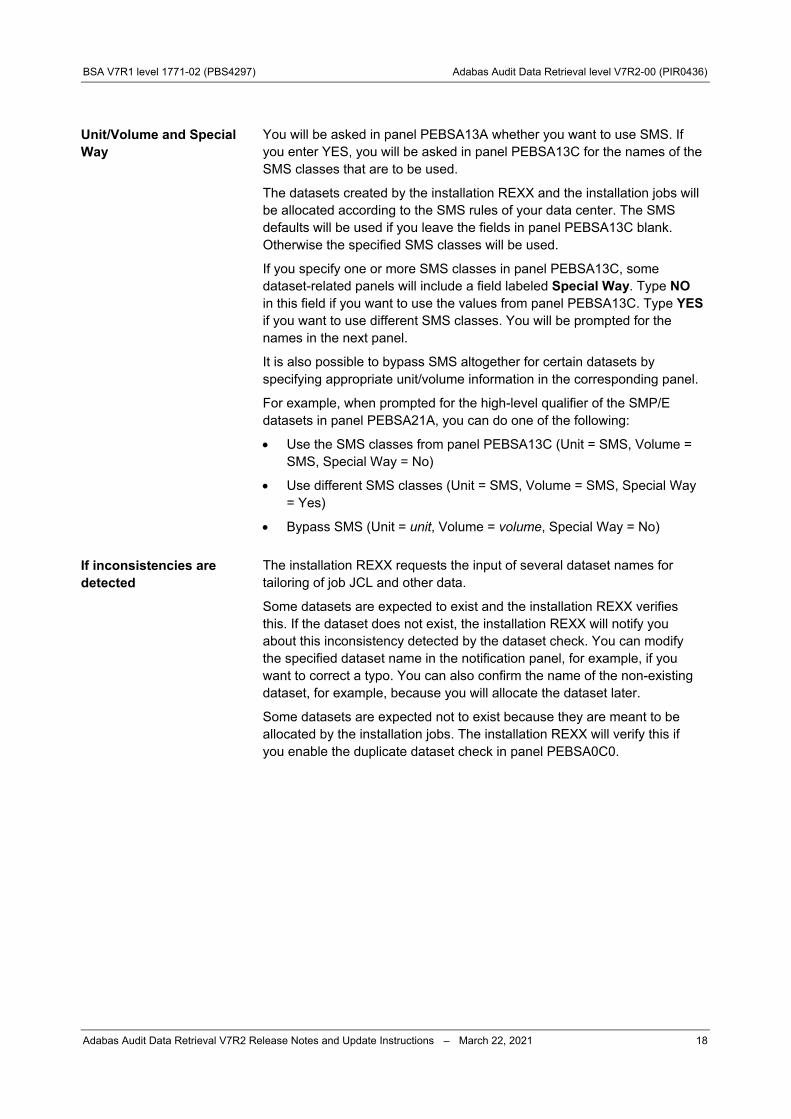
You will be asked in panel PEBSA13A whether you want to use SMS. If you enter YES, you will be asked in panel PEBSA13C for the names of the SMS classes that are to be used.
The datasets created by the installation REXX and the installation jobs will be allocated according to the SMS rules of your data center. The SMS defaults will be used if you leave the fields in panel PEBSA13C blank. Otherwise the specified SMS classes will be used.
If you specify one or more SMS classes in panel PEBSA13C, some dataset-related panels will include a field labeled Special Way. Type NO in this field if you want to use the values from panel PEBSA13C. Type YES if you want to use different SMS classes. You will be prompted for the names in the next panel.
It is also possible to bypass SMS altogether for certain datasets by specifying appropriate unit/volume information in the corresponding panel.
For example, when prompted for the high-level qualifier of the SMP/E datasets in panel PEBSA21A, you can do one of the following:
• Use the SMS classes from panel PEBSA13C (Unit = SMS, Volume = SMS, Special Way = No)
• Use different SMS classes (Unit = SMS, Volume = SMS, Special Way = Yes)
• Bypass SMS (Unit = unit, Volume = volume, Special Way = No) The installation REXX requests the input of several dataset names for tailoring of job JCL and other data.
Some datasets are expected to exist and the installation REXX verifies this. If the dataset does not exist, the installation REXX will notify you about this inconsistency detected by the dataset check. You can modify the specified dataset name in the notification panel, for example, if you want to correct a typo. You can also confirm the name of the non-existing dataset, for example, because you will allocate the dataset later.
Some datasets are expected not to exist because they are meant to be allocated by the installation jobs. The installation REXX will verify this if you enable the duplicate dataset check in panel PEBSA0C0.
Unit/Volume and Special Way
If inconsistencies are detected
BSA V7R1 level 1771-02 (PBS4297) Adabas Audit Data Retrieval level V7R2-00 (PIR0436)
Adabas Audit Data Retrieval V7R2 Release Notes and Update Instructions – March 22, 2021 19
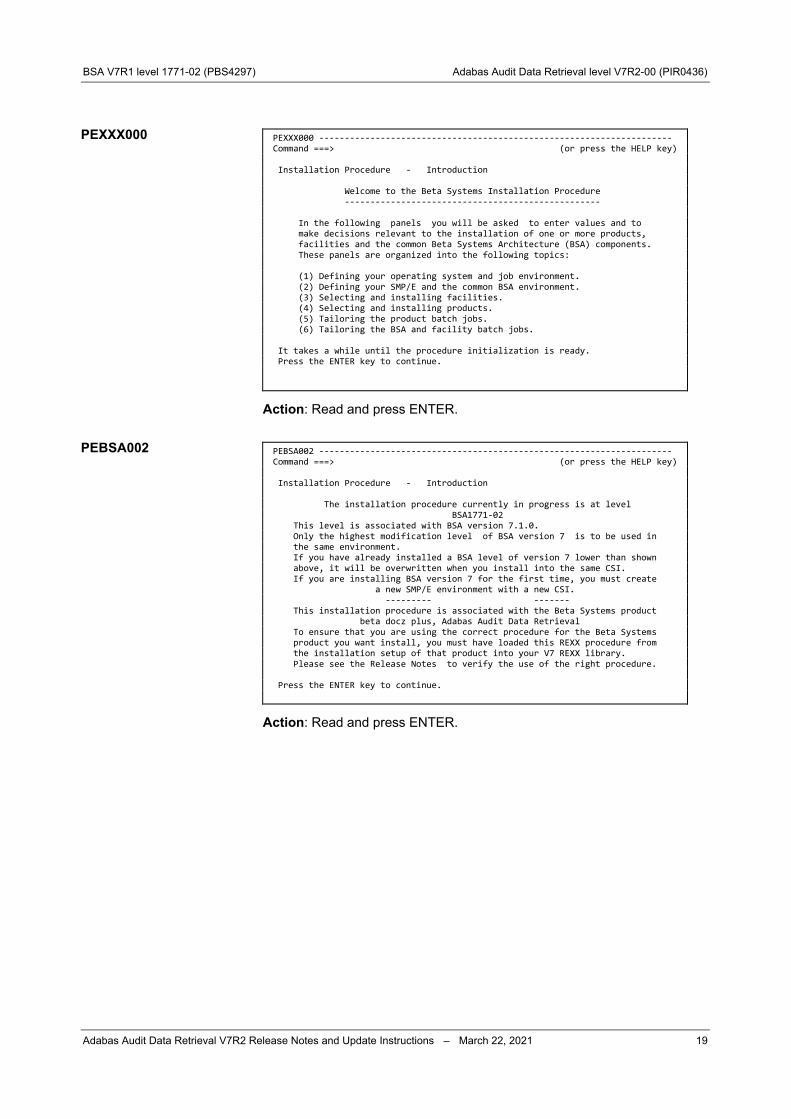
PEXXX000 --------------------------------------------------------------------- Command ===> (or press the HELP key) Installation Procedure - Introduction Welcome to the Beta Systems Installation Procedure -------------------------------------------------- In the following panels you will be asked to enter values and to make decisions relevant to the installation of one or more products, facilities and the common Beta Systems Architecture (BSA) components. These panels are organized into the following topics: (1) Defining your operating system and job environment. (2) Defining your SMP/E and the common BSA environment. (3) Selecting and installing facilities. (4) Selecting and installing products. (5) Tailoring the product batch jobs. (6) Tailoring the BSA and facility batch jobs. It takes a while until the procedure initialization is ready. Press the ENTER key to continue.
Action: Read and press ENTER.
PEBSA002 --------------------------------------------------------------------- Command ===> (or press the HELP key) Installation Procedure - Introduction The installation procedure currently in progress is at level BSA1771-02 This level is associated with BSA version 7.1.0. Only the highest modification level of BSA version 7 is to be used in the same environment. If you have already installed a BSA level of version 7 lower than shown above, it will be overwritten when you install into the same CSI. If you are installing BSA version 7 for the first time, you must create a new SMP/E environment with a new CSI. --------- ------- This installation procedure is associated with the Beta Systems product beta docz plus, Adabas Audit Data Retrieval To ensure that you are using the correct procedure for the Beta Systems product you want install, you must have loaded this REXX procedure from the installation setup of that product into your V7 REXX library. Please see the Release Notes to verify the use of the right procedure. Press the ENTER key to continue.
Action: Read and press ENTER.
PEXXX000
PEBSA002

BSA V7R1 level 1771-02 (PBS4297) Adabas Audit Data Retrieval level V7R2-00 (PIR0436)
Adabas Audit Data Retrieval V7R2 Release Notes and Update Instructions – March 22, 2021 20
PEBSA0A0 --------------------------------------------------------------------- Command ===> (or press the HELP key) Installation Procedure - Introduction The output of this procedure consists of a profile library containing the installation values which you enter here, and of a JCL library containing the tailored batch jobs which you must submit later on. All through this installation procedure you can enter the following special commands to help you navigate through the procedure: Enter BACK to go back to the previous panel. You can review and/or change then the information displayed. Enter BEGIN to go back to the beginning of the installation procedure. You can review and/or change all of the information previously entered. Press the END key to terminate the installation procedure. In this case some or all of the values entered will not be saved. Press the ENTER key to continue.
Action: Read and press ENTER.
PEBSA0C0 --------------------------------------------------------------------- Command ===> (or press the HELP key) Installation Procedure - Defining operating system and job environment The installation procedure will ask you to enter the names of the SMP/E, BSA and product data sets. If the data sets do not exist yet they will be created by the batch jobs which are generated by this installation procedure. After you have run this installation procedure you will be asked to submit the generated batch jobs. Enter YES below if you want a check to be made for duplicate data set names (this will take a little more time, but is safer). Enter NO to skip duplicate data set name checking. DSN Check ===> YES (Y)es or (N)o Enter BACK for the previous panel. Press the ENTER key to continue.
Action: Specify YES and press ENTER.
Reason: It's always a good idea to let the installation REXX verify the dataset names that you specify to prevent the accidental overwriting of existing datasets.
PEBSA0A0
PEBSA0C0

BSA V7R1 level 1771-02 (PBS4297) Adabas Audit Data Retrieval level V7R2-00 (PIR0436)
Adabas Audit Data Retrieval V7R2 Release Notes and Update Instructions – March 22, 2021 21
PEBSA1A0 --------------------------------------------------------------------- Command ===> (or press the HELP key) Installation Procedure - Defining operating system and job environment Here you specify what kind of SMP/E and Beta environments are to be used. Enter NEW if you intend to create a new environment.In this case you will be prompted to enter new values for SMP/E, BSA and product setup. Enter OLD if you have an existing SMP/E environment and an existing Beta profile library which already contain the common BSA version 7 components. You must enter NEW if you are installing BSA version 7 for the first time. The consolidated software inventory (CSI) file (and its SMP/E environment) for BSA V7 must be different from the CSI for BSA of lower versions. Environment ===> NEW (N)ew or (O)ld Note: If you enter BEGIN in the command line in any panel of the BSA procedure you will return to this environment selection panel. Enter BACK for the previous panel. Press the ENTER key to continue.
Action: Specify NEW and press ENTER. (Next panel: PEBSA13A)
Recommendation: We recommend that you install Adabas Audit Data Retrieval together with BSA and Beta 23 in a separate CSI.
Note: The installation REXX does not support Environment = OLD for Adabas Audit Data Retrieval. This panel is the next in sequence when you enter Environment = NEW in panel PEBSA1A0:
PEBSA13A --------------------------------------------------------------------- Command ===> (or press the HELP key) Installation Procedure - Setup Operating System and Job Environment Enter the DASD unit type on which all Beta data sets are to be allocated: (or press ENTER for the default unit type) ===> 3390 Enter BACK for the previous panel or BEGIN for the panel where you selected the old or new SMP/E and BSA environment. Press the ENTER key to continue.
Action: Press ENTER to accept 3390, which is the standard type.
PEBSA1A0
PEBSA13A

BSA V7R1 level 1771-02 (PBS4297) Adabas Audit Data Retrieval level V7R2-00 (PIR0436)
Adabas Audit Data Retrieval V7R2 Release Notes and Update Instructions – March 22, 2021 22
PEBSA13B --------------------------------------------------------------------- Command ===> (or press the HELP key) Installation Procedure - Setup Operating System and Job Environment Here you decide whether SMS management is to be used when allocating the data sets during this installation. Enter YES below if you require SMS data set management. Enter NO below if you do not have or do not require SMS management. ===> NO (Y)es or (N)o If you choose SMS management, SMS will be the default name for volume and unit device in each of the displays where SMS is allowed. You can overwrite unit and volume whenever you would like a specified data set to be allocated on a specific unit and volume. Enter BACK for the previous panel or BEGIN for the panel where you selected the old or new SMP/E and BSA environment. Press the ENTER key to continue.
Action: Do one of the following:
• Specify NO and press ENTER to bypass SMS (or if you do not have SMS).
In this case, specify unit and volume information when prompted for the names of new datasets in subsequent panels.
• Specify YES and press ENTER to use SMS.
In this case, you will be prompted to specify SMS classes in the next panel PEBSA13C.
See PEBSA13C for more information.
PEBSA13B

BSA V7R1 level 1771-02 (PBS4297) Adabas Audit Data Retrieval level V7R2-00 (PIR0436)
Adabas Audit Data Retrieval V7R2 Release Notes and Update Instructions – March 22, 2021 23
This panel is the next in sequence when you enter YES in panel PEBSA13B, i.e. you want to use SMS.
PEBSA13C --------------------------------------------------------------------- Command ===> (or press the HELP key) Installation Procedure - Setup Operating System and Job Environment Here you decide whether the allocation of any data set is to be controlled directly by defining storage class, management class and / or data class in your JCL. Enter the storage class , management class and data class that are required to allocate, manage and describe the Beta data sets during installation. Leave the class name(s) empty below if you don't want to allocate, manage and / or describe the data sets in this way. Storage Class ===> Management Class ===> Data Class ===> Enter BACK for the previous panel or BEGIN for the panel where you selected the old or new SMP/E and BSA environment. Press the ENTER key to continue.
Action: Do one of the following:
• Specify values and press ENTER.
• Leave the fields blank to use the defaults and press ENTER.
It depends on the conventions of your data center whether you can work with the SMS defaults or are expected to specify the names of classes. Contact your storage manager or a system programmer if in doubt.
PEBSA13C

BSA V7R1 level 1771-02 (PBS4297) Adabas Audit Data Retrieval level V7R2-00 (PIR0436)
Adabas Audit Data Retrieval V7R2 Release Notes and Update Instructions – March 22, 2021 24
PEBSA14A prompts you for the particulars of a new profile library.
The panel looks like this if you are using SMS (if panel includes Special Way, see PEBSA13C):
PEBSA14B --------------------------------------------------------------------- Command ===> (or press the HELP key) Installation Procedure - Setup Operating System and Job Environment This panel requires/shows the name of the common profile library which will contain all the values entered during installation. This data set (default name BETA.PROFILE ) is allocated for your convenience. It collects all the values which you enter in this installation procedure and will allow you to re-use those values when installing a new or higher product or facility level. The common profile library will be allocated SMS managed. Data Set Name ===> BETA.PROFILE Enter BACK for the previous panel or BEGIN for the panel where you selected the old or new SMP/E and BSA environment. Press the ENTER key to continue.
The panel looks like this if you are not using SMS:
PEBSA14A --------------------------------------------------------------------- Command ===> (or press the HELP key) Installation Procedure - Setup Operating System and Job Environment This panel requires the name of the common profile library which will contain all the values entered during installation. This common profile library (default name BETA.PROFILE ) is allocated for your convenience. It collects the values which you enter in this installation procedure and will allow you to re-use those values when installing a new or higher product or facility level. Pay attention to the DSN to avoid mistakenly overwritten members: Data Set Name ===> BETA.PROFILE Volume Serial ===> BETA00 Generic Unit ===> 3390 Space Units ===> CYLS (B)lks, (T)rks or (C)yls Block Size ===> 6160 for LRECL = 80 Enter BACK for the previous panel or BEGIN for the panel where you selected the old or new SMP/E and BSA environment. Press the ENTER key to continue.
Action: Specify a new dataset name (and the allocation parameters, if prompted) and press ENTER.
Note: You will have to provide this type of allocation parameters for all new datasets when prompted by the installation REXX. This document assumes that you are working with SMS for all subsequent panels.
PEBSA14A

BSA V7R1 level 1771-02 (PBS4297) Adabas Audit Data Retrieval level V7R2-00 (PIR0436)
Adabas Audit Data Retrieval V7R2 Release Notes and Update Instructions – March 22, 2021 25
PEBSA15B prompts you for the particulars of a PO dataset for the tailored BSA JCL.
The Data Set Name field is prepopulated with the name hlq.BETA97.CNTL, where hlq is the high-level qualifier of your installation datasets. The field Product JCL here is prepopulated with YES, which means that the tailored product JCL will be placed in the same PO dataset.
PEBSA15B --------------------------------------------------------------------- Command ===> (or press the HELP key) Installation Procedure - Setup Operating System and Job Environment Please enter or overtype below the name of the JCL library (DSN) which is to contain the tailored JCL output of this installation procedure. In addition, for a complete product installation, you can decide if the JCL output is to be placed in a common ( Product JCL here = YES ) or in separate JCL data set(s) ( Product JCL here = NO ). We recommend designating the data set as a common Beta JCL library . The library space requirements will be calculated by this procedure. The JCL library will be allocated SMS managed. Version 7 must have a different data set to any existing lower version. Data Set Name ===> TEST1.INSTALL.BSA.CNTL Product JCL here ===> NO (Y)ES OR (N)O Enter BACK for the previous panel or BEGIN for the panel where you selected the old or new SMP/E and BSA environment. Press the ENTER key to continue.
Action: Accept or modify the prepopulated values and press ENTER.
Note: The documentation assumes two separate libraries. The standard names used in the manuals are BSA.CNTL and BETA97.CNTL. If you specify Product JCL here = NO, you will be asked for the product JCL dataset before the tailoring of the product JCL (see PEIRI91B).
PEBSA02A --------------------------------------------------------------------- Command ===> (or press the HELP key) Installation Procedure - Setup Operating System and Job Environment All the jobs created during installation will be provided with jobcards. Enter or verify the sample jobcards below. Note: We recommend writing 'JOB' at the position indicated. (to guarantee correct file tailoring) //jobname JOB parameter vvv ===> //INSTTST JOB 1,MEUSER,CLASS=A,MSGCLASS=P,NOTIFY=&SYSUID ===> //* ===> //* ===> //* Enter BACK for the previous panel or BEGIN for the panel where you selected the old or new SMP/E and BSA environment. Press the ENTER key to continue.
Action: Confirm or modify the job card to be used for tailored JCL and press ENTER.
PEBSA15B
PEBSA02A

BSA V7R1 level 1771-02 (PBS4297) Adabas Audit Data Retrieval level V7R2-00 (PIR0436)
Adabas Audit Data Retrieval V7R2 Release Notes and Update Instructions – March 22, 2021 26
The installation REXX supports the use of system symbols in the named areas, for example, in dataset names like this: &SYSNAME..BETA97.CNTL
PEBSA1B0 --------------------------------------------------------------------- Command ===> (or press the HELP key) Installation Procedure - Setup Operating System and Job Environment Here you can specify whether you want to use system symbol support for - values in the started task procedure - some startup parameters on the BSA side (base and beta vdf) - database file names defined under BQLIN in installation job BxxDBFOR Enter YES to use system symbol support. Then you can enter values with system symbols in them. These values are temporarily substituted for syntax checking. A warning message appears if the system environment with the running procedure on it does not offer this support. Enter NO below to reject the system symbols support. System Symbol Support ===> NO (Y)es or (N)o There is no System Symbol Support for any parameters defined for beta caf and beta iaf, nor for values in the JCL of batch jobs. Enter BACK for the previous panel or BEGIN for the panel where you selected the old or new SMP/E and BSA environment. Press the ENTER key to continue.
Action: Do one of the following:
• Specify YES and press ENTER if you intend to use system symbols when providing values for the installation REXX. The installation REXX resolves system symbols when verifying datasets.
• Specify NO and press ENTER if you don't intend to use system symbols.
PEBSA1B0

BSA V7R1 level 1771-02 (PBS4297) Adabas Audit Data Retrieval level V7R2-00 (PIR0436)
Adabas Audit Data Retrieval V7R2 Release Notes and Update Instructions – March 22, 2021 27
SMP/E uses a database made up of several types of datasets. PEBSA21A prompts you for the particulars of the SMP/E datasets to be used for your installation.
You can review and if necessary modify the dataset names in the following panel PEBSA21D. See the description of the BSA installation job I#BSAJ01 for summary information on these datasets.
PEBSA21A --------------------------------------------------------------------- Command ===> (or press the HELP key) Installation Procedure - Defining the common SMP/E environment If you want the SMP/E files to be placed on a unit other than 3390 fill in the unit type below. Also enter the high level qualifier for the SMP/E data sets or confirm its default, and write the volume name. The SMP/E qualifier must differ from any that exists for lower versions. The SMP/E qualifier below must not be the same as the qualifier of the input data sets which are extracted from the installation download/DVD. Input Qualifier : TEST1.INSTALL.BSA SMP/E Qualifier ===> TEST1.INSTALL.SMPE SMP/E Volume Name ===> SMS SMP/E Unit Type ===> SMS Special Way ===> NO Enter BACK for the previous panel or BEGIN for the panel where you selected the old or new SMP/E and BSA environment. Press the ENTER key to continue.
Action: Enter the high-level qualifier of the SMP/E datasets for your new environment.
The panel may include a Special Way field, which enables you to specify SMS classes for these datasets (see PEBSA13C). Specify SMS for volume and unit type if you are using SMS. This panel displays the datasets that will be allocated for your new environment when you run the installation jobs:
PEBSA21D --------------------------------------------------------------------- Command ===> (or press the HELP key) Installation Procedure - Defining the common SMP/E environment The following data sets are used for SMP/E. Here you can change the unit and volume serial name (volser) as well as the name of the SMP data sets to select a different one. However,do not change the last level qualifier. Refer to the bsa Installation and System Guide for a complete description. Data Set Name Unit Volser ------------------------------------------------------------------------------ TEST1.INSTALL.SMPE.SMPPTS SMS SMS TEST1.INSTALL.SMPE.SMPLOG SMS SMS TEST1.INSTALL.SMPE.SMPLOGA SMS SMS TEST1.INSTALL.SMPE.SMPLTS SMS SMS TEST1.INSTALL.SMPE.SMPMTS SMS SMS TEST1.INSTALL.SMPE.SMPSTS SMS SMS TEST1.INSTALL.SMPE.SMPSCDS SMS SMS Enter BACK for the previous panel or BEGIN for the panel where you selected the old or new SMP/E and BSA environment. Press the ENTER key to continue.
Action: Normally there is no reason to modify any of the displayed values. Press ENTER to continue.
PEBSA21A
PEBSA21D

BSA V7R1 level 1771-02 (PBS4297) Adabas Audit Data Retrieval level V7R2-00 (PIR0436)
Adabas Audit Data Retrieval V7R2 Release Notes and Update Instructions – March 22, 2021 28
Here you can specify the name for the CSI.
PEBSA22B --------------------------------------------------------------------- Command ===> (or press the HELP key) Installation Procedure - Defining the common SMP/E environment This panel asks you for information needed to allocate the consolidated software inventory (CSI) file. Please confirm or overtype the name for the CSI file below. If you want it to be stored separately from the other SMP files and data sets, simp- ly overtype the volume name given below. The CSI must be different from any existing Beta CSI of lower BSA version. CSI File Name ===> TEST1.INSTALL.SMPE.CSI ( The last level qualifier must be CSI ) CSI Status : NEW Volume Name ===> SMS Enter BACK for the previous panel or BEGIN for the panel where you selected the old or new SMP/E and BSA environment. Press the ENTER key to continue.
Action: Press ENTER. The values you specify here are used as input for the installation job I#BSAJ05, which copies the SMP/E procedure to your procedure library.
PEBSA23A --------------------------------------------------------------------- Command ===> (or press the HELP key) Installation Procedure - Defining the common SMP/E environment In order to install version 7 with SMP/E you need an SMP/E procedure. One of the installation batch jobs will place this procedure in a system procedure library. Enter the name of this system procedure library and the member name to be used for the SMP/E procedure. Name of PROCLIB : ===> YOUR.PROCLIB Member Name : ===> BETASMPE The SMP/E procedure name must be different (unique) from any existing procedure name of lower versions. Enter BACK for the previous panel or BEGIN for the panel where you selected the old or new SMP/E and BSA environment. Press the ENTER key to continue.
Action: Provide the required values and press ENTER.
PEBSA22B
PEBSA23A

BSA V7R1 level 1771-02 (PBS4297) Adabas Audit Data Retrieval level V7R2-00 (PIR0436)
Adabas Audit Data Retrieval V7R2 Release Notes and Update Instructions – March 22, 2021 29
PEBSA23C prompts you for the name of the BSA installation datasets.
PEBSA23C --------------------------------------------------------------------- Command ===> (or press the HELP key) Installation Procedure - Defining the common SMP/E environment The current procedure assumes that BSA will be installed from DASD. Please enter or verify the High Level Qualifier (HLQ) of the SMP/E input libraries on DASD from which the BSA function will be received: SMP/E Input HLQ ===> TEST1.INSTALL.BSA You can choose another assembler program if you don't have ASMA90. This program will be defined in the OPTIONS and UTILITY entry of the GLOBAL zone in your CSI. SMP/E ASM Utility ===> ASMA90 ( ASMA90 , IEV90 ) Ensure that you have selected BSA on DVD and that unpack job CDUNPK00 completed successfully before you (re)submit the receive job I#BSAJ08. Enter BACK for the previous panel or BEGIN for the panel where you selected the old or new SMP/E and BSA environment. Press the ENTER key to continue.
Action: Do the following:
• Enter the high-level qualifiers that you specified when you unpacked the BSA super file hlqbsa.CDFILE using hlqbsa.JOBLIB(CDUNPK00).
• Enter the assembler program of your choice. It's a good idea to work with the standard zone names (GLOBAL, BETATGT, BETADLB), which you will find in almost all your tailored SMP/E installation jobs.
PEBSA31A --------------------------------------------------------------------- Command ===> (or press the HELP key) Installation Procedure - Defining the common bsa environment Enter the name of the target and distribution zones that are to be used for the installation of Beta components and facilities. A job will be generated that establishes both zones in a new CSI file. This job must be submitted together with the other installation jobs if you selected a new SMP/E environment. If you already have an SMP/E environment based on BSA version 7 and you would like to install new components into the same CSI then you must be sure that you use the same zone names as you did when you you first installed a product based on BSA version 7. If you install incorrectly 'on top', an error may occur in the CSI and prevent you from continuing the installation execution. Target zone name ===> BETATGT SMP/E environment : NEW Distribution zone name ===> BETADLB Enter BACK for the previous panel or BEGIN for the panel where you selected the old or new SMP/E and BSA environment. Press the ENTER key to continue.
Action: Press ENTER.
PEBSA23C
PEBSA31A

BSA V7R1 level 1771-02 (PBS4297) Adabas Audit Data Retrieval level V7R2-00 (PIR0436)
Adabas Audit Data Retrieval V7R2 Release Notes and Update Instructions – March 22, 2021 30
PEBSA31B prompts you for the particulars of the target library and distribution library to be used for your installation.
You can review and if necessary modify the dataset names and particulars in the following panel PEBSA31D.
The documentation uses the same high-level qualifier for target library and distribution library. For a list of the datasets, see the description of the BSA installation job I#BSAJ02.
PEBSA31B --------------------------------------------------------------------- Command ===> (or press the HELP key) Installation Procedure - Defining the common bsa environment Enter the high level qualifier(s) for the BSA target and distribution libraries and pre-define unit types, volume serial names and blocksizes. Target Library High Level Qualifier ===> TEST1.INSTALL.BSA Unit ===> SMS Volume ===> SMS BLKSIZE ===> 6160 ( for LRECL=80 ) Distribution Library High Level Qualifier ===> TEST1.INSTALL.BSA Unit ===> SMS Volume ===> SMS BLKSIZE ===> 6160 ( for LRECL=80 ) Enter BACK for the previous panel or BEGIN for the panel where you selected the old or new SMP/E and BSA environment. Press the ENTER key to continue.
Action: Enter the high-level qualifier of the libraries. This panel displays the datasets that will be allocated for your new environment when you run the installation jobs:
PEBSA31D --------------------------------------------------------------------- Command ===> (or press the HELP key) Installation Procedure - Defining the common bsa environment Here you can change data set, unit type, volume serial name and blocksize for the data sets below used as target and distribution libraries. Data Set Name Unit Volser Blksize ------------------------------------------------------------------------------ TEST1.INSTALL.BSA.LOAD SMS SMS 6144 TEST1.INSTALL.BSA.ISPPLIB SMS SMS 6160 TEST1.INSTALL.BSA.ISPMLIB SMS SMS 6160 TEST1.INSTALL.BSA.ISPSLIB SMS SMS 6160 TEST1.INSTALL.BSA.ISPTLIB SMS SMS 6160 TEST1.INSTALL.BSA.SAMPLIB SMS SMS 6160 TEST1.INSTALL.BSA.ALOAD SMS SMS 6144 TEST1.INSTALL.BSA.AISPPLIB SMS SMS 6160 TEST1.INSTALL.BSA.AISPMLIB SMS SMS 6160 TEST1.INSTALL.BSA.AISPSLIB SMS SMS 6160 TEST1.INSTALL.BSA.AISPTLIB SMS SMS 6160 TEST1.INSTALL.BSA.ASAMPLIB SMS SMS 6160 Enter BACK for the previous panel or BEGIN for the panel where you selected the old or new SMP/E and BSA environment. Press the ENTER key to continue.
Action: Normally there is no reason to modify any of the displayed values. Press ENTER to continue.
PEBSA31B
PEBSA31D

BSA V7R1 level 1771-02 (PBS4297) Adabas Audit Data Retrieval level V7R2-00 (PIR0436)
Adabas Audit Data Retrieval V7R2 Release Notes and Update Instructions – March 22, 2021 31
PEBSA32B prompts you for the particulars of a separate PO dataset, which will be used for the BSA and product load modules that require APF authorization.
Important: You will have to APF-authorize this library later and add it to your linklist concatenation.
PEBSA32B --------------------------------------------------------------------- Command ===> (or press the HELP key) Installation Procedure - Defining the common bsa environment Some programs of BSA (Beta Systems Architecture) and of the products require APF authorization. All these programs will be stored in a (commonly used) separate library (APFLOAD). This library will be created together with the BSA libraries. It must be APF authorized and concatenated into the MVS linklist. Please enter the data set name of this APFLOAD as well as the unit type, volume serial name and blocksize. Data Set Name ===> TEST1.INSTALL.BETA.APFLOAD Unit ===> SMS Volume Name ===> SMS Blksize ===> 6144 Enter BACK for the previous panel or BEGIN for the panel where you selected the old or new SMP/E and BSA environment. Press the ENTER key to continue.
Action: Accept or modify the prepopulated values and press ENTER.
Note: The standard name used in the manuals is BETA.APFLOAD. The purpose of PEBSA32D is similar to the panels that are displayed when you specify Special Way = YES.
PEBSA32D --------------------------------------------------------------------- Command ===> (or press the HELP key) Installation Procedure - Defining the common bsa environment Here you have the opportunity to enter a storage class , management class and / or data class if it is required to allocate the APFLOAD. Leave the class names empty if you want to allocate it without any special specification. In this case default classes will be accessed depending on the SMS selection criteria in your system. Some programs of the BSA and of the products must run APF authorized and will be stored in the BETA.APFLOAD below. Data Set Name ===> TEST1.INSTALL.BETA.APFLOAD Storage Class ===> Management Class ===> Data Class ===> Enter BACK for the previous panel or BEGIN for the panel where you selected the old or new SMP/E and BSA environment. Press the ENTER key to continue.
Action: Accept or modify the displayed values and press ENTER.
PEBSA32B
PEBSA32D

BSA V7R1 level 1771-02 (PBS4297) Adabas Audit Data Retrieval level V7R2-00 (PIR0436)
Adabas Audit Data Retrieval V7R2 Release Notes and Update Instructions – March 22, 2021 32
PEBSA32A prompts you for the particulars a PO dataset to be used as the Beta parameter library.
The members in this library are the so called LST members. The parameters stored in these members are the so-called LST parameters.
The name pattern of LST members is BnnLSTxx, where nn identifies the product. xx can be any numeric or alphabetic character combination, and you will be prompted for this by the installation REXX.
The installation REXX will tailor the LST member B01LSTxx (see PEBSA41B) and B97LSTxx (see PEXXXLST) with the LST parameters required for startup.
PEBSA32A --------------------------------------------------------------------- Command ===> (or press the HELP key) Installation Procedure - Defining the common bsa environment All parameters required by the products and facilities during startup execution will be stored in the Beta parmlib (default name BETA.PARMLIB). You can modify these startup parameters after installation by using the normal TSO EDIT functions. Note, that some of the parmlib members may be modified by batch jobs generated by this installation procedure. We recommend to specify a data set name different from any parmlib of lower versions to avoid unintentionally overwriting its members. Data Set Name ===> TEST1.INSTALL.PARMLIB Unit ===> SMS Volume Name ===> SMS (BLKSIZE will be the same as for your BSA libraries) Enter BACK for the previous panel or BEGIN for the panel where you selected the old or new SMP/E and BSA environment. Press the ENTER key to continue.
Action: Specify the dataset name and press ENTER.
PEBSA32A

BSA V7R1 level 1771-02 (PBS4297) Adabas Audit Data Retrieval level V7R2-00 (PIR0436)
Adabas Audit Data Retrieval V7R2 Release Notes and Update Instructions – March 22, 2021 33
The purpose of PEBSA32C is similar to the panels that are displayed when you specify Special Way = YES.
PEBSA32C --------------------------------------------------------------------- Command ===> (or press the HELP key) Installation Procedure - Defining the common bsa environment This panel gives you the chance to enter the storage class , management class and/or data class if it is required to allocate the BETA.PARMLIB. Leave the class names empty if you want to allocate it without any spe- cial specification. In this case default classes will be accessed which are defined for the standard SMS selection criteria in your system. The parmlib below is used to collect all the startup parameters for the products and for the facilities. You can modify the parameters in it by using TSO EDIT after the completion of the installation process. Data Set Name ===> TEST1.INSTALL.PARMLIB Storage Class ===> Management Class ===> Data Class ===> Enter BACK for the previous panel or BEGIN for the panel where you selected the old or new SMP/E and BSA environment. Press the ENTER key to continue.
Action: Accept or modify the displayed values and press ENTER. The names of these IBM Language Environment target libraries must be made known to the installation REXX.
PEBSA32E --------------------------------------------------------------------- Command ===> (or press the HELP key) Installation Procedure - Defining the common bsa environment Now specify the C language environment libraries for which DDDEF entries will be created in your SMP/E target zone. The routines, which are included from the C languages libraries, are a prerequisite for using the BSA Communication Server and other special BSA functions. The data set name of the libraries could be CEE.SCEELKED, CEE.SCEELKEX and CEE.SCEECPP. Please contact your system administrator if you are unsure where the libraries have been installed at your location. Data Set Name SCEELKED ===> CEE.SCEELKED Data Set Name SCEELKEX ===> CEE.SCEELKEX Data Set Name SCEECPP ===> CEE.SCEECPP Enter BACK for the previous panel or BEGIN for the panel where you selected the old or new SMP/E and BSA environment. Press the ENTER key to continue.
Action: Accept or modify the displayed names and press ENTER.
PEBSA32C
PEBSA32E

BSA V7R1 level 1771-02 (PBS4297) Adabas Audit Data Retrieval level V7R2-00 (PIR0436)
Adabas Audit Data Retrieval V7R2 Release Notes and Update Instructions – March 22, 2021 34
The specified numeric or alphabetic character combination will be used as identifier xx of the global LST member B01LSTxx (see PEBSA32A).
PEBSA41B --------------------------------------------------------------------- Command ===> (or press the HELP key) Installation Procedure - Defining SMP/E and common BSA environment All global values relevant to the product or facility execution are stored in the BETA.PARMLIB under member name B01LSTxx, where 'xx' is a two-digit identifier you specify below. This two-digit identifier can be a number, two letters, or a mix of both. The following panels will ask you to enter the BSA global values which will be tailored into the parmlib member by the installation procedure. If you already have a version 7 production environment and would like to install a test environment, this option can be used to specify an alternate B01LSTxx member for testing new BSA global values. Please enter the identifier for B01LSTxx below : LST number for B01LSTxx ===> 00 ( 00 to 99 or AA to ZZ ) Enter BACK for the previous panel or BEGIN for the panel where you selected the old or new SMP/E and BSA environment. Press the ENTER key to continue.
Action: Specify a two-digit identifier (it doesn't have to be numeric) and press ENTER. PEBSA41A prompts you for the number of the BETA SVC and the dataset name of your LPALIB.
PEBSA41A --------------------------------------------------------------------- Command ===> (or press the HELP key) Installation Procedure - Defining SMP/E and common BSA environment All Beta Systems products and facilities require the Beta user SVC for certain common functions. This SVC (type 3 or 4) is installed with the base components of BSA and is placed into the LPA library (LPALIB) by a special installation job generated here. Please enter the SVC number to assign to this SVC and the name of the LPALIB into which this SVC will be linked. Choose a SVC number between 200 and 255 and enter it below : ===> 254 Enter the data set name of your LPALIB here : ===> TEST1.INSTALL.LPALIB Enter BACK for the previous panel or BEGIN for the panel where you selected the old or new SMP/E and BSA environment. Press the ENTER key to continue.
Action: Enter the chosen number and the name of your LPALIB.
PEBSA41B
PEBSA41A

BSA V7R1 level 1771-02 (PBS4297) Adabas Audit Data Retrieval level V7R2-00 (PIR0436)
Adabas Audit Data Retrieval V7R2 Release Notes and Update Instructions – March 22, 2021 35
The BSA part of the installation REXX is generic and therefore provides more than one product.
Your installation medium includes only one product. Choose it.
PEBSA51A --------------------------------------------------------------------- Command ===> Scroll ===> PAGE Installation Procedure - Select beta docz plus (AAR) for installing it Please select ( S ) the requested product(s) and press the ENTER key. Select Product Version Title/Result ------------------------------------------------------------------------------ Beta32 Product not included in installation setup Beta77 Product not included in installation setup Beta88 Product not included in installation setup Beta89 Product not included in installation setup Beta91 Product not included in installation setup Beta92 Product not included in installation setup Beta92 EJM Product not included in installation setup Beta93 Product not included in installation setup Beta93 VPF Product not included in installation setup Beta93 FR V7R2M0 beta docz plus - Symphony S Beta97 AAR V7R2M0 Adabas Audit Data Retrieval Beta93 DT Product not included in installation setup ******************************* Bottom of data ********************************
Action: Enter the line command S in front of the highlighted product entry. PEXXX0A0 welcomes you to the product part of the installation REXX.
PEXXX0A0 --------------------------------------------------------------------- Command ===> (or press the HELP key) Installation Procedure - Installing AAR Welcome to the installation procedure for Adabas Audit Data Retrieval ---------------------------------------------------------------------- The following panels will ask you to describe how the selected product is to be customized for your installation. Please enter the information requested in each panel and press ENTER. The following special commands can be entered at any time to help you navigate through this procedure: Enter BACK to review and / or change the values in the previous panel. Enter BEGIN to go back to the first panel of this product procedure. You can then review / change all of the information previously entered. Press END to go back to the product selection menu in the BSA proce- dure. You can then cancel all the product information already entered. Enter BACK for the previous panel. Press the ENTER key to continue.
Action: Read and press ENTER.
PEBSA51A
PEXXX0A0
BSA V7R1 level 1771-02 (PBS4297) Adabas Audit Data Retrieval level V7R2-00 (PIR0436)
Adabas Audit Data Retrieval V7R2 Release Notes and Update Instructions – March 22, 2021 36
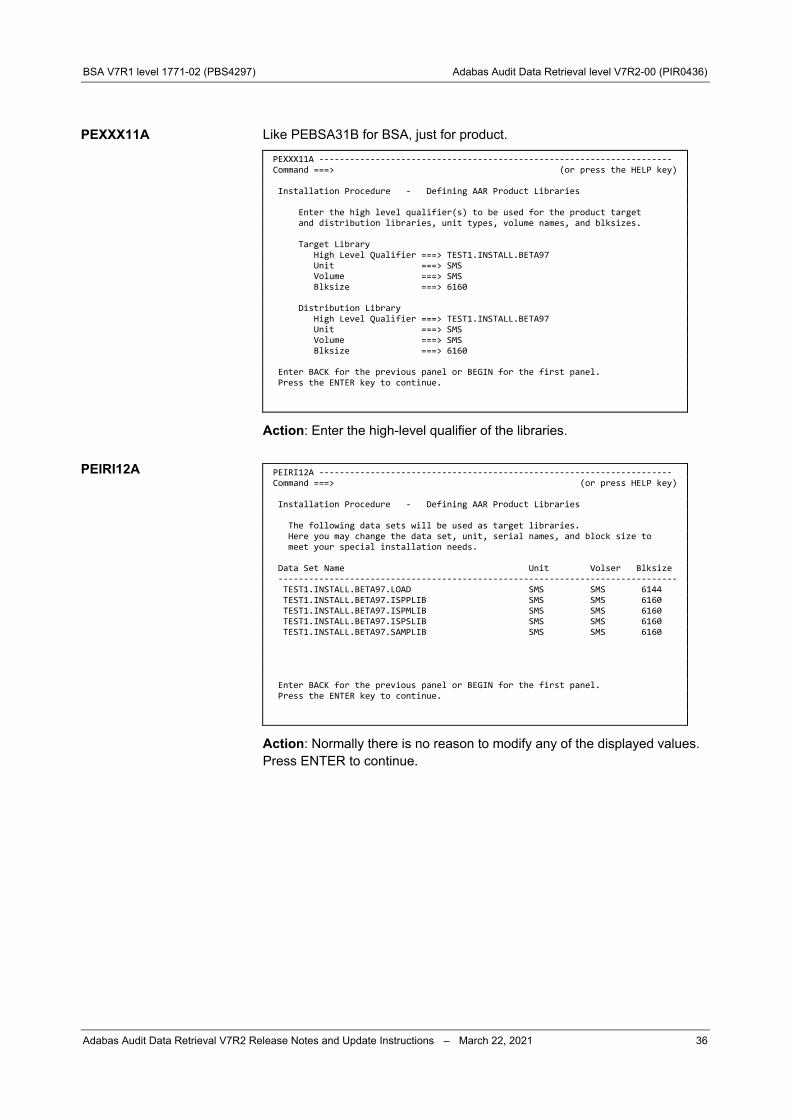
Like PEBSA31B for BSA, just for product.
PEXXX11A --------------------------------------------------------------------- Command ===> (or press the HELP key) Installation Procedure - Defining AAR Product Libraries Enter the high level qualifier(s) to be used for the product target and distribution libraries, unit types, volume names, and blksizes. Target Library High Level Qualifier ===> TEST1.INSTALL.BETA97 Unit ===> SMS Volume ===> SMS Blksize ===> 6160 Distribution Library High Level Qualifier ===> TEST1.INSTALL.BETA97 Unit ===> SMS Volume ===> SMS Blksize ===> 6160 Enter BACK for the previous panel or BEGIN for the first panel. Press the ENTER key to continue.
Action: Enter the high-level qualifier of the libraries.
PEIRI12A --------------------------------------------------------------------- Command ===> (or press HELP key) Installation Procedure - Defining AAR Product Libraries The following data sets will be used as target libraries. Here you may change the data set, unit, serial names, and block size to meet your special installation needs. Data Set Name Unit Volser Blksize ------------------------------------------------------------------------------ TEST1.INSTALL.BETA97.LOAD SMS SMS 6144 TEST1.INSTALL.BETA97.ISPPLIB SMS SMS 6160 TEST1.INSTALL.BETA97.ISPMLIB SMS SMS 6160 TEST1.INSTALL.BETA97.ISPSLIB SMS SMS 6160 TEST1.INSTALL.BETA97.SAMPLIB SMS SMS 6160 Enter BACK for the previous panel or BEGIN for the first panel. Press the ENTER key to continue.
Action: Normally there is no reason to modify any of the displayed values. Press ENTER to continue.
PEXXX11A
PEIRI12A

BSA V7R1 level 1771-02 (PBS4297) Adabas Audit Data Retrieval level V7R2-00 (PIR0436)
Adabas Audit Data Retrieval V7R2 Release Notes and Update Instructions – March 22, 2021 37
Like BSA panel PEBSA31D, but for product.
PEIRI12B --------------------------------------------------------------------- Command ===> (or press HELP key) Installation Procedure - Defining AAR Product Libraries The following data sets will be used as distribution libraries. Here you may change the data set, unit, serial names, and block size to meet your special installation needs. Data Set Name Unit Volser Blksize ------------------------------------------------------------------------------ TEST1.INSTALL.BETA97.ALOAD SMS SMS 6144 TEST1.INSTALL.BETA97.AISPPLIB SMS SMS 6160 TEST1.INSTALL.BETA97.AISPMLIB SMS SMS 6160 TEST1.INSTALL.BETA97.AISPSLIB SMS SMS 6160 TEST1.INSTALL.BETA97.ASAMPLIB SMS SMS 6160 Enter BACK for the previous panel or BEGIN for the first panel. Press the ENTER key to continue.
Action: Normally there is no reason to modify any of the displayed values. Press ENTER to continue. PEXXX21A and the following panels are about the Adabas Audit Data Retrieval database.
PEXXX21A --------------------------------------------------------------------- Command ===> (or press the HELP key) Installation Procedure - Set Up AAR Database Please enter or verify the high level qualifier(s) and VSAM owner for the databases (VSAM ESDS) of AAR. VSAM Data Set HLQ ===> TEST1.INSTALL.BETA97.DB VSAM Owner ===> B97 Please enter the volume serial of the disk on which the database files are to be allocated. Database Volume ===> SMS Enter BACK for the previous panel or BEGIN for the first panel. Press the ENTER key to continue.
Action: Provide the requested information and press ENTER.
PEIRI12B
PEXXX21A

BSA V7R1 level 1771-02 (PBS4297) Adabas Audit Data Retrieval level V7R2-00 (PIR0436)
Adabas Audit Data Retrieval V7R2 Release Notes and Update Instructions – March 22, 2021 38
The database definition file (DEFI file) contains the definitions for all the databases which are used by Adabas Audit Data Retrieval.
The standard name used in the manuals is BETA97.DB.DEF.
PEXXX21C --------------------------------------------------------------------- Command ===> (or press the HELP key) Installation Procedure - Set Up AAR Database The database will be controlled by the following definition file. Enter the cluster name and volume for this file below : Cluster Name Volume ===> TEST1.INSTALL.BETA97.DB ===> SMS Enter BACK for the previous panel or BEGIN for the first panel. Press the ENTER key to continue.
Action: Normally there is no reason to modify any of the displayed values. Press ENTER to continue. PEIRI21D prompts you to specify particulars for the various spool files, which are all components of the Adabas Audit Data Retrieval database.
PEIRI21D --------------------------------------------------------------------- Command ===> (or press HELP key) Installation Procedure - Set Up AAR Database The following VSAM dataset for database synchronization and the first spool, cache, index, global index, and spool reload file are required. You may change the cluster names, volume, and space in this panel. We recommend to use a 'fast / quiet' volume for the sync file. The space units for the files are in cylinder(s). Cluster Name Volume Space SYNC File ===> TEST1.INSTALL.BETA97.DB.SYNC ===> SMS : 1 INDEX File ===> TEST1.INSTALL.BETA97.DB.INDEX1 ===> SMS ===> 100 GLOBL File ===> TEST1.INSTALL.BETA97.DB.GLOBL1 ===> SMS ===> 100 CACHE File ===> TEST1.INSTALL.BETA97.DB.CACHE1 ===> SMS ===> 100 SPOOL File ===> TEST1.INSTALL.BETA97.DB.SPOOL1 ===> SMS ===> 20 RELOD File ===> TEST1.INSTALL.BETA97.DB.RELOD1 ===> SMS ===> 20 Enter BACK for the previous panel or BEGIN for the first panel. Press the ENTER key to continue.
Action: Provide the requested information and press ENTER.
Note: Space values are in cylinders. The minimum size (20 cylinders) is okay for the RELOD File, but the SPOOL File should not be smaller than INDEX, GLOBL, and CACHE. See the description of the spool files in Adabas Audit Data Retrieval Administrator Guide and decide accordingly.
PEXXX21C
PEIRI21D

BSA V7R1 level 1771-02 (PBS4297) Adabas Audit Data Retrieval level V7R2-00 (PIR0436)
Adabas Audit Data Retrieval V7R2 Release Notes and Update Instructions – March 22, 2021 39
It is possible to use software mirroring for the displayed components of the database.
Software mirroring should only be used as a fallback, in the unlikely event that hardware mirroring is not available for the volumes where the databases are stored.
PEIRI21E --------------------------------------------------------------------- Command ===> (or press HELP key) Installation Procedure - Set Up AAR Database Please specify which DB files you want to perform mirroring on. Mirror Main Database ===> NO (Y)es or (N)o Mirror List Database ===> NO (Y)es or (N)o Mirror Arc Database ===> NO (Y)es or (N)o Mirror Sfr Database ===> NO (Y)es or (N)o Mirror Lgf Database ===> NO (Y)es or (N)o Please enter the volume serial for the mirror DB files. It is strongly recommended that you use a different volume for the mirror databases. Mirror Database Volume ===> SMS Enter BACK for the previous panel or BEGIN for the first panel. Press the ENTER key to continue.
Action: Check with your system programmers. Then replace each YES in this panel with NO and press ENTER.
PEIRI21E

BSA V7R1 level 1771-02 (PBS4297) Adabas Audit Data Retrieval level V7R2-00 (PIR0436)
Adabas Audit Data Retrieval V7R2 Release Notes and Update Instructions – March 22, 2021 40
PEXXX22A prompts you to specify particulars for various VSAM clusters, which are all components of the Adabas Audit Data Retrieval database.
Each VSAM cluster comprises a key component and a data component. The ratio between the two should not be changed.
PEXXX22A --------------------------------------------------------------------- Command ===> (or press the HELP key) Installation Procedure - Set Up AAR Database The following VSAM cluster(s) are allocated. You can change volume and space and in special cases the names. The space units are in cylinders. Pay special attention to space limits (28 GB max. size for VSAM files). Cluster Name Volume Space for MAIN Database : Key ===> TEST1.INSTALL.BETA97.DB.MAIN.KEY ===> SMS ===> 10 Secondary Space ===> 0 Data ===> TEST1.INSTALL.BETA97.DB.MAIN ===> SMS ===> 20 Secondary Space ===> 0 Enter BACK for the previous panel or BEGIN for the first panel. Press the ENTER key to continue.
Action: Provide the requested information for each VSAM cluster and press ENTER.
Note: Specifying secondary space enables the automatic enlargement of the corresponding component as needed. The specified value refers to the maximum number of extents. Like PEBSA41B for BSA, just for product.
The specified numeric or alphabetic character combination will be used as identifier xx of the product LST member B97LSTxx (see PEBSA32A).
PEXXXLST --------------------------------------------------------------------- Command ===> (or press the HELP key) Installation Procedure - Installing AAR The Adabas Audit Data Retrieval requires certain initial execution values during the initialization of the product started task and batch jobs. These values are stored in the BETA.PARMLIB in member name B97LSTxx where 'xx' consists of a two-digit number, two characters or a mix of both. The next panels will ask you to enter the values which are tailored into this parmlib member. If you already have a production environment and would like to install a test environment, this option can be used to specify an alternate member B97LSTxx for testing new values of AAR. Please enter the identifier of the B97LSTxx below : LST number for B97LSTxx ===> 00 ( 00 to 99 or AA to ZZ ) Enter BACK for the previous panel or BEGIN for the first panel. Press the ENTER key to continue.
Action: Specify a two-digit identifier (it doesn't have to be numeric) and press ENTER.
PEXXX22A
PEXXXLST

BSA V7R1 level 1771-02 (PBS4297) Adabas Audit Data Retrieval level V7R2-00 (PIR0436)
Adabas Audit Data Retrieval V7R2 Release Notes and Update Instructions – March 22, 2021 41
The subsystem ID is a max. 4-digit identifier, which must be unique in your sysplex.
The entry in member IEFSSNxx is used when you IPL the system. For information on defining a subsystem dynamically, see BSA Installation and System Guide.
PEXXSSID --------------------------------------------------------------------- Command ===> (or press the HELP key) Installation Procedure - Installing AAR This panel asks you for the Subsystem ID that is to be given to the started task of AAR. This ID must be present in member IEFSSNxx of SYS1.PARMLIB when you IPL your MVS system before starting the started task. Enter a subsystem below compliant with the naming conventions for this method, i.e. no more than 4 alphanumeric characters beginning with an alphanumeric character, or beginning with #, § or $. Subsystem ID : SSID ===> B97A Keep in mind that Subsystem names must be unique in your environment. Enter BACK for the previous panel or BEGIN for the first panel. Press the ENTER key to continue.
Action: Provide the requested value and press ENTER. PEXXX31B requests additional values, which describe the subsystem you are about to install.
The VTAM network ID can be displayed in the system (SYS) panel of SDSF (NetID column).
PEXXX31B --------------------------------------------------------------------- Command ===> (or press the HELP key) Installation Procedure - Installing AAR In addition to the subsystem ID which you entered previously, the following information is required to provide descriptive information about the product system you are installing. Please enter your system VTAM net ID, name, location, and title below. You can choose any values which best describe your system. VTAM Net ID ===> YOURID System Name ===> PROD System Location ===> BERLIN System Title ===> Adabas Audit Data Retrieval Enter BACK for the previous panel or BEGIN for the first panel. Press the ENTER key to continue.
Action: Provide the requested values and press ENTER.
PEXXSSID
PEXXX31B

BSA V7R1 level 1771-02 (PBS4297) Adabas Audit Data Retrieval level V7R2-00 (PIR0436)
Adabas Audit Data Retrieval V7R2 Release Notes and Update Instructions – March 22, 2021 42
Installation job I#B97J07 copies the started task procedure to your procedure library. Panel PEXXXSTC prompts you for the required information.
PEXXXSTC --------------------------------------------------------------------- Command ===> (or press the HELP key) Installation Procedure - Set up AAR startup parameter The subsystem runs as a started task in its own address space. Here you must enter the started task procedure name for the above product. One of the installation jobs will place a member with this name into the required system procedure library (PROCLIB). Enter the name of the procedure library for the started task below : Name of PROCLIB ===> YOUR.STC.PROCLIB Enter the name to be used for the started task procedure : Started Task Proc. ===> BETA97 Remember that all started task procedures which are required for the products will be placed into the above procedure library. Enter BACK for the previous panel or BEGIN for the first panel. Press the ENTER key to continue.
Action: Provide the requested values and press ENTER. PEIRI32A prompts you specify standard values for the subsystem you are about to install.
These values will end up in the subsystem options record of your system (Option S.2).
PEIRI32A --------------------------------------------------------------------- Command ===> (or press HELP key) Installation Procedure - Installing AAR In the following you are asked for information which is required for the product to work. The values below are collected in the System Option Record (S#97ISYS). System Date Mask ===> DD.MM.YYYY (DD.MM.YYYY,DD/MM/YYYY,YY.DDD,YYYY.DDD, MM/DD/YY,DD.MM.YY,DD/MM/YY,MM/DD/YYYY.. System Language ===> E (E)nglish, (G)erman ..YYYY-MM-DD) Lines per Page ===> 55 In addition please enter below the default media type which should be used to archive data : Archive Media ===> TAPE (T)ape, (D)isk, or (O)disk Enter BACK for the previous panel or BEGIN for the first panel. Press the ENTER key to continue.
Action: Provide the requested value and press ENTER.
PEXXXSTC
PEIRI32A

BSA V7R1 level 1771-02 (PBS4297) Adabas Audit Data Retrieval level V7R2-00 (PIR0436)
Adabas Audit Data Retrieval V7R2 Release Notes and Update Instructions – March 22, 2021 43
PEIRI32E prompts you to specify standard values for the subsystem you are about to install.
These values will be used for the parameters B97_MAXIMUM_HITS_ALLOWED and B97_RC_TIMEOUT in the tailored LST member B97LSTxx.
PEIRI32E --------------------------------------------------------------------- Command ===> (or press HELP key) Installation Procedure - Installing AAR To limit the resource usage some options are possible which are stored into the B97LST parmlib member (B97LSTxx). Enter below how many hits are allowed in maximum per index query re- quest ( maximum hits allowed ) and the time in minutes after which the resources (storage), hold for a list, are freed and the list is closed in the case of inactivity ( resource control timeout ). Maximum Hits Allowed ===> 5000 ( 0 ... nnnnnn ) Resource Control Timeout ===> 45 ( 1 ... nnn minutes ) Enter BACK for the previous panel or BEGIN for the first panel. Press the ENTER key to continue.
Action: Provide the requested values and press ENTER. Using the defaults is okay. PEIRI32X prompts you to specify standard values for the subsystem you are about to install.
This value will be used for the parameter and B97_TC_TIMEOUT in the tailored LST member B97LSTxx.
PEIRI32X --------------------------------------------------------------------- Command ===> (or press HELP key) Installation Procedure - Installing AAR Some additional information is required which is collected in the B97LST parmlib member (B97LSTxx). Please enter the timeout value ( user522 ) after an inactive user gets an error message at the next access because the resources hold by him in beta docz plus are freed meanwhile. A value of zero means no time- out. User Timeout (522) ===> 60 ( 0 ... nnn minutes ) Enter BACK for the previous panel or BEGIN for the first panel. Press the ENTER key to continue.
PEIRI32E
PEIRI32X

BSA V7R1 level 1771-02 (PBS4297) Adabas Audit Data Retrieval level V7R2-00 (PIR0436)
Adabas Audit Data Retrieval V7R2 Release Notes and Update Instructions – March 22, 2021 44
PEIRI32Y prompts you to specify standard values for the subsystem you are about to install.
These values will be used for the parameter B97_TCPIP_PORT_AAV in the tailored LST member B97LSTxx.
The B97_TCPIP_PORT_AAV parameter is evaluated by the BSA TCP/IP server, which is the component on the z/OS side that enables TCP/IP communication between Adabas Audit Data View (AAV) and Adabas Audit Data Retrieval (AAR). At STC start, the BSA TCP/IP server binds to the specified address/port and starts listening for incoming requests from Adabas Audit Data View (AAV).
PEIRI32Y --------------------------------------------------------------------- Command ===> (or press HELP key) Installation Procedure - Installing beta docz plus (AAR) Some information are required to establish the communication between Adabas Audit Data Retrieval (AAR) and Adabas Audit Data View (AAV) via TCP/IP . These parameters must be stored into member B97LSTnn of the Beta parmlib library. Enter below the name of the TCP/IP started task in your z/OS system and the IP address of the TCP/IP stack: TCP/IP Started Task ===> TCPIP TCP/IP Address ===> 11.11.11.1 (in point notation) Enter here the port number which identifies the Adabas Audit Data View (AAV) communication to TCP/IP. This port number must be unique in your system. TCP/IP Port Number ===> 11111 Enter BACK for the previous panel or BEGIN for the first panel. Press the ENTER key to continue.
Specify the following in the corresponding fields:
TCP/IP Started Task Name of the TCP/IP started task (TCP/IP stack) on the z/OS system (max. 8 characters)
TCP/IP Address Bind address of the BSA TCP/IP server, for example, a specific numeric address or 0.0.0.0 for all available IPv4 addresses.
TCP/IP Port Number Listening port
PEIRI32Y

BSA V7R1 level 1771-02 (PBS4297) Adabas Audit Data Retrieval level V7R2-00 (PIR0436)
Adabas Audit Data Retrieval V7R2 Release Notes and Update Instructions – March 22, 2021 45
PEIRI32G prompts you to specify standard values for the subsystem you are about to install.
These values will end up in the LST member B97LSTxx.
PEIRI32G --------------------------------------------------------------------- Command ===> (or press HELP key) Installation Procedure - Installing AAR Some additional information is required which is collected in the B97LST parmlib member (B97LSTxx). Procedure Name for Automatic Reload ===> B97RLDA Dependent on your z/OS version (*) you may write the product SMF records with the extended IBM SMF header format (V1) or not (V0). IBM SMF Header Version ===> 0 (0,1) SMF Record Number ===> 197 (V0: 128-255, V1: 128-1151) (*) av. with z/OS 2.3 Enter BACK for the previous panel or BEGIN for the first panel. Press the ENTER key to continue.
Action: Provide the requested value and press ENTER. PEXXXPWD prompts you for the name of your license file. The specified value will be used for the parameter B97_LICX_DSNAME.
Important: Users of Adabas Audit Data Retrieval obtain their license file from Software AG (see "Licensing information" on page 5). Please do not contact the e-mail address displayed in the panel if you need a valid license file for Adabas Audit Data Retrieval.
PEXXXPWD --------------------------------------------------------------------- Command ===> (or press the HELP key) Installation Procedure - Installing AAR A license file is required for the proper operation of Adabas Audit Data Retrieval The licensing information is supplied as license file which must be defined in your Parmlib member under the keyword B97_LICX_DSNAME. Please enter the data set name (DSN) of this license file which can be obtained from the Beta Order Desk at [email protected] . This data set name will be tailored into the Parmlib member B97LSTxx. Enter the data set name of the license file for the products below : Data Set Name ===> TEST1.INSTALL.BSA.LICX Failure to do so correctly will result in product disablement. Refer to the bsa Installation & System Guide for further information. Enter BACK for the previous panel or BEGIN for the first panel. Press the ENTER key to continue.
Action: Specify the name (PO dataset with member name or PS dataset) and press ENTER.
PEIRI32G
PEXXXPWD

BSA V7R1 level 1771-02 (PBS4297) Adabas Audit Data Retrieval level V7R2-00 (PIR0436)
Adabas Audit Data Retrieval V7R2 Release Notes and Update Instructions – March 22, 2021 46
PEXXX6A0 informs you how much disk space is required by the installed system based on the values that you have specified.
PEXXX6A0 --------------------------------------------------------------------- Command ===> (or press the HELP key) Installation Procedure - Estimate AAR Storage Amount Most of the information related to the space requirements for the product are available now. At least 834 cylinders are needed to allocate the environment and database if you are creating a new system for AAR. Refer to the appropriate 'Installation and System Guide' to determine the space required for BSA and the other Beta Systems products. Product Data Sets ===> 222 ( CYLs ) Product Database ===> 612 ( CYLs ) If you want to change the amount of space, you will need to go back to the appropriate sections in Setting up the beta docz plus database. Go BACK to the appropriate section to change space in detail. Enter BACK for the previous panel or BEGIN for the first panel. Press the ENTER key to continue.
Action: Read and press ENTER. PEIRI91B asks you for the name of the PO dataset to be used for the tailored product installation jobs and other members.
This panel is displayed only if you have specified Product JCL here = NO in panel PEBSA15B.
PEIRI91B --------------------------------------------------------------------- Command ===> (or press HELP key) Installation Procedure - Tailoring AAR Batch Jobs This panel concerns the data set which is to contain the tailored JCL output of the installation procedure. Please enter or overtype the dataset name below. If this dataset does not yet exist it will be allocated SMS managed as desired at the starting point of the installation procedure. The space requirements will be computed by this procedure. Data Set Name ===> TEST1.INSTALL.BETA97.CNTL Enter BACK for the previous panel or BEGIN for the first panel. Press the ENTER key to continue.
Action: Accept or modify the displayed name and press ENTER.
PEXXX6A0
PEIRI91B
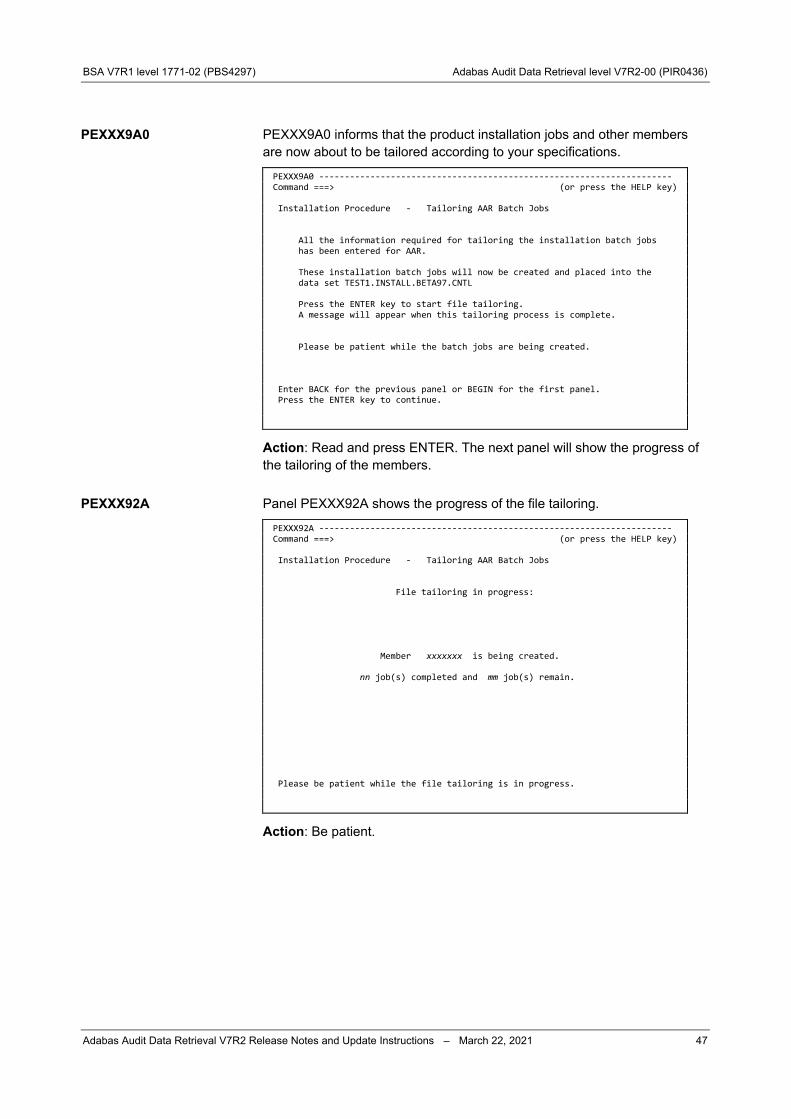
BSA V7R1 level 1771-02 (PBS4297) Adabas Audit Data Retrieval level V7R2-00 (PIR0436)
Adabas Audit Data Retrieval V7R2 Release Notes and Update Instructions – March 22, 2021 47
PEXXX9A0 informs that the product installation jobs and other members are now about to be tailored according to your specifications.
PEXXX9A0 --------------------------------------------------------------------- Command ===> (or press the HELP key) Installation Procedure - Tailoring AAR Batch Jobs All the information required for tailoring the installation batch jobs has been entered for AAR. These installation batch jobs will now be created and placed into the data set TEST1.INSTALL.BETA97.CNTL Press the ENTER key to start file tailoring. A message will appear when this tailoring process is complete. Please be patient while the batch jobs are being created. Enter BACK for the previous panel or BEGIN for the first panel. Press the ENTER key to continue.
Action: Read and press ENTER. The next panel will show the progress of the tailoring of the members. Panel PEXXX92A shows the progress of the file tailoring.
PEXXX92A --------------------------------------------------------------------- Command ===> (or press the HELP key) Installation Procedure - Tailoring AAR Batch Jobs File tailoring in progress: Member xxxxxxx is being created. nn job(s) completed and mm job(s) remain. Please be patient while the file tailoring is in progress.
Action: Be patient.
PEXXX9A0
PEXXX92A
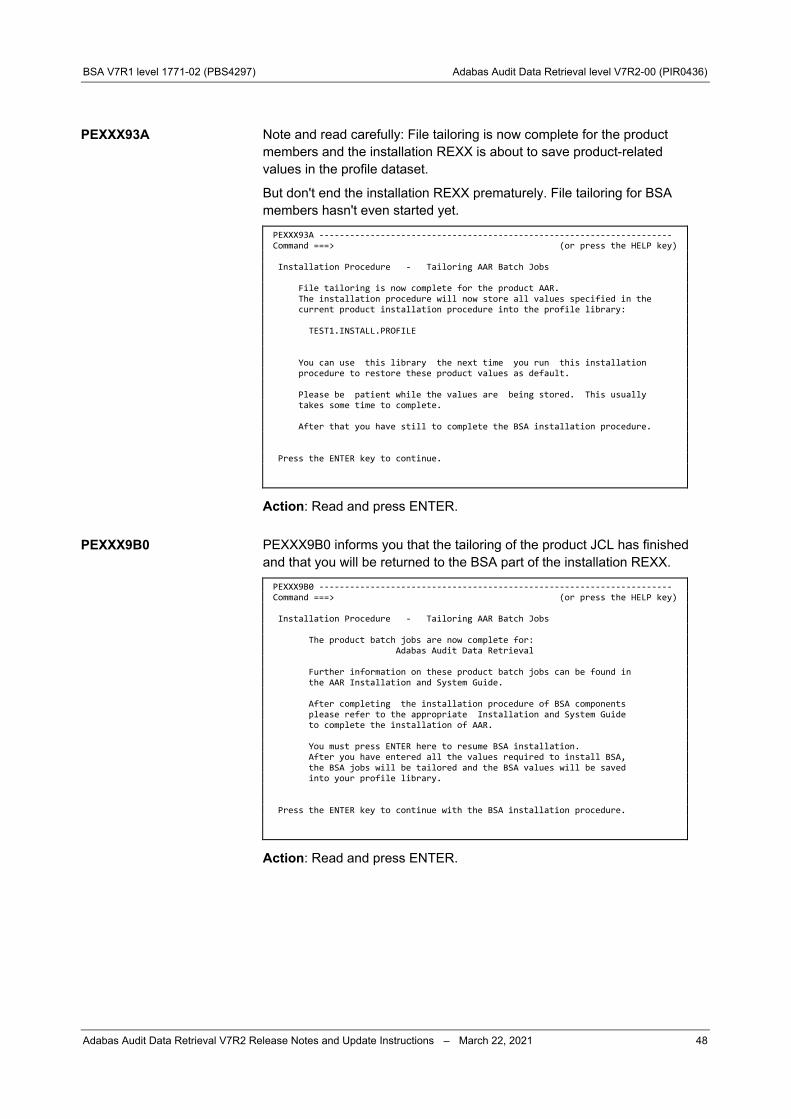
BSA V7R1 level 1771-02 (PBS4297) Adabas Audit Data Retrieval level V7R2-00 (PIR0436)
Adabas Audit Data Retrieval V7R2 Release Notes and Update Instructions – March 22, 2021 48
Note and read carefully: File tailoring is now complete for the product members and the installation REXX is about to save product-related values in the profile dataset.
But don't end the installation REXX prematurely. File tailoring for BSA members hasn't even started yet.
PEXXX93A --------------------------------------------------------------------- Command ===> (or press the HELP key) Installation Procedure - Tailoring AAR Batch Jobs File tailoring is now complete for the product AAR. The installation procedure will now store all values specified in the current product installation procedure into the profile library: TEST1.INSTALL.PROFILE You can use this library the next time you run this installation procedure to restore these product values as default. Please be patient while the values are being stored. This usually takes some time to complete. After that you have still to complete the BSA installation procedure. Press the ENTER key to continue.
Action: Read and press ENTER. PEXXX9B0 informs you that the tailoring of the product JCL has finished and that you will be returned to the BSA part of the installation REXX.
PEXXX9B0 --------------------------------------------------------------------- Command ===> (or press the HELP key) Installation Procedure - Tailoring AAR Batch Jobs The product batch jobs are now complete for: Adabas Audit Data Retrieval Further information on these product batch jobs can be found in the AAR Installation and System Guide. After completing the installation procedure of BSA components please refer to the appropriate Installation and System Guide to complete the installation of AAR. You must press ENTER here to resume BSA installation. After you have entered all the values required to install BSA, the BSA jobs will be tailored and the BSA values will be saved into your profile library. Press the ENTER key to continue with the BSA installation procedure.
Action: Read and press ENTER.
PEXXX93A
PEXXX9B0

BSA V7R1 level 1771-02 (PBS4297) Adabas Audit Data Retrieval level V7R2-00 (PIR0436)
Adabas Audit Data Retrieval V7R2 Release Notes and Update Instructions – March 22, 2021 49
We have seen PEBSA51A before, but now it says Procedure completed.
By not selecting anything here, we inform the installation REXX that we want to resume the BSA part.
PEBSA51A --------------------------------------------------------------------- Command ===> Scroll ===> PAGE Installation Procedure - Select beta docz plus for installing it Please select ( S ) the requested product(s) and press the ENTER key. Press the ENTER key to continue. Select Product Version Title/Result ------------------------------------------------------------------------------ Beta32 Product not included in installation setup Beta77 Product not included in installation setup Beta88 Product not included in installation setup Beta89 Product not included in installation setup Beta91 Product not included in installation setup Beta92 Product not included in installation setup Beta92 EJM Product not included in installation setup Beta93 Product not included in installation setup Beta93 VPF Product not included in installation setup Beta93 FR V7R2M0 beta docz plus - Symphony Beta97 AAR V7R2M0 Procedure completed Beta93 DT Product not included in installation setup ******************************* Bottom of data ********************************
Action: Press ENTER. PEXXX9A0 informs that the BSA installation jobs and other members are now about to be tailored according to your specifications.
PEBSA9A0 --------------------------------------------------------------------- Command ===> (or press the HELP key) Installation Procedure - Tailoring BSA and facility batch jobs All the information required for file tailoring has been entered. The installation batch jobs will now be created and placed in the dataset TEST1.INSTALL.BSA.CNTL Press the ENTER key to start file tailoring. A message will appear when the installation process is complete. Please be patient while the batch jobs are being created. Enter BACK for the previous panel or BEGIN for the panel where you selected the old or new SMP/E and BSA environment. Press the ENTER key to continue.
Action: Read and press ENTER. The next panel will show the progress of the tailoring of the members.
PEBSA51A
PEBSA9A0

BSA V7R1 level 1771-02 (PBS4297) Adabas Audit Data Retrieval level V7R2-00 (PIR0436)
Adabas Audit Data Retrieval V7R2 Release Notes and Update Instructions – March 22, 2021 50
Panel PEBSA91A shows the progress of the file tailoring.
PEBSA91A --------------------------------------------------------------------- Command ===> (or press the HELP key) Installation Procedure - Tailoring BSA and Beta Facility Jobs File tailoring in progress: Member xxxxxxx is being created. nn job(s) completed and mm job(s) remain. Please be patient while the file tailoring is in progress.
Action: Be patient. File tailoring is now complete for the BSA members and the installation REXX is about to save BSA-related values in the profile dataset.
PEBSA92A --------------------------------------------------------------------- Command ===> (or press the HELP key) Installation Procedure - Tailoring BSA and facility batch jobs The File tailoring of the BSA and SMP/E JCL members is now complete. The installation procedure will now store all values specified in the bsa installation procedure into the Beta profile library : TEST1.INSTALL.PROFILE You can use this library the next time you run this installation procedure to restore these values. Please be patient while the values are being stored. This usually takes some time to complete. Press the ENTER key to continue.
Action: Read and press ENTER.
PEBSA91A
PEBSA92A

BSA V7R1 level 1771-02 (PBS4297) Adabas Audit Data Retrieval level V7R2-00 (PIR0436)
Adabas Audit Data Retrieval V7R2 Release Notes and Update Instructions – March 22, 2021 51
PEBSA9B0 is the last panel to be displayed by the installation REXX.
The panel informs you that the next step is the submission of the tailored batch installation jobs and where you can find descriptions of them.
PEBSA9B0 --------------------------------------------------------------------- Command ===> (or press the HELP key) Installation Procedure Congratulations Step 2 of the installation procedure is finished. Now read the section entitled STEP 3 - Batch Jobs in the bsa Installation and System Guide and the section STEP 2 in the Installation and System Guide of the required products. Press the ENTER key.
Action: Press ENTER.
PEBSA9B0

BSA V7R1 level 1771-02 (PBS4297) Adabas Audit Data Retrieval level V7R2-00 (PIR0436)
Adabas Audit Data Retrieval V7R2 Release Notes and Update Instructions – March 22, 2021 52
SMP/E terms and concepts
SMP/E is IBM's tool for managing software installations on the z/OS mainframe. SMP/E manages software versions, helps apply patches and updates (PTFs), facilitates orderly testing and, if necessary, reversion to a previous state.
This section explains some of the basic terms and concepts used by SMP/E. If you need more detailed information on SMP/E, see the IBM documentation.
Tailored installation jobs
If applicable, this section also points out where SMP/E commands and actions are reflected in the tailored installation jobs. The standard installation assumes that BSA V7R1, Beta 23 V7R2, and Adabas Audit Data Retrieval V7R2 are installed in the same SMP/E environment. The basic building blocks of software include object modules, skeletons, panels, and other types of data. All of these building blocks are called elements.
A SYSMOD is a package for SMP/E that includes the element together with information that SMP/E needs to install and track system modifications. Each SYSMOD is assigned a seven character SYSMOD ID to uniquely identify it.
There are four different categories of SYSMODs:
• Function SYSMODs introduce the elements for a product.
• PTF (program temporary fix) SYSMODs prevent or fix problems with an element, or introduce new elements.
• APAR (authorized program analysis reports) SYSMODs fix problems with an element (not used by Beta Systems).
• USERMOD (user modifications) SYSMODs customize an element. The seven character FMID (Function Module ID) identifies a piece of software and its release number.
For example, the FMID of BSA V7R1 is RBS7100.
The FMID enables SMP/E to identify the various building blocks as belonging to the same piece of software. Modification control statements (MCS) at the beginning of the SYSMOD package provide management instructions for SMP/E. Each MCS start with ++ as the first two characters, for example, ++PTF(ptfnum) identifies a PTF SYSMOD and ++HOLD(reason) instructs SMP/E to keep a PTF in the global zone until the reason has been confirmed.
Overview
SYSMODs
FMID
Modification control statement (MCS)

BSA V7R1 level 1771-02 (PBS4297) Adabas Audit Data Retrieval level V7R2-00 (PIR0436)
Adabas Audit Data Retrieval V7R2 Release Notes and Update Instructions – March 22, 2021 53
The CSI datasets contain all the information SMP/E needs to track the elements in the distribution and target libraries.
The CSI stores information in three zones:
• The distribution zone is for entries that represent the elements found in the distribution libraries.
• The target zone is for entries that represent the elements found in the target libraries.
• The global zone has entries that identify the target and distribution zone and data on SMP/E processing.
Tailored installation jobs
I#BSAJ01 through I#BSAJ05 create a new SMP/E environment. A distribution library contains all the elements that are used as input for running your system. One very important use of the distribution libraries is for backup. Should a serious error occur with an element on the production system, the element can be replaced by a stable level found in the distribution library.
A target library contains all the executable code needed to run the system.
Tailored installation jobs
I#BSAJ06 through I#BSAJ07 allocate and define libraries for BSA.
I#B23J01 defines the BSA libraries also for Beta 23.
I#B97J01 through I#B97J02 allocate and define libraries for Adabas Audit Data Retrieval.
Consolidated software inventory (CSI)
Target library and distribution library

BSA V7R1 level 1771-02 (PBS4297) Adabas Audit Data Retrieval level V7R2-00 (PIR0436)
Adabas Audit Data Retrieval V7R2 Release Notes and Update Instructions – March 22, 2021 54
SMP/E installs SYSMODs in your target and distribution libraries.
The three basic commands provided for this are RECEIVE, APPLY, and ACCEPT.
1. The RECEIVE command gets the SYSMODs from the input dataset and copies them to an SMP/E temporary storage area in the global zone (SMPPTS dataset for MCSs and inline elements, SMPTLIB dataset for RELFILE).
2. The APPLY command installs the SYSMODs into the target system libraries.
3. The ACCEPT command installs the SYSMODs into the distribution libraries (used by Beta Systems only for function SYSMODs).
The RESTORE command reverts to a previous state. RESTORE is not possible after ACCEPT.
Tailored installation jobs
I#BSAJ08 through I#BSAJ09 do the RECEIVE/APPLY/ACCEPT for the BSA SYSMODs.
I#B23J02 through I#B23J04 do the RECEIVE/APPLY/ACCEPT for the Beta 23 SYSMODs.
I#B97J03 through I#B97J05 do the RECEIVE/APPLY/ACCEPT for the Adabas Audit Data Retrieval SYSMODs
Note: There is no ACCEPT in the tailored installation jobs for PTF SYSMODs, only RECEIVE and APPLY.
RECEIVE, APPLY, and ACCEPT

BSA V7R1 level 1771-02 (PBS4297) Adabas Audit Data Retrieval level V7R2-00 (PIR0436)
Adabas Audit Data Retrieval V7R2 Release Notes and Update Instructions – March 22, 2021 55
BSA installation and maintenance jobs
The job table in the current section shows which BSA jobs have to be run by new and existing users of Adabas Audit Data Retrieval. Use region 0M in your SMP/E procedure for all SMP/E jobs.
Stop all BSA V7-based started tasks using target libraries referenced in the DDDEFs in your SMP/E environment.
Which BSA jobs need to run?
Region size for SMP/E jobs
Before submitting BSA installation jobs ...

BSA V7R1 level 1771-02 (PBS4297) Adabas Audit Data Retrieval level V7R2-00 (PIR0436)
Adabas Audit Data Retrieval V7R2 Release Notes and Update Instructions – March 22, 2021 56
The following table shows the BSA jobs that have to run in sequence (top-down) when installing or applying maintenance. For more information on each job, see BSA Installation and System Guide.
Run the jobs that are marked with an X in the column of your currently installed level. (X) indicates that a job has to run under certain conditions only. A superscripted number indicates the presence of a note with additional information. Read this note first before submitting the job.
New installation
Max. RC (stepname if rc<>0)
Your RC
Your notes
I#BSAJ01: allocate SMP/E files X 0
I#BSAJ02: allocate new libraries X 0
I#BSAJ03: allocate SMP/E CSI X 0
I#BSAJ04: initialize SMP/E CSI X 0
I#BSAJ05: copy SMP/E procedure X 0
I#BSAJ06: add zones/SMPDDDEFs X 0
I#BSAJ07: add BSA DDDEFs X 0
I#BSAJ08: receive functions/PTFs X 1 0
I#BSAJ09: apply/accept functions X 0
I#BSAJ10: apply PTFs (includes PTFs with ++HOLD) 2 X 4 or 12 3
(BSSPTF)
I#BSAJ11: link SVC (X) 4 0
I#BSAJ12: allocate Parmlib X 0
I#BSAJ13: copy B01LSTxx X 0 The highest PTF of BSA level 1771-02 is PBS4297. We recommend that you contact support to find out whether there are any newer PTFs that should be installed.
Job table
Note 1: I#BSAJ08

BSA V7R1 level 1771-02 (PBS4297) Adabas Audit Data Retrieval level V7R2-00 (PIR0436)
Adabas Audit Data Retrieval V7R2 Release Notes and Update Instructions – March 22, 2021 57
One BSA PTF is defined with the SMP/E parameter ++HOLD... SYSTEM REASON(...). ++HOLD.
This is meant to draw your attention to the fact that this PTF requires subsequent action:
PTF Affected module Required actions
PBS4215 BST01SVC 1. Relink SVC (I#BSAJ11)
2. Activate SVC (e.g. SVCUPDTE)
Important: You must ensure that all of the following is done:
1. I#BSAJ10 must run with BYPASS(HOLDSYS(reason)) to apply the PTF.
2. I#BSAJ11 must run to relink the Beta SVC.
3. The new SVC must be activated after relinking (job SVCUPDTE, for example).
Applying PTFs with ++HOLD
Expect I#BSAJ10 to terminate with RC=8 if there are PTFs that have not yet been applied. This is indicated by the following messages in SMPOUT:
GIM30206E ** APPLY PROCESSING FAILED FOR SYSMOD PBSnnnn. HOLD REASON IDS WERE NOT RESOLVED. GIM35965I SYSTEM HOLD reason ORIGINATED BY SYSMOD PBSnnnn WAS NOT RESOLVED.
Affected PTFs are listed in the SMPRPT log, for example: CAUSER SYSMOD SUMMARY REPORT FOR APPLY PROCESSING CAUSER FMID MESSAGE ID PAGE ERROR DESCRIPTION AND POSSIBLE CAUSES PBSnnnn RBS7100 GIM35965I 1 SYSTEM HOLD reason ORIGINATED BY SYSMOD PBSnnnn WAS NOT RESOLVED. ... UNRESOLVED HOLD REASON REPORT FOR APPLY PROCESSING NOTE: THE SYSMODS LISTED IN THIS REPORT ALSO APPEAR IN THE CAUSER SYSMOD SUMMARY REPORT. TYPE REASON ID FMID SYSMOD ++HOLD DATA ------ --------- ------- ------- --------------------------------------------------------- SYSTEM reason RBS7100 PBSnnnn ++HOLD(PBSnnnn) FMID(RBS7100) SYSTEM REASON(reason) COMMENT(req_activity_info) ...
For the apply to be successful, rerun I#BSAJ10 with BYPASS, where you confirm the HOLDSYS reason of the PTF: //SMPCNTL DD * SET BDY(BETATGT) . APPLY PTFS FORFMID(RBS7100) RETRY(YES) BYPASS(HOLDSYS(reason)) .
Note 2: I#BSAJ10

BSA V7R1 level 1771-02 (PBS4297) Adabas Audit Data Retrieval level V7R2-00 (PIR0436)
Adabas Audit Data Retrieval V7R2 Release Notes and Update Instructions – March 22, 2021 58
RC=4 is okay if caused by the following messages from the LKED steps for the modules listed below: IEW2480W A711 EXTERNAL SYMBOL MAIN OF TYPE LD WAS ALREADY ... IEW2482W A712 THE ORIGINAL DEFINITION WAS IN A MODULE ...
These warning messages are okay if they occur for the following modules:
BST00CRT, BST00TZG, BST02TCJ, BST04PKS, BST04STA, and BST04STG
Subsequent GIM23903W and GIM23904W messages are likely to occur for these and other modules as a result of this.
RC=12 is okay if it is caused by the following error (no PTFs available): GIM24801S ** NO SYSMODS SATISFIED THE OPERANDS SPECIFIED ON THE APPLY COMMAND.
Always check the log to make sure that no other errors have occurred.
We recommend that you contact support to find out whether there are any newer PTFs that should be installed. This job (re)links the SVC. The SVC level is PBS4215. You can skip this job if your SVC is already up-to-date. The active SVC level is displayed in startup message IRM9151I.
A new SVC must be activated after relinking (see SVCUPDTE on page 63).
Note 3: I#BSAJ10
Note 4: I#BSAJ11

BSA V7R1 level 1771-02 (PBS4297) Adabas Audit Data Retrieval level V7R2-00 (PIR0436)
Adabas Audit Data Retrieval V7R2 Release Notes and Update Instructions – March 22, 2021 59
Beta 23 installation and maintenance jobs
The job table in the current section (see page 59) shows which B23 jobs have to be run by new and existing users of Adabas Audit Data Retrieval.
Beta 23 is installed into the BSA libraries. An existing BSA V7 environment is therefore required. Before submitting Beta 23 install jobs, stop all Beta product started tasks that are using the BSA Version 7 target libraries referenced in the DDDEFs in your SMP/E environment. The following table shows the Beta 23 jobs that have to run in sequence (top-down) when installing or applying maintenance. For more information on each job, see Adabas Audit Data Retrieval Installation and System Guide.
Run the jobs that are marked with an X in the column of your currently installed level. (X) indicates that a job has to run under certain conditions only. A superscripted number indicates the presence of a note with additional information. Read this note first before submitting the job.
New installation
Max. RC (stepname if rc<>0)
Your RC
Your notes
I#B23J01: add B23 DDDEFS X 0
I#B23J02: receive functions/PTFs (X) 1 0
I#B23J03: apply/accept functions X 0
I#B23J04: apply PTFs X 0 or 12 2 (BFSPTFS)
I#B23J02 and I#B97J03 each receive all Beta 23 and all Adabas Audit Data Retrieval functions and PTFs from the installation dataset. I#B23J02 will not find anything to receive if I#B97J03 has already run in the same environment. (BSA functions and BSA PTFs are received by I#BSAJ08.)
Which B23 jobs need to run?
Before submitting Beta 23 install jobs ...
Job table
Note 1: I#B23J02

BSA V7R1 level 1771-02 (PBS4297) Adabas Audit Data Retrieval level V7R2-00 (PIR0436)
Adabas Audit Data Retrieval V7R2 Release Notes and Update Instructions – March 22, 2021 60
RC=12 is okay if it is caused by the following error (no PTFs available):
GIM24801S ** NO SYSMODS SATISFIED THE OPERANDS SPECIFIED ON THE APPLY COMMAND.
Always check the log to make sure that no other errors have occurred.
We recommend that you contact support to find out whether there are any newer PTFs that should be installed.
Note 2: I#B23J04

BSA V7R1 level 1771-02 (PBS4297) Adabas Audit Data Retrieval level V7R2-00 (PIR0436)
Adabas Audit Data Retrieval V7R2 Release Notes and Update Instructions – March 22, 2021 61
Product installation and maintenance jobs
The job table in the current section shows which product installation jobs have to be run by new and existing users of Adabas Audit Data Retrieval. Before submitting any product installation jobs, stop all Adabas Audit Data Retrieval V7 started tasks using target libraries referenced in the DDDEFs in your SMP/E environment. The following table shows the jobs that have to run in sequence (top-down) when installing or applying maintenance to Adabas Audit Data Retrieval. For more information on each job, see Adabas Audit Data Retrieval Installation and System Guide.
Run the jobs that are marked with an X in the column of your currently installed level. (X) indicates that a job has to run under certain conditions only. A superscripted number indicates the presence of a note with additional information. Read this note first before submitting the job.
New installation
Max. RC (stepname if rc<>0)
Your RC
Your notes
I#B97J01: allocate libraries X 0
I#B97J02: add product DDDEFs X 0
I#B97J03: receive functions/PTFs (X) 1 0
I#B97J04: apply/accept functions X 0
I#B97J05: apply PTFs X 0 or 12 2 (IRMPTFS)
I#B97J06: copy B97LSTxx/B97SSIxx X 0
I#B97J07: copy STC procedures and reload procedure B97RLDA X 0
B97UMPRE: usermod PE97STRT X 3 0
Copy B97CLIST to DD SYSPROC X 4 n/a
B97LGFJ1: allocate LGFSLIB X 0
B16LGFJ2 (BSA job): copy BSA members X 0
Which B97 jobs need to run?
Before submitting product installation jobs...
Job table

BSA V7R1 level 1771-02 (PBS4297) Adabas Audit Data Retrieval level V7R2-00 (PIR0436)
Adabas Audit Data Retrieval V7R2 Release Notes and Update Instructions – March 22, 2021 62
I#B23J02 and I#B97J03 each receive all Beta 23 and all Adabas Audit Data Retrieval functions and PTFs from the installation dataset. If I#B23J02 has already run in the same environment, I#B97J03 will not find anything to receive and will end with RC=4. (BSA functions and BSA PTFs are received by I#BSAJ08.) RC=12 is okay if it is caused by the following error (no PTFs available):
GIM24801S ** NO SYSMODS SATISFIED THE OPERANDS SPECIFIED ON THE APPLY COMMAND.
Always check the log to make sure that no other errors have occurred.
We recommend that you contact support to find out whether there are any newer PTFs that should be installed. B97UMPRE receives and applies the non-displayable start panel PE97STRT as a usermod. This panel is called for first-time users of Adabas Audit Data Retrieval to set appropriate defaults for subsystem ID, system name, location etc. in the user's variable pool.
B97UMPRE ends with RC=12 if the corresponding usermod is already present. If you want to replace it, reject this usermod and then rerun B97UMPRE. Copy the CLIST to one of the procedure libraries defined under DD SYSPROC in your TSO logon procedures.
Note: When calling the CLIST via a panel, do not use the parameter NEWAPPL(BSS) or NEWAPPL(BST). Calling the CLIST with these parameters will lead to unpredictable results.
Note 1: I#B97J03
Note 2: I#B97J05
Note 3: B97UMPRE
Note 4: Copy B97CLIST to DD SYSPROC

BSA V7R1 level 1771-02 (PBS4297) Adabas Audit Data Retrieval level V7R2-00 (PIR0436)
Adabas Audit Data Retrieval V7R2 Release Notes and Update Instructions – March 22, 2021 63
BSA and product customization and activation
The table in this section shows which additional jobs must run to customize and activate BSA and Adabas Audit Data Retrieval after installing or applying maintenance. If you want to find out which product level is currently installed in an environment, use online option P.2 or check the startup messages in the JESMSGLG. The Adabas Audit Data Retrieval started task(s) that are using this database must be down when running database update jobs. If you have more than one Adabas Audit Data Retrieval subsystem and if these subsystems do not share the same database, you must run the database update jobs for each Adabas Audit Data Retrieval subsystem that has a database of its own.
New installation
Max. RC (stepname if rc<>0)
Your RC
Your notes
Define subsystem to z/OS (SETSSI ADD,SUBNAME=ssid) (X) 1 n/a
Authorize load libraries (X) 2 n/a
Update SVC (SVCUPDTE) (X) 3 0
Assemble and link B02UXSIN X 4 0
Assemble and link B04UXSEC X 5 0
Assemble and link B97UXSEC X 6 0
F LLA,REFRESH X 7 n/a
B97INIT X 4 8
B97DBDEF Define/initialize B97 VSAM clusters X 0
B97DBFOR Allocate/initialize B97 VSAM database X 0
B97DBLOD (table data load) X 9 0
Overview
Current Adabas Audit Data Retrieval level
Before submitting database update jobs ...
Customization and activation

BSA V7R1 level 1771-02 (PBS4297) Adabas Audit Data Retrieval level V7R2-00 (PIR0436)
Adabas Audit Data Retrieval V7R2 Release Notes and Update Instructions – March 22, 2021 64
Skip this step if the subsystem ID has already been defined.
For detailed information on subsystem initialization and required security definitions, see BSA Installation and System Guide. Check whether your Adabas Audit Data Retrieval and BSA load libraries need to be authorized (if BETA.APFLOAD concatenated in steplib). SVCUPDTE dynamically updates the SVC that you have (re)linked with BSA installation job I#BSAJ11.
The most recent SVC level is PBS4215. You can skip this job if your SVC is already up-to-date. The number and level of the active SVC is displayed in startup message IRM9151I.
During the SVC update, all BSA and Beta product subsystems that are working with this SVC must be stopped.
For detailed information on activating the SVC (IPL or dynamic method), see "Step 4: Specifying authorized functions to z/OS" and "Activating authorized functions (Beta SVC) in z/OS" in BSA Installation and System Guide. Run G#02XSIN from the BSA.CNTL to assemble and link B02UXSIN (logon security exit) into the BETA.APFLOAD. Run G#04XSEC from the BSA.CNTL to assemble and link B04UXSEC (BSA Service Manager security exit) into the BETA.APFLOAD.
Use appropriate RACF definitions and B04UXSEC to protect access to the options and functions of the BSA Service Manager. For detailed information, see "RACF security" in BSA Service Manager Manual. The B97UXSEC that is active after installation does not check any security.
The source code of a functional security exit is provided in member B97UXSEC in the BETA97.SAMPLIB. Run G#97XSEC from the BETA97.CNTL to assemble and link B97UXSEC into the BETA.APFLOAD. Refresh LLA with the following console command if modified libraries are concatenated in the linklist:
F LLA,REFRESH RC=4 can be ignored if it is caused by the following warning: SFF9119W PROFILE NOT DEFINED FOR (BETA.INIT.ssid)
Note 1: Define ssid to z/OS
Note 2: Authorize load libraries
Note 3: SVCUPDTE
Note 4: B02UXSIN
Note 5: B04UXSEC
Note 6: B97UXSEC
Note 7: F LLA,REFRESH
Note 8: B97INIT

BSA V7R1 level 1771-02 (PBS4297) Adabas Audit Data Retrieval level V7R2-00 (PIR0436)
Adabas Audit Data Retrieval V7R2 Release Notes and Update Instructions – March 22, 2021 65
This job replaces the LGFxxx tables in the database. The data in the LGFxxx tables is used by _beta smf.
RC=16 for step LGFDELE is okay if LGFxxx tables don't exist (new installation).
Note 9: B97DBLOD

BSA V7R1 level 1771-02 (PBS4297) Adabas Audit Data Retrieval level V7R2-00 (PIR0436)
Adabas Audit Data Retrieval V7R2 Release Notes and Update Instructions – March 22, 2021 66
Verification
To verify installation/maintenance:
1. Start the Adabas Audit Data Retrieval started task and check the JESMSGLG (displayed levels, database status, TCP/IP status) in SDSF.
IRM9151I B97LSTxx LOADED, SVC(svcnum/PBS4215/epaddr) SSID(ssid) SYSNAME(sysname) SYSPLEX(sysplex) SYSTEM(z/OSn.nn) ASIDX(asidx) IRM9151I BSA INITIALIZATION 177100 LEVEL: 02 / PBS4297 / PBS4244 IRM9151I CPU INFORMATION - TYPE: tttt ID: nnnn LPAR: l TLCPU: tccc CLCPU: cccc SLCPU: sccc IRM9005I LICENSE FILE filename WILL BE USED IRM9004I product HAS BEEN LICENSED FOR CUSTOMER: customername IRM9006I LICENSED CPU-TYPES: cputype IRM9557I DATABASE INITIALIZATION WITH VERSION: PBS4398 / PBS4397 ... IRM9154I BSA HAS STARTED BETA97 G7 SYSTEM LEVEL V7R2-00 PIR0436
where:
xx svcnum epaddr ssid sysname sysplex asidx tttt nnnn l tccc cccc sccc filename customername cputype
Identifier of the LST member Your SVC number Entry point address of the SVC Your subsystem ID Name of your z/OS system Name of your sysplex Address space ID assigned to STC/JOB Machine type Machine ID LPAR number Total LCPU count Configured LCPU count Standby LCPU count Name of the license file to be used Name of customer to whom this license was issued (as specified in the license file) List of the CPU types for which the license is valid
2. Call the Adabas Audit Data Retrieval ISPF application and verify the upgrade status of the database (option S.2, line command V).
The message Verification successful indicates that all required database updates have been successfully installed.
If one of the table entries displays NO in the column INSTALLED, check the step on database update, and verify the return codes of the insert statements.
You can also run the database verification job B97DBVER (for more information on verification, refer to the corresponding section in the Adabas Audit Data Retrieval Installation and System Guide).
Do NOT use the database if the INSTALLED column shows a NO.
Instructions

BSA V7R1 level 1771-02 (PBS4297) Adabas Audit Data Retrieval level V7R2-00 (PIR0436)
Adabas Audit Data Retrieval V7R2 Release Notes and Update Instructions – March 22, 2021 67
A level check is carried out when a Beta product is started. If the Beta SVC level does not correspond to the Beta control program, the Beta product will not be started and the message IRM9169E or IRM9197E is issued.
The most likely cause is one or both of the following:
• The SVC has not been updated.
• BST01ARI (B97INIT) has not run to initialize the subsystem.
If STC start leads to IRM9169E or IRM9197E