adafruit mprls ported pressure sensor breakout
TRANSCRIPT
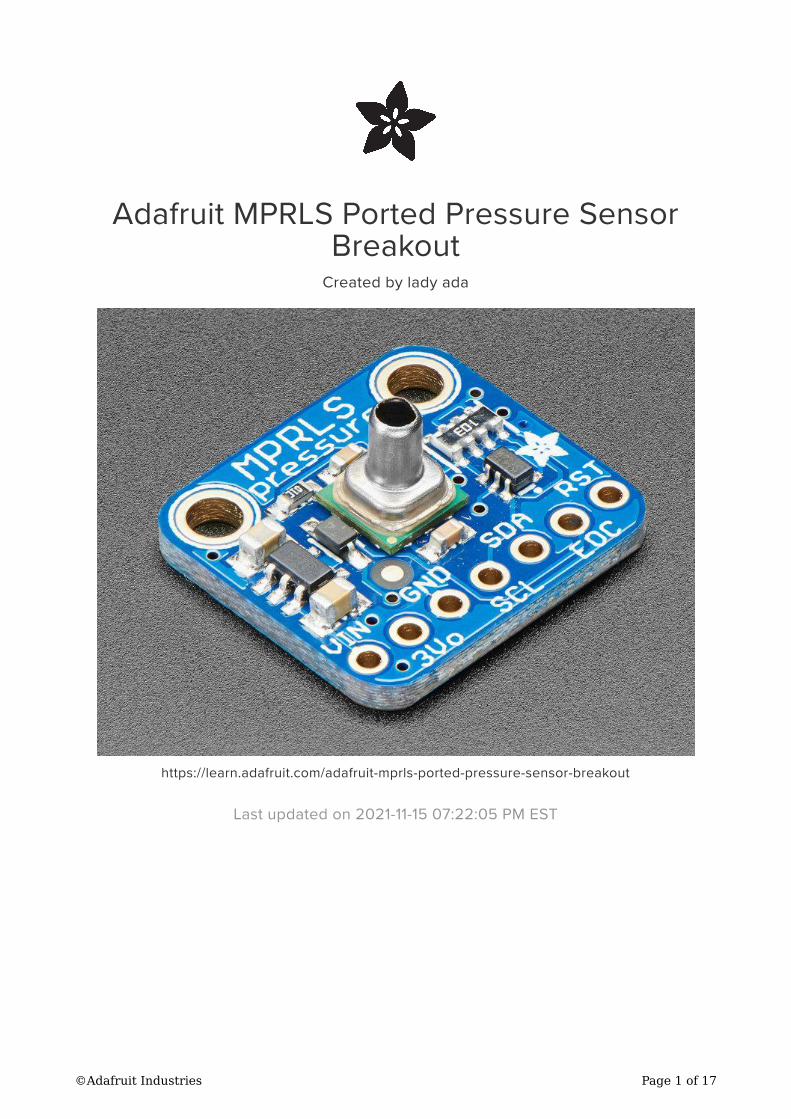
Adafruit MPRLS Ported Pressure Sensor
Breakout
Created by lady ada
https://learn.adafruit.com/adafruit-mprls-ported-pressure-sensor-breakout
Last updated on 2021-11-15 07:22:05 PM EST
©Adafruit Industries Page 1 of 17

3
5
6
6
6
7
7
8
8
10
10
11
12
12
12
13
13
14
14
15
16
16
16
16
Table of Contents
Overview
Pinouts
• Power Pins:
• I2C Logic pins:
• Other pins:
Assembly
• Prepare the header strip:
• Add the breakout board:
• And Solder!
Arduino Test
• Install Arduino Libraries
• Basic Example
Arduino Library Docs
Python & CircuitPython
• CircuitPython Microcontroller Wiring
• Python Computer Wiring
• CircuitPython Installation of MPRLS Library
• Python Installation of MPRLS Library
• CircuitPython & Python Usage
• Full Example Code
Python Docs
Downloads
• Datasheets & Files
• Schematic & Fabrication Print
©Adafruit Industries Page 2 of 17

Overview
We stock a few barometric pressure sensors, great for altitude and weather
measurements. This pressure sensor is special because it comes with a metal port!
Unlike other pressure sensors, you can easily attach a tube to it, to measure air
pressure inside a close space. In particular we think this would be a great sensor for
use with making DIY assistive tech "Sip & Puff" interfaces, or measuring the pressure
within a vacuum chamber or other pressurized container.
©Adafruit Industries Page 3 of 17

Unlike most ported pressure sensors, this one uses I2C, it's really easy to use with
any microcontroller. Inside is a silicone-gel covered pressure sensing gauge with a
pre-calibrated and compensated 24 bit ADC. We have example code and libraries for
Arduino (https://adafru.it/CCe) or CircuitPython/Python (https://adafru.it/CCf). You can
measure absolute pressure 0 to 25 PSI, which is a great range since ambient
pressure here on Earth is about 14.5 PSI.
The port is made of stainless steel and is 3.7mm long and 2.5mm diameter. It doesn't
come with tubing so be sure to purchase some tubing to attach to the port. Consider
using 3/32" ID (internal diameter) tubing. If you find it's not snug enough for your
project, try using 1/4" ID tubing with the 3/32" ID tubing inside for a better fit.
We've placed this nice sensor on a breakout board with 3.3V power regulation and
level shifting so you can use it with any kind of microcontroller or microcomputer,
from an Arduino compatible to Raspberry Pi
©Adafruit Industries Page 4 of 17

Pinouts
The MPRLS is a I2C sensor. That means it uses the two I2C data/clock wires available
on most microcontrollers, and can share those pins with other sensors as long as they
don't have an address collision. For future reference, the I2C address is 0x18 and you
can't change it!
©Adafruit Industries Page 5 of 17

Power Pins:
Vin - this is the power pin. Since the chip uses 3 VDC, we have included a
voltage regulator on board that will take 3-5VDC and safely convert it down. To
power the board, give it the same power as the logic level of your
microcontroller - e.g. for a 5V micro like Arduino, use 5V
3v3 - this is the 3.3V output from the voltage regulator, you can grab up to
100mA from this if you like
GND - common ground for power and logic
I2C Logic pins:
SCL - I2C clock pin, connect to your microcontrollers I2C clock line.
SDA - I2C data pin, connect to your microcontrollers I2C data line.
Other pins:
RST - Hardware reset input pin. Pulled up by default, drive to ground to
hardware reset the board. 3-5V logic safe
EOC - End Of Conversion output pin. Will toggle to let you know a sensing
conversion is ready to be read. Optional but will speed up you interface code
just a bit. You can leave it disconnected and we'll query the chip over I2C for
when it's ready.
•
•
•
•
•
•
•
©Adafruit Industries Page 6 of 17

Assembly
Prepare the header strip:
Cut the strip to length if necessary. It will
be easier to solder if you insert it into a
breadboard - long pins down
©Adafruit Industries Page 7 of 17
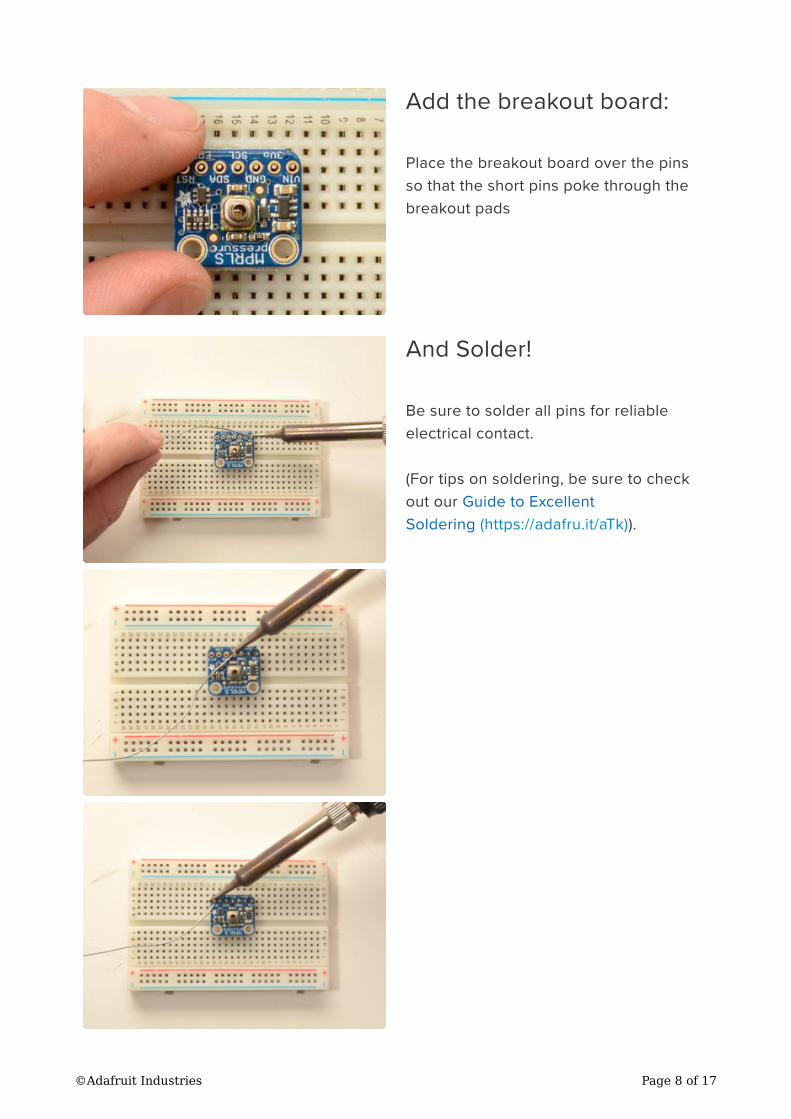
Add the breakout board:
Place the breakout board over the pins
so that the short pins poke through the
breakout pads
And Solder!
Be sure to solder all pins for reliable
electrical contact.
(For tips on soldering, be sure to check
out our Guide to Excellent
Soldering (https://adafru.it/aTk)).
©Adafruit Industries Page 8 of 17
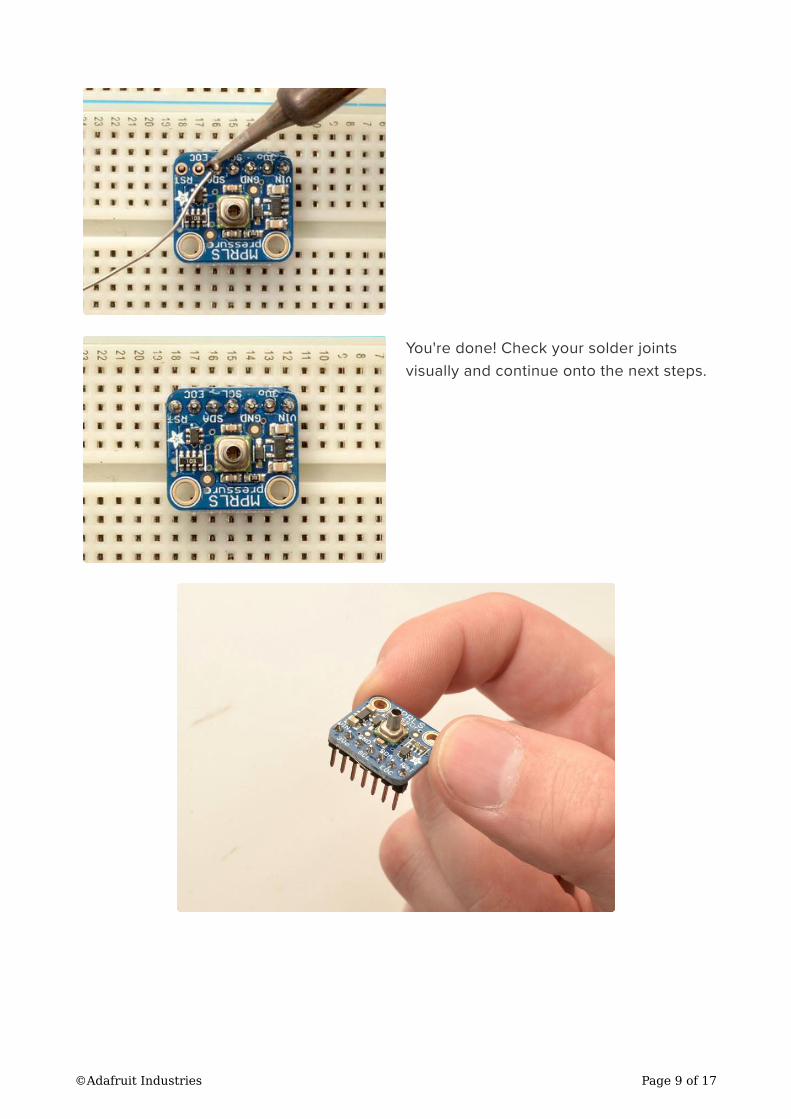
You're done! Check your solder joints
visually and continue onto the next steps.
©Adafruit Industries Page 9 of 17

Arduino Test
You can easily wire this breakout to any microcontroller, we'll be using an Arduino. For
another kind of microcontroller, just make sure it has I2C, then port the code - its
pretty simple stuff!
Connect Vin to the power supply, 3-5V is fine. Use the same voltage that the
microcontroller logic is based off of. For most Arduinos, that is 5V
Connect GND to common power/data ground
Connect the SCL pin to the I2C clock SCL pin on your Arduino. On an UNO &
'328 based Arduino, this is also known as A5, on a Mega it is also known as digi
tal 21 and on a Leonardo/Micro, digital 3
Connect the SDA pin to the I2C data SDA pin on your Arduino. On an UNO &
'328 based Arduino, this is also known as A4, on a Mega it is also known as digi
tal 20 and on a Leonardo/Micro, digital 2
The MPRLS has a default I2C address of 0x18 and cannot be changed!
Install Arduino Libraries
Lets begin by installing all the libraries we need. Open up the library manager in
Arduino IDE
•
•
•
•
©Adafruit Industries Page 10 of 17

Search for and install the latest version of the Adafruit MPRLS library
Basic Example
Start by opening up the Adafruit MPRLS -> simpletest under the Adafruit MPRLS
library:
And upload it to your board!
Open up the serial console to see the readings. You can blow into the port or cover it
with your finger to change the readings
©Adafruit Industries Page 11 of 17
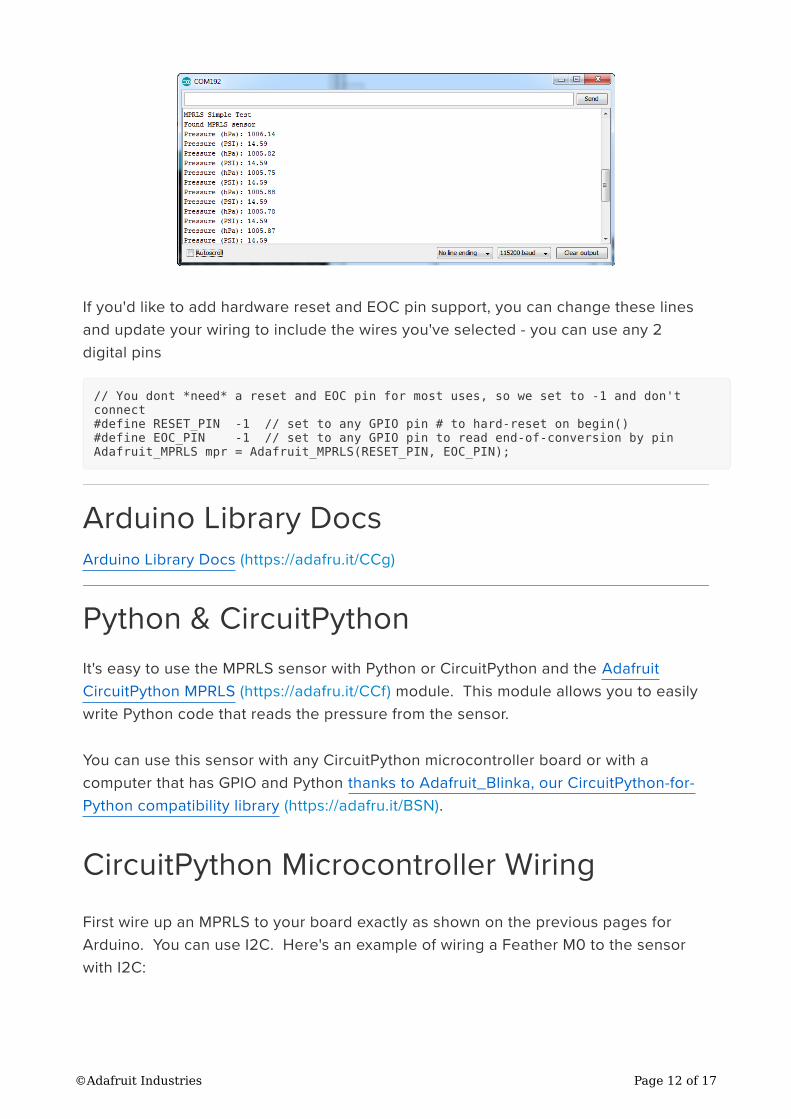
If you'd like to add hardware reset and EOC pin support, you can change these lines
and update your wiring to include the wires you've selected - you can use any 2
digital pins
// You dont *need* a reset and EOC pin for most uses, so we set to -1 and don't
connect
#define RESET_PIN -1 // set to any GPIO pin # to hard-reset on begin()
#define EOC_PIN -1 // set to any GPIO pin to read end-of-conversion by pin
Adafruit_MPRLS mpr = Adafruit_MPRLS(RESET_PIN, EOC_PIN);
Arduino Library Docs
Arduino Library Docs (https://adafru.it/CCg)
Python & CircuitPython
It's easy to use the MPRLS sensor with Python or CircuitPython and the Adafruit
CircuitPython MPRLS (https://adafru.it/CCf) module. This module allows you to easily
write Python code that reads the pressure from the sensor.
You can use this sensor with any CircuitPython microcontroller board or with a
computer that has GPIO and Python thanks to Adafruit_Blinka, our CircuitPython-for-
Python compatibility library (https://adafru.it/BSN).
CircuitPython Microcontroller Wiring
First wire up an MPRLS to your board exactly as shown on the previous pages for
Arduino. You can use I2C. Here's an example of wiring a Feather M0 to the sensor
with I2C:
©Adafruit Industries Page 12 of 17

Board 3V to sensor VIN
Board GND to sensor GND
Board SCL to sensor SCL
Board SDA to sensor SDA
Python Computer Wiring
Since there's dozens of Linux computers/boards you can use we will show wiring for
Raspberry Pi. For other platforms, please visit the guide for CircuitPython on Linux to
see whether your platform is supported (https://adafru.it/BSN).
Here's the Raspberry Pi wired with I2C:
Pi 3V3 to sensor VIN
Pi GND to sensor GND
Pi SCL to sensor SCL
Pi SDA to sensor SDA
CircuitPython Installation of MPRLS Library
You'll need to install the Adafruit CircuitPython MPRLS (https://adafru.it/CCf) library on
your CircuitPython board.
First make sure you are running the latest version of Adafruit CircuitPython (https://
adafru.it/Amd) for your board.
•
•
•
•
•
•
•
•
©Adafruit Industries Page 13 of 17
Next you'll need to install the necessary libraries to use the hardware--carefully follow
the steps to find and install these libraries from Adafruit's CircuitPython library bundle
(https://adafru.it/uap). Our CircuitPython starter guide has a great page on how to
install the library bundle (https://adafru.it/ABU).
For non-express boards like the Trinket M0 or Gemma M0, you'll need to manually
install the necessary libraries from the bundle:
adafruit_mprls.mpy
adafruit_bus_device
Before continuing make sure your board's lib folder or root filesystem has the adafrui
t_mprls.mpy, and adafruit_bus_device files and folders copied over.
Next connect to the board's serial REPL (https://adafru.it/Awz) so you are at the
CircuitPython >>> prompt.
Python Installation of MPRLS Library
You'll need to install the Adafruit_Blinka library that provides the CircuitPython
support in Python. This may also require enabling I2C on your platform and verifying
you are running Python 3. Since each platform is a little different, and Linux changes
often, please visit the CircuitPython on Linux guide to get your computer ready (https
://adafru.it/BSN)!
Once that's done, from your command line run the following command:
sudo pip3 install adafruit-circuitpython-mprls
If your default Python is version 3 you may need to run 'pip' instead. Just make sure
you aren't trying to use CircuitPython on Python 2.x, it isn't supported!
CircuitPython & Python Usage
To demonstrate the usage of the sensor we'll initialize it and read the pressure from
the board's Python REPL.
•
•
•
©Adafruit Industries Page 14 of 17
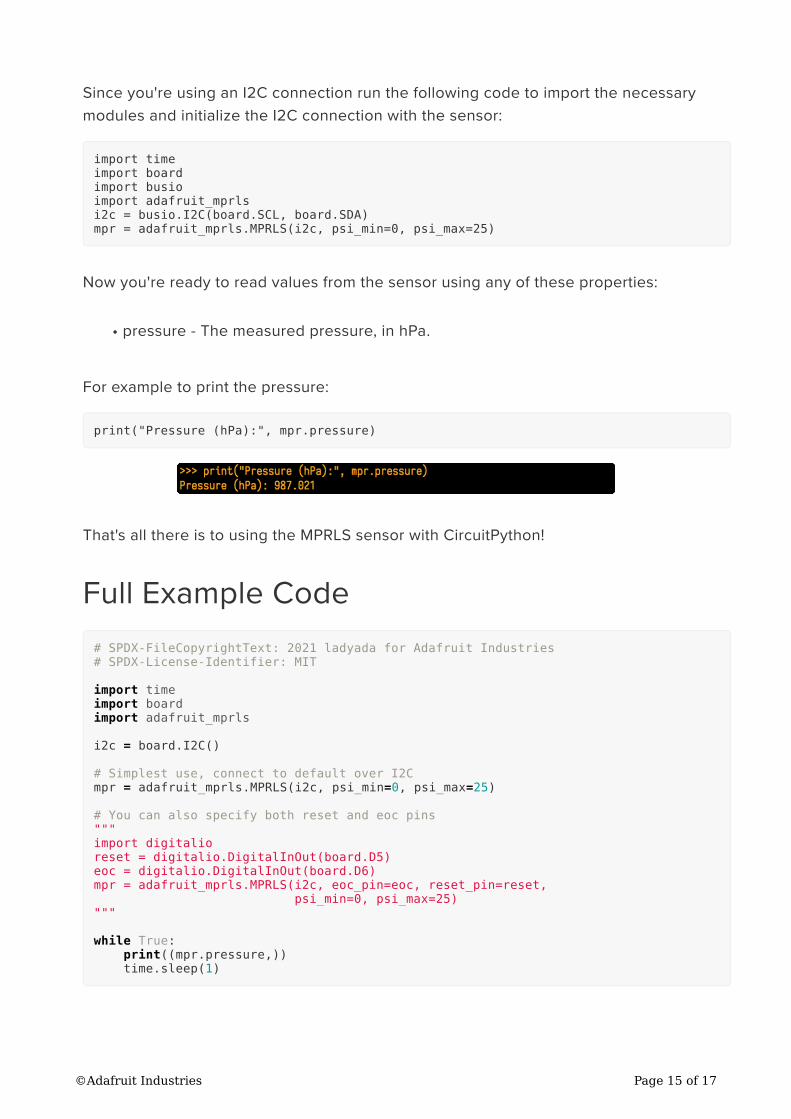
Since you're using an I2C connection run the following code to import the necessary
modules and initialize the I2C connection with the sensor:
import time
import board
import busio
import adafruit_mprls
i2c = busio.I2C(board.SCL, board.SDA)
mpr = adafruit_mprls.MPRLS(i2c, psi_min=0, psi_max=25)
Now you're ready to read values from the sensor using any of these properties:
pressure - The measured pressure, in hPa.
For example to print the pressure:
print("Pressure (hPa):", mpr.pressure)
That's all there is to using the MPRLS sensor with CircuitPython!
Full Example Code
# SPDX-FileCopyrightText: 2021 ladyada for Adafruit Industries
# SPDX-License-Identifier: MIT
import time
import board
import adafruit_mprls
i2c = board.I2C()
# Simplest use, connect to default over I2C
mpr = adafruit_mprls.MPRLS(i2c, psi_min=0, psi_max=25)
# You can also specify both reset and eoc pins
"""
import digitalio
reset = digitalio.DigitalInOut(board.D5)
eoc = digitalio.DigitalInOut(board.D6)
mpr = adafruit_mprls.MPRLS(i2c, eoc_pin=eoc, reset_pin=reset,
psi_min=0, psi_max=25)
"""
while True:
print((mpr.pressure,))
time.sleep(1)
•
©Adafruit Industries Page 15 of 17

Python Docs
Python Docs (https://adafru.it/CFy)
Downloads
Datasheets & Files
Datasheets & App notes for Honeywell MPR series (https://adafru.it/CCh)
PCB CAD files in GitHub (https://adafru.it/CCi)
Fritzing object in Adafruit Fritzing library (https://adafru.it/aP3)
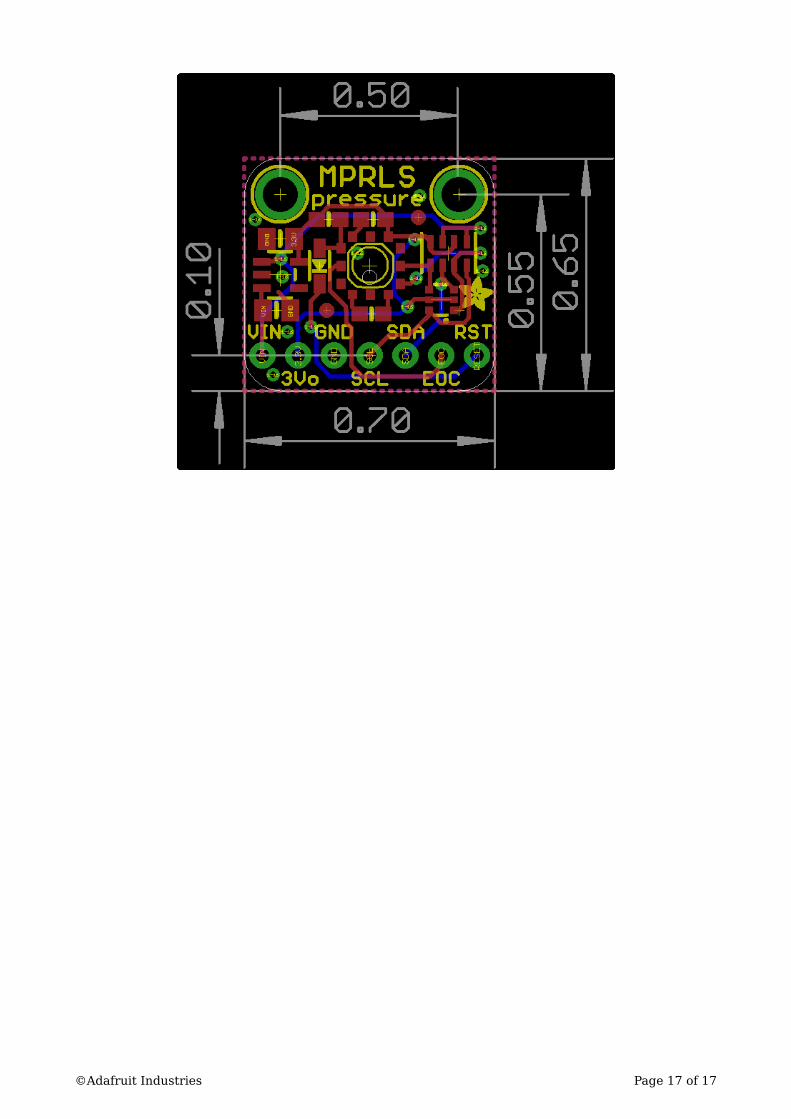
Schematic & Fabrication Print
•
•
•
©Adafruit Industries Page 16 of 17
©Adafruit Industries Page 17 of 17