add captions & journaling to a scrapbooking template · add captions & journaling to a...
TRANSCRIPT
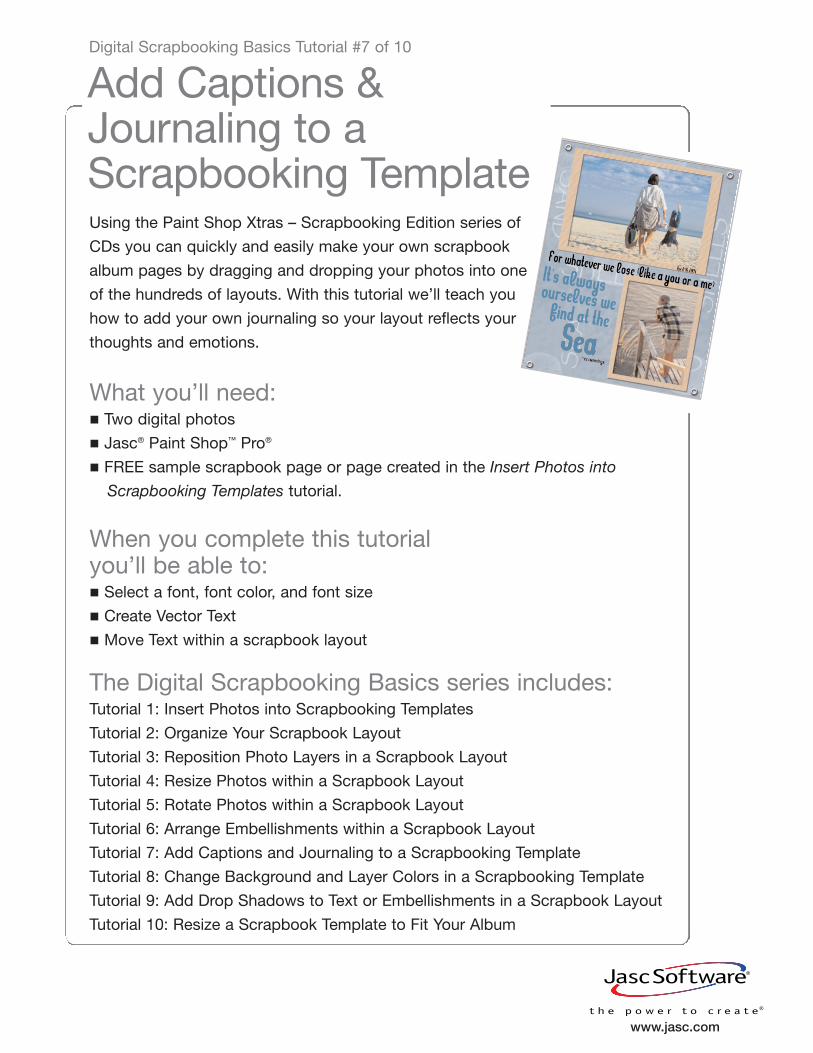
Using the Paint Shop Xtras – Scrapbooking Edition series of
CDs you can quickly and easily make your own scrapbook
album pages by dragging and dropping your photos into one
of the hundreds of layouts. With this tutorial we’ll teach you
how to add your own journaling so your layout reflects your
thoughts and emotions.
Add Captions & Journaling to aScrapbooking Template
What you’ll need:� Two digital photos
� Jasc® Paint Shop™ Pro®
� FREE sample scrapbook page or page created in the Insert Photos into
Scrapbooking Templates tutorial.
When you complete this tutorial you’ll be able to:� Select a font, font color, and font size
� Create Vector Text
� Move Text within a scrapbook layout
The Digital Scrapbooking Basics series includes:Tutorial 1: Insert Photos into Scrapbooking Templates
Tutorial 2: Organize Your Scrapbook Layout
Tutorial 3: Reposition Photo Layers in a Scrapbook Layout
Tutorial 4: Resize Photos within a Scrapbook Layout
Tutorial 5: Rotate Photos within a Scrapbook Layout
Tutorial 6: Arrange Embellishments within a Scrapbook Layout
Tutorial 7: Add Captions and Journaling to a Scrapbooking Template
Tutorial 8: Change Background and Layer Colors in a Scrapbooking Template
Tutorial 9: Add Drop Shadows to Text or Embellishments in a Scrapbook Layout
Tutorial 10: Resize a Scrapbook Template to Fit Your Album
www.jasc.com
Digital Scrapbooking Basics Tutorial #7 of 10
Add Captions & Journaling to a Scrapbooking Template Page 1
Open the Template & Add Photos
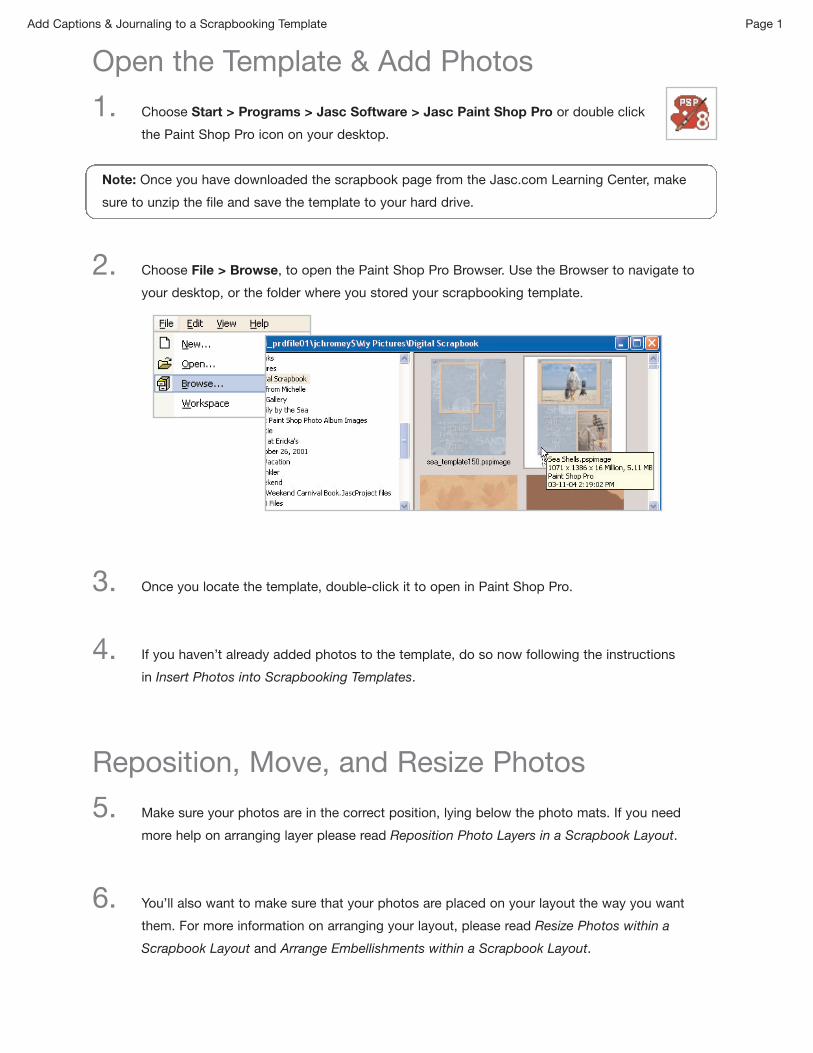
1. Choose Start > Programs > Jasc Software > Jasc Paint Shop Pro or double click
the Paint Shop Pro icon on your desktop.
Note: Once you have downloaded the scrapbook page from the Jasc.com Learning Center, make
sure to unzip the file and save the template to your hard drive.
2. Choose File > Browse, to open the Paint Shop Pro Browser. Use the Browser to navigate to
your desktop, or the folder where you stored your scrapbooking template.
3. Once you locate the template, double-click it to open in Paint Shop Pro.
4. If you haven’t already added photos to the template, do so now following the instructions
in Insert Photos into Scrapbooking Templates.
Reposition, Move, and Resize Photos
5. Make sure your photos are in the correct position, lying below the photo mats. If you need
more help on arranging layer please read Reposition Photo Layers in a Scrapbook Layout.
6. You’ll also want to make sure that your photos are placed on your layout the way you want
them. For more information on arranging your layout, please read Resize Photos within a
Scrapbook Layout and Arrange Embellishments within a Scrapbook Layout.
Add Captions & Journaling to a Scrapbooking Template Page 2
Note: Make sure you’ve renamed your layers to something you can easily recognize and that your
layer palette is displayed. You can learn more about this by reading the Organize Your Scrapbook
Layout tutorial.
Hide Sample Text
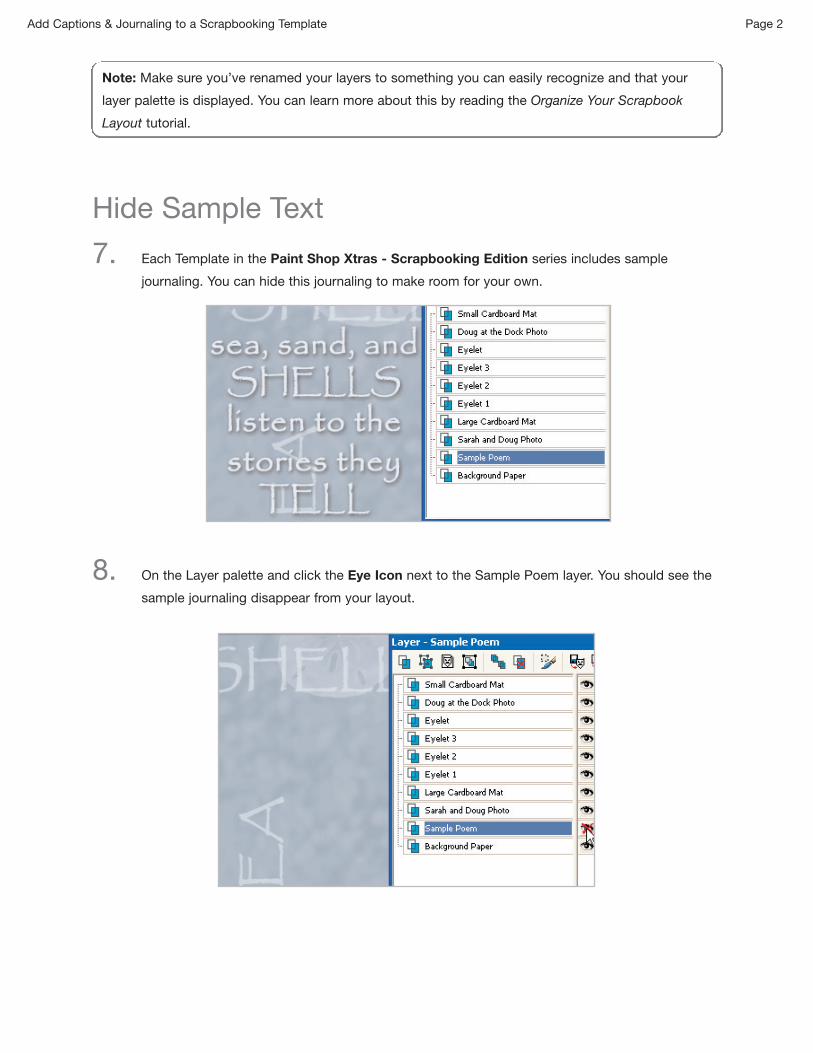
7. Each Template in the Paint Shop Xtras - Scrapbooking Edition series includes sample
journaling. You can hide this journaling to make room for your own.
8. On the Layer palette and click the Eye Icon next to the Sample Poem layer. You should see the
sample journaling disappear from your layout.
Add Captions & Journaling to a Scrapbooking Template Page 3
Add Your Own Journaling
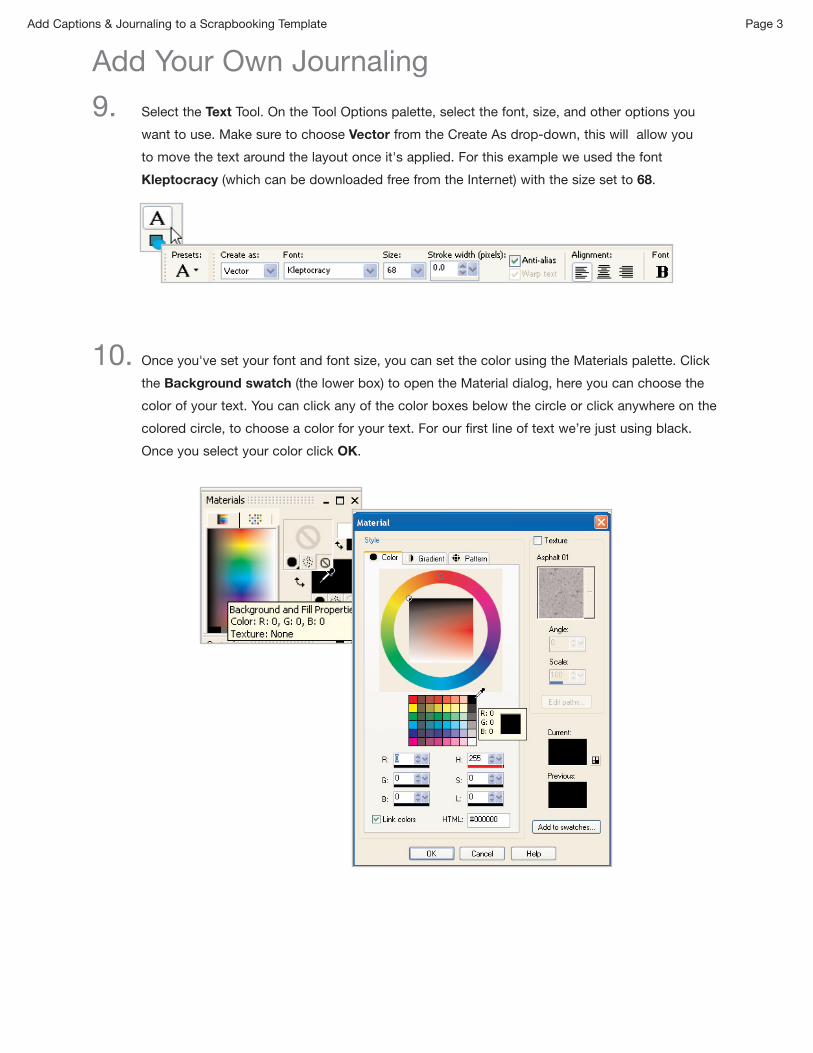
9. Select the Text Tool. On the Tool Options palette, select the font, size, and other options you
want to use. Make sure to choose Vector from the Create As drop-down, this will allow you
to move the text around the layout once it's applied. For this example we used the font
Kleptocracy (which can be downloaded free from the Internet) with the size set to 68.
10. Once you've set your font and font size, you can set the color using the Materials palette. Click
the Background swatch (the lower box) to open the Material dialog, here you can choose the
color of your text. You can click any of the color boxes below the circle or click anywhere on the
colored circle, to choose a color for your text. For our first line of text we’re just using black.
Once you select your color click OK.
Add Captions & Journaling to a Scrapbooking Template Page 4
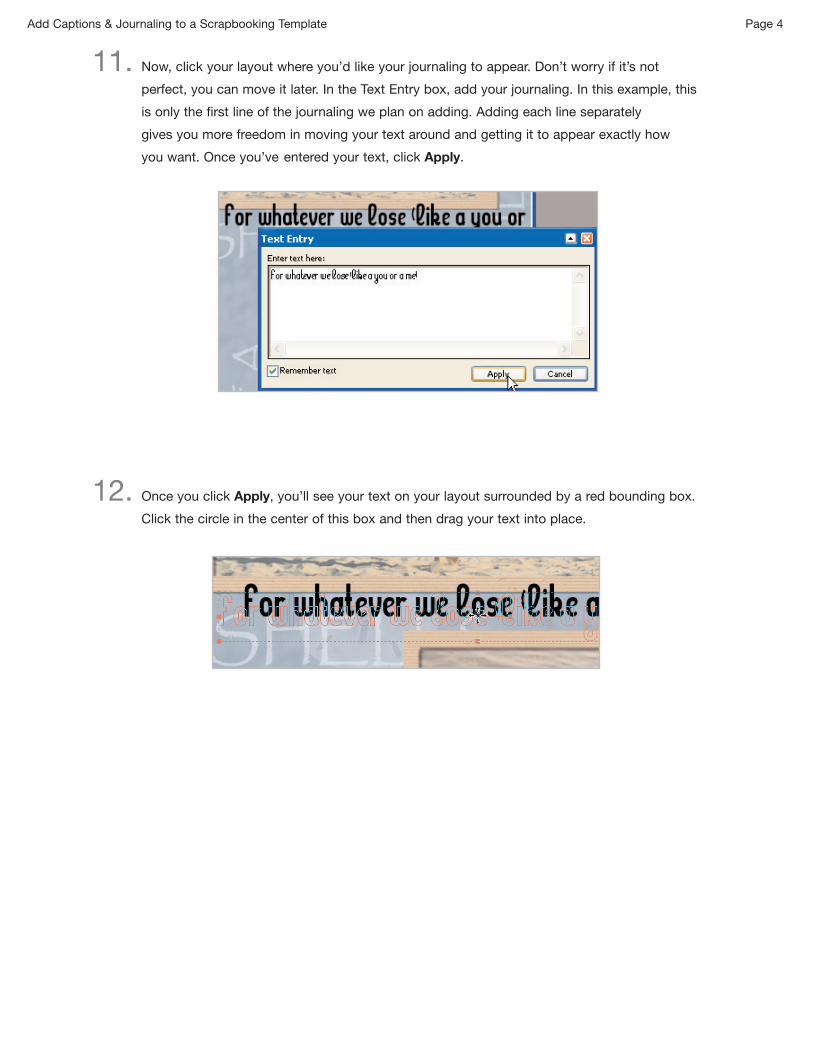
11. Now, click your layout where you’d like your journaling to appear. Don’t worry if it’s not
perfect, you can move it later. In the Text Entry box, add your journaling. In this example, this
is only the first line of the journaling we plan on adding. Adding each line separately
gives you more freedom in moving your text around and getting it to appear exactly how
you want. Once you’ve entered your text, click Apply.
12. Once you click Apply, you’ll see your text on your layout surrounded by a red bounding box.
Click the circle in the center of this box and then drag your text into place.
Add Captions & Journaling to a Scrapbooking Template Page 5
Match Text Color to Your Photo
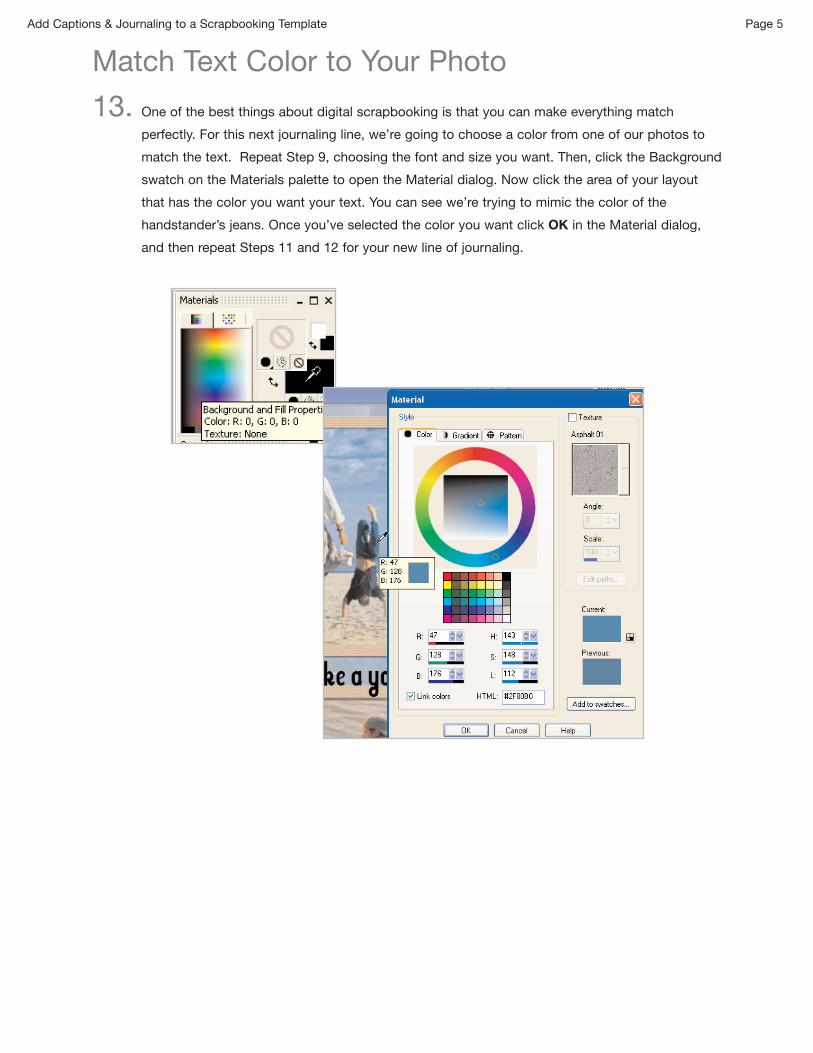
13. One of the best things about digital scrapbooking is that you can make everything match
perfectly. For this next journaling line, we’re going to choose a color from one of our photos to
match the text. Repeat Step 9, choosing the font and size you want. Then, click the Background
swatch on the Materials palette to open the Material dialog. Now click the area of your layout
that has the color you want your text. You can see we’re trying to mimic the color of the
handstander’s jeans. Once you’ve selected the color you want click OK in the Material dialog,
and then repeat Steps 11 and 12 for your new line of journaling.
Add Captions & Journaling to a Scrapbooking Template Page 6
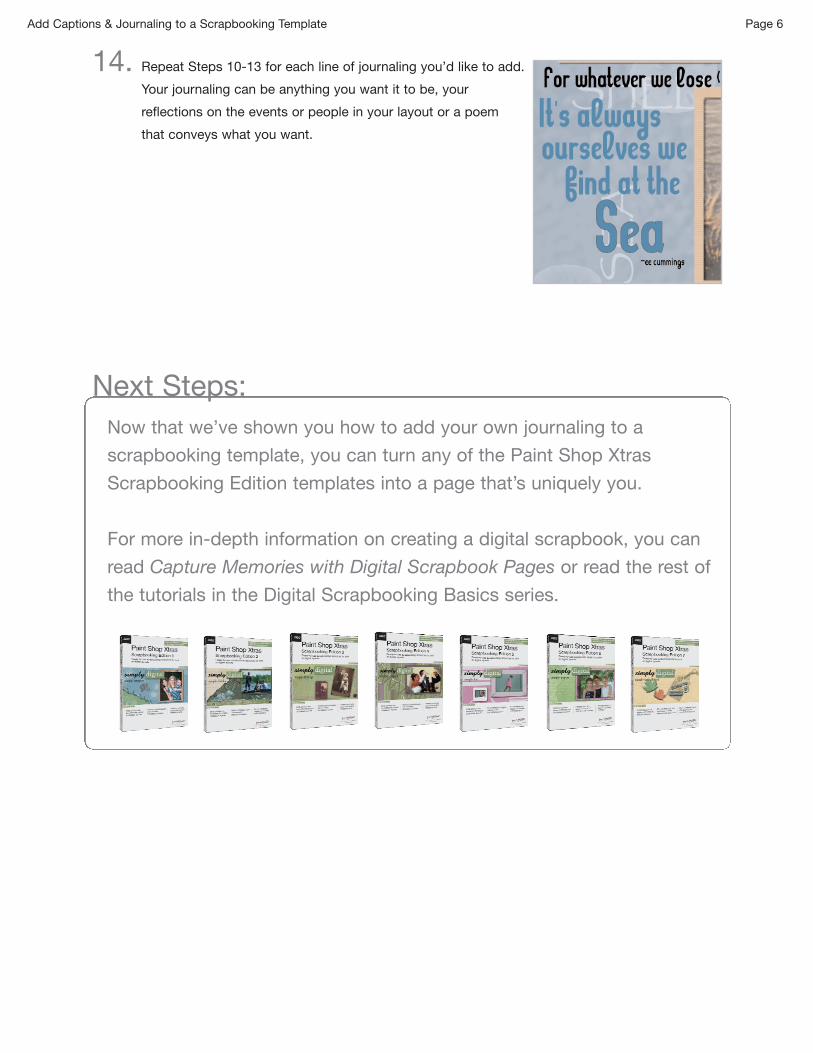
14. Repeat Steps 10-13 for each line of journaling you’d like to add.
Your journaling can be anything you want it to be, your
reflections on the events or people in your layout or a poem
that conveys what you want.
Next Steps:Now that we’ve shown you how to add your own journaling to a
scrapbooking template, you can turn any of the Paint Shop Xtras
Scrapbooking Edition templates into a page that’s uniquely you.
For more in-depth information on creating a digital scrapbook, you can
read Capture Memories with Digital Scrapbook Pages or read the rest of
the tutorials in the Digital Scrapbooking Basics series.