administration guide sybase idataagent -...
TRANSCRIPT
Administration GUIDE
Sybase iDataAgent
Published On: 11/19/2013 V10 Service Pack 4A Page 1 of 176
User Guide - Sybase iDataAgent
Introduction
Key Features
Terminology
Deployment on windowsRemote Install Uning CommCell Console
Interactive Install
Deployment On unixRemote Install Uning CommCell Console
Interactive Install
Configuration
Backup
Restore
ConfigurationUnderstanding the CommCell Console
Managing Sybase Server
Manually Creating a Master Database
Managing Subclients
Configuring User Accounts for Backups
Configuring Streams for Backups
Configuring Sybase ASE Cluster for a Single Node
Modifying an Agent, Instance, or Subclient
Deleting an Agent, Instance, or Subclient
BackupFull Backups
Transaction Log Backups
Scheduling a Backup
Table of Contents
Overview
System Requirements
Getting Started
Advanced Options
Published On: 11/19/2013 V10 Service Pack 4A Page 2 of 176
Managing Jobs
Additional Options
Browse DataUnderstanding the Restore Options Window
Browse and Restore Latest Data
Browse and Restore Data Before a Specified Backup Time
Browse and Restore Data Between a Specified Backup Time
Browse and Restore from Copies
List Media
Browse and Restore Using MediaAgent
Restore
Restoring the Sybase Server
Restoring the Master Database
Restoring System Databases
Restoring Databases to a Point in Time
Restoring Transaction Logs to a Point in Time
Recovering a Database
Restoring a Database to the Current State (Step-by-Step Restore)
Renaming a Database
Restoring Databases to a New Device
Restoring Databases to a Different Sybase Server Instance
Restoring the Sybase Server to a Different Path
Scheduling a Restore
Managing Restore Jobs
Additional Restore Options
data agingGetting Started
Extended Retention Rules
Disaster RecoveryPlanning for a Disaster Recovery
Rebuilding the Operating System
Restoring the Sybase Server
Resolve and Restore Defective Devices and Suspected Databases
Additional OperationsAudit Trail
Auxiliary Copy
License Administration
Online Help Links
Operating System and Application Upgrades
Operation Window
Published On: 11/19/2013 V10 Service Pack 4A Page 3 of 176
Schedule Policy
Storage Policy
Uninstalling Components
Configuration
Backup
Restore
Backup
Restore
Command Line
Best Practices
Frequently Asked Questions
Troubleshooting
Published On: 11/19/2013 V10 Service Pack 4A Page 4 of 176
Overview - Sybase iDataAgent
Introduction
Key FeaturesFull Range of Backup OptionsEfficient Job Management and ReportingBackup and Recovery FailoversBlock Level Deduplication
Terminology
The Sybase iDataAgent provides an unique, simplified end-to-end backup and recovery solution for Sybase system and user databases in your enterprise. In addition to complete protection of the system databases which contain user database characteristics, file locations etc., it also provides more granular backup and recovery of your enterprise’s data, related administration files and transaction logs.
Full Range of Backup and Recovery Options
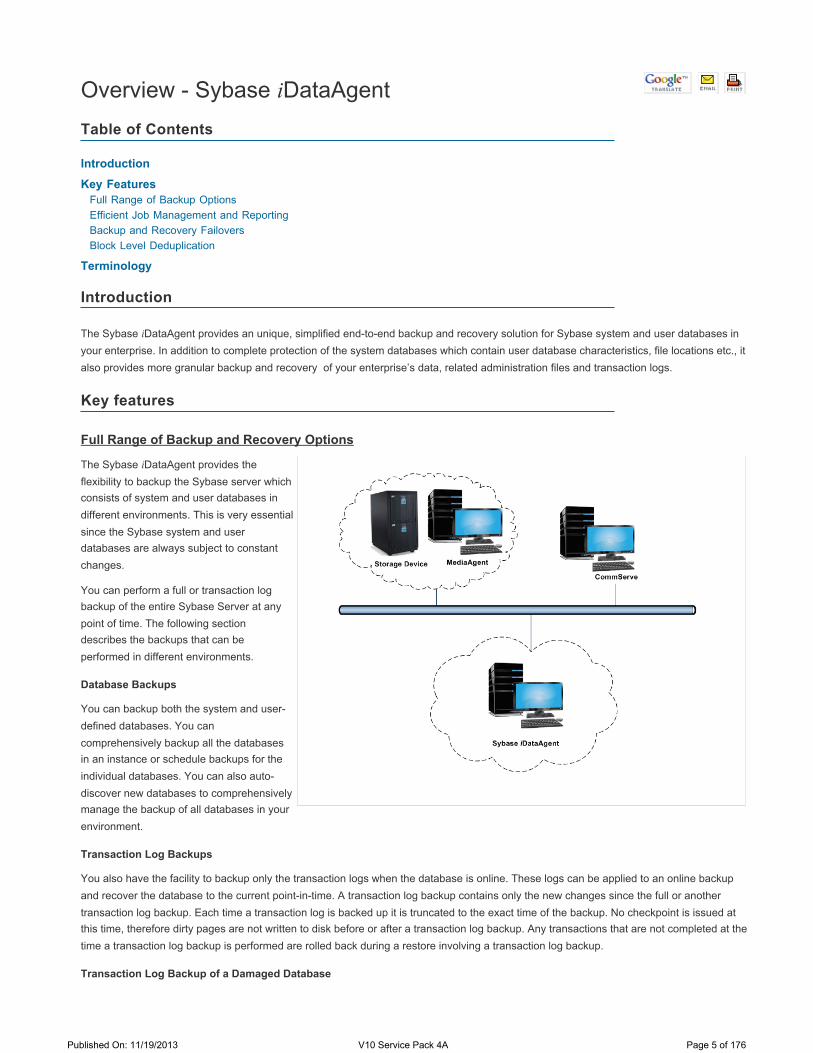
The Sybase iDataAgent provides the flexibility to backup the Sybase server which consists of system and user databases in different environments. This is very essential since the Sybase system and user databases are always subject to constant changes.
You can perform a full or transaction log backup of the entire Sybase Server at any point of time. The following section describes the backups that can be performed in different environments.
Database Backups
You can backup both the system and user-defined databases. You can comprehensively backup all the databases in an instance or schedule backups for the individual databases. You can also auto-discover new databases to comprehensively manage the backup of all databases in your environment.
Transaction Log Backups
You also have the facility to backup only the transaction logs when the database is online. These logs can be applied to an online backup and recover the database to the current point-in-time. A transaction log backup contains only the new changes since the full or another transaction log backup. Each time a transaction log is backed up it is truncated to the exact time of the backup. No checkpoint is issued at this time, therefore dirty pages are not written to disk before or after a transaction log backup. Any transactions that are not completed at the time a transaction log backup is performed are rolled back during a restore involving a transaction log backup.
Transaction Log Backup of a Damaged Database
Table of Contents
Introduction
Key features
Published On: 11/19/2013 V10 Service Pack 4A Page 5 of 176
If a database fails and any data is lost, you will want to restore it to the point of failure. Sybase iDataAgent allows you to capture all transaction log events that occurred after the last backup job was performed.
You can also protect the non-database files and profiles using the appropriate File System iDataAgent.
Backup and Recovery Failovers
In the event that a MediaAgent used for the backup or recovery operation fails, it is automatically resumed on alternate MediaAgents. In such cases, the backup or restore job will not restart from the beginning, but will resume from the point of failure. This is especially useful for backups and restores of large amount of data.
In the event, that a network goes down, the backup and recovery jobs are resumed on alternate data paths. Similarly, in the event of a device failure, the jobs are automatically switched to alternate disk and tape drives.
Efficient Job Management and Reporting
You can view and verify the status of backup and recovery operations from the Job Controller and the Event Viewer within the CommCell Console. You can also track the status of the jobs using Reports, which can be saved and distributed. Generate reports for different aspects of data management. Customize the reports to display only the required data and save them to a specific location in different formats. For example, you can create a backup job summary report to view the completed backup jobs.
You can schedule, generate and send the Reports via email without user intervention.
Block Level Deduplication
Deduplication provides a smarter way to store data by identifying and eliminating the duplicate items in a data protection operation.
Deduplication at the data block level compares blocks of data against each other. If an object (e.g., file, database) contains blocks of data that are identical to each other, then block level deduplication does not store the redundant data, which reduces the size of the object in storage. This reduces the size of the backup data copies on both the disk and tapes.
The Sybase iDataAgent documentation uses the following terminology:
Install the Sybase iDataAgent
Walks you through the process of installing the Sybase iDataAgent.
Back to Top
Terminology
ClientThe computer in which the iDataAgent is installed and contains the data to be secured.
InstanceThe Sybase Server to be used for the backup and restore operations.
SubclientThe Sybase databases to be backed up.
DeviceA physical storage locations in a disk such as a partition that is dedicated to holding the Sybase database.
Where to go Next
Published On: 11/19/2013 V10 Service Pack 4A Page 6 of 176

System Requirements - Sybase iDataAgent
The following requirements are for the Sybase iDataAgent:
System Requirements Supported Features License Requirements
Application/Operating System Architecture
Sybase ASE 15.7 64-bit on:
AIX AIX 7.1 Power PC (Includes IBM System p)
AIX 6.1 Power PC (Includes IBM System p)
HP-UX HP-UX 11i v3 (11.31) Itanium
Linux Red Hat Enterprise Linux
Red Hat Enterprise Linux 5.5, 5.6, 5.7 and 5.8
Red Hat Enterprise Linux/CentOS
Red Hat Enterprise Linux/CentOS 6.x x64
SuSE Linux (SLES)
SuSE Linux 11.x with glibc 2.9.x and above Intel Pentium, Itanium, x64 or compatible processors
SuSE Linux 11.x with glibc 2.6.x x64
Solaris Solaris 10.x x64
Windows Windows 2008
Microsoft Windows Server 2008 R2 Editions All Windows-compatible processors supported
Sybase ASE 15.7 32-bit on:
Windows Windows 2008
Microsoft Windows Server 2008 R2 Editions All Windows-compatible processors supported
Sybase ASE 15.5 64-bit on:
AIX AIX 7.1 Power PC (Includes IBM System p)
AIX 6.1 Power PC (Includes IBM System p)
AIX 5.3 with technology level 6 (or higher) and runtime library xlC.rte 8.0.0.0 or higher
Power PC (Includes IBM System p)
HP-UX HP-UX 11i v3 (11.31) Itanium
HP-UX 11i v2 (11.23) Itanium
Linux Red Hat Enterprise Linux/CentOS
Red Hat Enterprise Linux/CentOS 6.x x64
Red Hat Enterprise Linux/CentOS 5.x x64
Red Hat Enterprise Linux/CentOS 4.x x64
SuSE Linux (SLES)
Published On: 11/19/2013 V10 Service Pack 4A Page 7 of 176

SuSE Linux 11.x with glibc 2.6.x x64
SuSE Linux 10.x with glibc 2.4.x x64
Solaris Solaris 10.x x64
Windows Windows 2008
Microsoft Windows Server 2008 R2 Editions All Windows-compatible processors supported
Sybase ASE 15.5 32-bit on:
Linux Red Hat Enterprise Linux/CentOS
Red Hat Enterprise Linux/CentOS 6.x Intel Pentium or compatible processors
Red Hat Enterprise Linux/CentOS 5.x Intel Pentium or compatible processors
Red Hat Enterprise Linux/CentOS 4.x Intel Pentium or compatible processors
SuSE Linux (SLES)
SuSE Linux 11.x with glibc 2.6.x Intel Pentium or compatible processors
SuSE Linux 10.x with glibc 2.4.x Intel Pentium or compatible processors
Windows Windows 2008
Microsoft Windows Server 2008 R2 Editions All Windows-compatible processors supported
Windows 2003
Microsoft Windows Server 2003 32-bit Editions with a minimum of Service Pack 2
All Windows-compatible processors supported
Sybase ASE 15.0.x 32-bit/64-bit on:
AIX AIX 6.1 64-bit Power PC (Includes IBM System p)
AIX 5.3 64-bit with technology level 6 and runtime library xlC.rte 8.0.0.0 or higher
Power PC (Includes IBM System p)
HP-UX HP-UX 11i v3 (11.31) Itanium
HP-UX 11i v2 (11.23) Itanium
Linux Red Hat Enterprise Linux/CentOS
Red Hat Enterprise Linux/CentOS 5.x Intel Pentium, x64 or compatible processors
Red Hat Enterprise Linux/CentOS 4.x Intel Pentium, x64 or compatible processors
SuSE Linux (SLES)
SuSE Linux 11.x with glibc 2.6.x Intel Pentium, x64 or compatible processors
SuSE Linux 10.x with glibc 2.4.x Intel Pentium, x64 or compatible processors
Solaris Solaris 10.x with a minimum of SunOS (Sparc) Patch 119963-14 x64, Sparc T/M series
Windows Windows 2008
Microsoft Windows Server 2008 Editions All Windows-compatible processors supported
Windows 2003
Microsoft Windows Server 2003 Editions with a minimum of Service Pack 2
All Windows-compatible processors supported
Published On: 11/19/2013 V10 Service Pack 4A Page 8 of 176
The software can be installed on a Cluster if clustering is supported by the above-mentioned operating systems.
For information on supported cluster types, see Clustering - Support.
Windows
674 MB minimum of hard disk space for Data Protection Suite and Job Results
10 MB of additional hard disk space for log file growth
4 KB for Job Results
Linux
584 MB minimum of hard disk space for Data Protection Suite and Job Results
1 MB for Job Results
Solaris
2.73 GB minimum of hard disk space for Data Protection Suite and Job Results
34 MB for Job Results
Data Protection of data residing on global and non-global zones is supported.
For a comprehensive list of supported components, see Unix Virtualization.
The File System iDataAgent will be automatically installed during installation of this software, if it is not already installed. For System Requirements and install information specific to the File System iDataAgents, refer to:
System Requirements - AIX File System iDataAgent
System Requirements - HP-UX File System iDataAgent
System Requirements - Linux File System iDataAgent
System Requirements - Solaris File System iDataAgent
The operating system must have been installed with at least the user level software option selected.
SELinux
If you have SELinux enabled on the client computer, create the SELinux policy module as a root user before performing a backup. The SELinux Development package must be installed on the client.
To create an SELinux policy module, perform the following steps as user "root":
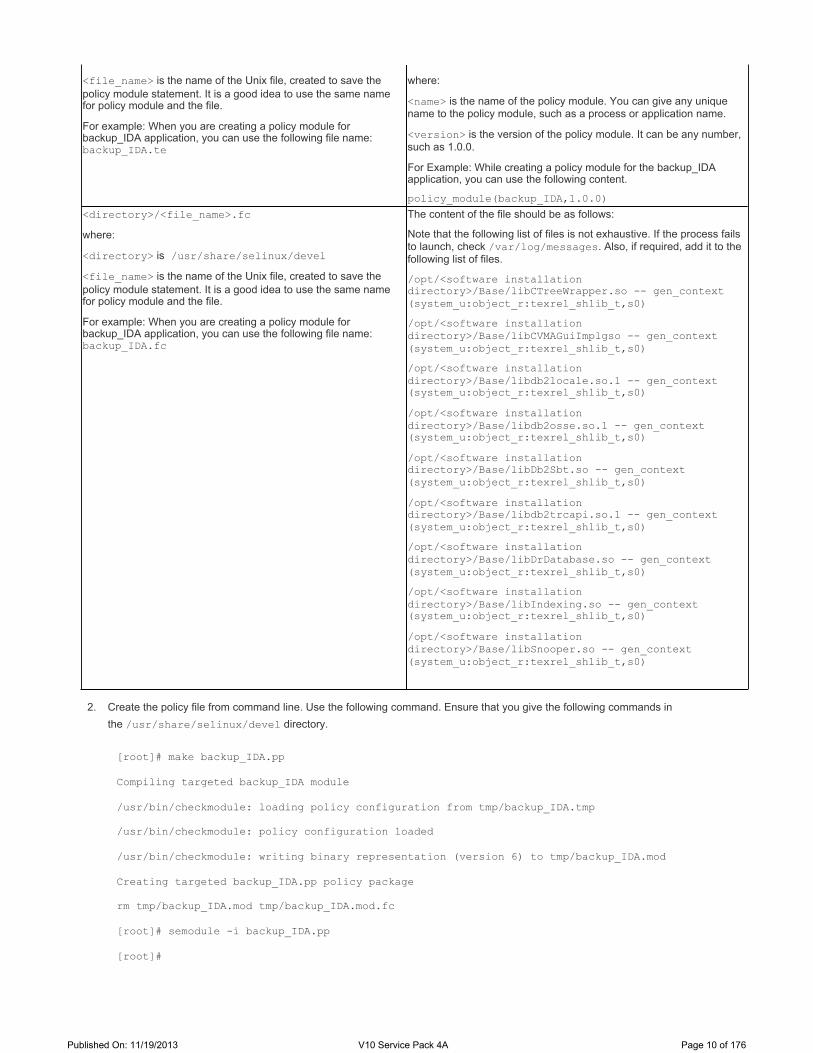
1. Create the following files in the /usr/share/selinux/devel directory:
Cluster - Support
Hard Drive
Solaris Zones/Containers Support
Miscellaneous
File Name Content of the File<directory>/<file_name>.tewhere:
<directory> is /usr/share/selinux/devel
The content of the file should be as follows:
policy_module(<name>,<version>)
##############################
Published On: 11/19/2013 V10 Service Pack 4A Page 9 of 176
2. Create the policy file from command line. Use the following command. Ensure that you give the following commands in the /usr/share/selinux/devel directory.
[root]# make backup_IDA.pp
Compiling targeted backup_IDA module
/usr/bin/checkmodule: loading policy configuration from tmp/backup_IDA.tmp
/usr/bin/checkmodule: policy configuration loaded
/usr/bin/checkmodule: writing binary representation (version 6) to tmp/backup_IDA.mod
Creating targeted backup_IDA.pp policy package
rm tmp/backup_IDA.mod tmp/backup_IDA.mod.fc
[root]# semodule -i backup_IDA.pp
[root]#
<file_name> is the name of the Unix file, created to save the policy module statement. It is a good idea to use the same name for policy module and the file.
For example: When you are creating a policy module for backup_IDA application, you can use the following file name: backup_IDA.te
where:
<name> is the name of the policy module. You can give any unique name to the policy module, such as a process or application name.
<version> is the version of the policy module. It can be any number, such as 1.0.0.
For Example: While creating a policy module for the backup_IDA application, you can use the following content.
policy_module(backup_IDA,1.0.0)<directory>/<file_name>.fcwhere:
<directory> is /usr/share/selinux/devel<file_name> is the name of the Unix file, created to save the policy module statement. It is a good idea to use the same name for policy module and the file.
For example: When you are creating a policy module for backup_IDA application, you can use the following file name: backup_IDA.fc
The content of the file should be as follows:
Note that the following list of files is not exhaustive. If the process fails to launch, check /var/log/messages. Also, if required, add it to the following list of files.
/opt/<software installation directory>/Base/libCTreeWrapper.so -- gen_context(system_u:object_r:texrel_shlib_t,s0)/opt/<software installation directory>/Base/libCVMAGuiImplgso -- gen_context(system_u:object_r:texrel_shlib_t,s0)/opt/<software installation directory>/Base/libdb2locale.so.1 -- gen_context(system_u:object_r:texrel_shlib_t,s0)/opt/<software installation directory>/Base/libdb2osse.so.1 -- gen_context(system_u:object_r:texrel_shlib_t,s0)/opt/<software installation directory>/Base/libDb2Sbt.so -- gen_context(system_u:object_r:texrel_shlib_t,s0)/opt/<software installation directory>/Base/libdb2trcapi.so.1 -- gen_context(system_u:object_r:texrel_shlib_t,s0)/opt/<software installation directory>/Base/libDrDatabase.so -- gen_context(system_u:object_r:texrel_shlib_t,s0)/opt/<software installation directory>/Base/libIndexing.so -- gen_context(system_u:object_r:texrel_shlib_t,s0)/opt/<software installation directory>/Base/libSnooper.so -- gen_context(system_u:object_r:texrel_shlib_t,s0)
Published On: 11/19/2013 V10 Service Pack 4A Page 10 of 176
3. Execute the policy module. Use the following command:
[root]# restorecon -R /opt/<software installation directory>
SELinux is now configured to work with this application.
.NET Framework
.NET Framework 4.0 is automatically installed. Note that .NET Framework 4.0 can co-exist with other versions of this software.
Microsoft Visual C++
Microsoft Visual C++ 2010 and 2008 Redistributable Packages are automatically installed. Note that these Visual C++ Redistributable Packages can co-exist with other versions of this software.
DISCLAIMER
Minor revisions and/or service packs that are released by application and operating system vendors are supported by our software but may not be individually listed in our System Requirements. We will provide information on any known caveat for the revisions and/or service packs. In some cases, these revisions and/or service packs affect the working of our software. Changes to the behavior of our software resulting from an application or operating system revision/service pack may be beyond our control. The older releases of our software may not support the platforms supported in the current release. However, we will make every effort to correct the behavior in the current or future releases when necessary. Please contact your Software Provider for any problem with a specific application or operating system.
Additional considerations regarding minimum requirements and End of Life policies from application and operating system vendors are also applicable
Published On: 11/19/2013 V10 Service Pack 4A Page 11 of 176
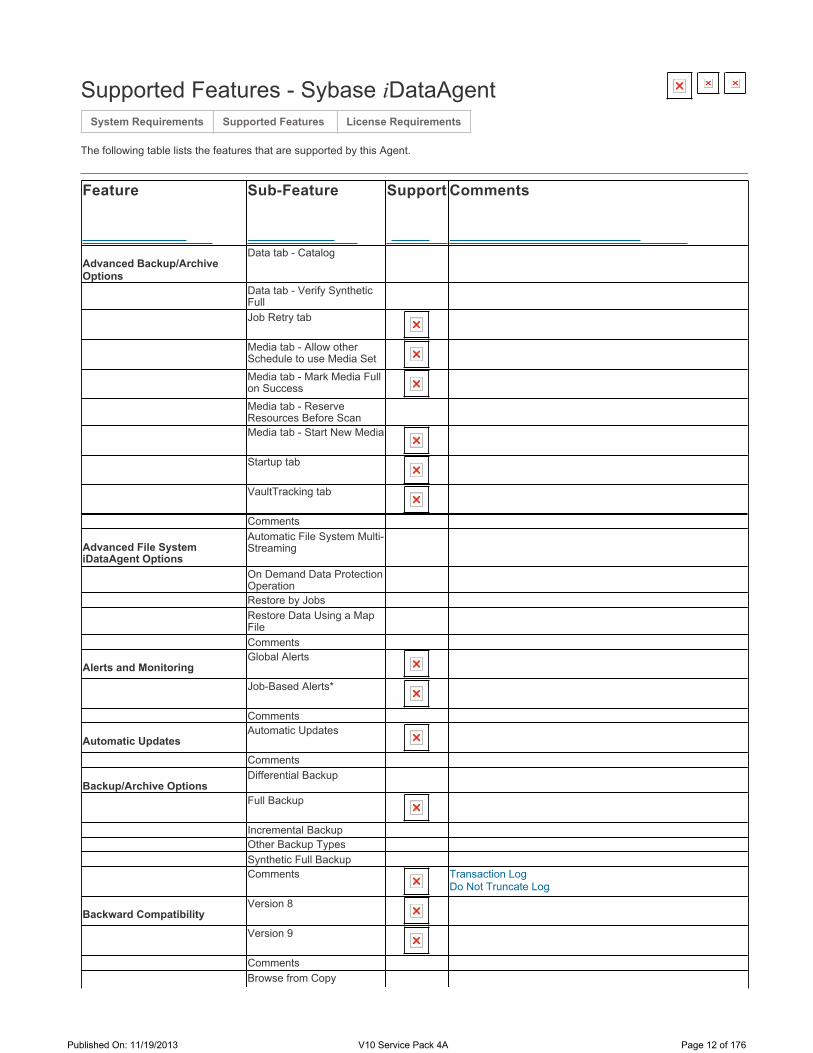
Supported Features - Sybase iDataAgent
The following table lists the features that are supported by this Agent.
System Requirements Supported Features License Requirements
Feature Sub-Feature Support Comments
Advanced Backup/Archive Options
Data tab - Catalog
Data tab - Verify Synthetic FullJob Retry tab
Media tab - Allow other Schedule to use Media Set
Media tab - Mark Media Full on Success
Media tab - Reserve Resources Before ScanMedia tab - Start New Media
Startup tab
VaultTracking tab
Comments
Advanced File System iDataAgent Options
Automatic File System Multi-Streaming
On Demand Data Protection OperationRestore by JobsRestore Data Using a Map FileComments
Alerts and Monitoring Global Alerts
Job-Based Alerts*
Comments
Automatic Updates Automatic Updates
Comments
Backup/Archive OptionsDifferential Backup
Full Backup
Incremental BackupOther Backup TypesSynthetic Full BackupComments Transaction Log
Do Not Truncate Log
Backward Compatibility Version 8
Version 9
CommentsBrowse from Copy
Published On: 11/19/2013 V10 Service Pack 4A Page 12 of 176
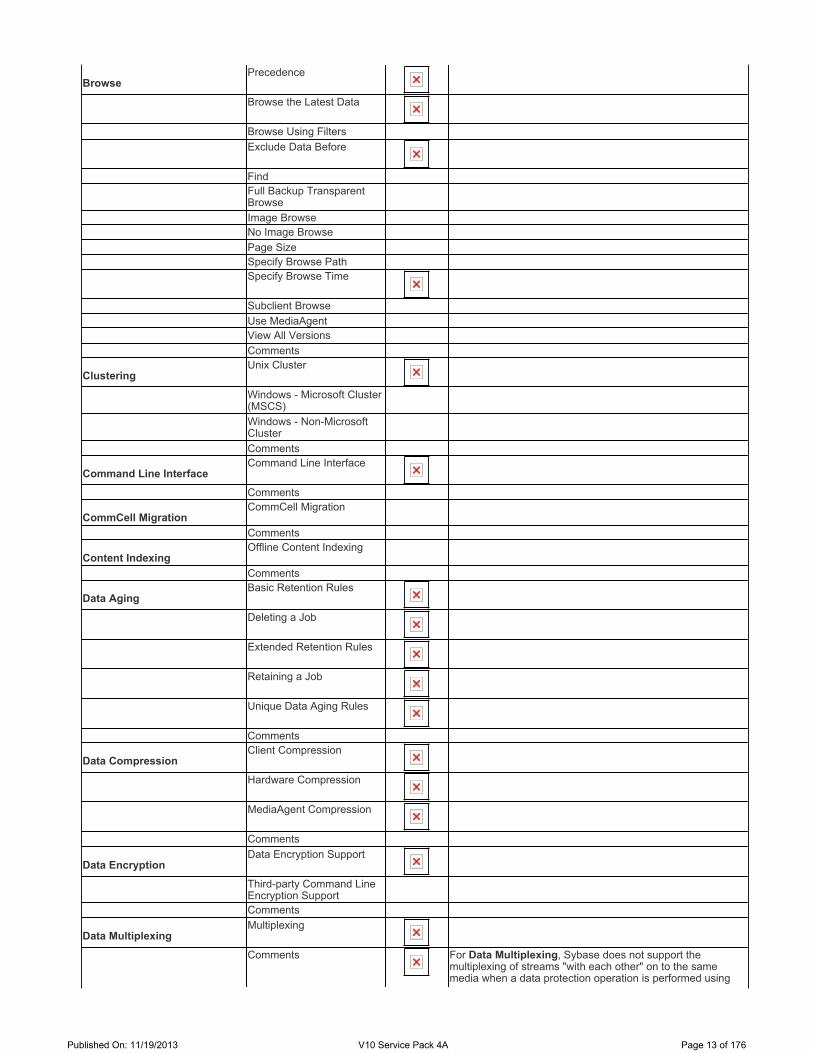
BrowsePrecedence
Browse the Latest Data
Browse Using FiltersExclude Data Before
FindFull Backup Transparent BrowseImage BrowseNo Image BrowsePage SizeSpecify Browse PathSpecify Browse Time
Subclient BrowseUse MediaAgentView All VersionsComments
Clustering Unix Cluster
Windows - Microsoft Cluster (MSCS)Windows - Non-Microsoft ClusterComments
Command Line InterfaceCommand Line Interface
Comments
CommCell Migration CommCell Migration
Comments
Content Indexing Offline Content Indexing
Comments
Data Aging Basic Retention Rules
Deleting a Job
Extended Retention Rules
Retaining a Job
Unique Data Aging Rules
Comments
Data Compression Client Compression
Hardware Compression
MediaAgent Compression
Comments
Data Encryption Data Encryption Support
Third-party Command Line Encryption SupportComments
Data MultiplexingMultiplexing
Comments For Data Multiplexing, Sybase does not support the multiplexing of streams "with each other" on to the same media when a data protection operation is performed using
Published On: 11/19/2013 V10 Service Pack 4A Page 13 of 176

the CommCell Console. However, the streams will be multiplexed when the operation is performed using the Command Line Interface or RMAN commands.
Deduplication MediaAgent Deduplication
Source Deduplication
Comments
Erase Backup/Archived Data Erase Data by Browsing
Erase StubsComments
Global Filters Global Filters
Comments
Installation Custom Package
Decoupled Install
Remote Install
Restore Only AgentsSilent Install
Comments
Installing 32-bit Components on a Microsoft Windows x64 Platform
Install 32-bit On x64
Comments
Job Restart - Data ProtectionNot Restartable
Restarts from the BeginningRestarts from the Beginning of the DatabaseRestarts from the Point-of-Failure
Comments You cannot restart the jobs on an upgraded CommServe
Job Restart - Data RecoveryNot Restartable
Restarts from the BeginningRestarts from the Beginning of the DatabaseRestarts from the Point-of-FailureComments You cannot restart the jobs on an upgraded CommServe
List Media List Media Associated with a Specific Backup Set or InstanceList Media Associated with IndexList Media Associated with Specific Files and/or FoldersList Media Associated with Specific JobsComments
Multi Instancing Multi Instance
Comments Ensure that there is no overlapping subclient content across instances before commencing data protection operations. If there is an overlap of subclient content, data loss may occur.
Optimized ScanOptimized Scan
Comments
Published On: 11/19/2013 V10 Service Pack 4A Page 14 of 176
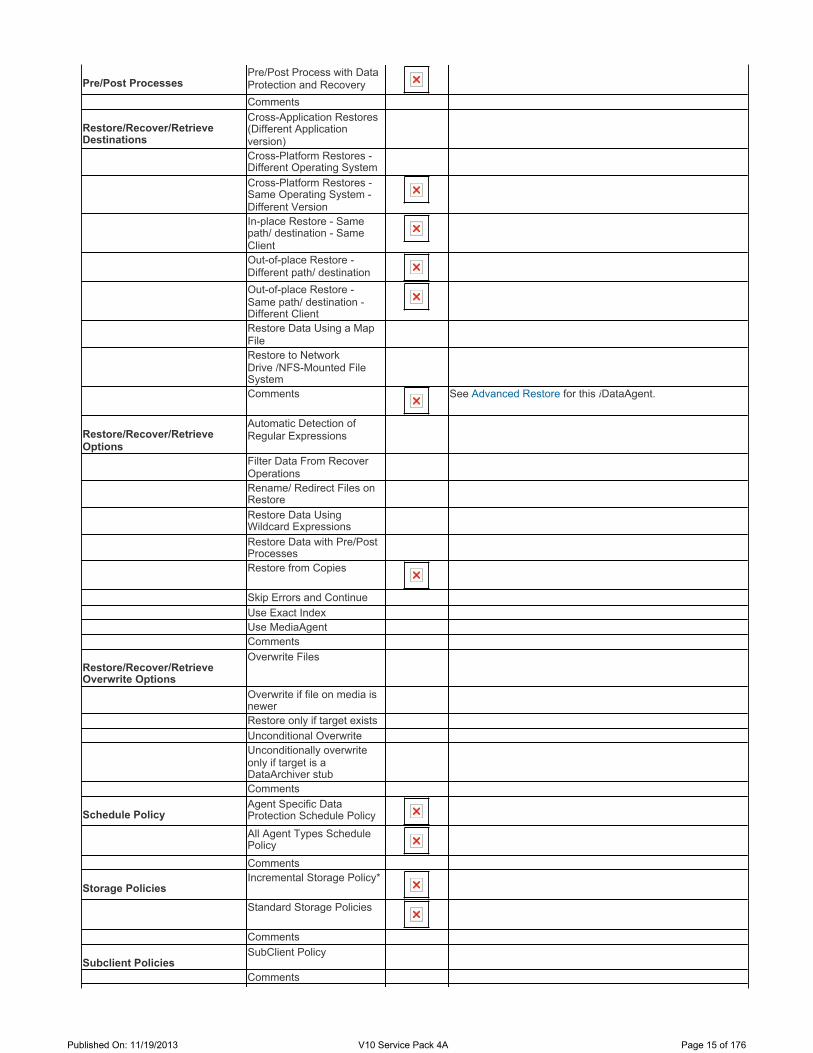
Pre/Post Processes Pre/Post Process with Data Protection and RecoveryComments
Restore/Recover/Retrieve Destinations
Cross-Application Restores (Different Application version)Cross-Platform Restores -Different Operating SystemCross-Platform Restores -Same Operating System -Different VersionIn-place Restore - Same path/ destination - Same ClientOut-of-place Restore -Different path/ destinationOut-of-place Restore -Same path/ destination -Different ClientRestore Data Using a Map FileRestore to Network Drive /NFS-Mounted File SystemComments See Advanced Restore for this iDataAgent.
Restore/Recover/Retrieve Options
Automatic Detection of Regular Expressions
Filter Data From Recover OperationsRename/ Redirect Files on RestoreRestore Data Using Wildcard ExpressionsRestore Data with Pre/Post ProcessesRestore from Copies
Skip Errors and ContinueUse Exact IndexUse MediaAgentComments
Restore/Recover/Retrieve Overwrite Options
Overwrite Files
Overwrite if file on media is newerRestore only if target existsUnconditional OverwriteUnconditionally overwrite only if target is a DataArchiver stubComments
Schedule Policy Agent Specific Data Protection Schedule Policy
All Agent Types Schedule Policy
Comments
Storage Policies Incremental Storage Policy*
Standard Storage Policies
Comments
Subclient Policies SubClient Policy
Comments
Published On: 11/19/2013 V10 Service Pack 4A Page 15 of 176
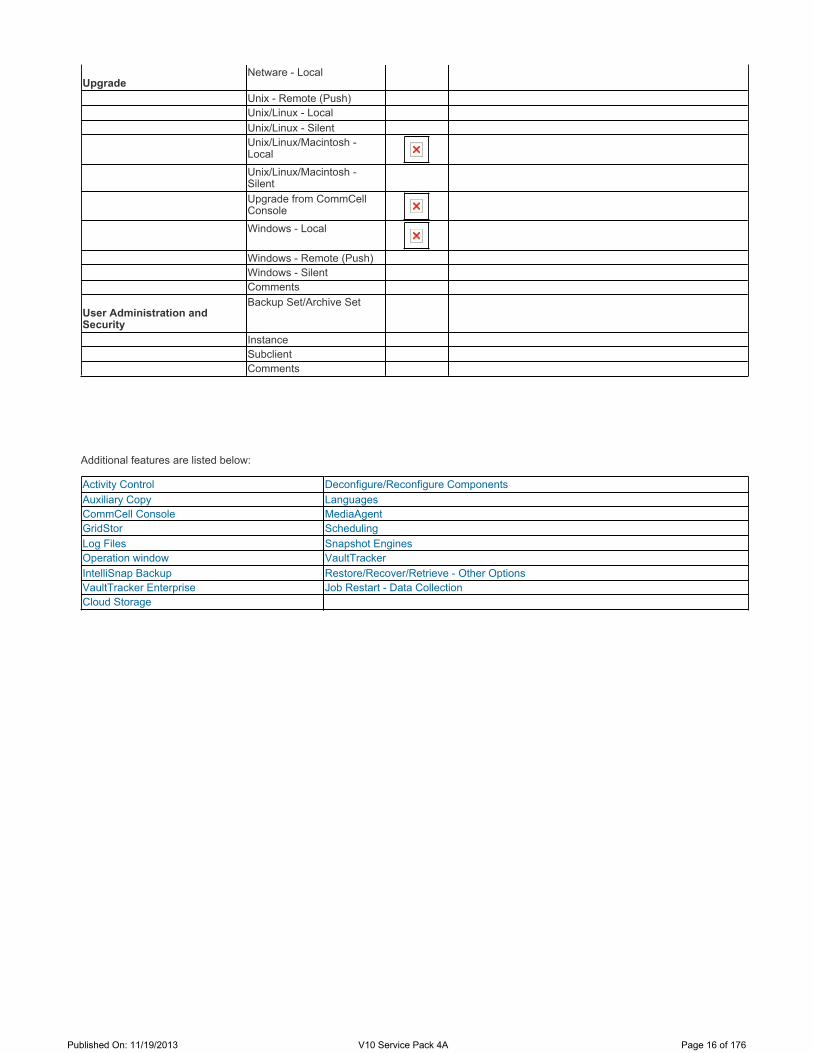
Additional features are listed below:
Upgrade Netware - Local
Unix - Remote (Push)Unix/Linux - LocalUnix/Linux - SilentUnix/Linux/Macintosh -Local
Unix/Linux/Macintosh -SilentUpgrade from CommCell Console
Windows - Local
Windows - Remote (Push)Windows - SilentComments
User Administration and Security
Backup Set/Archive Set
InstanceSubclientComments
Activity Control Deconfigure/Reconfigure Components Auxiliary Copy LanguagesCommCell Console MediaAgentGridStor Scheduling Log Files Snapshot EnginesOperation window VaultTracker IntelliSnap Backup Restore/Recover/Retrieve - Other Options VaultTracker Enterprise Job Restart - Data Collection Cloud Storage
Published On: 11/19/2013 V10 Service Pack 4A Page 16 of 176
Getting Started - Sybase iDataAgent
Install the software on a Windows computer on which the Sybase server resides.
In a clustered environment, install the software on the physical computer.
The computer will be added as a client in the CommCell as soon as the installation completes successfully.
The software installation may require a system reboot if a pending rename operation from a previously installed application is found in the operating system, hence, plan your installation at a convenient time.
System Requirements
Verify that the computer in which you wish to install the software satisfies the minimum requirements specified in System Requirements.
Download Software Packages
Download the latest software package to perform the install.
1. Open CommCell Console:
Click Start and point to All Programs.
Click HDPS .
Click Backup and Recovery Administrative Console.
2. From the CommCell Browser, click Tools | Add/Remove Software | Install Software.
Deployment - Windows Deployment - Unix Deployment - Cluster Configuration Backup Restore
Where to Install
Planning Your Installation
Before You Begin
Installation
The software can be installed using one of the following methods:
Method 1: Remote Install Using CommCell Console
Use this procedure to install remotely on a client computer.
Method 2: Interactive Install
Use this procedure to install the software by specifying installation settings and options.
Method 1: Remote Install Using CommCell Console
Published On: 11/19/2013 V10 Service Pack 4A Page 17 of 176
3. Click Next.
4. Click Next.
Published On: 11/19/2013 V10 Service Pack 4A Page 18 of 176
5. Click Manually Select Computers.
Click Next.
6. Enter the fully qualified domain name of the client computer.
For example: mycomputer.mydomain.mycompany.com
Click Next.
Do not use space and the following characters when specifying the Host Name:
\|`~!_@#$%^&*()+=<>/?,[]{}:;'"
Published On: 11/19/2013 V10 Service Pack 4A Page 19 of 176
7. Choose one of the following:
Click Next if you want to use the default cache location
Click Override Software Cache and specify a new location in the Software Cache box and then click Next
8. Specify the User Name and Password that must be used to access the client computer, and then click Next.
The software cache is the location from where the remote install program installs the software. This screen will not appear if the remote cache is not configured. For more information, see Managing Cache - Remote Cache.
The user must be an Administrator or a member of the Administrator group on that computer. Account information is required while performing remote installs for the first time on a client. For subsequent remote installs on that client, click Next without specifying the account information.
Published On: 11/19/2013 V10 Service Pack 4A Page 20 of 176
9. Click Sybase under Databases.
Click Next.
10. Select the following:
Select a client group from the available Client Groups, and then click Add.
From the Global Filters list, select one of the following:
Use Cell level Policy to inherit the global filter policy configuration set for the CommCell.
Always use Global Filters to apply the global filters policy to the default subclient regardless of the policy set for the CommCell.
Do not use Global Filters if you plan to define specific filters for the Agent.
From the Storage Policy To Use list, select a storage policy.
Click Next.
If you do not have a Storage Policy, the list will not be displayed. You can create the Storage Policy later in step 19.
This screen will not be displayed if Client Groups are not configured in the CommCell Console. For more information, see Client Computer Groups.
Published On: 11/19/2013 V10 Service Pack 4A Page 21 of 176

11. Specify the Sybase ASE Library Path and then click Next.
12. Click Next.
If necessary you can select additional options. Click the Help button to get more information on the available options.
Published On: 11/19/2013 V10 Service Pack 4A Page 22 of 176
13. Click Next.
If necessary you can select optional settings. Click the Help button to get more information on the available options.
14. Select one of the following:
If firewall configuration is not required, click Next.
If this computer and the CommServe is separated by a firewall, click Configure firewall services.
For firewall options and configuration instructions, see Firewall Configuration and continue with the installation.
Published On: 11/19/2013 V10 Service Pack 4A Page 23 of 176
15. Select Immediate.
Click Next.
16. Click Finish.
This screen will reflect the components you selected for install, and may look different from the example shown.
Published On: 11/19/2013 V10 Service Pack 4A Page 24 of 176
17. You can track the progress of the job from the Job Controller window of the CommCell console.
From the Home menu, click Job Controller.
Once the job is complete, view the job details from the Admin Job History.
Right-click the <CommServe>, point to View and then click Admin Job History.
Click Select Install/Upgrade/Remove/Repair Software.
Click OK.
Published On: 11/19/2013 V10 Service Pack 4A Page 25 of 176
You can view the following by right-clicking the job:
Details of the job
Option to Resubmit the job
Events associated with the job
Logs associated with the job
Option to send the Logs associated with the job
18. If you have installed on a clustered computer, make sure to install the software on all the physical nodes and then follow the steps described in Cluster Configuration.
19. To create a storage policy, you must have configured a library in the CommCell.
If you do not already have a library configured, go to Disk Library Creation.
If you have a library configured, go to Storage Policy Creation.
DISK LIBRARY CREATION:
1. From the CommCell Browser, navigate to Storage Resources, right-click the Libraries, point to Add and then click Disk Library...
Alternatively, you can also navigate to MediaAgents, right-click <MediaAgent>, point to All Tasks | Create Library and then click Disk Library...
2. From the Add Disk Library dialog box, specify the following:
In the Name box, specify name of the disk library.
From the MediaAgent list, select the MediaAgent.
Perform one of the following:
Select Local Path if you wish to specify a local path in the MediaAgent computer.
In the Disk Device box, type the name of the folder in which the disk library must located or click button to select the folder.
Select Network Path, if you wish to specify a network path as the target share.
In the Connect As box, type the user name.
In the Password and Verify Password box, type the password to access the network share.
In the Folder box, type the mount path or click button to select a mount path.
Click OK.
3. The newly created disk library will be displayed under Libraries node.
This will create a library and Storage Policy. Click to proceed to the Configuration section.
Storage Policy Creation
1. From the CommCell Browser, navigate to Policies.
Published On: 11/19/2013 V10 Service Pack 4A Page 26 of 176
2. Right-click the Storage Policies and then click New Storage Policy.
3. Follow the prompts displayed in the Storage Policy Wizard. The required options are mentioned below:
Select the Storage Policy type as Data Protection and Archiving and click Next.
Enter the name in the Storage Policy Name box and click Next.
From the Library list, click the name of a disk library to which the primary copy should be associated and then click Next.
Ensure that you select a library attached to a MediaAgent operating in the current release.
From the MediaAgent list, click the name of a MediaAgent that will be used to create the primary copy and then click Next.
For the device streams and the retention criteria information, click Next to accept default values.
Select Yes to enable deduplication for the primary copy.
From the MediaAgent list, click the name of the MediaAgent that will be used to host the Deduplication Database (DDB).
In the Location box, type the name of the folder in which the DDB must be located or click the Browse button to select the folder and then click Next.
Review the details and click Finish to create the Storage Policy.
This will create a storage policy. Click to proceed to the Configuration section.
Several additional options are available for remotely installing the software from CommCell Console, refer to Install Software from the CommCell Console (Remote Install) for more information.
1. Log on to the client computer as an Administrator or as a member of the Administrator group on that computer.
2. Run SetupAll.exe from the Software Installation Discs.
3. Click I accept the terms in the license agreement.
Click Next.
Method 2: Interactive install
Published On: 11/19/2013 V10 Service Pack 4A Page 27 of 176
4. Click Custom.
Click Next.
5. Click Select components to install on this computer and click Next.
Published On: 11/19/2013 V10 Service Pack 4A Page 28 of 176
6. Expand Database, and then click Sybase.
Click Next.
7. Verify the default location for software installation.
Click Next.
If necessary, click Browse... to change the default location.
Do not install the software to a mapped network drive
Do not use the following characters when specifying the destination path: / : * ? " < > | #
It is recommended that you use alphanumeric characters only
Published On: 11/19/2013 V10 Service Pack 4A Page 29 of 176
8. Click Browse to select the Sybase ASE Library Path.
The Sybase ASE (Adaptive Server Enterprise) server library is generally located under the Sybase ASE server install directory.
Click Next.
9. Click Install.
The Summary on your screen should reflect the components you selected for install, and may look different from the example shown.
Published On: 11/19/2013 V10 Service Pack 4A Page 30 of 176
10. Click Yes.
11. Click Next.
12. Select one of the following:
If firewall configuration is not required, click Next.
If this computer and the CommServe is separated by a firewall, click Configure firewall services.
For firewall options and configuration instructions, see Firewall Configuration and continue with the installation.
Published On: 11/19/2013 V10 Service Pack 4A Page 31 of 176

13. Enter the fully qualified domain name of the CommServe in the CommServe Host Name box.
Do not use space and the following characters when specifying the CommServe Host Name:
\|`~!@#$%^&*()+=<>/?,[]{}:;'"
Click Next.
14. Enter the following:
The local (NetBIOS) name of the client computer is displayed in the Select a Client name list.
If necessary you can also type a new (friendly) name for the client in this box. This name will be used in the CommCell and will also be displayed in the CommCell Console.
Do not use spaces when specifying a new name for the client.
The default network interface name of the client computer is displayed if the computer has only one network interface (NIC card).
If the computer has multiple network interfaces, select the interface name that is preferred for communication with the CommServe.
Click Next.
If a component is already installed on this computer, this screen will not be displayed; instead, the install program will use the same name as previously specified.
Published On: 11/19/2013 V10 Service Pack 4A Page 32 of 176
15. The default port numbers used for CommCell communication is displayed. If necessary, you can modify the port numbers.
Click Next.
16. Select one of the following options:
If you do not want to disable Windows Firewall, click Next.
If you want to disable Windows Firewall for all profiles, click Yes, disable Windows Firewall for all profiles and then click Next.
This screen will not appear if the default port numbers are not used for CommCell communication.
You will get this screen if you did not configure the firewall settings in step 11.
Published On: 11/19/2013 V10 Service Pack 4A Page 33 of 176
17. Select Add programs to the Windows Firewall Exclusion List, to add CommCell programs and services to the Windows Firewall Exclusion List.
Click Next.
18. Select a Client Group.Click Next.
This option enables CommCell operations across Windows firewall by adding CommCell programs and services to Windows firewall exclusion list.
It is recommended to select this option even if Windows firewall is disabled. This will allow the CommCell programs and services to function if the Windows firewall is enabled at a later time.
This screen will not be displayed if Client Groups are not configured in the CommCell Console. For more information, see Client Computer Groups.
Published On: 11/19/2013 V10 Service Pack 4A Page 34 of 176
19. Click Next.
20. Select a storage policy from the Storage Policy list.
Click Next.
This agent does not support Global Filters.
If you do not have a Storage Policy, the list will not be displayed. You can create the Storage Policy later in step 23.
Published On: 11/19/2013 V10 Service Pack 4A Page 35 of 176
21. Click OK.
22. Click Reboot Now.
23. To create a storage policy, you must have configured a library in the CommCell.
If you do not already have a library configured, go to Disk Library Creation.
If you have a library configured, go to Storage Policy Creation.
DISK LIBRARY CREATION:
1. From the CommCell Browser, navigate to Storage Resources, right-click the Libraries, point to Add and then click Disk Library...
This screen will reflect the components you selected for install, and may look different from the example shown.
If you already have a storage policy selected in step 18, click to proceed to the Configuration section.
If you do not have Storage Policy created, continue with the following step.
Published On: 11/19/2013 V10 Service Pack 4A Page 36 of 176
Alternatively, you can also navigate to MediaAgents, right-click <MediaAgent>, point to All Tasks | Create Library and then click Disk Library...
2. From the Add Disk Library dialog box, specify the following:
In the Name box, specify name of the disk library.
From the MediaAgent list, select the MediaAgent.
Perform one of the following:
Select Local Path if you wish to specify a local path in the MediaAgent computer.
In the Disk Device box, type the name of the folder in which the disk library must located or click button to select the folder.
Select Network Path, if you wish to specify a network path as the target share.
In the Connect As box, type the user name.
In the Password and Verify Password box, type the password to access the network share.
In the Folder box, type the mount path or click button to select a mount path.
Click OK.
3. The newly created disk library will be displayed under Libraries node.
This will create a library and Storage Policy. Click to proceed to the Configuration section.
Storage Policy Creation
1. From the CommCell Browser, navigate to Policies.
2. Right-click the Storage Policies and then click New Storage Policy.
3. Follow the prompts displayed in the Storage Policy Wizard. The required options are mentioned below:
Select the Storage Policy type as Data Protection and Archiving and click Next.
Enter the name in the Storage Policy Name box and click Next.
From the Library list, click the name of a disk library to which the primary copy should be associated and then click Next.
Ensure that you select a library attached to a MediaAgent operating in the current release.
From the MediaAgent list, click the name of a MediaAgent that will be used to create the primary copy and then click Next.
For the device streams and the retention criteria information, click Next to accept default values.
Select Yes to enable deduplication for the primary copy.
From the MediaAgent list, click the name of the MediaAgent that will be used to host the Deduplication Database (DDB).
In the Location box, type the name of the folder in which the DDB must be located or click the Browse button to select the folder and then click Next.
Review the details and click Finish to create the Storage Policy.
This will create a storage policy. Click to proceed to the Configuration section.
Published On: 11/19/2013 V10 Service Pack 4A Page 37 of 176

Custom Package
Create a compact software package for quick deployment to multiple clients.
Remote Install
Deploy the software from CommCell Console on multiple clients.
Silent Install
Deploy the software silently on multiple clients.
Additional Installation Methods
Published On: 11/19/2013 V10 Service Pack 4A Page 38 of 176
Getting Started - Sybase iDataAgent
Install the software on a UNIX computer on which the Sybase server resides.
For Solaris, software can be installed on one of the following:
Unix computer hosting the global zone on which Sybase server resides, and satisfies the minimum requirements specified in the System Requirements.
Unix computer in a non global zone on which Sybase server resides, and satisfies the minimum requirements specified in the system requirements.
In a clustered environment, install the software on the physical computer.
The computer will be added as a client in the CommCell as soon as the installation completes successfully.
System Requirements
Verify that the computer in which you wish to install the software satisfies the minimum requirements specified in System Requirements.
Download Software Packages
Download the latest software package to perform the install.
1. Open CommCell Console:
Click Start and point to All Programs.
Click HDPS .
Click Backup and Recovery Administrative Console.
2. From the CommCell Browser, click Tools | Add/Remove Software | Install Software.
Deployment - Windows Deployment - Unix Deployment - Cluster Configuration Backup Restore
Where to Install
Before You Begin
Installation
The software can be installed using one of the following methods:
Method 1: Remote Install Using CommCell Console
Use this procedure to install remotely on a client computer.
Method 2: Interactive Install
Use this procedure to install the software using the custom installation options.
Method 1: Remote Install Using CommCell Console
Published On: 11/19/2013 V10 Service Pack 4A Page 39 of 176

3. Click Next.
4. Select Unix and Linux.
Click Next.
Published On: 11/19/2013 V10 Service Pack 4A Page 40 of 176

5. Click Manually Select Computers.
Click Next.
6. Enter the fully qualified domain name of the client computer.
For example: mycomputer.mydomain.mycompany.com
Click Next.
Do not use space and the following characters when specifying the Host Name:
\|`~!_@#$%^&*()+=<>/?,[]{}:;'"
Published On: 11/19/2013 V10 Service Pack 4A Page 41 of 176

7. Choose one of the following:
Click Next if you want to use the default cache location
Click Override Software Cache and specify a new location in the Software Cache box and then click Next
8. Specify the User Name and Password that must be used to access the client computer, and then click Next.
The software cache is the location from where the remote install program installs the software. This screen will not appear if the remote cache is not configured. For more information, see Managing Cache - Remote Cache.
You can also specify the SUDO user credentials here, provided that the user is an Administrator or a member of the Administrator group with root privileges on that computer.
For steps to add a SUDO user to /etc/sudoers, see Frequently Asked Questions - Install.
Account information is required while performing remote installs for the first time on a client. For subsequent remote installs on that client, click Next without specifying the account information.
Published On: 11/19/2013 V10 Service Pack 4A Page 42 of 176
9. Click Sybase.
Click Next.
10. Select the following:
Select a client group from the available Client Groups, and then click Add.
From the Global Filters list, select one of the following:
Use Cell level Policy to inherit the global filter policy configuration set for the CommCell.
Always use Global Filters to apply the global filters policy to the default subclient regardless of the policy set for the CommCell.
Do not use Global Filters if you plan to define specific filters for the Agent.
From the Storage Policy To Use list, select a storage policy.
Click Next.
If you do not have a Storage Policy, the list will not be displayed. You can create the Storage Policy later in step 20.
This screen will not be displayed if Client Groups are not configured in the CommCell Console. For more information, see Client Computer Groups.
Published On: 11/19/2013 V10 Service Pack 4A Page 43 of 176
11. Specify the Sybase ASE Library Path and then click Next.
12. Click Next.
If necessary you can select additional options. Click the Help button to get more information on the available options.
Published On: 11/19/2013 V10 Service Pack 4A Page 44 of 176
13. Specify a name for the Unix Group and click Next.
If necessary you can select advanced options. Click the Help button to get more information on the available options.
14. Click Next.
If necessary you can select additional options. Click the Help button to get more information on the available options.
Published On: 11/19/2013 V10 Service Pack 4A Page 45 of 176
15. Select one of the following:
If firewall configuration is not required, click Next.
If this computer and the CommServe is separated by a firewall, click Configure firewall services.
For firewall options and configuration instructions, see Firewall Configuration and continue with the installation.
16. Select Immediate.
Click Next.
Published On: 11/19/2013 V10 Service Pack 4A Page 46 of 176
17. Click Finish.
18. You can track the progress of the job from the Job Controller window of the CommCell console.
From the Home menu, click Job Controller.
Once the job is complete, view the job details from the Admin Job History.
Right-click the <CommServe>, point to View and then click Admin Job History.
Click Select Install/Upgrade/Remove/Repair Software.
Click OK.
This screen will reflect the components you selected for install, and may look different from the example shown.
Published On: 11/19/2013 V10 Service Pack 4A Page 47 of 176
You can view the following by right-clicking the job:
Details of the job
Option to Resubmit the job
Events associated with the job
Logs associated with the job
Option to send the Logs associated with the job
19. If you have installed on a clustered computer, make sure to install the software on all the physical nodes and then follow the steps described in Cluster Configuration.
20. To create a storage policy, you must have configured a library in the CommCell.
If you do not already have a library configured, go to Disk Library Creation.
If you have a library configured, go to Storage Policy Creation.
DISK LIBRARY CREATION:
1. From the CommCell Browser, navigate to Storage Resources, right-click the Libraries, point to Add and then click Disk Library...
Alternatively, you can also navigate to MediaAgents, right-click <MediaAgent>, point to All Tasks | Create Library and then click Disk Library...
2. From the Add Disk Library dialog box, specify the following:
Published On: 11/19/2013 V10 Service Pack 4A Page 48 of 176

In the Name box, specify name of the disk library.
From the MediaAgent list, select the MediaAgent.
Perform one of the following:
Select Local Path if you wish to specify a local path in the MediaAgent computer.
In the Disk Device box, type the name of the folder in which the disk library must located or click button to select the folder.
Select Network Path, if you wish to specify a network path as the target share.
In the Connect As box, type the user name.
In the Password and Verify Password box, type the password to access the network share.
In the Folder box, type the mount path or click button to select a mount path.
Click OK.
3. The newly created disk library will be displayed under Libraries node.
This will create a library and Storage Policy.
Storage Policy Creation
1. From the CommCell Browser, navigate to Policies.
2. Right-click the Storage Policies and then click New Storage Policy.
3. Follow the prompts displayed in the Storage Policy Wizard. The required options are mentioned below:
Select the Storage Policy type as Data Protection and Archiving and click Next.
Enter the name in the Storage Policy Name box and click Next.
From the Library list, click the name of a disk library to which the primary copy should be associated and then click Next.
Ensure that you select a library attached to a MediaAgent operating in the current release.
From the MediaAgent list, click the name of a MediaAgent that will be used to create the primary copy and then click Next.
For the device streams and the retention criteria information, click Next to accept default values.
Select Yes to enable deduplication for the primary copy.
From the MediaAgent list, click the name of the MediaAgent that will be used to host the Deduplication Database (DDB).
In the Location box, type the name of the folder in which the DDB must be located or click the Browse button to select the folder and then click Next.
Review the details and click Finish to create the Storage Policy.
This will create a storage policy.
Published On: 11/19/2013 V10 Service Pack 4A Page 49 of 176
Several additional options are available for remotely installing the software from CommCell Console, refer to Install Software from the CommCell Console (Remote Install) for more information.
1. Logon to the client computer as root.
2. If you are installing the software from the Software Installation Discs, run the following command to mount the CD:
Run the following command from the Software Installation Package or mount point:
3. Press Enter.
Method 2: Interactive Install
mount -t iso9660,udf /dev/cdrom /mnt/cdrom
./cvpkgadd
You can also run this command as a SUDO user with root privileges:
For steps to add a SUDO user to /etc/sudoers, see Frequently Asked Questions - Install.
./sudo cvpkgadd
Selecting Setup TypePlease select how you want to perform the setup.1) CUSTOM - I want to answer all questions interactively2) QUICK - I just want to answer a few key questions3) AUTOMATIC - Let the setup decide on everything4) MY WAY - Please use my prepared answers in /etc/play.xml5) Exit
Published On: 11/19/2013 V10 Service Pack 4A Page 50 of 176

4. The product banner and other information is displayed.
Press Enter.
5. Read the license agreement. Type y and press Enter.
6. Press Enter.
7. The default network interface name of the client computer is displayed if the computer has only one network interface (NIC card), press Enter to accept.
If the computer has multiple network interfaces, enter the interface name that is preferred for communication with the CommServe, and then press Enter.
8. The local name of the client computer is displayed, press Enter to accept.
If necessary you can also enter a new (friendly) name for the client, and then press Enter. This name will be used in the CommCell and will also be displayed in the CommCell Console.
Do not use spaces when specifying a new name for the client.
9. Type the number associated with the Sybase iDataAgent and press Enter.
I want setup in this way: [1]
Selecting Unix Setup TaskPlease select a setup task you want to perform from the list below:Advanced options provide extra setup features such as creating custom package, recording/replaying user selections and installing External Data Connector software.1) Install data protection agents on this computer2) Advanced options3) Exit this menuYour choice: [1]
The interface names and IP addresses depend on the computer in which the software is installed and may be different from the example shown.
Setting Client/Physical Machine Host NameWe found one network interface available on your machine. We will associate it with the client being installed, and it will also be used by the CommServe to connect to the client. Note that you will be able to additionally customize Datapipe Interface Pairs used for the backup data traffic later in the Data Protection Suite Java GUI.Please check the interface name below, and make corrections if necessary:Client/Physical Machine Host Name: [myclient.company.com]
Setting Client NamePlease specify the client name for this machine.It does not have to be the network host name: you can enter any word here without spaces. The only requirement is that it must be unique on the CommServe.Physical Machine Client name: [myclient]
Selecting Modules to Install.
Published On: 11/19/2013 V10 Service Pack 4A Page 51 of 176
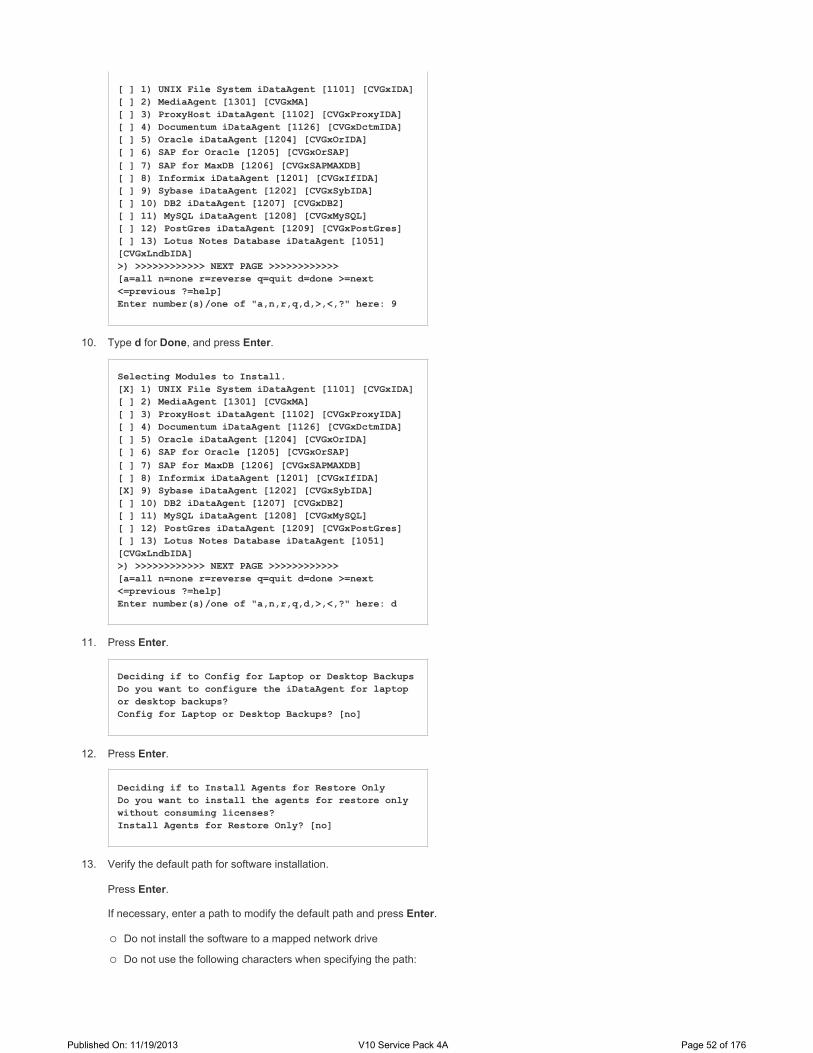
10. Type d for Done, and press Enter.
11. Press Enter.
12. Press Enter.
13. Verify the default path for software installation.
Press Enter.
If necessary, enter a path to modify the default path and press Enter.
Do not install the software to a mapped network drive
Do not use the following characters when specifying the path:
[ ] 1) UNIX File System iDataAgent [1101] [CVGxIDA][ ] 2) MediaAgent [1301] [CVGxMA][ ] 3) ProxyHost iDataAgent [1102] [CVGxProxyIDA][ ] 4) Documentum iDataAgent [1126] [CVGxDctmIDA][ ] 5) Oracle iDataAgent [1204] [CVGxOrIDA][ ] 6) SAP for Oracle [1205] [CVGxOrSAP][ ] 7) SAP for MaxDB [1206] [CVGxSAPMAXDB][ ] 8) Informix iDataAgent [1201] [CVGxIfIDA][ ] 9) Sybase iDataAgent [1202] [CVGxSybIDA][ ] 10) DB2 iDataAgent [1207] [CVGxDB2][ ] 11) MySQL iDataAgent [1208] [CVGxMySQL][ ] 12) PostGres iDataAgent [1209] [CVGxPostGres][ ] 13) Lotus Notes Database iDataAgent [1051] [CVGxLndbIDA]>) >>>>>>>>>>>> NEXT PAGE >>>>>>>>>>>>[a=all n=none r=reverse q=quit d=done >=next <=previous ?=help]Enter number(s)/one of "a,n,r,q,d,>,<,?" here: 9
Selecting Modules to Install.[X] 1) UNIX File System iDataAgent [1101] [CVGxIDA][ ] 2) MediaAgent [1301] [CVGxMA][ ] 3) ProxyHost iDataAgent [1102] [CVGxProxyIDA][ ] 4) Documentum iDataAgent [1126] [CVGxDctmIDA][ ] 5) Oracle iDataAgent [1204] [CVGxOrIDA][ ] 6) SAP for Oracle [1205] [CVGxOrSAP][ ] 7) SAP for MaxDB [1206] [CVGxSAPMAXDB][ ] 8) Informix iDataAgent [1201] [CVGxIfIDA][X] 9) Sybase iDataAgent [1202] [CVGxSybIDA][ ] 10) DB2 iDataAgent [1207] [CVGxDB2][ ] 11) MySQL iDataAgent [1208] [CVGxMySQL][ ] 12) PostGres iDataAgent [1209] [CVGxPostGres][ ] 13) Lotus Notes Database iDataAgent [1051] [CVGxLndbIDA]>) >>>>>>>>>>>> NEXT PAGE >>>>>>>>>>>>[a=all n=none r=reverse q=quit d=done >=next <=previous ?=help]Enter number(s)/one of "a,n,r,q,d,>,<,?" here: d
Deciding if to Config for Laptop or Desktop BackupsDo you want to configure the iDataAgent for laptop or desktop backups?Config for Laptop or Desktop Backups? [no]
Deciding if to Install Agents for Restore OnlyDo you want to install the agents for restore only without consuming licenses?Install Agents for Restore Only? [no]
Published On: 11/19/2013 V10 Service Pack 4A Page 52 of 176
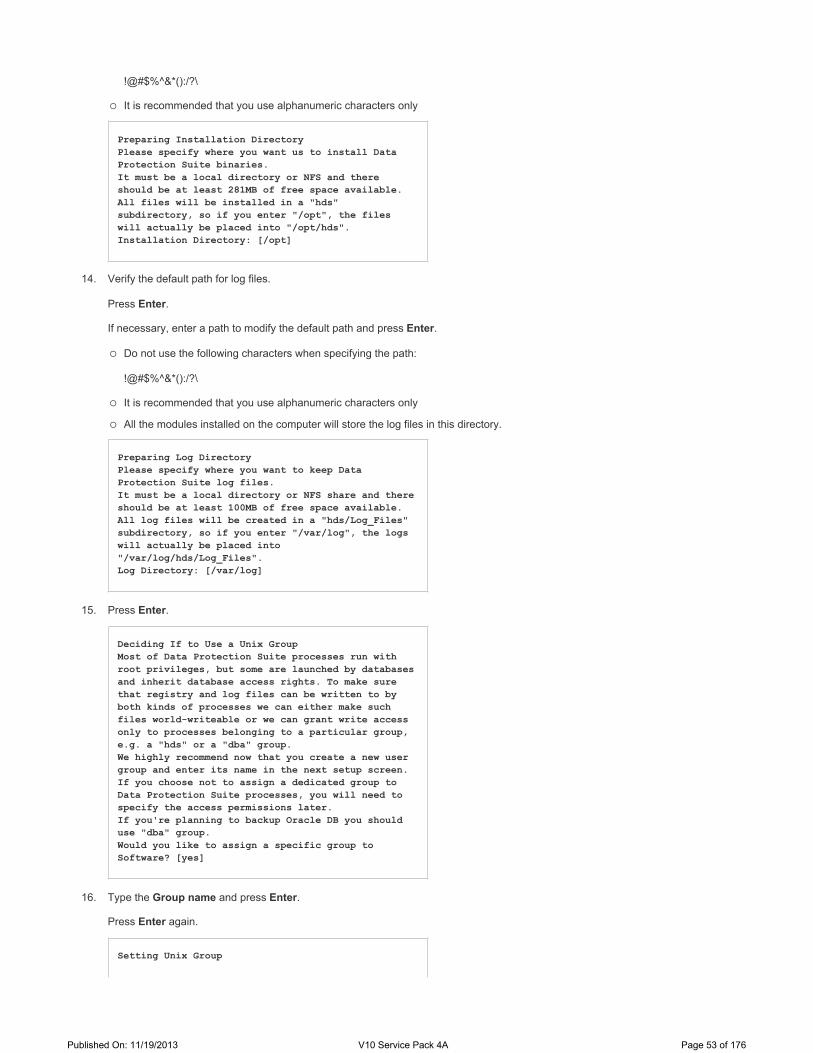
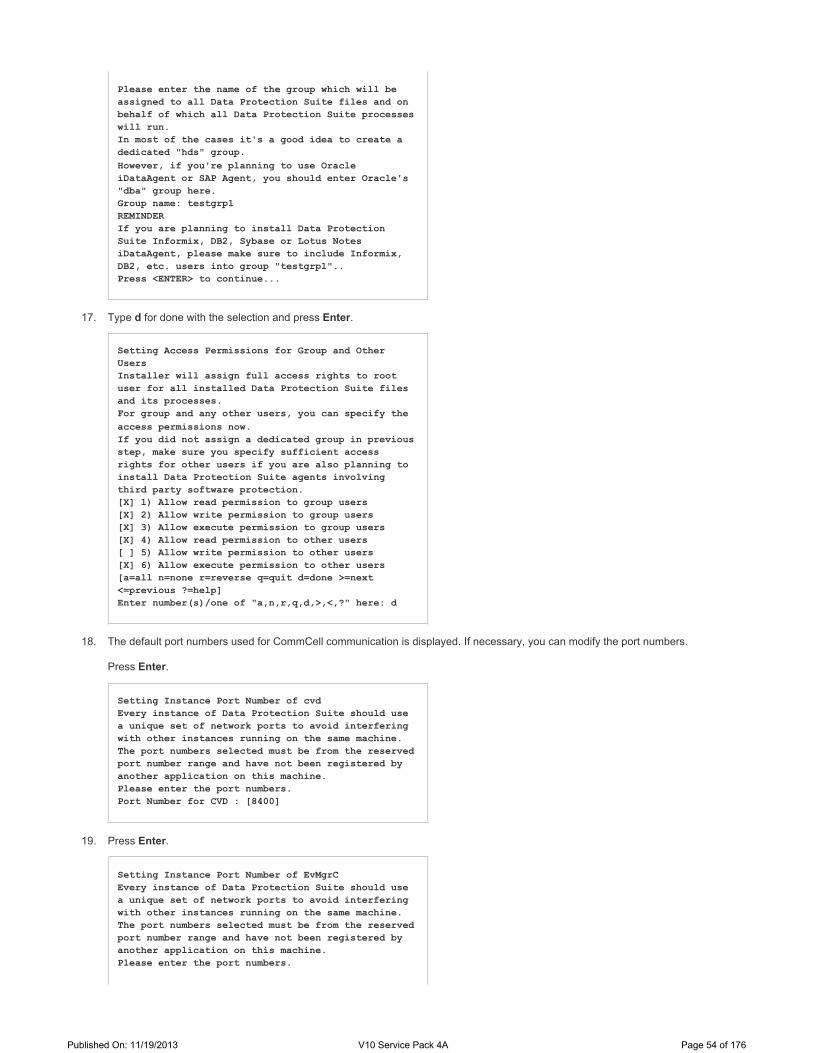
!@#$%^&*():/?\
It is recommended that you use alphanumeric characters only
14. Verify the default path for log files.
Press Enter.
If necessary, enter a path to modify the default path and press Enter.
Do not use the following characters when specifying the path:
!@#$%^&*():/?\
It is recommended that you use alphanumeric characters only
All the modules installed on the computer will store the log files in this directory.
15. Press Enter.
16. Type the Group name and press Enter.
Press Enter again.
Preparing Installation DirectoryPlease specify where you want us to install Data Protection Suite binaries.It must be a local directory or NFS and there should be at least 281MB of free space available. All files will be installed in a "hds" subdirectory, so if you enter "/opt", the files will actually be placed into "/opt/hds".Installation Directory: [/opt]
Preparing Log DirectoryPlease specify where you want to keep Data Protection Suite log files.It must be a local directory or NFS share and there should be at least 100MB of free space available. All log files will be created in a "hds/Log_Files" subdirectory, so if you enter "/var/log", the logs will actually be placed into "/var/log/hds/Log_Files".Log Directory: [/var/log]
Deciding If to Use a Unix GroupMost of Data Protection Suite processes run with root privileges, but some are launched by databases and inherit database access rights. To make sure that registry and log files can be written to by both kinds of processes we can either make such files world-writeable or we can grant write access only to processes belonging to a particular group, e.g. a "hds" or a "dba" group.We highly recommend now that you create a new user group and enter its name in the next setup screen. If you choose not to assign a dedicated group to Data Protection Suite processes, you will need to specify the access permissions later.If you're planning to backup Oracle DB you should use "dba" group.Would you like to assign a specific group to Software? [yes]
Setting Unix Group
Published On: 11/19/2013 V10 Service Pack 4A Page 53 of 176
17. Type d for done with the selection and press Enter.
18. The default port numbers used for CommCell communication is displayed. If necessary, you can modify the port numbers.
Press Enter.
19. Press Enter.
Please enter the name of the group which will be assigned to all Data Protection Suite files and on behalf of which all Data Protection Suite processes will run.In most of the cases it's a good idea to create a dedicated "hds" group.However, if you're planning to use Oracle iDataAgent or SAP Agent, you should enter Oracle's "dba" group here.Group name: testgrp1REMINDERIf you are planning to install Data Protection Suite Informix, DB2, Sybase or Lotus Notes iDataAgent, please make sure to include Informix, DB2, etc. users into group "testgrp1"..Press <ENTER> to continue...
Setting Access Permissions for Group and Other UsersInstaller will assign full access rights to root user for all installed Data Protection Suite files and its processes.For group and any other users, you can specify the access permissions now.If you did not assign a dedicated group in previous step, make sure you specify sufficient access rights for other users if you are also planning to install Data Protection Suite agents involving third party software protection.[X] 1) Allow read permission to group users[X] 2) Allow write permission to group users[X] 3) Allow execute permission to group users[X] 4) Allow read permission to other users[ ] 5) Allow write permission to other users[X] 6) Allow execute permission to other users[a=all n=none r=reverse q=quit d=done >=next <=previous ?=help]Enter number(s)/one of "a,n,r,q,d,>,<,?" here: d
Setting Instance Port Number of cvdEvery instance of Data Protection Suite should use a unique set of network ports to avoid interfering with other instances running on the same machine.The port numbers selected must be from the reserved port number range and have not been registered by another application on this machine.Please enter the port numbers.Port Number for CVD : [8400]
Setting Instance Port Number of EvMgrCEvery instance of Data Protection Suite should use a unique set of network ports to avoid interfering with other instances running on the same machine.The port numbers selected must be from the reserved port number range and have not been registered by another application on this machine.Please enter the port numbers.
Published On: 11/19/2013 V10 Service Pack 4A Page 54 of 176
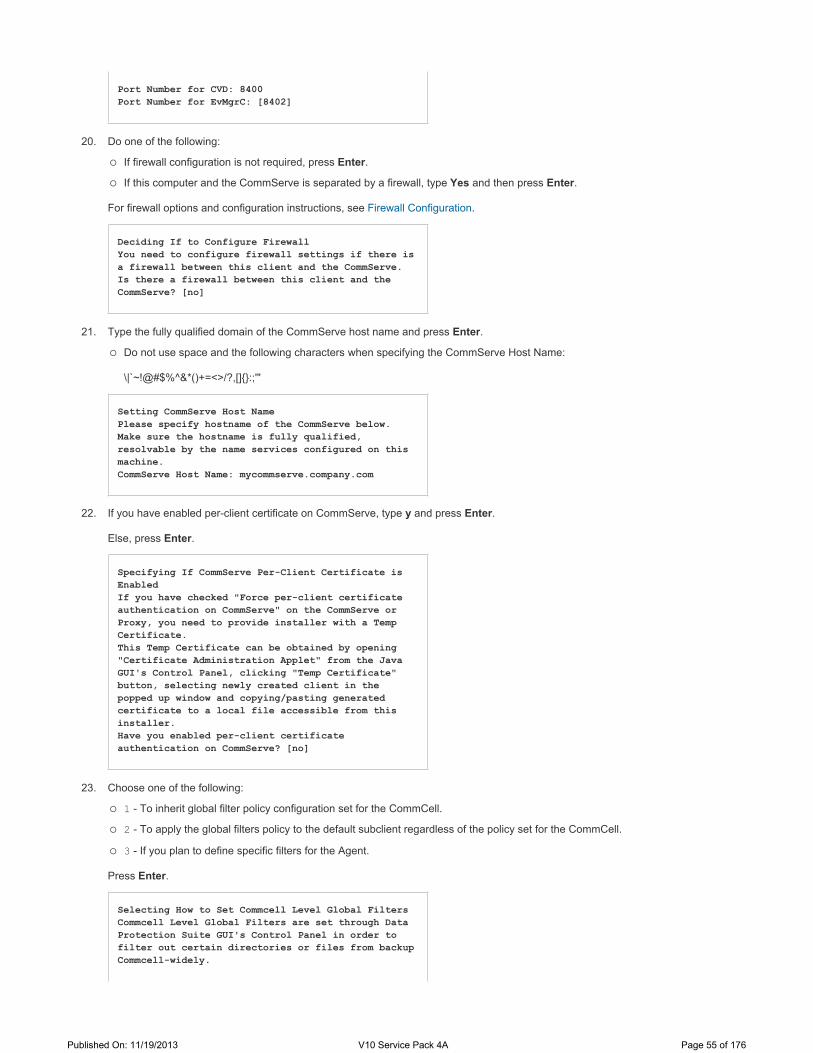
20. Do one of the following:
If firewall configuration is not required, press Enter.
If this computer and the CommServe is separated by a firewall, type Yes and then press Enter.
For firewall options and configuration instructions, see Firewall Configuration.
21. Type the fully qualified domain of the CommServe host name and press Enter.
Do not use space and the following characters when specifying the CommServe Host Name:
\|`~!@#$%^&*()+=<>/?,[]{}:;'"
22. If you have enabled per-client certificate on CommServe, type y and press Enter.
Else, press Enter.
23. Choose one of the following:
1 - To inherit global filter policy configuration set for the CommCell.
2 - To apply the global filters policy to the default subclient regardless of the policy set for the CommCell.
3 - If you plan to define specific filters for the Agent.
Press Enter.
Port Number for CVD: 8400Port Number for EvMgrC: [8402]
Deciding If to Configure FirewallYou need to configure firewall settings if there is a firewall between this client and the CommServe.Is there a firewall between this client and the CommServe? [no]
Setting CommServe Host NamePlease specify hostname of the CommServe below. Make sure the hostname is fully qualified, resolvable by the name services configured on this machine.CommServe Host Name: mycommserve.company.com
Specifying If CommServe Per-Client Certificate is EnabledIf you have checked "Force per-client certificate authentication on CommServe" on the CommServe or Proxy, you need to provide installer with a Temp Certificate.This Temp Certificate can be obtained by opening "Certificate Administration Applet" from the Java GUI's Control Panel, clicking "Temp Certificate" button, selecting newly created client in the popped up window and copying/pasting generated certificate to a local file accessible from this installer.Have you enabled per-client certificate authentication on CommServe? [no]
Selecting How to Set Commcell Level Global FiltersCommcell Level Global Filters are set through Data Protection Suite GUI's Control Panel in order to filter out certain directories or files from backup Commcell-widely.
Published On: 11/19/2013 V10 Service Pack 4A Page 55 of 176

24. Type the appropriate number to select the Client Group and press Enter.
25. Type d for Done, and press Enter.
26. Press Enter.
27. Press Enter.
If you turn on the Global filters, they will be effective to the default subclient.There are three options you can choose to set the filters. Please select how to set the Global Filters for the default subclient?1) Use Cell level policy2) Always use Global filters3) Do not use Global filtersYour Choice: [1]
This screen will be displayed only if Client Groups are configured for the CommCell.
Selecting Client Computer GroupsClient Group(s) is currently configured on CommServe mycommserve.company.com. Please choose the group(s) that you want to add this client myclient.company.com to.[ ] 1) Client Grp1[a=all n=none r=reverse q=quit d=done >=next <=previous ?=help]Enter number(s)/one of "a,n,r,q,d,>,<,?" here: 1
Selecting Client Computer GroupsClient Group(s) is currently configured on CommServe mycommserve.company.com. Please choose the group(s) that you want to add this client myclient.company.com to.[X] 1) Client Grp1[a=all n=none r=reverse q=quit d=done >=next <=previous ?=help]Enter number(s)/one of "a,n,r,q,d,>,<,?" here: d
Deciding if to Configure Storage PolicyWould you like to configure Storage Policy on this client?Configure? [no]
Adjusting modes and permissions of files...done.Starting Data Protection Suite services...done.Thank you for choosing Data Protection Suite.
If you do not have Storage Policy created, this message will be displayed. You may not be prompted for user input. You can create the Storage Policy later in step 35.
There seem to be no Storage Policies configured on the CommServe. Before you can run any backups of this IDA, you will need to install a MediaAgent, create a Storage Policy and assign it to all subclients..
If you already have a storage policy selected in step 25, click to proceed to the Configuration section.
If you do not have Storage Policy created, continue with the following step.
Published On: 11/19/2013 V10 Service Pack 4A Page 56 of 176
28. Type y to install the software Backup/Recovery modules, and press Enter.
29. Type the Sybase user ID, and press Enter.
30. Type the name of the user group for Sybase and press Enter.
31. Type the name of Sybase Adaptive Server, and press Enter.
32. Type the name of the Sybase home directory, and press Enter.
33. Type the name of the Sybase ASE variable, and press Enter.
34. Type the name of the Sybase OCS variable, and press Enter.
35. If you have installed on a clustered computer, make sure to install the software on all the physical nodes and then follow the steps described in Cluster Configuration.
36. To create a storage policy, you must have configured a library in the CommCell.
If you do not already have a library configured, go to Disk Library Creation.
If you have a library configured, go to Storage Policy Creation.
Disk Library Creation:
1. From the CommCell Browser, navigate to Storage Resources, right-click the Libraries, point to Add and then click Disk Library...
Alternatively, you can also navigate to MediaAgents, right-click <MediaAgent>, point to All Tasks | Create Library and then click Disk Library...
2. From the Add Disk Library dialog box, specify the following:
The control now passes to the Syb_install.sh script to allow it to install Data Protection Suite Backup/Recovery modules for Sybase.Press <ENTER> to continue ...
Do you wish to install Backup/Recovery modules for Sybase now? (n/[y]) y
Please enter SYBASE user ID [sybase]: sybase
Please enter user group for sybase [sybase]:sybase
Please enter the SYBASE SERVER Name: Server1
Please enter SYBASE home directory: /opt/sybase
The Sybase ASE (Adaptive Server Enterprise) server library is generally located under the Sybase ASE server install/home directory.
Please enter the SYBASE_ASE variable: ASE-15_0
You can view the location of this variable in sybase.env file residing in the home directory.
Please enter the SYBASE_OCS variable:OCS-15_0
Published On: 11/19/2013 V10 Service Pack 4A Page 57 of 176
In the Name box, specify name of the disk library.
From the MediaAgent list, select the MediaAgent.
Perform one of the following:
Select Local Path if you wish to specify a local path in the MediaAgent computer.
In the Disk Device box, type the name of the folder in which the disk library must located or click button to select the folder.
Select Network Path, if you wish to specify a network path as the target share.
In the Connect As box, type the user name.
In the Password and Verify Password box, type the password to access the network share.
In the Folder box, type the mount path or click button to select a mount path.
Click OK.
3. The newly created disk library will be displayed under Libraries node.
This will create a library and Storage Policy. Click to proceed to the Configuration section.
Storage Policy Creation
1. From the CommCell Browser, navigate to Policies.
2. Right-click the Storage Policies and then click New Storage Policy.
3. Follow the prompts displayed in the Storage Policy Wizard. The required options are mentioned below:
Select the Storage Policy type as Data Protection and Archiving and click Next.
Enter the name in the Storage Policy Name box and click Next.
From the Library list, click the name of a disk library to which the primary copy should be associated and then click Next.
Ensure that you select a library attached to a MediaAgent operating in the current release.
From the MediaAgent list, click the name of a MediaAgent that will be used to create the primary copy and then click Next.
For the device streams and the retention criteria information, click Next to accept default values.
Select Yes to enable deduplication for the primary copy.
From the MediaAgent list, click the name of the MediaAgent that will be used to host the Deduplication Database (DDB).
In the Location box, type the name of the folder in which the DDB must be located or click the Browse button to select the folder and then click Next.
Review the details and click Finish to create the Storage Policy.
This will create a storage policy. Click to proceed to the Configuration section.
Published On: 11/19/2013 V10 Service Pack 4A Page 58 of 176
Custom Package
Create a compact software package for quick deployment to multiple clients.
Remote Install
Deploy the software from CommCell Console on multiple clients.
Silent Install
Deploy the software silently on multiple clients.
Additional Installation Methods
Published On: 11/19/2013 V10 Service Pack 4A Page 59 of 176

Getting Started - Sybase iDataAgent
Once the Sybase iDataAgent is installed, configure the Sybase Server and subclient as follows:
From the CommCell Browser, navigate to Client Computers | <Client>.
Right-click Sybase, point to All Tasks, and then click New Sybase Server.
In the Server Name box, type the Sybase server name. The Sybase server name should exactly be the same as the name existing in interface file and sysservers table.
For Unix:
In the SA User Name box, type the Sybase administrator user name.
In the Account Password box, type the account password for the Sybase administrator user account.
In the Confirm Password box, re-type the password.
For Windows:
In the User Name box, type the name of the local administrator with Sybase sysadmin role privileges in the following format:
Domain\user (if domain exists) or
Computer name\user” (where user is a local administrator).
Type the password in the Account Password box and retype the password in Confirm Password box.
Click OK.
Deployment - Windows Deployment - Unix Deployment - Cluster Configuration Backup Restore
Published On: 11/19/2013 V10 Service Pack 4A Page 60 of 176

In the Sybase Home box, type the path to the directory where the Sybase application files reside. Alternatively, click Browse to select the location.
In the Sybase ASE box, type the directory name where you installed Adaptive Server Enterprise (ASE) environment variable.
You can view the path to the ASE directory in .env file residing in the Sybase home directory.
In the Sybase OCS box, type the Sybase Open Client Server (OCS )environment variable.
You can view this variable in sybase.env file residing in home directory.
In the Configuration File box, type the path to the configuration file. Alternatively, click Browse to select the location.
In the Shared Memory Directory box, type the location of the directory where you specify the shared memory file name. When you start an Adaptive Server, it creates a shared memory file that resides in the home directory. for example: /opt/sybase/ASE-15_0. Alternatively, click Browse to select the location.
Published On: 11/19/2013 V10 Service Pack 4A Page 61 of 176
Specify a value in the Block Size box.
In the Default Database Storage Policy box, select the storage policy name.
For Unix:
In the User Name box, type the name of the local administrator with Sybase sysadmin role.
Click OK.
For Windows:
In the User Name box, type the name of the local administrator with Sybase sysadmin role privileges.
In the Account Password box, type the password for the user account.
In the Confirm Password box, re-type the password.
Click OK.
From the CommCell Browser, navigate to Client Computers | <Client> | Sybase iDataAgent.
Right-click the <Instance>, and then click Properties.
Select the Backup Server from the list.
Click OK.
From the CommCell Browser, navigate to Client Computers | <Client> | Sybase | <Instance>.
Right-click the default Subclient, and then click Properties.
Click the Storage Device tab.
In the Storage Policy box, select the storage policy.
Click OK.
Click to continue. If you do not have Storage Policy created, follow the step given below to create a storage policy.
Click Create Storage Policy.
Follow the prompts displayed in the Create Storage Policy Wizard. The required options are mentioned below:
Select the Storage Policy type as Data Protection and Archiving and click Next.
Enter the name in the Storage Policy Name box and click Next.
From the Library list, click the name of a disk library to which the primary copy should be associated and then click Next. Ensure that you select a library attached to a MediaAgent operating in the current release.
From the MediaAgent list, click the name of a MediaAgent that will be used to create the primary copy and then click Next.
Published On: 11/19/2013 V10 Service Pack 4A Page 62 of 176

For the device streams and the retention criteria information, click Next to accept default values.
Select Yes to enable deduplication for the primary copy and then click Next.
From the MediaAgent list, click the name of the MediaAgent that will be used to host the Deduplication Database.
In the Location box, type the name of the folder in which the deduplication database must be located, and then click Next.
Review the details and click Finish to create the Storage Policy.
Back to top
Published On: 11/19/2013 V10 Service Pack 4A Page 63 of 176
Getting Started - Sybase iDataAgent
1. From the CommCell Browser, navigate to Client Computers | <Client> | Sybase | <Instance>.
Right-click the default subclient and click Backup.
2. Click Full as backup type and then select Immediate.
Click OK.
3. You can track the progress of the job from the Job Controller window of the CommCell console.
4. Once the job is complete, view the job details from the Backup History. Right-click the Subclient and select Backup History.
Deployment - Windows Deployment - Unix Deployment - Cluster Configuration Backup Restore
WHAT GETS BACKED UP WHAT DOES NOT GET BACKED UPSybase system databases
Sybase user databases
Transaction logs
Sybase application files
Operating system data
Use the File System iDataAgent to back up the above mentioned components.
Published On: 11/19/2013 V10 Service Pack 4A Page 64 of 176

5. Click OK.
6. Right-click the job to:
Browse the database that was backed up.
View Failed Items.
Resubmit the job.
View job details.
View media associated with the job.
View events associated with the job.
View or send the log file that is associated with the job.
Published On: 11/19/2013 V10 Service Pack 4A Page 65 of 176
Back to top
Published On: 11/19/2013 V10 Service Pack 4A Page 66 of 176
Getting Started Restore - Sybase iDataAgent
As restoring your backup data is very crucial, it is recommended that you perform a restore operation immediately after your first full backup to understand the process. The following section explain the steps for restoring a database.
1. From the CommCell Browser, navigate to Client Computers | <Client> | Sybase.
Right-click the <Instance>, point to All Tasks, and then click Browse and Restore.
2. Click the Advanced Options tab.
Select the MediaAgent that was used during the storage policy creation from the Use MediaAgent drop-down list. This MediaAgent should be the one you installed along with your agent.
Click View Content.
Deployment - Windows Deployment - Unix Deployment - Cluster Configuration Backup Restore
Published On: 11/19/2013 V10 Service Pack 4A Page 67 of 176
3. In the right pane of the window, select one or more databases that you wish to restore.
Click Recover All Selected.
4. Click OK.
Published On: 11/19/2013 V10 Service Pack 4A Page 68 of 176
5. You can monitor the progress of the restore job in the Job Controller.
6. Once the restore job has completed, right-click the agent or <instance>, point to View and click Restore History.
7. Click OK.
Published On: 11/19/2013 V10 Service Pack 4A Page 69 of 176

8. You can view the following details about the job by right-clicking the job:
View Restore Items - You can view them as Successful, Failed, Skipped or All.
View Job Details
View Events of the restore job.
View and send Log files of the restore job
Resubmit the restore job
Congratulations - You have successfully completed your first backup and restore.
If you want to further explore this Agent's features read the Advanced sections of this documentation.
Back to top
Published On: 11/19/2013 V10 Service Pack 4A Page 70 of 176
Advanced Configuration - Sybase iDataAgent
Understanding the CommCell Console
Managing the Sybase ServerAdding a New Sybase ServerChanging the Sybase Home DirectoryChanging the Backup ServerConfiguring the Environment VariablesChanging the Configuration FileChanging the Shared Memory DirectoryChanging the Block Size
Manually Creating a Master Database
Managing SubclientsCreating a User-Defined Subclient to Backup Specific DatabasesEnabling/Disabling Automatic Discovery of Databases to the Default SubclientManually Discovering Databases
Configuring Sybase SQL AnywhereConfiguring Image BackupConfiguring Dump Backup
Configuring User Accounts for BackupsAt the Client Computer Group Level
Configuring Streams for Backups
Configuring Sybase ASE Cluster for a Single Node
Modifying an Agent, Instance, or Subclient
Deleting an Agent, Instance, or SubclientDeleting an AgentDeleting an InstanceDeleting a Subclient
The Sybase iDataAgent uses the following logical entities to manage backup and restore operations from the CommCell Console.
Agent
Facilitates the creation of Sybase Server instance.
Instance
Defines the Sybase Server to be backed up.
Subclient
Defines the Sybase databases to be backed up.
Table of Contents
Understanding the CommCell Console
Published On: 11/19/2013 V10 Service Pack 4A Page 71 of 176

In the CommCell Console each instance references a Sybase server. Hence it is necessary to create an instance for each Sybase Server to be backed up. You can manage your server/instance as described in the following sections:
Adding a New Sybase Server
Whenever a new Sybase Server is created on the client, you will add the Sybase Server to the CommCell using the following steps:
1. From the CommCell Browser, navigate to Client Computers | <Client>.
2. Right-click Sybase, point to All Tasks, and then click New Sybase Server.
3. In the Server Name box type the Sybase server name.
4. In the SA User Name box, type the Sybase administrator user name with the permissions to perform data protection, recovery and administrative operations.
In the Account Password box, type the account password for the Sybase administrator user account.
In the Confirm Password box, re-type the password.
5. In the Sybase Home box, type the path to the directory where the Sybase application files reside. Alternatively, click Browse to select the location.
6. In the Sybase ASE box, type the directory name where you installed Adaptive Server Enterprise (ASE) environment variable.
You can view the path to the ASE directory in .env file residing in the Sybase home directory.
7. In the Sybase OCS box, type the Sybase Open Client Server (OCS )environment variable.
You can view this variable in sybase.env file residing in home directory.
8. In the Configuration File box, type the path to the configuration file. Alternatively, click Browse to select the location.
9. In the Shared Memory Directory box, type the location of the directory where you specify the shared memory file name. When you start an Adaptive Server, it creates a shared memory file that resides in the home directory. for example: /opt/sybase/ASE-15_0. Alternatively, click Browse to select the location.
10. Specify a value in the Block Size box.
11. In the Default Database Storage Policy box, select the storage policy.
12. For Unix, in the User Name box, type the name of the user with read and write permissions to Data Protection Suite Software Installation Directory, client registry directory, Sybase software installation directories and Sybase database devices directories.
Managing the Sybase Server
Published On: 11/19/2013 V10 Service Pack 4A Page 72 of 176
Click OK.
For Windows:
In the User Name box, type the name of the local administrator with Sybase sysadmin role privileges in the following format:
Domain\user (if domain exists) or
Computer name\user” (where user is a local administrator).
Type the password in the Account Password box and retype the password in Confirm Password box.
Click OK.
Published On: 11/19/2013 V10 Service Pack 4A Page 73 of 176

13. From the CommCell Browser, navigate to Client Computers | <Client> | Sybase iDataAgent.
14. Right-click the <Instance>, and then click Properties.
15. Select the Backup Server from the list.
16. Click OK.
Changing the Sybase Home Directory
Sybase HOME directory refers to the location where the Sybase application resides. You can modify the home path location for an instance at any point of time. Use the following steps to change the Sybase HOME directory:
1. From the CommCell Browser, navigate to Client Computers | <Client> | Sybase iDataAgent.
2. Right-click the <Instance>, and then click Properties
3. In the Sybase Home box, type the path to the Sybase application. Alternatively, click Browse to select the location.
4. Click OK.
Published On: 11/19/2013 V10 Service Pack 4A Page 74 of 176

Changing the Backup Server
If a backup server that is associated to a Sybase server instance reaches its maximum storage capacity even after compressing your earlier backups, you can change the backup server to enhance your backup and restore jobs.
Use the following steps to change the backup server:
1. From the CommCell Browser, navigate to Client Computers | <Client> | Sybase iDataAgent.
2. Right-click the <Instance>, and then click Properties.
3. From the Backup Server list, select the backup server name.
4. Click OK.
Published On: 11/19/2013 V10 Service Pack 4A Page 75 of 176
Configuring the Environment Variables
By default, the Sybase ASE (Adaptive Server Enterprise) server library and Open Client Server (OCS )environment variable are located under the Sybase ASE server home directory. Use the following steps to configure Sybase environment variables:
1. From the CommCell Browser, navigate to Client Computers | <Client> | Sybase iDataAgent.
2. Right-click the <Instance>, and then click Properties
3. In the Sybase ASE box, type the Sybase ASE server directory.
4. In the Sybase OCS box, type the Sybase OCS environment variable.
5. Click OK.
Published On: 11/19/2013 V10 Service Pack 4A Page 76 of 176
Changing the Configuration File
Use the following steps to change the location of the configuration file:
1. From the CommCell Browser, navigate to Client Computers | <Client> | Sybase iDataAgent.
2. Right-click the <Instance>, and then click Properties
3. In the Configuration File box, type the path to the configuration file. Alternatively, click Browse to select the location.
4. Click OK.
Published On: 11/19/2013 V10 Service Pack 4A Page 77 of 176
Changing the Shared Memory Directory
Sybase uses shared memory for inter process communication and caching the data. Use the following steps to change the location of the shared memory directory:
1. From the CommCell Browser, navigate to Client Computers | <Client> | Sybase iDataAgent.
2. Right-click the <Instance>, and then click Properties
3. In the Shared Memory Directory box, type the path to the Shared memory directory. Alternatively, click Browse to select the location.
4. Click OK.
Published On: 11/19/2013 V10 Service Pack 4A Page 78 of 176
By default, the block size is not specified in the dump command and will use the Sybase server's default block size. You can specify a block size (4096 X N), overriding the default block size. For example, if the Sybase server's default block size is 2k (2048), then you can specify the block size as (2048 x N). Note that the Maximum block size allowed is 32768 (32 K).
Use the following steps to specify the block size (overriding the default block size) for Sybase backup:
1. From the CommCell Browser, navigate to Client Computers | <Client> | Sybase iDataAgent.
2. Right-click the <Instance>, and then click Properties.
3. In the Block Size box, specify the block size.
4. Click OK.
Changing the Block Size
Published On: 11/19/2013 V10 Service Pack 4A Page 79 of 176
When you restore an entire Sybase server or a master database, it is highly recommended to select Sybase create devices. However, you can also create a master database manually and then perform a restore without selecting Sybase create devices.
Use the following steps to manually create a master database:
1. First, you need to shut down the Sybase server.
2. Execute the command to remove the old device (master.dat).
Example:
/oradata/sybase/syb1503/ASE-15_0/bin/dataserver -s S1503LNX -b200M -f -z 2048 -d /oradata/sybase/syb1503/data/master.dat -c /oradata/sybase/syb1503/ASE-15_0/S1503LNX.cfg
3. Execute the command to start the Sybase server
Example:
./startserver –f RUN_S1503LNX
4. Execute the command to alter the master database
Example:
alter database master on master="87M"
5. Restart the Sybase server.
You can perform the Master Database Restore to verify that the master database is restored without a password.
Manually Creating a Master Database
Published On: 11/19/2013 V10 Service Pack 4A Page 80 of 176
When you create an instance, a default subclient is automatically created. The default subclient includes all the databases associated with that instance. If a new database is added to the instance, then that database is automatically assigned to the content of the default subclient. However, you can create user-defined subclients to backup individual or a group of databases.
Creating a User defined Subclient to Backup Specific Databases
If you want to back up groups of specific databases, you can do so by creating a user-defined subclient containing any number of databases that exist within the instance. This is useful if you want to back up a subset of databases at certain times or with a particular frequency.
If you want to divide your backups into smaller groups, you can do so by creating user-defined subclients using the following steps:
1. From the CommCell Browser, navigate to Client Computers | <Client> | Sybase iDataAgent.
2. Right-click the <Instance>, point to All Tasks, and then click New Subclient.
3. In the Subclient Name box, type the subclient name.
4. Click the Content tab.
5. Click Configure.
6. Click Discover to discover the Sybase databases.
7. Click the Subclient Name column adjacent to the existing databases, and then select the desired subclient from the drop-down list.
Repeat this step to assign the available databases to the user-defined subclient.
8. Click OK.
Managing Subclients
Published On: 11/19/2013 V10 Service Pack 4A Page 81 of 176
9. Click the Storage Device tab.
10. In the Storage Policy box, select the storage policy.
11. Click OK.
Published On: 11/19/2013 V10 Service Pack 4A Page 82 of 176
Enabling/Disabling Automatic Discovery of Databases to the default Subclient
When an automatic database discovery is enabled, all the existing Sybase databases are discovered automatically on the default subclient when a backup job is submitted. If any new databases are added after a previous backup, these newly added databases will be automatically discovered on the default subclient when a backup job is performed.
Use the following steps to enable automatic database discovery:
1. From the CommCell Browser, navigate to Client Computers | <Client> | Sybase iDataAgent.
2. Right-click the <Instance>, and then click Properties.
3. Select the Enable Auto Discovery check box.
4. Click OK.
Manually Discovering Databases
Whenever a backup job is initiated, newly created Sybase databases are discovered automatically on the default subclient. However, for a user-defined subclient, you need to manually discover the databases prior to running any backup jobs. Use the following steps to manually discover the Sybase databases:
1. From the CommCell Browser, navigate to Client Computers | <Client> | Sybase iDataAgent | <Instance>.
2. Right-click the desired <subclient> and then click Properties.
3. Click the Content tab.
4. Click Configure.
5. Click Discover to discover the Sybase databases.
Published On: 11/19/2013 V10 Service Pack 4A Page 83 of 176
6. Click the Subclient Name column adjacent to the desired database, and then select the desired subclient from the drop-down list.
7. Click OK.
Sybase's SQL Anywhere supports two types of backup:
Image Backup
Dump Backup
Image backup creates a copy of the database file and/or transaction log file. each of these database and transaction log files are created as separate files.
Dump database creates a SQL file that contains all the commands to rebuild the database.
You must install the SQL Anywhere client and server binaries on the client computer before configuring and performing SQL Anywhere backups and restores. However, you must use Data Protection Suite's file system iDataAgent to manage the subclients and perform backups and restores for Sybase's SQL Anywhere.
Configuring Image Backup
If you want to perform both data and log backups, then you must create two separate sub clients for database files and transaction log backups.
Creating a subclient for Database backup:
Use the following steps to create a subclient for database backups:
1. From the CommCell Browser, navigate to Client Computers | <Client> | File System iDataAgent.
2. Right-click the <BackupSet>, point to All Tasks, and then click New Subclient.
Configuring Sybase SQL Anywhere
Published On: 11/19/2013 V10 Service Pack 4A Page 84 of 176

3. In the Subclient Name box, type the subclient name.
4. Click the Storage Device tab.
5. In the Storage Policy box, select the storage policy.
6. Click the Pre/Post Process tab.
7. Click Browse to locate the data directory path and add the script for database backup.
The script should contain the dbbackup command. This command should include the data backup directory path to backup database files as a pre-scan process.
Published On: 11/19/2013 V10 Service Pack 4A Page 85 of 176

8. Click the Content tab.
9. Click Add Paths.
10. Add the local path for data backups and click OK.
Published On: 11/19/2013 V10 Service Pack 4A Page 86 of 176

11. Click OK to create a subclient for data backup. Perform FULL backups of this subclient at periodic intervals.
The Database backup script for UNIX and Windows based file systems will be as follows:
where
-d : Performs database and user defined dbspace file backup. The transaction file will not be included.
-y : Creates the backup directory or replaces a previous backup file in the directory without confirmation. If you want to be prompted when an attempt is made to overwrite an existing file, do not specify -s or -y.
Example (UNIX:):
Example (Windows):
Creating a subclient for Log backup:
Use the following steps to create a subclient for log backups:
1. From the CommCell Browser, navigate to Client Computers | <Client> | File System iDataAgent.
dbbackup -d -y -o <log output file> -c "<connect string>" <backup-directory>
dbbackup -d -y -o /temp/SqlAnywhereBackup.log -c "eng=demo11;dbn=mydb;uid=dba;pwd=sql;LINKS=ALL" /dataBackup/full
dbbackup -d -y -o c:\temp\SqlAnywhereBackup.log -c "eng=demo11;dbn=mydb;uid=dba;pwd=sql;LINKS=ALL" d:\dataBackup
Published On: 11/19/2013 V10 Service Pack 4A Page 87 of 176

2. Right-click the <BackupSet>, point to All Tasks, and then click New Subclient.
3. In the Subclient Name box, type the subclient name.
4. Click the Storage Device tab.
5. In the Storage Policy box, select the storage policy.
6. Click the Pre/Post Process tab.
7. Click Browse to locate the log directory path and add the script for log backup.
The script should contain the dbbackup command. This command should include the log backup directory path to backup the transaction log files as a pre-scan process.
Published On: 11/19/2013 V10 Service Pack 4A Page 88 of 176
8. Click the Content tab.
9. Click Add Paths.
10. Add the local path for log backups and click OK.
Published On: 11/19/2013 V10 Service Pack 4A Page 89 of 176
11. Click OK to create a subclient for log backup. Perform Incremental backups for this subclient at periodic intervals as the system will pick up only the recent transaction log copies generated in the log backup directory.
The log backup script for UNIX and Windows based file systems will be as follows:
where
-t : Backup transaction log.
-r : Rename and restart the transaction log.
-n : Rename local backup of transaction log to match server.
-x : Delete/truncate the transaction log
-y : Creates the backup directory or replaces a previous backup file in the directory without confirmation. If you want to be prompted when an attempt is made to overwrite an existing file, do not specify -s or -y.
Example (UNIX):
Example (Windows):
dbbackup -d -y -o <log output file> -c "<connect string>" -r -t -n < log-backup-directory>
dbbackup -d -y -o /temp/SqlAnywhereBackup.log -c "eng=demo11;dbn=mydb;uid=dba;pwd=sql;LINKS=ALL" -r -t -n /databackup/logBackup
dbbackup -d -y -o c:\temp\SqlAnywhereBackup.log -c "eng=demo11;dbn=mydb;uid=dba;pwd=sql;LINKS=ALL" -r -t -n d:\logBackup
Published On: 11/19/2013 V10 Service Pack 4A Page 90 of 176

Configuring Dump Backup
Use the following steps to create a subclient for dump backups:
1. From the CommCell Browser, navigate to Client Computers | <Client> | File System iDataAgent.
2. Right-click the <BackupSet>, point to All Tasks, and then click New Subclient.
3. In the Subclient Name box, type the subclient name.
4. Click the Storage Device tab.
5. In the Storage Policy box, select the storage policy.
6. Click the Pre/Post Process tab.
7. Click Browse to locate the dump directory path and add the script for dump backup.
The script should contain the dbunload command. Use the dbunload utility to obtain the SQL dump of the database, which can be
Published On: 11/19/2013 V10 Service Pack 4A Page 91 of 176
used to rebuild the database. The dbunload command should include the output dump directory as a pre-scan process.
8. Click the Content tab.
9. Click Add Paths.
10. Add the path for the reload SQL file and dump data directory to the sub-client content and click OK.
Published On: 11/19/2013 V10 Service Pack 4A Page 92 of 176
11. Click OK to create a subclient for dump backup. Perform the backups of this subclient at periodic intervals.
The dump backup script for UNIX and Windows based file systems will be as follows:
where
-r : Name of the generated reload ISQL command file (default "reload.sql")
Example (UNIX):
Example (Windows):
The Sybase iDataAgent requires two user accounts to access the Sybase application and database to perform backup and restore operations:
Database user account with administrator privileges.
dbunload -c "Connect-String" -r <dump-file-name> <directory-to-dump-data>
dbunload -y -c "eng=demo11;dbn=mydb;uid=dba;pwd=sql;LINKS=ALL" -r /temp/myDBReload.sql /temp/dataDump
dbunload -y -c "eng=demo11;dbn=mydb;uid=dba;pwd=sql;LINKS=ALL" -r d:\myDBReload.sql D:\dataDump
Configuring User Accounts for Backups
Published On: 11/19/2013 V10 Service Pack 4A Page 93 of 176
On Unix computers, the account information for accessing the database is provided during the Sybase iDataAgent installation.
On Windows computers, the account information is provided during the instance configuration after the installation of the Agent.
Operating system account with privileges to access the Sybase application.
The following table illustrates the required user account privileges for backup and restore operations:
Use the following steps to change the user account for accessing the Sybase instance:
1. From the CommCell Browser, navigate to Client Computers | <Client> | Sybase.
2. Right-click the <Instance> and click Properties.
3. Click the Accounts tab.
4. Type the user name in the User Name box.
5. Type the SA user name in the SA User Name box.
6. Type the password in the SA Account Password box and retype it in the SA Confirm Password box.
7. Click OK.
OPERATIONS USER ACCOUNT NEEDED:Create Sybase server Sybase database administrator account (SA role)Backup Sybase database and Restore non-system databases
Operating system user account (operator role) with access to all the databases in an instance.
Restore Sybase system databases
Sybase database administrator account (SA role)
Published On: 11/19/2013 V10 Service Pack 4A Page 94 of 176
At the Client Computer Group Level
This user account will be used for all computers within a Client Computer Group. Configure the user account at this level if different users will be conducting backup and restore operations for each Client Computer Group in your organization. This user account will override the user account configured at the CommCell level.
1. From the CommCell Browser, navigate to the Client Computer Groups node.
2. Verify that all the Agent clients for which you wish to configure the user account are included in the Client Computer Groups.
3. Right-click the <Client Group> and click Properties.
4. Click the Advanced Settings tab.
5. Click the Override higher levels settings check box.
6. Select one of the following:
Use Local System Account, if the computer's Administrator account contains the required privileges.
Impersonate User, if you want to use a different account that contains the required privileges. Type the User Name and Password for this account in the space provided.
7. Click OK.
By default, backup data is sent to media in two streams. This means that a database is sent to media during a backup in two parallel waves. This results in backup taking about half the time to complete as it otherwise would if only one stream is used.
You can increase the number of streams used for backups for a particular subclient provided the number of streams does not exceed the maximum number configured in the subclient storage policy. Increasing the number of streams for a subclient further reduces the amount of time a backup takes to complete. For example, increasing the number of streams from 2 to 3 enhances backup time from one-half that of a single stream to one-third.
Note that the same number of streams used for performing a backup will be needed to restore the data.
1. From the CommCell Browser, navigate to Client Computers | <Client>| Sybase | <Instance>.
2. Right-click the <Subclient>, and then click Properties.
3. Click the Storage Device tab.
4. In the Number of Data Backup Streams box, type or select the number of data backup streams.
5. Click OK.
Configuring Streams for Backups
Published On: 11/19/2013 V10 Service Pack 4A Page 95 of 176
You need to specify the path of the Quorum device which is usually a raw device to backup Sybase ASE cluster for a single node.
For example, if Sybase instance name is asece1 and the raw device path is /dev/sdb1, then you need to specify the registry key as follows under Sybase Agent:
Use the following steps to detect and configure the path of the Quorum device for the Sybase instance:
1. From the CommCell Browser, navigate to Client Computers.
2. Right-click the <Client> to be configured and then click Properties.
3. Click Advanced.
4. Click the Additional Settings tab and then click Add.
5. In the Name field, type <Sybase Instance Name>_QuorumDevice and click Lookup.
6. In the Value field, type the path of the Quorum device.
7. Click OK.
Configuring Sybase ASE Cluster for a Single Node
asece1_QuorumDevice /dev/sdb1
Published On: 11/19/2013 V10 Service Pack 4A Page 96 of 176
There are several configurable properties available for your agent that can be modified from the agent, instance, or subclient level as per need.
It is recommended that that you do not modify the properties of a subclient when a job is in progress for that specific subclient. If a job is in progress, either wait for the job to complete or kill the job from the Job Controller.
The following table describes the properties that can configured from the agent, instance, and subclient levels.
Modifying an Agent, Instance, or Subclient
OPTION DESCRIPTION RELATED TOPICS
Change Storage Policies
You can modify the storage policies in any of the following situations: To include a different media for the backup operation. To use a storage policy with a different retention criteria.
You can change the storage policies from the subclient level.
1. From the CommCell Browser, right-click the subclient.
2. Click Properties.
3. Click Storage Device.
4. Select the Storage policy from the drop-down menu.
5. Click OK.
Refer to Storage Policies.
Rename a SubclientYou can rename a subclient:
1. From the CommCell Browser, right-click the subclient.
2. Click Properties.
3. Type the new name in the Subclient name field.
4. Click OK. Data Transfer Options You can efficiently configure the available resources for transferring data secured
by data protection operations from the subclient level. This includes the following: Enable or disable Data Compression either on the client or the MediaAgent. Configure the transfer of data in the network using the options for Network Bandwidth Throttling and Network Agents.
You can configure the data transfer options.
1. From the CommCell Browser,right-click the subclient.
2. Click Properties.
3. Click Storage Device.
Refer to Data Compressionand Network Bandwidth Throttling.
Published On: 11/19/2013 V10 Service Pack 4A Page 97 of 176
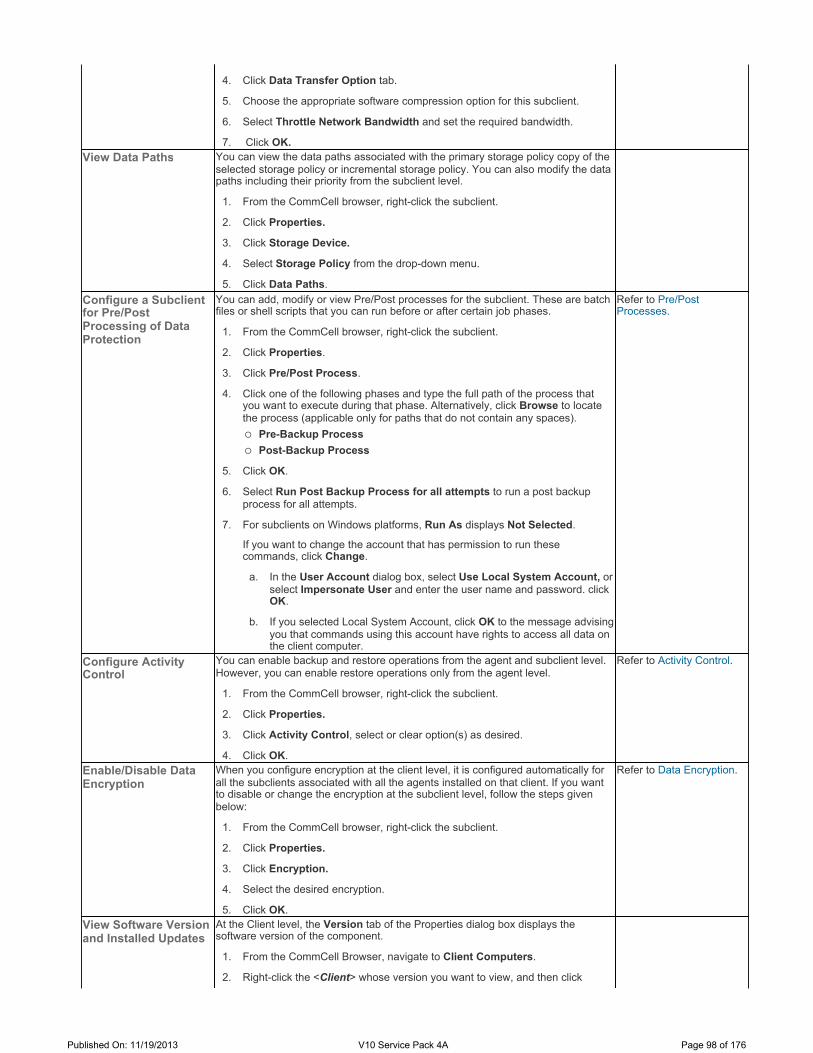
4. Click Data Transfer Option tab.
5. Choose the appropriate software compression option for this subclient.
6. Select Throttle Network Bandwidth and set the required bandwidth.
7. Click OK.View Data Paths You can view the data paths associated with the primary storage policy copy of the
selected storage policy or incremental storage policy. You can also modify the data paths including their priority from the subclient level.
1. From the CommCell browser, right-click the subclient.
2. Click Properties.
3. Click Storage Device.
4. Select Storage Policy from the drop-down menu.
5. Click Data Paths. Configure a Subclient for Pre/Post Processing of Data Protection
You can add, modify or view Pre/Post processes for the subclient. These are batch files or shell scripts that you can run before or after certain job phases.
1. From the CommCell browser, right-click the subclient.
2. Click Properties.
3. Click Pre/Post Process.
4. Click one of the following phases and type the full path of the process that you want to execute during that phase. Alternatively, click Browse to locate the process (applicable only for paths that do not contain any spaces).
Pre-Backup ProcessPost-Backup Process
5. Click OK.
6. Select Run Post Backup Process for all attempts to run a post backup process for all attempts.
7. For subclients on Windows platforms, Run As displays Not Selected.
If you want to change the account that has permission to run these commands, click Change.
a. In the User Account dialog box, select Use Local System Account, or select Impersonate User and enter the user name and password. click OK.
b. If you selected Local System Account, click OK to the message advising you that commands using this account have rights to access all data on the client computer.
Refer to Pre/Post Processes.
Configure Activity Control
You can enable backup and restore operations from the agent and subclient level. However, you can enable restore operations only from the agent level.
1. From the CommCell browser, right-click the subclient.
2. Click Properties.
3. Click Activity Control, select or clear option(s) as desired.
4. Click OK.
Refer to Activity Control.
Enable/Disable Data Encryption
When you configure encryption at the client level, it is configured automatically for all the subclients associated with all the agents installed on that client. If you want to disable or change the encryption at the subclient level, follow the steps given below:
1. From the CommCell browser, right-click the subclient.
2. Click Properties.
3. Click Encryption.
4. Select the desired encryption.
5. Click OK.
Refer to Data Encryption.
View Software Version and Installed Updates
At the Client level, the Version tab of the Properties dialog box displays the software version of the component.
1. From the CommCell Browser, navigate to Client Computers.
2. Right-click the <Client> whose version you want to view, and then click
Published On: 11/19/2013 V10 Service Pack 4A Page 98 of 176
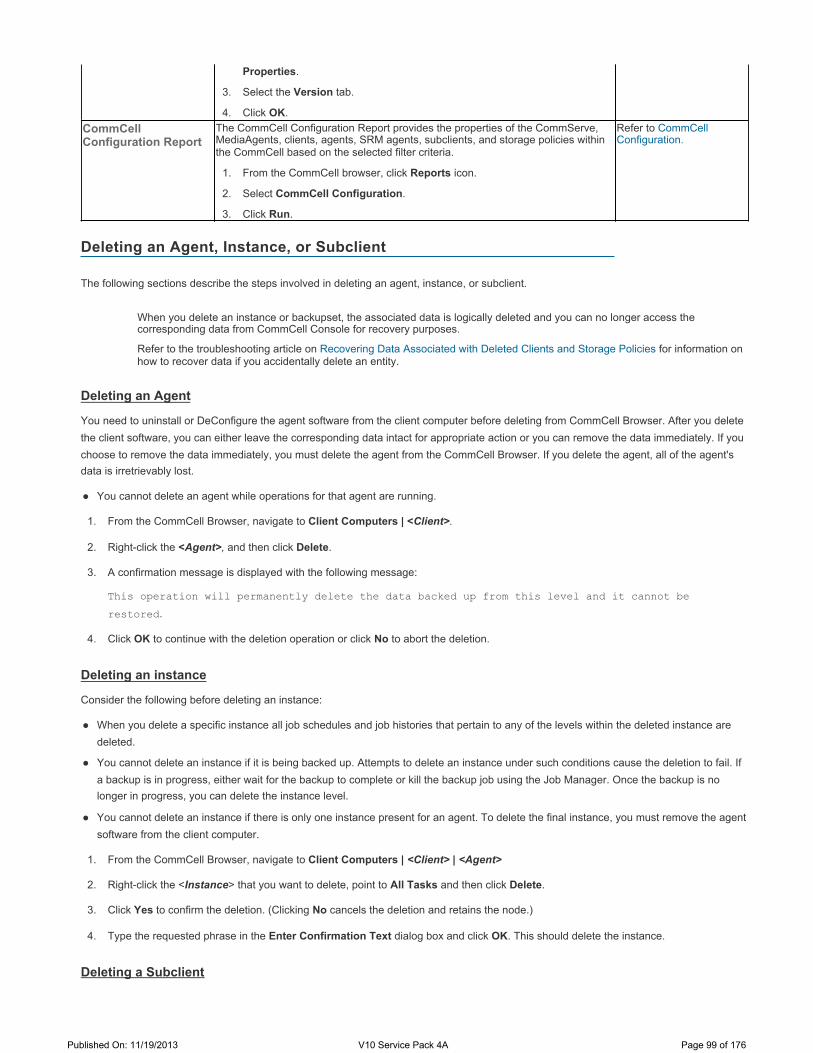
The following sections describe the steps involved in deleting an agent, instance, or subclient.
Deleting an Agent
You need to uninstall or DeConfigure the agent software from the client computer before deleting from CommCell Browser. After you delete the client software, you can either leave the corresponding data intact for appropriate action or you can remove the data immediately. If you choose to remove the data immediately, you must delete the agent from the CommCell Browser. If you delete the agent, all of the agent's data is irretrievably lost.
You cannot delete an agent while operations for that agent are running.
1. From the CommCell Browser, navigate to Client Computers | <Client>.
2. Right-click the <Agent>, and then click Delete.
3. A confirmation message is displayed with the following message:
This operation will permanently delete the data backed up from this level and it cannot be restored.
4. Click OK to continue with the deletion operation or click No to abort the deletion.
Deleting an instance
Consider the following before deleting an instance:
When you delete a specific instance all job schedules and job histories that pertain to any of the levels within the deleted instance are deleted.
You cannot delete an instance if it is being backed up. Attempts to delete an instance under such conditions cause the deletion to fail. If a backup is in progress, either wait for the backup to complete or kill the backup job using the Job Manager. Once the backup is no longer in progress, you can delete the instance level.
You cannot delete an instance if there is only one instance present for an agent. To delete the final instance, you must remove the agent software from the client computer.
1. From the CommCell Browser, navigate to Client Computers | <Client> | <Agent>
2. Right-click the <Instance> that you want to delete, point to All Tasks and then click Delete.
3. Click Yes to confirm the deletion. (Clicking No cancels the deletion and retains the node.)
4. Type the requested phrase in the Enter Confirmation Text dialog box and click OK. This should delete the instance.
Deleting a Subclient
Properties.
3. Select the Version tab.
4. Click OK. CommCell Configuration Report
The CommCell Configuration Report provides the properties of the CommServe, MediaAgents, clients, agents, SRM agents, subclients, and storage policies within the CommCell based on the selected filter criteria.
1. From the CommCell browser, click Reports icon.
2. Select CommCell Configuration.
3. Click Run.
Refer to CommCell Configuration.
Deleting an Agent, Instance, or Subclient
When you delete an instance or backupset, the associated data is logically deleted and you can no longer access the corresponding data from CommCell Console for recovery purposes.
Refer to the troubleshooting article on Recovering Data Associated with Deleted Clients and Storage Policies for information on how to recover data if you accidentally delete an entity.
Published On: 11/19/2013 V10 Service Pack 4A Page 99 of 176
Consider the following before deleting a subclient:
You cannot delete a default subclient.
Schedules associated with the subclient are also automatically deleted.
1. From the CommCell Browser, navigate to Client Computers | <Client> | <Agent> | <Instance>.
2. Right-click the <Subclient> that you want to delete, and then click Delete.
3. A confirmation message is displayed, asking if you want to delete the subclient.
Click No to cancel the deletion and retain the subclient, or click Yes to continue the deletion.
Back to top
Published On: 11/19/2013 V10 Service Pack 4A Page 100 of 176
Advanced Backup - Sybase iDataAgent
Full Backups
Transaction Log BackupsBacking Up Transaction Log of a Damaged Database (Do Not Truncate Logs)Skipping Full Backups after a Log Backup
Performing SQL Anywhere BackupsPerforming Image BackupPerforming Dump Backup
Scheduling a Backup
Managing JobsRestarting JobsControlling Jobs
Additional Options
Full backups provide the most comprehensive protection of data.
Backups for any client start with a full backup. The full backup becomes a baseline to which subsequent backup types are applied. For example, a full backup must be performed before an archive log backup can be initiated.
You can perform a full backup of an online or offline database. The default is online backup.
Use the following steps to run a full backup:
1. From the CommCell Browser, navigate to Client Computers | <Client> | Sybase | <Instance>.
2. Right-click the <Subclient> and click Backup.
3. Select Full as the backup type and click Immediate.
4. Click OK.
You can track the progress of the job from the Job Controller. When the backup job has completed, the Job Controller displays Completed.
A transaction log backup captures the transaction log which contains a record of all committed or uncommitted transactions. Transaction log backups are consistent with the start time of the backup.
The use of transaction log backups make point-in-time recovery possible. This is useful in the scenario of a database failure where it is unacceptable to lose any data and you want to restore to the point of failure. If you use only full backups, you will be able to restore to the time of the backup, but not to a point-in-time between backups.
Table of contents
Full Backups
Transaction Log Backups
Published On: 11/19/2013 V10 Service Pack 4A Page 101 of 176
A transaction log backup is similar to a traditional incremental backup you might perform on a file system because the transaction log backup contains only the new changes since the full or another transaction log backup.
Each time a transaction log is backed up it is truncated to the exact time of the backup. No checkpoint is issued at this time, therefore dirty pages are not written to disk before or after a transaction log backup. If there are dirty pages, any completed transactions will need to be rolled forward if a transaction log restore is performed. Any transactions that are not completed at the time a transaction log backup is performed are rolled back during a restore involving a transaction log backup.
Use the following steps to run a transaction log backup:
1. From the CommCell Browser, navigate to Client Computers | <Client> | Sybase | <Instance>.
2. Right-click the <Subclient> and click Backup.
3. Select Transaction Log as backup type.
4. Click Immediate.
5. Click OK.
You can track the progress of the job from the Job Controller. When the backup has completed, the Job Controller displays Completed.
Back Up Transaction Log of Damaged Database (Do Not Truncate Logs)
In Sybase server, some databases may not have log devices. By default, when you perform a log backup, the system performs log backups of those databases that possess transaction logs. Hence, it is necessary to perform a full backup after a log backup. A full backup will perform a backup of all databases irrespective of the fact that they may or may not possess transaction logs.
A full backup will automatically truncates and shrinks transaction logs to save space. This may not be acceptable if you experience a database failure and you want to restore to the point of failure. In this case, you will want to capture all transaction log events that have occurred since the last backup was run.
Use the following steps to disable log truncation during a backup:
1. From the CommCell Browser, navigate to Client Computers | <Client> | Sybase | <Instance>.
2. Right-click the <Subclient> and click Backup.
3. Select Transaction Log as backup type.
4. Select Do Not Truncate Log.
5. Click Immediate.
6. Click OK.
You can track the progress of the job from the Job Controller. When the backup has completed, the Job Controller displays Completed.
Published On: 11/19/2013 V10 Service Pack 4A Page 102 of 176
Skipping Full Backups after a Log Backup
It is necessary to perform a full backup after a log backup. However, you may not always need a full backup after a log backup. Use the following steps to skip a full backup immediately after a log backup:
1. From the CommCell Browser, navigate to Client Computers | <Client> | Sybase | <Instance>.
2. Right-click the <Subclient> and click Backup.
3. Select Transaction Log as backup type.
4. Select Sybase Skip Full after Log Backup (Sybase).
5. Click Immediate.
6. Click OK.
You can track the progress of the job from the Job Controller. When the backup has completed, the Job Controller displays Completed.
Use dbbackup utility to perform image backups. dbbackup creates a backup copy of all the files for a single database. The image backup created by the dbbackup utility consists of a separate file for each file that is backed up.
Use dbunload utility to to obtain the SQL dump of the database, which can later be used to rebuild the database. Use the file system iDataAgent to backup the obtained reload file and associated dumped data.
Performing Image Backup
Performing a SQL Anywhere Data backup:
You must perform FULL backups of the subclient created for SQL Anywhere image data backups. You can perform them manually or schedule them at periodic intervals.
Use the following steps to perform a full data backup:
1. From the CommCell Browser, navigate to Client Computers | <Client> | File System iDataAgent | <BackupSet>
2. Right-click the Subclient created for SQL Anywhere data backups, and click Backup.
Performing SQL Anywhere Backups
Published On: 11/19/2013 V10 Service Pack 4A Page 103 of 176
3. Select Full as the backup type and click Immediate.
4. Click OK.
You can track the progress of the job from the Job Controller. When the backup job has completed, the Job Controller displays Completed.
Performing a SQL Anywhere Log backup:
You must perform frequent Incremental backups of the subclient created for SQL Anywhere image log backups as the system will pick up only the recent transaction log copies generated in the log backup directory. You can perform them manually or schedule them at periodic intervals.
Use the following steps to perform an incremental log backup:
1. From the CommCell Browser, navigate to Client Computers | <Client> | File System iDataAgent | <BackupSet>
2. Right-click the Subclient created for SQL Anywhere log backups, and click Backup.
3. Select Incremental as the backup type and click Immediate.
4. Click OK.
You can track the progress of the job from the Job Controller. When the backup job has completed, the Job Controller displays Completed.
Published On: 11/19/2013 V10 Service Pack 4A Page 104 of 176
Performing Dump Backup
Perform the backups of the subclient created with obtained reload file and associated dumped data at periodic intervals.
Use the following steps to perform a dump backup:
1. From the CommCell Browser, navigate to Client Computers | <Client> | File System iDataAgent | <BackupSet>
2. Right-click the Subclient created for SQL Anywhere dump backups, and click Backup.
3. Select the backup type and click Immediate.
4. Click OK.
You can track the progress of the job from the Job Controller. When the backup job has completed, the Job Controller displays Completed.
Follow the steps given below to schedule a backup:
Scheduling a Backup
Published On: 11/19/2013 V10 Service Pack 4A Page 105 of 176
1. From the CommCell Browser, navigate to Client Computers | <Client> | Sybase.
2. Right-click the <Subclient> and click Backup.
3. Select the Backup type.
4. Click Schedule to schedule the backup for a specific time.
5. Click Configure to set the schedule for the backup job. The Schedule Details dialog is displayed.
6. Select the appropriate scheduling options. For example:
Click Weekly.
Check the days you want the run the backup job.
Change the Start Time to 9:00 PM.
Click OK to close the Schedule Details dialog.
Click OK to close the Backup Options dialog.
The backup job will execute as per the schedule.
Jobs can be managed in a number of ways. The following sections provide information on the different job management options available:
Restarting Jobs
Jobs that fail to complete successfully are automatically restarted based on the job restartability configuration set in the Control Panel. Keep in mind that changes made to this configuration will affect all jobs in the entire CommCell.
To Configure the job restartability for a specific job, you can modify the retry settings for the job. This will override the setting in the Control
Managing Jobs
Published On: 11/19/2013 V10 Service Pack 4A Page 106 of 176
Panel. It is also possible to override the default CommServe configuration for individual jobs by configuring retry settings when initiating the job. This configuration, however, will apply only to the specific job.
Configure Job Restartability at the CommServe Level
1. From the CommCell Browser, click Control Panel icon.
2. Select Job Management.
3. Click Job Restarts tab and select a Job Type.
Select Restartable to make the job restartable.
Change the value for Max Restarts to change the maximum number of times the Job Manager will try to restart a job.
Change the value for Restart Interval (Mins) to change the time interval between attempts for the Job Manager to restart the job.
4. Click OK.
Configure Job Restartability for an Individual Job
1. From the CommCell Browser, navigate to Client Computers | <Client> | Sybase | <Instance>.
2. Right-click the <Subclient> and click Backup.
3. Click Advanced.
4. In the Advanced Backup Options dialog box, click the Job Retry tab.
5. Select Enable Total Running Time and specify the maximum elapsed time before a job can be restarted or killed.
Select Kill Running Jobs When Total Running Time Expires to kill the job after reaching the maximum elapsed time.
6. Select Enable Number Of Retries and specify the number of retries.
7. Click OK.
Backup jobs for this Agent are resumed from the point-of-failure.
Published On: 11/19/2013 V10 Service Pack 4A Page 107 of 176
Controlling Jobs
The following controls are available for running jobs in the Job Controller window:
Suspending a Job
1. From the Job Controller of the CommCell Console, right-click the job and select Suspend.
2. The job status may change to Suspend Pending for a few moments while the operation completes. The job status then changes to Suspended.
Resuming a Job
1. From the Job Controller of the CommCell Console, right-click the job and select Resume.
2. As the Job Manager attempts to restart the job, the job status changes to Waiting, Pending, or Running.
Killing a Job
1. From the Job Controller of the CommCell Console, right-click the job and select Kill.
2. Click Yes when the confirmation prompt appears if you are sure you want to kill the job. The job status may change to Kill Pending for a few moments while the operation completes. Once completed, the job status will change to Killed and it will be removed from the Job Controller window after five minutes.
The following table describes the available additional options to further refine your backup operations:
SuspendTemporarily stops a job. A suspended job is not terminated; it can be restarted at a later time.
ResumeResumes a job and returns the status to Waiting, Pending, Queued, or Running. The status depends on the availability of resources, the state of the Operation Windows, or the Activity Control setting.
KillTerminates a job.
Additional Options
OPTION DESCRIPTION RELATED TOPICS
Startup OptionsThe Startup Options are used by the Job Manager to set priority for resource allocation. This is useful to give higher priority to certain jobs. You can set the priority as follows:
1. From the CommCell Browser, navigate to Client Computers | <Client> | Sybase | <Instance>.
2. Right-click the Subclient in the right pane and click Backup.
3. Click Advanced and click Startup tab.
4. Select the Change Priority checkbox.
Refer to Job Priority and Priority Precedence.
Published On: 11/19/2013 V10 Service Pack 4A Page 108 of 176
5. Enter a priority number - 0 is the highest priority and 999 is the lowest priority.
6. Select the Start up in suspended State check box to start the job in a suspended state.
7. Click OK. Alerts
This option enables users or user groups to get automatic notification on the status of the data protection job. Follow the steps given below to set up the criteria to raise notifications/alerts:
1. From the CommCell Browser, navigate to Client Computers | <Client> | Sybase | <Instance>.
2. Right-click the Subclient in the right pane and click Backup.
3. Click Advanced and select the Alert tab.
4. Click Add Alert.
5. From the Add Alert Wizard dialog box, select the required threshold and notification criteria and click Next.
6. Select the required notification types and click Next.
7. Select the recipients and click Next.
8. Click Finish.
9. Click OK.
Refer to Alerts and Notifications.
Vault TrackerThis feature provides the facility to manage media that is removed from a library and stored in offsite locations. Depending on your VaultTracker setup, select the required options. Use the following steps to access and select the VaultTracker options.
1. From the CommCell Browser, navigate to Client Computers | <Client> | Sybase | <Instance>.
2. Right-click the Subclient in the right pane and click Backup.
3. Click Advanced and select the VaultTracking tab.
4. Select the required options.
5. Click OK.
Refer to VaultTracker or VaultTracker Enterprise.
Extended Data Retention This option allows you to extend the expiration date of a specific job. This will
override the default retention set at the corresponding storage policy copy. Follow the steps given below to extend the expiration date:
1. From the CommCell Browser, navigate to Client Computers | <Client> | Sybase | <Instance>.
2. Right-click the Subclient in the right pane and click Backup.
3. Click Advanced and select the Media tab.
4. Select one of the following options: Infinite - Select this option to extend the expiration date by infinite number of days Number of day - Select this option to specify the number of days to extend the expiration date and then enter the number of days.
5. Click OK.
Refer to Extended Retention Rules.
Allow Other Schedules to Use Media Set The Allow Other Schedules to use Media Set option allows jobs that are part of the
schedule or schedule policy and using the specific storage policy to start a new media. It also prevents other jobs from writing to the same set of media.
1. From the CommCell Browser, navigate to Client Computers | <Client> | Sybase | <Instance>.
2. Right-click the Subclient in the right pane and click Backup.
3. Click Advanced and select the Media tab.
4. Select the Allow Other Schedules To Use Media Set check box.
5. Click OK.
Refer to Creating an Exportable Media Set.
Mark Media FullThis option marks the media as full, two minutes after the successful completion of
Refer to Start New Media.
Published On: 11/19/2013 V10 Service Pack 4A Page 109 of 176
the data protection job. This option prevents another job from writing to this media. Follow the steps given below:
1. From the CommCell Browser, navigate to Client Computers | <Client> | Sybase | <Instance>.
2. Right-click the Subclient in the right pane and click Backup.
3. Click Advanced and select Media tab.
4. Select the Mark Media Full on Success check box.
5. Click OK. Start New Media
The Start New Media option enables you to start the data protection operation on a new media. This feature provides control over where the data physically resides. Use the following steps to start the data protection operation on a new media:
1. From the CommCell Browser, navigate to Client Computers | <Client> | Sybase | <Instance>.
2. Right-click the Subclient in the right pane and click Backup.
3. Click Advanced and select the Media tab.
4. Select the Start New Media check box.
5. Click OK.
Refer to Start New Media.
Data Path OptionsData Protection operations use a default Library, MediaAgent, Drive Pool, and Drive as the Data Path. You can use this option to change the data path if the default data path is not available. Follow the steps given below to change the default data path:
1. From the CommCell Browser, navigate to Client Computers | <Client> | Sybase | <Instance>.
2. Right-click the Subclient in the right pane and click Backup.
3. Click Advanced and select the Data Path tab.
4. Select the MediaAgent and Library.
5. Select the Drive Pool and Drive for tape library.
6. Click OK.
Refer Change Data Path.
CommCell Readiness Report
The CommCell Readiness Report provides you with vital information such as connectivity and readiness of the Client, MediaAgent, and CommServe. It is useful to run this report before performing a backup or a recovery operation. Follow the steps given below to generate the report:
1. On the CommCell Console menu bar, select the Reports tab.
2. Click Readiness.
The Report Selection dialog box appears.
3. If necessary, select Reports | CommServer | CommCell Readiness in the left pane.
4. Select the Computers tab, and then click Modify below the Computers list.
5. In the dialog box that appears, clear Include All Client Computers and All Client Groups.
6. Select the appropriate client from the Exclude list, and then click Include >.
7. Click OK.
8. Select the MediaAgent tab, and then clear Include All MediaAgents.
9. Select the appropriate MediaAgent from the Exclude list, and then click Include >.
10. Click Run.
The report appears in your default Web browser.
Refer to CommCell Readiness Report.
Backup Job Summary Report
The Backup Job Summary Report provides you with information about all of the backup jobs that are run in last 24 hours for a specific subclient. You can get information such as status, time, data size, and so on for each backup job. It is useful to run this report after performing the backup. Follow the steps given below to generate the report:
1. On the CommCell Console menu bar, select the Reports tab.
Refer to Backup Job Summary Report.
Published On: 11/19/2013 V10 Service Pack 4A Page 110 of 176
2. Click Summary.
The Report Selection dialog box appears.
3. If necessary, select Reports | Jobs | Job Summary in the left pane.
4. On the General tab, select Data Management.
5. Select the Computers tab.
6. Select Subclient, and then select the Edit sub tab.
7. Navigate to Client Computers | <Client> | File System | Backup Set | <Subclient>.
8. Click Run.
The report appears in your default Web browser.
Back to top
Published On: 11/19/2013 V10 Service Pack 4A Page 111 of 176
Browse Data – Sybase iDataAgent
Understanding the Restore Options Window
Browse and Restore Latest Data
Browse and Restore Data Before a Specified Backup Time
Browse and Restore Data Between a Specified Backup Time
Browse and Restore from Copies
List Media
Browse and Restore Using MediaAgent
Browse provides an easy-to-use convenience to search and restore data.
You can open the browse and restore window from backup-set or subclient level. The sub levels displayed in the result window is based on where you start the browse operation.
Selecting Objects From the Restore Window for Restore
The restore window displays objects and consists of two parts:
The left pane displays the object tree at the selected level.
The right pane displays the contents of the selected object.
Note that the window displays only the data that was obtained by a backup. Data that is excluded by a filter, or data which did not exist as of the specified browse time does not appear in the window.
Selections follow these rules:
All selections are recursive.
Clicking a box again causes the selection to be cleared.
If you select an object in the left pane, then all of its contents are selected.
You can select a specific object in the right pane.
Selection status is revealed by the selection icons as follows:
Restore Data Browse and Restore
Table of Contents
Understanding the Restore Options Window
Indicates that the object is not selected for restoration.
Published On: 11/19/2013 V10 Service Pack 4A Page 112 of 176
1. From the CommCell Browser, navigate to Client Computers | <Client> | Sybase.
2. Right-click an instance and click All Tasks | Browse and Restore.
3. Click View Content.
The latest data backed up by all the subclients is displayed in the Client Browse tab.
Follow the steps given below to browse the data backed up before specified time. This will display data from all cycles that fall under the specified time range.
1. From the CommCell Browser, navigate to Client Computers | <Client> | Sybase.
2. Right-click an instance and click All Tasks | Browse and Restore.
3. Select Time Range.
4. Under Absolute Time select End Time and enter a date and time to browse and restore data before it.
5. Click View Content.
Indicates that a portion of the object is selected for restoration. i.e., only some of the child object(s) within the selected object.Indicates that the entire object, including all of its child objects, are selected for restoration.
Browse and Restore Latest Data
Browse and Restore Data Before a Specified Backup Time
Published On: 11/19/2013 V10 Service Pack 4A Page 113 of 176
Follow the steps given below to browse data between specified time:
1. From the CommCell Browser, navigate to Client Computers | <Client> | Sybase.
2. Right-click an instance and click All Tasks | Browse and Restore.
3. Select Time Range.
4. Under Absolute Time do the following:
Select Start Time and enter a date and time.
Select End Time and enter a date and time.
Data in between the time specified here will be browsed and restored.
5. Click View Content.
By default, when a browse operation is requested, the software attempts to browse from the storage policy copy with the lowest copy
Browse and Restore Data Between a Specified Backup Time
Browse and Restore from Copies
Published On: 11/19/2013 V10 Service Pack 4A Page 114 of 176

precedence. If the data that you want to browse was already pruned from the primary copy, the software searches the other copies of the storage policy, starting from the copy with the lowest copy precedence to a copy with the highest copy precedence.
This feature is useful in the following conditions:
The media containing protected data for a particular copy has been removed from the storage library, you can choose to browse from a copy whose media are inside the library.
Allows browsing from a copy that accesses faster disk media rather than slower tape media.
When media drives used by a particular copy are busy with another operation, this helps in browsing from a different copy to avoid resource conflicts.
1. From the CommCell Browser, navigate to Client Computers | <Client> | Sybase.
2. Right-click an instance and click All Tasks | Browse and Restore.
3. From the Restore Options dialog box, click the Advanced Options tab.
4. Select Browse from copy precedence checkbox and specify the preference number.
5. Click View Content.
List media option is useful to predict media required to restore the index required to browse data. This is useful when the index is not available in the index cache. This option is also used to list media associated with data protection operations up to the specified date and time range.
The following section describes how to perform this operation.
1. From the CommCell Browser, navigate to Client Computers | <Client> | Sybase.
2. Right-click an instance and click All Tasks | Browse and Restore.
3. Click List Media.
You can use the Latest Data to list media associated with the most recent data protection cycle.
Or Specify Browse Time to list media associated with data protection operations up to the specified date and time range.
4. From the List Media dialog box, click List Media for restore within specified time range.
If you specify a copy precedence number for a browse operation, the software searches only the storage policy copy with that precedence number in all storage policies used for securing the data. If data does not exist in the specified copy, the browse operation fails even if the data exists in another copy of the same storage policy.
List Media
Published On: 11/19/2013 V10 Service Pack 4A Page 115 of 176

5. Click OK.
6. The appropriate media is listed in the Media dialog box.
Data can be restored from any compatible library and drive type in the CommCell. By default, the system automatically identifies and restores data from any configured library in the CommCell, even if the media is not available in the original library in which the data protection operation was performed. Use this procedure to Browse using a specific MediaAgent.
1. From the CommCell Browser, navigate to Client Computers | <Client> | Sybase.
2. Right-click an instance and click All Tasks | Browse and Restore.
3. From the Restore Options dialog box, click the Advanced Options tab and choose the MediaAgent that must be used to perform the browse.
4. Click View Content.
Browse and Restore Using MediaAgent
If a MediaAgent is selected for browse, the library and media that are required for restore operation must be accessible to this MediaAgent for restore. The Restore may fail if it is not accessible.
Back to top
Published On: 11/19/2013 V10 Service Pack 4A Page 116 of 176
Advanced Restore - Sybase iDataAgent
Restoring the Sybase Server
Restoring the Master Database
Restoring System Databases
Restoring Databases to a Point in Time
Restoring Transaction Logs to a Point in Time
Recovering DatabasesRestoring and Recovering the DatabasesRestoring the Databases without a Recovery
Restoring a Database to the Current State (Step-by-Step Restore)
Renaming a Database
Restoring Databases to a New Device
Restoring Databases to a Different Sybase Server Instance
Restoring the Sybase Server to a Different Path
Restoring to a Disk (App Free Restore)Recovering the Database After a Restore
Restoring SQL Anywhere BackupsRestoring Image BackupsRestoring Dump Backups
Scheduling a Restore
Managing Restore JobsRestarting Jobs Controlling Jobs
Additional Restore Options
When the Sybase server is corrupted or lost, you can restore and recover it from the latest full backup.
When restoring an entire server, make sure to perform the following:
The server should be offline.
Edit the Sybase configuration file which usually resides in Sybase home directory to disable the following parameter:
sp_configure ’enable xact coordination’, 0
Set the ‘enable xact coordination = 0’ under “DTM Administration” section by editing the configuration file.
If the dataserver is running, execute the following command to turn it off and then restart the dataserver to update the changes.
“sp_configure "enable job scheduler", 0 “
Use the following steps to restore an entire Sybase server:
1. From the CommCell Browser, navigate to Client Computers | <Client> | Sybase.
2. Right-click the <Instance> point to All Tasks and then click Restore Sybase Server.
3. Select Sybase Create Devices.
Restore Data Browse and Restore
Table of Contents
Restoring the Sybase Server
Published On: 11/19/2013 V10 Service Pack 4A Page 117 of 176
4. Click OK to start the restore.
When you restore an entire Sybase server or a master database, it is highly recommended to select Sybase create devices. However, you can also create a master database manually and then perform a restore without selecting Sybase create devices. See Manually Creating a Master Database for a detailed information.
Prior to restoring the master database, make sure that the Sybase server is offline. Use the following steps to restore a master database without selecting Sybase create devices:
1. From the CommCell Browser, navigate to Client Computers | <Client> | Sybase.
2. Right-click the <Instance> and then click All Tasks | Browse and Restore.
3. Click View Content.
4. Select the Master database in the right pane and click Recover All Selected.
Restoring the Master Database
If the dataserver is configured with a password for a default user sa, follow Manually Creating a Master Database to create a new master device with an empty password.
Published On: 11/19/2013 V10 Service Pack 4A Page 118 of 176
5. Click OK to start the restore.
System databases are essential for the operation of the Sybase Server instance. If you need to restore the Sybase Server in the event of a system failure, the system databases (master, model, sybsystemdb and sybsystemprocs) must be backed up. The tempdb does not get backed up as it is re-created by the Sybase Server every time the server is started.
Prior to restoring system databases, make sure that the databases are offline.
Restoring System Databases
Published On: 11/19/2013 V10 Service Pack 4A Page 119 of 176
When restoring the sybsystemdb, make sure to perform the following:
Edit the Sybase configuration file which usually resides in Sybase home directory to disable the following parameter:
sp_configure ’enable xact coordination’, 0
Set the ‘enable xact coordination = 0’ under DTM Administration section by editing the configuration file.
If you are restoring the sybmgmtdb as part of the system databases, then you need to turn off the job scheduler during restore. Edit the Sybase configuration file to set ‘enable job scheduler = 0’ under SQL Server Administration.
If the dataserver is running, execute the following command to turn it off and then restart the dataserver to update the changes.
“sp_configure "enable job scheduler", 0 “
By default, system databases are restored in the same location from where they were backed up and their data files are overwritten. Follow the steps given below to restore the system databases:
1. From the CommCell Browser, navigate to Client Computers | <Client> | Sybase.
2. Right-click the <Instance> and then click All Tasks | Browse and Restore.
3. Click View Content.
4. Select the system databases (master, model, sybsystemdb and sybsystemprocs) in the right pane and click Recover All Selected.
5. Click OK to start the restore.
Restoring Sybase Databases to a Point in Time
Published On: 11/19/2013 V10 Service Pack 4A Page 120 of 176

If any undesired transaction occurs in the database, you can revert the database to a state just before the transaction. The point in time option enables you to restore the database to a specific point-in-time. This option is useful in the following scenarios:
If any undesired transaction occurs in the database, you can revert the database to a state just before the transaction.
If a database fails, you can restore to the state just before the point of failure.
You can restore multiple databases to a consistent time. This will be useful for the absolute synchronization of the databases.
Before performing the point-in-time restore of a database, ensure that transaction logs for the database are backed up.
Follow the steps given below to restore a database(s) to a point in time:
1. From the CommCell Browser, navigate to Client Computers | <Client> | Sybase.
2. Right-click the <Instance> and then click All Tasks | Browse and Restore.
3. Click View Content.
4. In the right pane of the Browse window, select one or more databases and click Recover All Selected.
5. Select the Point-in-time checkbox.
6. From the Restore Time list, select the date and time.
7. Click OK to start the restore.
The database(s) will be restored to the selected date and the next scheduled backup for that database will automatically convert to a Full backup.
Restoring Transaction Logs to a Point in Time
Published On: 11/19/2013 V10 Service Pack 4A Page 121 of 176
You can restore the transaction logs along with the database to a specific point in time. The point in time should be in between the start and end point of a transaction log. The database backup job along with the immediate transaction log after a point in time will be restored.
For example:
Let us assume that you have performed a Full backup (F1) and transaction log backup (L1) for the first time at 1 P.M. Subsequently you have performed L2 at 3 P.M. Later, you have performed L3, F2, L4,L5 etc at subsequent intervals. If you perform a point in time restore for the transaction log backups at 2 P.M, the Full backup (F1) along with the log backups of L1 and L2 (transaction log after point in time) will be restored.
Follow the steps given below to restore transaction logs along with the database(s) to a point in time:
1. From the CommCell Browser, navigate to Client Computers | <Client> | Sybase.
2. Right-click the <Instance> and then click All Tasks | Browse and Restore.
3. Click View Content.
4. In the right pane of the Browse window, select one or more databases and click Recover All Selected.
5. Select the Point-in-time checkbox.
6. From the Restore Time list, select the date and time.
7. Click OK to start the restore.
The transaction logs along with the database(s) will be restored to a selected point in time.
By default, a database is left in the online state after a restore. you can restore the data and then recover the database at a later point-in-
Recovering Databases
Published On: 11/19/2013 V10 Service Pack 4A Page 122 of 176

time after performing any post operations.
Restoring and Recovering the Databases
If you want to recover the database after the restore, follow the steps given below:
1. From the CommCell Browser, navigate to Client Computers | <Client> | Sybase.
2. Right-click the <Instance> and then click All Tasks | Browse and Restore.
3. Click View Content.
4. In the right pane of the Browse window, select the database to be recovered and click Recover All Selected.
5. Click OK.
Restoring the Databases without Recovery
Follow the steps given below to restore the database without recovery:
1. From the CommCell Browser, navigate to Client Computers | <Client> | Sybase.
2. Right-click the <Instance> and then click All Tasks | Browse and Restore.
3. Click View Content.
4. In the right pane of the Browse window, select the databases you want to recover and click Recover All Selected.
5. Click No Recover.
6. Click OK.
Published On: 11/19/2013 V10 Service Pack 4A Page 123 of 176
When you want to restore an event in the database but do not know the exact time of the event, you can first restore the database to the last full backup and then run a Step-by-Step restore to apply the logs by the sequence of log backups. Step-by-Step Restores are performed on individual databases. You will not be able to schedule a step-by-step restore.
Use the following steps to run a Step-by-Step restore:
1. From the CommCell Browser, navigate to Client Computers | <Client> | Sybase.
2. Right-click the <Instance> and then click All Tasks | Browse and Restore.
3. Click View Content.
4. In the right pane of the Browse window, select a database to be restored and click Recover All Selected.
5. In the Destination Server drop down list, select the destination server name.
6. Select the Restore Options check box.
7. Select Sybase Step By Step option.
8. Select the last Full backup time from the Restore Time drop down list.
9. Click Recover if you want to recover the database after a restore or click No Recover if you want to recover it later.
10. Click OK to start the restore.
11. Select Next Transaction Log time after the last full backup from the Restore Time drop down list.
Restoring a Database to the Current State (Step-By-Step Restore)
This is a controlled restore and applicable for restoring a single database.
Published On: 11/19/2013 V10 Service Pack 4A Page 124 of 176
12. Repeat the steps 8 to 10 until you restore the desired data.
You can rename user databases. Ensure that the new database names are unique and conform to the Sybase Identifier rules. When you rename databases, make sure that the tables in the databases are not referencing to or referenced by table (s) in any other databases.
Use the following steps given to rename a database:
1. From the CommCell Browser, navigate to Client Computers | <Client> | Sybase.
2. Right-click the <Instance> and then click All Tasks | Browse and Restore.
3. Click View Content.
4. In the right pane of the Browse window, select the database to be renamed and click Recover All Selected.
5. Select the Rename Databases check box.
6. Click Advanced.
7. Click the Options tab.
8. Click the Target Database column and type the new database name.
9. Click OK.
Renaming a Database
Published On: 11/19/2013 V10 Service Pack 4A Page 125 of 176
While restoring the Sybase databases to a new device, you can also change the size of the device. However, you need to drop the existing device to change the size and then perform the restore. Use the following steps to restore the selected databases to a new device:
1. From the CommCell Browser, navigate to Client Computers | <Client> | Sybase.
2. Right-click the <Instance> and then click All Tasks | Browse and Restore.
3. Click View Content.
4. In the right pane of the Browse window, select the databases you want to restore and click Recover All Selected.
5. Select the Sybase Create Devices checkbox.
6. Click Advanced.
7. Click the Options tab.
8. Type the new device name under the Device Name column and type the path of the new device under the Physical Path column and click OK.
9. Click OK to start the restore.
Restoring Databases to a New Device
Published On: 11/19/2013 V10 Service Pack 4A Page 126 of 176
By default, when restoring to a different Sybase Server instance, a database is restored to the same location as source server in the destination server.
Prior to restoring the database to a different server, ensure the following:
The max page size of source server should be the same as the destination server.
Ensure that the Sybase destination server is configured in the CommCell console.
When performing a cross machine restore, you can only restore from lower version to a higher version. For example: you can restore from Sybase 15.5. to 15.7 and not from 15.7 to 15.5.
Follow the steps below to restore a database to a different destination server.
1. From the CommCell Browser, navigate to Client Computers | <Client> | Sybase.
2. Right-click the <Instance> and then click All Tasks | Browse and Restore.
3. Click View Content.
4. In the right pane of the Browse window, select the databases you want to restore and click Recover All Selected.
5. Select the Destination Server.
6. If the devices are not existing on the destination server, then select Sybase Create Devices. See Restoring Databases to a New Device to create or change the devices on the destination server.
7. Click OK to start the restore.
Restoring Databases to a Different Sybase Server Instance
Published On: 11/19/2013 V10 Service Pack 4A Page 127 of 176
Make sure that you have a Sybase Database Administrator privileges when you restore a Sybase server to a different path. Also, make sure that the device should be able to hold the database being restored.
If an entire server needs to be restored to a different path, then perform the following before restoring the server:
1. First, you need to restore master database and system databases like model and sybsystemdb which reside on master device.
2. Drop the databases and existing Sybase devices. Ensure that the databases of a different Sybase server are not part of the device that is being dropped.
3. Restore the individual databases separately choosing Sybase create device. Each individual database needs to be restored as a separate job.
Use the following steps to restore individual databases to a different path:
1. From the CommCell Browser, navigate to Client Computers | <Client> | Sybase.
2. Right-click the <Instance> and then click All Tasks | Browse and Restore.
3. Click View Content.
4. In the right pane of the Browse window, select the databases you want to restore and click Recover All Selected.
5. Select the Sybase Create Devices checkbox.
6. Click Advanced.
7. Click the Options tab.
Restoring the Sybase server to a Different Path
Published On: 11/19/2013 V10 Service Pack 4A Page 128 of 176
8. Type the new path of the selected device under the Physical Path column and click OK.
9. Click OK to start the restore.
You can restore the backup jobs of data and logs or multiple backup jobs at a time directly to a location on a disk using CommCell console without the intervention of Sybase application. This is useful for restoring multiplexed data on the same media. The data from different backup jobs are passed back to the client so that all of the interleaved backup jobs can be restored in parallel. You can restore the data associated with a specific backup job (s) such as full, incremental, logs, etc., in parallel streams. You can also submit multiple restore jobs from full and incremental backups.
Use the following steps to perform an app free restore operation:
1. From the CommCell Browser, navigate to Client Computers | <Client> | Sybase.
Right-click the <Instance>, point to All Tasks and then click Restore to Disk.
Restoring to a Disk (App Free Restore)
Published On: 11/19/2013 V10 Service Pack 4A Page 129 of 176

2. Click OK
3. Select the backup job that you want to restore to a disk. Right click on the job and select Restore to Disk.
You can select multiple backup jobs at a time and restore them to disk.
Published On: 11/19/2013 V10 Service Pack 4A Page 130 of 176
4. Type the path or click Browse to specify the location of the disk to restore the application data.
Impersonate User if you want to use a different account that contains the required privileges.
n the User Name box, type the user name. The User should have necessary privileges to restore the application data.
In the Password box, type the password for the user account.
In the Confirm Password box, re-type the password.
5. The backup job will be restored to the disk location specified in the Restore Options for All Selected Items dialog box.
Recovering the Database After a Restore
The dump files associated with a backup job will restored to a disk in the following format:
<BACKUP-JOB-ID>-<DATABASE-NAME>-<TOTAL-NO-OF-STRIPES>-<DB/XACT>-<TIME-STAMP>-<STRIPE-NUMBER>.
Published On: 11/19/2013 V10 Service Pack 4A Page 131 of 176
Example 1: Database dump files associated with database db1 and backup job 1989. Backup job 1989 was performed with 4 streams, hence you will see 4 files.
Example 2: Transaction dump files associated with database db1 and transaction log backup job 2140. Backup job 2140 was performed with 3 streams, hence you will see 3 files.
A restore script will be auto generated by Data Protection Suite for each database and for each backup job.
Restore script file format will be as follows:
Format for database restore script is as follows:
Format for database recovery script is is as follows:
Example 1:
Script file name for database db1 job ID 1989(Database backup) is 1989--db1.sql
Script file content:
Example 2:
Script file name for database db1 job ID 2140(Transaction log backup) is 2140—db1.sql
Script file content:
1989-db1-4.DB.130212185252553.001989-db1-4.DB.130212185252553.011989-db1-4.DB.130212185252553.021989-db1-4.DB.130212185252553.03
2140-db1-3.XACT.130221194903420.002140-db1-3.XACT.130221194903420.012140-db1-3.XACT.130221194903420.02
<BACKUP-JOB-ID>-<DATABASE-NAME>.sql
load database <DATABASE-NAME> from “SybGalaxy:: -disk <FIRST-STRIPE-DUMP-FILE-PATH>” stripe on “SybGalaxy:: -disk <SECOND-STRIPE-DUMP-FILE-PATH>” ………..
load transaction <DATABASE-NAME> from “SybGalaxy:: -disk <FIRST-STRIPE-DUMP-FILE-PATH>” stripe on “SybGalaxy:: -disk <SECOND-STRIPE-DUMP-FILE-PATH>”………..
load database db1 from "SybGalaxy:: -disk /MyAppFreeRestore/2141/1989-db1-4.DB.130212185252553.00" stripe on "SybGalaxy:: -disk /MyAppFreeRestore/2141/1989-db1-4.DB.130212185252553.01" stripe on "SybGalaxy:: -disk /MyAppFreeRestore/2141/1989-db1-4.DB.130212185252553.02" stripe on "SybGalaxy:: -disk /MyAppFreeRestore/2141/1989-db1-4.DB.130212185252553.03"
load transaction db1 from "SybGalaxy:: -disk /MyAppFreeRestore/2141/2140-db1-3.XACT.130221194903420.00" stripe on "SybGalaxy:: -
Published On: 11/19/2013 V10 Service Pack 4A Page 132 of 176
Connect to Sybase ASE server and execute the following restore script to restore/recover the database:
Example :
disk /MyAppFreeRestore/2141/2140-db1-3.XACT.130221194903420.01"stripe on "SybGalaxy:: -disk /MyAppFreeRestore/2141/2140-db1-3.XACT.130221194903420.02"go
isql –U username –P password –S ServerName -i <script_name>.sql
Execute restore script [root@localhost 2141]# isql -Usa -Padmin123 -SybGalaxy -i <script_name>.sql3> goBackup Server session id is: 60. Use this value when executing the'sp_volchanged' system stored procedure after fulfilling any volume changerequest from the Backup Server.Backup Server: 4.132.1.1: Attempting to open byte stream device: 'SybGalaxy::-disk /MyAppFreeRestore/2141/1989-db1-4.DB.130212185252553.00::00'Backup Server: 4.132.1.1: Attempting to open byte stream device: 'SybGalaxy::-disk /MyAppFreeRestore/2141/1989-db1-4.DB.130212185252553.01::01'Backup Server: 4.132.1.1: Attempting to open byte stream device: 'SybGalaxy::-disk /MyAppFreeRestore/2141/1989-db1-4.DB.130212185252553.02::02'Backup Server: 4.132.1.1: Attempting to open byte stream device: 'SybGalaxy::-disk /MyAppFreeRestore/2141/1989-db1-4.DB.130212185252553.03::03'Backup Server: 6.28.1.1: Dumpfile name 'db11307110984 ' section number 1mounted on byte stream 'SybGalaxy:: -disk/MyAppFreeRestore/2141/1989-db1-4.DB.130212185252553.03::03'Backup Server: 6.28.1.1: Dumpfile name 'db11307110984 ' section number 1mounted on byte stream 'SybGalaxy:: -disk/MyAppFreeRestore/2141/1989-db1-4.DB.130212185252553.01::01'Backup Server: 6.28.1.1: Dumpfile name 'db11307110984 ' section number 1mounted on byte stream 'SybGalaxy:: -disk/MyAppFreeRestore/2141/1989-db1-4.DB.130212185252553.00::00'Backup Server: 6.28.1.1: Dumpfile name 'db11307110984 ' section number 1mounted on byte stream 'SybGalaxy:: -disk/MyAppFreeRestore/2141/1989-db1-4.DB.130212185252553.02::02'Backup Server: 4.188.1.1: Database db1: 1040 kilobytes (16%) LOADED.Backup Server: 4.188.1.1: Database db1: 1046 kilobytes (17%) LOADED.Backup Server: 4.188.1.1: Database db1: 2072 kilobytes (33%) LOADED.Backup Server: 4.188.1.1: Database db1: 4122 kilobytes (67%) LOADED.Backup Server: 4.188.1.1: Database db1: 6170 kilobytes
Published On: 11/19/2013 V10 Service Pack 4A Page 133 of 176

Restoring Image Backups
Use dbeng utility to start and recover the database for image based database files and transaction log files respectively.
Restoring a SQL Anywhere Data backup:
Use the following steps to restore an image data backup:
1. From the CommCell Browser, navigate to Client Computers | <Client> | File System | <Backup Set>.
2. Right-click the Subclient created for SQL Anywhere data backups in the right pane and then click Browse and Restore.
3. Click View Content.
4. Select the database files that you want to restore and click Recover All Selected.
5. Stop the database and rename the database files.
6. In the Restore Options dialog box, select the Destination client from the dropdown list.
7. Type the destination path or click Browse to select the destination path to restore the selected database files.
(100%) LOADED.Backup Server: 4.188.1.1: Database db1: 6182 kilobytes (100%) LOADED.Backup Server: 3.42.1.1: LOAD is complete (database db1).Started estimating recovery log boundaries for database 'db1'.Database 'db1', checkpoint=(912, 18), first=(912, 18), last=(912, 18).Completed estimating recovery log boundaries for database 'db1'.Started ANALYSIS pass for database 'db1'.Completed ANALYSIS pass for database 'db1'.Started REDO pass for database 'db1'. The total number of log records to processis 1.Completed REDO pass for database 'db1'.Use the ONLINE DATABASE command to bring this database online; ASE will not bring it online automatically.Recovery of database 'db1' will undo incomplete nested top actions.Database db1 is now online.
Restoring SQL Anywhere Backups
Published On: 11/19/2013 V10 Service Pack 4A Page 134 of 176
8. From the CommCell Browser, navigate to Client Computers | <Client> | File System | <Backup Set>.
9. Right-click the Subclient created for SQL Anywhere log backups in the right pane and then click Browse and Restore.
10. Click View Content.
11. Select the log files that you want to restore and click Recover All Selected.
Published On: 11/19/2013 V10 Service Pack 4A Page 135 of 176
12. Click Advanced.
13. Click Pre/Post tab.
14. Click Browse to locate the recoverDBScript path and add the script for recovering the database and transaction log files.
The script should contain the dbeng as a post recovery command. This command should include the database file and transaction log files location.
Published On: 11/19/2013 V10 Service Pack 4A Page 136 of 176

15. Click OK.
The recoverDBScript dbeng for UNIX and Windows based file systems will be as follows:
where
-ad : specifies the location of the transaction log files. The database server determines the correct order for applying the transaction logs to the backup copy of the database based on the log offsets.
Example (UNIX):
Example (Windows):
Restoring Dump Backups
Use dbisql utility to reload the dump file in to the database. Perform the following before restoring the dump based backup:
Drop the database which needs to be restored.
Initialize the same database using dbinit utility.
For example, if you drop the mydb.db database, then you have to create and initialize the same mydb.db with the command dbinit mydb.db. Then, you must start the initialized database.
Use the following steps to restore a dump based backup:
1. From the CommCell Browser, navigate to Client Computers | <Client> | File System | <Backup Set>.
2. Right-click the Subclient created for SQL Anywhere dump backups in the right pane and then click Browse and Restore.
dbeng11 -n <Server-Name> <Database-File> -ad <Transaction-Log-Files-Location>.
dbeng11 "/Sybase Anywhere/mydb/mydb.db" -ad /databackup/LogBackup
dbeng11 "d:\Sybase Anywhere\mydb\mydb.db" -ad d:\LogBackup
Use dbspawn command with dbeng utility to start the database server in the background.
Example:
dbspawn dbeng11 "/Sybase Anywhere/mydb/mydb.db" -ad /temp1/LogBackup(UNIX)
dbspawn dbeng11 "d:\Sybase Anywhere\mydb\mydb.db" -ad d:\LogBackup(Windows)
Published On: 11/19/2013 V10 Service Pack 4A Page 137 of 176
3. Click View Content.
4. Select the data dump file and reload (sql) file that you want to restore and click Recover All Selected.
5. Click Advanced.
6. Click Pre/Post tab.
7. Click Browse to locate the restoreDBScript file and add the script for recovering the reload sql file.
The script should contain the dbisql as a post recovery command. This command should include the the reload sql file which contains the path to the dump file to be applied to restore the content of the database.
8. Click OK.
The recoverDBScript dbisql for UNIX and Windows based file systems will be as follows:
Example (UNIX):
dbisqlc -c “Connect-String” <Reload-SQL-File>
dbisqlc -c "eng=demo11;dbn=mydb;uid=dba;pwd=sql" /temp/myDBReload.sql
Published On: 11/19/2013 V10 Service Pack 4A Page 138 of 176
Example (Windows):
Follow the steps given below to schedule a restore job:
1. From the CommCell Browser, navigate to Client Computers | <Client> | Sybase.
2. Right-click the <Instance> and then click All Tasks | Browse and Restore.
3. Click View Content.
4. In the right pane of the window, select one or more databases that you wish to restore.
5. Click Recover All Selected.
6. Select the required restore options under General tab.
7. Click Job Initiation tab and click Schedule.
8. Click Configure.
9. Select the appropriate scheduling options. For example:
Click Weekly.
Check the days you want the run the restore job.
Change the Start Time to 9:00 PM
Click OK to close the Schedule Details dialog
dbisqlc -c "eng=demo11;dbn=mydb;uid=dba;pwd=sql" d:\myDBReload.sql
Scheduling A restore
Published On: 11/19/2013 V10 Service Pack 4A Page 139 of 176
Click OK to close the Restore Options dialog
The restore job will execute as per the schedule.
Once you initiate the restore operation, a restore job is generated in the Job Controller. Jobs can be managed in a number of ways. The following sections provide information on the different job management options available:
Restarting Jobs
Jobs that fail to complete successfully are automatically restarted based on the job restartability configuration set in the Control Panel. Keep in mind that changes made to this configuration will affect all jobs in the entire CommCell.
To Configure the job restartability for a specific job, you can modify the retry settings for the job. This will override the setting in the Control Panel. It is also possible to override the default CommServe configuration for individual jobs by configuring retry settings when initiating the job. This configuration, however, will apply only to the specific job.
Configure Job Restartability at the CommServe Level
1. From the CommCell Console toolbar, click Control Panel.
2. Under the System section, click Job Management.
3. Click Job Restarts tab and select a Job Type.
Select Restartable to make the job restartable.
You can change the value for Max Restarts to change the maximum number of times the Job Manager will try to restart a job.
You can change the value for Restart Interval (Mins) to change the time interval between attempts for the Job Manager to restart the job.
4. Click OK.
Managing Restore Jobs
Restore jobs for this Agent are resumed from the point-of-failure.
Published On: 11/19/2013 V10 Service Pack 4A Page 140 of 176
Controlling Jobs
The following controls are available for running jobs in the Job Controller window:
Suspending a Job
1. From the Job Controller of the CommCell Console, right-click the job and select Suspend.
2. The job status may change to Suspend Pending for a few moments while the operation completes. The job status then changes to Suspended.
Resuming a Job
1. From the Job Controller of the CommCell Console, right-click the job and select Resume.
2. As the Job Manager attempts to restart the job, the job status changes to Waiting, Pending, or Running.
Killing a Job
1. From the Job Controller of the CommCell Console, right-click the job and select Kill.
2. Click Yes when the confirmation prompt appears if you are sure you want to kill the job. The job status may change to Kill Pending for a few moments while the operation completes. Once completed, the job status will change to Killed and it will be removed from the Job Controller window after five minutes.
Several additional options are available to further refine your restore operations. The following table describes these options, as well as the steps to implement them.
Be sure to read the overview material referenced for each feature prior to using them.
SuspendTemporarily stops a job. A suspended job is not terminated; it can be restarted at a later time.
ResumeResumes a job and returns the status to Waiting, Pending, Queued, or Running. The status depends on the availability of resources, the state of the Operation Windows, or the Activity Control setting.
KillTerminates a job.
Additional Restore Options
OPTION DESCRIPTION RELATED TOPIC
Startup OptionsThe Startup Options are used by the Job Manager to set priority for resource
Refer to Job Priority and Priority Precedence.
Published On: 11/19/2013 V10 Service Pack 4A Page 141 of 176
allocation. This is useful to give higher priority to certain jobs. You can set the priority as follows:
1. From the CommCell Browser, navigate to Client Computers | <Client> | Sybase.
2. Right-click the <Instance> and then click All Tasks | Browse and Restore.
3. Click View Content.
4. In the Browse window, select the database you want to restore and click Recover All Selected.
5. In the Sybase Restore dialog box, click Advanced.
6. In the Advanced Restore Options dialog box, click Startup.
7. On the Startup tab, select Change Priority.
8. Enter a priority number - 0 is the highest priority and 999 is the lowest priority.
9. Select the Start up in suspended State check box to start the job in a suspended state.
10. Click OK. Copy Precedence By default, the system retrieves data from the storage policy copy with the lowest
copy precedence. If the data was pruned from the primary copy, the system automatically retrieves data from the other copies of the storage policy in the lowest copy precedence to highest copy precedence order. Once the data is found, it is retrieved, and no further copies are checked.
You can retrieve data from a specific storage policy copy (Synchronous Copy or Selective Copy). If data does not exist in the specified copy, the data retrieve operation fails even if the data exists in another copy of the same storage policy. Follow the steps given below to retrieve the data from a a specific storage policy copy:
1. From the CommCell Browser, navigate to Client Computers | <Client> | Sybase.
2. Right-click the <Instance> and then click All Tasks | Browse and Restore.
3. Click View Content.
4. In the Browse window, select the database you want to restore and click Recover All Selected.
5. In the Sybase Restore dialog box, click Advanced.
6. In the Advanced Restore Options dialog box, click Copy Precedence.
7. On the Copy Precedence tab, select the Restore from copy precedencecheck box.
8. Enter the copy precedence number.
9. Click OK. Data Path Options
The data recovery operations use a default Library, MediaAgent, Drive Pool, and Drive as the Data Path. You can use this option to change the data path if the default data path is not available. Follow the steps given below to change the default data path:
1. From the CommCell Browser, navigate to Client Computers | <Client> | Sybase.
2. Right-click the <Instance> and then click All Tasks | Browse and Restore.
3. Click View Content.
4. In the Browse window, select the database you want to restore and click Recover All Selected.
5. In the Sybase Restore dialog box, click Advanced.
6. In the Advanced Restore Options dialog box, click Data Path.
7. On the Data Path tab, select the MediaAgent and Library.
8. Select the Drive Pool and Drive for tape library.
9. Select the name of the Proxy server if you wish to restore using a proxy server.
You can select the Proxy server only when you are restoring from a snapshot.
Refer to Change Data Path.
Published On: 11/19/2013 V10 Service Pack 4A Page 142 of 176

This option is not available for a regular restore.
10. Click OK. Encryption
If the client's data is encrypted with a pass phrase, you must enter the pass-phrase to start the data recovery operation. Follow the steps given below to enter the pass-phrase:
1. From the CommCell Browser, navigate to Client Computers | <Client> | Sybase.
2. Right-click the <Instance> and then click All Tasks | Browse and Restore.
3. Click View Content.
4. In the Browse window, select the database you want to restore and click Recover All Selected.
5. In the Sybase Restore dialog box, click Advanced.
6. In the Advanced Restore Options dialog box, click Encryption.
7. Enter the Pass Phrase.
8. Click OK.
Refer to Data Encryption.
AlertsThis option enables users or user groups to get automatic notification on the status of the data recovery job. Follow the steps given below to set up the criteria to raise notifications/alerts:
1. From the CommCell Browser, navigate to Client Computers | <Client> | Sybase.
2. Right-click the <Instance> and then click All Tasks | Browse and Restore.
3. Click View Content.
4. In the Browse window, select the database you want to restore and click Recover All Selected.
5. In the Sybase Restore dialog box, click Advanced.
6. In the Advanced Restore Options dialog box, click Alerts.
7. Click Add Alert.
8. From the Add Alert Wizard dialog box, select the required threshold and notification criteria and click Next.
9. Select the required notification types and click Next.
10. Select the recipients and click Next.
11. Click Finish.
12. Click OK.
Refer to Alerts and Notifications.
CommCell Readiness Report
The CommCell Readiness Report provides you with vital information such as connectivity and readiness of the Client, MediaAgent, and CommServe. It is useful to run this report before performing a backup or a recovery operation. Follow the steps given below to generate the report:
1. On the CommCell Console menu bar, select the Reports tab.
2. Click Readiness.
The Report Selection dialog box appears.
3. If necessary, select Reports | CommServer | CommCell Readiness in the left pane.
4. Select the Computers tab, and then click Modify below the Computers list.
5. In the dialog box that appears, clear Include All Client Computers and All Client Groups.
6. Select the appropriate client from the Exclude list, and then click Include >.
7. Click OK.
8. Select the MediaAgent tab, and then clear Include All MediaAgents.
9. Select the appropriate MediaAgent from the Exclude list, and then click Include >.
10. Click Run.
Refer to CommCell Readiness Report.
Published On: 11/19/2013 V10 Service Pack 4A Page 143 of 176
The report appears in your default Web browser.Restore Job Summary Report The Restore Job Summary Report provides you with information about all the data
recovery jobs that are run in last 24 hours for a specific client and agent. You can get information such as failure reason, failed objects, job options, and so on. It is useful to run this report after performing the restore. Follow the steps given below to generate the report:
1. On the CommCell Console menu bar, select the Reports tab.
2. Click Summary.
The Report Selection dialog box appears.
3. If necessary, select Reports | Jobs | Job Summary in the left pane.
4. On the General tab, select Data Recovery Jobs.
5. Select the Computers tab.
6. Select the appropriate client and the appropriate agent.
7. Click Run.
The report appears in your default Web browser.
Refer to Restore Job Summary Report.
Back to top
Published On: 11/19/2013 V10 Service Pack 4A Page 144 of 176
Data Aging - Sybase iDataAgent
Getting Started
Extended Retention Rules
Data Aging is the process of removing old data from secondary storage to allow the associated media to be reused for future backups.
By default, all backup data is retained infinitely. However, you should change the retention of your data based on your needs. Note that if you continue to have infinite retention, you will also need infinite storage capacity.
1. From the CommCell Browser, navigate to Policies | Storage Policies | <Storage Policy>.
Right-click the <Storage Policy Copy> and click the Properties.
2. Click the Retention tab.
Under Basic Retention Rules for All Backups, click the Retain For.
Enter number of days to retain the data.
Enter number of cycles to retain the data.
Click OK.
Table of Contents
Getting Started
Published On: 11/19/2013 V10 Service Pack 4A Page 145 of 176
3. Confirm Basic Retention dialog box will be displayed.
Click Yes.
4. From the CommCell Console, click the Reports tab.
Click the Forecast icon.
5. Under Reports, Data Retention Forecast and Compliance is selected by default.
Click Run.
6. The report will display the data to be pruned when a data aging job is run.
To ensure only data intended for aging is actually aged, it is important to identify the data that will be aged based on the retention rules you have configured. Hence, ensure this report
Published On: 11/19/2013 V10 Service Pack 4A Page 146 of 176
7. From the CommCell Console, right click the <CommServe> icon, point to All Tasks and then click Data Aging.
8. Under Job Initiation, by default Immediate is selected to run the job immediately.
Click OK.
includes only the data you intend to age.
If necessary, fine-tune your rules so that only the intended data is aged.
Once you run a data aging job, the data will be pruned.
Published On: 11/19/2013 V10 Service Pack 4A Page 147 of 176
9. You can track the progress of the job from the Job Controller window. When the job is completed, in the Job Controller the Statuswill be displayed as Completed.
Make sure that the job completes successfully. If the job did not complete successfully, rerun the job.
Extended retention rules allow you to keep specific full (or synthetic full) backups for longer periods of time.
Extended retention rules can be used in the following circumstances:
If you have a single drive tape library
If you want to create a hierarchical retention scheme (grandfather-father-son tape rotation)
In all other cases, it is recommended that the Auxiliary Copy feature be used for extended storage as it actually creates another physical copy of the data, thereby reducing the risk of data loss due to media failure.
Understanding Extended Retention Rules
Extended retention allows you to retain a specific full (or synthetic full) backup for an additional period of time. For example, you may want to retain your monthly full backups for 90 days.
Extended retention rules allow you to define three additional "extended" retention periods for full (or synthetic full) backups. For example:
You may want to retain your weekly full backups for 30 days.
You may want to retain your monthly full backup for 90 days.
You may want to retain your yearly full backup for 365 days.
A backup job will be selected for extended retention based on its start time. For example: If a backup job starts at 11:55 pm on August 31st
Extended Retention Rules
Published On: 11/19/2013 V10 Service Pack 4A Page 148 of 176
and ends at 1 am on September 1st, then it will be selected as the last full backup for the month of August and will be picked up for extended retention.
Setting Up Extended Retention Rules
Use the following steps for setting up the extended retention rules:
1. Right-click the storage policy copy and click Properties.
2. Click the Retention tab.
3. Set the basic retention rules by clicking Retain for and entering the number of days and cycles appropriate for your organization.
4. Set the extended retention rules as follows:
a. Click the For button.
b. Enter the number of Days Total to retain the backup.
c. Click the Keep drop-down list, and select the desired backup criteria (e.g., Monthly Full, Weekly Full).
d. Click the Grace Days drop-down list and select the number of days (e.g., 2).
This allows you to consider the additional number of days along with the Extended Retention rule. For example, if the last full backup job fails with in the defined extended retention criteria, then the next full backup job that ran in the specified grace days will be selected for retention.
5. Repeat Step 4 to configure additional extended retention.
6. Click OK.
Advanced TopicsData Aging - Advanced
Provides comprehensive information on additional Data Aging capabilities.
Published On: 11/19/2013 V10 Service Pack 4A Page 149 of 176
Disaster Recovery - Sybase iDataAgent
Planning for a Disaster Recovery
Rebuilding the Operating System
Restoring the Sybase Server
Resolve and Restore Defective Devices and Suspected Databases
Before you begin a disaster recovery, make sure to perform the following:
Perform frequent backups of your Sybase server and the latest file system.
Make sure that the Originating host and destination host have the same Sybase version.
Use the File System iDataAgent to backup the Sybase Home and dataserver configuration files.
Managing Backups
As a best practice, it is recommended that you group databases into multiple subclients as follows:
Add larger databases into separate subclients.
Add small databases together into one or more subclients. This is important for the following reasons:
During Disaster recovery, when you have to quickly rebuild the entire instance, you can concurrently restore all the subclients together.
During Backup failures, the backup will restart from the beginning of the database instead of from the beginning of the entire instance. Similarly, this will ensure that large database backups are not affected by restarts from a smaller database.
Once the subclients are created, schedule frequent backups for dynamic data and regular backup schedules for static data in the Sybase Server.
In the case of disaster recovery, where a full system restore is required, you must first rebuild the system to exactly the state as it existed before the problem. Use the following steps to rebuild the operating system:
1. Rebuild the hardware if needed.
2. Install the same version of the operating system with the same patches that were previously installed.
3. Edit the host file of the client to include the CommServe name.
4. Install the File System iDataAgent on the client.
5. Perform a full system restore of the File System iDataAgent.
This will restore the Sybase application files and all of the iDataAgent software. If there are any problems with the Sybase iDataAgent, we recommend that you un-install and re-install the software in the same drive as it was previously installed. Use the same installation parameters, passwords, and backup type settings as were previously used. In addition to restoring your operating system, this operation will restore the Sybase application files and the Sybase iDataAgent.
6. Reboot the computer.
7. Create a Sybase server instance (each instance references a Sybase server) on the destination host. Ensure that you are including the parameters that were used for the Sybase server instance before the system failure.
8. On the destination host, start up the Sybase server (instance) and then shut down the server.
Table of Contents
Planning for a Disaster Recovery
Rebuilding the Operating System
Published On: 11/19/2013 V10 Service Pack 4A Page 150 of 176
When the Sybase server is corrupted or lost, you can restore and recover it from the latest full backup. When restoring an entire server, make sure that the server is offline.
Use the following steps to restore the Sybase server:
1. Create a master device with an empty password. Login as Sybase user and execute the following command:
Run the following query on CommServe database to find the max page size of your sybase server:
Example:
To get max page size for S155syb2 Sybase server:
select * from APP_InstanceProp where componentNameId in (select id from APP_InstanceName where name = 'S155syb2') and attrName = 'SYBASE Max page size'
From the CommCell Browser, navigate to Client Computers | <Client> | Sybase.
Right-click the <Instance>, point to All Tasks, and then click Browse and Restore.
Restoring the Sybase Server
sybase$/Sybase/sybase<version># $SYBASE/$SYBASE_ASE/bin/dataserver –s <SybaseInstanceName> -b <device size in MB> -f –z <Pagesize> -d <master device physical path> -c <Sybase dataserver config file>
select * from APP_InstanceProp where componentNameId in (select id from APP_InstanceName where name = '<your sybase server name>') and attrName = 'SYBASE Max page size'
# /Sybase/sybase15.0.3/ASE-15_5/bin/dataserver -s S155syb2 -b 60M -f -z 2048 -d /Sybase/sybase15.0.3/data/S155syb2/master.dat -c /Sybase/sybase15.0.3/ASE-15_5/S155syb2.cfg
If the physical devices of the database do not exist on the server or you do not know the device list, perform the following to retrieve the list of devices existing on the server:
Ensure that the physical devices of the database exist physically on the server before performing a full system restore.
Published On: 11/19/2013 V10 Service Pack 4A Page 151 of 176
Click the Advanced Options tab.
Select the MediaAgent that was used during the storage policy creation from the Use MediaAgent drop-down list. This MediaAgent should be the one you installed along with your agent.
Click View Content.
In the right pane of the window, select one or more databases that you wish to restore.
Click Recover All Selected.
Published On: 11/19/2013 V10 Service Pack 4A Page 152 of 176
Click Advanced.
Click Options tab. You will see the list of all the devices and their sizes. You can create devices needed for restore based on this list.
Published On: 11/19/2013 V10 Service Pack 4A Page 153 of 176
2. Start the dataserver.
Example:
/Sybase/sybase15.0.3/ASE-15_5/install/startserver -f RUN_S155syb2
3.
Step-1 informs you to create a master device which can be used by master, model and tempdb databases.
Verify the that the physical devices required for full system restore are existing under the specified locations as informed in steps 2 to 6.
If you have lost the devices due a corruption or hardware issue, you have to manually create them. Use the following command to manually create a device:
For 15.x and above:
For 12.5 and above:
Example:
1> disk init name='sysprocsdev',2> physname='/Sybase/sybase15.0.3/data/S155dbs12/sysprocs.dat',3> size='512M'
cd $SYBASE/$SYBASE_ASE/install./startserver –f RUN_<sybInstanceName>
# isql –Usa –P –S<Sybase Instance Name>1> disk init name = “<device name>” , physname = “device physical path>” , vstart=0,size = “<device size>M”go
# isql –Usa –P –S<Sybase Instance Name>
1> disk init name = “<device name>” , physname = “device physical path>” , vstart=0,vdevno= <devId>, size = “<device size *1024 *1024/pagesize>”go
Please note that the devId is unique for each device and should be >0
Published On: 11/19/2013 V10 Service Pack 4A Page 154 of 176
4> go
1> disk init name='TEST',2> physname='/Sybase/sybase15.0.3/data/S155dbs12/test.dat',3> size='1228M'4> go1> disk init name='TEST_LOG',2> physname='/Sybase/sybase15.0.3/data/S155dbs12/test_log.dat',3> size='500M'4> go
4. Use the following command to shutdown the dataserver after creating the devices:
Perform a full restore to restore an entire Sybase server.
When restoring an entire server, make sure that the server is offline. Use the following steps to restore the Sybase server from CommCell browser:
1. From the CommCell Browser, navigate to Client Computers | <Client> | Sybase.
Right-click the <Instance>, point to All Tasks, and then click Browse and Restore.
2. Click the Advanced Options tab.
Select the MediaAgent that was used during the storage policy creation from the Use MediaAgent drop-down list. This MediaAgent should be the one you installed along with your agent.
isql –Usa –P –S<Sybase Instance Name>shutdown with nowaitexit
Published On: 11/19/2013 V10 Service Pack 4A Page 155 of 176
Click View Content.
3. In the right pane of the window, select one or more databases that you wish to restore.
Click Recover All Selected.
4. Click OK.
Published On: 11/19/2013 V10 Service Pack 4A Page 156 of 176
5. You can monitor the progress of the restore job in the Job Controller.
A full Sybase restore may fail if one or more database devices are defective or have been physically deleted and the corresponding databases have therefore been marked as suspected. In such a case, all the databases marked as suspected and the corresponding devices whose files have been lost must be dropped and re-created.
Use the following steps to resolve and restore defective devices and suspected databases:
1. Issue the following command to determine whether the database is suspected:
Example:
sp_marksuspect (<sybdb1>)
2. Drop the suspected database using the following command:
Example:
Resolve and Restore Defective Devices and Suspected Databases
sp_marksuspect (<database name>)
dbcc dbrepair (<database name>, dropdb)
Published On: 11/19/2013 V10 Service Pack 4A Page 157 of 176
dbcc dbrepair (<sybdb1>, dropdb)
3. If the database to be recovered is sybsystemprocs (system database), use the following command to drop the corresponding device (since stored procedures are not available at this point):
Example
disk release name = <tempdbdev>
4. If any of the data device files do not exist but the device entry exists in sysdevices, drop those devices using the following command:
Example:
sp_dropdevice <tempdbdev>
5. Repeat the above procedure for each suspected database.
6. Resume the restore starting with the first database that was deemed suspected.
disk release name = <device name>
sp_dropdevice <device name>
Published On: 11/19/2013 V10 Service Pack 4A Page 158 of 176
Additional Operations - Sybase iDataAgent
Audit Trail
Auxiliary Copy
Erasing Backup Data
Global Filters
Online Help Links
Operating System and Application Upgrades
Operation Window
Schedule Policy
Storage Policy
Subclient Policy
Uninstalling Components
Advanced Topics
The Audit Trail feature allows you to track the operations of users who have access to the CommCell. This capability is useful if a detrimental operation was performed in the CommCell and the source of that operation needs to be determined.
Audit Trail tracks operations according to four severity levels:
Critical: This level records operations that will result in imminent loss of data.
High: This level records operations that may result in loss of data.
Medium: This level records changes to the general configuration of one or more entities. Such changes may produce unintended results when operations are performed.
Low: This level records changes to status, addition of entities, and other operations that have minimal impact on existing CommCell functions.
To set Audit Trail retention periods:
1. From the Home tab in the CommCell Console, click Control Panel. The Control Panel dialog box appears.
2. From the Monitoring options, click Audit Trail.
3. From the Audit Trail dialog box, select the desired retention time (in days) for each severity level.
4. Click OK.
For details, see Audit Trail.
An auxiliary copy operation allows you to create secondary copies of data associated with data protection operations, independent of the original copy.
1. Expand the Policies node, right-click storage policy for which you want to perform an auxiliary copy, click All Tasks, and then click Run Auxiliary Copy.
2. If you are starting the auxiliary copy operation from the CommServe level, select the storage policy for which you wish to perform the auxiliary copy.
Table of Contents
Audit Trail
Auxiliary Copy
If you are starting the auxiliary copy operation from the Storage Policy level, the Storage
Published On: 11/19/2013 V10 Service Pack 4A Page 159 of 176

3. If the source copy is configured with a shared library, select the Source MediaAgent for the auxiliary copy.
4. Click OK to start the auxiliary copy operation. A progress bar displays the progress of the operation.
For details, see Auxiliary Copy.
The Erase Data feature allows you to permanently erase any data that can be backed up. Using Erase Data, you can erase data such as file system, system state, and office communications server (OCS) data.
Configuring Erase Data
To erase data, you need to first assign a Filter Storage Policy for Erasing Data. Follow the steps given below to assign a Filter Storage Policy:
1. From the CommCell Browser, right-click the storage policy that you want to use as a filter storage policy, then click Properties.
2. From the General tab of the Storage Policy Properties dialog box, select the Allow Erase Data check box.
3. Click OK.
4. From the CommCell Browser, right-click the <Agent> and then click Properties.
5. From the Storage Device tab of the agent Properties dialog box, select a filter storage policy from the Filter Storage Policy list.
6. Click OK.
Running an Erase Data Job
After the configuration has been completed, you can now browse and erase data. Keep in mind that the erase data operation only erases the backup data - the source data will remain on the local hard drive. Therefore, it is recommended to delete the data from the source first so that it will not be backed up again. However, the stubs must be deleted from the source before running the erase data operation so that they are not backed up again. Otherwise, the synthetic full backup jobs will fail.
1. From the CommCell Browser, right-click the <Backup Set>, select All Tasks and then click Erase Data By Browsing.
2. You are warned that the data will be permanently removed. Click Yes to continue.
3. From the Erase Data by Browsing dialog box, click Browse.
4. In the Browse Options dialog box, select a browse time range and any advanced browse options, and click OK.
5. From the browse selection window, select the data objects that you want to erase, and click OK.
6. In the Job Initiation tab, select Immediate to run the job immediately.
You can track the progress of the job from the Job Controller or Event Viewer.
For details, see Erasing Backup Data.
Global Filters are exclusions that filter data from backups across all Agents in a CommCell that support the feature. Global Filters serve as a template for files, folders, and entities that should always be excluded from all (or most) backups in a CommCell, such as temporary data a computer does not retain or data that is recoverable by means other than a restore. This saves space on media and enhances backup performance.
By default, filters configured for a particular subclient override any Global Filters configured for the CommCell. You can, however, configure subclients to include global filters along with any filters already configured for the subclient.
Policy field is already populated with the name of the Storage Policy you selected.
Erasing Backup Data
Global Filters
Published On: 11/19/2013 V10 Service Pack 4A Page 160 of 176
For details, see Global Filters.
Configure Global Filters
1. From the CommCell Browser, right-click the CommServe, click Control Panel, and then click Global Filters.
2. Select Use Global Filters on All Subclients.
3. Click Browse to locate the files or folders to be excluded from backups and click OK.
4. Click OK to save your changes.
Enable/Disable Global Filters for a Subclient
1. From the CommCell Browser, right-click the subclient for which you want to enable Global Filters and click Properties.
2. Click the Filters tab.
3. Select one of the following values from the Include Global Filters list:
ON to enable Global Filters for this subclient.
OFF to disable Global Filters for this subclient.
Use Cell Level Policy to enables or disables Global Filters for this subclient.
4. Click OK.
Operating system upgrades are only supported when upgrading from one version of an OS to a different version of the same OS (e.g., Win2003 to Win2008). The two methods of upgrading are:
Seamless Upgrade - This involves uninstalling the Agent software, upgrading the operating system, and then re-installing the Agent software.
Full OS Replacement - This involves performing a clean install of a new version of the OS, re-installing any application software, then re-installing the CommServe, MediaAgent, and/or Agent software.
For Full OS Replacement, the client computer must be configured to have the CommServe, MediaAgent, and/or Client software re-installed to the same location, the same Fully Qualified Domain Name or short domain name, the same partitions, disk drive format (FAT, NTFS, et. al.), and IP configuration as previously.
Use the following strategy to upgrade the operating system software:
Identify the computers you want to upgrade and the CommCell components installed on each of these computers.
Choose the type of upgrade procedure you want to use on each computer: seamless or full replacement.
CommServe, MediaAgent, and Client computers can be upgraded in any order.
For details, see Operating System and Application Upgrades.
Use the following links to view the online help for the corresponding tabs in the CommCell Console:
If the Use Global Filters on All Subclients option is enabled, then the Use Cell Level Policy option will enable Global Filters on this subclient.
If the Use Global Filters on All Subclients option is disabled, then the Use Cell Level Policy option will disable Global Filters on this subclient.
Operating System and Application Upgrades
If it is necessary to remove Agent software to facilitate an operating system or application upgrade, do not delete the icon for the Agent from the CommCell Console, or all associated backed up data will be lost.
Online Help Links
Published On: 11/19/2013 V10 Service Pack 4A Page 161 of 176
By default, all operations in the CommCell can run for 24 hours. To prevent certain operations from running during certain periods of the day, you can define operation rules so that these operations are disabled during those times.
When operation rules are configured, operations that are started within the time window specified will go to a queued (as opposed to pending) state. Once the time window specified in the operation rule has elapsed, these queued or running operations will resume automatically.
1. In the CommCell Browser, right-click the appropriate entity, click All Tasks, and then click Operation Window.
2. Click Add.
3. From the Operation Window dialog box:
Enter the name of the rule in the Name field.
Select either an administration, data protection (either full or non-full), and/or a data recovery operation from the Operations pane.
4. Click OK.
For details, see Operation Window.
Operations Entity Online Help Links Sub Links
ConfigurationAgent Sybase Properties (General)
Sybase Properties (Security)
Sybase Properties (Activity Control)Instance Properties of Sybase: <instance name> (General)
Properties of Sybase: <instance name> (Accounts)
Properties of Sybase: <instance name> (Security)Subclient Subclient Properties of <Subclient Name> (General)
Subclient Properties of <Subclient Name> (Content)
Subclient Properties of <Subclient Name> (Pre/Post Process)
Subclient Properties of <Subclient Name> (Storage Device)
Subclient Properties of <Subclient Name> (Activity Control)
Subclient Properties of <Subclient Name> (Encryption)
BackupBackup Options Backup Options for Subclient <Subclient Name> Save As Script
Schedule Details
Advanced Backup Options
Advanced Backup Options (Startup)
Advanced Backup Options (Job Retry)
Advanced Backup Options (Media)
Advanced Backup Options (Data Path)
Advanced Backup Options (VaultTracking)
Advanced Backup Options (Alert)
RestoreRestore Options Sybase Restore Options (General)
Sybase Restore Options (Job Initiation)
Save As Script
Schedule DetailsAdvanced Restore Options
Advanced Restore Options (Startup)
Advanced Restore Options (Copy Precedence)
Advanced Restore Options (Data Path)
Advanced Restore Options (Encryption)
Advanced Restore Options (Alert)
Advanced Restore Options (Options)
Operation Window
Published On: 11/19/2013 V10 Service Pack 4A Page 162 of 176
A schedule policy is a defined schedule or group of schedules for specific operations to be performed on associated objects within the CommCell. When the schedules from a policy are run, the specified operations, (e.g., auxiliary copy, backup, etc.,) will be performed on the associated CommCell objects.
1. Expand the Policies node, right-click Schedule Policies and click Add.
2. Type the Name of the schedule policy.
3. Select the Type of schedule policy.
4. Select the Agent Type.
5. Type a description of the schedule policy.
6. Click Add.
7. Enter a Schedule Name in the Schedule Pattern tab.
8. Click OK.
9. On the Associations tab, select the objects to be associated with the schedule policy.
10. Click OK.
For details, see Schedule Policy.
A Storage policy defines the data lifecycle management rules for protected data. Storage policies map data from its original location to a physical storage media and determine its retention period.
1. From the CommCell Browser, navigate to Policies.
2. Right-click Storage Policies, and then click New Storage Policy.
3. Click Next.
4. Select Data Protection and Archiving to create a regular storage policy or CommServe Disaster Recovery Backup to backup the CommServe database and click Next.
5. In the Storage Policy Name box, specify the name of the storage policy, and then click Next.
6. From the Library list, select a library for the primary copy, and then click
7. From the MediaAgent list, select the MediaAgent, and then click Next.
8. Enter number of data streams and set the retention period for the policy, and then click Next.
9. Click Next.
10. From the MediaAgent Name list, select the MediaAgent.
11. In the Location box, type or click Browse to your designated deduplication database location, and then click Next.
12. Confirm your selections, and then click Finish.
For details, see Storage Policy.
Subclient policies allow you to configure multiple subclients within a CommCell from a centralized template. This alleviates the need to manually configure each subclient that shares a similar configuration.
1. Expand the Policies node, right-click Subclient Policies and click New Subclient Policy.
Schedule Policy
Storage Policy
Subclient Policy
Published On: 11/19/2013 V10 Service Pack 4A Page 163 of 176
2. Enter policy name in the Name entry field, then select the appropriate file system type from the iDataAgent drop-down list.
3. In the Subclient pane, assign a storage policy for each subclient template by clicking in the drop down box under the Storage Policycolumn.
4. Click OK.
For details, see Subclient Policies.
You can uninstall the components using one of the following method:
Method 1: Uninstall Components Using the CommCell Console
1. From the CommCell Browser, right-click the desired Client Computer and click All Tasks -> Add/Remove Software and click Uninstall Software.
2. Uninstall Software Options dialog will appear.
3. In the Uninstall Software tab, select Uninstall All to uninstall all the software packages.
4. In the Job Initiation tab, select Immediate to run the job immediately.
You can track the progress of the job from the Job Controller or Event Viewer.
Method 2: Uninstall Components from Add or Remove Programs
1. Click the Start button on the Windows task bar and then click Control Panel.
2. Double-click Add/Remove Programs.
For Windows Vista/Windows 2008, click Uninstall a Program in the Control Panel.
3. Click Remove to uninstall the components in the following sequence:
1. <Agent>
2. File System iDataAgent
3. Base Software
For details, see Uninstalling Components.
Uninstalling Components
Method 1: Uninstall Components Using the CommCell Console
Method 2: Uninstall Components from Add or Remove Programs
Advanced TopicsProvides comprehensive information about additional capabilities for the following features:
Audit TrailAuxiliary CopyLicense AdministrationLicense Usage by CapacityOperation WindowSchedule PolicyStorage PoliciesUninstalling Components
Back to top
Published On: 11/19/2013 V10 Service Pack 4A Page 164 of 176
Best Practices - Sybase iDataAgent
Creating Subclients
As a best practice, it is recommended that you create separate subclients to backup data that undergo frequent changes.
For example, if the EXAMPLE and USERS dbspaces undergo frequent changes, you can create a separate subclient for each tablespace.
Example:
• User-defined subclient: Test1
Content: EXAMPLE
• User-defined subclient: Test2
Content: USERS
It is recommended that you create a separate user-defined subclient for the log files on the client.
Distributing the client data using subclients as recommended above, can help improve backup performance by organizing the workload on the client into logical groupings.
Subclient Content
As a best practice, it is recommended that you add only a few small databases to each subclient and add larger databases into separate subclients. On a restart condition, the system will back up all databases in the subclient from the beginning. For this reason, you would not want a large database that has completed its backup successfully to be backed up again only because a smaller one has caused a restart to occur.
Re-configuring Default Subclient Content
We recommend that you do not re-configure the content of a default subclient because this would disable its capability to serve as a catch-all entity for client data. As a result, some data will not get backed up or scanned.
Changing Storage Policies
If you change a storage policy for a default subclient, and want to restore to a point in time prior to the change (i.e., restore from previous storage policy), perform a Full backup of the database as soon as possible. Data from the old storage policy will not be considered as the most recent cycle and when it exceeds its retention period, and hence will be pruned.
Published On: 11/19/2013 V10 Service Pack 4A Page 165 of 176

Frequently Asked Questions - SybaseCan we protect data on non-global zones if the File System iDataAgent is installed only on the global zone
How do we protect Sybase data on a non-global zone
What are the folders/files created and changes done during install of this agent
Can we perform an interactive upgrade from Data Protection Suite v8.0 to Data Protection Suite v10.0 if a Sybase Adaptive Server Enterprise v12.5 instance is configured in Data Protection Suite v8.0
When does a Non-Full Backup automatically get converted to a Full Backup
Are remote backup servers supported
How are Transaction Logs truncated
Can we perform a table level restore
Can you backup Sybase IQ Data
Can we load a Master Database while performing a cross-platform restore
Is cross-platform loading available for transaction dumps
Can we restore from the transaction log backups
Can I schedule step-by-step restores
Can we perform SQL Anywhere Backups and Restores using Sybase iDataAgent ?
Can we protect data on non-global zones if the File System iDataAgent is installed only on the global zone?
Yes. We can protect file system data on non-global zones if the File System iDataAgent is installed only on the global zone. However, in order to enable consistent backups of application specific data on the non-global zones, you will need to install the corresponding application specific iDataAgent on the non-global zone.
How do we protect Sybase data on a non-global zone?
In order to enable consistent backups of Sybase data on a non-global zone, you need to install the Sybase iDataAgent on the non-global zone.
What are the Folders/Files Created and Changes Done During Install of this Agent?
Can we perform an interactive upgrade from Data Protection Suite v8.0 to Data Protection Suite v10.0 if a Sybase Adaptive Server Enterprise v12.5 instance is configured in Data Protection Suite v8.0?
No. An interactive upgrade to Data Protection Suite v10.0 from v8.0 may fail if a Sybase Adaptive Server Enterprise v12.5 instance is configured for Data Protection Suite v8.0.
When does a Non-Full Backup Automatically get Converted to a Full Backup?A non-full backup is automatically converted to a full backup in the following situations:
First backup of the subclient.
Re-associating a subclient to another storage policy.
Promote a secondary storage policy copy that is not synchronized with a primary copy (for all the subclients of a storage policy).
If a backup job within the most recent backup cycle is pruned or disabled from a primary copy.
PLATFORMS FOLDERS CREATED FILES CREATED OTHER CHANGESLinux None None Create a link to libSybGalaxy.so under
$SYBASELIBPATHSolaris None None Create a link to libSybGalaxy.so under
$SYBASELIBPATHAIX None None Create a link to libSybGalaxy.so under
$SYBASELIBPATH
Published On: 11/19/2013 V10 Service Pack 4A Page 166 of 176

CommCell Migration operation.
When a Sybase database createtime is changed since the last backup.
Are remote backup servers supported?
No. Remote Backup Servers are not supported. You can only change the backup server that is associated to a Sybase server instance from the available backup servers with in the Sybase server environment.
How are Transaction Logs truncated?
Truncation of transaction logs use the following rules:
Transaction logs will be truncated at the completion of a Transaction Log backup.
Transaction logs will be truncated every time a checkpoint is processed, if the database is in truncate mode.
Full backups do not truncate transaction logs.
Can we perform a table level restore?
Currently, table level restore for Sybase database is not supported. However, you can create a new database and restore your backup to this new database (target database). After the restore, you can truncate original table in the source database and replace this table with the table in the target database using bcp export/import commands.
Ensure that you have the latest full backup i.e., the backup prior to the corruption or loss of a table that you want to restore.
Use the following steps to restore a table:
1. From the CommCell Browser, navigate to Client Computers | <Client> | Sybase.
2. Right-click the <Instance>, point to All Tasks and then click Browse and Restore.
3. Click View Content in the Restore Options dialog box.
4. In the right pane of the window, select one or more databases that you wish to restore. Click Recover All Selected.
5. Select the Rename Databases check box and click Advanced.
Click the Options tab.
Click the Target Database column and type the new database name.
Click OK.
Published On: 11/19/2013 V10 Service Pack 4A Page 167 of 176
6. Click OK in the Sybase Restore dialog box. A new database (target database) is created and restored with the latest backup.
7. Truncate the table that is corrupted in source database.
Example:
8. Run the following command from the target database:
Example:
9. Run the following command from the source database:
When you rename a database, make sure that the tables in the database are not referencing to or referenced by tables in any other databases.
use db1truncate table_abc
bcp <db_name>.owner.<table_name> out <file_name> -Y -U<user_name> -P <password> -S <server_name>
use db2bcp db2.owner.table_abc out file1 -y -sa -pwd -SYB1
bcp<db_name>.owner.<table_name> in <file_name> -Y -
Published On: 11/19/2013 V10 Service Pack 4A Page 168 of 176
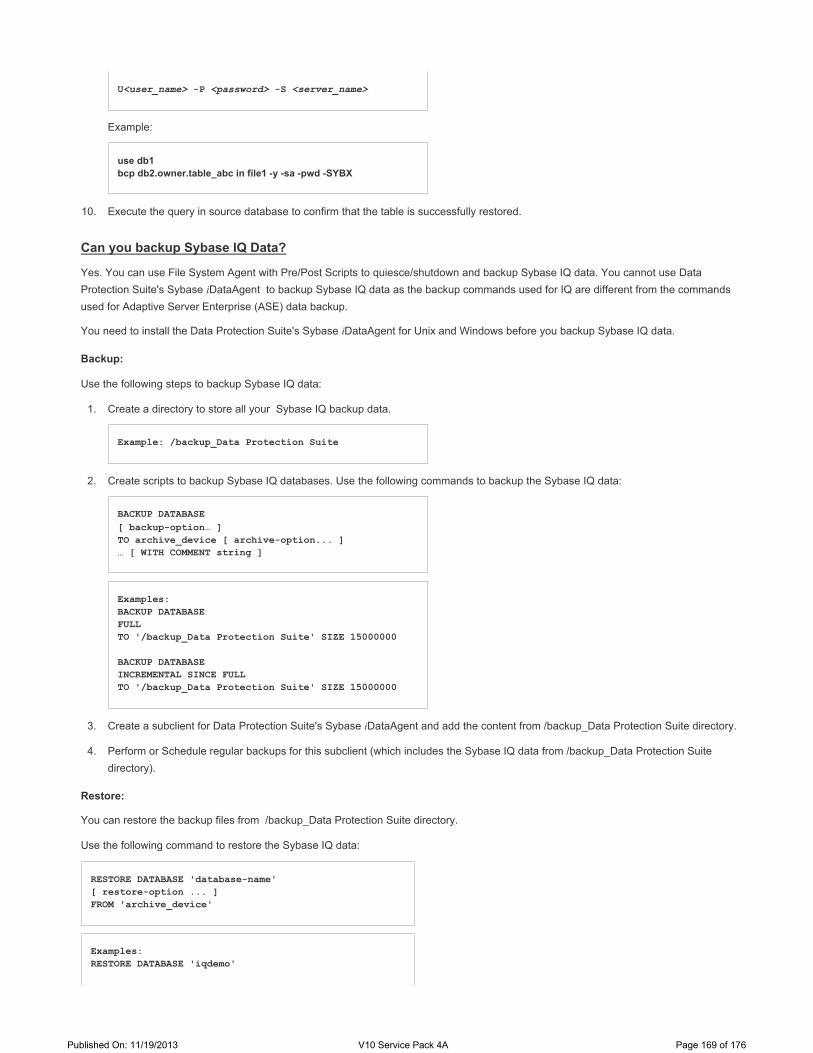
Example:
10. Execute the query in source database to confirm that the table is successfully restored.
Can you backup Sybase IQ Data?
Yes. You can use File System Agent with Pre/Post Scripts to quiesce/shutdown and backup Sybase IQ data. You cannot use Data Protection Suite's Sybase iDataAgent to backup Sybase IQ data as the backup commands used for IQ are different from the commands used for Adaptive Server Enterprise (ASE) data backup.
You need to install the Data Protection Suite's Sybase iDataAgent for Unix and Windows before you backup Sybase IQ data.
Backup:
Use the following steps to backup Sybase IQ data:
1. Create a directory to store all your Sybase IQ backup data.
2. Create scripts to backup Sybase IQ databases. Use the following commands to backup the Sybase IQ data:
3. Create a subclient for Data Protection Suite's Sybase iDataAgent and add the content from /backup_Data Protection Suite directory.
4. Perform or Schedule regular backups for this subclient (which includes the Sybase IQ data from /backup_Data Protection Suite directory).
Restore:
You can restore the backup files from /backup_Data Protection Suite directory.
Use the following command to restore the Sybase IQ data:
U<user_name> -P <password> -S <server_name>
use db1bcp db2.owner.table_abc in file1 -y -sa -pwd -SYBX
Example: /backup_Data Protection Suite
BACKUP DATABASE[ backup-option… ]TO archive_device [ archive-option... ]… [ WITH COMMENT string ]
Examples:BACKUP DATABASE FULLTO '/backup_Data Protection Suite' SIZE 15000000
BACKUP DATABASE INCREMENTAL SINCE FULLTO '/backup_Data Protection Suite' SIZE 15000000
RESTORE DATABASE 'database-name' [ restore-option ... ]FROM 'archive_device'
Examples:RESTORE DATABASE 'iqdemo'
Published On: 11/19/2013 V10 Service Pack 4A Page 169 of 176

Can we load a master database while performing a cross-platform restore?
No. Sybase do not support loading a master database while performing a cross-platform restore.
Is cross-platform loading available for transaction dumps?
No. Cross-platform loading is only available for database dumps and not to the transaction dumps.
Can we restore from the transaction log backups?
Yes. You can restore the transaction logs along with the database to a specific point in time. The point in time should be in between the start and end point of a transaction log. Point in Time restore will restore the database followed by transaction logs restored until the point of time. The nearest database backup job before the point-in time will be picked up followed by one or more transaction log backups. The immediate transaction log backup after a Point in Time will be restored.
For example:
Let us assume that you have performed a Full backup (F1) and transaction log backup (L1) for the first time at 1 P.M. Subsequently you have performed L2 at 3 P.M. Later, you have performed L3, F2, L4,L5 etc at subsequent intervals. If you perform a point in time restore for the transaction log backups at 2 P.M, the Full backup (F1) along with the log backups of L1 and L2 (transaction log after point in time) will be restored.
We do not support the restores from the transaction log backups that are not truncated. Transaction log jobs picked for Point in Time restore should fall with in one backup cycle and not across job cycles.
You can perform a point of time restore of transaction logs for clients and CommServe on different time zones.
Can i schedule step-by-step restores?
No. You cannot schedule step-by-step restores.
Can we perform SQL Anywhere Backups and Restores using Sybase iDataAgent ?
No. We currently support Sybase ASE for backups and restores. However, we can perform SQL Anywhere backups and restores using Data Protection Suite's file system iDataAgent with pre-post scripts. See Configuring Sybase SQL Anywhere, Performing SQL Anywhere Backups and Restoring SQL Anywhere Backups for more information on how to configure and perform SQL Anywhere backups and restores.
FROM '/backup_Data Protection Suite'
Back to top
Published On: 11/19/2013 V10 Service Pack 4A Page 170 of 176
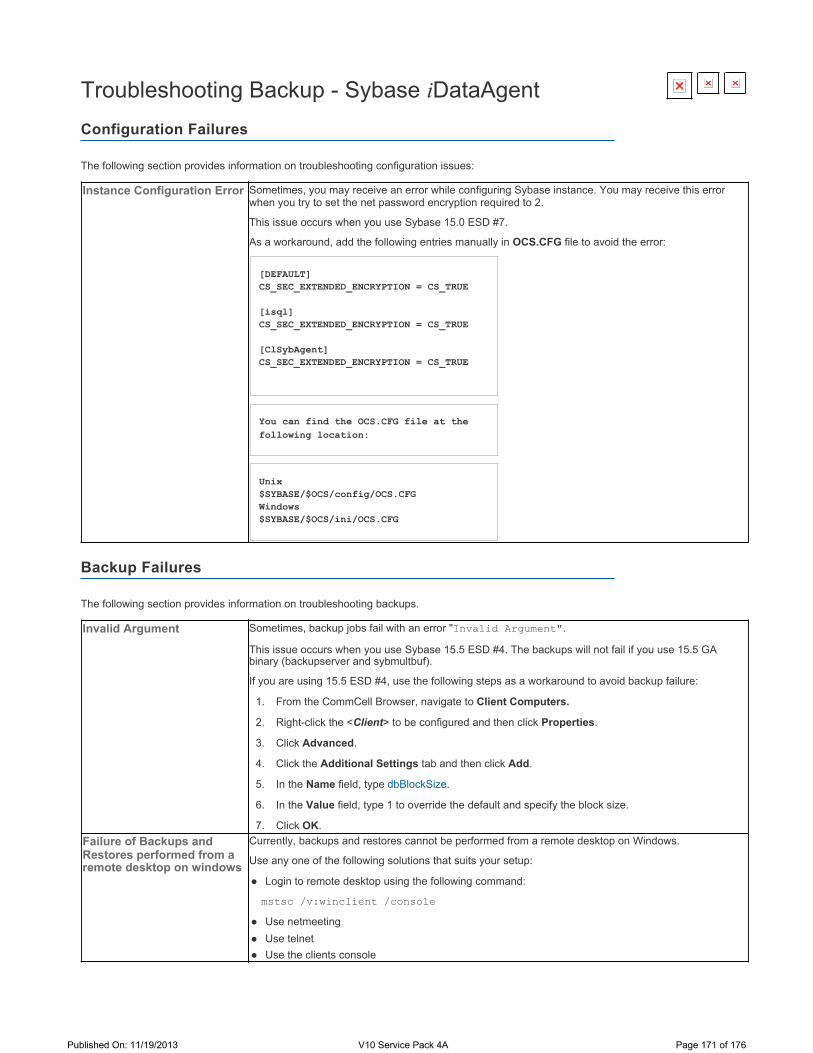
Troubleshooting Backup - Sybase iDataAgent
The following section provides information on troubleshooting configuration issues:
The following section provides information on troubleshooting backups.
Configuration Failures
Instance Configuration Error Sometimes, you may receive an error while configuring Sybase instance. You may receive this error when you try to set the net password encryption required to 2.
This issue occurs when you use Sybase 15.0 ESD #7.
As a workaround, add the following entries manually in OCS.CFG file to avoid the error:
[DEFAULT]CS_SEC_EXTENDED_ENCRYPTION = CS_TRUE
[isql]CS_SEC_EXTENDED_ENCRYPTION = CS_TRUE
[ClSybAgent]CS_SEC_EXTENDED_ENCRYPTION = CS_TRUE
You can find the OCS.CFG file at the following location:
Unix$SYBASE/$OCS/config/OCS.CFGWindows$SYBASE/$OCS/ini/OCS.CFG
Backup Failures
Invalid Argument Sometimes, backup jobs fail with an error "Invalid Argument".
This issue occurs when you use Sybase 15.5 ESD #4. The backups will not fail if you use 15.5 GA binary (backupserver and sybmultbuf).
If you are using 15.5 ESD #4, use the following steps as a workaround to avoid backup failure:
1. From the CommCell Browser, navigate to Client Computers.
2. Right-click the <Client> to be configured and then click Properties.
3. Click Advanced.
4. Click the Additional Settings tab and then click Add.
5. In the Name field, type dbBlockSize.
6. In the Value field, type 1 to override the default and specify the block size.
7. Click OK. Failure of Backups and Restores performed from a remote desktop on windows
Currently, backups and restores cannot be performed from a remote desktop on Windows.
Use any one of the following solutions that suits your setup:
Login to remote desktop using the following command:
mstsc /v:winclient /consoleUse netmeeting Use telnet Use the clients console
Published On: 11/19/2013 V10 Service Pack 4A Page 171 of 176

Backup jobs from Sybase iDataAgent will be displayed as "Completed w/ one or more errors" in the Job History in the following cases:
If the subclient contains multiple databases, killing a backup job when some of the database backup jobs are not completed.
If the subclient contains multiple databases, if some of the databases in the subclient are corrupted or removed.
Completed with One or More Errors
Published On: 11/19/2013 V10 Service Pack 4A Page 172 of 176
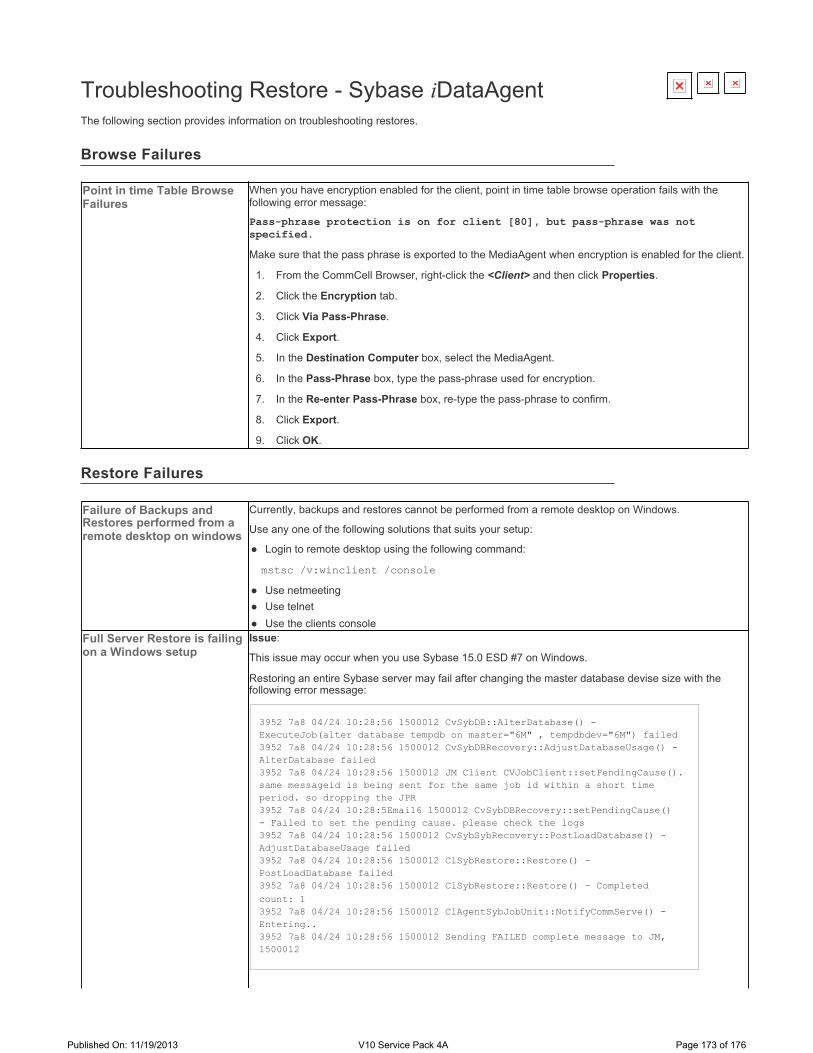
Troubleshooting Restore - Sybase iDataAgentThe following section provides information on troubleshooting restores.
Browse Failures
Point in time Table Browse Failures
When you have encryption enabled for the client, point in time table browse operation fails with the following error message:
Pass-phrase protection is on for client [80], but pass-phrase was not specified.Make sure that the pass phrase is exported to the MediaAgent when encryption is enabled for the client.
1. From the CommCell Browser, right-click the <Client> and then click Properties.
2. Click the Encryption tab.
3. Click Via Pass-Phrase.
4. Click Export.
5. In the Destination Computer box, select the MediaAgent.
6. In the Pass-Phrase box, type the pass-phrase used for encryption.
7. In the Re-enter Pass-Phrase box, re-type the pass-phrase to confirm.
8. Click Export.
9. Click OK.
Restore Failures
Failure of Backups and Restores performed from a remote desktop on windows
Currently, backups and restores cannot be performed from a remote desktop on Windows.
Use any one of the following solutions that suits your setup:
Login to remote desktop using the following command:
mstsc /v:winclient /consoleUse netmeeting Use telnet Use the clients console
Full Server Restore is failing on a Windows setup
Issue:
This issue may occur when you use Sybase 15.0 ESD #7 on Windows.
Restoring an entire Sybase server may fail after changing the master database devise size with the following error message:
3952 7a8 04/24 10:28:56 1500012 CvSybDB::AlterDatabase() -ExecuteJob(alter database tempdb on master="6M" , tempdbdev="6M") failed3952 7a8 04/24 10:28:56 1500012 CvSybDBRecovery::AdjustDatabaseUsage() -AlterDatabase failed3952 7a8 04/24 10:28:56 1500012 JM Client CVJobClient::setPendingCause(). same messageid is being sent for the same job id within a short time period. so dropping the JPR3952 7a8 04/24 10:28:5Email6 1500012 CvSybDBRecovery::setPendingCause() - Failed to set the pending cause. please check the logs3952 7a8 04/24 10:28:56 1500012 CvSybSybRecovery::PostLoadDatabase() -AdjustDatabaseUsage failed3952 7a8 04/24 10:28:56 1500012 ClSybRestore::Restore() -PostLoadDatabase failed3952 7a8 04/24 10:28:56 1500012 ClSybRestore::Restore() - Completed count: 13952 7a8 04/24 10:28:56 1500012 ClAgentSybJobUnit::NotifyCommServe() -Entering..3952 7a8 04/24 10:28:56 1500012 Sending FAILED complete message to JM, 1500012
Published On: 11/19/2013 V10 Service Pack 4A Page 173 of 176
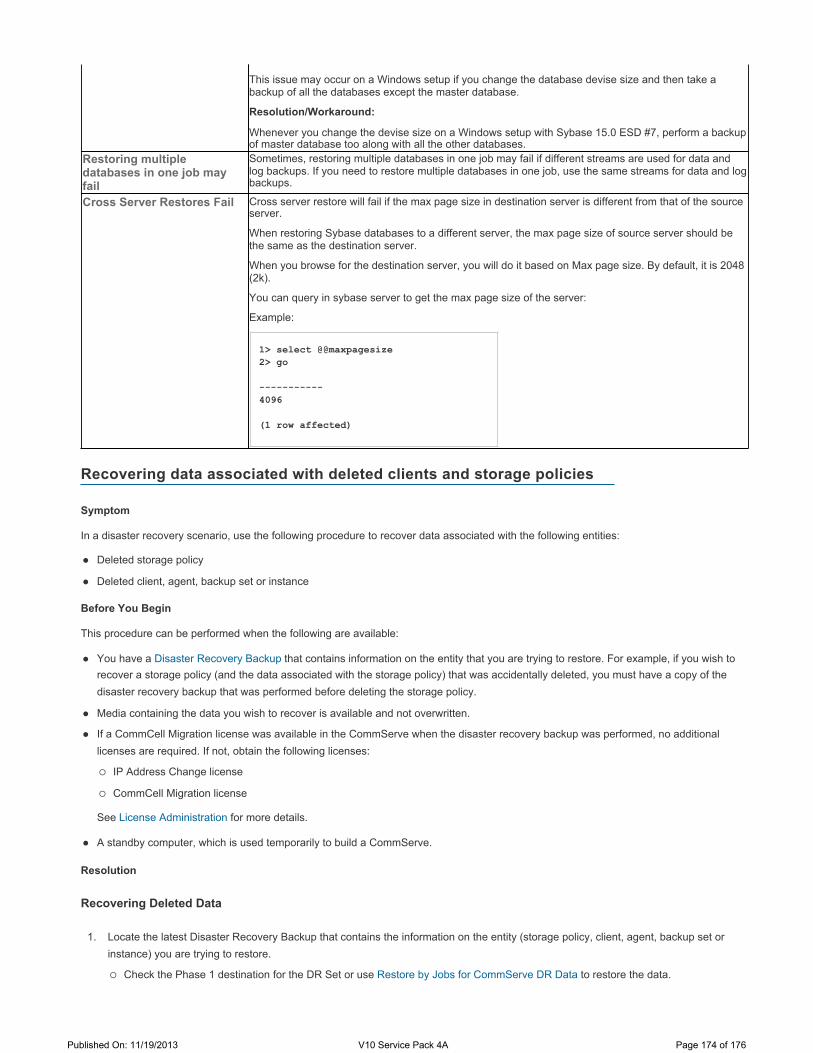
Symptom
In a disaster recovery scenario, use the following procedure to recover data associated with the following entities:
Deleted storage policy
Deleted client, agent, backup set or instance
Before You Begin
This procedure can be performed when the following are available:
You have a Disaster Recovery Backup that contains information on the entity that you are trying to restore. For example, if you wish to recover a storage policy (and the data associated with the storage policy) that was accidentally deleted, you must have a copy of the disaster recovery backup that was performed before deleting the storage policy.
Media containing the data you wish to recover is available and not overwritten.
If a CommCell Migration license was available in the CommServe when the disaster recovery backup was performed, no additional licenses are required. If not, obtain the following licenses:
IP Address Change license
CommCell Migration license
See License Administration for more details.
A standby computer, which is used temporarily to build a CommServe.
Resolution
Recovering Deleted Data
1. Locate the latest Disaster Recovery Backup that contains the information on the entity (storage policy, client, agent, backup set or instance) you are trying to restore.
Check the Phase 1 destination for the DR Set or use Restore by Jobs for CommServe DR Data to restore the data.
This issue may occur on a Windows setup if you change the database devise size and then take a backup of all the databases except the master database.
Resolution/Workaround:
Whenever you change the devise size on a Windows setup with Sybase 15.0 ESD #7, perform a backup of master database too along with all the other databases.
Restoring multiple databases in one job may fail
Sometimes, restoring multiple databases in one job may fail if different streams are used for data and log backups. If you need to restore multiple databases in one job, use the same streams for data and log backups.
Cross Server Restores Fail Cross server restore will fail if the max page size in destination server is different from that of the source server.
When restoring Sybase databases to a different server, the max page size of source server should be the same as the destination server.
When you browse for the destination server, you will do it based on Max page size. By default, it is 2048 (2k).
You can query in sybase server to get the max page size of the server:
Example:
1> select @@maxpagesize2> go
-----------4096
(1 row affected)
Recovering data associated with deleted clients and storage policies
Published On: 11/19/2013 V10 Service Pack 4A Page 174 of 176
If the job was pruned and you know the media containing the Disaster Recovery Backup, you can move the media in the Overwrite Protect Media Pool. See Accessing Aged Data for more information. You can then restore the appropriate DR Set associated with the job as described in Restore by Jobs for CommServe DR Data.
If the job is pruned and you do not know the media containing the Disaster Recovery Backup, you can do one of the following:
If you regularly run and have copies of the Data on Media and Aging Forecast report, you can check them to see if the appropriate media is available.
If you do not have an appropriate report, and know the media that contains the DR Backup, catalog the media using Media Explorer. Once the cataloging process is completed, details of the data available in the media are displayed.
2. On a standby computer, install the CommServe software. For more information on installing the CommServe, see Install the CommServe.
3. Restore the CommServe database using the CommServe Disaster Recovery Tool from the Disaster Recovery Backup described in Step 1. (See CommServe Disaster Recovery Tool - Getting Started for step-by-step instructions.)
4. Verify and ensure that the HDPS Client Event Manager HDPS Communications Service (EvMgrS) is running.
5. If you did not have a CommCell Migration license available in the CommServe when the disaster recovery backup was performed, apply the IP Address Change license and the CommCell Migration license on the standby CommServe. See Activate Licenses for step-by-step instructions.
6. Export the data associated with the affected clients from the standby CommServe as described in Export Data from the Source CommCell.
7. Import the exported data to the main CommServe as described in Import Data on the Destination CommCell.
This brings back the entity in the CommServe database and the entity is visible in the CommCell Browser. (Press F5 to refresh the CommCell Browser if the entity is not displayed after a successful merge.)
8. If you have additional data that was backed up after the disaster recovery backup and before the deletion of the entity, use the procedure described in Import Metadata from a Tape Media to obtain the necessary information.
9. You can now browse and restore the data from the appropriate entity.
When you start the Command Line Interface to capture data, use the name of the standby CommServe in the -commcell argument.
As a precaution, mark media (tape media) associated with the source CommCell as READ ONLY before performing a data recovery operation in the destination CommCell.
Back to top
Published On: 11/19/2013 V10 Service Pack 4A Page 175 of 176

© 1997-2013 CommVault Systems Inc. All rights reserved.This document may not be copied or further distributed, in whole or in part, without written permission from CommVault Systems
Inc.
Published On: 11/19/2013 V10 Service Pack 4A Page 176 of 176