agent for sap guide - casupport.broadcom.com sso agent for sap 12 51-enu... · ca sso options for...
TRANSCRIPT
Agent for SAP Guide r12.51
CA SSO

This Documentation, which includes embedded help systems and electronically distributed materials (hereinafter referred to as the “Documentation”), is for your informational purposes only and is subject to change or withdrawal by CA at any time.
This Documentation may not be copied, transferred, reproduced, disclosed, modified or duplicated, in whole or in part, without the prior written consent of CA. This Documentation is confidential and proprietary information of CA and may not be disclosed by you or used for any purpose other than as may be permitted in (i) a separate agreement between you and CA governing your use of the CA software to which the Documentation relates; or (ii) a separate confidentiality agreement between you and CA.
Notwithstanding the foregoing, if you are a licensed user of the software product(s) addressed in the Documentation, you may print or otherwise make available a reasonable number of copies of the Documentation for internal use by you and your employees in connection with that software, provided that all CA copyright notices and legends are affixed to each reproduced copy.
The right to print or otherwise make available copies of the Documentation is limited to the period during which the applicable license for such software remains in full force and effect. Should the license terminate for any reason, it is your responsibility to certify in writing to CA that all copies and partial copies of the Documentation have been returned to CA or destroyed.
TO THE EXTENT PERMITTED BY APPLICABLE LAW, CA PROVIDES THIS DOCUMENTATION “AS IS” WITHOUT WARRANTY OF ANY KIND, INCLUDING WITHOUT LIMITATION, ANY IMPLIED WARRANTIES OF MERCHANTABILITY, FITNESS FOR A PARTICULAR PURPOSE, OR NONINFRINGEMENT. IN NO EVENT WILL CA BE LIABLE TO YOU OR ANY THIRD PARTY FOR ANY LOSS OR DAMAGE, DIRECT OR INDIRECT, FROM THE USE OF THIS DOCUMENTATION, INCLUDING WITHOUT LIMITATION, LOST PROFITS, LOST INVESTMENT, BUSINESS INTERRUPTION, GOODWILL, OR LOST DATA, EVEN IF CA IS EXPRESSLY ADVISED IN ADVANCE OF THE POSSIBILITY OF SUCH LOSS OR DAMAGE.
The use of any software product referenced in the Documentation is governed by the applicable license agreement and such license agreement is not modified in any way by the terms of this notice.
The manufacturer of this Documentation is CA.
Provided with “Restricted Rights.” Use, duplication or disclosure by the United States Government is subject to the restrictions set forth in FAR Sections 12.212, 52.227-14, and 52.227-19(c)(1) - (2) and DFARS Section 252.227-7014(b)(3), as applicable, or their successors.
Copyright © 2015 CA. All rights reserved. All trademarks, trade names, service marks, and logos referenced herein belong to their respective companies.

CA Technologies Product References
This document references the following CA Technologies products:
■ CA SSO
■ CA SSO SessionLinker
■ CA Federation
Contact CA Technologies
Contact CA Support
For your convenience, CA Technologies provides one site where you can access the information that you need for your Home Office, Small Business, and Enterprise CA Technologies products. At http://ca.com/support, you can access the following resources:
■ Online and telephone contact information for technical assistance and customer services
■ Information about user communities and forums
■ Product and documentation downloads
■ CA Support policies and guidelines
■ Other helpful resources appropriate for your product
Providing Feedback About Product Documentation
If you have comments or questions about CA Technologies product documentation, you can send a message to [email protected].
To provide feedback about CA Technologies product documentation, complete our short customer survey which is available on the CA Support website at http://ca.com/docs.

Contents 5
Contents
Chapter 1: Overview and Architecture 9
CA SSO Options for SAP ................................................................................................................................................ 9
CA SSO Agent for SAP Integration .............................................................................................................................. 11
CA SSO Agent for SAP Authentication Modes ............................................................................................................ 12
Components in a CA SSO Agent for SAP Environment ............................................................................................... 13
User or Client ...................................................................................................................................................... 13
Front-End Web Server ......................................................................................................................................... 13
Policy Server ........................................................................................................................................................ 13
Web AS J2EE Engine ............................................................................................................................................ 14
CA Federation ...................................................................................................................................................... 14
Chapter 2: CA SSO Agent for SAP Deployment Examples 15
Case 1: CA SSO Agent for SAP SSO Mode ................................................................................................................... 15
How Use Case 1 Works ....................................................................................................................................... 16
Case 2: CA Federation with CA SSO Agent for SAP ..................................................................................................... 18
How Use Case 2 Works ....................................................................................................................................... 19
Case 3: CA SSO Agent for SAP and CA Federation with CA SSO Connector ............................................................... 19
How Use Case 3 Works ....................................................................................................................................... 21
Chapter 3: Installing and Configuring CA SSO Agent for SAP 23
Gather Information for the Installation Wizard ......................................................................................................... 23
Run the Installation Wizard on Windows ................................................................................................................... 24
Run the Installation Wizard on UNIX .......................................................................................................................... 24
Gather Information for the Configuration Wizard ..................................................................................................... 25
Gather Information to Configure Your Authentication Mode ............................................................................ 25
Gather Information to Configure Your SSO Mode .............................................................................................. 26
Gather Information to Configure Your Federation Mode ................................................................................... 28
Run the Configuration Wizard .................................................................................................................................... 28
Chapter 4: Configuration for SSO Mode with CA SSO 31
How to Configure CA SSO Agent for SAP in SSO Mode .............................................................................................. 31
Configure the Front-End Web Server .................................................................................................................. 31
Verify the Configuration of MYSAPSSO2 Tickets ................................................................................................. 32
Map a CA SSO User as a Web AS User ................................................................................................................ 32
Configure an Active Response for the SessionLinker .......................................................................................... 33
6 Agent for SAP Guide
Configure the Web Agent ................................................................................................................................... 33
Configure CA SSO Policies ................................................................................................................................... 34
Chapter 5: Configuration for Federation Mode with CA Federation 35
Intended Audience ..................................................................................................................................................... 35
Federation Partnership Overview .............................................................................................................................. 35
Considerations for the Asserting Party Configuration ............................................................................................... 36
How to Configure the Relying Party in a Federation Partnership .............................................................................. 37
User Identification Based on an Assertion Attribute.................................................................................................. 38
SAP Web AS User Identification ................................................................................................................................. 39
SSO Configuration for Federation Mode .................................................................................................................... 40
Single Logout Configuration for Federation Mode..................................................................................................... 41
Identity Cookie Settings for Federation Mode ........................................................................................................... 42
Assertion Attribute Use by the Target SAP Application ............................................................................................. 43
Chapter 6: Configuring SAP Web AS 7.0 and CA SSO Agent for SAP to Work Together 45
Guidelines for Updating CA SSO Policies .................................................................................................................... 45
Change the Configuration of the SAP J2EE Engine ..................................................................................................... 46
Deploy and View SiteMinderLoginModule.sca .......................................................................................................... 46
Prerequisites ....................................................................................................................................................... 46
Deploy SiteMinderLoginModule.sca ................................................................................................................... 47
View the Deployed SiteMinderLoginModule.sca ................................................................................................ 48
Configure SiteMinderLoginModule ............................................................................................................................ 48
Create an Authentication Template ........................................................................................................................... 49
Select Applications to Use the Authentication Template .......................................................................................... 50
Set the CAPKIHOME Environment Variable ............................................................................................................... 50
How to Confirm your CA SSO Protection ................................................................................................................... 50
Deploy the Test Application ................................................................................................................................ 51
Configure the Test Application............................................................................................................................ 52
Configure the Enterprise Portal Authentication Scheme .................................................................................... 53
How to Configure the CA SSO Settings ................................................................................................................ 56
Chapter 7: Configuring SAP Web AS 7.1-7.4 and CA SSO Agent for SAP to Work Together 57
Guidelines for Updating CA SSO Policies .................................................................................................................... 57
Change the Configuration of the SAP J2EE Engine ..................................................................................................... 58
Deploy the SiteMinderLoginModule.sca .................................................................................................................... 58
Contents 7
Add SiteMinderLoginModule Property Using the AS Java Config Tool ...................................................................... 59
Set the CAPKIHOME Environment Variable ............................................................................................................... 60
Configure SiteMinderLoginModule Using SAP NetWeaver Administrator ................................................................ 60
Create an Authentication Template Using SAP NetWeaver Administrator ............................................................... 61
Configure the LogOff URL of the Enterprise Portal ............................................................................................. 61
Configure an Authentication Scheme for the Enterprise Portal ................................................................................ 62
Configure CA SSO to Protect the Enterprise Portal ............................................................................................. 65
Chapter 8: Configuring CA SSO Agent for SAP with Multiple System IDs (SID) 67
Chapter 9: Upgrading CA SSO Agent for SAP 69
How to Prepare for the Upgrade ................................................................................................................................ 69
Gather Information for the Upgrade .................................................................................................................. 70
Upgrade CA SSO Agent for SAP on Windows ...................................................................................................... 71
Upgrade CA SSO Agent for SAP on UNIX ............................................................................................................. 71
Chapter 10: Troubleshooting 73
Verify the CA SSO Policies .......................................................................................................................................... 73
Check the Web Agent Log .......................................................................................................................................... 74
Temporarily Disable the Session Linker ..................................................................................................................... 74
Examine Web AS Log Files and Traces ....................................................................................................................... 74
Chapter 11: Log Messages 75
Agent initialization failed...Check FIPS mode compatibility with Policy Server. Also verify that the specified Policy Servers are reachable ...................................................................................................................................... 75
Exception from System.loadLibrary(smjavaagentapi) java.lang.UnsatisfiedLinkError: no smjavaagentapi in java.library.path ......................................................................................................................................................... 76
smwebas.home property not set ............................................................................................................................... 76
java.lang.ClassNotFoundException: com.netegrity.siteminder.sap.webas.jaas.SiteMinderLoginModule. ............... 77
no JDecrypt in java.library.path ................................................................................................................................. 77
javaagent_api_init ...................................................................................................................................................... 78
Invalid Entries in the Configuration File ..................................................................................................................... 78
Return code from doManagement Error ................................................................................................................... 79
Policy server IP address or ports are invalid .............................................................................................................. 79
WAS Usernames Do Not Match ................................................................................................................................. 80
SiteMinderSessionID header not found or empty - Aborting... ................................................................................. 80
CA SSO Session Spec Header Not Found or Empty .................................................................................................... 81
Resource not protected by CA SSO ............................................................................................................................ 81
CA SSO Session Is Invalid ............................................................................................................................................ 81
8 Agent for SAP Guide
CA SSO login module authentication failed. Redirecting to the error page... ............................................................ 82
Overall login stack authentication failed. Sending error message... .......................................................................... 82
FEDPROFILE Cookie not found - Aborting… ................................................................................................................ 83
FEDPROFILE cookie set to LOGGEDOFF ...................................................................................................................... 83
Invalid entries for Fed Connector in Config file .......................................................................................................... 83
Appendix A: Front-End Web Server Configuration 85
Apache Web Server .................................................................................................................................................... 85
Verify an Apache Web Server Configuration - Example ...................................................................................... 85
Sun Java Systems Web Server .................................................................................................................................... 86
Verify a Sun Java Systems Web Server Configuration Using RPP - Example ....................................................... 86
Appendix B: NPSEncrypt and NPSVersion Tools 89
NPSEncrypt Tool ......................................................................................................................................................... 89
NPSVersion Tool ......................................................................................................................................................... 90

Chapter 1: Overview and Architecture 9
Chapter 1: Overview and Architecture
This section contains the following topics:
CA SSO Options for SAP (see page 9) CA SSO Agent for SAP Integration (see page 11) CA SSO Agent for SAP Authentication Modes (see page 12) Components in a CA SSO Agent for SAP Environment (see page 13)
CA SSO Options for SAP
CA SSO supports the following SSO deployment options for SAP.
Tier-1
A Web Agent hosted on a front-end web server provides authentication. The web server acts as a proxy for requests to the SAP Web Application Server.
A Tier 1 solution is the minimum requirement for SSO. However, Tier-1 solutions have the following limitations:
■ The ERP Solution trusts information sent from the security solution and does no verification.
■ The point of trust is the web server, which can reside in the DMZ.
Two security options apply:
Option 1
User credentials are stored in the ERP database/directory. The database/directory may not be encrypted, and may be located on the web server leaving user information vulnerable to attack.
Option 2
Users log on to the ERP solution as a super user, masking the identity of the true user.
Tier-2
A CA SSO Connector hosted on the ERP System provides authentication. CA SSO and ERP session linkages are maintained using the SessionLinker.
This product is a Tier-2 solution that enables the ERP solution to verify that information that is passed by CA SSO was sent by CA SSO. This critical capability ensures that even internal users are not attempting to compromise the SAP system.

CA SSO Options for SAP
10 Agent for SAP Guide
This product has the following benefits:
■ The points of trust are the ERP Connector and the Policy Server.
■ Users can be authenticated at the main application site when they first log in and then move seamlessly to any ERP application without being prompted for credentials.
– CA SSO assumes responsibility for authentication.
– CA SSO integrates with the user directory and/or database so there is no need to store user credentials in multiple locations.
CA SSO Agent for SAP Integration
Chapter 1: Overview and Architecture 11
CA SSO Agent for SAP Integration
This product provides seamless single-sign on (SSO) integration among the following types of applications:
■ SAP applications
■ Web Application Server J2EE applications
■ Enterprise Portal applications
■ Non-SAP applications
■ Non-web AS applications
The Web AS J2EE engine lets you integrate a third-party authentication product with the standard Pluggable Authentication Module (PAM) framework. You can protect applications that are deployed on the Web AS J2EE engine with a Login Stack or Authentication template. Create the template from a standard or custom Java Authentication and Authorization Service (JAAS) login module.
The Java Authentication and Authorization Service (JAAS), from Sun Microsystems, implements a Java technology version of the standard PAM framework, and supports user-based authorization.
You can customize the Login Stack or the Authentication template to use a set of JAAS-based login modules arranged in a particular order in the login stack. A custom login module that is based on the JAAS framework can be developed and registered with the Security Provider service offered with the Web AS J2EE engine. This engine provides a pluggable mode of developing and deploying the login modules independently of the application, which uses it as a part of a login stack protecting the application.
The Enterprise Portal from SAP also allows usage of the custom login module, as part of the login stack, to act as an authentication mechanism for access to Enterprise Portal. You can modify the Enterprise Portal authentication scheme. The authentication scheme references an authentication template or login stack inside the SAP Web AS.
This product is the SSO solution for integration with SAP Web AS. The agent specifically addresses SSO with J2EE-based applications deployed on the SAP Web AS J2EE engine, including the Enterprise Portal application. The current solution allows extension of these SSO capabilities with applications deployed outside of SAP Web AS too.
This product provides increased security using a Tier 2 session validation whereby the point of trust is moved from the web server to the SAP Web AS J2EE engine.
CA SSO Agent for SAP Authentication Modes
12 Agent for SAP Guide
Many web-based applications use an independent session management scheme, such as a session cookie or session ticket. Therefore, these applications can bypass the CA SSO replay prevention and session management logic. The possibility that the CA SSO and application sessions can become asynchronous to each other is one of the main security problems when integrating applications that maintain their own sessions. This product includes the SessionLinker component to prevent session synchronization issues. The SessionLinker web server plug-in monitors the CA SSO Session ID header against the Web AS session ticket. When the two sessions diverge, the SessionLinker acts. The SessionLinker prevents the application from operating until a new session within the SAP Web AS is established.
In addition to providing enhanced security, this product uses the increased number of authentication mechanisms available with CA SSO.
Note: This product only controls the authentication for the applications that are deployed on the SAP Web AS and for the Enterprise Portal. The SAP Web AS J2EE engine itself controls and administers all authorizations and roles.
CA SSO Agent for SAP Authentication Modes
This product uses either one or both of the following modes to authenticate users:
SSO Mode
Validates user sessions against the Policy Server, which confirms that the SMSESSION cookie the user presents is legitimate. The Policy Server returns the ID of the SAP Web AS user in an active response to CA SSO Agent for SAP, which asserts that ID to the SAP Web Application Server. The SAP Web Application server authorizes the user.
Federation Mode
Receives Federation Profile cookies from CA Federation. This prodcut extracts the contents of the cookie, and then asserts the SP side user ID and the user attributes (from the cookie) to the SAP Web Application server. The SAP Web Application server authorizes the user.
Both modes can be used together. For example, you can use the SSO mode to authenticate the users inside your organization, and you can use the Federation mode to authenticate users outside of your organization. However, only one mode can be used in a web browser session.
If both modes are used together and the user is authenticated by CA SSO and CA Federation, then the CA SSO authentication takes priority. For example, if CA Federation operates with the CA SSO Connector enabled, then the CA SSO authentications take priority over the CA Federation authentications.
Components in a CA SSO Agent for SAP Environment
Chapter 1: Overview and Architecture 13
Components in a CA SSO Agent for SAP Environment
This product has the following components:
User or Client
A user refers to a web browser of an end user. A client is the HTTP-based web client, which accesses the J2EE engine of the SAP Web Application Server.
Front-End Web Server
When this product operates in SSO mode, the agent-supported web server runs as a front-end to the SAP Web Application Server J2EE engine. The applications that are deployed on the J2EE engine are accessible through the CA SSO supported front-end web server.
The Web Agent is configured on the web server, which protects the application on this web server and the J2EE engine that is accessed through the web server.
The web server also hosts the CA SSO SessionLinker web server plug-in. The SessionLinker intercepts the requests and tracks the Web AS J2EE session against the CA SSO Session ID using the following items:
■ The MYSAPSSO2 ticket
■ The JSESSIONID cookie
The CA SSO SessionLinker synchronizes the CA SSO session with the third-party application session for better security. For example, if a user logs out of the third-party application, the CA SSO SessionLinker logs the user out of CA SSO. Conversely, if a user logs out of CA SSO, the SessionLinker invalidates the related session of the third-party application.
Note: The CA SSO SessionLinker supports only the SSO Mode. The CA SSO SessionLinker is not used in Federation Mode.
Policy Server
When this product operates in SSO mode, the Policy Server governs access to the applications deployed on the web server and the SAP Web Application Server J2EE engine.
Components in a CA SSO Agent for SAP Environment
14 Agent for SAP Guide
The Policy Server also hosts the SessionLinker Policy Server plug-in.
Note: The CA SSO SessionLinker supports only the SSO Mode. The CA SSO SessionLinker is not used in Federation Mode.
Web AS J2EE Engine
The SAP Web Application Server J2EE engine is a J2EE-compliant operating environment for running J2EE applications. Login stacks or authentication templates protect the applications that are deployed on the J2EE engine. The login stacks or authentication templates consist of JAAS-compliant login modules, which are also deployed on the J2EE engine.
The following login modules are deployed as part of the login stack:
SiteMinderLoginModule
Custom JAAS-compliant login module that validates the CA SSO session of the user with the CA SSO Java Agent API.
CreateTicketLoginModule
Web AS J2EE engine login module, which creates the MYSAPSSO2 ticket for the authenticated user. The J2EE engine supports the use of logon tickets for SSO in an SAP system environment. The logon ticket is stored as a session cookie, named MYSAPSSO2, in the web browser of the user.
CA Federation
CA Federation enables customers to establish federated partnerships in a flexible way, together with or independent of a Web access management system. CA Federation supports standards-based federation. Organizations act as the asserting party, providing user authentication and assertion of identity, or as the relying party, consuming the identity to allow access to web resources and services.
Chapter 2: CA SSO Agent for SAP Deployment Examples 15
Chapter 2: CA SSO Agent for SAP Deployment Examples
This section contains the following topics:
Case 1: CA SSO Agent for SAP SSO Mode (see page 15) Case 2: CA Federation with CA SSO Agent for SAP (see page 18) Case 3: CA SSO Agent for SAP and CA Federation with CA SSO Connector (see page 19)
Case 1: CA SSO Agent for SAP SSO Mode
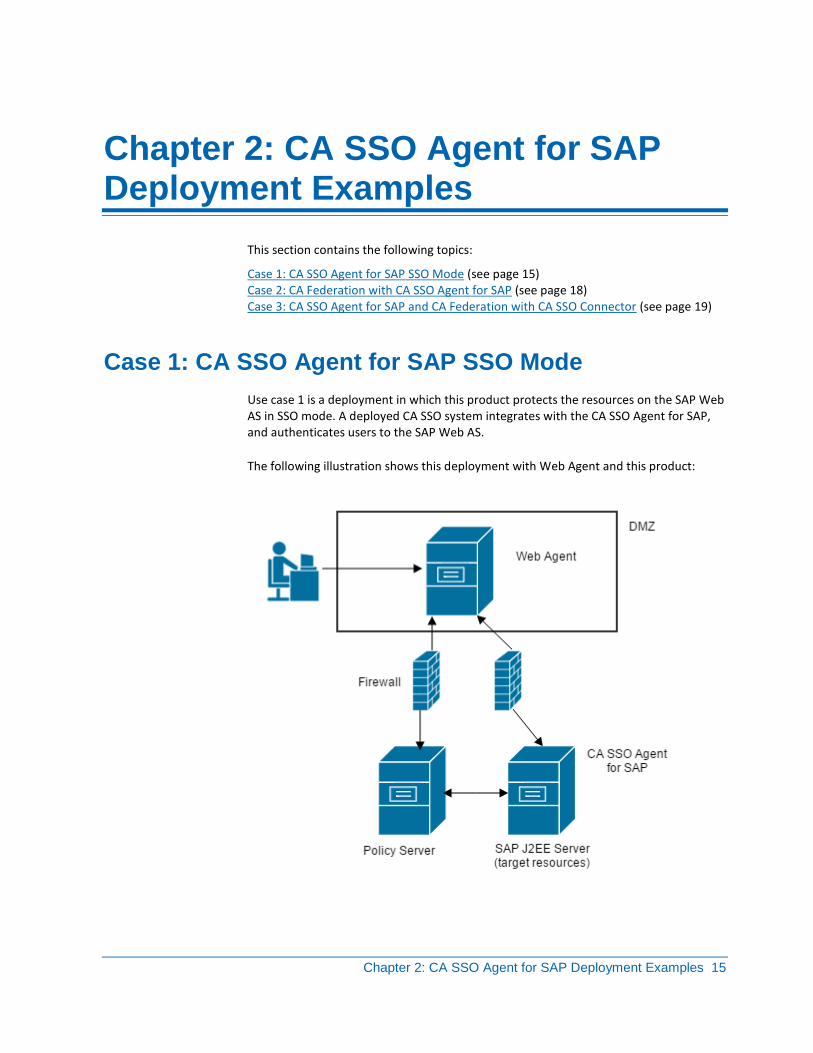
Use case 1 is a deployment in which this product protects the resources on the SAP Web AS in SSO mode. A deployed CA SSO system integrates with the CA SSO Agent for SAP, and authenticates users to the SAP Web AS.
The following illustration shows this deployment with Web Agent and this product:

Case 1: CA SSO Agent for SAP SSO Mode
16 Agent for SAP Guide
How Use Case 1 Works
The interaction between the components in SSO mode is shown in the following illustration:
This product works according to the following process:
1. User (HTTP-based web client) accesses the Web AS J2EE engine application or Enterprise Portal using the front-end web server.
2. Web Agent hosted on the web server, intercepts the request, and determines whether the Policy Server is protecting the requested application or resource. If the resource is protected, the user is challenged for authentication.
3. Policy Server authenticates the user and checks for the access permissions to the protected application. If the user has access to the application, the Policy server returns the Web AS username in the form of an HTTP header response along with the SessionLinker header response. The SessionLinker response contains the cookie names (MYSAPSSO2 and JSESSIONID) against which the CA SSO session is tracked.

Case 1: CA SSO Agent for SAP SSO Mode
Chapter 2: CA SSO Agent for SAP Deployment Examples 17
4. Once CA SSO allows access to the protected application or resource, the web server forwards the request to the J2EE engine. The J2EE engine invokes the CA SSO login module, protecting the Web AS deployed application or the Enterprise Portal application.
5. The CA SSO login module validates the session information against the Policy Server.
6. The Policy Server returns success and the Web AS username if the session is valid. The CA SSO login module confirms that the session does indeed belong to the requesting Web AS user. If the session is not valid, the authentication attempt fails. Access to the requested resource is denied.
7. If the CA SSO login module successfully validates the user session, the module sets the user Principal to the Web AS username. The Web AS J2EE engine invokes the CreateTicketLoginModule, which creates the MYSAPSSO2 ticket for the authenticated Web AS user. The J2EE engine services the request for the application if both login modules succeed.
8. The SessionLinker on the web server tracks the CA SSO session against the MYSAPSSO2 and JSESSIONID cookies of the Web AS session. If access is illegal, the cookies are emptied. If access is legal, the requested application or resource is presented to the user.

Case 2: CA Federation with CA SSO Agent for SAP
18 Agent for SAP Guide
Case 2: CA Federation with CA SSO Agent for SAP
CA Federation customers who want to protect resources on an SAP Web AS with this product can use the example in the following illustration:
Case 3: CA SSO Agent for SAP and CA Federation with CA SSO Connector
Chapter 2: CA SSO Agent for SAP Deployment Examples 19
How Use Case 2 Works
Use case 2 for CA Federation and this product implementations assumes the following conditions:
■ No Policy Server
■ No Web Agent
■ This product operating in Federation mode.
The example in use case two works according to the following process:
1. The user authenticates to the asserting party.
2. The asserting party passes an assertion to CA Federation at the relying party.
3. The CA Federation creates a FEDPROFILE cookie.
4. The user is redirected to the target resource on the SAP Web AS J2EE server.
5. The SAP Web Application server invokes the login module.
6. The CA SSO login module (in the login stack of the SAP Web AS) extracts the contents of the FEDPROFILE cookie. The login module authenticates the session of the user to the SAP Web AS based on the User Identity present in the FEDPROFILE cookie.
7. The SAP Web AS authorizes the user, and then allows access to the requested resource.
Case 3: CA SSO Agent for SAP and CA Federation with CA SSO Connector
CA Federation with the CA SSO Connector enabled protects the SAP Web AS and requests for federation resources.
A deployed CA SSO system can integrate with CA Federation to allow authentication using CA SSO. This integration is accomplished using the CA SSO Connector, a software component included with CA Federation.

Case 3: CA SSO Agent for SAP and CA Federation with CA SSO Connector
20 Agent for SAP Guide
The following illustration shows this deployment with CA SSO, CA Federation, and the SAP Web AS:
Note: Both CA Federation connector and this product must be configured with the same Policy Server.

Case 3: CA SSO Agent for SAP and CA Federation with CA SSO Connector
Chapter 2: CA SSO Agent for SAP Deployment Examples 21
How Use Case 3 Works
When this product operates in Federation mode, it works with CA Federation to handle requests for federated resources on the SAP Web AS. If CA SSO is protecting the SAP Web AS server, the Policy Server generates and validates the CA SSO session and user identity information. Additionally, CA Federation generates a cookie that contains user attributes that are passed on to the target application on the SAP Web AS.
Use Case 3 includes the following components in the network:
■ Policy Server
■ Web Agent
■ CA Federation with the CA SSO Connector is enabled; it is operating in either standalone or proxy mode
■ This product is operating in both SSO mode and federation mode
The communication process is as follows:
1. The federated user authenticates at the asserting party, which generates a SAML assertion.
2. The asserting party passes the assertion to CA Federation at the relying party.
3. CA Federation with the CA SSO connector enabled, contacts the Policy Server, which generates an SMSESSION cookie that includes CA SSO session and identity information. Additionally, CA Federation itself generates a FEDPROFILE cookie that contains user attributes.
4. The Web Agent intercepts the request and validates the user using the SMSESSION cookie.
The target URL you configure in CA Federation is a protected resource of the Web Agent.
5. The Web Agent forwards the request and the FEDPROFILE cookie to the SAP Web AS.
6. The SAP Web Application server invokes the login module, which calls CA SSO Agent for SAP.
7. This product extracts the contents of the SMSESSION and FEDPROFILE cookies and asserts the user session and user attributes to the SAP Web AS.
8. The SAP Web AS delivers the requested resource to the user.
Note: For enterprise users connecting directly through the CA SSO agent (rather than the asserting party), the communication process is identical to Use Case 1 which is discussed earlier in this chapter.

Chapter 3: Installing and Configuring CA SSO Agent for SAP 23
Chapter 3: Installing and Configuring CA SSO Agent for SAP
This section contains the following topics:
Gather Information for the Installation Wizard (see page 23) Run the Installation Wizard on Windows (see page 24) Run the Installation Wizard on UNIX (see page 24) Gather Information for the Configuration Wizard (see page 25) Run the Configuration Wizard (see page 28)
Gather Information for the Installation Wizard
The installation wizard requires the following information:
Install Folder
Specifies the directory where the product files are installed.
Default:
Windows:
C:\Program Files\CA\webasagent
UNIX
<home-dir>/CA/webasagent
SAP Web Application Server Path
Specifies the SAP Web Application Server instance root directory.
Default:
Windows:
drive:\usr\sap\<SID>\<instance_name>
UNIX
/usr/sap/<SID>/<instance_name>

Run the Installation Wizard on Windows
24 Agent for SAP Guide
Run the Installation Wizard on Windows
The installation wizard installs the product on your web application server.
Follow these steps:
1. Double-click the following file:
ca-erp-webas-<version>-<operating_environmentprocessor_type>.exe
Note: To install using console, open a console window and then run the previous command with the -i console option.
Note: To install unattended, open a console window and then run the previous command with the “-i silent –f <installer_properties_file>” options. The installer properties file (ca-sapwebas-installer.properties) is located in the install_config_info directory of the product.
Important! To install unattended, you must install the product using wizard or console once. The installer properties file is required for unattended installation. Before you perform the unattended installation, verify that the installer properties file is updated based on the host where you install the product.
2. Follow the prompts in the wizard.
3. (Optional) Run the configuration wizard when the installation wizard finishes.
More information:
Gather Information for the Configuration Wizard (see page 25)
Run the Installation Wizard on UNIX
The installation wizard installs the product on your web application server.
Follow these steps:
1. Execute the following file:
ca-erp-webas-<version>-<operating_environmentprocessor_type>.bin
Note: To install using console, open a console window and then run the previous command with the -i console option.
Note: To install unattended, open a console window and then run the previous command with the “-i silent –f <installer_properties_file>” options. The installer properties file (ca-sapwebas-installer.properties) is located in the install_config_info directory of the product.

Gather Information for the Configuration Wizard
Chapter 3: Installing and Configuring CA SSO Agent for SAP 25
Important! To install unattended, you must install the product using wizard or console once. The installer properties file is required for unattended installation. Before you perform the unattended installation, verify that the installer properties file is updated based on the host where you install the product.
2. Follow the prompts in the wizard.
Gather Information for the Configuration Wizard
Before you run the configuration wizard, gather the following information:
■ Gather configuration information for host registration.
■ Gather configuration information for your authentication mode (see page 25).
■ Gather information to configure your SSO mode (see page 26).
■ Gather information to configure your federation mode (see page 28).
Gather Information to Configure Your Authentication Mode
Depending on the authentication mode you want to use, the configuration wizard requires different information. If you are configuring both modes, select both the following check boxes in the configuration wizard:
Agent Mode
Specifies any of the following authentication modes:
SSO Mode
Authenticates the user to the SAP Web AS server using the Policy Server and Web Agent.
Federation Mode
Authenticates the user to the SAP Web AS using CA Federation.

Gather Information for the Configuration Wizard
26 Agent for SAP Guide
Gather Information to Configure Your SSO Mode
To configure this product for SSO mode, the configuration wizard requires the following information:
To establish a connection between this product host and the Policy Server, register the host with the Policy Server. After registration is complete, the registration tool creates the SmHost.conf file. After this file is created successfully, the client computer becomes a trusted host.
Admin User Name
Specifies the name of a Policy Server administrator that registers the host with the Policy Server. The administrator must be defined already with the Policy Server and must have the permission to register Trusted Hosts.
Admin Password
Specifies the Policy Server administrator account password.
Enable Shared Secret Rollover
Specifies that the Policy Server generates a new shared secret periodically, which is used to encrypt the communication to this product.
Trusted Host Name
Specifies a unique name that represents the trusted host to the Policy Server. This name need not be the same as the physical client system that you register.
Host Configuration Object
Specifies the name of the Host Configuration Object (HCO) in the Policy Server that defines the connection between the trusted host and the Policy Server. The HCO must be defined already in the Policy Server.
Policy Server IP Address
Specifies the IP address or the host name and the authentication port of the Policy Server where you are registering the host.
Default Port: 44442
FIPS Encryption Mode
Determines whether the agent communicates with the Policy Server using the certified Federal Information Processing Standard (FIPS) 140-2 compliant cryptographic libraries.
FIPS Compatibility Mode (Default)
Specifies non-FIPS mode, which lets the Policy Server and the agents read and write information using the existing CA SSO encryption algorithms. If your organization does not require the use of FIPS-compliant algorithms, the Policy Server and the agents can operate in non-FIPS mode without further configuration.
Gather Information for the Configuration Wizard
Chapter 3: Installing and Configuring CA SSO Agent for SAP 27
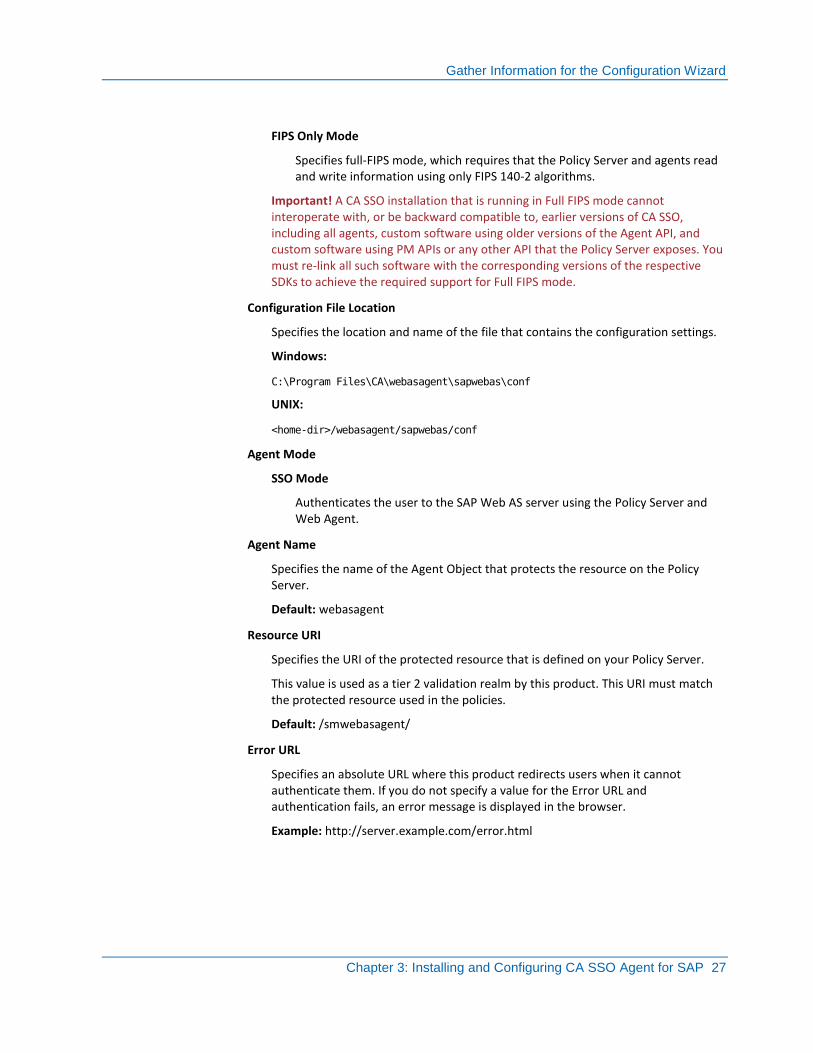
FIPS Only Mode
Specifies full-FIPS mode, which requires that the Policy Server and agents read and write information using only FIPS 140-2 algorithms.
Important! A CA SSO installation that is running in Full FIPS mode cannot interoperate with, or be backward compatible to, earlier versions of CA SSO, including all agents, custom software using older versions of the Agent API, and custom software using PM APIs or any other API that the Policy Server exposes. You must re-link all such software with the corresponding versions of the respective SDKs to achieve the required support for Full FIPS mode.
Configuration File Location
Specifies the location and name of the file that contains the configuration settings.
Windows:
C:\Program Files\CA\webasagent\sapwebas\conf
UNIX:
<home-dir>/webasagent/sapwebas/conf
Agent Mode
SSO Mode
Authenticates the user to the SAP Web AS server using the Policy Server and Web Agent.
Agent Name
Specifies the name of the Agent Object that protects the resource on the Policy Server.
Default: webasagent
Resource URI
Specifies the URI of the protected resource that is defined on your Policy Server.
This value is used as a tier 2 validation realm by this product. This URI must match the protected resource used in the policies.
Default: /smwebasagent/
Error URL
Specifies an absolute URL where this product redirects users when it cannot authenticate them. If you do not specify a value for the Error URL and authentication fails, an error message is displayed in the browser.
Example: http://server.example.com/error.html

Run the Configuration Wizard
28 Agent for SAP Guide
Gather Information to Configure Your Federation Mode
To configure the product in Federation mode, the configuration wizard requires the following information:
Configuration File Location
Specifies the location and name of the file that contains the configuration settings.
Windows:
C:\Program Files\CA\webasagent\sapwebas\conf
UNIX:
<home-dir>/webasagent/sapwebas/conf
Agent Mode
Federation Mode
Authenticates the user to the SAP Web AS using CA Federation.
Federation Password
Specifies the password defined in CA Federation that is used to encrypt data that is sent from CA Federation to this product.
FedConnector Zone
Specifies the Federation security zone in which CA Federation is running.
Default: FED
Error URL
Specifies an absolute URL where this product redirects users when it cannot authenticate them. If you do not specify a value for the Error URL and authentication fails, an error message is displayed in the browser.
Example: http://server.example.com/error.html
Run the Configuration Wizard
Use the configuration wizard to configure the product.
Run the Configuration Wizard
Chapter 3: Installing and Configuring CA SSO Agent for SAP 29
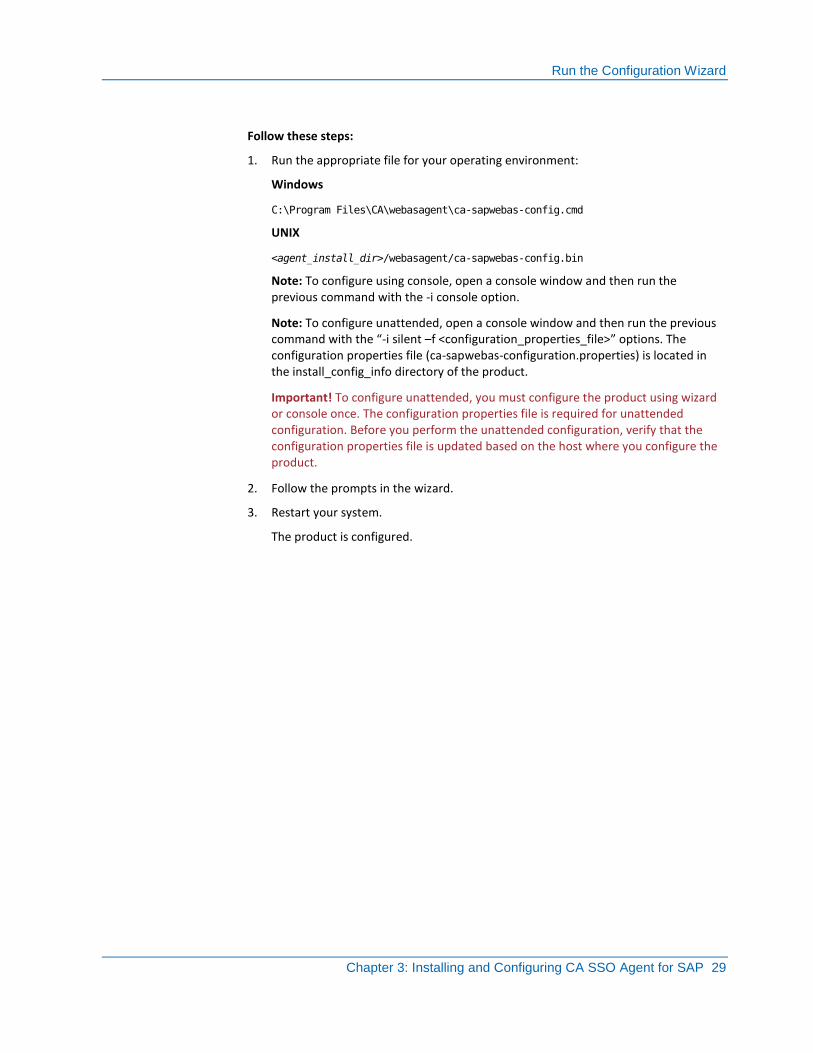
Follow these steps:
1. Run the appropriate file for your operating environment:
Windows
C:\Program Files\CA\webasagent\ca-sapwebas-config.cmd
UNIX
<agent_install_dir>/webasagent/ca-sapwebas-config.bin
Note: To configure using console, open a console window and then run the previous command with the -i console option.
Note: To configure unattended, open a console window and then run the previous command with the “-i silent –f <configuration_properties_file>” options. The configuration properties file (ca-sapwebas-configuration.properties) is located in the install_config_info directory of the product.
Important! To configure unattended, you must configure the product using wizard or console once. The configuration properties file is required for unattended configuration. Before you perform the unattended configuration, verify that the configuration properties file is updated based on the host where you configure the product.
2. Follow the prompts in the wizard.
3. Restart your system.
The product is configured.


Chapter 4: Configuration for SSO Mode with CA SSO 31
Chapter 4: Configuration for SSO Mode with CA SSO
This section contains the following topics:
How to Configure CA SSO Agent for SAP in SSO Mode (see page 31)
How to Configure CA SSO Agent for SAP in SSO Mode
The following process outlines the steps for SSO mode configuration. In this configuration, this product interacts with a Policy Server. For detailed information about configuring the Agent for SAP for Federation mode using CA Federation, see Configuration for Federation Mode (see page 35).
Follow these steps:
1. See the platform support matrix and verify that your environment meets all of the prerequisites.
2. Configure the front-end web server (see page 31).
3. Verify the configuration of MYSAPSSO2 tickets (see page 32).
4. Configure the Web Agent (see page 33).
5. Configure the Policies (see page 34).
Configure the Front-End Web Server
The web server (which operates with a Web Agent), acts as a front end for the SAP Web Application Server (Web AS) J2EE engine.
The following list describes guidelines for configuring the front-end web server:
■ Install and configure a Web Agent on the front-end web server to provide the first tier of authentication for CA SSO Agent for SAP.
Note: For more information, see the CA SSO documentation.
■ Configure the web server to proxy the requests for the Web AS J2EE engine applications.
– For the SAP Enterprise Portal, configure the web server to proxy the requests for resources starting with /irj.
How to Configure CA SSO Agent for SAP in SSO Mode
32 Agent for SAP Guide
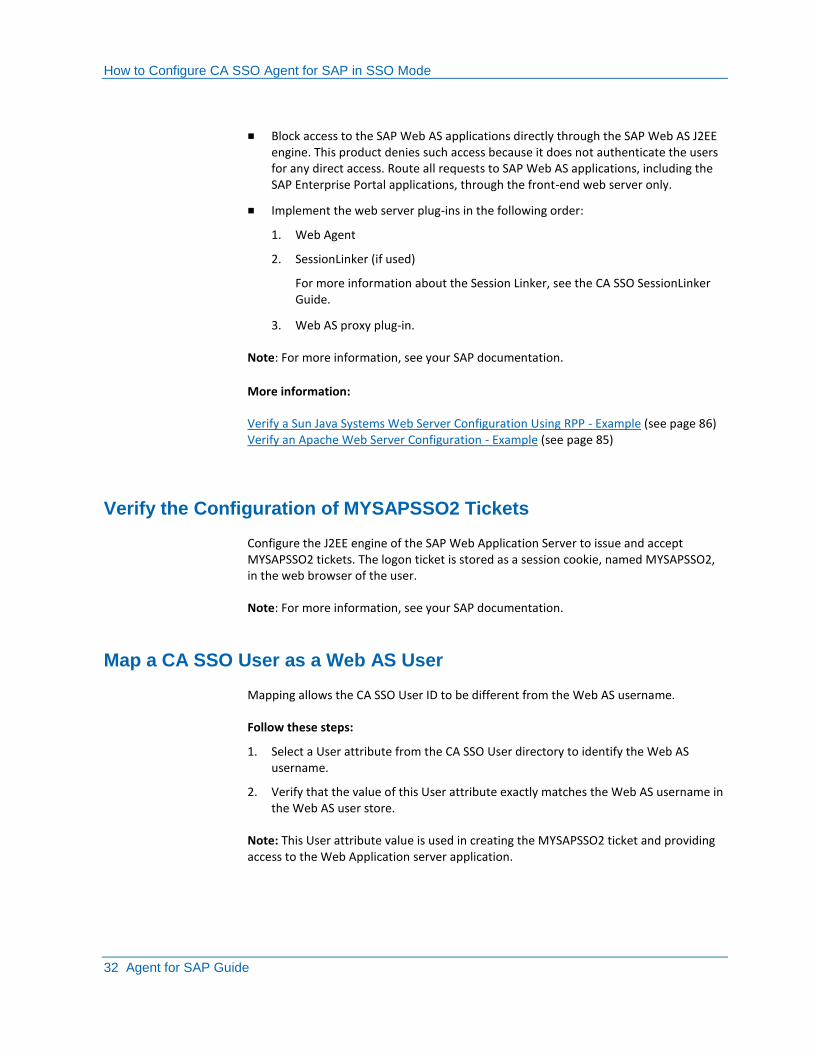
■ Block access to the SAP Web AS applications directly through the SAP Web AS J2EE engine. This product denies such access because it does not authenticate the users for any direct access. Route all requests to SAP Web AS applications, including the SAP Enterprise Portal applications, through the front-end web server only.
■ Implement the web server plug-ins in the following order:
1. Web Agent
2. SessionLinker (if used)
For more information about the Session Linker, see the CA SSO SessionLinker Guide.
3. Web AS proxy plug-in.
Note: For more information, see your SAP documentation.
More information:
Verify a Sun Java Systems Web Server Configuration Using RPP - Example (see page 86) Verify an Apache Web Server Configuration - Example (see page 85)
Verify the Configuration of MYSAPSSO2 Tickets
Configure the J2EE engine of the SAP Web Application Server to issue and accept MYSAPSSO2 tickets. The logon ticket is stored as a session cookie, named MYSAPSSO2, in the web browser of the user.
Note: For more information, see your SAP documentation.
Map a CA SSO User as a Web AS User
Mapping allows the CA SSO User ID to be different from the Web AS username.
Follow these steps:
1. Select a User attribute from the CA SSO User directory to identify the Web AS username.
2. Verify that the value of this User attribute exactly matches the Web AS username in the Web AS user store.
Note: This User attribute value is used in creating the MYSAPSSO2 ticket and providing access to the Web Application server application.
How to Configure CA SSO Agent for SAP in SSO Mode
Chapter 4: Configuration for SSO Mode with CA SSO 33
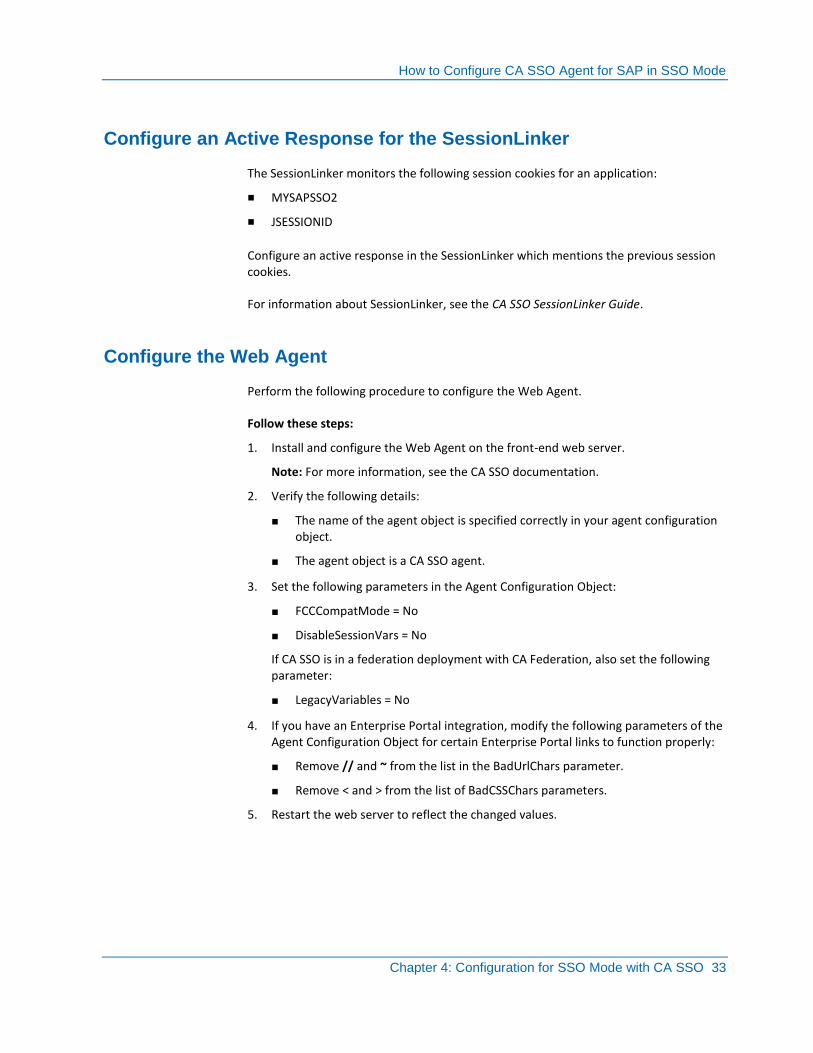
Configure an Active Response for the SessionLinker
The SessionLinker monitors the following session cookies for an application:
■ MYSAPSSO2
■ JSESSIONID
Configure an active response in the SessionLinker which mentions the previous session cookies.
For information about SessionLinker, see the CA SSO SessionLinker Guide.
Configure the Web Agent
Perform the following procedure to configure the Web Agent.
Follow these steps:
1. Install and configure the Web Agent on the front-end web server.
Note: For more information, see the CA SSO documentation.
2. Verify the following details:
■ The name of the agent object is specified correctly in your agent configuration object.
■ The agent object is a CA SSO agent.
3. Set the following parameters in the Agent Configuration Object:
■ FCCCompatMode = No
■ DisableSessionVars = No
If CA SSO is in a federation deployment with CA Federation, also set the following parameter:
■ LegacyVariables = No
4. If you have an Enterprise Portal integration, modify the following parameters of the Agent Configuration Object for certain Enterprise Portal links to function properly:
■ Remove // and ~ from the list in the BadUrlChars parameter.
■ Remove < and > from the list of BadCSSChars parameters.
5. Restart the web server to reflect the changed values.

How to Configure CA SSO Agent for SAP in SSO Mode
34 Agent for SAP Guide
Configure CA SSO Policies
Perform the following procedure to configure CA SSO policies.
Follow these steps:
1. Use the agent object and an authentication scheme to create a validation realm for protecting the following resource:
/smwebasagent/
2. Create a rule on the realm protecting the following Web Agent Actions:
■ Get
■ Post
3. Create a response that contains the following Web Agent HTTP Header Variable response attributes:
■ A User attribute, set to a Variable Name WASUSERNAME (an Attribute Name set to the attribute for presentation to the Web Application Server for MYSAPSSO2 ticket generation).
■ An Active Response for NPSSessionLinker, using the following settings:
– Leave the Variable Name blank.
– Set the Library Name to npssessionlinker.
– Set the Function Name to Config.
– Set the Parameters to COOKIE1=MYSAPSSO2;COOKIE2=JSESSIONID.
– In the Advanced tab, remove the leading equal sign (=).
4. Verify that the result matches the following example:
<@lib="npssessionlinker" func="Config"
param="COOKIE1=MYSAPSSO2;COOKIE2=JSESSIONID"@>
5. Create a policy that includes the previous rule with an appropriate set of users. Associate the responses with the rule created in Step 2.
Chapter 5: Configuration for Federation Mode with CA Federation 35
Chapter 5: Configuration for Federation Mode with CA Federation
This section contains the following topics:
Intended Audience (see page 35) Federation Partnership Overview (see page 35) Considerations for the Asserting Party Configuration (see page 36) How to Configure the Relying Party in a Federation Partnership (see page 37) User Identification Based on an Assertion Attribute (see page 38) SAP Web AS User Identification (see page 39) SSO Configuration for Federation Mode (see page 40) Single Logout Configuration for Federation Mode (see page 41) Identity Cookie Settings for Federation Mode (see page 42) Assertion Attribute Use by the Target SAP Application (see page 43)
Intended Audience
This section describes the configuration of this product for use with CA Federation. We assume that you are familiar with federation concepts and terminology. For more information about federation, see the product documentation that ships with your version of CA Federation.
Federation Partnership Overview
The main purpose of CA Federation is to establish a partnership between two organizations so they can share user identity information and attributes to facilitate single sign-on. A CA Federation partnership consists of two entities at two different sites—one local and one remote. Either entity can assume the role of the asserting party, the side that creates the assertion or the relying party, the side that uses the identity information in the assertion.
If CA Federation is deployed at both sites, each site must define a partnership. Therefore, for each local asserting party-to-relying party partnership at one site, there has to be a reciprocal local relying party-to-asserting party partnership at the corresponding site. These two definitions define a single partnership. For example, Site A is the local SAML 2.0 IdP and has specified a partnership with Site B as the remote SAML 2.0 SP. Site B is the local SAML 2.0 SP and has specified a partnership with Site A as its remote SAML 2.0 IdP.

Considerations for the Asserting Party Configuration
36 Agent for SAP Guide
In the following network, CA Federation is deployed only at the relying party where the Agent for SAP and SAP Web AS J2EE server reside so you only need one partnership definition. Configure CA Federation as the local relying party and the partner providing the assertion as the remote asserting party. For SAML 2.0, for example, the relying party is the local SP while the asserting party is the remote IdP.
The following figure shows the sides of a federated partnership.
Note: A relying party can establish partnerships with more than one asserting party.
Considerations for the Asserting Party Configuration
The deployment in this chapter shows the asserting party at the remote side of the federated partnership. CA Federation and this product are at the local relying party side of the partnership. This chapter does not assume that CA Federation is at the asserting party; a third-party product can generate assertions. Therefore, detailed configuration procedures for the asserting party are beyond the scope of this chapter.
The following considerations apply for asserting party configuration:
Assertion Generation
Configure the federation product at the asserting party to generate assertions. An assertion can include attributes that the target SAP application at the relying party uses for customization. If CA Federation is at both sides of the partnership, see the CA Federation Manager Guide for instructions on configuring the asserting party.
Single Logout Configuration
An administrator at the asserting party can enable single logout (SLO) as a SAML 2.0 feature. Single logout results in the simultaneous end of all federated user sessions that are associated with the browser that initiated the logout. The asserting or the relying party can initiate single logout, and the single logout configuration settings are the same at both sides.

How to Configure the Relying Party in a Federation Partnership
Chapter 5: Configuration for Federation Mode with CA Federation 37
At the asserting party, the single logout configuration can use a logout confirmation page. The asserting party redirects the user to this page when the single logout process is complete. A URL identifies the logout page.
When communicating with the Agent for SAP at the relying party, enter the URL of the SAP Web AS logout page as the logout confirmation page. When CA Federation initiates single logout, it directs the user to its single logout URL, and it terminates the CA Federation user session. After terminating the CA Federation session, CA Federation redirects the user to the logout URL. When the logout URL is set to the SAP Web AS logout URL, this logout page invalidates the SAP Web AS session.
If your local site initiates single logout, the logout URL must be accessible to the local site. The logout URL must also be a local resource and not a resource in a federated partner domain. For example, if the local domain is acme.com and your partner is example.com, then the single logout confirmation URL must be in acme.com.
How to Configure the Relying Party in a Federation Partnership
Use the CA Federation user interface to configure partnerships. The following process establishes a CA Federation partnership. Some of the steps in this process require specific settings for this product. For the settings relevant to the Agent for SAP, more detailed configuration instructions follow this general process.
To learn more about CA Federation and partnership creation, see the CA Federation product documentation.
Important! Configure this product in Federation mode to operate with CA Federation.
The deployment in this chapter has CA Federation and the CA SSO Agent for SAP at the relying party. Therefore, the following configuration process is only for the relying party. The administrator at the remote asserting party must configure that party properly for federated communication. Although the asserting party configuration process is beyond the scope of this chapter, there are configuration issues to consider (see page 36).
Follow these steps:
1. Log in to CA Federation.
2. Identify the federation entities (the local and remote partners) that make up the partnership.
In this partnership, this product is the local relying party and the partner is the remote asserting party. The CA Federation UI provides an entity wizard to guide you through this process.
User Identification Based on an Assertion Attribute
38 Agent for SAP Guide
3. Create a partnership. The CA Federation Partnership Wizard guides you through the necessary steps.
This product is the local relying party, so you must create, for example, a SAML2 SP ->Idp partnership.
Configure the following partnership details:
a. Partnership name and participating entities
b. Federation users
c. User identification (see page 38).
The user identification step is where you specify the identity of the user on the SAP Web AS.
d. Single sign-on (SSO) (see page 40).
The single sign-on configuration is where you define whether the assertion is passed using HTTP-Artifact or POST as the single sign-on profile. You also define the target resource that the user wants to access.
e. Single logout (SLO) (see page 41) – SAML 2.0 only.
Enables the simultaneous end-of-user sessions within the browser that initiated the session.
f. Digital signing of assertions and assertion responses.
g. Encryption of assertions and assertion content– SAML 2.0 only
4. Configure the identity cookie information (see page 42) for Federation mode.
The Agent needs its FEDZone and FEDPassword settings to match the cookie zone and password settings for CA Federation. The values must be shared during an out-of-band communication.
5. (Optional) If the assertion sent by the asserting partner contains attributes, the application on the SAP server has to retrieve these attributes. Review the instructions on assertion attribute retrieval (see page 43) for details on how to accomplish this task.
User Identification Based on an Assertion Attribute
The User Identification step lets you specify what identity attribute in the assertion the relying party uses to find users in its user store. Locating the user in the user directory is the process of disambiguation.
For this product, the user identity is that of the user on the SAP Web AS system. This user identity is the one you want to assert to the SAP Web AS.
SAP Web AS User Identification
Chapter 5: Configuration for Federation Mode with CA Federation 39
Select one of the following methods for the user identification process:
Name ID
Instructs the relying party to use the value of the NameID element in the assertion to locate the correct user record.
Select Attribute
Instructs the relying party to use the value of a specific attribute from the assertion. This option tells the relying party to use attributes from the assertion to locate the correct user record. These attributes are defined at the asserting party and included in the assertion. The relying party must know what attributes the asserting party is going to send in assertion. You can use this option, for example, if the Name ID is transient and changes regularly.
Select a predefined attribute from the drop-down list or enter an attribute directly in the text box. This list is populated if the remote asserting entity was created based on metadata that contained attributes.
Specify Xpath
Instructs the relying party to use information from the assertion that the Xpath search string defines. For example, you can configure the relying party to look for the entityID and use that attribute to locate a user record. After you determine which attribute is extracted from the assertion, include the attribute in a search specification thatCA Federation uses to locate a user in the user store.
After a successful disambiguation process, CA Federation generates a session for the user.
After disambiguation, CA Federation must pass one attribute from the user directory record to the SAP Web AS. This attribute identifies a valid SAP Web AS user. CA Federation passes this attribute in an identity cookie, named the FEDPROFILE cookie. Configure which attribute from the user directory record that CA Federation uses according to the information in SAP Web AS User Identification (see page 39).
SAP Web AS User Identification
After disambiguation, CA Federation asserts one attribute from the user directory record to the SAP Web AS as a valid SAP Web AS user. CA Federation passes the value of this attribute in an identity cookie, named FEDPROFILE cookie.
The User Directory configuration in the CA Federation UI is where you specify which attribute CA Federation includes in the FEDPROFILE cookie.
SSO Configuration for Federation Mode
40 Agent for SAP Guide
In the CA Federation UI, select the User Directory tab and complete the following field for your user directory type:
Universal ID Attribute (LDAP) or Universal ID Column (ODBC)
Specify any user attribute in the user record at the relying party directory that identifies the SAP Web AS user name. The value of the user attribute you select must match the value of the Web AS username in the SAP Web AS user store.
For example, the relying party directory has a user record with an attribute mail=JSmithSAP. If you set the Universal ID to mail, the SAP Web AS user directory must also contain a user name record set to JSmithSAP.
The value of the user attribute gets included in the FEDPROFILE cookie to provide access to the application on the SAP Web AS.
SSO Configuration for Federation Mode
If the Agent for SAP is operating in Federation mode, complete single sign-on configuration for the partnership. To configure single sign-on at the relying party, specify the SAML binding that is supported by the relying party and the related aspects of how the relying party handles single sign-on communication.
Detailed instructions for single sign-on configuration can be found in the CA Federation documentation.
To access the single sign-on dialog, select the SSO and SLO step from the CA Federation UI Partnership Wizard.
When you configure single sign-on, be aware of the following fields:
SSO Profile
Be sure to select one or both of the profiles. If you select HTTP-Artifact, also configure the authentication method for the outgoing back channel.
Target
Specifies the target resource URL at the destination site. In standalone federation mode, set the value of this field to the SAP portal or to the web server proxy to the SAP Web AS portal.
Relay State Overrides Target
(Optional) Replaces the value specified in the Target field with the value of the Relay State query parameter for initiated single sign-on.
This check box gives you more control over the target because using the Relay State query parameter lets you dynamically define the target.

Single Logout Configuration for Federation Mode
Chapter 5: Configuration for Federation Mode with CA Federation 41
SSO Service URL Group Box
Lists the URLs of the Single Sign-On Services at the remote asserting party. Each entry in the table specifies the location where the AuthnRequest service can redirect an AuthnRequest message.
Note: Some CA Federation configuration settings are in different dialogs depending on the CA Federation version. For the exact location of the configuration settings, see the CA Federation documentation and UI online help for your version of CA Federation.
Single Logout Configuration for Federation Mode
If the Agent for SAP is operating in Federation mode, we recommend configuring single logout (SLO) as a feature. Single logout results in the simultaneous end of all federated user sessions that are associated with the browser that initiated the logout. Single logout helps ensure that no sessions are left open for unauthorized users to gain access to resources at the relying party. The asserting or the relying party can initiate single logout, and the single logout configuration settings are the same at either side.
For detailed configuration instructions for single logout, see the CA Federation documentation.
To configure single logout between CA Federation and the SAP Web AS server, note the settings of the following SLO fields:
Location URL
Specifies the URL of the single logout service at the asserting party. This URL is where the relying party sends its SLO request.
SLO Confirm URL
Specifies the URL where the user is redirected when the single logout process is complete.
For this product, enter the URL of the SAP Web AS logoff page. The SLO Confirm URL helps ensure that the single logout initiated from CA Federation logs out the user from the CA Federation session. The URL also helps ensure that the associated SAP cookie is invalidated.
This URL must be accessible to the local site if SLO is initiated from your local site. This URL must also be a local resource and not a resource in a federated partner domain. For example, if the local domain is acme.com and your partner is example.com, then the SLO Confirm URL must be in acme.com.

Identity Cookie Settings for Federation Mode
42 Agent for SAP Guide
Relay State Overrides SLO Confirm URL
Replaces the URL in the SLO Confirm URL field with the value of the Relay State query parameter in the single logout request.
This check box gives you more control over the single logout confirmation target because using the Relay State query parameter lets you dynamically define the confirmation URL for SLO requests.
Note: Some CA Federation configuration settings are in different dialogs depending on the CA Federation version. For the exact location of the configuration settings, consult the CA Federation documentation and UI online help for your version of CA Federation.
Identity Cookie Settings for Federation Mode
CA Federation supports single sign-on security zones. Single sign-on security zones provide configurable trust relationships between groups of applications within the same cookie domain. Security zone affiliation is reflected in cookie names. For CA Federation, the default identity cookie is named FEDPROFILE. This cookie contains user identity information and user attributes that an application can use to customize the user experience.
At the relying party, CA Federation creates the FEDPROFILE cookie and passes the cookie to the Agent for SAP. The Agent for SAP extracts the required identity information from the cookie to disambiguate a user and permit access to the requested resource.
For the Agent for SAP to access and read the FEDPROFILE cookie, the Agent needs its FEDZone and FEDPassword settings to match the cookie zone and password settings for CA Federation. The values must be shared during an out-of-band communication.
In the CA Federation UI, go to Infrastructure, Deployment Settings to locate the cookie settings.
Review the value of the following fields so you know how to configure the associated Agent for SAP settings:
Cookie Zone
Specifies the prefix for the cookie zone name. You can set this prefix to any alphabetical value.
Default: FED
At the relying party, the CA Federation Cookie Zone value must match the Agent FEDZone value. The values must be shared during an out-of-band communication. Specify theFEDZone value when running the Agent configuration wizard.
Assertion Attribute Use by the Target SAP Application
Chapter 5: Configuration for Federation Mode with CA Federation 43
Encryption Password
Indicates the encryption password of the FEDPROFILE cookie for the relying party.
If you provide a password for the FEDPROFILE cookie, define the same value for the Agent FedPassword value. The values must be shared during an out-of-band communication. This value cannot be blank. Specify the FEDPassword value when running the Agent configuration wizard.
Confirm Password
Confirms the password entry.
For more information about cookie settings, see the CA Federation Manager Guide.
Note: Some CA Federation configuration settings are in different dialogs depending on the CA Federation version. For the exact location of the configuration settings, consult the CA Federation Manager Guide and UI online help for your version of CA Federation.
Assertion Attribute Use by the Target SAP Application
This product in federation mode can receive an assertion from the remote partner that includes user attributes. The target SAP application can use these assertion attributes to customize the application for each user.
When the SAP Web AS calls the agent to authenticate a user, the server passes a subject to the agent. The agent adds one or more principals to the subject, as follows:
Primary principal
The primary principal is always added to the subject and it represents the user identity.
User attributes principal
A user attributes principal is added to the subject only if user attributes are in the FEDPROFILE cookie sent to the agent.
The agent returns the subject back to the SAP Web AS, which passes this subject and the additional principals to the target application.

Assertion Attribute Use by the Target SAP Application
44 Agent for SAP Guide
For the target application to retrieve the principals, add code to the application that extracts the principals. Add the following code to the SAP application to retrieve the principals and then use the attributes in the user attributes principal for customization.
Set setPrincipals = subject.getPrincipals();
Iterator itrPrincipals = setPrincipals.iterator();
java.security.Principal principal;
while (itrPrincipals.hasNext())
{
principal = (java.security.Principal) itrPrincipals.next();
}
The code sample returns the second principal containing the user attributes to the application. The application can then retrieve the attributes using the following call:
Principal.toString()
Add this string call to the application after the previous code.
The result of retrieving the attributes is a comma-separated string of attributes enclosed in curly braces, as follows:
{attr1=val1, attr2=val2}
Finally, the SAP Web AS application parses the string and process the assertion attributes.
Attribute retrieval by the target application is complete.

Chapter 6: Configuring SAP Web AS 7.0 and CA SSO Agent for SAP to Work Together 45
Chapter 6: Configuring SAP Web AS 7.0 and CA SSO Agent for SAP to Work Together
This section contains the following topics:
Guidelines for Updating CA SSO Policies (see page 45) Change the Configuration of the SAP J2EE Engine (see page 46) Deploy and View SiteMinderLoginModule.sca (see page 46) Configure SiteMinderLoginModule (see page 48) Create an Authentication Template (see page 49) Select Applications to Use the Authentication Template (see page 50) Set the CAPKIHOME Environment Variable (see page 50) How to Confirm your CA SSO Protection (see page 50)
Guidelines for Updating CA SSO Policies
Guidelines for updating the CA SSO policies:
■ Do not modify the CA SSO policies configured in Configure CA Single Sign-On Policies (see page 34). The CA SSO login module uses these policies for Tier 2 authentication.
■ Create additional policies for protecting each of the Web AS applications and the Enterprise Portal. See Configure CA Single Sign-On Policies (see page 34).
■ The name of the protected resource for Web AS applications depends on the particular Web AS application. For Enterprise Portal, /irj/ is usually the protected resource. For webdynpro applications, protect the /web-dynpro/ resource.
■ Verify that all users accessing the Web AS or Enterprise Portal applications are included in the policies you created for the /smwebasagent/ validation realm.
More information:
Configure CA SSO Policies (see page 34)

Change the Configuration of the SAP J2EE Engine
46 Agent for SAP Guide
Change the Configuration of the SAP J2EE Engine
The J2EE engine of the SAP Web AS server needs some configuration changes to work with CA SSO:
Follow these steps:
1. Access the SAP J2EE Engine Config Tool:
2. Add the following property to the Java Parameters field:
Dsmwebas.home
3. Set the value of the previous property to the directory of the SmWebASSSO.conf file.
Note: If the path to the file contains spaces, surround the path with double quotation marks, for example: "file_path".
Deploy and View SiteMinderLoginModule.sca
An SCA is a SAP Component Archive that is used to deploy components with NetWeaver.
Deploy SiteMinderLoginModule.sca and use the J2EE Engine Visual Administrator to view it.
For more information about using an SCA, go to the SAP Help Portal web site, and then search the documentation for the following phrase:
SAP-Specific Deployment as SCA Using SDM
Prerequisites
To deploy the SiteMinderLoginModule.sca, your environment requires the following prerequisites:
■ SiteMinderLoginModule.sca must be available.
■ Install and start the SDM server on the host that is accessed by the users.

Deploy and View SiteMinderLoginModule.sca
Chapter 6: Configuring SAP Web AS 7.0 and CA SSO Agent for SAP to Work Together 47
Deploy SiteMinderLoginModule.sca
Perform the following procedure to deploy SiteMinderLoginModule.sca.
Follow these steps:
1. Start the SDM GUI, by executing one of the following script files in the usr/sap/SID/instance_name/SDM/Program directory.
■ RemoteGui.bat for Windows hosts
■ RemoteGui.sh for UNIX hosts
2. Log in to the SDM server using the following steps:
a. Select SDM GUI, Login.
b. Enter the SDM server password. If the SDM password was not explicitly specified during the SDM installation, the default is sdm.
c. Optionally, enter a description of the user who is logging in in the User Description field.
d. Enter the SDM server hostname and port.
e. Select Login. The SDM Repository in the SAP - Software Deployment Manager GUI appears.
3. Click the Deployment tab.
The Step 1 of 4: Choose SCAs/SDAs to be deployed screen appears.
4. Click the Add SCA button, which is the first button to the left.
The Choose window appears.
5. Browse to the location of SiteMinderLoginModule.sca, and select it. Click Next.
The required module is displayed on the window.
6. Click Next.
The Repository Preview pane appears.
7. Click Next.
The message Step 3 of 4 SDM is Ready to Deploy - Start Deployment appears.
8. Click Start.
Deployment starts, and a progress bar indicates the progress of the operation.
9. When the Overall Deployment Progress is 100 percent, click Confirm.
10. Disconnect and Exit from SDM GUI by either clicking the Disconnect button or selecting the appropriate choice in the menu.
The SiteMinderLoginModule is successfully deployed.
Configure SiteMinderLoginModule
48 Agent for SAP Guide
View the Deployed SiteMinderLoginModule.sca
Perform the following procedure to view SiteMinderLoginModule deployed as an SCA.
Follow these steps:
1. In the Visual Administrator GUI of J2EE Engine, select Global Configuration, cluster, SID, server_instance..., Libraries.
The Global Configuration pane appears.
2. Select the SiteMinderLoginModule node.
A window pane appears displaying the CA SSO jars contained in the JARs Contained field, and a reference to the security interface in the Library Reference field.
Configure SiteMinderLoginModule
Perform the following procedure to configure the SiteMinderLoginModule.
Follow these steps:
1. Open the J2EE Engine Visual Administrator console and, on the Cluster tab, navigate to Server, Services, Security Provider
2. Select the Runtime tab and the User Management tab.
3. Click the Pencil button to enable edit mode.
4. Click the Manage Security Stores button.
5. Select the UME User Store for the User Store in use in the current Web AS environment.
6. Click the Add Login Module button.
7. When the dialog is displayed, click OK (no need to specify anything in this dialog).
8. In the Add Login Module dialog, specify the following class name:
com.netegrity.siteminder.sap.webas.jaas.SiteMinderLoginModule
9. Specify the display name, for example, SiteMinderLoginModule, and a description for the login module, and then click OK.
10. Verify that Security Provider is still selected on the Cluster tab, and then click the Properties tab.
11. For the LoginModuleClassLoaders property, enter the following value:
library:ca.com~SiteMinderLoginModule
12. Click the Update button.
13. Click the Save icon in the toolbar above the Properties tab.
Create an Authentication Template
Chapter 6: Configuring SAP Web AS 7.0 and CA SSO Agent for SAP to Work Together 49
14. When you are prompted, restart the server.
15. Restart the J2EE engine.
Create an Authentication Template
Perform the following procedure to create an authentication template.
Follow these steps:
1. Open the J2EE Engine Visual Administrator console.
2. On the Cluster tab, navigate to and select Server, Services, Security Provider
3. Click the Runtime tab and click the Policy Configurations tab.
4. Click the Pencil button to enable edit mode.
5. At the bottom of the Components panel, click the Add button.
6. In the dialog, enter the name for the new authentication template (new policy configuration), for example, siteminder. Click OK.
7. In the Components panel, select the siteminder authentication template that you created.
8. Click the Authentication tab for the template and click the Add New button.
9. Add the following information to the template:
Login Modules Flag Options
SiteMinderLoginModule REQUISITE if SiteMinderLoginModule is configured as the only Login Module.
Typically OPTIONAL if other Login Modules are also configured. However, other settings may be used based on the specific requirements of your deployment.
(Optional) redirectOnError
If set to True (the default), SiteMinderLoginModule redirects users to the Error page or a 403 error response that is sent on authentication failure.
If set to False, SiteMinderLoginModule does not redirect users to the Error page or a 403 error response that is sent on authentication failure.
Note: If multiple Login Modules are configured and the OPTIONAL flag is set, redirectOnError to False.
com.sap.security.core.server.jaas.CreateTicketLoginModule
REQUIRED ume.configuration.active
Note: Set this option to True.
Select Applications to Use the Authentication Template
50 Agent for SAP Guide
Select Applications to Use the Authentication Template
Applications deployed on the Web AS J2EE engine can use the Authentication template.
Follow these steps:
1. Verify that the application you want to protect (with this product) is deployed on the Web AS J2EE engine.
2. In the Visual Administrator console, select the Security Provider service from the Cluster list.
3. Click the Runtime tab and the Policy Configurations tab.
4. From the Components list, select the application to protect.
5. In the Authentication tab, click the drop-down list to select the siteminder authentication template.
Set the CAPKIHOME Environment Variable
In UNIX, the r12.51 Agent for SAP needs the CAPKIHOME environment variable.
Follow these steps:
1. Open <SID>_<Java_Instance>_<hostname> file available in the following location:
<SAP_home>/<SID>SYS/profile/
SAP home
Specifies the installation directory of SAP.
2. Add the following line to the file:
SETENV_<xx> = CAPKIHOME=<Agent_install_dir>/sapwebas/CAPKI
Note: If the above profile has 6 SETENV variables (SETENV_00 to SETENV_05), then set “<xx>” as 06.
3. Restart SAP Web AS.
How to Confirm your CA SSO Protection
To confirm that this product is protecting the resources on your SAP Web Application server, use the following process:
1. Deploy the test application.
2. Configure the test application.
How to Confirm your CA SSO Protection
Chapter 6: Configuring SAP Web AS 7.0 and CA SSO Agent for SAP to Work Together 51
3. Configure an authentication scheme for the Enterprise portal.
4. Configure your CA SSO settings.
Deploy the Test Application
This product comes with a test application, testapp.ear that you deploy to confirm that CA SSO is protecting your SAP Web AS server.
Follow these steps:
1. Navigate to the following directory:
usr/sap/SID/INSTANCE_NAME/j2ee/deploying
2. Run the appropriate script for your operating environment:
■ DeployTool.bat (Windows)
■ DeployTool (UNIX)
3. Click Project, New Project.
The New Project dialog appears.
4. Navigate to a directory where you want to save your project. Enter a name for your project file, and then click OK.
The New Project dialog closes. The full path to your project file appears in the title bar.
5. Click the Deployer tab.
The menu names in the menu bar change.
6. Click Deploy, Connect.
The login dialog appears.
7. Enter your SAP Administrator credentials, and then click Connect.
The Visual Administrator tool appears.
8. Click Deploy, Ear, Load Ear
The Choose ear file dialog appears.
9. Navigate to the following file:
CA\webasagent\sapwebas\samples\testapp.ear
10. Click OK.
The Choose ear file dialog closes.

How to Confirm your CA SSO Protection
52 Agent for SAP Guide
11. Click Deploy, Deployment, Deploy Ear.
The test application is deployed. A confirmation dialog appears.
12. Click Yes to start the application.
The test application is started.
Configure the Test Application
After the test application is deployed, add users to the TestAppSecurityRole that is configured for the test application.
Follow these steps:
1. Open the J2EE Engine Visual Admin console. In the left pane, click Server, Services, Security Provider.
2. In the right pane, click the Runtime tab, and then click the Policy Configurations tab.
3. Click the testapp application displayed in the Components list.
4. On the right pane, click the Security Roles tab, and then select the TestAppSecurityRole.
5. From within the Mappings group-box, click Add, and then select users from the user tree. Click OK.
Note: Verify that the WASUSERNAME response attribute returns this username.
The users that you selected appear in the Users list box.
6. Click the Authentication tab and select the authentication template (see Selecting Applications to Use the Authentication Template (see page 50)).
7. Configure a CA SSO Policy that contains a realm for the application in the Policy Server with the resource /testapp/.
8. Create the rules and responses and bind them to the CA SSO policy.
9. Configure the front-end web server to forward this URL (/testapp/) to the Web AS J2EE Engine. For proxy configuration details for the respective web server, as detailed in Front-End Web Server Configuration (see page 85).
10. Access the following URL:
http://webserver:port/testapp/testconfig.jsp

How to Confirm your CA SSO Protection
Chapter 6: Configuring SAP Web AS 7.0 and CA SSO Agent for SAP to Work Together 53
11. Enter valid CA SSO credentials for authentication.
Upon successful authentication, the test page displays the following HTTP headers:
■ WASUSERNAME
■ SM_SERVERSESSIONID or SMSERVERSESSIONID
■ SM_SERVERSESSIONSPEC or SMSERVERSESSIONSPEC
■ NPS_SESSION_LINKER
12. Refresh the page, and then verify that the following cookies are visible:
SMSESSION,
JSESSIONID
MYSAPSSO2
13. Verify that the user principal displayed matches the WASUSERNAME.
The test application is configured.
More information:
Configure CA SSO Policies (see page 34)
Configure the Enterprise Portal Authentication Scheme
To integrate the SiteMinderLoginmodule with the Enterprise Portal, create an AuthScheme.
Follow these steps:
1. Verify that this product is deployed on the Web AS J2EE Engine, as described in the following sections of this guide:
■ How to Update the CA Single Sign-On Policies (see page 45)
■ Deploy and View SiteMinderLoginModule (see page 46)
■ Configure SiteMinderLoginModule (see page 48)
2. Create a backup of the existing authschemes.xml file, as follows:
a. In the Web AS J2EE Engine Visual Administrator console, select the Configuration Adapter service under the Server node.
b. In the Display Configuration tab, scroll to the following:
cluster_data, server, persistent, com.sap.security.core.ume.service, authschemes.xml
c. Double-click authschemes.xml, and click the Download button to keep a copy of the file.

How to Confirm your CA SSO Protection
54 Agent for SAP Guide
3. Edit the authschemes.xml file:
a. Click the Edit button to switch to the edit mode. At the prompt, click Yes.
b. Click the Write button (pencil icon) to open authschemes.xml.
c. Create a new authscheme by copying the elements of the existing uidpwdlogon authscheme. Rename the new authscheme to SiteMinder.
See the following example:

How to Confirm your CA SSO Protection
Chapter 6: Configuring SAP Web AS 7.0 and CA SSO Agent for SAP to Work Together 55
d. Modify frontendtarget of the SiteMinder authscheme to point to a URL iView, which refers to an error page. This page is presented to the user if authentication is unsuccessful or if the authentication stack fails. For details on creating a URL iView, see the SAP documentation.
Note: The value of frontendtarget given here is just for reference. Change it for each user environment. Also if the frontendtarget value given here is an iView, the allow the Everyone group Read access to it.
e. Modify the default authscheme-ref so that it points to the SiteMinder authscheme.
f. Click OK to save changes to the authschemes.xml file.
4. Navigate to Server, Services, and select Security Provider.
5. Click the Runtime tab and the Select Policy Configurations tab.
6. (Optional) Remove other Login Modules (BasicPasswordLoginModule, EvaluateTicketLoginModule) from the ticket authentication template stack.
7. Add the following modules to the ticket authentication template stack, in the following order and after the EvaluateTicketLoginModule, if present:
■ SiteMinderLoginModule
■ CreateTicketLoginModule
8. Do one of the following tasks:
■ If there are no other Login Modules in the stack, ensure that the following flags are set:
– SiteMinderLoginModule with flag REQUISITE
– CreateTicketLoginModule with flag REQUIRED
■ If there are other Login Modules in the stack, you may need to change the Login Module flags as shown below or based upon deployment-specific requirements:
– SiteMinderLoginModule with flag OPTIONAL
– CreateTicketLoginModule with flag OPTIONAL
Note: You must set redirectOnError option to False if the OPTIONAL flag is set for SiteMinderLoginModule.
9. Restart the Web AS J2EE engine for the changes to take effect.
How to Confirm your CA SSO Protection
56 Agent for SAP Guide
How to Configure the CA SSO Settings
To configure CA SSO to protect the Enterprise portal, use the following process:
1. If you have not already done so, add the Enterprise Portal configuration settings for this product.
2. Create a realm for the resource /irj/ in the Policy Server with the associated rules and responses.
3. Verify that the WASUSERNAME response attribute configured in this CA SSO policy is defined to return a valid Enterprise Portal user ID for the corresponding CA SSO user.
4. Access the following URL:
http://webserver:port/irj/portal
5. When challenged, enter CA SSO credentials for authentication.
On successful authentication, the portal page is displayed.
More information:
Configure CA SSO Policies (see page 34)
Configure the LogOff URL of the Enterprise Portal (7.0)
Configure the LogOff URL of the Enterprise Portal (version 7.0) to the LogOffURI parameter of the Web Agent.
Note: For more information about configuring the LogOffURI parameter of the Web Agent, see the CA SSO documentation.
Follow these steps:
1. Run the Config Tool.
2. Click Cluster data, Global server configuration, services, com.sap.security.core.ume.service.
3. Set the value of the ume.logoff.redirect.url key to the URL of the LogOff page that you want to use for the Enterprise Portal.
4. Restart the WebAS J2EE engine.
The LogOff URL is configured.

Chapter 7: Configuring SAP Web AS 7.1-7.4 and CA SSO Agent for SAP to Work Together 57
Chapter 7: Configuring SAP Web AS 7.1-7.4 and CA SSO Agent for SAP to Work Together
This section contains the following topics:
Guidelines for Updating CA SSO Policies (see page 57) Change the Configuration of the SAP J2EE Engine (see page 58) Deploy the SiteMinderLoginModule.sca (see page 58) Add SiteMinderLoginModule Property Using the AS Java Config Tool (see page 59) Set the CAPKIHOME Environment Variable (see page 60) Configure SiteMinderLoginModule Using SAP NetWeaver Administrator (see page 60) Create an Authentication Template Using SAP NetWeaver Administrator (see page 61) Configure an Authentication Scheme for the Enterprise Portal (see page 62)
Guidelines for Updating CA SSO Policies
Guidelines for updating the CA SSO policies:
■ Do not modify the CA SSO policies configured in Configure CA Single Sign-On Policies (see page 34). The CA SSO login module uses these policies for Tier 2 authentication.
■ Create additional policies for protecting each of the Web AS applications and the Enterprise Portal. See Configure CA Single Sign-On Policies (see page 34).
■ The name of the protected resource for Web AS applications depends on the particular Web AS application. For Enterprise Portal, /irj/ is usually the protected resource. For webdynpro applications, protect the /web-dynpro/ resource.
■ Verify that all users accessing the Web AS or Enterprise Portal applications are included in the policies you created for the /smwebasagent/ validation realm.
More information:
Configure CA SSO Policies (see page 34)

Change the Configuration of the SAP J2EE Engine
58 Agent for SAP Guide
Change the Configuration of the SAP J2EE Engine
Use the AS Java Config Tool to add a parameter named smwebas.home that identifies the path to the CA SSO Agent configuration directory that contains the SmWebAsSSO.conf file.
Follow these steps:
1. Start the AS Java Config Tool. See the SAP documentation for details on how to start the tool on your operating system.
2. Perform the following steps for each WebAS instance:
a. Click the appropriate instance-ID entry.
b. Click the VM Parameters tab.
c. Click the System tab.
d. Click the New button.
e. Complete the fields in the New parameter dialog to create the smwebas.home parameter as follows:
Name: smwebas.home
Value (Windows): SMagent_install_dir\sapwebas\conf
Value (UNIX): SMagent_install_dir/sapwebas/conf
Note: On Windows, if the pathname contains spaces, use DOS notation.
Deploy the SiteMinderLoginModule.sca
SAP uses SAP Component Archives (SCAs) as the mechanism for deploying components with NetWeaver. To deploy the SiteMinderLoginModule, use SAP Java Support Package Manager (JSPM) or NetWeaver Developer Studio.
For JSPM, follow these steps:
1. To locate the SCA file, navigate to the following location:
<AGENT_INSTALL_DIR>/sapwebas/lib/
2. Copy the SCA file to the following JSPM Inbox directory:
<DIR_EPS_ROOT>/in
Add SiteMinderLoginModule Property Using the AS Java Config Tool
Chapter 7: Configuring SAP Web AS 7.1-7.4 and CA SSO Agent for SAP to Work Together 59
3. Start JSPM and log in.
4. Deploy the SiteMinderLoginModule as a hotfix as follows:
a. Select the Hot fixes option on the Select Package Type page and click Next.
b. Review the information that is displayed on the Specify Queue page and click Next.
c. Review the information that is displayed on the Check Queue page and click Next.
5. Verify that the status of the SiteMinderLoginModule is DEPLOYED on the Completed page.
6. Click Exit to close JSPM.
For NetWeaver Developer Studio, follow these steps:
1. Open NetWeaver Developer Studio and connect to the SAP system using Window, Preferences, SAP AS Java.
2. Navigate to Deploy View.
3. Add the SiteMinderLoginModule.sca to External Deployable Archives.
4. Right-click the SiteMinderLoginModule and select Deploy.
Add SiteMinderLoginModule Property Using the AS Java Config Tool
Use the AS Java Config Tool to add the value "library:ca.com~SiteMinderLoginModule" to the LoginModuleClassLoader property.
Follow these steps:
1. In the AS Java Config tool, click Instance-ID, Services, Security.
2. Add the value library:ca.com~SiteMinderLoginModule to the LoginModuleClassLoaders key.
3. Save the changes and restart SAP Web AS.
Set the CAPKIHOME Environment Variable
60 Agent for SAP Guide
Set the CAPKIHOME Environment Variable
In UNIX, the r12.51 Agent for SAP needs the CAPKIHOME environment variable.
Follow these steps:
1. Open <SID>_<Java_Instance>_<hostname> file available in the following location:
<SAP_home>/<SID>SYS/profile/
SAP home
Specifies the installation directory of SAP.
2. Add the following line to the file:
SETENV_<xx> = CAPKIHOME=<Agent_install_dir>/sapwebas/CAPKI
Note: If the above profile has 6 SETENV variables (SETENV_00 to SETENV_05), then set “<xx>” as 06.
3. Restart SAP Web AS.
Configure SiteMinderLoginModule Using SAP NetWeaver Administrator
Use the SAP NetWeaver Administrator to configure SiteMinderLoginModule.
Follow these steps:
1. From the NetWeaver Application Server Java interface, click SAP NetWeaver Administrator.
The SAP NetWeaver Administrator opens at the Welcome page.
2. Click the Configuration Management tab, and then click Authentication and Single-sign on.
3. Click Login Modules and then click Create.
4. Enter the following details for SiteMinderLoginModule in the New Login Module dialog and then click Create:
■ Display Name: SiteMinderLoginModule
■ Class Name: com.netegrity.siteminder.sap.webas.jaas.SiteMinderLoginModule.
Note: After creating the login module, do not specify any options.

Create an Authentication Template Using SAP NetWeaver Administrator
Chapter 7: Configuring SAP Web AS 7.1-7.4 and CA SSO Agent for SAP to Work Together 61
Create an Authentication Template Using SAP NetWeaver Administrator
Use SAP NetWeaver Administrator to create an authentication template.
Follow these steps:
1. Click the Configuration Management tab, and then click Authentication and Single-sign on.
2. Click Components and click Create.
3. Enter the following details for the authentication template in the New Custom Configuration dialog and then click Create:
■ Configuration Name: SiteMinder
■ Type: Custom
4. On the Authentication Stack tab, click Edit.
5. Click Add to assign the login module to the template. Select SiteminderLoginModule as the Login Module Name from the drop-down menu and set the value to Requisite.
6. To the SiteminderLoginModule, add the options as follows:
a. Click Add in the options section.
b. Enter redirectOnError in the Name column and set the values to true.
7. Click Add, to add the CreateTicketLoginModule, and set the value to Required.
8. To the CreateTicketLoginModule, add the options as follows:
a. Click Add in the options section.
b. Enter ume.configuration.active in the Name column and set the value to true.
9. Save the work on the Authentication Stack tab.
Configure the LogOff URL of the Enterprise Portal
Configure the LogOff URL of the Enterprise Portal to the LogOffURI parameter of the Web Agent.
Note: For more information about configuring the LogOffURI parameter of the Web Agent, see the CA SSO documentation.
Configure an Authentication Scheme for the Enterprise Portal
62 Agent for SAP Guide
Follow these steps:
1. Run the Config Tool.
2. Click Cluster data, Global server configuration, services, com.sap.security.core.ume.service.
3. Set the value of the ume.logoff.redirect.url key to the URL of the LogOff page that you want to use for the Enterprise Portal. The value must match the value of the LogOffURI parameter for the Web Agent.
4. Restart the WebAS J2EE engine.
The LogOff URL is configured.
Configure an Authentication Scheme for the Enterprise Portal
Create an authentication scheme to integrate SiteMinderLoginmodule with the Enterprise Portal.
Follow these steps:
1. Create a backup of the existing authschemes.xml file, as follows:
a. Start the Web AS Java Config Tool by executing SAPJ2EEEngine_installation\j2ee\configtool\configtool.bat.
b. Click the symbol for Switch to configuration editor mode.
c. In the tree, navigate to cluster_config, system, custom_global, cfg, services, com.sap.security.core.ume.service, Persistent, authschemes.xml.
d. Click the symbol for Switch between view and edit mode to switch to edit mode.
e. In the tree, select authschemes.xml and click the symbol for Show the details of the selected node.
f. In the Change File dialog, click Download and save the file to a local directory. Leave the Change File dialog open.
g. Make a duplicate copy of the authschemes.xml file with a different name.
2. Edit the local authschemes.xml file in a text editor:
a. Create a new authscheme by copying the elements of the existing uidpwdlogon authscheme. Rename the new authscheme to SiteMinder.
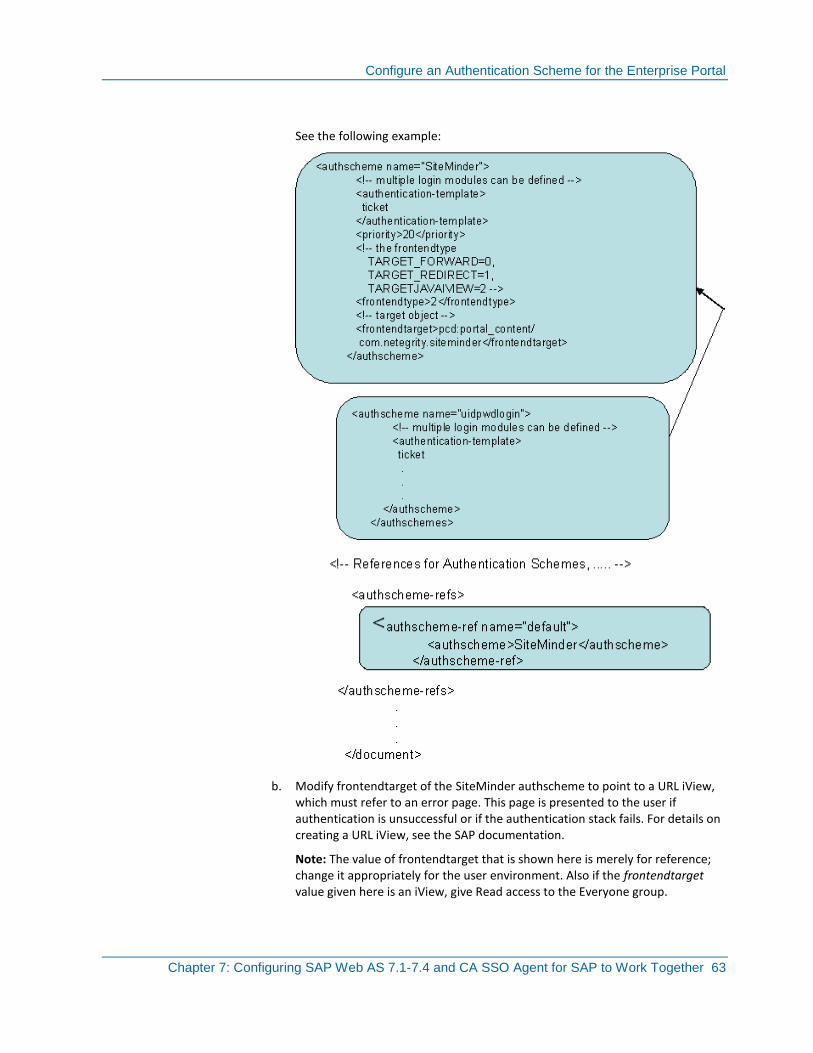
Configure an Authentication Scheme for the Enterprise Portal
Chapter 7: Configuring SAP Web AS 7.1-7.4 and CA SSO Agent for SAP to Work Together 63
See the following example:
b. Modify frontendtarget of the SiteMinder authscheme to point to a URL iView, which must refer to an error page. This page is presented to the user if authentication is unsuccessful or if the authentication stack fails. For details on creating a URL iView, see the SAP documentation.
Note: The value of frontendtarget that is shown here is merely for reference; change it appropriately for the user environment. Also if the frontendtarget value given here is an iView, give Read access to the Everyone group.

Configure an Authentication Scheme for the Enterprise Portal
64 Agent for SAP Guide
c. Modify the default authscheme-ref so that it points to the SiteMinder authscheme.
d. Save your changes to the authschemes.xml file and close the text editor.
3. In the Web AS Java Config Tool Change File dialog that you left open in step 1f, click Upload and select the local authschemes.xml file you edited previously.
4. Open the SAP NetWeaver Administrator
5. Navigate to Configuration, Security, Authentication and Single Sign-On.
6. Click on the "ticket" template.
7. (Optional) Remove other Login Modules (BasicPasswordLoginModule, EvaluateTicketLoginModule) from the ticket authentication template stack.
8. Add the following modules to the ticket authentication template stack, in the order that is shown and after the EvaluateTicketLoginModule, if present:
■ SiteMinderLoginModule
■ CreateTicketLoginModule
9. Click on the SiteMinderLoginModule entry and add a redirectOnError option as follows:
a. Click Add in the options section.
b. Enter redirectOnError in the Name column and set the values to true.
10. Click on the CreateTicketLoginModule entry and add a ume.configuration.active option as follows:
a. Click Add in the options section.
b. Enter ume.configuration.active in the Name column and set the value to true.
11. Do one of the following steps:
■ If there are no other Login Modules in the stack, ensure that the following flags are set:
– SiteMinderLoginModule with flag REQUISITE
– CreateTicketLoginModule with flag REQUIRED
■ If there are other Login Modules in the stack, you may need to change the Login Module flags as follows or based upon deployment-specific requirements:
– SiteMinderLoginModule with flag OPTIONAL
– CreateTicketLoginModule with flag OPTIONAL
Note: Set the redirectOnError option to False if the OPTIONAL flag is set for SiteMinderLoginModule.
12. Restart the Web AS J2EE engine for the changes to take effect.
Configure an Authentication Scheme for the Enterprise Portal
Chapter 7: Configuring SAP Web AS 7.1-7.4 and CA SSO Agent for SAP to Work Together 65
Configure CA SSO to Protect the Enterprise Portal
To configure CA SSO to protect the Enterprise portal, use the following process:
1. Configure CA SSO to protect the /irj/ realm.
2. Verify that the WASUSERNAME response attribute configured in this CA SSO policy is defined to return a valid Enterprise Portal user ID for the corresponding CA SSO user.
3. Access the following URL:
http://webserver:port/irj/portal
4. When challenged, enter CA SSO credentials for authentication.
On successful authentication, the portal page is displayed.
More information
Configure CA SSO Policies (see page 34) Configure an Authentication Scheme for the Enterprise Portal (see page 62) Guidelines for Updating CA SSO Policies (see page 45)


Chapter 8: Configuring CA SSO Agent for SAP with Multiple System IDs (SID) 67
Chapter 8: Configuring CA SSO Agent for SAP with Multiple System IDs (SID)
During the Agent for SAP configuration, only one system ID or instance is configured. For load-balancing purposes, you need multiple instances in your environment.
Follow these steps:
1. Navigate to the following location:
<SAP_agent_install_folder>/bin
2. Copy the files from the bin folder to the following location for each instance:
Windows:
C:\usr\sap\<SID>\<Instanme name>\j2ee\os_libs
UNIX:
/usr/sap/<SID>/<Instance name>/j2ee/os_libs
Important! After copying the files and setting the environment variable, perform the steps required to configure SAP Web Application Server and Agent for SAP to work together.
More information:
Configuring SAP Web AS 7.1-7.4 and CA SSO Agent for SAP to Work Together (see page 57)


Chapter 9: Upgrading CA SSO Agent for SAP 69
Chapter 9: Upgrading CA SSO Agent for SAP
This section contains the following topics:
How to Prepare for the Upgrade (see page 69)
How to Prepare for the Upgrade
Follow these steps:
1. Use the CA SSO platform support matrix to verify that both the previous and new versions of the product use the same operating system. Upgrades are only supported if the operating environments for both versions are the same.
2. Upgrade the other CA SSO components (such as the Policy Server and Web Agent) in your environment first.
Note: For more information about upgrading your CA SSO components, see the CA SSO documentation.
3. Gather the information for the product upgrade.
4. Run the installation wizard to upgrade the product.
5. Configure the upgraded product.
6. Undeploy the existing SiteMinderLoginModule and redeploy the new SiteMinderLoginModule that is provided with the product.

How to Prepare for the Upgrade
70 Agent for SAP Guide
Gather Information for the Upgrade
To upgrade the product, the installation wizard requires the following information:
Install Folder
Specifies the directory where the previous versions of the product files are installed. The installer replaces these files with the current version during the upgrade.
Default: In Windows, for version 5.6
erp_agent_location\CA\erpconn\
For version 12.0:
erp_agent_location\CA\webasagent
Default: In UNIX/Linux, for version 5.6
erp_agent_location/CA/erpconn/
For version 12.0
erp_agent_location/CA/webasagent
Configuration File Location
Specifies the location of the configuration file from a previous version of the product. The configuration settings of the previous version are copied to the configuration wizard so you do not need to retype them when you run the configuration wizard for the new version. After the installation is complete, run the configuration wizard to confirm or change any settings.
Default: In Windows, for version 5.6:
erp_agent_location\erpconn\sapwebas\conf
For version 12.0:
erp_agent_location\CA\webasagent\sapwebas\conf
Default: In UNIX/Linux, for version 5.6:
erp_agent_location/CA/erpconn/sapwebas/conf
For version 12.0:
erp_agent_location/CA/webasagent/sapwebas/conf
SAP Web Application Server Path
Specifies the SAP Web Application Server instance root directory.
Default: In Windows:
drive:\usr\sap\sid\instance_name
Default: In UNIX/Linux:
/usr/sap/sid/instance_name
How to Prepare for the Upgrade
Chapter 9: Upgrading CA SSO Agent for SAP 71
Upgrade CA SSO Agent for SAP on Windows
The installation wizard detects a previous installation and upgrades the product.
Follow these steps:
1. Download the installation kit to a temporary directory on your web server.
2. Double-click the following file:
ca-erp-webas-<version>-<operating_environmentprocessor_type>.exe
Note: To upgrade using console, open a console window and then run the previous command with the -i console option.
Note: To upgrade unattended, open a console window and then run the previous command with the “-i silent –f <installer_properties_file>” options. The installer properties file (ca-sapwebas-installer.properties) is located in the install_config_info directory of the product.
3. Follow the prompts in the wizard.
4. (Optional) Run the configuration wizard when the installation wizard finishes.
Upgrade CA SSO Agent for SAP on UNIX
The installation wizard detects a previous installation and upgrades the product.
Follow these steps:
1. Execute the following file:
ca-erp-webas-<version>-<operating_environmentprocessor_type>.bin
Note: To upgrade using console, open a console window and then run the previous command with the -i console option.
Note: To upgrade unattended, open a console window and then run the previous command with the “-i silent –f <installer_properties_file>” options. The installer properties file (ca-sapwebas-installer.properties) is located in the install_config_info directory of the product.
2. Follow the prompts in the wizard. Use the information from your worksheet to complete the wizard.


Chapter 10: Troubleshooting 73
Chapter 10: Troubleshooting
This section contains the following topics:
Verify the CA SSO Policies (see page 73) Check the Web Agent Log (see page 74) Temporarily Disable the Session Linker (see page 74) Examine Web AS Log Files and Traces (see page 74)
Verify the CA SSO Policies
You can use the CA SSO Test tool to verify the CA SSO policies.
Follow these steps:
1. Access the CA SSO Test Tool from the Start, Programs menu.
2. Specify the correct Agent name and the smhost.conf file location. Click Connect.
3. Enter the correct validation realm resource (for example, /smwebasagent/), action GET. Click IsProtected.
4. Enter a valid CA SSO username and password. Click IsAuthenticated, and IsAuthorized.
5. Check the configuration of the Policy Server and the Policy Server logs if any of the following events occur:
■ A red indicator appears at any time
■ The responses WASUSERNAME and NPS_SESSION_LINKER (only for SSO Mode if the SessionLinker is used) do not appear in the Attributes section, examine the Policy Server configuration and logs.
6. Change the resource to the Web AS application. Click IsProtected, IsAuthenticated, and IsAuthorized. Verify that no red indicators appear and that responses appear for WASUSERNAME and NPS_SESSION_LINKER.
7. Change the resource to the Enterprise Portal application resource and click IsProtected, IsAuthenticated, and IsAuthorized. Verify that no red indicators appear and that responses appear for both WASUSERNAME and NPS_SESSION_LINKER.
8. Verify that the users configured for accessing Web AS and Enterprise portal also have access to the validation realm resource, /smwebasagent/.
Check the Web Agent Log
74 Agent for SAP Guide
Check the Web Agent Log
Review the log file for the Web Agent if any of the following conditions occur:
■ The web browser shows a 500 Server Error page.
■ The web browser continuously returns to the login page.
Note: For more information, see the CA SSO documentation.
Temporarily Disable the Session Linker
If the product is configured for SSO Mode, try simplifying the environment by temporarily eliminating the possibility of a problem in Session Linker.
Note: For more information, see the SessionLinker documentation
Important: Do not perform this procedure in a production environment—it could expose the system to attacks.
Examine Web AS Log Files and Traces
Review the log files and trace logs of the SAP Web Application Server for any problem.
Chapter 11: Log Messages 75
Chapter 11: Log Messages
This section contains the following topics:
Agent initialization failed...Check FIPS mode compatibility with Policy Server. Also verify that the specified Policy Servers are reachable (see page 75) Exception from System.loadLibrary(smjavaagentapi) java.lang.UnsatisfiedLinkError: no smjavaagentapi in java.library.path (see page 76) smwebas.home property not set (see page 76) java.lang.ClassNotFoundException: com.netegrity.siteminder.sap.webas.jaas.SiteMinderLoginModule. (see page 77) no JDecrypt in java.library.path (see page 77) javaagent_api_init (see page 78) Invalid Entries in the Configuration File (see page 78) Return code from doManagement Error (see page 79) Policy server IP address or ports are invalid (see page 79) WAS Usernames Do Not Match (see page 80) SiteMinderSessionID header not found or empty - Aborting... (see page 80) CA SSO Session Spec Header Not Found or Empty (see page 81) Resource not protected by CA SSO (see page 81) CA SSO Session Is Invalid (see page 81) CA SSO login module authentication failed. Redirecting to the error page... (see page 82) Overall login stack authentication failed. Sending error message... (see page 82) FEDPROFILE Cookie not found - Aborting… (see page 83) FEDPROFILE cookie set to LOGGEDOFF (see page 83) Invalid entries for Fed Connector in Config file (see page 83)
Agent initialization failed...Check FIPS mode compatibility with Policy Server. Also verify that the specified Policy Servers are reachable
Reason:
The CA SSO Agent for SAP could not start.
Action:
Check one or more of the following settings:
■ The Policy Server IP Address that the Policy Server name is a fully qualified domain name

Exception from System.loadLibrary(smjavaagentapi) java.lang.UnsatisfiedLinkError: no smjavaagentapi in
java.library.path
76 Agent for SAP Guide
■ That the Agent encryption mode is compatible with the encryption mode used by the Policy Server
Note: The following FIPS/AES encryption modes are not compatible:
■ This product in COMPAT mode with Policy Server in ONLY mode
Run the configuration wizard again to correct these settings.
Exception from System.loadLibrary(smjavaagentapi) java.lang.UnsatisfiedLinkError: no smjavaagentapi in java.library.path
Reason:
This message appears in the Web AS default trace file if the Java Agent API file is not present in the system path.
Action:
Check the configuration of your CA SSO Login Module.
More information:
Configure SiteMinderLoginModule (see page 48)
smwebas.home property not set
Reason:
This message appears in the Web AS default trace file when the smwebas.home property is not set.
Action:
Use the Web AS Configuration Tool to ensure the smwebas.home property is set correctly.
java.lang.ClassNotFoundException: com.netegrity.siteminder.sap.webas.jaas.SiteMinderLoginModule.
Chapter 11: Log Messages 77
java.lang.ClassNotFoundException: com.netegrity.siteminder.sap.webas.jaas.SiteMinderLoginModule.
Reason:
The Web AS default trace file contains this message for any of the following reasons:
■ The SiteMinderLoginModule.sca library was not deployed.
■ The SiteMinderLoginModule.sca library was deployed incorrectly.
■ No reference to the SiteMinderLoginModule.sca library exists in the ClassLoaders property of the Security Provider service.
Action:
Check the deployment of the SiteMinderLoginModule.sca library.
no JDecrypt in java.library.path
Reason:
The Web AS default trace file contains this message when the JDecrypt.dll is not present in the system path.
Action:
Copy the JDecrypt library
From
<agent_install_drectory>\sapwebas\bin
To:
<sap_home>\<SID>\<instance>\j2ee\os_libs
More information:
Configure SiteMinderLoginModule (see page 48)

javaagent_api_init
78 Agent for SAP Guide
javaagent_api_init
Reason:
This message appears in the CA SSO Agent for SAP log file if the Java Agent API file is not present in the system path.
Action:
Copy the Java Agent API (smjavaagentapi) library
From
<agent_install_directory>\sapwebas\bin
To:
<sap_home>\<SID>\<instance>\j2ee\os_libs
Invalid Entries in the Configuration File
Reason:
Agent configuration details are missing or are incorrect.
Action:
Run the Agent Configuration Wizard again and correct the errors.

Return code from doManagement Error
Chapter 11: Log Messages 79
Return code from doManagement Error
Reason:
This message can occur for any of the following reasons:
■ The Agent configuration contains an incorrect IP address or fully qualified domain name for the Policy Server.
■ The Policy server is not running.
■ A communication problem exists between the Policy Server and the CA SSO Login Module.
■ Policy Server closes the connection if the handshake is not completed within 10 seconds (Handshake timeout). The smps.log file contains the following message:
Closing accepted connection for session connection idle too long before handshake
Action:
Do the following tasks:
■ Verify that the IP address of the Policy Server is correct in the Agent configuration.
■ Start the Policy Server.
■ Verify the communication between the Policy Server and the CA SSO Login Module.
■ In the Policy Server, set the value of the registry key AcceptTimeout to 60 seconds at the following location:
HKEY_LOCAL_MACHINE/Software/Netegrity/SiteMinder/CurrentVersion/PolicyServer/
Valid for 12.51 CR 06 Policy Server onwards
Valid for 12.52 SP1 CR 02 Policy Server onwards
■ Restart the Policy Server and SAP instance.
Policy server IP address or ports are invalid
Reason:
The following items in the Agent configuration differ from those stored on the Policy Server:
■ Invalid IP address
■ Invalid accounting, authentication, or authorization ports
Action:
Run the Agent Configuration Wizard again. Ensure that you specify the Policy Server IP address and ports correctly.

WAS Usernames Do Not Match
80 Agent for SAP Guide
WAS Usernames Do Not Match
Reason:
The following reasons can cause this error:
■ An attempted session hijack occurred, where a WASUSERNAME header was manually sent to the browser.
■ The User attribute passed in the WASUSERNAME Policy Server response for the resource mentioned in the Agent configuration does not match with the one given for the resource currently being accessed.
Action:
Check the WASUSERNAME response in the following realms:
■ Validation realm
■ Application realm
The user attribute passed must match in both realms.
More information:
Configure CA SSO Policies (see page 34)
SiteMinderSessionID header not found or empty - Aborting...
Reason:
One of the following HTTP headers was not available to the CA SSO Login module:
■ SMSERVERSESSIONID
■ SM_SERVERSESSIONID
Action:
Check the following items:
■ The configuration of the Web Agent on the proxy Web Server
■ The value of the DisableSessionVars Agent parameter must be set to no (in the Agent Configuration Object)
CA SSO Session Spec Header Not Found or Empty
Chapter 11: Log Messages 81
CA SSO Session Spec Header Not Found or Empty
Reason:
One of the following HTTP headers was not available to the CA SSO Login module:
■ SMSERVERSESSIONSPEC
■ SM_SERVERSESSIONSPEC
Action:
Check the following items:
■ The configuration of the Web Agent on the proxy Web Server
■ The value of the DisableSessionVars Agent parameter (must be set to no)
Resource not protected by CA SSO
Reason:
The resource listed in the Agent configuration is not protected in the Policy Server.
Action:
Verify that you have completed all the steps for configuring CA SSO policies.
More information:
Configure CA SSO Policies (see page 34)
CA SSO Session Is Invalid
Reason:
Validation of the Tier 2 CA SSO session can fail when any of the following events occur:
■ The timeout for the session expires.
■ The session user does not have the proper access permissions.
Action:
Check the following items:
■ The session timeout values
■ The permissions of the user associated with the invalid session.
CA SSO login module authentication failed. Redirecting to the error page...
82 Agent for SAP Guide
CA SSO login module authentication failed. Redirecting to the error page...
Reason:
The user was denied access by the CA SSO login module, and was redirected to the error page.
The user is redirected to the absolute URL of the Error page, which is the ErrorURL parameter that is specified during Agent configuration.
If the URL of the Error page is not displayed and the “Page cannot be displayed” message appears in the browser, check the ErrorURL parameter that is specified during Agent configuration.
If the ErrorURL parameter is not specified during configuration, the log file of this product can issue an additional message:
"CA SSO login module authentication failed. No Error URL configured, sending error message..."
Action:
Verify that the values in the Agent configuration file are correct. If you still get this error, contact CA Technical Support.
Overall login stack authentication failed. Sending error message...
Reason:
A login using the CA SSO module succeeded, but another login module in the stack failed.
Action:
Check the other login modules in the stack. Especially those using the following flags:
■ REQUISITE
■ REQUIRED

FEDPROFILE Cookie not found - Aborting…
Chapter 11: Log Messages 83
FEDPROFILE Cookie not found - Aborting…
Reason:
The CA SSO Login Module did not receive the FEDPROFILE cookie from CA Federation.
Action:
Verify the following items:
■ The cookie settings are enabled in the browser.
■ CA Federation is creating the FEDPROFILE cookie.
FEDPROFILE cookie set to LOGGEDOFF
Reason:
The user completed a single logout (SLO) transaction from CA Federation.
Action:
The FEDPROFILE cookie is not valid. Authentication of the user to the SAP Web AS fails.
Invalid entries for Fed Connector in Config file
Reason:
The following settings are not configured correctly:
■ Federation Security Zone
■ Federation password
Action:
Verify the following items:
■ The Federation Security Zone is provided correctly (not empty).
■ The Federation password is not empty and verify that it is AES encrypted.


Appendix A: Front-End Web Server Configuration 85
Appendix A: Front-End Web Server Configuration
This section contains the following topics:
Apache Web Server (see page 85) Sun Java Systems Web Server (see page 86)
Apache Web Server
This configuration requires two apache modules: mod_proxy (used for transforming the Apache web server into an intermediary server); and mod_rewrite (performs modifications to the URL based upon a set of rules and configurations).
See the SAP documentation to configure the Apache web server as a front-end web server to the Web AS.
Verify an Apache Web Server Configuration - Example
The following steps summarize how to verify the configuration. Use the steps only for reference.
Follow these steps:
1. Open the Apache web server configuration file (httpd.conf).
2. Make sure that the file contains the following entries:
LoadModule rewrite_module modules/mod_rewrite.so
LoadModule proxy_module modules/libproxy.so
LoadModule proxy_connect_module modules/mod_proxy_connect.so
LoadModule proxy_http_module modules/mod_proxy_http.so
AddModule mod_rewrite.c
AddModule mod_proxy.c
RewriteLog "/etc/httpd/logs/rewrite_log"
RewriteLogLevel 9

Sun Java Systems Web Server
86 Agent for SAP Guide
3. Between the Location tags, specify the rules and conditions to use for the redirection. Specify a Location section for each application you want the Apache web server to redirect, for example:
<Location /application_root_dir>
RewriteEngine On
RewriteCond %{THE_REQUEST} \.jsp
RewriteRule ^(.+) http://somehost.com:90%{REQUEST_URI} [P]
RewriteCond %{THE_REQUEST} Example
RewriteRule ^(.+) htt://somehost.com:90%{REQUEST_URI} [P]
</Location>
Sun Java Systems Web Server
See the SAP documentation to configure the Sun Java Systems web server as a front-end web server to the Web AS.
Verify a Sun Java Systems Web Server Configuration Using RPP - Example
The following process summarizes how to verify the configuration (obj.conf) of a Sun Java System Web server in reverse proxy mode. Use the steps only for reference.
Follow these steps:
■ The NameTrans directive takes the following form:
NameTrans fn="map" from="/realma" name="reverse-proxy-/reamla"
to="http:/realma"
Where "from=" contains the name of local virtual path (for example, /realma) and "to=" contains the remote virtual path (for example, http:/realma). Use the format in the sample to specify "to=" (http:/<Virtual Path>).

Sun Java Systems Web Server
Appendix A: Front-End Web Server Configuration 87
■ The following Object directives are appended at the end of the obj.conf file:
<Object name="reverse-proxy-/reamla">
Route fn="set-origin-server" server="<URL>"
</Object>
<Object ppath="http:*">
Service fn="proxy-retrieve" method="*"
</Object>
Where reverse-proxy-/reamla is name mentioned in NameTrans directive, and the <URL> is a URL for the remote server. For example:
<Object name="reverse-proxy-/reamla">
Route fn="set-origin-server" server="http://server.myorg.org:CA Portal"
</Object>
<Object ppath="http:*">
Service fn="proxy-retrieve" method="*"
</Object>


Appendix B: NPSEncrypt and NPSVersion Tools 89
Appendix B: NPSEncrypt and NPSVersion Tools
This section contains the following topics:
NPSEncrypt Tool (see page 89) NPSVersion Tool (see page 90)
NPSEncrypt Tool
Sometimes secret values must be stored in a configuration file. For security purposes, you might want to encrypt and store the encrypted form of these secret values. Use the NPSEncrypt tool. When a setting allows encrypted values to be used, this tool decrypts it before use. If the setting is not encrypted, the value entered is used.
The NPSEncrypt utility takes plain text from the command line, encrypts it, and prints the result on the screen. The resulting encrypted text can be cut and pasted wherever it is needed.
A product that allows an encrypted value, automatically decrypts it when needed.
Run the NPSEncrypt utility from the directory where it exists. The default location of the utility is as follows:
<SAP_agent_install_folder>\tools\
To encrypt a value, use the command prompt and type the NPSEncrypt command followed by a space and the text to be encrypted:
C:\Program Files\CA\webasagent\sapwebas\tools>npsencrypt secret
[NPSEncrypt Version 12.0.0000.244 - NPSEncrypt Revision 12.0.0000.244]
[NDSEnc-B]9Avy5I7DdZvyKMQUEyCmkA==
In this case, the encrypted form of secret is:
[NDSEnc-B]9Avy5I7DdZvyKMQUEyCmkA==
When you copy and paste, grab the entire line, including [NDSEnc-].
NPSEncrypt encrypts the same text to many different cipher text values. Use any of the values, for example:
C:\Program Files\CA\webasagent\sapwebas\tools>npsencrypt secret
[NPSEncrypt Version 12.0.0000.244 - NPSEncrypt Revision 12.0.0000.244]
[NDSEnc-B]+gSD4iNxxr2dApU2LeaVNg==

NPSVersion Tool
90 Agent for SAP Guide
C:\Program Files\CA\webasagent\sapwebas\tools>npsencrypt secret
[NPSEncrypt Version 12.0.0000.244 - NPSEncrypt Revision 12.0.0000.244]
[NDSEnc-C]/QFL4W7I7k0iWpANyne0zA==
C:\Program Files\CA\webasagent\sapwebas\tools>npsencrypt secret
[NPSEncrypt Version 12.0.0000.244 - NPSEncrypt Revision 12.0.0000.244]
[NDSEnc-C]Af0T4bgeF96of3IA6PuOng==
C:\Program Files\CA\webasagent\sapwebas\tools>npsencrypt secret
[NPSEncrypt Version 12.0.0000.244 - NPSEncrypt Revision 12.0.0000.244]
[NDSEnc-C]Af0T4bgeF96of3IA6PuOng==
C:\Program Files\CA\webasagent\sapwebas\tools>npsencrypt secret
[NPSEncrypt Version 12.0.0000.244 - NPSEncrypt Revision 12.0.0000.244]
[NDSEnc-B]BPnb4AN1P28PdwnSbqgfKw==
C:\Program Files\CA\webasagent\sapwebas\tools>npsencrypt secret
[NPSEncrypt Version 12.0.0000.244 - NPSEncrypt Revision 12.0.0000.244]
[NDSEnc-B]BPnb4AN1P28PdwnSbqgfKw==
The syntax for using the command is:
NPSENCRYPT.exe [Text]
Text
Specifies the text to be encrypted.
Examples of possible usage for the tool follow:
1. Run NPSEncrypt without any parameter using the following command:
NPSEncrypt.exe
[NPSEncrypt Version 12.0.0000.129 - NPSEncrypt Revision 12.0.0000.129]
2. Run NPSEncrypt with the "text" to be encrypted using the following command:
NPSEncrypt.exe <text >
An RC2 algorithm encrypted value such as the following sample appears:
[NDSEnc-A]gg7ljFtRbwb9ss
For Unix and Linux Platforms, the name of the tool is NPSEncrypt.
NPSVersion Tool
Use the NPSVersion tool to extract version information from many CA products. To use this command-line tool, type NPSVersion, a space, and the name of the executable whose version information you want, for example:
C:\Program Files\CA\webasagent\sapwebas\tools>npsversion NPSEncrypt.exe
[NPSVersion Version 12.0.0000.244 - NPSVersion Revision 12.0.0000.244]
NPSEncrypt.exe - Component: NPSEncrypt V12.0.0000.244 (Sep 28 2009 17:37:05)
NPSEncrypt.exe - Package: NPSEncrypt V12.0.0000.244
C:\Program Files\CA\webasagent\sapwebas\tools>

NPSVersion Tool
Appendix B: NPSEncrypt and NPSVersion Tools 91
Use the NPSVersion tool on one platform to extract information for a product built for any other platform. The information displayed might differ in format and content than the previous sample, but the relevant lines when discussing any issues with Support are Package and Component. Each line has a version number.Package refers to the version of the Product.
Component refers to the part of the product that is enclosed within this specific file. The version number can be larger than the Package version. One of more bugs can have been repaired for the component or minor enhancements added to the component that did not require a package to be rebuilt or renumbered.