all you need to know about microsoft windows nano server · 2019-10-23 · all o ee no bou microsof...
TRANSCRIPT

All You Need to Know about Microsoft Windows Nano Server
Mike Resseler Veeam Technical Evangelist

All You Need to Know about Microsoft Windows Nano Server
2© 2016 Veeam Software
IntroductionWindows Server 2016 will become generally available somewhere in 2016. As of today, Microsoft hasn’t
given any release date yet, but it provide with technical previews (TPs) to discover and learn the new
technology on a regular basis. Many organizations and their IT teams say they don’t want to work with
beta software yet and that they want to wait to learn the platform when it is ready. I strongly advise you
to change that thinking. With Microsoft picking up the pace — and with the pressure
on IT departments worldwide — moving your data center to new technology faster than ever before
will become a game changer and provide a big advantage for your business to be more agile and
competitive in today’s world.
Today, I want to talk about Microsoft Windows Nano Server. Nano Server is a headless deployment
option for Windows Server, coming in 64-bit only. For many, it will look very confusing at first, and many
will quickly look at it and decide it is not for their environment. I hope to convince you to look further
and to give you as much information and guidance as possible.

All You Need to Know about Microsoft Windows Nano Server
3© 2016 Veeam Software
ContentsIntroduction . . . . . . . . . . . . . . . . . . . . . . . . . . . . . . . . . . . . . . . . . . . . . . . . . . . . . . . . . . . . . . . . . . . . . . . . . . . 2
Some history . . . . . . . . . . . . . . . . . . . . . . . . . . . . . . . . . . . . . . . . . . . . . . . . . . . . . . . . . . . . . . . . . . . . . . . . . . 5
Windows NT to Windows Server 2003 . . . . . . . . . . . . . . . . . . . . . . . . . . . . . . . . . . . . . . . . . . . . . . . . . . . . . . . . . . . .5
Windows Server 2008 and R2 . . . . . . . . . . . . . . . . . . . . . . . . . . . . . . . . . . . . . . . . . . . . . . . . . . . . . . . . . . . . . . . . . . . .5
Windows Server 2012 and R2 . . . . . . . . . . . . . . . . . . . . . . . . . . . . . . . . . . . . . . . . . . . . . . . . . . . . . . . . . . . . . . . . . . . .5
What is Nano Server? . . . . . . . . . . . . . . . . . . . . . . . . . . . . . . . . . . . . . . . . . . . . . . . . . . . . . . . . . . . . . . . . . . . 6
Why? . . . . . . . . . . . . . . . . . . . . . . . . . . . . . . . . . . . . . . . . . . . . . . . . . . . . . . . . . . . . . . . . . . . . . . . . . . . . . . . . . . 6
Setting the expectations . . . . . . . . . . . . . . . . . . . . . . . . . . . . . . . . . . . . . . . . . . . . . . . . . . . . . . . . . . . . . . . 9
Let’s look at the quick installation . . . . . . . . . . . . . . . . . . . . . . . . . . . . . . . . . . . . . . . . . . . . . . . . . . . . . . . 9
A virtual Nano Server . . . . . . . . . . . . . . . . . . . . . . . . . . . . . . . . . . . . . . . . . . . . . . . . . . . . . . . . . . . . . . . . . . . . . . . . . . . .9
A physical Nano Server. . . . . . . . . . . . . . . . . . . . . . . . . . . . . . . . . . . . . . . . . . . . . . . . . . . . . . . . . . . . . . . . . . . . . . . . . 16
Packages . . . . . . . . . . . . . . . . . . . . . . . . . . . . . . . . . . . . . . . . . . . . . . . . . . . . . . . . . . . . . . . . . . . . . . . . . . . . . 17
Advanced installation / deployment options . . . . . . . . . . . . . . . . . . . . . . . . . . . . . . . . . . . . . . . . . . . . 20
New-NanoServerImage . . . . . . . . . . . . . . . . . . . . . . . . . . . . . . . . . . . . . . . . . . . . . . . . . . . . . . . . . . . . . . . . . . . . . . . . 20
Get-NanoServerPackages . . . . . . . . . . . . . . . . . . . . . . . . . . . . . . . . . . . . . . . . . . . . . . . . . . . . . . . . . . . . . . . . . . . . . . 23
Edit-NanoServerImage . . . . . . . . . . . . . . . . . . . . . . . . . . . . . . . . . . . . . . . . . . . . . . . . . . . . . . . . . . . . . . . . . . . . . . . . . 24
Additional information for advanced installation/deployment . . . . . . . . . . . . . . . . . . . . . . . . . . . 25
Domain join options . . . . . . . . . . . . . . . . . . . . . . . . . . . . . . . . . . . . . . . . . . . . . . . . . . . . . . . . . . . . . . . . . . . . . . . . . . . 25
Joining a different domain . . . . . . . . . . . . . . . . . . . . . . . . . . . . . . . . . . . . . . . . . . . . . . . . . . . . . . . . . . . . . . . . 25
Reusing a domain account . . . . . . . . . . . . . . . . . . . . . . . . . . . . . . . . . . . . . . . . . . . . . . . . . . . . . . . . . . . . . . . 26
Joining Nano Server to a domain online . . . . . . . . . . . . . . . . . . . . . . . . . . . . . . . . . . . . . . . . . . . . . . . . . . 26
Using the unattend file . . . . . . . . . . . . . . . . . . . . . . . . . . . . . . . . . . . . . . . . . . . . . . . . . . . . . . . . . . . . . . . . . . . 27
Azure . . . . . . . . . . . . . . . . . . . . . . . . . . . . . . . . . . . . . . . . . . . . . . . . . . . . . . . . . . . . . . . . . . . . . . . . . . . . . . . . . . . . . . . . . . 29
Managing Nano Server . . . . . . . . . . . . . . . . . . . . . . . . . . . . . . . . . . . . . . . . . . . . . . . . . . . . . . . . . . . . . . . . 30
The Nano Server Recovery Console . . . . . . . . . . . . . . . . . . . . . . . . . . . . . . . . . . . . . . . . . . . . . . . . . . . . . . . . . . . . 30
Figuring out the IP address. . . . . . . . . . . . . . . . . . . . . . . . . . . . . . . . . . . . . . . . . . . . . . . . . . . . . . . . . . . . . . . . . . . . . 34
PowerShell Remoting/PowerShell Direct . . . . . . . . . . . . . . . . . . . . . . . . . . . . . . . . . . . . . . . . . . . . . . . . . . . . . . . 35

All You Need to Know about Microsoft Windows Nano Server
4© 2016 Veeam Software
Windows PowerShell CIM sessions over WinRM. . . . . . . . . . . . . . . . . . . . . . . . . . . . . . . . . . . . . . . . . . . . . . . . . 38
Windows Remote Management. . . . . . . . . . . . . . . . . . . . . . . . . . . . . . . . . . . . . . . . . . . . . . . . . . . . . . . . . . . . . . . . 39
Working with remote consoles . . . . . . . . . . . . . . . . . . . . . . . . . . . . . . . . . . . . . . . . . . . . . . . . . . . . . . . . . . . . . . . . . 39
Remote Server Management Tools . . . . . . . . . . . . . . . . . . . . . . . . . . . . . . . . . . . . . . . . . . . . . . . . . . . . . . . . . . . . . 45
Deploying apps on Nano Server . . . . . . . . . . . . . . . . . . . . . . . . . . . . . . . . . . . . . . . . . . . . . . . . . . . . . . . . 46
Appendix A: Additional information
on packages . . . . . . . . . . . . . . . . . . . . . . . . . . . . . . . . . . . . . . . . . . . . . . . . . . . . . . . . . . . . . . . . . . . . . . . . . . 47
DNS Package . . . . . . . . . . . . . . . . . . . . . . . . . . . . . . . . . . . . . . . . . . . . . . . . . . . . . . . . . . . . . . . . . . . . . . . . . . . . . . . . . . 47
IIS Server. . . . . . . . . . . . . . . . . . . . . . . . . . . . . . . . . . . . . . . . . . . . . . . . . . . . . . . . . . . . . . . . . . . . . . . . . . . . . . . . . . . . . . . 48
Offline installation . . . . . . . . . . . . . . . . . . . . . . . . . . . . . . . . . . . . . . . . . . . . . . . . . . . . . . . . . . . . . . . . . . . . . . . . 48
Online installation . . . . . . . . . . . . . . . . . . . . . . . . . . . . . . . . . . . . . . . . . . . . . . . . . . . . . . . . . . . . . . . . . . . . . . . . 49
Working with IIS . . . . . . . . . . . . . . . . . . . . . . . . . . . . . . . . . . . . . . . . . . . . . . . . . . . . . . . . . . . . . . . . . . . . . . . . . . 50
Hyper-V. . . . . . . . . . . . . . . . . . . . . . . . . . . . . . . . . . . . . . . . . . . . . . . . . . . . . . . . . . . . . . . . . . . . . . . . . . . . . . . . . . . . . . . . 52
Failover Clustering . . . . . . . . . . . . . . . . . . . . . . . . . . . . . . . . . . . . . . . . . . . . . . . . . . . . . . . . . . . . . . . . . . . . . . . . . . . . . 52
Appendix B: Setup & Boot eventing, Kernel Debugging & Emergency Management Services . . . 53
Setup & Boot Eventing . . . . . . . . . . . . . . . . . . . . . . . . . . . . . . . . . . . . . . . . . . . . . . . . . . . . . . . . . . . . . . . . . . . . . . . . . 53
Kernel Debugging . . . . . . . . . . . . . . . . . . . . . . . . . . . . . . . . . . . . . . . . . . . . . . . . . . . . . . . . . . . . . . . . . . . . . . . . . . . . . 54
Emergency Management Services . . . . . . . . . . . . . . . . . . . . . . . . . . . . . . . . . . . . . . . . . . . . . . . . . . . . . . . . . . . . . 55
Appendix C: Unattend, SetupComplete and DISM . . . . . . . . . . . . . . . . . . . . . . . . . . . . . . . . . . . . . . . 56
DISM . . . . . . . . . . . . . . . . . . . . . . . . . . . . . . . . . . . . . . . . . . . . . . . . . . . . . . . . . . . . . . . . . . . . . . . . . . . . . . . . . . . . . . . . . . 56
Unattend File . . . . . . . . . . . . . . . . . . . . . . . . . . . . . . . . . . . . . . . . . . . . . . . . . . . . . . . . . . . . . . . . . . . . . . . . . . . . . . . . . . 57
Using setupcomplete.cmd . . . . . . . . . . . . . . . . . . . . . . . . . . . . . . . . . . . . . . . . . . . . . . . . . . . . . . . . . . . . . . . . . . . . . 59
Author information . . . . . . . . . . . . . . . . . . . . . . . . . . . . . . . . . . . . . . . . . . . . . . . . . . . . . . . . . . . . . . . . . . . 61
About Veeam Software . . . . . . . . . . . . . . . . . . . . . . . . . . . . . . . . . . . . . . . . . . . . . . . . . . . . . . . . . . . . . . . . 61

All You Need to Know about Microsoft Windows Nano Server
5© 2016 Veeam Software
Some historyThe best way to explain Nano Server is dive into the history of Windows Server and how
it has evolved over the years.
Windows NT to Windows Server 2003
If you look at Windows NT until Windows Server 2003, it is a full-blown server system with a graphical
user interface (GUI) and lots of functionality right out of the box. On top of that, it allows you to deploy
roles and features like Active Directory, DNS, DHCP, clustering and many more. At that time, you only
had one server installation and that was the full-blown server.
Windows Server 2008 and R2
With Windows Server 2008 and R2, a new server installation option came to life. It was called Core
Server. Core Server is still a full-blown Windows Server that allows you to run almost every application,
role or workload on top of it, but all of the GUI elements are removed, including MMCs and more. At
first sight, it was a very big deal because it lowered the attack footprint, patching and resource usage.
However, it never gained the attraction of the IT world it deserved. The reasons for that are simple:
• You couldn’t switch between core and the full GUI. The option was chosen at the installation
and reinstalling it was the only way to switch
• It was very difficult to configure. Everything had to be done through command line. PowerShell
wasn’t fully supported (and many modules for technologies didn’t existed yet or were lacking) and
remote management through MMC’s or that version of the server manager wasn’t really that good
As a result, the adoption ranged from very limited to nonexistent.
Windows Server 2012 and R2
Microsoft listened very well to the feedback and concerns about Core Server and brought many
enhancements to Windows Server 2012 and R2. To start with, there is now one base Windows Server,
which is the core version. And on top of that, you can deploy features and roles. But you can also
deploy the minimal server interface on it, which, again, is a role. The minimal server interface gave you
some limited access to management tools, but not the full-blown GUI tools. This in-the-middle solution
seemed like a good idea, but it wasn’t deployed a lot. Still, there are many administrators that choose
for the full-blown solution although adaption of the core model picked up some fans and certainly
in high-density environments, or in environments where resources are very valuable, this model
becomes more and more popular.
But what if you could even go further and look at an even smaller operating system option that has
multiple benefits and will allow us to start deploying application workloads exactly as it happens in the
cloud? As you can imagine, this requires a shift in thinking and operations. Don’t be scared of it — just
continue reading and find out everything there is to know.

All You Need to Know about Microsoft Windows Nano Server
6© 2016 Veeam Software
What is Nano Server?Nano Server is a headless, 64-bit only deployment option for Windows Server 2016. Microsoft created this
component specifically with key scenarios in mind: Nano Server was created to serve as cloud fabric and
infrastructure (Hyper-V host, clustering, networking, storage) and as a deployment option for applications
that are — as they call it — born in the cloud (Platform-as-a-Service v2 and ASP.NET v5 applications).
It’s important to know that this deployment option is really headless. The moment you decide
to deploy a supported role (such as Hyper-V), you need to realize that this lives outside of Nano Server.
There are absolutely no binaries or metadata inside this server. Even the drivers come as a package that
you can install on top of it. This makes this server option perfect for those that want to deploy
only what they need and keep everything else as minimalistic as possible.
Nano Server is ideal for some key scenarios in your environment such as:
• Hyper-V host
• Storage host for Scale-Out File Servers
• DNS server
• Web server (IIS)
• A host for applications specifically designed for this
• Container host
And this is just the beginning. I can’t predict the future, but image if I can deploy Nano Servers for my
specific core infrastructure such as Active Directory, DHCP, DNS (which already works today) and such.
It would save me a lot of management trouble and resources.
Why?When you read further, you will see that Nano Server will give you some challenges in the way you
deploy, configure and manage it. But don’t forget that this is a TP, so these challenges might change
and become easier or even go away when we hit GA. So before you do that and decide it’s not worth
the trouble, let’s explore the advantages of deploying Nano Server in your environment.
Reboots
Reboots for a Windows Server are something we learned to live with for many years. IT administrators
all around the world are familiar with Patch Tuesday. However, in many cases, it creates many
headaches. While you will never be able to remove patches and updates, a headless solution
will definitely require less patches.

All You Need to Know about Microsoft Windows Nano Server
7© 2016 Veeam Software
Less patches does not mean less security. Because there are less components to patch, the attack
vector also decreases. Many attacks are done on components that simply do not exist anymore in the
server core, especially when you come to think of GUI elements. Microsoft did some research in 2014
to list the differences:
Figure 1: Patches & Reboots ©Microsoft
Figure 1 shows the amount of important bulletins, critical bulletins and reboots required in 2014 for
Nano Server, Server Core and the Full Server option. As you can see, there are quite some differences,
and the maintenance work that needs to be done on Nano Server is lower than on the other options.
It should also show that when you can’t choose Nano Server, Server Core is your best option.
Server images
Further in this document, you will notice that we will create small images of servers. Those of you who
need to manage server image libraries will welcome Nano Server because it will take less disk space.
Again, Microsoft provided us with numbers, as you can see below:
Figure 2: Server Images. ©Microsoft
Figure 2 shows the differences in setup time, disk footprint and VHD(x) size between Server Core
and Nano Server. You can imagine that these numbers are even higher on the Full Server flavor.

All You Need to Know about Microsoft Windows Nano Server
8© 2016 Veeam Software
Resources
Last but not least you will also notice a huge difference in resource consumption. There are fewer processes
running, and the boot IO and kernel MB in use are all lower on Nano Server, as you can see in Figure 3:
Figure 3: Resource Utilization ©Microsoft
Figure 4 shows the differences in the amount of drivers loaded, services running and ports
open between Server Core and Nano Server:
Figure 4: Drivers, services & ports ©Microsoft
Many of you might think that the last figure should fall under security and not resources, and you are
not wrong. Microsoft does exactly the same. On the other hand, less services and drivers loaded also
means less resources necessary so I could argue that they fall under both.
Conclusion
While the above numbers are certainly not final and are only from the measurement Microsoft did
in 2014, you should be able to see that using Nano Server can deliver some huge improvements
and advantages. And if using Nano Server is not a possibility, then Server Core should be your choice.
I personally expect these numbers to improve even further. Although the way you manage Nano
Server will be different than how you have always managed Windows Server operating systems, the
advantages are higher than the downsides. In the end, you will notice that managing Nano Server
certainly isn’t that difficult and it is just a matter of getting used to it.

All You Need to Know about Microsoft Windows Nano Server
9© 2016 Veeam Software
Setting the expectationsStarting to work with Nano Server today is, in my humble opinion, a must. If you are an IT professional,
you need to learn how it works, how it needs to be managed (which requires a mental change) and
how to troubleshoot it. The faster you do this, the more your business will benefit. But don’t forget that
we are still working on a TP. A lot can change between now and GA, whatever you do with it today will
still be a great learning experience.
With that said, we are not at GA yet, and the differences and enhancements that were introduced
between TP3 and TP4 were massive. We can only assume (and hope) that there will be many more
enhancements and improvements in the next preview and later in the GA version. Everything in this
paper is performed on TP4, so if you want to follow this guide, you will need to work with TP4.
Let’s look at the quick installationWhen you start, you have to realize that Nano Server is not an installation option. It cannot be selected
during setup as you are used to with other versions of Windows Server. The binaries are found on the
installation media but you need to create a “base-image” first before you can deploy it. There are many
possibilities to create that image, so let’s start here with a quick way to get things going.
A virtual Nano Server
Copy the files NanoServerImageGenerator.psm1 and Convert-WindowsImage.ps1 from the NanoServer folder
on the installation media to a folder on your hard drive. In my case, I copy them to a file called NanoBaseImage
Figure 5: Copied script & module

All You Need to Know about Microsoft Windows Nano Server
10© 2016 Veeam Software
Open Windows PowerShell, Windows PowerShell ISE (or the tool of your choice) as an administrator
and navigate to the folder where you have copied your scripts.
Figure 6: PowerShell ISE
Before you can start, you’ll need to import the NanoServerImageGenerator.psm1 module. This is already a
great improvement compared to the previous TP because you don’t need to dot source the scripts anymore.
The command to do this is:
Import-Module .\NanoServerImageGenerator.psm1 -Verbose
Note: The “verbose” is not necessary, but it will show you all the work that is done while importing this
module. As you can see in Figure 7: Importing the module, three functions are imported. We will go
into detail about those later.
Figure 7: Importing the module

All You Need to Know about Microsoft Windows Nano Server
11© 2016 Veeam Software
Now you can create the first VHD you can use in a virtual environment. Don’t worry about the different
parameters yet, I will dive deep into those next. What you are doing here is creating a simple VHD,
setting an administrator password and including Hyper-V guest drivers.
New-NanoServerImage -MediaPath <path to root of media> -BasePath .\Base –TargetPath .\NanoServerVM\NanoServerVM.vhd -ComputerName <computer name> -GuestDrivers
• <path to root of media> is the path where the contents of the TP4 ISO
are (either copied to disk or mounted as ISO)
• BasePath is the folder where the Nano Server WIM and packages will be placed
• TargetPath this will be the folder where the VHD (or VHDX) will be created
• ComputerName this is where you define the name of the computer
• GuestDrivers defines a set of drivers specifically to run it as a virtual machine (VM)
We will go further into details about those parameters later on.
In my case, this becomes:
New-NanoServerImage -MediaPath D:\ -BasePath .\Base -TargetPath .\NanoServerVMS\TP4Nano-01\TP4Nano-01.vhd -ComputerName TP4Nano-01
-GuestDrivers
Figure 8: Creating your first image, with password request

All You Need to Know about Microsoft Windows Nano Server
12© 2016 Veeam Software
After entering the password, the system will start creating the VHD.
Figure 9: Creating the VHD
After creation, the only thing left to do is create a VM in Hyper-V and attach the VHD(X) to it. This is how:
Open Hyper-V Manager and select New > Virtual Machine
Press Next on the Before You Begin page
Figure 10: Before you Begin

All You Need to Know about Microsoft Windows Nano Server
13© 2016 Veeam Software
On the Specify Name and Location page, choose the name of the VM (this is not the computer
name but rather the name that will be visible in Hyper-V Manager) and location where you want
to store it and press Next.
Figure 11: Specify Name and Location
On the Specify Generation page, choose the generation. If you chose to deploy a VHD, then choose
Generation 1. If you want to deploy a VHDX then choose Generation 2. Press Next
Figure 12: Specify Generation

All You Need to Know about Microsoft Windows Nano Server
14© 2016 Veeam Software
On the Assign Memory page, adjust the startup memory and decide whether you want to use
Dynamic Memory or Static Memory. Press Next
Figure 13: Assign Memory
On the Configure Networking page, select the network that you want to connect to and press Next.
Figure 14: Configure Networking

All You Need to Know about Microsoft Windows Nano Server
15© 2016 Veeam Software
On the Connect Virtual Hard Disk page, select Use an existing virtual hard disk, point to the
created VHD(X) and press Next.
Figure 15: Connect Virtual Hard Disk
On the Complete page, review your settings and press Finish.
Figure 16: Completing the New Virtual Machine Wizard
This is, of course, perfectly possible with PowerShell. I will show you an example on how to do that
in the next chapter, Advanced installation/Deployment options.

All You Need to Know about Microsoft Windows Nano Server
16© 2016 Veeam Software
A physical Nano Server
While most of the examples in this paper will be virtual Nano Servers, some of them will certainly run
on physical servers. When you use Nano Server as a Hyper-V node (either clustered or not), it is necessary
that it is a physical server. For the purpose of this paper, I actually run nested Hyper-V so I can simulate
this behavior. However, in a real world environment, this probably won’t be the case.
The procedure to create a VHD for a physical machine is more or less the same as it is for a VM. I used
the following command:
New-NanoServerImage -MediaPath D:\ -BasePath .\Base -TargetPath .\NanoServerVMS\TP4NanoPhysical01\TP4NanoPhysical01.vhd -ComputerName NanoPhysical -OEMDrivers –Compute -Clustering
The difference between this one and the one for the VM is that I already added some roles — packages
such as compute and clustering — and also added the OEMDrivers package to include drivers. In the
next chapter, I’ll talk about these packages in more detail.
Another note of importance is that I actually didn’t had to specify the –MediaPath anymore because I
already had a base image created. After you do this once, you can keep using this base until there
are updates to the media.
Figure 17: Creating a physical Nano Server
Another difference is that you are not going to connect the VHD to a VM, but will instead deploy that
VHD onto a physical server.
If that physical server already has an operating system, you can simply copy the VHD to that server,
mount the VHD and then run bcdboot d:\windows. Finally unmount the VHD and restart the server.
You should be able to boot into the Nano Server VHD.

All You Need to Know about Microsoft Windows Nano Server
17© 2016 Veeam Software
Of course, if you prefer dual boot, you can always use bcdboot to add a boot listing, but this probably
won’t happen very often. In most cases, you want to deploy it on a clean, empty server.
In that case, I advise you to read the following two excellent blog posts that explain what other methods
you have (and will prefer). Again, because this is not the scope of this paper and most people will have
their own deployment preferences, I won’t dive deeper into this.
• Deploying Nano Server to a Bare-Metal Machine using a WIM and WinPE
• How to use WDS to PxE Boot a Nano Server VHD
PackagesThe previous steps (in the A virtual Nano Server section) will give you a running VM. Unfortunately, this
VM only has a name and administrator login. The VM is not domain joined, and maybe it requires a static
IP address, special firewall settings and many other changes your specific environment requires.
It is also completely headless at this point in time: No packages are installed, so you have a running
operating system that isn’t performing any functions at all. Before we dive into more advanced
deployments, let’s take a look at the available packages. Note that earlier we discussed that TP4 contains
more installation packages than the previous TPs. We expect this pattern to continue as we approach
GA. If you have packages that you would like to see included with Nano Server, you can go to Microsoft’s
UserVoice initiative and vote for your preferred package. It is through UserVoice that two new packages
arrived in TP4 based on the feedback of worldwide users and testers.
The size of the core OS that we deployed is only around 448 MB and will grow slightly by adding
packages but not by much. However, as previously mentioned, this is the core OS only and doesn’t
perform anything yet.
Figure 18: Size of a headless Nano Server
In the Role / Feature column in Table 1: Roles and Features, you can see the various roles or features
and the option that you will need to use to deploy those through the script.
Role / Feature Parameter for the script Filename on ISO
Hyper-V ComputeMicrosoft-NanoServer-Compute-Package
Failover Clustering ClusteringMicrosoft-NanoServer-FailoverCluster-Package
Hyper-V guest drivers GuestDriversMicrosoft-NanoServer-Guest-Package
Basic drivers (physical deployment) – these drivers are the same as the drivers included in the core version of the OS
OEMDriversMicrosoft-NanoServer-OEM-Drivers-Package

All You Need to Know about Microsoft Windows Nano Server
18© 2016 Veeam Software
File Server role and other storage components
StorageMicrosoft-NanoServer-Storage-Package
Windows Defender (including a default signature file)
DefenderMicrosoft-NanoServer-Defender-Package
Reverse forwarders for application compatibility for application frameworks such as Ruby, Node .js etc .…
ReverseForwardersMicrosoft-OneCore-ReverseForwarders-Package
DNS Server rolePackages Microsoft-NanoServer-DNS-Package
Microsoft-NanoServer-DNS-Package
Desired State Configuration (DSC)
Packages Microsoft-NanoServer-DSC-Package
Microsoft-NanoServer-DSC-Package
Internet Information Server (IIS)Packages Microsoft-NanoServer-IIS-Package
Microsoft-NanoServer-IIS-Package
Host support for Windows Containers
ContainersMicrosoft-NanoServer-Containers-Package
System Center Virtual Machine Manager agent
Packages Microsoft-Windows-Server-SCVMM-Package
-Packages Microsoft-Windows-Server-SCVMM-Compute-Package
Microsoft-Windows-Server-SCVMM-Compute-Package
Microsoft-Windows-Server-SCVMM-Package
Network Performance Diagnostics Service (NPDS)
Packages Microsoft-NanoServer-NPDS-Package
Microsoft-NanoServer-NPDS-Package
Data Center BridgingPackages Microsoft-NanoServer-DCB-Package
Microsoft-NanoServer-DCB-Package
Table 1: Roles and Features
The Hyper-V role seems clear enough. With a minimum installation and all the benefits described
in the Why? Section, Nano Server should be the option of choice for each deployment. However, as of
today in TP4, there are still a few differences between Hyper-V running on Nano Server or on any other
installation option. More information can be found within Appendix A, section Hyper-V.
Clustering services is also a straightforward role. In my opinion, it doesn’t matter whether this is for
Hyper-V or for file servers. As long as it is servicing the customers and you can do all the management
and monitoring remotely, all the resources you can take away from the OS and give to the application
services itself is a benefit. You can find more information about the clustering package under Appendix
A, section Failover Clustering.
The Hyper-V guest drivers will inject the integration components into the VHD(X) so that you
immediately have the correct drivers when booting the Nano Server on Hyper-V.
The OEMdrivers (or basic drivers) provide the same set of drivers that are also in the core version
of the operating system. While it is possible to add other drivers (which I will explain later), you can easily
add defaults just by adding this package.
The Storage package will add the necessary file server services and other storage components. Think

All You Need to Know about Microsoft Windows Nano Server
19© 2016 Veeam Software
about the necessary solutions for connecting to storage such as MPIO or deploying scale-out file servers.
The Windows Defender package will add Windows Defender, including a default signature file.
Of course, this will need to be updated if you want this. In my opinion, and because most of my host
servers are not connected in any way to the internet or any other network where there is a risk for
infection, I actually think it is great that you can decide whether or not you are going to deploy Defender.
The ReverseForwarders package is a special one. This will allow you to run certain applications under
a certain compatibility, like Node.JS or Ruby. However, while this might seem like a solution for some,
I certainly urge everyone who is serious about this technology to investigate how you can develop born-
in-the-cloud applications and look at the new installer model.
The DNS server package will add the DNS server on top of Nano Server. However, there are some
catches, which I will cover in the DNS Package chapter.
The Desired State Configuration package adds the necessary components to work with this
technology. In the current preview, it is only push, but that doesn’t mean there aren’t already great things
you can do with Desired State Configuration.
The IIS package will add the necessary binaries to run IIS and certain features of that service. However,
not all features are already supported. For more information, look at chapter IIS Server under Appendix A:
Additional information on packages.
The Containers package will add host container support into the Nano Server. At this point,
the deployed Nano Server will be able to run containerized applications.
The System Center Virtual Machine agent actually comes in two flavors and can be a bit confusing.
There is a little catch: You don’t need to use the – Compute option when you want to create a Hyper-V
host with the SCVMM agent. Instead, you need to use – Packages Microsoft-NanoServer-Compute-
Package, Microsoft-Windows-Server-SCVMM-Compute-Package
If you do not include the -SCVMM package at the time of creation but rather at the host or cluster
to VMM at a later point, the VMM agent will automatically deploy then.
The Network Performance Diagnostics Service (NPDS) package enables a new feature that comes
more — or less — straight out of the Azure world and builds on top of the network discovery.
The Data Center Bridging package is a set of standards to enable converged fabrics in a data center
to allow storage, networking, clustering and the like, so traffic can all share the same network
infrastructure. Nano Server supports this also, just like the other server options.
Finally, you don’t see it in the packages, you can monitor Nano Server with Microsoft System Center
Operations Manager. System Center TP4 includes an agent that you can deploy onto Nano Server TP4.
As you can see, you can already install quite a few roles and features on Nano Server,
and I certainly believe more will come.
Some additional roles and features that don’t come in a package but are certainly important are MPIO,
SET NIC teaming and the Windows Update WMI provider.

All You Need to Know about Microsoft Windows Nano Server
20© 2016 Veeam Software
Advanced installation / deployment optionsAs you may recall, I used the –Verbose parameter when I imported the module
NanoServerImageGenerator. We saw in the output that it added three cmdlets or scripts.
Let’s look at all the parameters that exist with the scripts that come with Nano Server
and what you can customize.
Note: You can only use these scripts on a Windows 8.1, Windows 10, Windows Server 2012 R2 or Windows
Server 2016 TP installation. Other OSs are not supported.
New-NanoServerImage
This function allows you to create a new Nano Server image. In the quick installation, we only briefly
touched the potential of what we can do, so let’s dive a bit deeper into all the parameters that exist.
Parameter Value Explanation
MediaPath String
This is the location of the source media. If a local copy of the source media already exists and it is specified as the base path, then no copying is performed. This is the downloaded ISO that you either mounted or copied to a specific location. This is only necessary the first time.
BasePath StringThis is the location for the copy of the source media. It will be under a folder (auto-created if not exist) and contains the packages, tools, hard disk image and WIM file.
TargetPath String
This is the location of the final, modified image.
The image format is determined based on the file extension. Possible extension values are .VHD and .VHDX. VHD will come with MBR and VHDX with GPT disk layout.
Language String
This is the language locale of the packages (i.e., en-us, fr-ca). It’s important to know that the script will automatically install the local language of the computer where you run it. Therefore, if your workstation has a different locale than what you want for your servers, you will need to add this parameter to force it in the right locale or language.
MaxSize UInt64This is size — in bytes — of the dynamic VHD(X) you create. Default is 4 GB. Note that this number needs to be in bytes.
Storage N/A This adds the Storage role.
Compute N/A With this, you can add the Compute (Hyper-V) role.
Defender N/A This adds the Windows Defender feature.
Clustering N/A This allows you to add the clustering role.
OEMDrivers N/AThis is used to add the OEM Drivers package. Those drivers are the same set of drivers that exists in Server Core.
GuestDrivers N/AThis adds the Guest Drivers package (and enables integration of Nano Server with Hyper-V, when running as a guest).
ReverseForwarders N/A Use this to add the Reverse Forwarders package.
Containers N/A This allows you to add the Containers role.
Packages String
Include the following packages separated by a comma. This is the specific parameter that adds the packages that don’t have a specific parameter. See the Packages chapter for more information.

All You Need to Know about Microsoft Windows Nano Server
21© 2016 Veeam Software
ForAzure N/AThis automatically includes the options necessary to run Nano Server on Azure. For more information, see the Azure chapter.
ComputerName StringThis sets the computer name of the image. Note that the computer name can’t be longer than 15 characters.
Administrator-Password
SecureStringThis sets the image’s administrator password. If you do not specify this on the command line, you will be interactively prompted to do.
DomainName StringThis joins the image to the specified domain performing an offline join. For more information, see the chapter about domain join.
DomainBlobPath StringThis lets you Join the image to the domain as specified in the given domain blob. For more information, see the chapter about domain join.
ReuseDomainNode StringWhen joining a domain, reuse a node with the same name if it exists. For more information, see the chapter about domain join.
DriversPath String
If you need additional drivers or specific ones instead of the OEM drivers, you can add them with this parameter. It should point to the path containing the drivers (.inf and binaries). Note that the drivers need to be signed, otherwise the command will fail.
InterfaceName-OrIndex
String
If you want to change the IP settings of an adapter, you need to use this parameter in conjunction with the below IP parameters. You can retrieve these using Get-NetAdapter, netsh or EMC if you already created an image, and in a VM, the first will always be named Ethernet.
Ipv6Address StringThis sets the given IPv6 static address on the interface specified by InterfaceNameOrIndex.
Ipv4Address StringThis sets the given IPv4 static address on the interface specified by InterfaceNameOrIndex.
Ipv4SubnetMask StringThis sets the given IPv4 subnet mask on the interface specified by InterfaceNameOrIndex.
Ipv4Gateway StringThis sets the given IPv4 gateway on the interface specified by InterfaceNameOrIndex.
DebugMethod String
With this parameter, you will enable kernel debugging on the target image with the specified method. The values can be Serial, Net, 1394 or USB.
Depending on the value of this parameter, other parameters may become available. See kernel debugging for more information.
EnableEMS N/AThis enables EMS (Emergency Management Services) and BootEMS on the image. See Emergency Management Services for more information.
EMSPort Byte This is the port to enable EMS on. The default is 1.
EMSBaudRate UInt32 This is the baud rate to use for EMS. The default is 115200bps.
EnableRemote- ManagementPort
N/AThis parameter opens port 5985 for inbound TCP connections for Windows Remote Management (WinRM). See Windows Remote Management for more information.
MergePath StringThis parameter specifies additional directory path on the computer where you create the image and that directory and the files in it will be added to the root of the VHD(X).

All You Need to Know about Microsoft Windows Nano Server
22© 2016 Veeam Software
Now, let’s look at an example. What I want to create is a Nano Server that has the packages clustering
and compute (I want to build a Hyper-V cluster). It also needs to be automatically joined to the domain
MD .local because that is the domain in which I am working (I will explore in this topic further in the
Domain join options). Remote Management is enabled, Guest drivers are installed and a static IPv4
address is attached to it. I also want my VHDX (it is going to be a Generation 2 machine) defined with
a maximum of 100 GB (but it will be smaller as it is dynamically expanding). I’ll add my local scripts
directory (E:\Scripts) into the C: volume of that Nano Server. This is how the PowerShell line will look:
New-NanoServerImage -TargetPath .\NanoServerVMS\TP4Nano-06\TP4Nano-06.vhdx -BasePath .\Base -Clustering -Compute -ComputerName TP4Nano-06 -DomainName MD.Local -EnableRemoteManagementPort -GuestDrivers -InterfaceNameOrIndex ethernet -Ipv4Address 192.168.1.186 -Ipv4Gateway 192.168.1.1
-Ipv4SubnetMask 255.255.255.0 -MaxSize 107374182400 -MergePath E:\Scripts
Figure 19: Advanced creation of a Nano Server
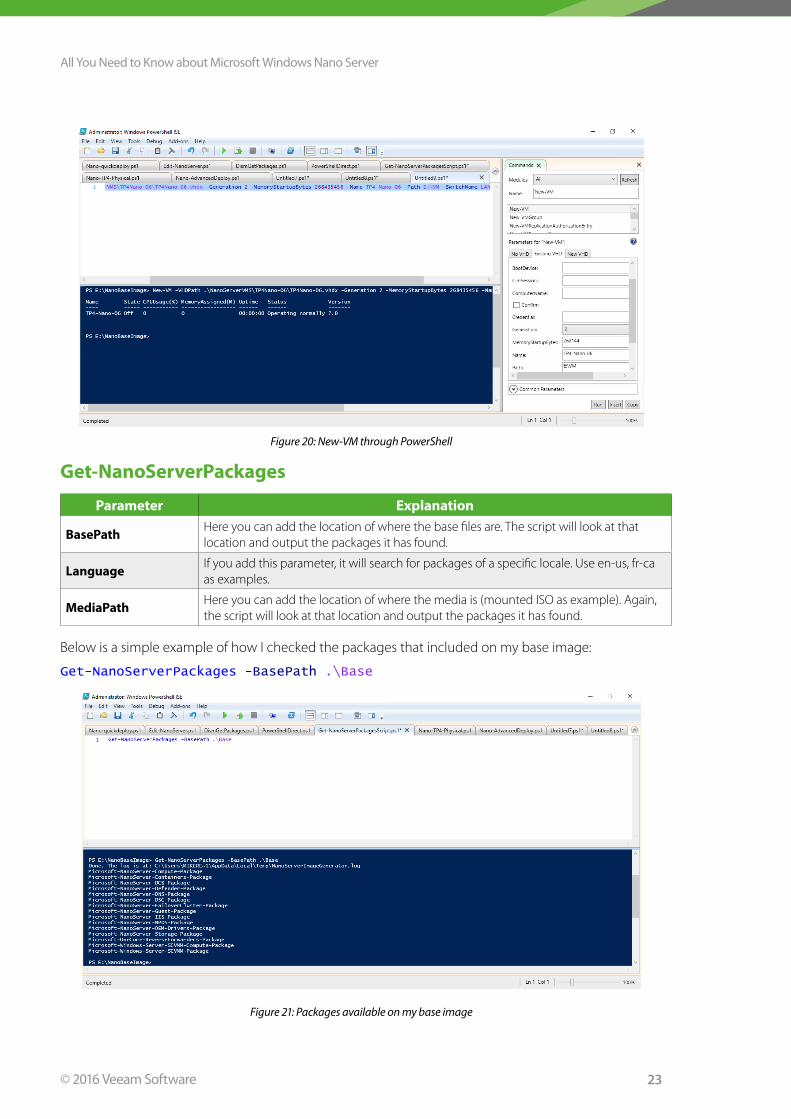
Again, I want to add this as a VM to my environment, but as promised, I will not go through the wizard
again, but I’ll use PowerShell to do the job instead. To do this, I’ll create a new VM, attach the created
VHDX to it, give it a startup memory of 256 MB and attach it to the LAN virtual network.
New-VM -VHDPath .\NanoServerVMS\TP4Nano-06\TP4Nano-06.vhdx -Generation 2
-MemoryStartupBytes 268435456 -Name TP4-Nano-06 -Path E:\VM -SwitchName LAN
All You Need to Know about Microsoft Windows Nano Server
23© 2016 Veeam Software
Figure 20: New-VM through PowerShell
Get-NanoServerPackages
Parameter Explanation
BasePathHere you can add the location of where the base files are. The script will look at that location and output the packages it has found.
LanguageIf you add this parameter, it will search for packages of a specific locale. Use en-us, fr-ca as examples.
MediaPathHere you can add the location of where the media is (mounted ISO as example). Again, the script will look at that location and output the packages it has found.
Below is a simple example of how I checked the packages that included on my base image:
Get-NanoServerPackages -BasePath .\Base
Figure 21: Packages available on my base image

All You Need to Know about Microsoft Windows Nano Server
24© 2016 Veeam Software
As you can see, I have the available packages I described. Note that I only have the en-us
locale here and none of the other languages.
Edit-NanoServerImage
If you already created a Nano Server but want to add additional packages — maybe change the
IP address or do any other customizations — you don’t need to rebuild an image or simply create
a new one. You can modify a created image afterwards. Before TP4, this had to be done with DISM.
For those of you who prefer this method, this is still possible but it can be done with the
cmdlet Edit-NanoServerImage also.
A few notes on this script:
• The Nano Server needs to be turned off
• You cannot change VHD to VHDX with this script
• All of the parameters in New-NanoServerImage are the same besides –MaxSize and –MediaPath,
which you can’t here. So to be able to use this script, the same base image path needs to be used
(it can’t use the media) and the VHD(X) needs to exist already and cannot be modified with a
maximum size anymore.
In the example below, I’m going to modify the Nano Server we created in the Quick Start chapter and
add a fixed IP address, but I’m also going to add the IIS and DNS package. This is something I will use
later on when diving deeper into those two packages.
Edit-NanoServerImage -BasePath .\Base -TargetPath .\NanoServerVMS\TP4Nano-01\TP4Nano-01.vhd -EnableRemoteManagementPort -GuestDrivers -InterfaceNameOrIndex Ethernet -Ipv4Address 192.168.1.181 -Packages
Microsoft-NanoServer-IIS-Package, Microsoft-NanoServer-DNS-Package
Figure 22: Script is running and modifying the Nano Server
After running this script and starting the Nano Server again, I can check if everything worked.
In the DNS Package chapter, I will actually show you how I did it.

All You Need to Know about Microsoft Windows Nano Server
25© 2016 Veeam Software
Additional information for advanced installation/deploymentBefore we continue our mission with Nano Server, there are a few things I want to talk about. Let’s
take a deeper look at the domain join possibilities and the specific Azure parameter you can use.
Domain join options
There are many possibilities to join your Nano Server to an existing domain. I prefer the first option described
below, but this will not always be the best option. Let’s look at the five different methods you can use.
Joining the Nano Server to the domain where the local computer resides
This is by far my most favorite one because it is very easy to do. In TP3, joining a domain took quite
a bit of work, but in TP4, it is much easier. If the workstation or server on which you are building the
image is joined to the same domain to which you want to join the Nano Server, you only need to use
the appropriate switch within the PowerShell script and the rest will be done automatically for you.
You might recall the example that we used in chapter the New-NanoServerImage
New-NanoServerImage -TargetPath .\NanoServerVMS\TP4Nano-06\TP4Nano-06.vhdx -BasePath .\Base -Clustering -Compute -ComputerName TP4Nano-06 -DomainName MD.Local -EnableRemoteManagementPort -GuestDrivers -InterfaceNameOrIndex ethernet -Ipv4Address 192.168.1.186 -Ipv4Gateway 192.168.1.1 -Ipv4SubnetMask 255.255.255.0 -MaxSize 107374182400 -MergePath E:\Scripts
One of the switches we use is –DomainName and the name of my domain. This is all you need
to do to get that computer joined to the domain.
An offline domain join happens in the background and the script will automatically harvest a domain
blob for the specific domain and use that to do the domain join. Of course, you need to have the
administrative rights to perform a domain join when you perform this action. So make sure that the
user you are running the PowerShell cmdlets with has those rights.
If you want to know what happens in the background exactly, just read further because for the next
methods there will be more manual work that you need to do and that’s what actually happens.
Joining a different domain
If the workstation or server you are working on is not joined to a domain or is joined to another
domain, you can’t work with the fully automated parameter. However, it still isn’t that difficult at all.
What you need to do is harvest a domain blob. You need to keep a few things in mind:
• The blob must be manually harvested on a computer that is joined to the specific domain
• You need to have the rights to perform this action
This is the command you need to use when harvesting a blob (Note: This is an elevated prompt):
djoin /Provision /Domain Contoso /Machine serverName /SaveFile serverName.
djoin

All You Need to Know about Microsoft Windows Nano Server
26© 2016 Veeam Software
Copy that blob to a place on your computer where you are building the image and use
the switch –DomainBlobPath to perform the action. As an example:
New-NanoServerImage -MediaPath \\Path\To\Media\en_us -BasePath .\Base
-TargetPath .\ServerName.vhd -DomainBlobPath .\Path\ServerName.djoin
Please note that you don’t add the parameter name –ComputerName anymore because the blob
already contains the server name. It will throw an error if you do so.
Reusing a domain account
You can use the third method when you want to reuse a domain account. If the server name already
exists in Active Directory, you can use simple the parameter –ReuseDomainNode in your script.
Joining Nano Server to a domain online
All of the previous methods are offline joins when the image is created. But what happens
when your server is already created and running? Can you still join it to a domain?
Luckily, the answer is yes. Performing an online join to a domain is possible, but it requires a bit of work.
Let’s go over the procedure.
Harvesting a blob .
Just like before, you will need to harvest a blob and use that to join the server online to a domain.
Note: The computer that is in that domain and the location from which you will harvest the blob needs to be
running Windows 10 or Windows Server TP4! The domain controller does not need to.
djoin.exe /provision /domain <domain-name> /machine <machine-name> /savefile .\objblob
You will have a file called objblob now. The next step is to copy that file to the Nano Server. You can do
it easily by mapping the administrative C$ share to a drive.
net use z: \\<ip address of Nano Server>\c$ md z:\Tempcopy odjblob z:\Temp
Note: It might be that you receive an error doing this. That probably means the firewall on the Nano Server is
blocking the request. In that case, run the following commands first:
Set-Item WSMan:\localhost\Client\TrustedHosts "<IP address of Nano Server>"$ip = "<ip address of Nano Server>"Enter-PSSession -ComputerName $ip -Credential $ip\Administratornetsh advfirewall firewall set rule group="File and Printer Sharing" new enable=yesExit-PSSession
Note: You can find more information on this procedure in the PowerShell Remoting/ chapter.

All You Need to Know about Microsoft Windows Nano Server
27© 2016 Veeam Software
Now you need to join the Nano Server to the domain. Again, for more information about Enter-PSSession
or about when the command fails, refer to the PowerShell Remoting/PowerShell Direct chapter.
Enter-PSSession -ComputerName $ip -Credential $ip\Administratordjoin /requestodj /loadfile c:\Temp\odjblob /windowspath c:\windows /localosshutdown /r /t 5Exit-PSSession
The procedure works like this:
• Connect remotely to the server and start a remote PowerShell session
• Use djoin to load the configuration out of the created blob file and join that server to the domain.
(For more information on djoin, go to https://technet.microsoft.com/en-us/library/offline-domain-
join-djoin-step-by-step(v=ws.10).aspx)
• Instruct the computer to restart (the parameter /r does this in the shutdown command)
and wait 5 seconds.
• Those 5 seconds give you the time necessary to exit the remote PowerShell session
(Exit-PSSession)
And that’s it. After you reboot, your Nano Server will be joined to the domain.
Using the unattend file
The last option you have is using an unattend file. You will need to use parts of the procedure
above to do this.
First, you will start by harvesting a blob again, just like you did before. When you’re finished with that, open the
blob file with a text editor (Notepad works fine) and copy the files in the unattend file. See the example below:<unattend xmlns="urn:schemas-microsoft-com:unattend" xmlns:wcm="http://schemas.microsoft.com/WMIConfig/2002/State" xmlns:xsi="http://www.w3.org/2001/XMLSchema-instance"> <settings pass="offlineServicing"> <component name="Microsoft-Windows-Shell-Setup" processorArchitecture="amd64" publicKeyToken="31bf3856ad364e35" language="neutral" versionScope="nonSxS"> <ComputerName>NANO02</ComputerName> </component> <component name="Microsoft-Windows-UnattendedJoin" processorArchitecture="amd64" publicKeyToken="31bf3856ad364e35" language="neutral" versionScope="nonSxS"> <OfflineIdentification> <Provisioning> <AccountData>ARAIAMzMzMxYAwAAAAAAAAAAAgABAAAAAQAAAAQAAgABAAAAAQAAADADAAAIAAIAMAMAAAEQCADMzMzMIAMAAAAAAAAw3cPMQKrDzFC0xMyAS8PMBAAGAHCyxMwQABIAQKXDzBAAEgCArsPM5CERzLqjb0aCyTDByrOx3ACmw8yAq8PMQKzDzAEAAADkIRHMuqNvRoLJMMHKs7HcQK3DzACvw8z98QDgUPDDzPDww8wAAAAACQAAAAAAAAAJAAAATQBEAC4ATABPAEMAQQBMAAAAAAAHAAAAAAAAAAcAAABOAGEAbgBvADAAMgAAAAAAeQAAAAAAAAB5AAAAKwA0AC4AZgAvAFwATgBqAHAAUABeAGQASgBwAFQAYAAzAC8ATwBfAF0AZQBiAHkAQwBAAFUAJgApACEAdwA1AGMAQQBJAFsAVQBAACEANQBmACcANwBgAGYAOgBPAHIAcQAxAGwAOQBvAE8AYAAuAGQAbQBlACYAdwAnAHAASAAtAEQALAByAHgAMABaAF4AXgBMAHAANwB3AEcASgBnACUAJQA6AHAAKAAnAE8ATQBnAGcAUgB0AFoAXABFACgAaABNACcATwBnADUALAAlAGsAVwA8AGIAKwBXAD0AMABUAHMAQABvAFwAcgA9AGAAAAAAAAMAAAAAAAAAAgAAAE0ARAAJAAAAAAAAAAgAAABNAEQALgBsAG8AYwBhAGwACQAAAAAAAAAIAAAATQBEAC4AbABvAGMAYQBsAAQAAAABBAAAAAAABRUAAAB4U757beNM1WKt7FAQAAAAAAAAABAAAABcAFwARABDADAAMQAuAE0ARAAuAGwAbwBjAGEAbAAAABAAAAAAAAAAEAAAAFwAXAAxADkAMgAuADEANgA4AC4AMQAuADIAMgAwAAAACQAAAAAAAAAJAAAATQBEAC4AbABvAGMAYQBsAAAAAAAJAAAAAAAAAAkAAABNAEQA

All You Need to Know about Microsoft Windows Nano Server
28© 2016 Veeam Software
LgBsAG8AYwBhAGwAAAAAABgAAAAAAAAAGAAAAEQAZQBmAGEAdQBsAHQALQBGAGkAcgBzAHQALQBTAGkAdABlAC0ATgBhAG0AZQAAABgAAAAAAAAAGAAAAEQAZQBmAGEAdQBsAHQALQBGAGkAcgBzAHQALQBTAGkAdABlAC0ATgBhAG0AZQAAAAAAAAA= </AccountData> </Provisioning> </OfflineIdentification> </component> </settings><settings pass="offlineServicing"> </settings> <settings pass="oobeSystem"> <component name="Microsoft-Windows-Shell-Setup" processorArchitecture="amd64" publicKeyToken="31bf3856ad364e35" language="neutral" versionScope="nonSxS"> <UserAccounts> <AdministratorPassword> <Value>P@ssw0rd</Value> <PlainText>true</PlainText> </AdministratorPassword> </UserAccounts> <TimeZone>Pacific Standard Time</TimeZone> </component> </settings> <settings pass="specialize"> <component name="Microsoft-Windows-Shell-Setup" processorArchitecture="amd64" publicKeyToken="31bf3856ad364e35" language="neutral" versionScope="nonSxS"> <RegisteredOwner>MD</RegisteredOwner> <RegisteredOrganization>MD</RegisteredOrganization> </component> </settings>
</unattend>
The important part for the domain join is the data that resides between the <AccountData>
and </AccountData> part. This is the information you can copy from that blob file that you have
harvested. Now, you need to inject the unattend.xml file into the Nano Server image, which I explain
in Appendix C: Unattend, SetupComplete and DISM.

All You Need to Know about Microsoft Windows Nano Server
29© 2016 Veeam Software
Azure
Running Nano in Microsoft Azure is possible. As of today, there are two methods to do so:
Method 1: Deploy Nano Server through the gallery
When you log in to your Microsoft Azure subscription, you can deploy a new VM. It doesn’t matter whether
you are using the classic method or the new resource manager deployment. You will need to find this image
in the gallery by running a search with the keyword Nano. Then, it’s just a matter of choosing your size,
networking and all other options, just as if you are deploying any other regular VM in Microsoft Azure.
Figure 23: Nano Server build in Microsoft Azure
However, there is a difference. Because you are not building your image with the correct packages, you
can’t add the roles to it upfront. Therefore, you will need to deploy your packages online by using DISM.
Because these packages cannot be reached from outside of the image, the engineering team has — for
now — chosen to add those packages in a folder on the root drive. Therefore, the image will be
a bit bigger than your local image.
Method 2: Bring your own server to Azure
It is possible to bring your own VHD and use it as a server in Microsoft Azure. One of the parameters you
might have seen above is the –Azure parameter. This parameter will automatically deploy the Hyper-V
guest drivers and open the remote management port. The syntax to do that would look like this:
New-NanoServerImage -MediaPath \\Path -BasePath .\Base -TargetPath .\name.
vhdx -ForAzure
The advantages are that you don’t need those packages inside your VM and you can tune your image
upfront before actually starting it. For more information on how to upload your own VHD, visit https://azure.
microsoft.com/en-us/documentation/articles/virtual-machines-create-upload-vhd-windows-server/.
Finally, note that Nano Server in TP4 does support nested virtualization, so you would be able
to deploy Nano Server hosts onto Azure and inside deploye VMs.

All You Need to Know about Microsoft Windows Nano Server
30© 2016 Veeam Software
Managing Nano ServerThere are different methods to manage Nano Server, including methods that permit remote
management while having zero IP connectivity to the Nano node. Below, you can see all the options
and some ideas on how to figure out what the IP address of the server is.
It’s important to know that Nano Server is managed 100% remotely. The only exception is when
the connectivity is lost and you want to use an emergency solution to fix the connectivity.
The Nano Server Recovery Console
In TP3, this was called the Emergency Management Console, but it was renamed in TP4
to Server Recovery Console.
This recovery console can be compared to the iLo of HP or DRAC from Dell or any other KVM type
of console. While you can remotely manage everything, there might be a situation in which you
misconfigure something by accident and can’t access the Nano Server through remote IP management.
In this case, you can use the Recovery Console to fix your issues and get remote connectivity again.
In TP4, a lot of functionality has been added to make sure you can fix the connectivity issues.
I will use the TP4-Nano-01 server that I created in Let’s look at the quick installation chapter
to show the possibilities.
Let’s look at the quick installation chapter to show the possibilities. Because this is a running VM,
I don’t need to attach a screen and keyboard to it, but I will just use the VMConnect functionality
to view the console instead.
Before I actually do that, let me walk you through the navigation methods you will need
to use when you want to view information or make changes to the server’s configuration.
• To scroll through the screen, you will need to use the arrow keys
• To jump to an option that you can select, you can use the TAB key. You will notice that it will
be highlighted, and then you can use ENTER to select and jump to the next screen.
• The ESC key will get you to a previous screen, and pressing ESC on the first screen will actually log you off.
• On some screens, you will notice that you can do additional things with the function keys. For
example, in the network configuration screen of a chosen network adapter, F11 will give you
the possibility to modify the IPv4 settings and F12 will do the same for IPv6.
Now, let’s connect to a server and log on.
All You Need to Know about Microsoft Windows Nano Server
31© 2016 Veeam Software
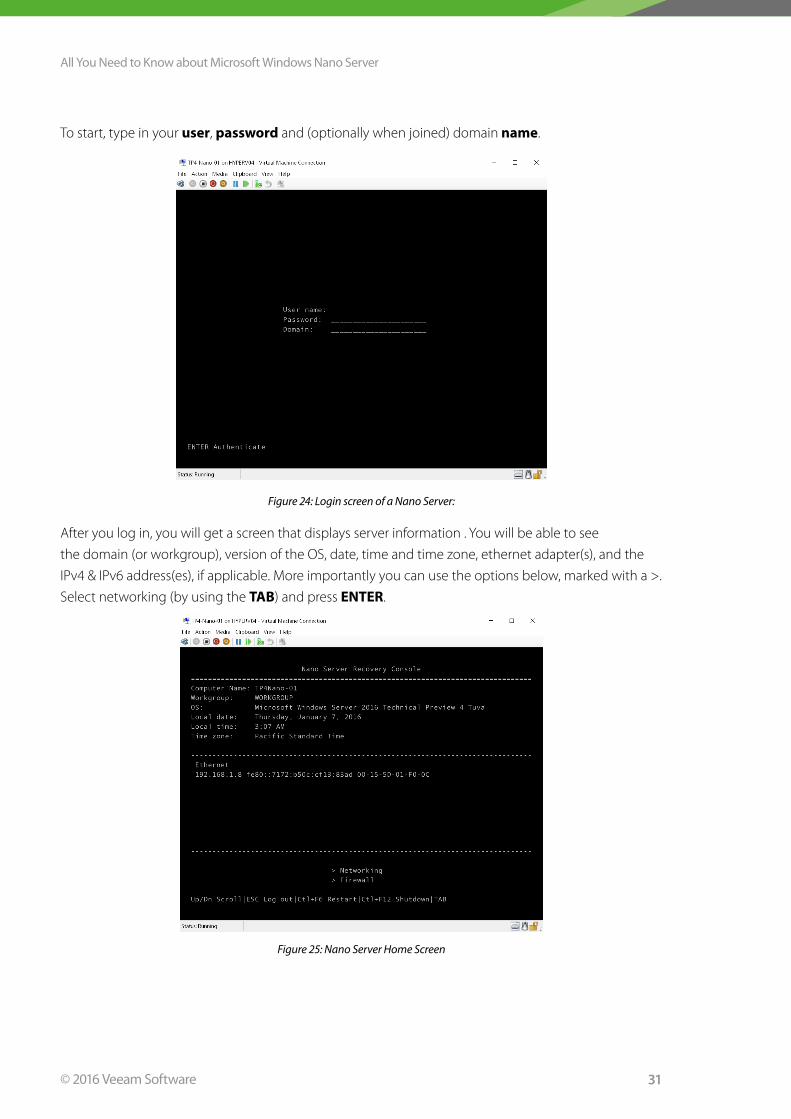
To start, type in your user, password and (optionally when joined) domain name.
Figure 24: Login screen of a Nano Server:
After you log in, you will get a screen that displays server information . You will be able to see
the domain (or workgroup), version of the OS, date, time and time zone, ethernet adapter(s), and the
IPv4 & IPv6 address(es), if applicable. More importantly you can use the options below, marked with a >.
Select networking (by using the TAB) and press ENTER.
Figure 25: Nano Server Home Screen

All You Need to Know about Microsoft Windows Nano Server
32© 2016 Veeam Software
On the networking screen, you will see the different network interfaces (if applicable) and you
can select the one you want to review or change by using TAB and ENTER again. Select the
appropriate network adapter.
Figure 26: Network Settings screen
On this page, you can see all the details of that network card. Scroll down with the arrow keys
to see more information like the network driver. For the remainder of this, I’ll demonstrate a few
examples of what you can do.
Figure 27: Network Settings for a specific interface

All You Need to Know about Microsoft Windows Nano Server
33© 2016 Veeam Software
The next page shows the routing table, and, as you can see, you can add a route by using F10.
Figure 28: Routing Table
The next screen shows you the IPv4 configuration, which I reached by pressing F11 on the network
settings page, and the option to change some items.
Figure 29: Adjust IP screen

All You Need to Know about Microsoft Windows Nano Server
34© 2016 Veeam Software
Finally, you will see an example of the firewall rules below and the option to enable or disable them.
Figure 30: Firewall Rules
I’m often asked if it is possible to create firewall rules through this console. The answer to that question
is no. The entire idea of the console is to fix connectivity issues to the Nano Server if something went
wrong. The moment you have restored connectivity, you should use remote management techniques
again to create your own firewall rules or do other tasks.
Finally, you can restart or shutdown the Nano Server through this console.
Figuring out the IP address
We already stated you need to manage Nano Server remotely. One of the issues can be that you have
automation systems in place that deploy Nano Server or that you use DHCP to give the Nano Server
an IP address. In both cases, you might not know what the IP address is.
So how can you figure out IP address? There are actually a few methods, and you can use
the one that works best for you.
• Nano Server Recovery Console (explained above): By connecting to this console,
you will be able to see the IP configuration of that server.
• Use the Emergency Management Services. For more information,
see the Emergency Management Services chapter.
• Simply ping the server name if your DNS system is configured correctly.
• Use PowerShell Direct (if the Nano Server is a VM). This is described the next chapter, PowerShell.
I’m sure you can find other ways to figure out what the IP address is, but the above methods
are the most used.

All You Need to Know about Microsoft Windows Nano Server
35© 2016 Veeam Software
PowerShell Remoting/PowerShell Direct
Ideally, you will do the majority of your work through PowerShell remoting or PowerShell Direct.
Let’s start with PowerShell Remoting.
Before you can start using this, you will need to do a few things to get the environment ready.
To start with, you need to:
• Add the IP address of the Nano Server to the list of trusted hosts on your management computer
(the computer from which you are performing your actions)
• Make the account that you are using a member of the Nano Severs administrators
• Enable CredSSP (if you are planning to use this feature)
To add the IP address to your list of trusted hosts, perform the following in PowerShell (elevated):
Set-Item WSMan:\localhost\Client\TrustedHosts "192.168.1.183"
Figure 31: Adding an IP to the trusted hosts list
Note: It will request confirmation to do this. Also, while it is less secure, it might be handy in development
or test to use * instead of IP addresses so all of your test Nano Servers are trusted at once.
Now, we can start a remote Windows PowerShell session. Follow the command below:
$ip = "192.168.1.183"Enter-PSSession -Computername $ip -Credential $ip\administrator
The first line simply adds the IP address to a variable called $ip. The second line will start the PowerShell
session, and you will connect to the IP address — not the computer name, which I will come back to
in a second — with the local administrator.

All You Need to Know about Microsoft Windows Nano Server
36© 2016 Veeam Software
You probably won’t do this often. After the server has joined the domain, you will want to connect
through the DNS name and with the domain administrator. In the example, this becomes the following:
Figure 32: Connecting to a server with remote PowerShell
You will see in PowerShell that you won’t be connected to your local computer anymore, but you’ll
be connected to the Nano Server instead. From that moment on, everything you type will be executed
on the remote machine.
Figure 33: Remote PowerShell session to server TP4Nano-03
In Figure 33, you can see that I am connected to server TP4Nano-03 and by using ipconfig
you can actually see the IP address of that server.
One important note. Because you are running PowerShell on the Nano Server, some commands you want
to use will not be recognized. This is not a bug! Certain commands are simply not available on Nano Server.
After you’re finished with your work, you can use Exit-PSSession to exit the session (or simply Exit).
Enter-PSSession is a pretty powerful tool and supports quite a few parameters. As an alternative, there
is also New-PSSession. If you want to learn more on these commands, have a look at the following
page: https://technet.microsoft.com/en-us/library/hh849707.aspx

All You Need to Know about Microsoft Windows Nano Server
37© 2016 Veeam Software
Now let’s discuss PowerShell Direct.
PowerShell Direct only works with a VM: It won’t help you with a physical server. PowerShell Direct
allows you to run PowerShell commands inside the VM (like remote PowerShell), but it has no
dependencies on the connection. So imagine that you can’t connect to your VM because of firewall
restrictions, network not reachable or any other reason, you will be able to run PowerShell
on the VM remotely, even when you have no connection to it.
There are, however, a few items you need to take into account before you start using this:
• This only works on Windows 10 or Windows Server TP as a host
• The guest that you are connecting to must be a Windows 10 or Windows Server TP
• You need to be a Hyper-V administrator
• You must run PowerShell elevated
• You need to have credentials to the VM
• The guest must run on the host from where you are performing the connection
How it works is very similar to PowerShell remoting:
Enter-PSSession -VMName tp4-nano-03
Note that you have to use the VMName. So, if your VM name is different than your computer name, you
need to take this into account. (As you see, my VMName is a bit different than my actual computer name.)
You can also connect through the GUID:
Enter-PSSession -VMId fb6f2ae6-328f-4f78-8751-5a88a07230b7
Figure 34: Enter-PSSession through GUID
Last but not least, you can always use a full script block to send commands to the VM.
Invoke-Command -VMName VMName -ScriptBlock { Commands }

All You Need to Know about Microsoft Windows Nano Server
38© 2016 Veeam Software
Windows PowerShell CIM sessions over WinRM
You can also use Windows PowerShell CIM sessions over Windows Remote Management (WinRM)
to interact with Windows Nano Server. You can use CIM sessions and instances in Windows PowerShell
to run WMI commands over WinRM.
Let me show you how this works.
$cim = New-CimSession –Credential md\administrator –ComputerName tp4nano-03
In this example, I am creating a new CIM session to the computer tp4nano-03
(with the md domain administrator) and store it in a variable called cim.
When I run this command, I am prompted for the domain administrator account password:
Figure 35: New CIM session
Now that this is done, you can start running WMI commands. For example:
Get-CimInstance –CimSession $cim –ClassName Win32_ComputerSystem | Format-List * Get-CimInstance –CimSession $cim -Query "SELECT * from Win32_Process"
Figure 36: Running WMI commands over CIM

All You Need to Know about Microsoft Windows Nano Server
39© 2016 Veeam Software
Windows Remote Management
Nano Server allows WinRM, which is Microsoft’s implementation of the WS-Management Protocol.
You can find more information about this protocol here: https://msdn.microsoft.com/en-us/library/
windows/desktop/aa384426(v=vs.85).aspx
This means you can run programs remotely on the Nano Server with WinRM. However, as you might
guess, not everything will work because the server itself does not support all of those programs.
Before you can do this, you need to configure the service on the local client from where you are
running the commands. Open an elevated command prompt and run the following commands:
winrm quickconfigwinrm set winrm/config/client @{TrustedHosts="*"}chcp 65001winrs -r:192.168.1.185 -u:administrator -p:passwordused ipconfig
Of course the * in TrustedHosts isn’t the most secure thing to do, so in a production environment, you
want to be more selective in the hosts that you trust. Below is an example screenshot of such a remote call:
Figure 37: Output of a WinRS command
Working with remote consoles
By now, you are probably thinking that you don’t like the fact that you need to do everything through
PowerShell. I don’t blame you. PowerShell is a great solution, and I do advise you to learn as much
as possible about it. But for more day to day tasks, you still want to use your known management
consoles. However, as I said, there are no consoles available on Nano Server. Does that mean you
need to do everything through scripting? Not at all.
Almost everything is possible through your trusted management consoles that you run locally. Before you
start, make sure you installed the RSAT tools if you are performing this from a Windows 10 installation.
Let’s have a look on how this works.

All You Need to Know about Microsoft Windows Nano Server
40© 2016 Veeam Software
Throughout this paper, we have worked on several Nano Servers. In total, I have deployed six servers,
but we are only going to use four of them here. They are TP4Nano-03 through 06. All four of those
servers have the Hyper-V Package, failover clustering, management enabled and a static IP address in
my server VLAN. The management workstation I am going to use is a Windows 10 client with access to
that VLAN to perform remote management.
Let’s start with Server Manager. Server Manager was introduced in Windows Server 2008.
Unfortunately, at this point Server Manager had a very false start. Nobody liked it during that timeframe,
and honestly, it was so limited that it was practically unusable. Microsoft made a lot of changes to
Server Manager in 2012 and 2012 R2 and continued improving this tool even more in Windows Server
2016. Connecting to a Nano Server is very easy when you are connecting from a computer that is
in the same domain. If this is not the case, you need to make sure that WinRM is configured.
In our example, TP4Nano-03 through 05 is already added into server manager. Now we are going
to add 06 to it, to show that you can do remote management from your RSAT consoles.
The procedure is very simple:
Figure 38: Server Manager
This is my server manager with my domain controller and three Nano Servers. You can see the Data
retrieval failures occurred message, which has the BPA (Best Practices Analyzer) and missing events.
This is simply because they aren’t implemented yet. I’m sure they will be available at GA latest,
or they might even be in the next technical preview.

All You Need to Know about Microsoft Windows Nano Server
41© 2016 Veeam Software
Let’s add TP4Nano-06 now by simply going to Manage -> Add Servers.
Figure 39: Adding a server to server manager
Depending on your user, you might need to right-click that server and choose Manage As… and
provide different credentials. When that is done, you will have a new server that you can start managing.
Figure 40: Server added to the list
Note that by right-clicking on this server, you already get the option to choose Hyper-V Manager
and Failover Cluster Manager because this is a Hyper-V server with the clustering role already on it.

All You Need to Know about Microsoft Windows Nano Server
42© 2016 Veeam Software
Let’s choose Failover Cluster Manager and add this node to our cluster.
Figure 41: Failover Cluster Manager
It might be that you need to connect to the cluster the first time you do this. Because I have
already done this a few times, Failover Cluster Manager remembered my settings so I see my cluster
immediately. Now I am going to use Add Node… to add this server to the cluster.
Figure 42: Adding a server to the cluster
Note that in TP4, running validation tests is not supported yet!

All You Need to Know about Microsoft Windows Nano Server
43© 2016 Veeam Software
Now, I have added a node to my cluster exactly as I would have done with Server Core
or full server implementations.
Figure 43: Cluster with fourth node added
Hyper-V manager also works perfectly. I will continue to use server manager and right-click
on one of the nodes to open Hyper-V Manager, but you can also do this without Server Manager.
Figure 44: Using Hyper-V Manager

All You Need to Know about Microsoft Windows Nano Server
44© 2016 Veeam Software
But those aren’t the only tools that work. You can still use computer management and more when connecting
to Nano Server. A few examples are Event Viewer and Computer Management, as you can see below.
Figure 45: Event viewer connected remotely to a Nano Server
Figure 46: Computer Management
While it is very easy and quick to remotely manage everything with PowerShell, sometimes you just
want to have your GUI consoles to do your work. As you can see, many of those are available and
usable when connecting to your Nano Servers.

All You Need to Know about Microsoft Windows Nano Server
45© 2016 Veeam Software
Remote Server Management Tools
Remote Server Management Tools is completely new and — at the moment of this writing — not yet
publically available. It is not even in beta yet. Only a few private testers have access to this new service.
It is an Azure-based web service and is intended to remotely manage your servers on-premises
through a gateway that you need to deploy on-premises.
The idea behind this solution is that it can replace (in the future) specific tools such as
• Task Manager
• Registry Editor
• Event Viewer
• Device Manager
• SConfig (the tool that is used in server core for some initial configuration)
• Control Panel
• File Explorer
• Performance Monitor
• Disk Management
• Users/Group Manager
• And probably a lot more in the future
This is only a subset of tasks that have been announced so far. Again, this won’t be explicitly for Nano
Server, but it will also work with Server Core and Full Server installations. If you are planning to use this
functionality for your servers with GUI or Core Servers, you can use it for Nano Server also.

All You Need to Know about Microsoft Windows Nano Server
46© 2016 Veeam Software
Deploying apps on Nano ServerWe already learned about the many packages available for Nano Server, and you can deploy multiple roles
and features onto Nano Server. But what about other workloads? What about custom-built applications?
The bad news is that you can’t take your current applications and simply start installing them
on Nano Server. The reason is very simple: MSI (Windows Installer) is not supported.
MSI has been built for local installations and improved over the years. But just ask any application
packager and ask how difficult it sometimes is to remotely install MSI applications, and you will notice
that this is not the best thing to use on Nano Server. MSI can also contain custom actions, requiring GUI
elements, and, as you know by now, that is not possible on a Nano Server. Last but not least — and this
something Microsoft emphasizes frequently — many of the deployments of Nano Server will be done
offline in the long run (meaning that the workload is already deployed or installed before the server is
started first, again something that MSI does not support.
So what is the alternative?
Enter Windows Server Apps (WSAs). WSAs give you a method to package and install applications,
based on APPX on Nano Server.
Before you think that APPX are WSAs, please be aware of this: In a way they are the same, but WSAs
extend the APPX functionality to support Windows Server specific extensions. This also means that
WSAs are NOT supported on Windows Client systems. They also cannot be submitted to the Windows
Store. WSAs also need to run in machine-wide full trust, while store apps run in an app container-
restricted environment.
At this point in time, there are a lot of restrictions around WSAs and most PowerShell cmdlets
to support the installation (and uninstallation), making WSAs far from complete. But if you have
a developer in your team, it wouldn’t hurt to start exploring the possibilities.
This work will not be lost. At this moment, WSAs are only supported in Nano Server, but the main goals
are that it will be supported on all Windows flavors and that it will give you a choice when deploying
packages into containers.
You can find more detailed information in the two blog posts from the Nano Server team below:
http://blogs.technet.com/b/nanoserver/archive/2015/11/18/installing-windows-server-apps-on-
nano-server.aspx
http://blogs.technet.com/b/nanoserver/archive/2015/11/19/hands-on-packaging-and-installing-
your-first-windows-server-apps-on-nano-server.aspx

All You Need to Know about Microsoft Windows Nano Server
47© 2016 Veeam Software
Appendix A: Additional information on packagesDNS Package
When deploying the DNS server package, all PowerShell cmdlets are available locally on Nano Server.
Of course, you can still do everything through remoting (as we will discuss later) or even use the DNS
Manager MMC remotely to manage DNS.
One word of caution though: At this time (TP4), there is no support for AD integrated DNS. However,
I am convinced that this will become available in later builds.
Last but not least, adding the package to the deployment isn’t enough. You still need to enable
the feature by using the following command:
Enable-WindowsOptionalFeature -Online -FeatureName DNS-Server-Full-Role
In this example, I will use PowerShell Direct to connect to server TP4-Nano-01, which we modified
earlier in this paper. On the second line, I will enable the DNS server feature. On the third line, I will
import the DnsServer PowerShell module (Verbose again) to show you that all DNS PowerShell cmdlets
are locally available on the Nano Server. After that, I will check if the DNS server is actually running.
Finally, I will exit the PowerShell Direct session.
Enter-PSSession -VMName tp4-nano-01 Enable-WindowsOptionalFeature -Online -FeatureName DNS-Server-Full-RoleImport-Module DnsServer -VerboseGet-Service *dnsExit-PSSession
Figure 47: Starting the DNS Server role
From now on, this server is a ready-to-run DNS Server.

All You Need to Know about Microsoft Windows Nano Server
48© 2016 Veeam Software
Finally, if you want to use the DNS Server MMC console, you can do that by simply connecting
remotely to another server from your management station.
Figure 48: DNS Manager connected to a Nano DNS Server
IIS Server
There are two ways to install IIS Server on a NANO deployment. Both offline and online installations are
supported, but, as stated by Microsoft in the documentation, the offline installation is the preferred method.
Offline installation
For offline installation, you need to add the package to the image you are building by using
the –Packages parameter in the New-NanoServerImage script:
-Packages Microsoft-NanoServer-IIS-Package
This is by far the easiest method. However, you may already have an existing image or VHD\x and you
need to add it post-installation. In that case, as long as it is still offline (e.g., not running), you can use
DISM to do the work. Besides DISM, please note that the Edit-NanoServerImage cmdlet also works
to add the package afterwards. Let’s look at DISM for a second.
The steps are below:
md mountdirdism /Mount-Image /ImageFile:.\TP4Nano-01.vhd /Index:1 /MountDir:.\mountdirdism /Add-Package /PackagePath:.\packages\Microsoft-NanoServer-IIS-Package.cab /Image:.\mountdirdism /Add-Package /PackagePath:.\packages\en-us\Microsoft-NanoServer-IIS-Package.cab /Image:.\mountdirdism /Unmount-Image /MountDir:.\MountDir /Commit
The above assumes that the name of the VHD is TP4Nano-01.vhd and is reachable at that location.
Then, we add the IIS package and the localized package. Don’t forget to do this because it won’t
be done automatically and will fail if you forget.

All You Need to Know about Microsoft Windows Nano Server
49© 2016 Veeam Software
Online installation
If the offline method is not an option for whatever reason (most likely in a container installation),
you will need a different approach:
• Copy the Packages folder from the installation media to a local folder inside the Nano Server
• Create an unattend.xml file and copy to a folder located on the Nano Server
The XML file contents should look like this:<?xml version="1.0" encoding="utf-8"?><unattend xmlns="urn:schemas-microsoft-com:unattend"> <servicing> <package action="install">
<assemblyIdentity name="Microsoft-NanoServer-IIS-Package" version="10.0.10586.0" processorArchitecture="amd64" publicKeyToken="31bf3856ad364e35" language="neutral" />
<source location="c:\packages\Microsoft-NanoServer-IIS-Package.cab" /> </package> <package action="install">
<assemblyIdentity name="Microsoft-NanoServer-IIS-Package" version="10.0.10586.0" processorArchitecture="amd64" publicKeyToken="31bf3856ad364e35" language="en-US" /><source location="c:\packages\en-us\Microsoft-NanoServer-IIS-Package.cab" />
</package> </servicing> <cpi:offlineImage cpi:source="" xmlns:cpi="urn:schemas-microsoft-com:cpi" /></unattend>
In the contents above, make sure that “C:\Packages\ . . .” corresponds with the exact location of your
packages on the Nano Server.
Connect to your Nano Server through PowerShell (both remote and direct will work).
Now, switch to the folder where the unattend .xml is located and run:
dism /online /apply-unattend:.\unattend.xml
Note: if you receive a 0x80004005 error, this can safely be ignored.
To confirm the package is actually installed, run the following:
dism /online /get-packages

All You Need to Know about Microsoft Windows Nano Server
50© 2016 Veeam Software
Figure 49: Verifying that the installation succeeded
Finally, restart your Nano Server or type net start w3svc to start IIS.
Working with IIS
The moment IIS is running, you can check the default page to see if it is running
Figure 50: Checking if IIS is runningre

All You Need to Know about Microsoft Windows Nano Server
51© 2016 Veeam Software
By default, in TP4 the following features are active:
Default IIS FeaturesDefault document
Directory browsing
HTTP Errors
Static Content
HTTP Logging
Static Content Compression
Request Filtering
IISAdministration PowerShell Module
Table 2: Default IIS enabled features
The following features are available but not enabled by default:
IIS Features availableHttp Redirection
Custom Logging
Request Monitor
Tracing
Dynamic Content Compression
Basic Authentication
Client Certificate Mapping Authentication
Digest Authentication
Client Certificate Mapping Authentication
IP and Domain Restrictions
URL authorization
Windows Authentication
Application Development
Application Initialization
CGI
ISAPI Extensions
ISAPI Filters
Server Side Includes
WebSocket Protocol
Table 3: Optional IIS Features
The scope of this paper is not to show how to change IIS, but note that it can’t be done by an MMC.
If your web administrators want to make changes, they have three options:
• Using the IISAdministration module for Windows PowerShell remotely
• Using AppCmd .exe remotely
• Editing the IIS configuration store manually

All You Need to Know about Microsoft Windows Nano Server
52© 2016 Veeam Software
Hyper-V
Hyper-V is one of these workloads that I expect to run on Nano Server a lot in the future. Today in TP4,
there are many options already, but not everything is possible yet. Let’s take a look at the differences:
• You must do all management remotely, and the computer that is the management server must run
the same build. What I mean is that you can’t manage Nano Server with an older Hyper-V manager
or older PowerShell cmdlets
• RemoteFX is not available. If this is a requirement for your Hyper-V host(s), you can’t work with Nano Server
• Hyper-V Replica is not supported
While I don’t see RemoteFX coming to Nano Server, I can only assume that Replica will come and that
it is just a matter of time.
Now, let’s talk management. As already stated, you can use the console remotely to connect to the host
(see Working with remote consoles).
It is very important to get the authentication correct.
If you want to use constrained delegation, then you need to know it works exactly as in previous
releases. Check out these articles for more information:
Enabling Hyper-V Remote Management - Configuring Constrained Delegation For SMB
and Highly Available SMB
Enabling Hyper-V Remote Management - Configuring Constrained Delegation
For Non-Clustered Live Migration
If you want to use CredSSP, see PowerShell Remoting/ first, specifically the part about PowerShell
Remoting. From that moment on, you will be able to use CredSSP, both for the Hyper-V Manager
console as Windows PowerShell cmdlets.
Failover Clustering
Just as I expect Hyper-V to become an important role for Nano Server (and an enabler for this
technology), I expect the same thing for Failover Clustering. Both will kind of go hand-in-hand.
The good news is that Failover Clustering works the same way as in Windows Core Server.
However, as you have read here already many times, you must manage clusters remotely. Again,
this can be done through PowerShell, but you can also remotely connect with the cluster manager
(as already seen in this paper).

All You Need to Know about Microsoft Windows Nano Server
53© 2016 Veeam Software
A few notes to get your Nano cluster working:
• All nodes must be joined to the same domain
• The domain account must have Administrator privileges on all Nano Server nodes
• All commands executed must be run in an elevated command prompt
However, there are some items that are not supported on Nano Server in TP4 (again, I assume this
is just until the next TP or GA):
• Cluster validation tests are not supported
• Running failover clustering cmdlets locally on a Nano Server is not possible
• Every clustering role besides Hyper-V and File Server is not currently supported in TP4.
For more information on Clustering PowerShell cmdlets, visit this page: https://technet.microsoft.com/
library/ee461009.aspx
Appendix B: Setup & Boot eventing, Kernel Debugging & Emergency Management ServicesWhether we like it or not, sometimes things go wrong and we need to troubleshoot. We already
talked about doing things remotely and as long as you can connect to the server through the various
methods, you can do your troubleshooting with PowerShell or the remote consoles. However,
sometimes even that isn’t possible and you find yourself in a situation in which the server does not
boot correctly or is completely stuck or damaged. Depending on the workload you are running,
it might be easier and faster to simply recreate the image and deploy it, or you need to troubleshoot
the problem. In that case, the below methods can be used to troubleshoot the server.
Setup & Boot Eventing
One of the tools you can use is the setup and boot event collection. This is designed to get your logs
(ETW messages) of your server and collect them through a specific collector. This is not for Nano Server
alone: This will be possible with Server Core and Full Server also.
Through this mechanism you will be able to view remotely your evets while the server boots
(or is in setup) and you can get those events from both physical and VMs. That collector will be
responsible to grab the events. Note that the collector won’t pull the events. This is a push operation
so it will be the Nano Server that is pushing the events to your collector (also called the SBEC collector).
This is a new feature that comes with Windows Server 2016 TP, starting from TP2. You can find more information
on the requirements and setup here: https://technet.microsoft.com/en-us/library/mt126188.aspx
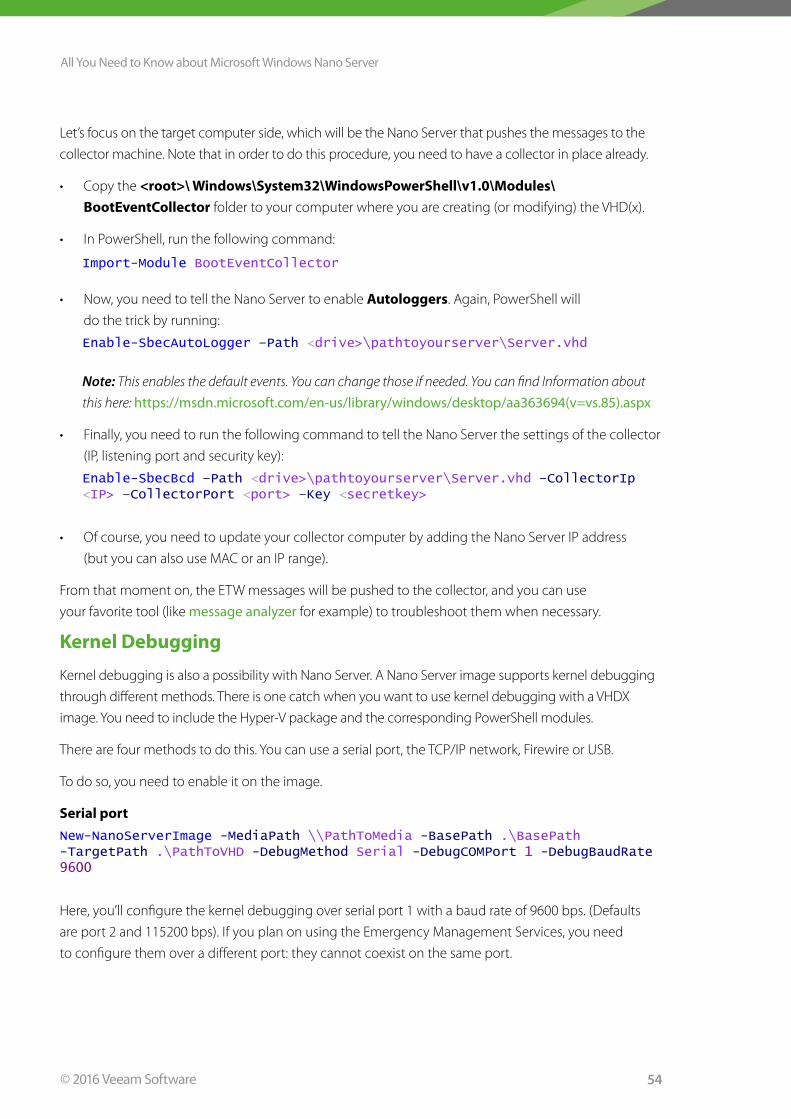
All You Need to Know about Microsoft Windows Nano Server
54© 2016 Veeam Software
Let’s focus on the target computer side, which will be the Nano Server that pushes the messages to the
collector machine. Note that in order to do this procedure, you need to have a collector in place already.
• Copy the <root>\ Windows\System32\WindowsPowerShell\v1 .0\Modules\
BootEventCollector folder to your computer where you are creating (or modifying) the VHD(x).
• In PowerShell, run the following command:
Import-Module BootEventCollector
• Now, you need to tell the Nano Server to enable Autologgers. Again, PowerShell will
do the trick by running:
Enable-SbecAutoLogger –Path <drive>\pathtoyourserver\Server.vhd
Note: This enables the default events. You can change those if needed. You can find Information about
this here: https://msdn.microsoft.com/en-us/library/windows/desktop/aa363694(v=vs.85).aspx
• Finally, you need to run the following command to tell the Nano Server the settings of the collector
(IP, listening port and security key):
Enable-SbecBcd –Path <drive>\pathtoyourserver\Server.vhd –CollectorIp <IP> –CollectorPort <port> –Key <secretkey>
• Of course, you need to update your collector computer by adding the Nano Server IP address
(but you can also use MAC or an IP range).
From that moment on, the ETW messages will be pushed to the collector, and you can use
your favorite tool (like message analyzer for example) to troubleshoot them when necessary.
Kernel Debugging
Kernel debugging is also a possibility with Nano Server. A Nano Server image supports kernel debugging
through different methods. There is one catch when you want to use kernel debugging with a VHDX
image. You need to include the Hyper-V package and the corresponding PowerShell modules.
There are four methods to do this. You can use a serial port, the TCP/IP network, Firewire or USB.
To do so, you need to enable it on the image.
Serial port
New-NanoServerImage -MediaPath \\PathToMedia -BasePath .\BasePath -TargetPath .\PathToVHD -DebugMethod Serial -DebugCOMPort 1 -DebugBaudRate 9600
Here, you’ll configure the kernel debugging over serial port 1 with a baud rate of 9600 bps. (Defaults
are port 2 and 115200 bps). If you plan on using the Emergency Management Services, you need
to configure them over a different port: they cannot coexist on the same port.

All You Need to Know about Microsoft Windows Nano Server
55© 2016 Veeam Software
TCP/IP network
New-NanoServerImage -MediaPath \\PathToMedia -BasePath .\BasePath -TargetPath .\PathToVHD -DebugMethod Net -DebugRemoteIP 192.168.1.100 -DebugPort 64000
The above example will ensure the kernel debugging can only be done by the computer with IP
192.168.1.100 over port 64000. Note that the port you specify has to be greater than 49152. There will
also be an encryption key generated (together with the VHD(x)), but if you want to, you can create your
own by adding the parameter –DebugKey <key>
Fireware (IEEE1349 protocol)New-NanoServerImage -MediaPath \\PathToMedia -BasePath .\BasePath -TargetPath .\PathToVHD -DebugMethod 1394 -DebugChannel 3
If you want to use this method, be aware that the parameter –DebugChannel is mandatory.
USB
New-NanoServerImage -MediaPath \\PathToMedia -BasePath .\BasePath -TargetPath .\PathToVHD -DebugMethod USB -DebugTargetName <nano>
The name behind the –DebugTargetName parameter is the one you are going to use when you
connect to the remote debugger.
For more information on the debugging process itself, visit the following two links:
• Setting Up Kernel-Mode Debugging over a Network Cable Manually
• Remote Debugging Using WinDbg
Emergency Management Services
The Emergency Management Services (EMS) provides you with a serial console interface into
the bootloader menu within Microsoft Windows.
In most installations, this is enabled by default, but in Nano Server, this must be enabled when creating
the image so you can use it when needed.
Luckily, this is easy to do and can simply be added as parameters when you are creating your image:
New-NanoServerImage -MediaPath \\PathToMedia -BasePath .\BasePath -TargetPath .\PathToVHD -EnableEMS -EMSPort 3 -EMSBaudRate 9600
Here we enable EMS over serial port 3 with a baud rate of 9600. The defaults are port 1 and 115200
bps. When you want to use this with a VHDX implementation, the same remark as with the kernel
debugging applies: you will need to include the Hyper-V feature and the corresponding Windows
PowerShell modules.

All You Need to Know about Microsoft Windows Nano Server
56© 2016 Veeam Software
Appendix C: Unattend, SetupComplete and DISMWe’ve talked a lot about using parameters when creating images. Before TP4, there was a lot of work
that needed to be done through the unattend file, DSIM and even a run at first boot script. Some of you
will say that it is a good thing that this is not necessary anymore, but others will say that this was good
because this is the way they work for each server deployment. The good news is that it isn’t going away
and you can still use those type of techniques to get your images modified. So let’s have a look
on how they work, in case you need them:
DISM
Lets start with Deployment Image Servicing and Management (DISM) because this will be used for the
next steps in this chapter. Following the definition, DISM.exe is a command-line tool that can be used
to service a Windows image or to prepare a Windows Preinstallation Environment (Windows PE) image.
DISM can be used to service a Windows image (.wim) or a virtual hard disk (.vhd or .vhdx).
In Nano Server, we will be changing the VHD or VHDX image that we have built by using the scripts
most of the time. As already stated, you can do a lot with the parameters, but sometimes it is necessary
to work with DISM to do certain things or you use DISM as the main tool to create your images and
you don’t want to change that method for Nano Server alone.
Now, let’s look how this works with a Nano Server image.
The basics are (almost) always the same
dism /Mount-Image /ImageFile:.\NanoServerVM5.vhd /Index:1 /MountDir:.\mountdircd mountdirdirmd testdir cd..dism /Unmount-image /MountDir:.\mountdir /commit
In this example, I am mounting the image NanoServer5 .vhd under the Mount Directory mountdir.
In the next step, I simply browse to that mountdir, do a simple dir command to show the root
of the file system.
Now you can start using commands to change your image. For now, the only change I made is creating
a folder called testdir under the root.
The cd . . in this script is just to make sure that I am a folder under the mountdir, so I can unmount
the image and commit the changes made, which I do with the last line.
However, you can do quite a few things to change your image, and we already have some examples
in this paper for the offline installation of IIS or offline installation of additional packages.

All You Need to Know about Microsoft Windows Nano Server
57© 2016 Veeam Software
Unattend File
An unattend.xml file, when used at the right location, will configure specific settings when you boot
the image. This is also sometimes referred to as an answer file. For a quick overview of unattend files,
visit this page: https://technet.microsoft.com/en-us/library/cc748874(v=ws.10).aspx
In this paper, I already showed a few examples of the unattend.xml file, but let’s look at one more
and then see how you can inject this into your image.<unattend xmlns="urn:schemas-microsoft-com:unattend" xmlns:wcm="http://schemas.microsoft.com/WMIConfig/2002/State" xmlns:xsi="http://www.w3.org/2001/XMLSchema-instance"> <settings pass="offlineServicing"> <component name="Microsoft-Windows-Shell-Setup" processorArchitecture="amd64" publicKeyToken="31bf3856ad364e35" language="neutral" versionScope="nonSxS"> <ComputerName>NANO05</ComputerName> </component> </settings><settings pass="offlineServicing"> </settings> <settings pass="oobeSystem"> <component name="Microsoft-Windows-Shell-Setup" processorArchitecture="amd64" publicKeyToken="31bf3856ad364e35" language="neutral" versionScope="nonSxS"> <UserAccounts> <AdministratorPassword> <Value>P@ssw0rd</Value> <PlainText>true</PlainText> </AdministratorPassword> </UserAccounts> <TimeZone>Pacific Standard Time</TimeZone> </component> </settings> <settings pass="specialize"> <component name="Microsoft-Windows-Shell-Setup" processorArchitecture="amd64" publicKeyToken="31bf3856ad364e35" language="neutral" versionScope="nonSxS"> <RegisteredOwner>MD</RegisteredOwner> <RegisteredOrganization>MD</RegisteredOrganization> </component> </settings></unattend>
You will notice a few things that we are doing with this file. First, we are actually setting the computer
name to Nano05. But we are doing some more things such as setting the administrator password,
changing the time zone to the correct one and finally setting the registered owner to my organization.
By copying this script and simply changing those four parameters to your own specifications,
you have a working unattend.xml file, ready to be injected.

All You Need to Know about Microsoft Windows Nano Server
58© 2016 Veeam Software
To do this, you are going to use DISM as we discussed above and put the file at its correct place.
dism /Mount-Image /ImageFile:.\NanoServerVM5.vhd /Index:1 /MountDir:.\mountdircd mountdir cd Windows cd Panthercopy e:\unattend.xmlcd..cd..cd..dism /Unmount-image /MountDir:.\mountdir /commit
In the first line, I am using DISM to mount the image. In the second line, I go to that mountdir.
When you want to use the unattend.xml file, you need to place it in the correct location of the image.
That location is <root>\Windows\Panther.
Figure 51: Location of the unattend.xml file
After placing the file in the correct location, you can commit the changes or do other tasks first.

All You Need to Know about Microsoft Windows Nano Server
59© 2016 Veeam Software
Using setupcomplete .cmd
You can run a specific script called setupcomplete.cmd immediately after Windows Setup
completes. You can find more information here: https://technet.microsoft.com/en-us/library/
cc766314(v=ws.10).aspx
Because there is no Windows Setup in Nano Server, this script will be executed the first time the server
starts. Just like with the unattend.xml file, this file needs to be placed in a specific location in order to work.
dism /Mount-Image /ImageFile:.\NanoServerVM5.vhd /Index:1 /MountDir:.\mountdircd mountdirdircd Windowsmd setupcd setupmd scriptscd scriptscopy e:\setupcomplete.cmd cd..cd.. cd..cd..dism /Unmount-image /MountDir:.\mountdir /commit
Again, I am using DISM to place the file under the right folder. This time, I need to place it under
<root>\Windows\Setup\Scripts. Note that the folders setup and scripts probably won’t exist,
so you will need to create them.
Figure 52: Location of setupcomplete.cmd

All You Need to Know about Microsoft Windows Nano Server
60© 2016 Veeam Software
Now, let’s have a look at an example of this file.
powershell.exe -command "Import-Module C:\windows\system32\windowspowershell\v1.0\Modules\Microsoft.PowerShell.Utility\Microsoft.PowerShell.Utility.psd1; Import-Module C:\windows\system32\WindowsPowerShell\v1.0\Modules\NetAdapter\NetAdapter.psd1; $ifa = (Get-NetAdapter -Name Ethernet).ifalias; netsh interface ip set address $ifa static 192.168.1.254 255.255.255.0 192.168.1.1; netsh interface ip set dns $ifa static 192.168.1.220; netsh interface ip add dns $ifa 192.168.1.1 index=2"
The above should be one line in the script, so I’ll split it into pieces and explain what I do.
Powershell .exe –command is the start of the script. Everything after that, which is between (“),
are the actual commands to execute. I can split up that large line into multiple commands
Import-Module C:\windows\system32\windowspowershell\v1.0\Modules\Microsoft.PowerShell.Utility\Microsoft.PowerShell.Utility.psd1;Import-Module C:\windows\system32\WindowsPowerShell\v1.0\Modules\NetAdapter\NetAdapter.psd1;$ifa = (Get-NetAdapter -Name Ethernet).ifalias;netsh interface ip set address $ifa static 192.168.1.254 255.255.255.0 192.168.1.1;netsh interface ip set dns $ifa static 192.168.1.220;netsh interface ip add dns $ifa 192.168.1.1 index=2
The first two simply load the correct PowerShell modules that are necessary to perform the job.
After that, I store the index of the nic with the name Ethernet into the variable $ifa
Then, I have three commands that use netsh to set a static IP address, subnet mask, gateway,
primary and, finally, secondary DNS server.
As you can see, by using this method, there are quite a few things you can change as long
as you can script it.

All You Need to Know about Microsoft Windows Nano Server
61© 2016 Veeam Software
Mike Resseler is a Technical Evangelist for Veeam. Mike is focused
on technologies around Hyper-V and System Center. With years of
experience in the field he presents on many occasions on large events
such as MMS, TechEd and TechDays. Mike has been an awarded the MVP
for System Center Cloud and Datacenter Management since 2010 and
received the Hyper-V MVP since 2014. His major hobby is discussing
and developing solid Disaster Recovery scenarios. Additionally, he has
enterprise-class experience in Private Cloud architecture, deployment
with marked focus on protection from the bottom to the top. He holds
certifications in many Microsoft Technologies such as MCITP. Follow Mike
on Twitter @MikeResseler or @Veeam.
Author information:
About Veeam Software Veeam® recognizes the new challenges companies across the globe face in enabling the Always-
On Business™, a business that must operate 24/7/365. To address this, Veeam has pioneered
a new market of Availability for the Always-On Enterprise™ by helping organizations meet SLAs
for recovery time and point objectives (RTPO™) of less than 15 minutes for all applications and
data, through a fundamentally new kind of solution that delivers high-speed recovery, data loss
avoidance, verified recoverability, leveraged data and complete visibility. Veeam Availability
Suite™, which includes Veeam Backup & Replication™, leverages virtualization, storage, and
cloud technologies that enable the modern data center to help organizations save time, mitigate
risks, and dramatically reduce capital and operational costs.
Founded in 2006, Veeam currently has 37,000 ProPartners and more than 183,000 customers
worldwide. Veeam's global headquarters are located in Baar, Switzerland, and the company has
offices throughout the world. To learn more, visit https://www.veeam.com.

All You Need to Know about Microsoft Windows Nano Server
62© 2016 Veeam Software
Learn more and previewthe upcoming v9 release
vee.am/v9
NEW Veeam® AvailabilitySuite™ v9
RTPO™ <15 minutes forALL applications and data