ar.drone 2 – antenna mount - installation proceduregarrock.com/dronemod/docs/amw-20130303.pdf ·...
TRANSCRIPT

AR.Drone 2 – Antenna Mount - Installation Procedure
Document Number: AMW-20130303-1
Use this procedure to: 1) Wheel Antenna Mast 2) RP-SMA Antenna Mast 3) Bottom Mount
Wheel Antenna
3/5/2013

DroneMod.com AR.Drone 2 – Antenna Mount - Installation Procedure
1 Document Number: AMW-20130303-1 Mar 5th, 2013
Mast Antenna - In Flight: (Velcro not necessary on wheel as shown)
Mast Antenna - In Carry Case:

DroneMod.com AR.Drone 2 – Antenna Mount - Installation Procedure
2 Document Number: AMW-20130303-1 Mar 5th, 2013
Mast Mount - Step 1: Cable Tie
Note: This assumes the bottom cover is already removed.
The mast can be secured to either the front right or back right cross member.
There is a lot more clearance on the front right cross member.
1. Turn the drone upside-down
2. Attach the cable tie as shown. Make sure to orient the cable tie as shown in
the picture. (The cable will slide back alongside the drone body when done)
3. Using a pair (or two pair) of pliers, grab the tail of the tie and firmly take up
the slack. You may have to use pliers to help form the tie around the cross
member in order to get the remaining slack out
4. The cable tie is secure once no motion is noticed in the cable tie hole.
(sometimes it takes a another pull on the tie until a final click is heard)
5. Once the tie is known to be secure, then snip off the excess cable tie

DroneMod.com AR.Drone 2 – Antenna Mount - Installation Procedure
3 Document Number: AMW-20130303-1 Mar 5th, 2013
Mast Mount - Step 2: Drone Body Slit
1. Using a razor knife, cut a slit in the drone body
2. Use the cable hole as a reference to enter the razor knife into the body. This step will help
ensure the Right Angle MMCX Connector is directly under the cable tie hole
3. The slit should start about 1mm (0.04”) from the bottom of the drone body
4. The slit should end just under the cable tie hole

DroneMod.com AR.Drone 2 – Antenna Mount - Installation Procedure
4 Document Number: AMW-20130303-1 Mar 5th, 2013
Mast Mount - Step 3: RF Cable
1. Slide the Straight MMCX Connector (the one that will plug into the Main Board) through the
drone body
2. Plug the MMCX Male Connector Plug into the MMCX Female Jack on the Main Board. Put a
finger on the back side of the MMCX Jack to reduce stress when inserting the MMCX Cable Male
Plug
3. Dress the cable as shown

DroneMod.com AR.Drone 2 – Antenna Mount - Installation Procedure
5 Document Number: AMW-20130303-1 Mar 5th, 2013
Mast Mount - Step 4: Antenna Mast
1. Plug the Mast RF Cable into the MMCX Right Angle Connector
2. Then insert the carbon fiber antenna mast.
3. Twist the Carbon Fiber Antenna Mast into the cable tie hole. Insert it until it is snug but can
release in case of a crash. Typically this is about half way into the hole
4. Connect the Wheel Antenna MMCX Connector Jack to the top of the antenna mast

DroneMod.com AR.Drone 2 – Antenna Mount - Installation Procedure
6 Document Number: AMW-20130303-1 Mar 5th, 2013
Bottom Mount – In Flight: (Velcro used to secure to Bottom Cover)
NOTE: Unless your application requires a Bottom Mount Wheel Antenna, it is
highly recommended to use a mast mount. A mast mounted antenna makes a
very noticeable increase in RF performance and range compared to a bottom
mount.
DroneMod.com AR.Drone 2 – Antenna Mount - Installation Procedure
7 Document Number: AMW-20130303-1 Mar 5th, 2013
Bottom Mount - Step 1: Remove Bottom Cover
No picture available
1. Use a hair dryer to warm the perimeter of the bottom cover. This will soften the adhesive
2. Starting at the down looking camera end, peel away the cover from the drone body. Make your
way to the ultrasonic end
3. NOTE: As you get to the ultrasonic area, look between the two ultrasonic transducers for an
attached piece of foam. Reach in and gently remove it from the cover before completely
removing the Bottom Cover
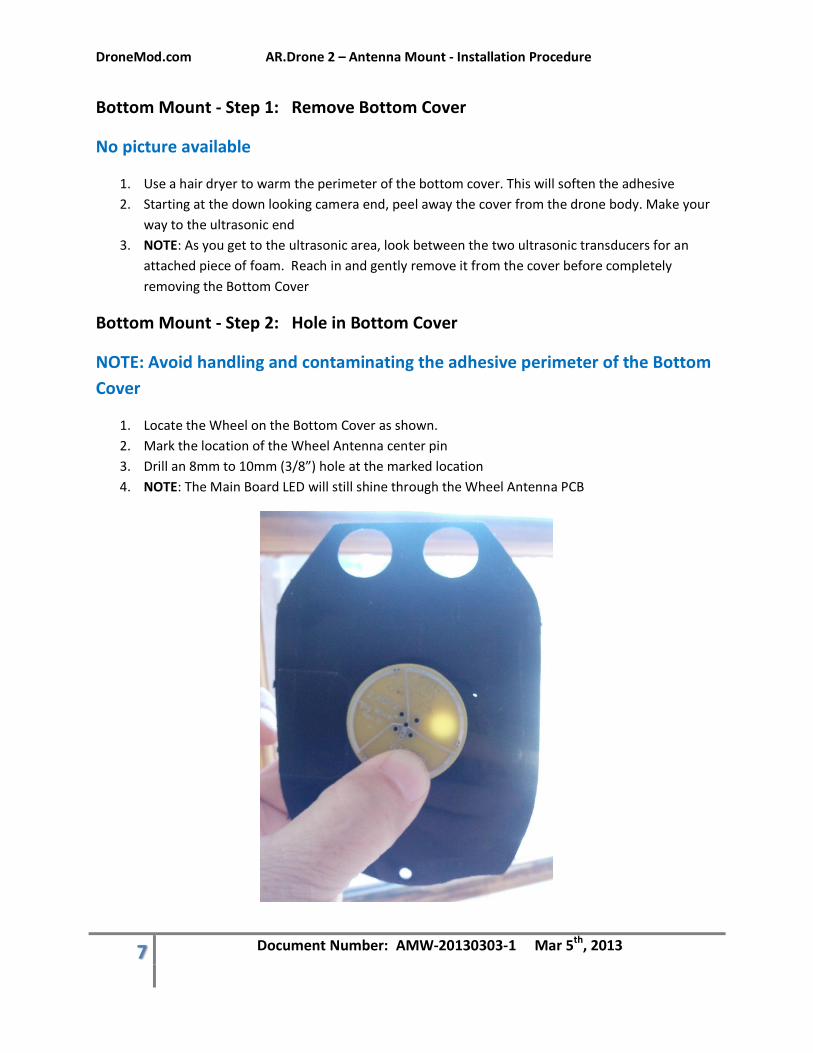
Bottom Mount - Step 2: Hole in Bottom Cover
NOTE: Avoid handling and contaminating the adhesive perimeter of the Bottom
Cover
1. Locate the Wheel on the Bottom Cover as shown.
2. Mark the location of the Wheel Antenna center pin
3. Drill an 8mm to 10mm (3/8”) hole at the marked location
4. NOTE: The Main Board LED will still shine through the Wheel Antenna PCB

DroneMod.com AR.Drone 2 – Antenna Mount - Installation Procedure
8 Document Number: AMW-20130303-1 Mar 5th, 2013
Bottom Mount - Step 3: Velcro
No picture available
1. Cut out an area the size of the Bottom Cover hole in both pieces of the Velcro
2. Apply to the Wheel and the Bottom Cover
Bottom Mount - Step 4: Route RF Cable
No picture available
1. Route the Right Angle MMCX RF connector out the hole in the Bottom Cover
Bottom Mount - Step 5: Reattach Bottom Cover
No picture available
4. Use a hair dryer to warm the adhesive perimeter of the Bottom Cover
5. Reattach the Bottom Cover back on the drone
6. Start at the down looking camera end and make your way to the ultrasonic end
7. As you apply the Bottom Cover to the drone body, make sure there are no excess gaps in the
drone body cross member slits