artistic - oomph-wellness.org
TRANSCRIPT
ArtisticActivity Book
A book of activities for your mind, body and soul.

Bouquet Henri Matisse
1916-1917San Diego Museum of Art
This was painted in the midst of the first World War when Matisse, who was too old to serve, retreated to the French countryside.
Water Lily Pond Claude Monet
1899The National Gallery
Monet purchased land with a pond near his property in Giverny, intending to build something "for the pleasure of the eye.” The result was his water-lily garden.
SunflowersVan Gogh
1889Van Gogh Museum
This was painted with three shades of yellow ‘and nothing else’. This demonstrated that it was possible to create an image with numerous variations of a single colour, without any loss of eloquence.
Welcome to the Oomph! Art Gallery! A celebration of art work from all over the world.
Did you know: There are now over 55,000 museums in 202 countries in the World?
The Oomph!
Art Gallery
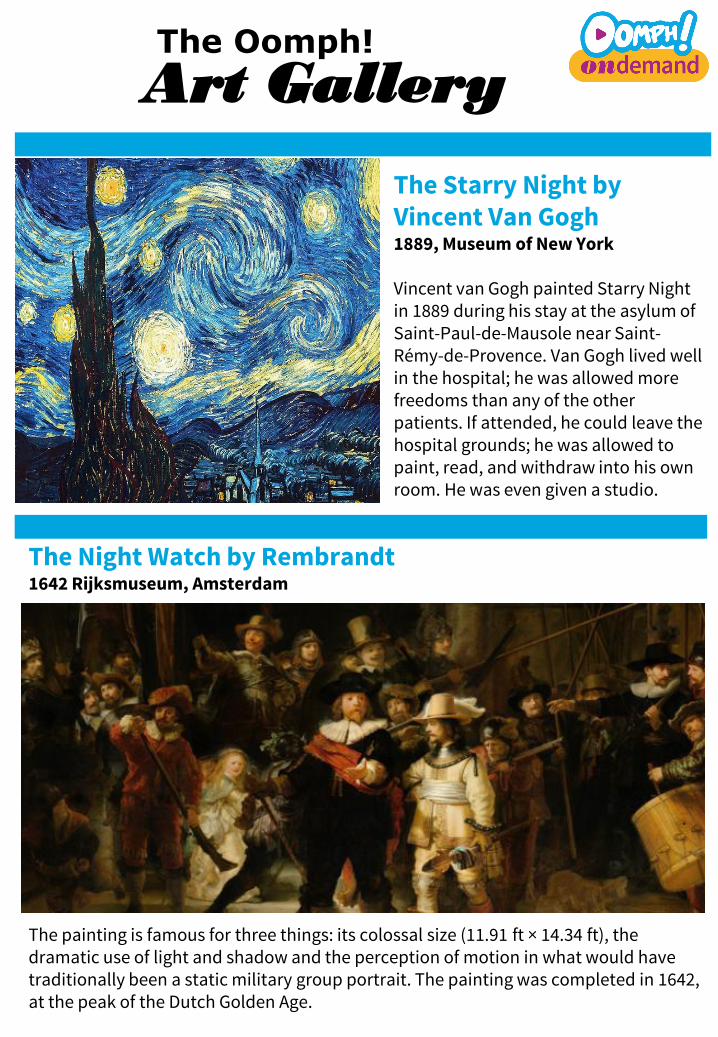
The Night Watch by Rembrandt 1642 Rijksmuseum, Amsterdam
The painting is famous for three things: its colossal size (11.91 ft × 14.34 ft), the dramatic use of light and shadow and the perception of motion in what would have traditionally been a static military group portrait. The painting was completed in 1642, at the peak of the Dutch Golden Age.
The Starry Night by Vincent Van Gogh1889, Museum of New York
Vincent van Gogh painted Starry Night in 1889 during his stay at the asylum of Saint-Paul-de-Mausole near Saint-Rémy-de-Provence. Van Gogh lived well in the hospital; he was allowed more freedoms than any of the other patients. If attended, he could leave the hospital grounds; he was allowed to paint, read, and withdraw into his own room. He was even given a studio.
The Oomph!
Art Gallery
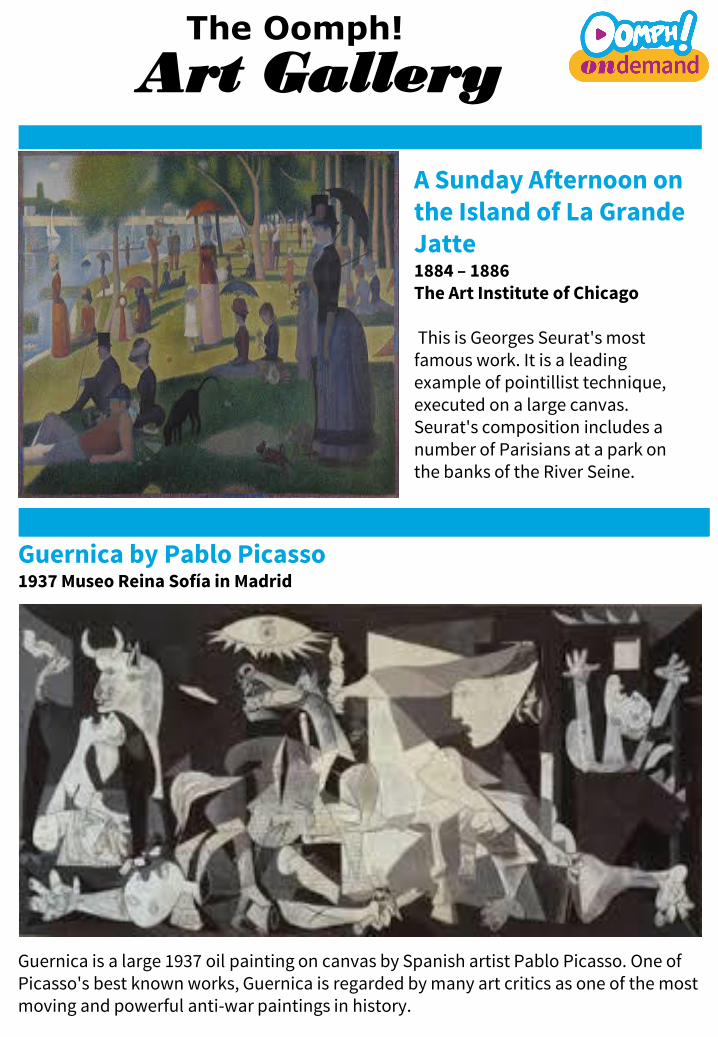
A Sunday Afternoon on the Island of La Grande Jatte1884 – 1886The Art Institute of Chicago
This is Georges Seurat's most famous work. It is a leading example of pointillist technique, executed on a large canvas. Seurat's composition includes a number of Parisians at a park on the banks of the River Seine.
Guernica by Pablo Picasso 1937 Museo Reina Sofía in Madrid
Guernica is a large 1937 oil painting on canvas by Spanish artist Pablo Picasso. One of Picasso's best known works, Guernica is regarded by many art critics as one of the most moving and powerful anti-war paintings in history.
The Oomph!
Art Gallery
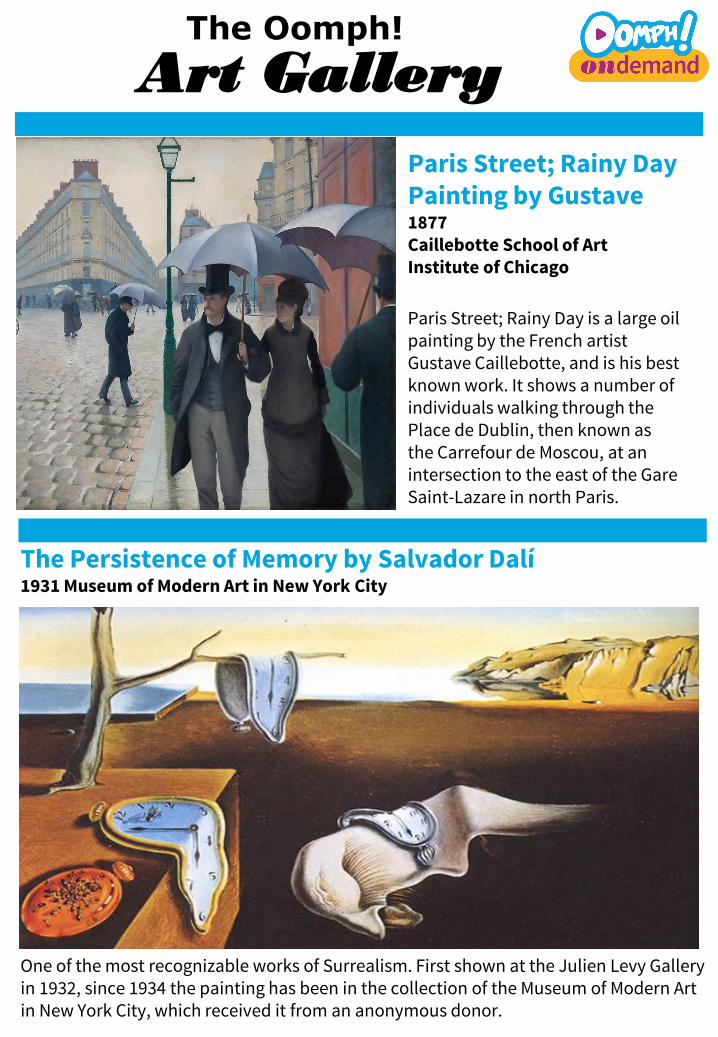
Paris Street; Rainy DayPainting by Gustave 1877Caillebotte School of Art Institute of Chicago
Paris Street; Rainy Day is a large oil painting by the French artist Gustave Caillebotte, and is his best known work. It shows a number of individuals walking through the Place de Dublin, then known as the Carrefour de Moscou, at an intersection to the east of the Gare Saint-Lazare in north Paris.
The Persistence of Memory by Salvador Dalí 1931 Museum of Modern Art in New York City
One of the most recognizable works of Surrealism. First shown at the Julien Levy Gallery in 1932, since 1934 the painting has been in the collection of the Museum of Modern Art in New York City, which received it from an anonymous donor.
The Oomph!
Art Gallery
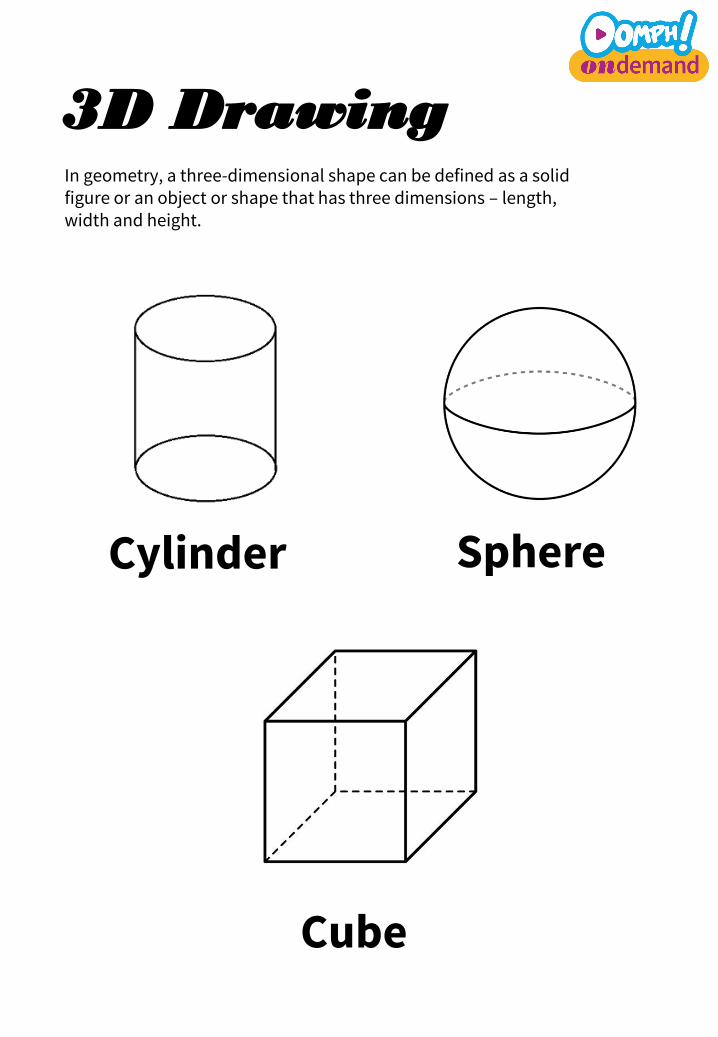
Cylinder Sphere
Cube
3D DrawingIn geometry, a three-dimensional shape can be defined as a solid figure or an object or shape that has three dimensions – length, width and height.

• Shapes are amongst the
first things we learn to
draw in life.
• There are three basic
shapes that any form
can be fitted into:
the cube, the sphere
and the cylinder.
• At the heart of these
shapes are two simple
geometric shapes:
the square and the
ellipse.
• Learning to accurately
draw and combine
these will help you to
construct any object,
observed or imagined.
• The next three activities
will look these shapes,
and how to draw them
accurately, with the
hope that this will
support your future
drawings.
3D Shapes

Let’s draw a sphere
• Using a pen or pencil make a
circle, it can be as wide as you
like it to be!
• Once you have drawn
your circle, draw a curved
line across it to make a 3-
dimensional shape.
• Ensure that the pencil
gently touches the paper so
you can shade it in later.
• Admire your sphere!
Follow the steps to draw your own shape on the next page:
3D Shapes
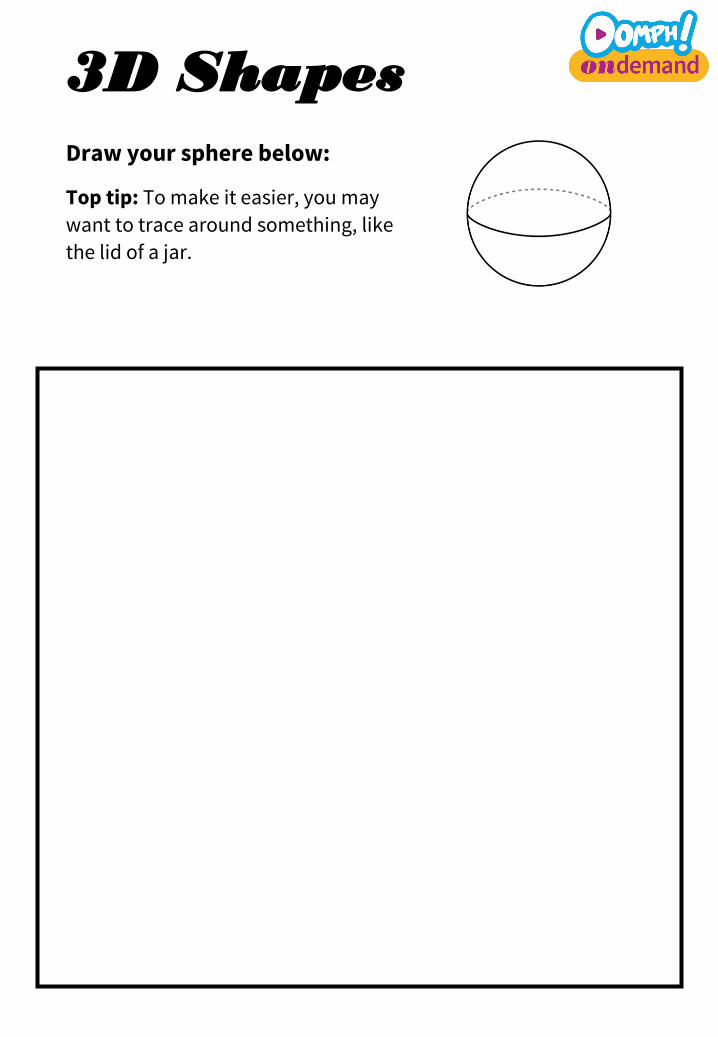
Top tip: To make it easier, you may
want to trace around something, like
the lid of a jar.
Draw your sphere below:
3D Shapes
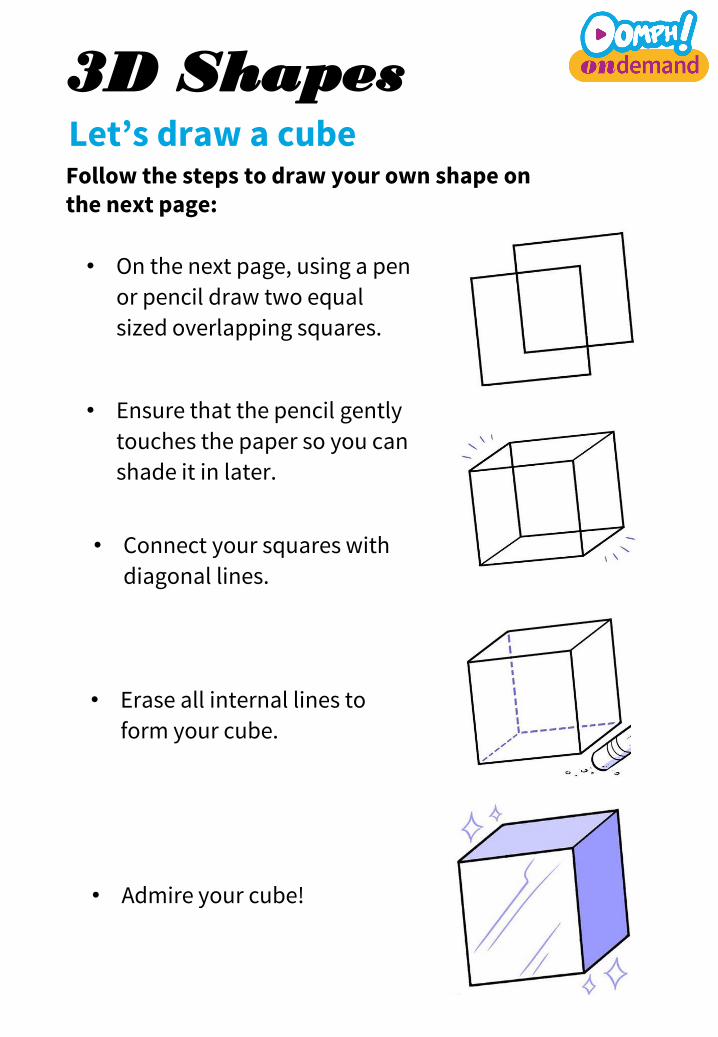
Let’s draw a cube
• On the next page, using a pen
or pencil draw two equal
sized overlapping squares.
• Ensure that the pencil gently
touches the paper so you can
shade it in later.
• Erase all internal lines to
form your cube.
• Connect your squares with
diagonal lines.
• Admire your cube!
Follow the steps to draw your own shape on the next page:
3D Shapes
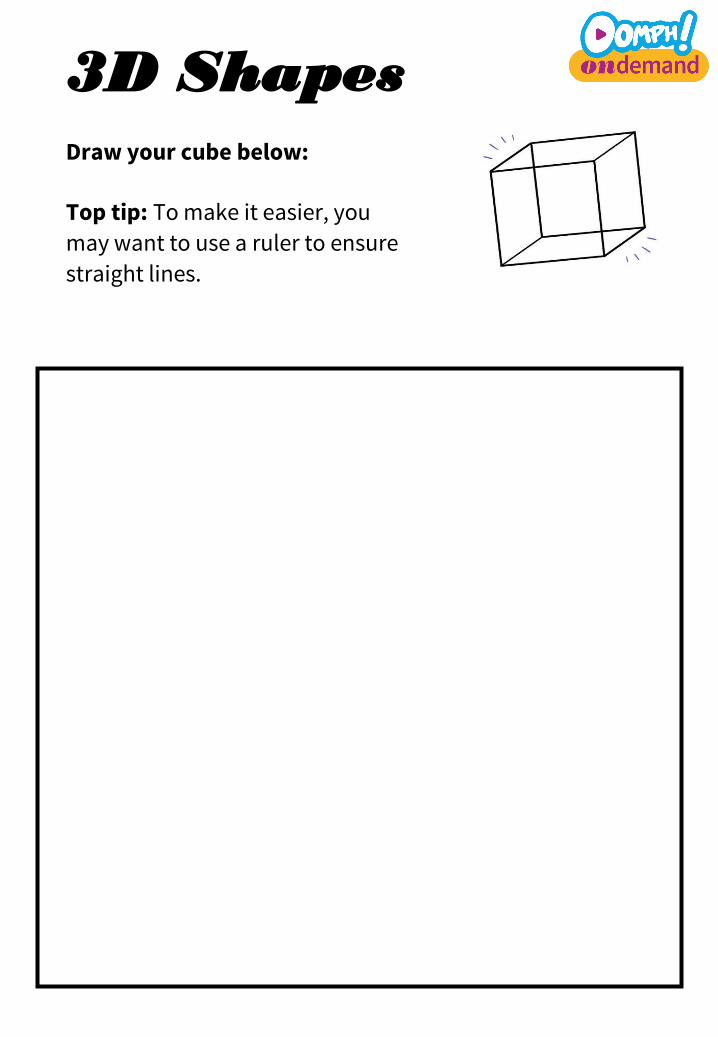
Top tip: To make it easier, you
may want to use a ruler to ensure
straight lines.
Draw your cube below:
3D Shapes
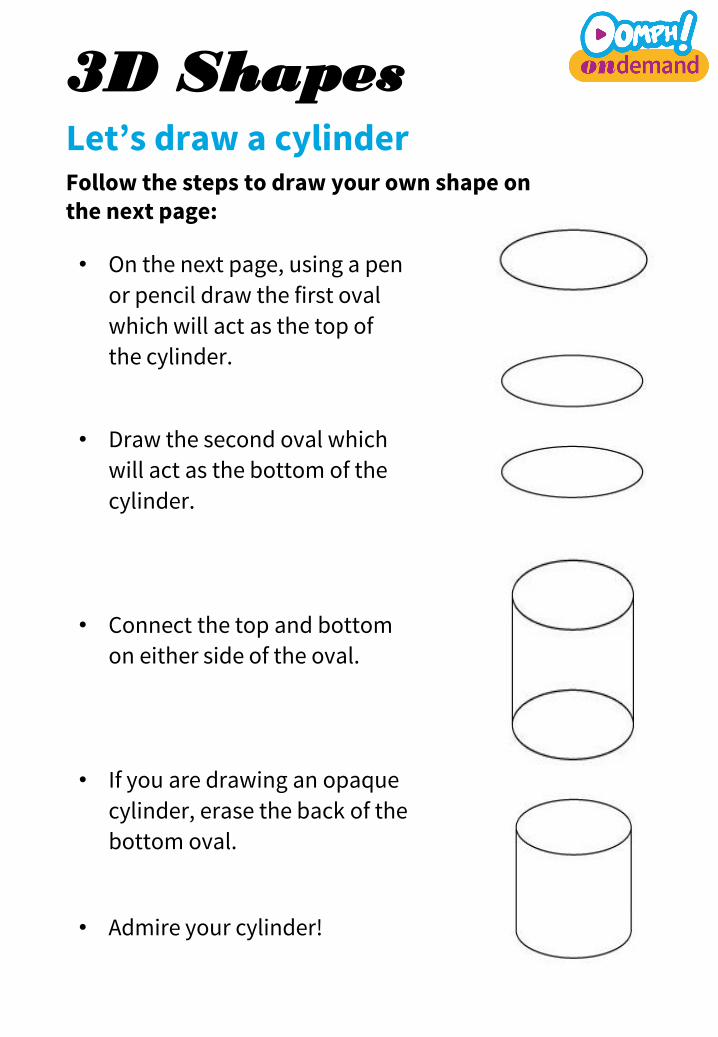
Let’s draw a cylinder
• On the next page, using a pen
or pencil draw the first oval
which will act as the top of
the cylinder.
• Draw the second oval which
will act as the bottom of the
cylinder.
• Connect the top and bottom
on either side of the oval.
• If you are drawing an opaque
cylinder, erase the back of the
bottom oval.
• Admire your cylinder!
Follow the steps to draw your own shape on the next page:
3D Shapes
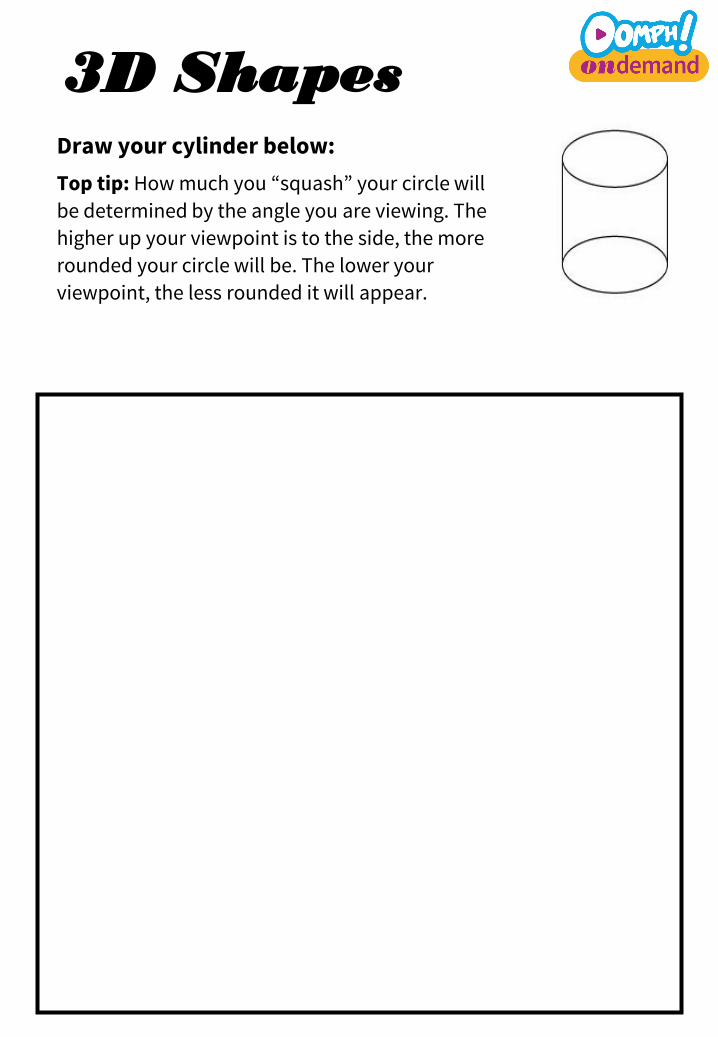
Top tip: How much you “squash” your circle will
be determined by the angle you are viewing. The
higher up your viewpoint is to the side, the more
rounded your circle will be. The lower your
viewpoint, the less rounded it will appear.
Draw your cylinder below:
3D Shapes
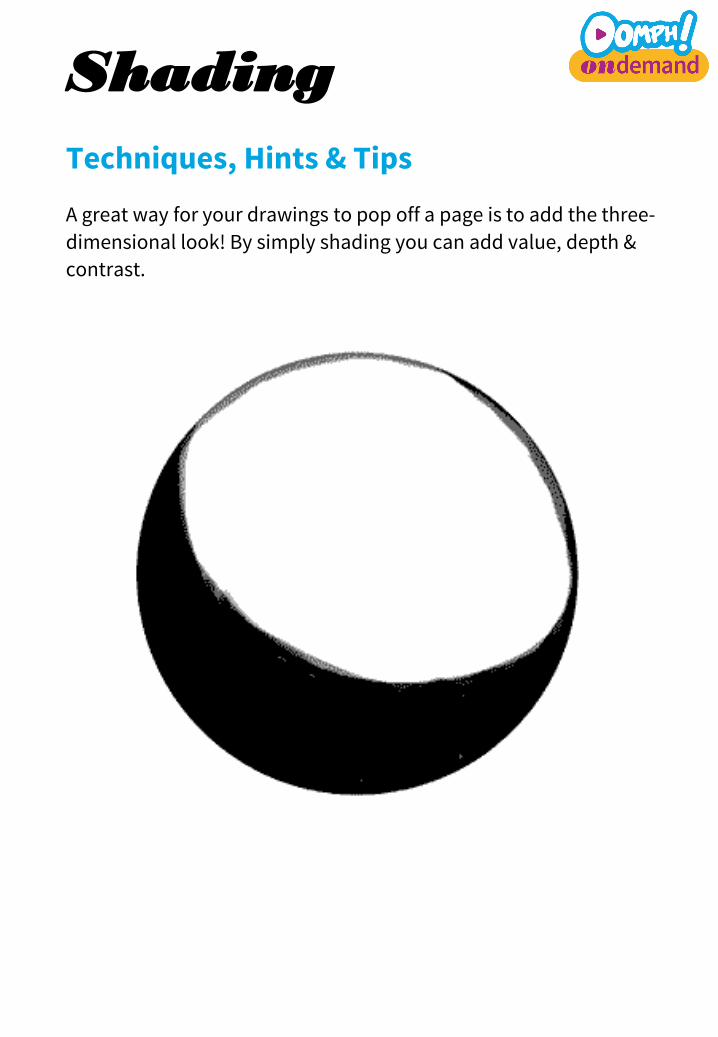
A great way for your drawings to pop off a page is to add the three-
dimensional look! By simply shading you can add value, depth &
contrast.
Shading
Techniques, Hints & Tips

Hatching is where you draw a series of
parallel lines to create a shadow
effect in your picture. By spacing lines
closer together, you can make darker
shadows, and by bringing lines further
apart you can make the drawing look
brighter.
Top Tip: Ensure the hatching lines are drawn in one long stroke to keep them uniform.
Have a go in the circle below:
Hatching
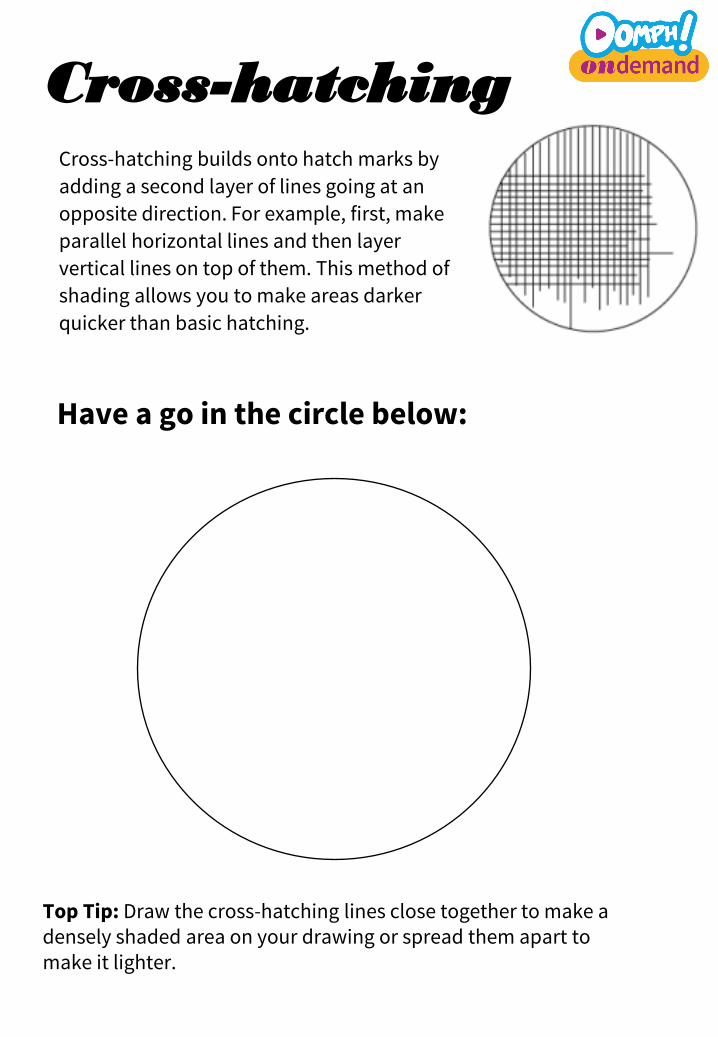
Cross-hatching builds onto hatch marks by
adding a second layer of lines going at an
opposite direction. For example, first, make
parallel horizontal lines and then layer
vertical lines on top of them. This method of
shading allows you to make areas darker
quicker than basic hatching.
Top Tip: Draw the cross-hatching lines close together to make a densely shaded area on your drawing or spread them apart to make it lighter.
Have a go in the circle below:
Cross-hatching
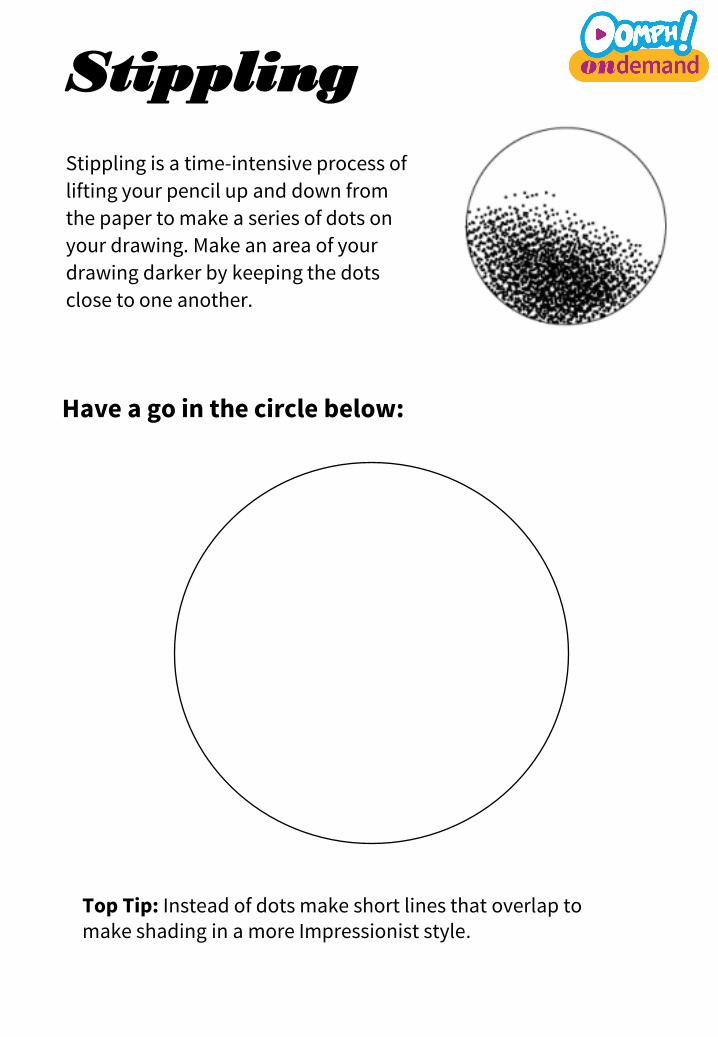
Stippling is a time-intensive process of
lifting your pencil up and down from
the paper to make a series of dots on
your drawing. Make an area of your
drawing darker by keeping the dots
close to one another.
Top Tip: Instead of dots make short lines that overlap to make shading in a more Impressionist style.
Have a go in the circle below:
Stippling

Blending your shading gives your
drawing a smooth and realistic finish
and requires the most time and
technique to do correctly. Shade with
the side of a soft graphite pencil and
increase the amount of pressure you
apply to the paper to make transitions
between light and dark values.
Top Tip: Your light source will determine where the darkest shadows and the brightest highlights appear. Shadows will be on the opposite side of your light source while highlights will appear where your light source is pointing.
Have a go in the circle below:
Blending

Shade the square on one side of the rectangle with your darkest value.
Start to add value to each square so it is lighter than the darkest value.
Work on each square, making them progressively lighter, until you
reach the other end of the grid.
Leave the last square empty so that it is brightest value. Aim to have
smooth transitions between each of the squares rather than having
drastic changes in value. The square next to your lightest shade should
not be too dark.
When learning to draw value scales improve skills by helping to determine what pressure to use, with each pencil, when shading. This will help you get the most realistic effect in your drawing.
Using the grids below, practice your shading skills by creating a
value scale from light to dark.
Use these scales to practice your shading techniques from the previous tasks!
Value Scale

Now you have the necessary tools, have a go at adding some shading to the below pictures!
Add Some Shading

A spot of colouring
Colouring is a simple and relaxing way of taking time for yourself. It can be a helpful practice if you find it hard to switch off as it allows the mind to slow down and become absorbed without strain.
Try it yourself in this pack! Take your time selecting the colours you want to use. Then spend a minute or two looking at the pattern before you start.
Art Therapy

“Mindfulness isn’t difficult, we just need to remember to do it.”Sharon Salzberg
Colour Me In
The next time you need to relax try this simple drawing exercise.
Have a go below:
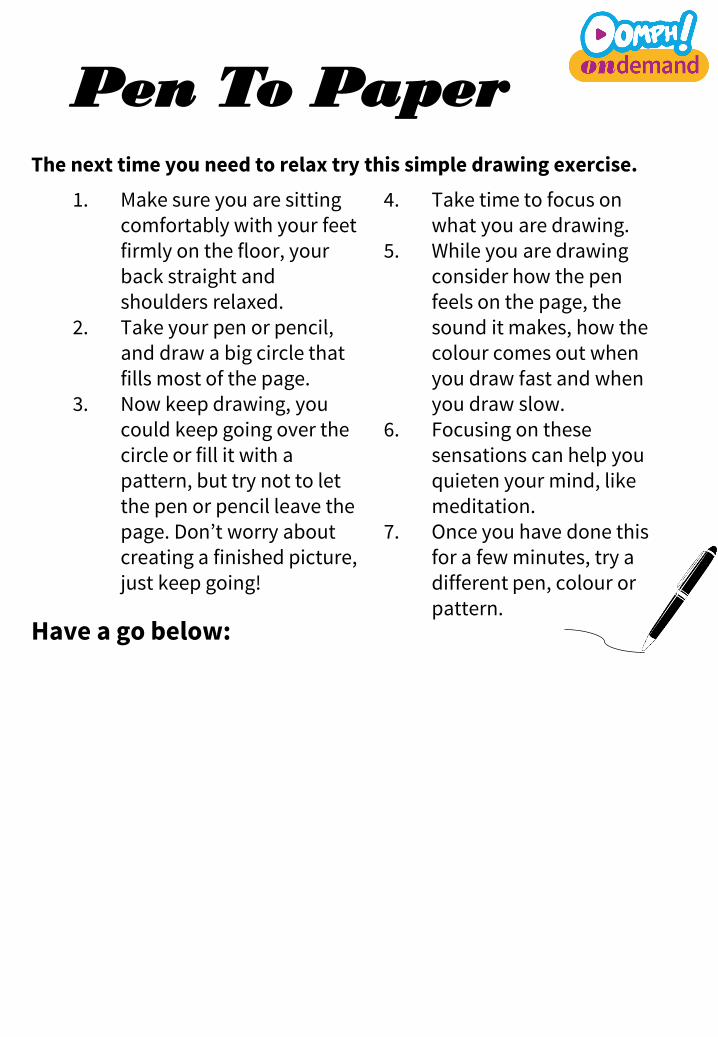
4. Take time to focus on what you are drawing.
5. While you are drawing consider how the pen feels on the page, the sound it makes, how the colour comes out when you draw fast and when you draw slow.
6. Focusing on these sensations can help you quieten your mind, like meditation.
7. Once you have done this for a few minutes, try a different pen, colour or pattern.
1. Make sure you are sitting comfortably with your feet firmly on the floor, your back straight and shoulders relaxed.
2. Take your pen or pencil, and draw a big circle that fills most of the page.
3. Now keep drawing, you could keep going over the circle or fill it with a pattern, but try not to let the pen or pencil leave the page. Don’t worry about creating a finished picture, just keep going!
Pen To Paper
“The only thing that is ultimately real about your journey is the step that you are taking at this moment. That’s all there ever is.”Eckhart Tolle
Colour Me In

A common mindfulness activity is a ‘body-scan’.
This involves focusing on different parts of your body, one at a time, and thinking about how they feel. We like to add another dimension to this idea by drawing them. For example, start drawing your hand and fix your attention on how it looks and what sensations you are feeling. It doesn’t have to be perfect because the finished product doesn’t matter – mindfulness drawing is all about the process!
Have a go below:
Mindfulness
“Be mindful. Be grateful. Be positive. Be true. Be kind.”Roy T. Bennett
Colour Me In
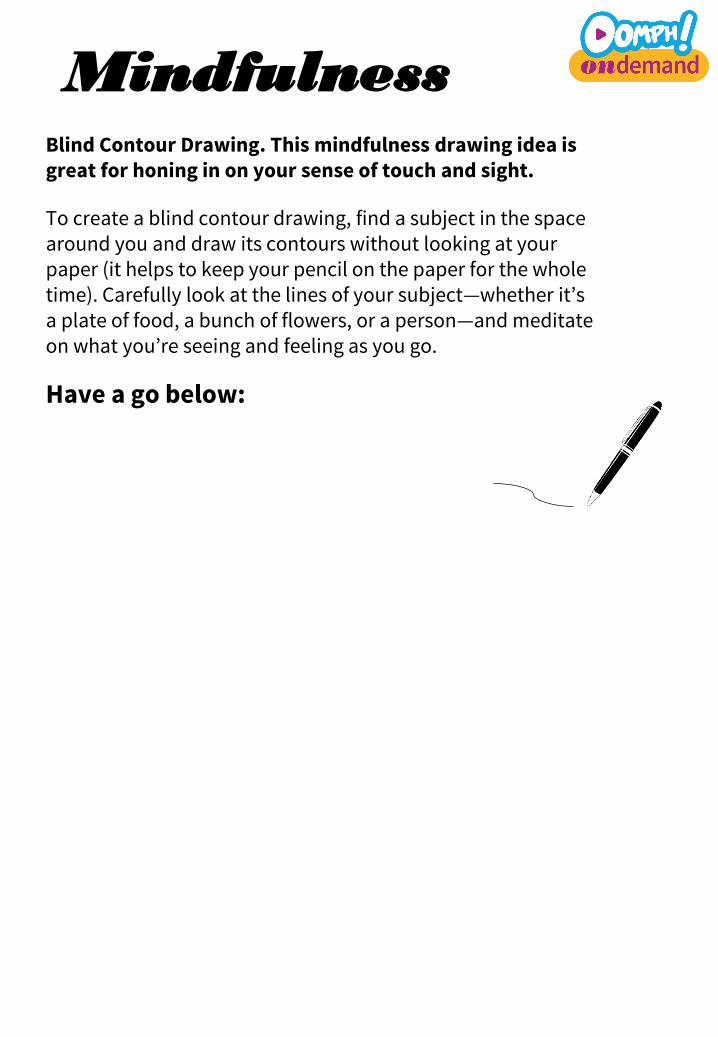
Blind Contour Drawing. This mindfulness drawing idea is great for honing in on your sense of touch and sight.
To create a blind contour drawing, find a subject in the space around you and draw its contours without looking at your paper (it helps to keep your pencil on the paper for the whole time). Carefully look at the lines of your subject—whether it’s a plate of food, a bunch of flowers, or a person—and meditate on what you’re seeing and feeling as you go.
Have a go below:
Mindfulness
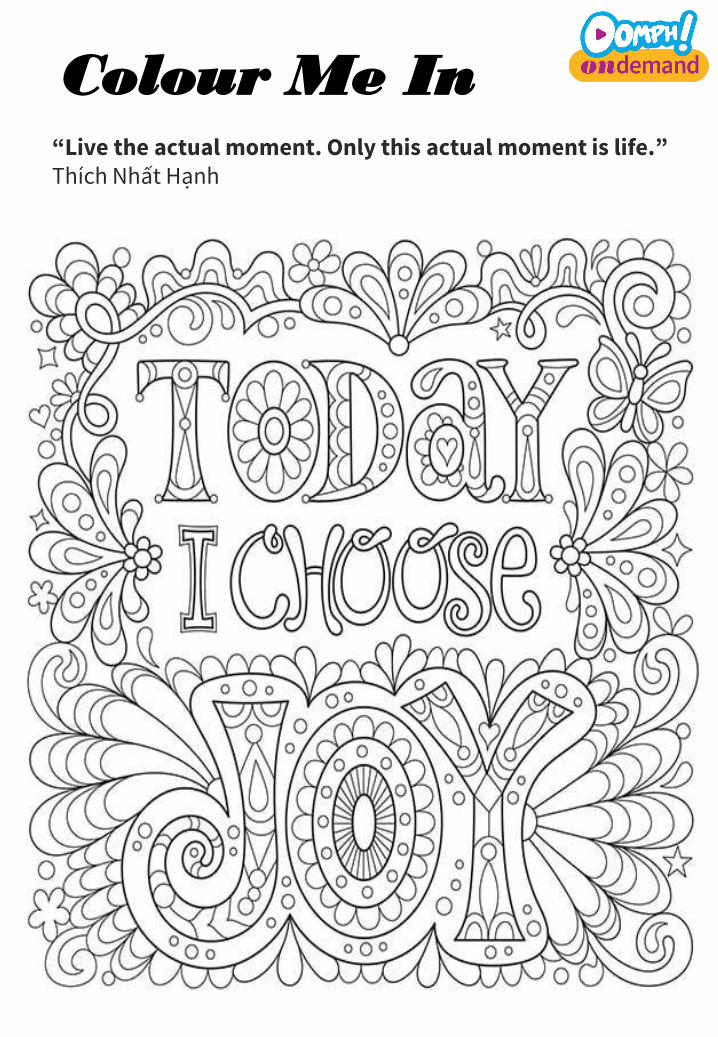
“Live the actual moment. Only this actual moment is life.” Thích Nhất Hạnh
Colour Me In
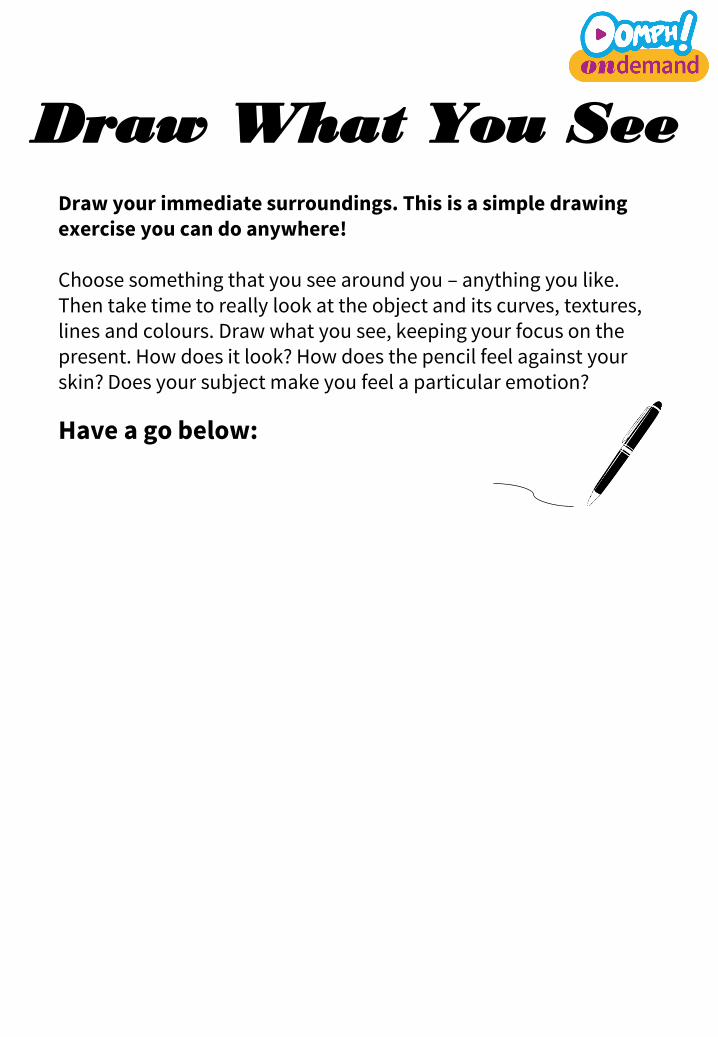
Draw your immediate surroundings. This is a simple drawing exercise you can do anywhere!
Choose something that you see around you – anything you like. Then take time to really look at the object and its curves, textures, lines and colours. Draw what you see, keeping your focus on the present. How does it look? How does the pencil feel against your skin? Does your subject make you feel a particular emotion?
Have a go below:
Draw What You See
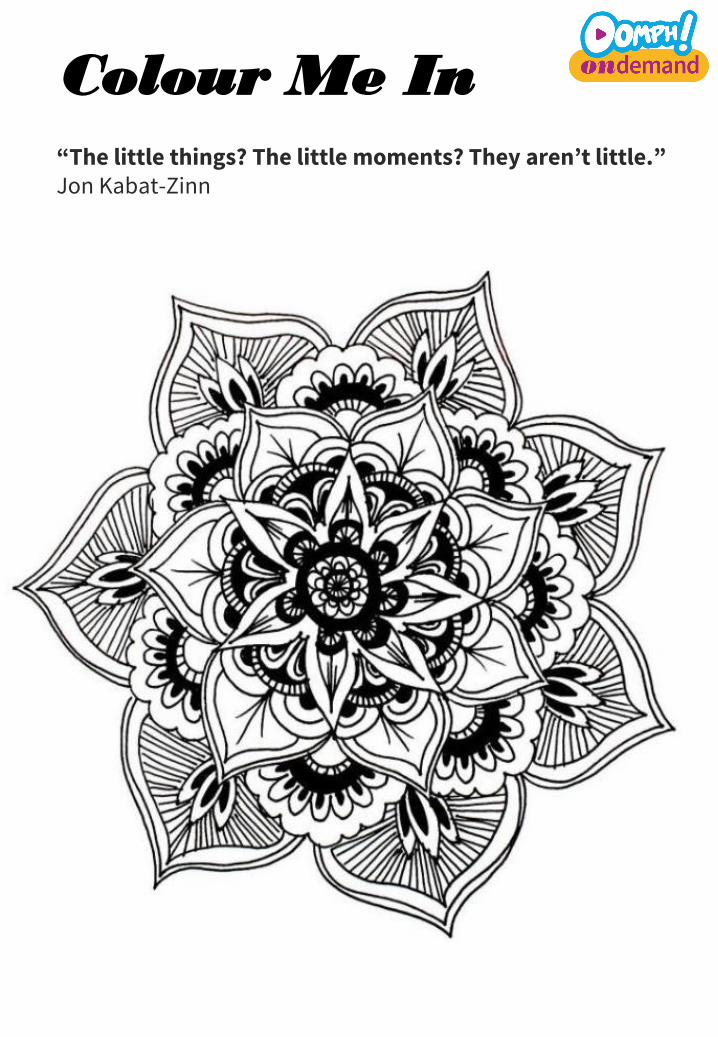
“The little things? The little moments? They aren’t little.” Jon Kabat-Zinn
Colour Me In