aseptichairq9bgh9q08416907ck9fxol3z-wpengine.netdna-ssl.com/... · the adc-01 portable dental chair...
TRANSCRIPT

P.O. Box 1548 • Woodinville, WA 98072-15481-800-426-5913 • 425-487-3157 • Fax: 360-668-8722
email: [email protected] • Internet: www.aseptico.com
OPERATION ANDMAINTENANCE MANUAL
AseptiChair Item ADC-01

Page 2
TABLE OF CONTENTS
Introduction . . . . . . . . . . . . . . . . . . . . . . . . . . . . . . . . . . . . . . . . . . . . . . . . . . . . . . . . . . . . . . . .3
Purpose . . . . . . . . . . . . . . . . . . . . . . . . . . . . . . . . . . . . . . . . . . . . . . . . . . . . . . . . . . . . .3
Performance Characteristics . . . . . . . . . . . . . . . . . . . . . . . . . . . . . . . . . . . . . . . . . . . .3
Items Furnished . . . . . . . . . . . . . . . . . . . . . . . . . . . . . . . . . . . . . . . . . . . . . . . . . . . . . .3
Operation Instructions . . . . . . . . . . . . . . . . . . . . . . . . . . . . . . . . . . . . . . . . . . . . . . . . . . . . . . .4
Chair Set-Up . . . . . . . . . . . . . . . . . . . . . . . . . . . . . . . . . . . . . . . . . . . . . . . . . . . . . . . . .4Chair Adjustments . . . . . . . . . . . . . . . . . . . . . . . . . . . . . . . . . . . . . . . . . . . . . . . . . . . .5
Collapsing the Chair . . . . . . . . . . . . . . . . . . . . . . . . . . . . . . . . . . . . . . . . . . . . . . . . . .6
Cleaning & Maintenance . . . . . . . . . . . . . . . . . . . . . . . . . . . . . . . . . . . . . . . . . . . . . . . . . . . . .6
Parts List . . . . . . . . . . . . . . . . . . . . . . . . . . . . . . . . . . . . . . . . . . . . . . . . . . . . . . . . . . . . . . . . . .8
Parts Diagram . . . . . . . . . . . . . . . . . . . . . . . . . . . . . . . . . . . . . . . . . . . . . . . . . . . . . . . . . . . . . .9
TABLE OF ILLUSTRATIONS
Figure 1 - Leg Adjustment Pin Location . . . . . . . . . . . . . . . . . . . . . . . . . . . . . . . . . . . . . . . .4
Figure 2 - Leg Adjustment Pin Placement . . . . . . . . . . . . . . . . . . . . . . . . . . . . . . . . . . . . . . .4
Figure 3 - Folding Out Foot/Leg Rest . . . . . . . . . . . . . . . . . . . . . . . . . . . . . . . . . . . . . . . . . .4
Figure 4 - Arm Sling Pin Insertion . . . . . . . . . . . . . . . . . . . . . . . . . . . . . . . . . . . . . . . . . . . . .4
Figure 5 - Backrest adjustment . . . . . . . . . . . . . . . . . . . . . . . . . . . . . . . . . . . . . . . . . . . . . . . .5
Figure 6 - Positioning footrest to vertical . . . . . . . . . . . . . . . . . . . . . . . . . . . . . . . . . . . . . . . .5
Figure 7 - Parts Diagram . . . . . . . . . . . . . . . . . . . . . . . . . . . . . . . . . . . . . . . . . . . . . . . . . . . . .8
Page 3
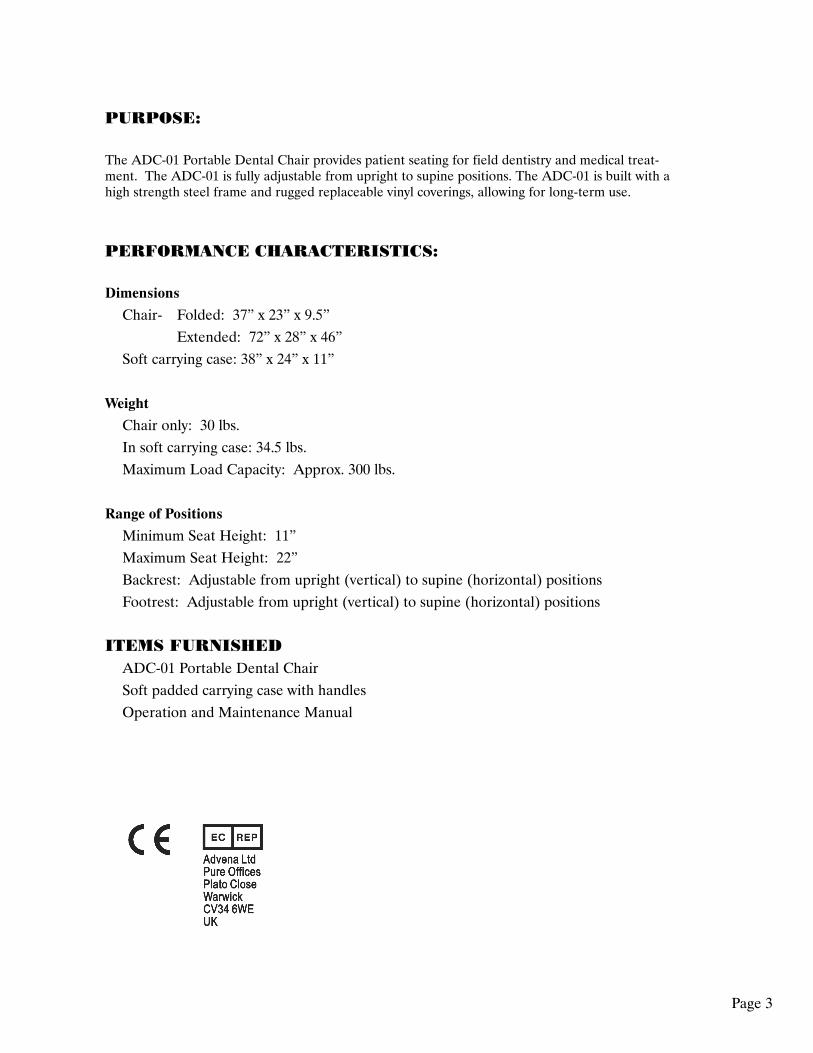
PERFORMANCE CHARACTERISTICS:
Dimensions
Chair- Folded: 37” x 23” x 9.5”Extended: 72” x 28” x 46”
Soft carrying case: 38” x 24” x 11”
Weight
Chair only: 30 lbs.In soft carrying case: 34.5 lbs.Maximum Load Capacity: Approx. 300 lbs.
Range of Positions
Minimum Seat Height: 11”Maximum Seat Height: 22”Backrest: Adjustable from upright (vertical) to supine (horizontal) positionsFootrest: Adjustable from upright (vertical) to supine (horizontal) positions
ITEMS FURNISHEDADC-01 Portable Dental ChairSoft padded carrying case with handlesOperation and Maintenance Manual
PURPOSE:
The ADC-01 Portable Dental Chair provides patient seating for field dentistry and medical treat-ment. The ADC-01 is fully adjustable from upright to supine positions. The ADC-01 is built with ahigh strength steel frame and rugged replaceable vinyl coverings, allowing for long-term use.

Page 4
CHAIR SET-UP:
1. Remove the chair from its carryingcase and set it on the floor, legsdown, in its folded position.
2. Rotate the chair up onto one sideand remove the leg adjustment pinsfrom their storage pouch underneaththe chair seat. (Fig. 1)
Figure 1 - Leg Adjustment Pin Location
Figure 2 - Leg Adjustment Pin Placement
Figure 3 - Folding Out Foot/Leg Rest
Figure 4 - Arm Sling Pin Insertion
5. Insert right and left arm sling pins into holeson the sides of the seat frame. (Fig. 4)
6. Complete set-up by positioning backrest andplacing headrest at the proper height on thefront side of backrest.
4. When the chair has been raised andthe height set, the foot and leg por-tion should be folded forward, outhorizontally. It will stop in the hor-izontal position. (Fig. 3)
3. Standing in front of the chair, put your toeon one of the front chair legs and lift up onthe backrest and front seat portion. Raisechair seat to desired height. Lock in placeby inserting leg adjustment pins throughchair leg tube and into adjustment link onthe right and left side of the chair. (Fig. 2)
LegAdjustmentPins
InsertLegAdjustmentPins
Insert PinsInto FrameHoles

Page 5
CHAIR ADJUSTMENTS:
1. Seat Height- The ADC-01 chair seat height can be set at any ofthe five preset settings. Without a patient in the chair, put yourtoe on one of the front chair legs and lift up slightly on thechair seat. While lifting and holding seat, remove the legadjustment pin from the right and left side. Align link withtube hole in any of the five positions and lock in place byinserting the pin and chain assembly. (see Fig. 1)
2. Backrest- The backrest may be set in anyposition from upright to full supine. Tochange the position of the backrest, simply liftthe chrome friction lever on the back side ofthe backrest, lower backrest, then releaselever to lock.
3. Footrest- The footrest may be positionedin the normal horizontal operating posi-tion, or allowed to hang down vertically soa patient can be seated in a sitting position.To release footrest into the vertical posi-tion, first fold toe section inward, then liftslightly on footrest section. While lifting,pull the black knobs on each side of thechair frame to release and push footrestdown into the vertical position. Lock inthe vertical position by snapping holdingstrap around the chair leg frame.To reposition footrest in the horizontalposition, unsnap holding strap from frame,lift footrest to the horizontal position untilit locks, then unfold toe section out to hor-izontal. (Fig. 6)
4. Headrest- The headrest slides freely on its mounting strap andcan be positioned at different heights for different size patients.
To return the backrest to an upright position,lift backrest to desired position. Backrest willautomatically lock in place. (Fig. 5)
NEVER LOWER THE BACK-REST WHEN A PATIENT IS INTHE CHAIR WITHOUT COM-PLETELY SUPPORTINGTHEIR WEIGHT FIRST.
Figure 5 - Backrest adjustment
Figure 6 - Positioning footrest to vertical
WARNING
Lift lever to position.Release to lock.
SnapAroundFrame
Pull BlackKnob toRelease

Page 6
COLLAPSING THE CHAIR:
1. Fold toe and then leg sections onto seat as it was originally stored.2. Pull arm slings out of the holes in the chair frame.3. Put your toe onto one of the front chair legs and lift up slightly on
the seat, then remove height adjustment pins. While supportingchair weight, let the chair fold down toward the floor.
4. As the chair folds down, release the backrest adjustment leveruntil the chair collapses completely. Rotate the chair up onto oneside and insert the leg adjustment pins into their storage pouchunderneath the chair seat.
5. Fold the arm slings and headrest onto the chair and place foldedchair into carrying case.
CLEANING AND MAINTENANCE:
Although bleach, when diluted to <10% and wiped clean immediatelycould be used, it is not recommended. The use of barrier covers andmild cleaning solutions is recommended as the primary asepsisapproach on chair and stool upholstery instead of relying onchemicals. The use of barriers greatly extends the life of chair andstool upholstery and can be replaced between patients.
NEVER FORCE THE CHAIR INTO THE COLLAPSED POSITION.FORCING THE CHAIR DOWN WITHOUT RELEASING THEBACKREST ADJUSTMENT LEVER MAY BEND THE ADJUST-MENT ASSEMBLY AND WILL VOID THE WARRANTY.
WARNING
NEVER SIT ON THE EDGE OF THE SIT-TING SURFACE. ALWAYS SIT IN THE
CENTER OF THE SEAT.
WARNING

Page 7
NOTES
Page 8
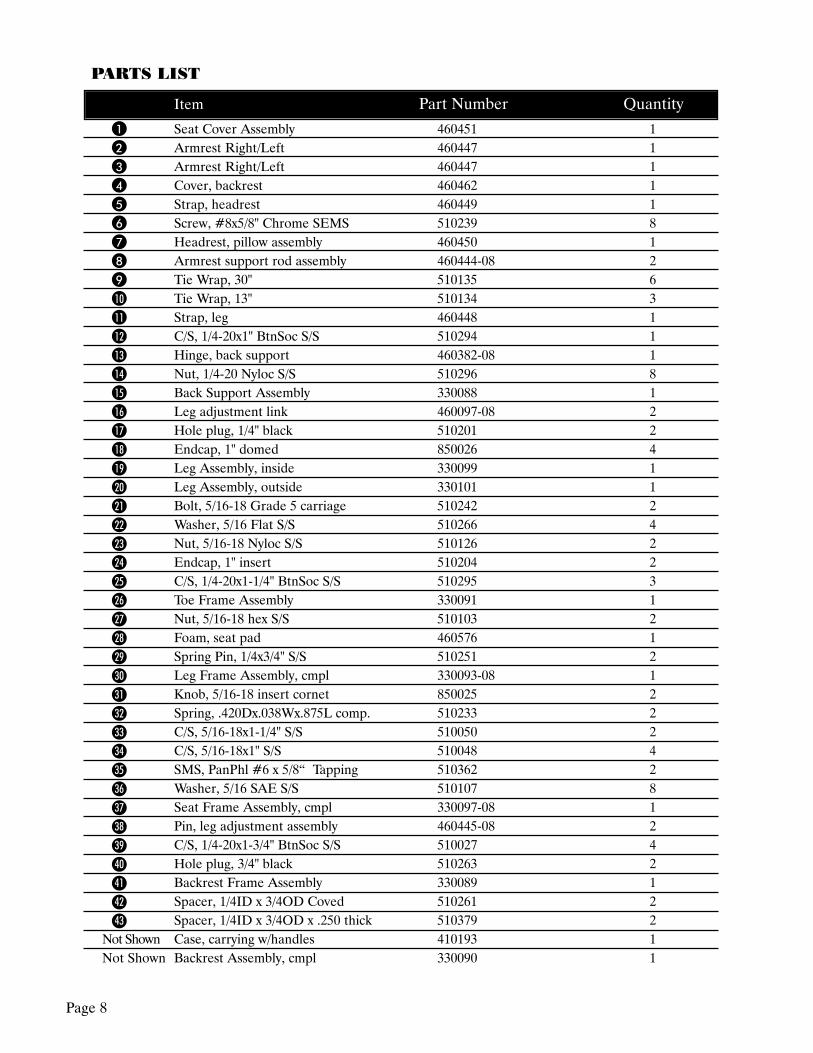
PARTS LIST
Item Part Number Quantity
1 Seat Cover Assembly 460451 12 Armrest Right/Left 460447 13 Armrest Right/Left 460447 14 Cover, backrest 460462 15 Strap, headrest 460449 16 Screw, #8x5/8" Chrome SEMS 510239 87 Headrest, pillow assembly 460450 18 Armrest support rod assembly 460444-08 29 Tie Wrap, 30" 510135 610 Tie Wrap, 13" 510134 311 Strap, leg 460448 112 C/S, 1/4-20x1" BtnSoc S/S 510294 113 Hinge, back support 460382-08 114 Nut, 1/4-20 Nyloc S/S 510296 815 Back Support Assembly 330088 116 Leg adjustment link 460097-08 217 Hole plug, 1/4" black 510201 218 Endcap, 1" domed 850026 419 Leg Assembly, inside 330099 120 Leg Assembly, outside 330101 121 Bolt, 5/16-18 Grade 5 carriage 510242 222 Washer, 5/16 Flat S/S 510266 423 Nut, 5/16-18 Nyloc S/S 510126 224 Endcap, 1" insert 510204 225 C/S, 1/4-20x1-1/4" BtnSoc S/S 510295 326 Toe Frame Assembly 330091 127 Nut, 5/16-18 hex S/S 510103 228 Foam, seat pad 460576 129 Spring Pin, 1/4x3/4" S/S 510251 230 Leg Frame Assembly, cmpl 330093-08 131 Knob, 5/16-18 insert cornet 850025 232 Spring, .420Dx.038Wx.875L comp. 510233 233 C/S, 5/16-18x1-1/4" S/S 510050 234 C/S, 5/16-18x1" S/S 510048 435 SMS, PanPhl #6 x 5/8“ Tapping 510362 236 Washer, 5/16 SAE S/S 510107 837 Seat Frame Assembly, cmpl 330097-08 138 Pin, leg adjustment assembly 460445-08 239 C/S, 1/4-20x1-3/4" BtnSoc S/S 510027 440 Hole plug, 3/4" black 510263 241 Backrest Frame Assembly 330089 142 Spacer, 1/4ID x 3/4OD Coved 510261 243 Spacer, 1/4ID x 3/4OD x .250 thick 510379 2
Not Shown Case, carrying w/handles 410193 1Not Shown Backrest Assembly, cmpl 330090 1

PARTS DIAGRAM
Aseptico ADC-01
Portable Dental Chair
Figure 7 - Parts Diagram

NOTES

NOTES

P.O. Box 1548 • Woodinville, WA 98072-15481-800-426-5913 • 425-487-3157 • Fax: 360-668-8722
email: [email protected] • Internet: www.aseptico.comPRINTED IN THE USA
WARRANTY
Aseptico warrants its products against defects in material or workmanship for aperiod of two (2) years, from date of original invoice. Some handpieces arewarranted for one year under the same conditions. Other handpieces andexpendable components, such as air turbines and light bulbs, are covered by shorterwarranty periods, or have no warranty. Aseptico's sole obligation under productwarranty is (at its sole option and discretion) to repair or replace any defectivecomponent or product in part or whole. Aseptico shall be the sole arbiter of suchaction.
In the event of alleged defect under warranty, the purchaser is to notify Aseptico'sCustomer Service Department promptly. Customer Service will provide instructions,usually directing that the product be returned for service. Shipment to Aseptico andthe cost thereof is always the responsibility of the purchaser.
Accidental misuse, inappropriate installation, or failure to perform directedmaintenance voids the warranty. Deliberately defacing, modifying, or removing theserial number voids the warranty.
Aseptico does not assume, under this warranty, any risks or liabilities arising from theclinical use of its products, whether or not such use involves coincidental utilization ofproducts manufactured by others.
P/N: 420128Rev. HECO 1393008/2016