aspnet tutorial 14 unlock and approve cs
TRANSCRIPT

Forms Authentication, Authorization, User Accounts, and Roles :: Unlocking and Approving User Accounts
Introduction Along with a username, password, and email, each user account has two status
fields that dictate whether the user can log into the site: locked out and approved. A
user is automatically locked out if they provide invalid credentials a specified number
of times within a specified number of minutes (the default settings lock a user out
after 5 invalid login attempts within 10 minutes). The approved status is useful in
scenarios where some action must transpire before a new user is able to log on to
the site. For example, a user might need to first verify their email address or be
approved by an administrator before being able to login.
Because a locked out or unapproved user cannot login, it’s only natural to wonder
how these statuses can be reset. ASP.NET does not include any built-in functionality
or Web controls for managing users’ locked out and approved statuses, in part
because these decisions need to be handled on a site-by-site basis. Some sites might
automatically approve all new user accounts (the default behavior). Others have an
administrator approve new accounts or do not approve users until they visit a link
sent to the email address provided when they signed up. Likewise, some sites may
lock out users until an administrator resets their status, while other sites send an
email to the locked out user with a URL they can visit to unlock their account.
This tutorial shows how to build a web page for administrators to manage users’
locked out and approved statuses. We will also see how to approve new users only
after they have verified their email address.
Step 1: Managing Users’ Locked Out and Approved Statuses In the Building an Interface to Select One User Account from Many tutorial we
constructed a page that listed each user account in a paged, filtered GridView. The
grid lists each user’s name and email, their approved and locked out statuses,
whether they’re currently online, and any comments about the user. To manage
users’ approved and locked out statuses, we could make this grid editable. To
change a user’s approved status, the administrator would first locate the user
account and then edit the corresponding GridView row, checking or unchecking the
approved checkbox. Alternatively, we could manage the approved and locked out
statuses through a separate ASP.NET page.
For this tutorial let’s use two ASP.NET pages: ManageUsers.aspx and
UserInformation.aspx. The idea here is that ManageUsers.aspx lists the user
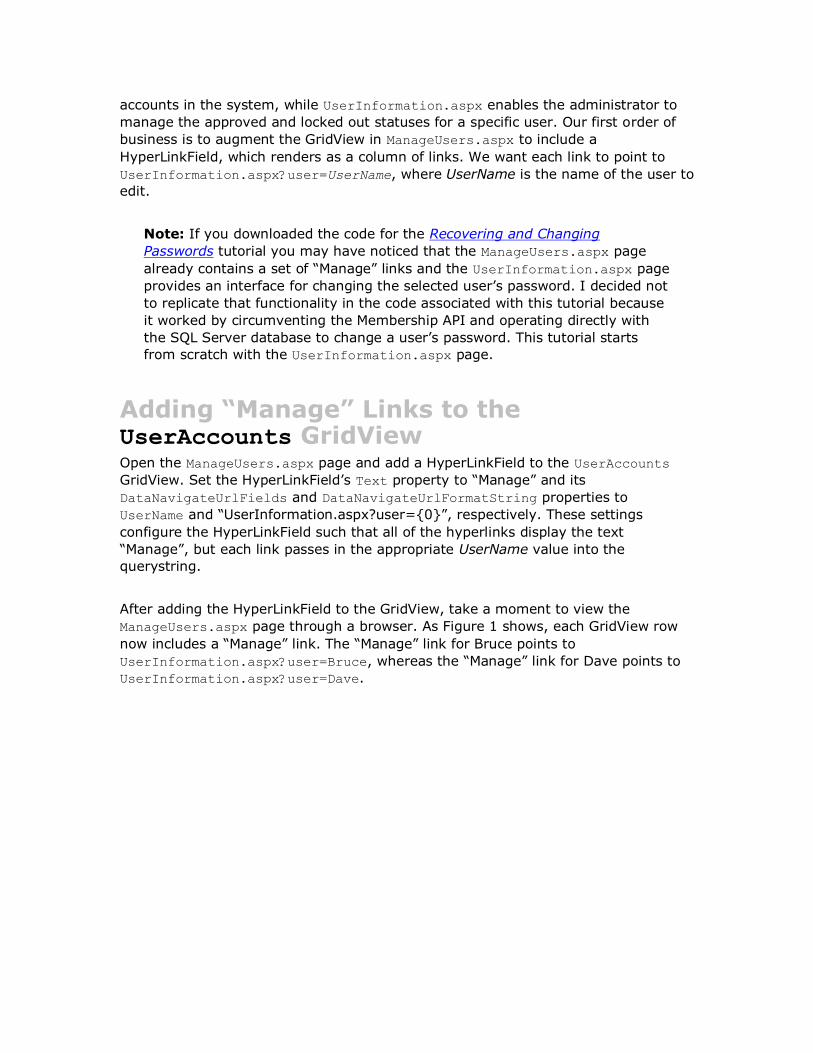
accounts in the system, while UserInformation.aspx enables the administrator to
manage the approved and locked out statuses for a specific user. Our first order of
business is to augment the GridView in ManageUsers.aspx to include a
HyperLinkField, which renders as a column of links. We want each link to point to
UserInformation.aspx?user=UserName, where UserName is the name of the user to
edit.
Note: If you downloaded the code for the Recovering and Changing
Passwords tutorial you may have noticed that the ManageUsers.aspx page
already contains a set of “Manage” links and the UserInformation.aspx page
provides an interface for changing the selected user’s password. I decided not
to replicate that functionality in the code associated with this tutorial because
it worked by circumventing the Membership API and operating directly with
the SQL Server database to change a user’s password. This tutorial starts
from scratch with the UserInformation.aspx page.
Adding “Manage” Links to the UserAccounts GridView Open the ManageUsers.aspx page and add a HyperLinkField to the UserAccounts
GridView. Set the HyperLinkField’s Text property to “Manage” and its
DataNavigateUrlFields and DataNavigateUrlFormatString properties to
UserName and “UserInformation.aspx?user={0}”, respectively. These settings
configure the HyperLinkField such that all of the hyperlinks display the text
“Manage”, but each link passes in the appropriate UserName value into the
querystring.
After adding the HyperLinkField to the GridView, take a moment to view the
ManageUsers.aspx page through a browser. As Figure 1 shows, each GridView row
now includes a “Manage” link. The “Manage” link for Bruce points to
UserInformation.aspx?user=Bruce, whereas the “Manage” link for Dave points to
UserInformation.aspx?user=Dave.

Figure 1: The HyperLinkField Adds a “Manage” Link for Each User Account
We will create the user interface and code for the UserInformation.aspx page in a
moment, but first let’s talk about how to programmatically change a user’s locked
out and approved statuses. The MembershipUser class has IsLockedOut and
IsApproved properties. The IsLockedOut property is read-only. There is no
mechanism to programmatically lock out a user; to unlock a user, use the
MembershipUser class’s UnlockUser method. The IsApproved property is readable
and writeable. To save any changes to this property, we need to call the Membership
class’s UpdateUser method, passing in the modified MembershipUser object.
Because the IsApproved property is readable and writeable, a CheckBox control is
probably the best user interface element for configuring this property. However, a
CheckBox will not work for the IsLockedOut property because an administrator
cannot lock out a user, she may only unlock a user. A suitable user interface for the
IsLockedOut property is a Button that, when clicked, unlocks the user account. This
Button should only be enabled if the user is locked out.
Creating the UserInformation.aspx Page We are now ready to implement the user interface in UserInformation.aspx. Open
this page and add the following Web controls:
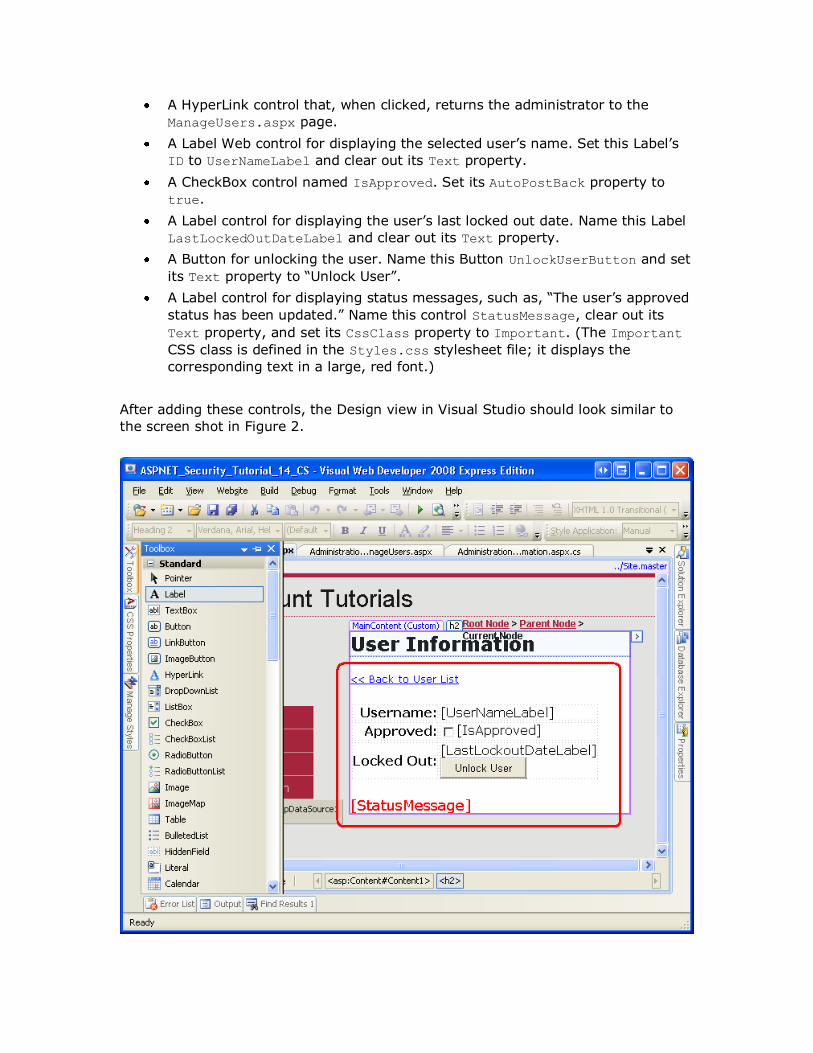
A HyperLink control that, when clicked, returns the administrator to the
ManageUsers.aspx page.
A Label Web control for displaying the selected user’s name. Set this Label’s
ID to UserNameLabel and clear out its Text property.
A CheckBox control named IsApproved. Set its AutoPostBack property to
true.
A Label control for displaying the user’s last locked out date. Name this Label
LastLockedOutDateLabel and clear out its Text property.
A Button for unlocking the user. Name this Button UnlockUserButton and set
its Text property to “Unlock User”.
A Label control for displaying status messages, such as, “The user’s approved
status has been updated.” Name this control StatusMessage, clear out its
Text property, and set its CssClass property to Important. (The Important
CSS class is defined in the Styles.css stylesheet file; it displays the
corresponding text in a large, red font.)
After adding these controls, the Design view in Visual Studio should look similar to
the screen shot in Figure 2.

Figure 2: Create the User Interface for UserInformation.aspx
With the user interface complete, our next task is to set the IsApproved CheckBox
and other controls based on the selected user’s information. Create an event handler
for the page’s Load event and add the following code:
protected void Page_Load(object sender, EventArgs e)
{
if (!Page.IsPostBack)
{
// If querystring value is missing, send the user to
ManageUsers.aspx
string userName = Request.QueryString["user"];
if (string.IsNullOrEmpty(userName))
Response.Redirect("ManageUsers.aspx");
// Get information about this user
MembershipUser usr = Membership.GetUser(userName);
if (usr == null)
Response.Redirect("ManageUsers.aspx");
UserNameLabel.Text = usr.UserName;
IsApproved.Checked = usr.IsApproved;
if (usr.LastLockoutDate.Year < 2000)
LastLockoutDateLabel.Text = string.Empty;
else
LastLockoutDateLabel.Text =
usr.LastLockoutDate.ToShortDateString();
UnlockUserButton.Enabled = usr.IsLockedOut;
}
}
The above code starts by ensuring that this is the first visit to the page and not a
subsequent postback. It then reads the username passed through the user
querystring field and retrieves information about that user account via the
Membership.GetUser(username) method. If no username was supplied through the
querystring, or if the specified user could not be found, the administrator is sent
back to the ManageUsers.aspx page.

The MembershipUser object’s UserName value is then displayed in the
UserNameLabel and the IsApproved CheckBox is checked based on the IsApproved
property value.
The MembershipUser object’s LastLockoutDate property returns a DateTime value
indicating when the user was last locked out. If the user has never been locked out,
the value returned depends on the Membership provider. When a new account is
created, the SqlMembershipProvider sets the aspnet_Membership table’s
LastLockoutDate field to the minimum datetime value SQL allows, 1754-01-01
12:00:00 AM. The above code displays an empty string in the
LastLockoutDateLabel if the LastLockoutDate property occurs before year 2000;
otherwise, the date portion of the LastLockoutDate property is displayed in the
Label. The UnlockUserButton’s Enabled property is set to the user’s locked out
status, meaning that this Button will only be enabled if the user is locked out.
Take a moment to test the UserInformation.aspx page through a browser. You will,
of course, need to start at ManageUsers.aspx and select a user account to manage.
Upon arriving at UserInformation.aspx, note that the IsApproved CheckBox is only
checked if the user is approved. If the user has ever been locked out, their last
locked out date is displayed. The Unlock User button is enabled only if the user is
currently locked out. Checking or unchecking the IsApproved CheckBox or clicking
the Unlock User button causes a postback, but no modifications are made to the user
account because we’ve yet to create event handlers for these events.
Return to Visual Studio and create event handlers for the IsApproved CheckBox’s
CheckedChanged event and the UnlockUser Button’s Click event. In the
CheckedChanged event handler, set the user’s IsApproved property to the Checked
property of the CheckBox and then save the changes via a call to
Membership.UpdateUser. In the Click event handler, simply call the
MembershipUser object’s UnlockUser method. In both event handlers, display a
suitable message in the StatusMessage Label.
protected void IsApproved_CheckedChanged(object sender, EventArgs e)
{
// Toggle the user's approved status
string userName = Request.QueryString["user"];
MembershipUser usr = Membership.GetUser(userName);
usr.IsApproved = IsApproved.Checked;
Membership.UpdateUser(usr);
StatusMessage.Text = "The user's approved status has been
updated.";
}
protected void UnlockUserButton_Click(object sender, EventArgs e)

{
// Unlock the user account
string userName = Request.QueryString["user"];
MembershipUser usr = Membership.GetUser(userName);
usr.UnlockUser();
UnlockUserButton.Enabled = false;
StatusMessage.Text = "The user account has been unlocked.";
}
Testing the UserInformation.aspx Page With these event handlers in place, revisit the page and unapproved a user. As
Figure 3 shows, you should see a brief message on the page indicating that the
user’s IsApproved property was successfully modified.
Figure 3: Chris has been Unapproved
Next, logout and try to login as the user whose account was just unapproved.
Because the user is not approved, they cannot login. By default, the Login control
displays the same message if the user cannot login, regardless of the reason. But in
the Validating User Credentials Against the Membership User Store tutorial we looked
at enhancing the Login control to display a more appropriate message. As Figure 4

shows, Chris is shown a message explaining that he cannot login because his
account is not yet approved.
Figure 4: Chris Cannot Login Because His Account is Unapproved
To test the locked out functionality, attempt to login as an approved user, but use an
incorrect password. Repeat this process the necessary number of times until the
user’s account has been locked out. The Login control was also updated to show a
custom message if attempting to login from a locked out account. You know that an
account has been locked out once you start seeing the following message at the login
page: “Your account has been locked out because of too many invalid login attempts.
Please contact the administrator to have your account unlocked.”
Return to the ManageUsers.aspx page and click the Manage link for the locked out
user. As Figure 5 shows, you should see a value in the LastLockedOutDateLabel the
Unlock User button should be enabled. Click the Unlock User button to unlock the
user account. Once you have unlocked the user, they will be able to login again.

Figure 5: Dave Has Been Locked Out of the System
Step 2: Specifying New Users’ Approved Status The approved status is useful in scenarios where you want some action to be
performed before a new user is able to login and access the user-specific features of
the site. For example, you may be running a private website where all pages, except
for the login and signup pages, are accessible only to authenticated users. But what
happens if a stranger reaches your website, finds the signup page, and creates an
account? To prevent this from happening you could move the signup page to an
Administration folder, and require that an administrator manually create each
account. Alternatively, you could allow anyone to signup, but prohibit site access
until an administrator approves the user account.
By default, the CreateUserWizard control approves new accounts. You can configure
this behavior using the control’s DisableCreatedUser property. Set this property to
true to not approve new user accounts.
Note: By default the CreateUserWizard control automatically logs on the new
user account. This behavior is dictated by the control’s LoginCreatedUser
property. Because unapproved users cannot login to the site, when

DisableCreatedUser is true the new user account is not logged into the site,
regardless of the value of the LoginCreatedUser property.
If you are programmatically creating new user accounts via the
Membership.CreateUser method, to create an unapproved user account use one of
the overloads that accept the new user’s IsApproved property value as an input
parameter.
Step 3: Approving Users By Verifying their Email Address Many websites that support user accounts do not approve new users until they verify
the email address they supplied when registering. This verification process is
commonly used to thwart bots, spammers, and other ne’er-do-wells as it requires a
unique, verified email address and adds an extra step in the signup process. With
this model, when a new user signs up they are sent an email message that includes
a link to a verification page. By visiting the link the user has proven that they
received the email and, therefore, that the email address provided is valid. The
verification page is responsible for approving the user. This may happen
automatically, thereby approving any user who reaches this page, or only after the
user provides some additional information, such as a CAPTCHA.
To accommodate this workflow, we need to first update the account creation page so
that new users are unapproved. Open the EnhancedCreateUserWizard.aspx page in
the Membership folder and set the CreateUserWizard control’s DisableCreatedUser
property to true.
Next, we need to configure the CreateUserWizard control to send an email to the
new user with instructions on how to verify their account. In particular, we will
include a link in the email to the Verification.aspx page (which we’ve yet to
create), passing in the new user’s UserId through the querystring. The
Verification.aspx page will lookup the specified user and mark them approved.
Sending a Verification Email to New Users To send an email from the CreateUserWizard control, configure its MailDefinition
property appropriately. As discussed in the previous tutorial, the ChangePassword
and PasswordRecovery controls include a MailDefinition property that works in the
same manner as the CreateUserWizard control’s.
Note: To use the MailDefinition property you need to specify mail delivery
options in Web.config. For more information, refer to Sending Email in
ASP.NET.
Start by creating a new email template named CreateUserWizard.txt in the
EmailTemplates folder. Use the following text for the template:
Hello <%UserName%>! Welcome aboard.
Your new account is almost ready, but before you can login you must
first visit:
<%VerificationUrl%>
Once you have visited the verification URL you will be redirected to
the login page.
If you have any problems or questions, please reply to this email.
Thanks!
Set the MailDefinition’s BodyFileName property to
“~/EmailTemplates/CreateUserWizard.txt” and its Subject property to “Welcome to
My Website! Please activate your account.”
Note that the CreateUserWizard.txt email template includes a
<%VerificationUrl%> placeholder. This is where the URL for the
Verification.aspx page will be placed. The CreateUserWizard automatically
replaces the <%UserName%> and <%Password%> placeholders with the new account’s
username and password, but there is no built-in <%VerificationUrl%> placeholder.
We need to manually replace it with the appropriate verification URL.
To accomplish this, create an event handler for the CreateUserWizard’s SendingMail
event and add the following code:
protected void NewUserWizard_SendingMail(object sender,
MailMessageEventArgs e)
{
// Get the UserId of the just-added user
MembershipUser newUser =
Membership.GetUser(NewUserWizard.UserName);
Guid newUserId = (Guid)newUser.ProviderUserKey;
// Determine the full verification URL (i.e.,
http://yoursite.com/Verification.aspx?ID=...)
string urlBase = Request.Url.GetLeftPart(UriPartial.Authority) +
Request.ApplicationPath;
string verifyUrl = "/Verification.aspx?ID=" + newUserId.ToString();
string fullUrl = urlBase + verifyUrl;
// Replace <%VerificationUrl%> with the appropriate URL and
querystring
e.Message.Body = e.Message.Body.Replace("<%VerificationUrl%>",
fullUrl);
}
The SendingMail event fires after the CreatedUser event, meaning that by the time
the above event handler executes the new user account has already been created.
We can access the new user’s UserId value by calling the Membership.GetUser
method, passing in the UserName entered into the CreateUserWizard control. Next,
the verification URL is formed. The statement
Request.Url.GetLeftPart(UriPartial.Authority) returns the
http://yourserver.com portion of the URL; Request.ApplicationPath returns
path where the application is rooted. The verification URL is then defined as
Verification.aspx?ID=userId. These two strings are then concatenated to form
the complete URL. Finally, the email message body (e.Message.Body) has all
occurrences of <%VerificationUrl%> replaced with the full URL.
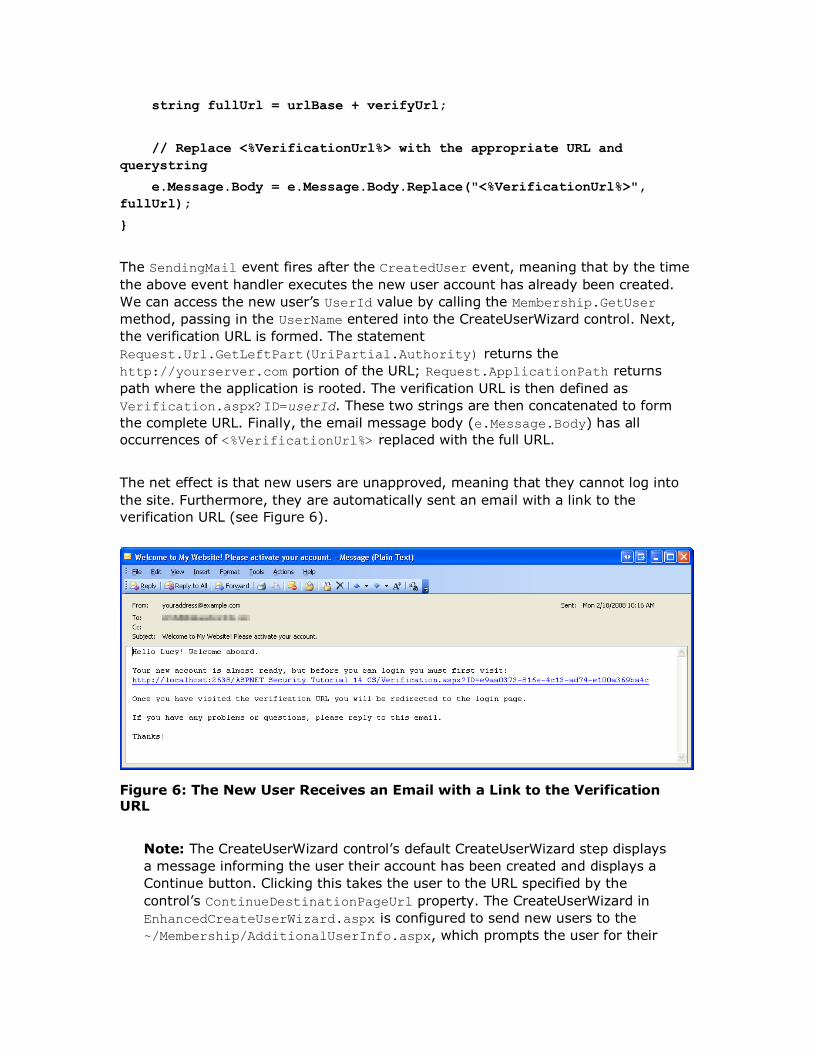
The net effect is that new users are unapproved, meaning that they cannot log into
the site. Furthermore, they are automatically sent an email with a link to the
verification URL (see Figure 6).
Figure 6: The New User Receives an Email with a Link to the Verification URL
Note: The CreateUserWizard control’s default CreateUserWizard step displays
a message informing the user their account has been created and displays a
Continue button. Clicking this takes the user to the URL specified by the
control’s ContinueDestinationPageUrl property. The CreateUserWizard in
EnhancedCreateUserWizard.aspx is configured to send new users to the
~/Membership/AdditionalUserInfo.aspx, which prompts the user for their

hometown, homepage URL, and signature. Because this information can only
be added by logged on users, it makes sense to update this property to send
users back to the site’s homepage (~/Default.aspx). Moreover, the
EnhancedCreateUserWizard.aspx page or the CreateUserWizard step should
be augmented to inform the user that they have been sent a verification
email and their account won’t be activated until they follow the instructions in
this email. I leave these modifications as an exercise for the reader.
Creating the Verification Page Our final task is to create the Verification.aspx page. Add this page to the root
folder, associating it with the Site.master master page. As we’ve done with most of
the previous content pages added to the site, remove the Content control that
references the LoginContent ContentPlaceHolder so that the content page uses the
master page’s default content.
Add a Label Web control to the Verification.aspx page, set its ID to
StatusMessage and clear out its text property. Next, create the Page_Load event
handler and add the following code:
protected void Page_Load(object sender, EventArgs e)
{
if (string.IsNullOrEmpty(Request.QueryString["ID"]))
StatusMessage.Text = "The UserId was not included in the
querystring...";
else
{
Guid userId;
try
{
userId = new Guid(Request.QueryString["ID"]);
}
catch
{
StatusMessage.Text = "The UserId passed into the
querystring is not in the proper format...";
return;
}
MembershipUser usr = Membership.GetUser(userId);
if (usr == null)
StatusMessage.Text = "User account could not be found...";

else
{
// Approve the user
usr.IsApproved = true;
Membership.UpdateUser(usr);
StatusMessage.Text = "Your account has been approved.
Please <a href=\"Login.aspx\">login</a> to the site.";
}
}
}
The bulk of the above code verifies that the UserId supplied through the querystring
exists, that it is a valid Guid value, and that it references an existing user account. If
all of these checks pass, the user account is approved; otherwise, a suitable status
message is displayed.
Figure 7 shows the Verification.aspx page when visited through a browser.
Figure 7: The New User’s Account is Now Approved
Summary All Membership user accounts have two statuses that determine whether the user
can log into the site: IsLockedOut and IsApproved. Both of these properties must
be true for the user to login.
The user’s locked out status is used as a security measure to reduce the likelihood of
a hacker breaking into a site through brute force methods. Specifically, a user is
locked out if there are a certain number of invalid login attempts within a certain
window of time. These bounds are configurable through the Membership provider
settings in Web.config.
The approved status is commonly used as a means to prohibit new users from
logging in until some action has transpired. Perhaps the site requires that new
accounts first be approved by the administrator or, as we saw in Step 3, by verifying
their email address.
Happy Programming!
About the Author Scott Mitchell, author of multiple ASP/ASP.NET books and founder of
4GuysFromRolla.com, has been working with Microsoft Web technologies since 1998.
Scott works as an independent consultant, trainer, and writer. His latest book is
Sams Teach Yourself ASP.NET 2.0 in 24 Hours. Scott can be reached at
[email protected] or via his blog at http://ScottOnWriting.NET.
Special Thanks To… This tutorial series was reviewed by many helpful reviewers. Interested in reviewing my upcoming MSDN articles? If so, drop me a line at [email protected]