automotive
TRANSCRIPT

6. Adjustable Wrench
- Has moveable jaw that you adjust to fit nuts and bolt heads of various sizes.

Tighten the jaws against the flats of the nuts or bolt before applying a
turning force. Adjustable wrenches are normally used only when
applying relatively light torque. They are not always as strong as fixed jaw wrenches and may be damaged if excessive torque is
apply.

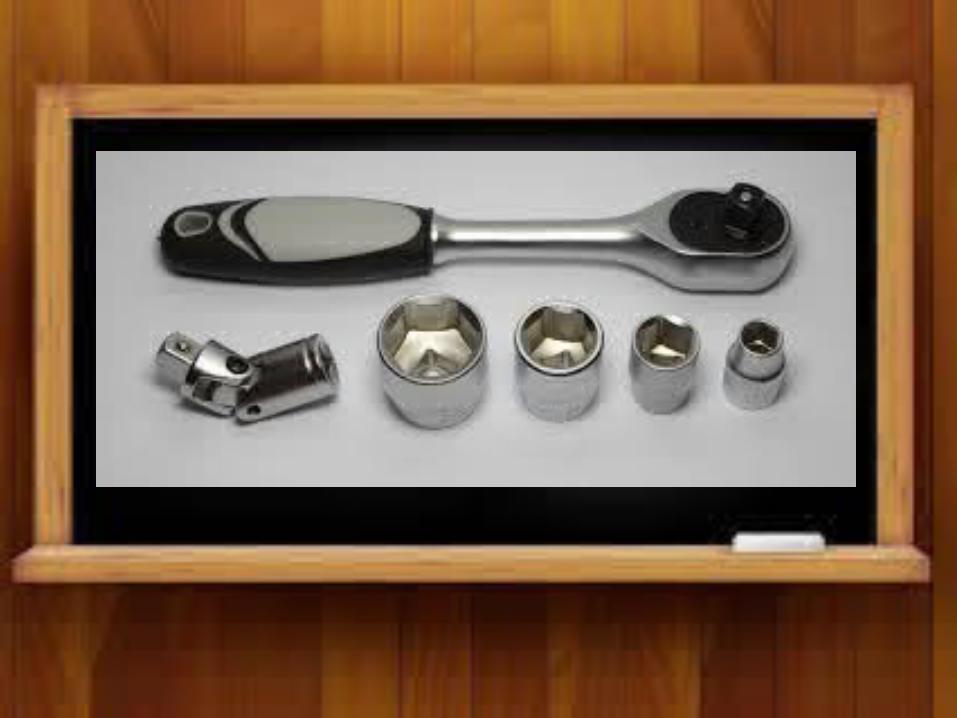
7. Socket Wrench
- Most widely used tools in the shop. They are like box wrenches except that the head of socket head or socket is detachable from the
handle.

Sockets1. 12 point socket – allows you to
turn a bolt or nut in tight spots
2. 6 point socket – if a bolt head or nut has rounded corners or
excessive resistance to turning.
3. 8 point socket – for turning square heads.
4. Deep socket – reach nuts on bolts or studs that are too long for the
standard socket to reach.
5. Spark-plug socket – 6 point deep socket with a rubber insert.
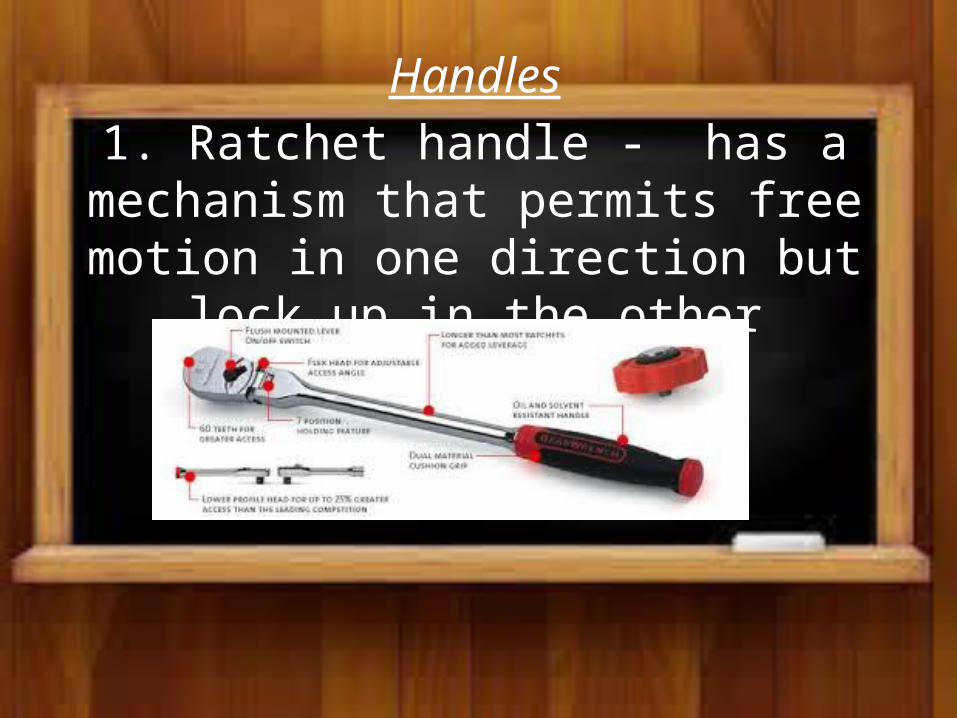
Handles
1. Ratchet handle - has a mechanism that permits free motion in one direction
but lock up in the other
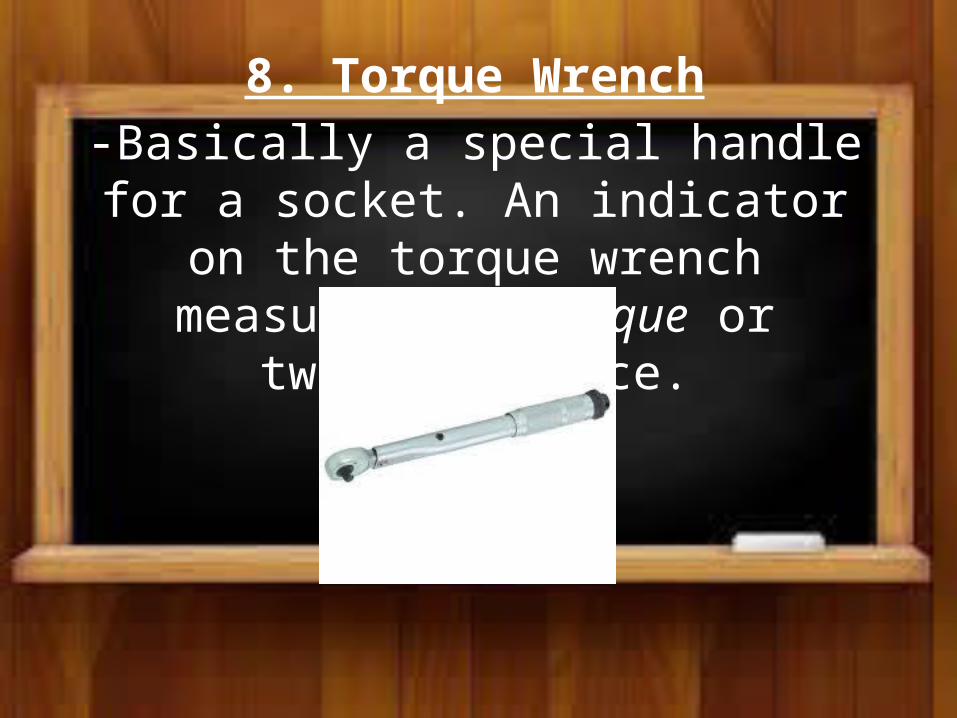
8. Torque Wrench-Basically a special handle for a socket.
An indicator on the torque wrench measures the torque or twisting force.
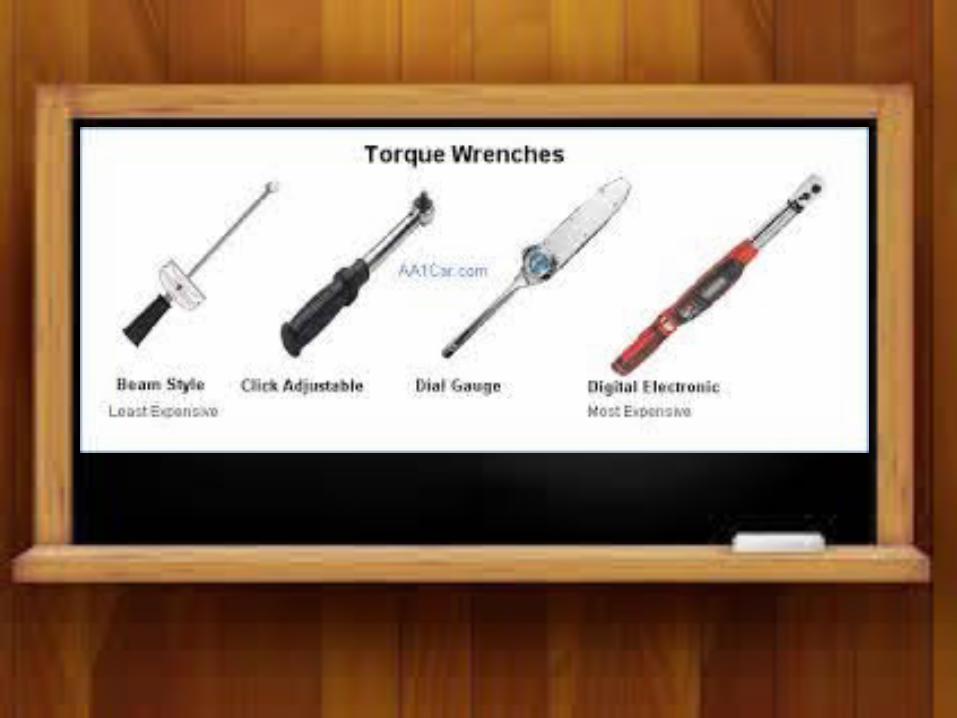

9. Torque-angle Gauge
A. Torque-to-yield bolts – an initial torque with a torque wrench
B. Torque-angle gauge – accurately measures the turning angle in
degrees.

Removing Frozen Nuts and Bolts
Sometimes a nut or bolt is frozen. It will not break loose with normal turning force. Try
applying penetrating oil around the threads. Give the penetrating
oil time to soak in.

Then try loosening the fastener again. Tapping lightly
on the nut or bolt with a hammer may help. Use a chisel or a nut cracker or
splitter to split off a frozen nut

PLIERS-Are hand tools with a pair of adjustable
pivoted jaws for cutting or gripping.
Removing Broken Bolts and Studs
When a threaded fastener breaks, approach the problem logically. You
must remove the broken part. Be patient, and be careful not to create
an even bigger problem.

Removal methods to try depend on where to break occurred on the fastener.
1. BREAK ABOVE SURFACES.
When the break is above the surface, you may be able to file flats on two sides.
Then use a wrench to back out the broken part. Sometimes you can cut a slot in the bolt. Then remove it with a screwdriver. Another way is to attach
locking pliers to the threads. Then turn the bolt out.

2. BREAK CLOSE TO SURFACE
If the break is close to the surface, try removing the bolt with a center punch. Place the point of the punch on the bolt, but off center. Then tap
the punch lightly with a hammer. By moving he punch and tapping it, the
bolt may back out.
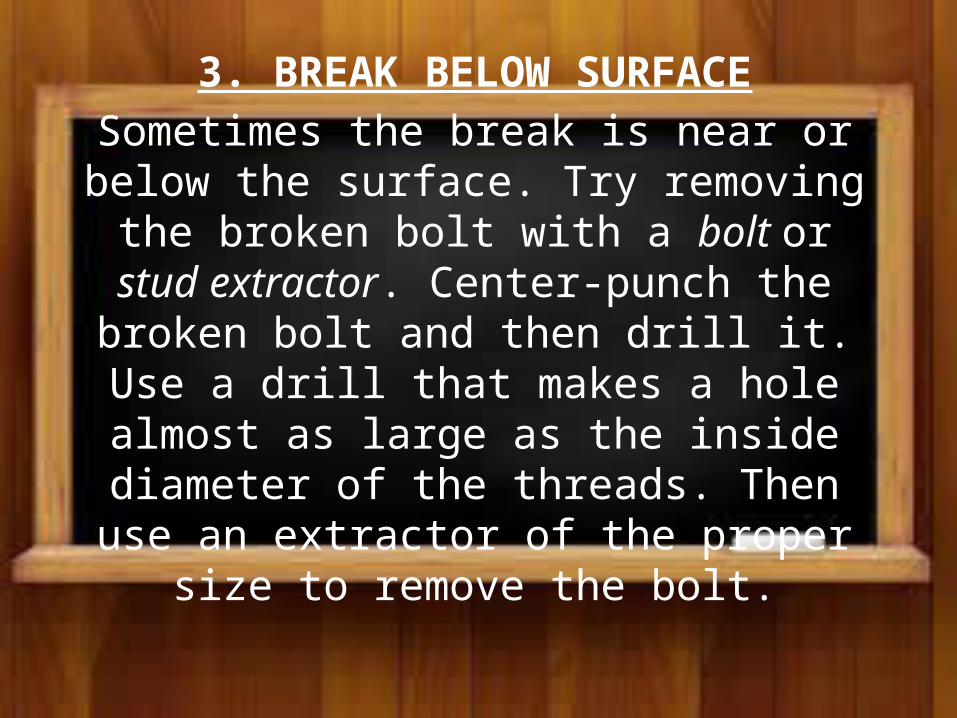
3. BREAK BELOW SURFACE
Sometimes the break is near or below the surface. Try removing the broken
bolt with a bolt or stud extractor. Center-punch the broken bolt and then
drill it. Use a drill that makes a hole almost as large as the inside diameter of the threads. Then use an extractor of the
proper size to remove the bolt.

Pullers -Remove parts assembled with an
interference fit.
Three Basic Types of Pullers
1. Pressure screw
2. Slide hammer
3. Combination

CUTTING TOOLS-Remove metal
1. Chisels
2. Hacksaw
3. Files
4. Punches
5. Drills
6. Taps and Dies
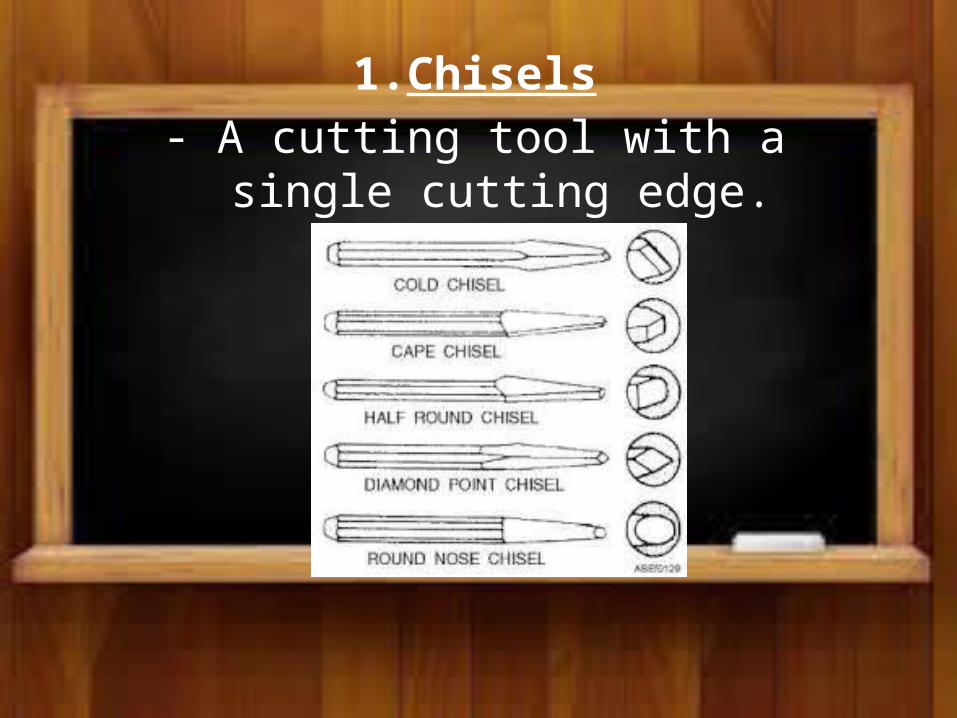
1. Chisels- A cutting tool with a single cutting
edge.

2. Hacksaw
- Is basically an adjustable metal frame that holds a steel saw blade. The blade is replaceable and has from 14-32 teeth
per inch.

3. Files
- Used for cutting and shaping metal.
a. Rough or course-cut file – when the cuts are far apart
b. Smooth or dead-smooth file – when the cuts are close together

c. Single cut File – has a series of sharp blades
d. Double cut file – has a second series cut at an angle to the first

4. Punches - Used to knock out rivets and pins.
- Align parts for assembly

5. Twist Drills - Tools for making holes

6. Taps and Dies
a. Taps – cut inside threads
b. Dies – cuts outside threads on rods
c. Diestock – holds the die
d. Chamfer or bevel – the rod end so the die starts easily.
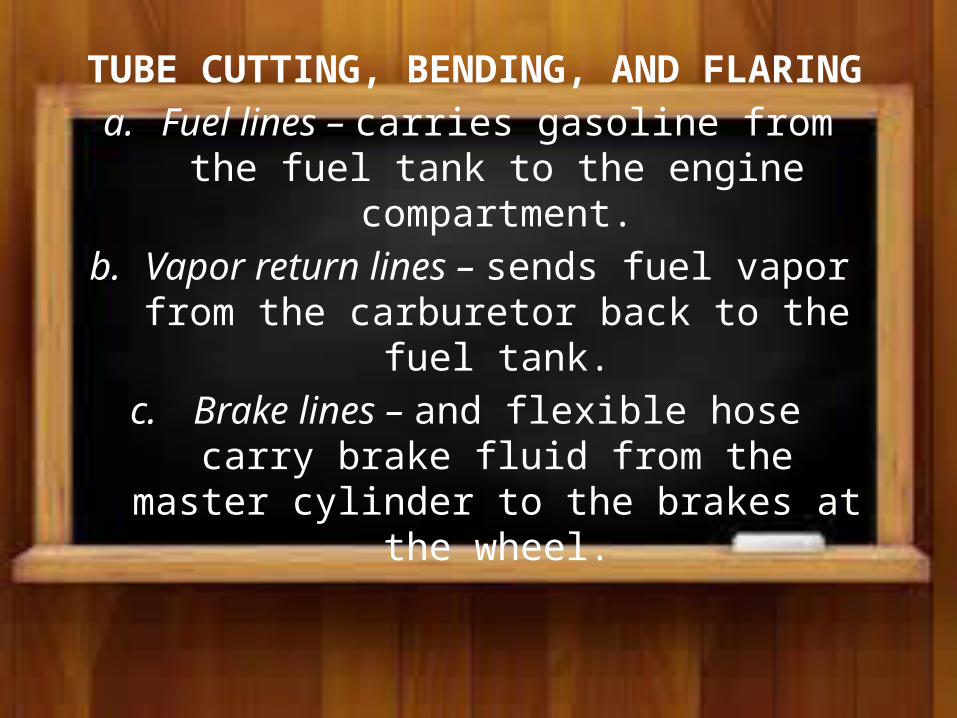
TUBE CUTTING, BENDING, AND FLARING
a. Fuel lines – carries gasoline from the fuel tank to the engine compartment.
b. Vapor return lines – sends fuel vapor from the carburetor back to the fuel
tank.
c. Brake lines – and flexible hose carry brake fluid from the master cylinder to
the brakes at the wheel.

POWER TOOLS- Tools powered by electricity,
compressed air, or hydraulic pressure
SHOP EQUIPMENT
- The shop furnishes some equipment the technician uses in diagnosis and repair.
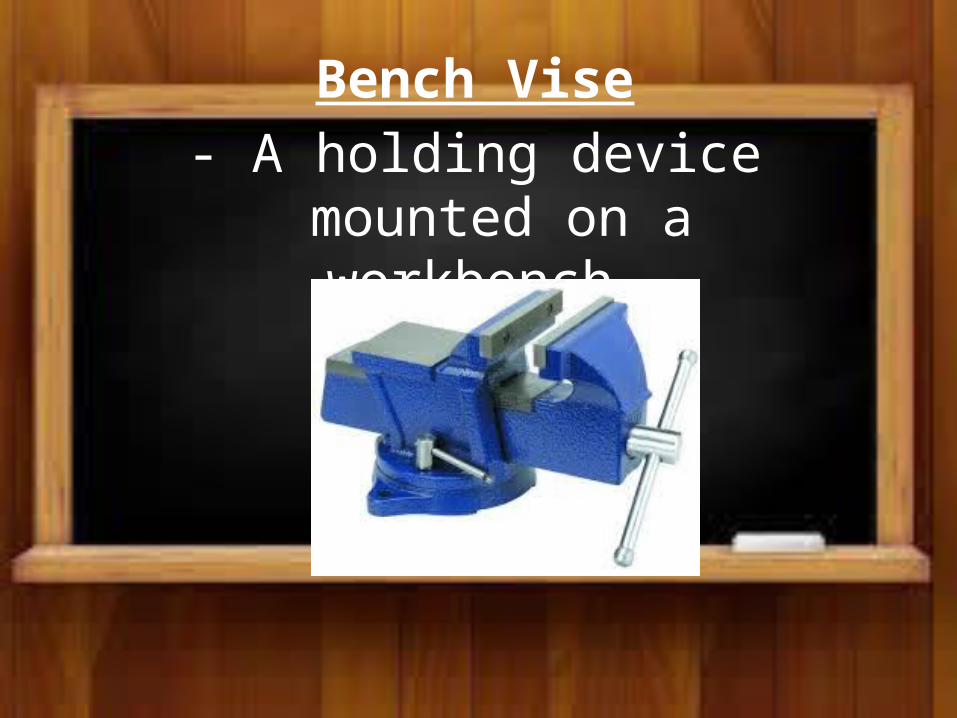
Bench Vise
- A holding device mounted on a workbench.

TYPES OF POWER TOOLS
1. Electric tools – have electric motors
2. Pneumatic tools – operate by air
3. Hydraulic tools – work because of pressure on a liquid
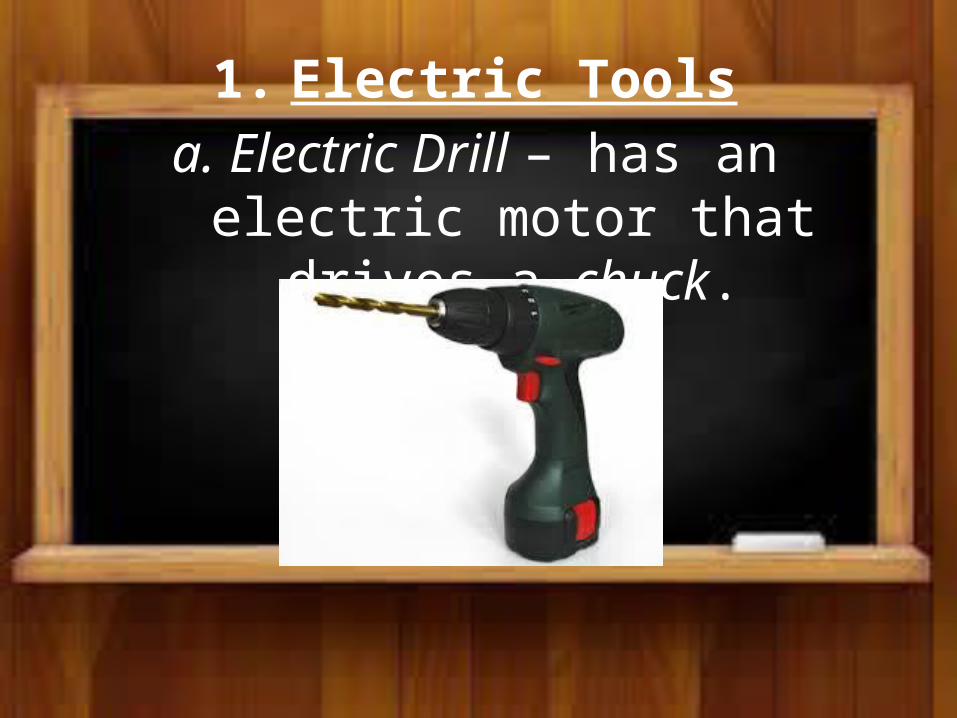
1. Electric Tools
a. Electric Drill – has an electric motor that drives a chuck.

CAUTIONS
1. Drill must be properly grounded through the third blade or ground
terminal in the plug.
2. Do not drag the drill by its cord
3. Keep your hands and clothes away from the rotating chuck
and drill bit

4. Keep a firm grip on the drill
5. If the bit jams, do not try to break it free by turning the
drill on and off
6. When you finish with the drill, disconnect it.

b. Drill Press
- Vertical drilling machine powered by an electric motor

c. Grinding Wheel- Mounts on a bench or pedestal- Use to sharpen a chisel.

CAUTIONS1. Do not hammer on the grinding
wheel or apply excessive force against it.
2. Do not grind on the side of the wheel.

3. Do not adjust the tool rest while the grinder is running.
4. Watch for sparks.
5. Do not touch the rotating wheel
6. Adjust the light to see clearly what you are doing.

7. When grinding a tool, do not overheat it
8. Always wear eye protection even if the has an eye shield.
9. Always make sure the safety guards and shields are in place
and correctly adjusted.

d. Soldering Gun- A semi-permanent metal joining
process.
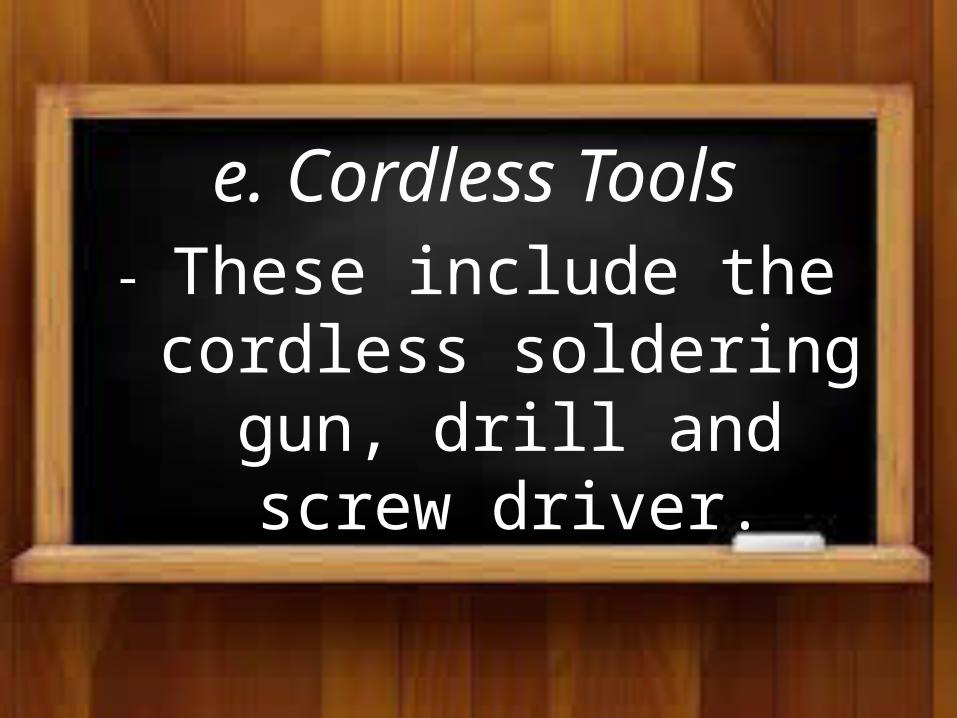
e. Cordless Tools- These include the
cordless soldering gun, drill and screw driver.

2. Pneumatic Toolsa. Air Compressor and Air-Supply
System• Air compressor – produces
compressed air• Air supply system – distributes the
compressed air throughout the shop

b. Air tools – give either rotary or
reciprocating motion.

CAUTONS ON OPERATING AIR TOOLS
1. Air nozzles or blowguns should have a diffuser.
2. Never use the blowgun to blow dust off your clothes
and never point it at anyone.

3. Never look into the air outlet of a pneumonic tool.
4. Never operate an air hammer without a bit
installed.
5. Never blow-clean brake or clutch parts.

c. Air Hammer
- Produces a reciprocating motion to drive a
hammering or cutting tool
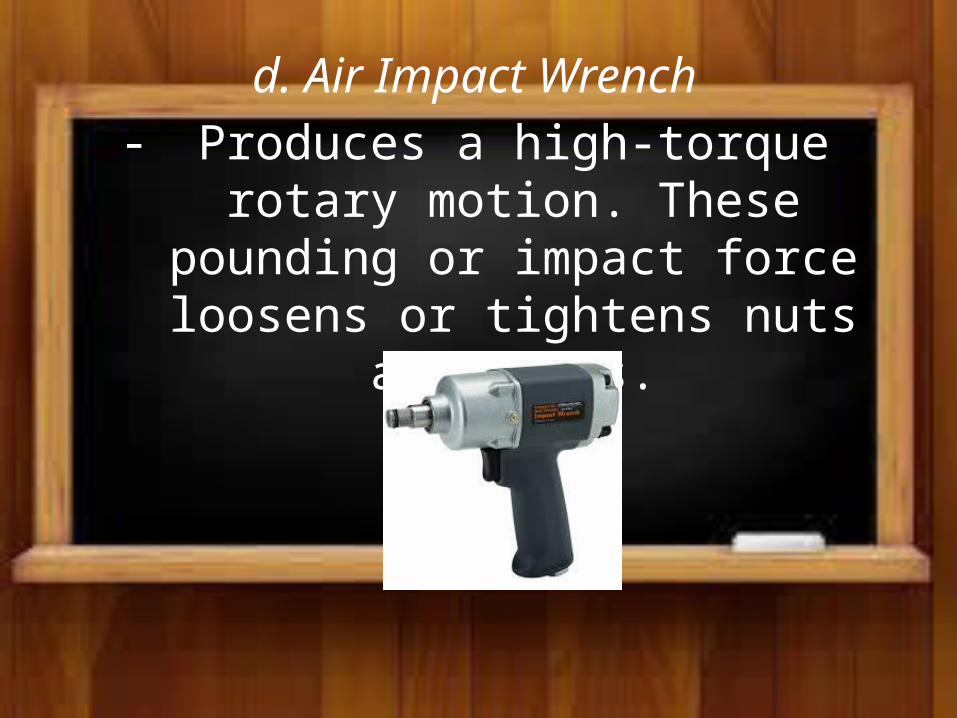
d. Air Impact Wrench- Produces a high-torque rotary
motion. These pounding or impact force loosens or tightens nuts and
bolts.

CAUTIONS1. Always use impact sockets of
the correct size. Hand tool sockets will “pound out” and
may break.
2. Hold the impact wrench so the socket fits squarely to the nut or
bolt.

3. Once a nut or bolt tightens, never impact it beyond to additional
one-half turn.
4. Use a torque wrench or torque-angle gauge for final tightening.
5. Soak rusty nuts or bolts with penetrating oil before impacting
them.

e. Air Drill- Has an air motor. These makes the
tool lighter than an electric drill.

f. Air Ratchet- Similar to hand-tool ratchets, but
operate faster. Apply less force than an impact wrench.

CARE OF AIR TOOLS• Never drag around air tool by its
hose.• Never drop an air tool on the
floor or otherwise abuse a tool. • When not in use, disconnect the
air tool from the air hose.

• Put the tool away in its storage place.
• Lubricate the air tool everyday before using it.
• Apply three or four squirts of air tool into the nipple closest to the
tool.

• Then connect the air hose to the nipple and operate
the tool. This lubricates the internal parts. It also flushes out dirt and
moisture.

3. Hydraulic Tools
a. Hydraulic jacks – one type is the portable floor jack.

Parts CleanersParts cleaning is so important that
many technicians will not let anyone else clean the parts they are working on. It is during the
cleaning process that clues to the cause of the trouble often show
up

Solvent TankRemove old gasket and thick deposits on
parts with a putty knife, scraper and wire brush.
The final cleaning by washing and degreasing the part in the solvent tank.

Spray Washers
Engine blocks and transmission
cases are too large to clean in a
solvent tank. These and other large
parts may be cleaned in a spray
washer