autopsy: forensic dissection with carolina’s...
TRANSCRIPT

Carolina Biological Supply Company
AUTOPSY: Forensic Dissection with Carolina’s Perfect Solution®
Pigs

Carolina™ Forensic Dissection Kit
Classroom Kit includes:• 8 Carolina's Perfect Solution® Pigs• Carolina's Perfect Solution® Pig Heart• Carolina's Perfect Solution® Pig Kidney• 7 Prepared Microscope Slides• 40 Large Weigh Boats• 8 Absorbent Pads
• 8 Suture Needles
• 8 Sponges • 8 Hand Lenses• Nylon Line
Classroom KitCatalog no. 221489
Student KitCatalog no. 221488

Why Are We Doing a Pig AUTOPSY?
• Similar to human anatomy
• Organ systems are completely removed and studied
• New and unique dissection protocol

Objectives
• Conduct a fetal pig dissection using the protocol for a human autopsy
• Experience the quality of Carolina’s Perfect Solution® specimens

Safety Issues
• Personal protective equipmentGloves, goggles, and lab aprons
• SharpsScalpels and other sharp instruments should be used sparingly; exploration is better performed with blunt instruments
• Safety tipIf you are not using an instrument, set it down

Modeling a “Real” Autopsy
• Prosector―The forensic pathologist conducting the autopsy
• Diener―The morgue assistant
• Materials manager―Responsible for instruments and supplies
• Recorder―Records all info for autopsy report
ForensicPig
Dissection

Getting Started
Participants work in groups of 2
Prepare for dissection

Dissection Preparation Tips
• Organize your dissection area
• Wear apron, gloves, and safety glasses
• Place absorbent pad under the dissecting pan (white side up)
• Lay out your instruments so they are easy to access
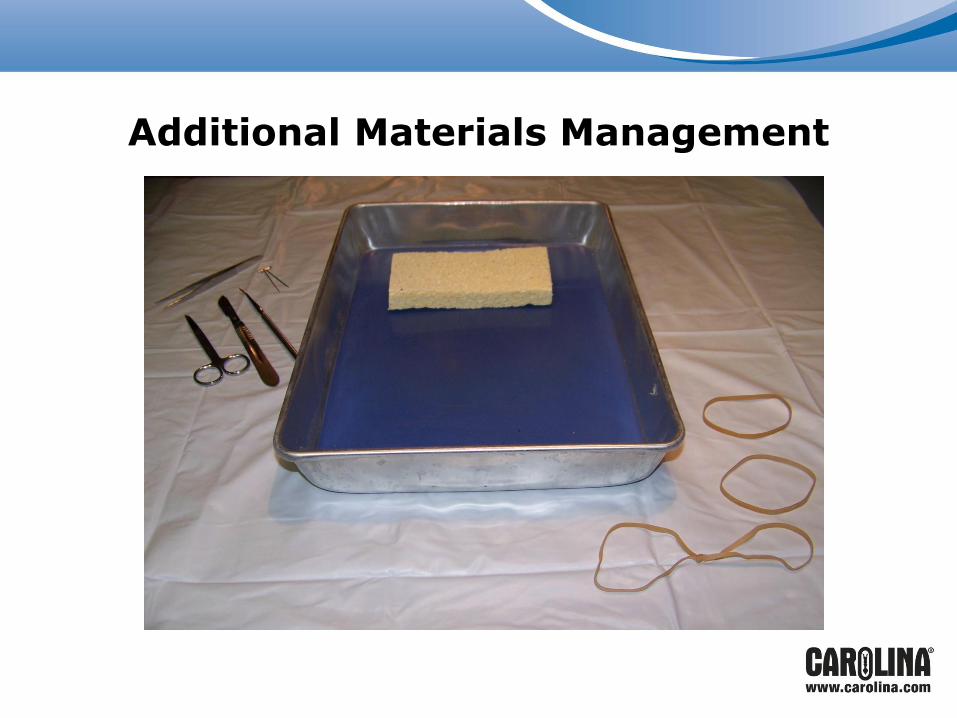
Additional Materials Management

Prepare Rubber Bands

Remove Specimen from Bag and Place on Tray
Twist one side of rubber band around one leg. Wrap band around back of tray and twist around the other leg.
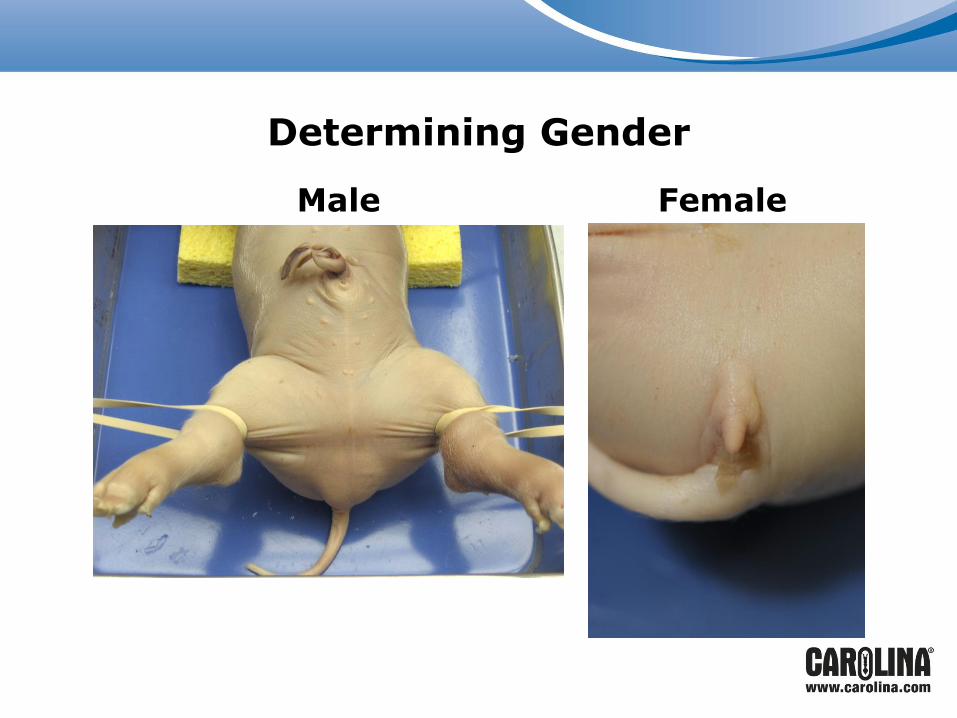
Determining Gender
Male Female

Determining Gender
Umbilical cord
Teats
Urogenital opening
Scrotum
Genital papilla
Anus

External Anatomy
Examine external features beginning with the HEAD. Pay careful attention to:
• Amount and color of hair
• Unique markings
• Mouth
• Nostrils
• Tongue
• Ears
• Eyes

Autopsy Report
Location Observations
Head
Dorsal Side
Ventral Side
Appendages
Posterior
(including
genitalia)

Prepare for Internal Anatomy

Making the First Incision
Feel for the space between the top of the shoulder and the corner of the jaw. This will assist you in making the initial incision.

Classic Y Incision for Internal Anatomy

Y-Shaped Incision
• Continue cutting the tail of the Y incision until you reach the umbilical cord
• Use appropriate cut for male or female pig
• Cut the skin, muscle, and connective tissues of the chest wall (exposing the sternum and rib cage)

Lift the V-shaped flap and pull it gently upwards. Use the tip of the scalpel as shown to assist in lifting the flap.

Thymus gland tissue: Tease away to expose the thyroid gland below, lying between these 2 masses.
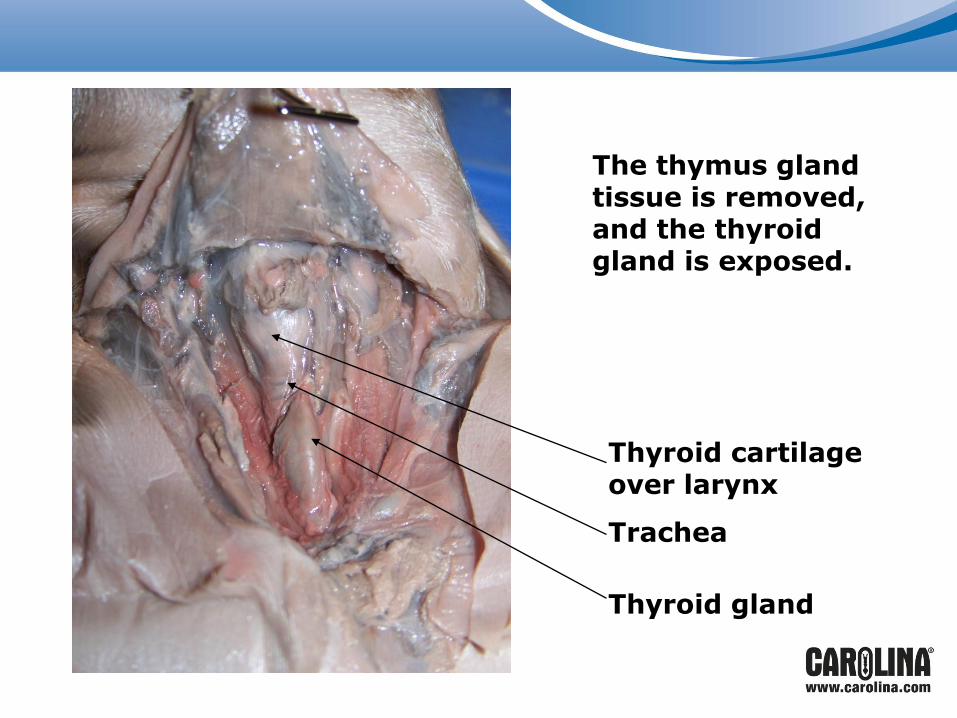
. The thymus gland tissue is removed, and the thyroid gland is exposed.
Thyroid gland
Thyroid cartilage over larynx
Trachea

Remove thymus and thyroid tissue. Measure the length and mass and record them on your data table.

Peel skin and tissue away from midline incision. Use the scalpel or scissors to help clear away the fascia. Make a lateral incision on both sides of the body at the bottom of the rib cage.

Umbilical vein exposed

Make low lateral incisions to expose the abdominal cavity.

Cut up each side of the rib cage to remove the chest plate. Stay low in the chest cavity.


The diaphragm may still be attached at the bottom of the rib cage after cutting up both sides of the rib cage. Cut the diaphragm away now so the chest plate can be lifted.
Diaphragm

The diaphragm is cut away.

Cut away the remaining connections of tissue and bone. Lift the chest plate off.

Before removing the organ block, have students look for and examine the pancreas. Gently lift the stomach
and look for the gland tissue in the crease between the bottom
of the stomach and the top of the intestines.

Stomach, lifted
Pancreas

To begin removal of the organ block, make the initial incision at the top of the trachea, just below the larynx.

Lift from trachea and pull gently downward. Make sure you have included the esophagus lying posterior to the trachea. Use the tip of the scalpel to help remove the connective tissue that holds the organ block to the back of the body.

After beginning the initial removal of the organ block, go to the
lowest point of the large intestine and make an incision. Proceed with removal
of the organ block from the bottom by pulling gently upward.

Make incision here

As you pull upward, note the kidneys in the posterior
of the abdominal cavity. These can be removed later.

Kidneys


Organ Block Removed
• Begin to remove organs individually.
• Measure the length and mass of each organ.
• Record on data table.
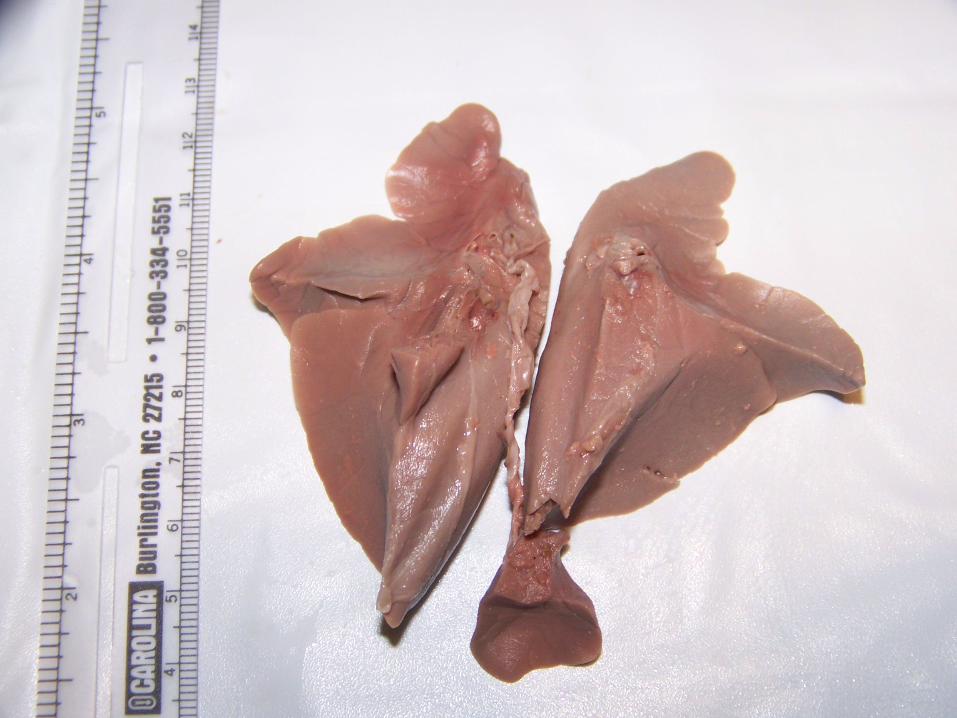


Note: Gallbladder is embedded in the lobe of liver on the underside. Lift gently to expose common bile duct.

Internal Anatomy
• Respiratory system
• Endocrine system
• Circulatory system
• Digestive system
• Urogenital system
• Fetal pig heart vs adult pig heart
• Fetal pig kidney vs adult pig kidney
• Central nervous system (brain, spinal cord)
• Prepared microscope slides

The Final Steps
Return all of the organs to the body cavity and suture the incisions.

Time to Clean Up . . .
• Carolina’s Perfect Solution® specimens- Return to white bucket or take home for
further study- All other waste in the trash bags
• Dissecting pans and instruments- Clean or take as gift
• Safety glasses and aprons- Gift from Carolina
• Evaluation forms/info cards- Complete, return to presenter

We Can Meet Your Dissection Needs
Top-quality specimens and supplies

Additional Resources from Carolina
Carolina™ BioLab® Virtual Lab Series
Guide students through an interactive virtual dissection, teaching internal and external features

Carolina Free Resources
Carolina offers many free resources
to help support teachers.

• To be eligible, you MUST wear your “Perfect” T-shirt to the Carolina booth.
• Present your completed entry form to a staff member from PRESERVED MATERIALS.
• One winner will be chosen after the show. (You need not be present to win.)
Wear Your Tee and Enter to Win a FREE Kit of YOUR Choice!

Evaluations: Share Your Thoughts!
Scale = 1 to 10
10 = Outstanding
9 = Above Average
8, 7 = Average
6, 5, 4 = Below Average
3, 2, 1 = Well Below Average
Please provide comments!

Carolina Biological Supply Company
Thank you for investing your time
in our training program.
For all of your classroom needs,
Visit our Web site at www.carolina.com.
Enjoy the rest of the conference!