avamar virtual edition 7.3 for - dell emc · emc avamar virtual edition 7.3 for vmware installation...
TRANSCRIPT

EMC® Avamar® Virtual Edition 7.3 forVMware
Installation Guide302-002-843
REV 03

Copyright © 2001-2017 EMC Corporation All rights reserved.
Published August 2017
Dell believes the information in this publication is accurate as of its publication date. The information is subject to change without notice.
THE INFORMATION IN THIS PUBLICATION IS PROVIDED “AS-IS.“ DELL MAKES NO REPRESENTATIONS OR WARRANTIES OF ANY KIND
WITH RESPECT TO THE INFORMATION IN THIS PUBLICATION, AND SPECIFICALLY DISCLAIMS IMPLIED WARRANTIES OF
MERCHANTABILITY OR FITNESS FOR A PARTICULAR PURPOSE. USE, COPYING, AND DISTRIBUTION OF ANY DELL SOFTWARE DESCRIBED
IN THIS PUBLICATION REQUIRES AN APPLICABLE SOFTWARE LICENSE.
Dell, EMC, and other trademarks are trademarks of Dell Inc. or its subsidiaries. Other trademarks may be the property of their respective owners.
Published in the USA.
EMC CorporationHopkinton, Massachusetts 01748-91031-508-435-1000 In North America 1-866-464-7381www.EMC.com
2 EMC Avamar Virtual Edition 7.3 for VMware Installation Guide

5
7
Introduction 11Overview of Avamar Virtual Edition for VMware......................................... 12Appropriate environments for AVE..............................................................12
Installation 15Preinstallation requirements and best practices..........................................16
System requirements..................................................................... 16Verifying the DNS configuration.....................................................16AVE virtual disk requirements.........................................................17Software requirements...................................................................17Network requirements....................................................................17Virtual disk configuration best practices.........................................18Network Time Protocol (NTP) server best practices..................... 18
Upgrade requirements and best practices................................................... 18Installation.................................................................................................. 19
Preparing the virtual machine.........................................................19Configuring network settings.........................................................22Installing and configuring Avamar software................................... 23
Post-installation tasks................................................................................ 24Upgrading Avamar software....................................................................... 26
Tables
Preface
Chapter 1
Chapter 2
CONTENTS
EMC Avamar Virtual Edition 7.3 for VMware Installation Guide 3

CONTENTS
4 EMC Avamar Virtual Edition 7.3 for VMware Installation Guide

Typographical conventions........................................................................................... 8Maximum change rates AVE supports for file server and mixed environments............ 12Minimum requirements for AVE.................................................................................. 16AVE virtual disk requirements......................................................................................17Additional AVE software installation requirements...................................................... 17
12345
TABLES
EMC Avamar Virtual Edition 7.3 for VMware Installation Guide 5

TABLES
6 EMC Avamar Virtual Edition 7.3 for VMware Installation Guide

PREFACE
As part of an effort to improve its product lines, EMC periodically releases revisions ofits software and hardware. Therefore, some functions described in this documentmight not be supported by all versions of the software or hardware currently in use.The product release notes provide the most up-to-date information on productfeatures.
Contact your EMC technical support professional if a product does not functionproperly or does not function as described in this document.
Note
This document was accurate at publication time. Go to EMC Online Support (https://support.emc.com) to ensure that you are using the latest version of this document.
PurposeThis guide describes how to install the Avamar Virtual Edition solution, a single-node,non-RAIN Avamar server that runs as a virtual machine in a VMware ESXi or vSphereServer environment.
AudienceThe information in this guide is primarily intended for system administrators who areresponsible for installing and maintaining Avamar virtual servers.
Revision historyThe following table presents the revision history of this document.
Revision Date Description
01 April 2016 GA release of Avamar 7.3
02 May 2017 Added upgrade information
03 August 2017 Added note that upgrading to7.4 Service Pack 1 isrecommended, rather thanupgrading to 7.3 Service Pack1.
Related documentationThe following EMC publications provide additional information:
l Avamar Release Notes
l Avamar Administration Guide
l Avamar Operational Best Practices Guide
l Avamar Product Security Guide
l Avamar Backup Clients User Guide
EMC Avamar Virtual Edition 7.3 for VMware Installation Guide 7

Special notice conventions used in this documentEMC uses the following conventions to alert the reader to particular information.
NOTICE
The Notice convention emphasizes important information about the current topic.
Note
The Note convention addresses specific information that is related to the currenttopic.
Typographical conventionsIn this document, EMC uses the typographical conventions that are shown in thefollowing table.
Table 1 Typographical conventions
Convention Example Description
Bold typeface Click More Options. Use for names of interfaceelements, such as names ofwindows, dialog boxes,buttons, fields, tab names,key names, and menu paths(what a user specificallyselects or clicks).
Italic typeface EMC Avamar AdministrationGuide
Use for full titles ofpublications that arereferenced in text.
Monospace font Event Type =INFORMATIONEvent Severity = OKEvent Summary = Newgroup created
Use for:
l System code
l System output, such asan error message orscript
l Pathnames, file names,prompts, and syntax
l Commands and options
Monospace font with italictypeface
Type Avamar_server,
where Avamar_server is theDNS name or IP address ofthe Avamar server.
Use for variables.
Monospace font with boldtypeface
Type yes. Use for user input.
Square brackets [--domain=String(/)]--name=String
Square brackets encloseoptional values.
Vertical bar [--domain=String(/)] |--name=String
Vertical bar indicatesalternate selections - the barmeans “or”.
PREFACE
8 EMC Avamar Virtual Edition 7.3 for VMware Installation Guide

Table 1 Typographical conventions (continued)
Convention Example Description
Braces {[--domain=String(/)]| --name=String}
Braces enclose content thatthe user must specify.
Ellipses valid hfs ... Ellipses indicate nonessentialinformation that is omittedfrom the example.
Where to get helpThe Avamar support page provides access to licensing information, productdocumentation, advisories, and downloads, as well as how-to and troubleshootinginformation. This information may enable you to resolve a product issue before youcontact EMC Customer Support.
To access the Avamar support page:
1. Go to https://support.EMC.com/products.
2. Type a product name in the Find a Product box.
3. Select the product from the list that appears.
4. Click the arrow next to the Find a Product box.
5. (Optional) Add the product to the My Products list by clicking Add to myproducts in the upper right corner of the Support by Product page.
Comments and suggestionsComments and suggestions help EMC to continue to improve the accuracy,organization, and overall quality of the user publications. Send comments andsuggestions about this document to [email protected].
Please include the following information:
l Product name and version
l Document name, part number, and revision (for example, 01)
l Page numbers
l Other details to help address documentation issues
PREFACE
EMC Avamar Virtual Edition 7.3 for VMware Installation Guide 9

PREFACE
10 EMC Avamar Virtual Edition 7.3 for VMware Installation Guide

CHAPTER 1
Introduction
This chapter includes the following topics:
l Overview of Avamar Virtual Edition for VMware................................................. 12l Appropriate environments for AVE..................................................................... 12
Introduction 11

Overview of Avamar Virtual Edition for VMwareEMC® Avamar® Virtual Edition (AVE) is a single-node non-RAIN (Redundant Array ofIndependent Nodes) Avamar server that runs as a virtual machine in a VMware® ESXi5.1/5.5/6.0 environment. AVE integrates the latest version of Avamar software withSUSE Linux as a VMware virtual machine.
AVE is similar to single-node Avamar servers in the following ways:
l Runs autonomously as a target for all Avamar client backups
l Performs replication to a physical Avamar system or another AVE
AVE is available in four configurations: 0.5 TB, 1 TB, 2 TB, and 4 TB licensed capacity.AVE is not scalable to a multi-node Avamar server and resizing the virtual machine isnot supported. You can increase storage capacity by deploying additional AVE virtualmachines, and then divide backups among them. Or you can replicate the data toanother Avamar server, delete the smaller virtual machine, create a larger virtualmachine, and replicate the data back to the larger virtual machine.
AVE supports backup of physical and virtual clients:
l For physical clients, install Avamar client software on each client.
l For virtual clients, there are two options for backups. Virtual clients can be backedup through guest OS backups (requires installing Avamar client software on eachvirtual machine) or through host-based backups (requires a proxy server).
Appropriate environments for AVEThe following factors have the most direct impact on the long-term reliability,availability, and supportability of the AVE virtual machine:
l I/O performance capability of the AVE storage subsystem
l Amount of data added daily to the AVE virtual machine (change rate)
l Capacity utilized within the AVE virtual machine
Specifications in this section and AVE virtual disk requirements on page 17 describeminimum or maximum requirements for these factors. AVE generally performs betterwhen I/O performance is higher, and change rate and utilized capacity are lower. Tomaximize the capacity the AVE virtual machine can use, the daily change rate of thedata AVE protects must be balanced with adequate I/O performance.
The first step in determining the proper implementation of AVE is to establish whichkind of customer environment AVE will be used to protect, file server or mixedenvironment. File server environments include file system data and mixedenvironments include file system data and structured data (for example, databasedata).
The following table describes the maximum change rates that AVE supports for fileserver and mixed environments.
Table 2 Maximum change rates AVE supports for file server and mixed environments
Configuration File server data Mixed data
0.5 TB AVE Less than 2 GB per day Less than 5 GB per day
1 TB AVE Less than 4 GB per day Less than 10 GB per day
Introduction
12 EMC Avamar Virtual Edition 7.3 for VMware Installation Guide

Table 2 Maximum change rates AVE supports for file server and mixedenvironments (continued)
Configuration File server data Mixed data
2 TB AVE Less than 8 GB per day Less than 20 GB per day
4 TB AVE Less than 20 GB per day Less than 20 GB per day
Actual results depend on the retention policy and the actual data change rate. Whenthe daily change rate exceeds the limits specified in the previous table, deploy a singleor multi-node Avamar server.
Introduction
Appropriate environments for AVE 13

Introduction
14 EMC Avamar Virtual Edition 7.3 for VMware Installation Guide

CHAPTER 2
Installation
This chapter includes the following topics:
l Preinstallation requirements and best practices................................................. 16l Upgrade requirements and best practices.......................................................... 18l Installation.......................................................................................................... 19l Post-installation tasks........................................................................................24l Upgrading Avamar software...............................................................................26
Installation 15

Preinstallation requirements and best practicesBefore you install an AVE virtual machine, follow the preinstallation requirements andreview the best practices in the following sections.
Note
Using third party tools to create clones or exact copies of deployed Avamar VirtualEdition systems is known to cause issues. Cloning of Avamar Virtual Edition systems isnot supported.
System requirements
Supported versions of the VMware ESXi are available in the EMC AvamarCompatibility and Interoperability Matrix on EMC Online Support at https://support.EMC.com.
The following table defines the minimum system requirements for each size of AVE.
Table 3 Minimum requirements for AVE
0.5 TB AVE 1 TB AVE 2TB AVE 4 TB AVE
Processors Minimum two 2GHz processors
Minimum two 2GHz processors
Minimum two 2GHz processors
Minimum four 2GHz processors
Memory 6 GB 8 GB 16 GB 36 GB
Disk space 900 GB 1,650 GB 3,150 GB 6,150 GB
Networkconnection
1 GbE connection 1 GbE connection 1 GbE connection 1 GbE connection
Verifying the DNS configurationPrior to installing AVE, DNS must be properly configured. Failure to have DNS set upproperly can cause runtime or configuration issues.
Procedure
1. Open a command prompt on the vCenter Server and type the followingcommand:
nslookup AVE_IP_address DNS_Server_IP_address
The nslookup command will return the FQDN for AVE.
2. Type the following command:
nslookup AVE_FQDN DNS_Server_IP_address
The nslookup command will return the IP address for AVE.
3. Type the following command:
nslookup FQDN_of_vCenter DNS_Server_IP_address
The nslookup command returns the IP address of the vCenter Server.
Installation
16 EMC Avamar Virtual Edition 7.3 for VMware Installation Guide

4. If the nslookup commands returned the proper information, close thecommand prompt. If the nslookup commands do not return properinformation, resolve the DNS configuration before you install AVE.
AVE virtual disk requirementsThe AVE disk layout comprises one operating system disk (126 GB) and severalstorage partitions (250 GB or 1000 GB depending on the AVE configuration).
The OS disk stores the operating system, Avamar application and log files.
The storage partitions store the backup data. Backup data is evenly distributed acrossthe storage partitions. The primary amount of the disk read, write, and seek usageoccurs on the storage partitions. To improve performance in the storageconfiguration, distribute storage partitions across high performance LUNs.
In addition to the OS partition, the following table defines the number and size ofvirtual disks required for each AVE configuration.
Table 4 AVE virtual disk requirements
AVE configuration Number of virtual disks
0.5 TB 3 storage partitions (250 GB each)
1 TB 6 storage partitions (250 GB each)
2 TB 3 storage partitions (1000 GB each)
4 TB 6 storage partitions (1000 GB each)
Note
Because the AVE .ova installation creates three 250 GB storage partitions along withthe OS disk, approximately 900 GB of free disk space is required at installation.However, the AVE .ovf installation does not create storage partitions duringinstallation, and therefore only enough disk space for the OS disk is required atinstallation, and subsequent storage partitions can be created on other datastores.
Software requirementsBefore you install AVE, ensure you have the software listed in the following table.
Table 5 Additional AVE software installation requirements
Requirement Description
Applications PuTTY and WinSCP (not required for .ovadeployments)
Files AVE Package (not required for .ovadeployments), operating system securitypatches (if applicable)
Network requirementsBefore you install AVE, gather the following information:
l Hostnames and IP addresses for the AVE virtual machine and the DNS Server
Installation
AVE virtual disk requirements 17

l Gateway, netmask, and domain of the AVE virtual machine
l Firewall openings, if applicable
Note
The Avamar Product Security Guide provides client-server data port usage and firewallrequirements.
Virtual disk configuration best practicesESXi supports multiple disk formats. For AVE virtual machines, the initial configurationis Thick Provision Lazy Zeroed.
Note
AVE does not support thin provisioning.
After the initial installation, if you configure the virtual disks for the Thick ProvisionEager Zeroed, you will get better initial performance because the first write to the diskwill require less operations.
Note
See the VMware documentation for information on converting Lazy zeroed virtualdisks to Eager zeroed virtual disks. Converting a disk from Thick Provisioned LazyZeroed to Thick Provisioned Eager Zeroed is time consuming and can consume asignificant number of storage I/O processes.
A virtual machine running AVE aggressively uses disk I/O and is almost never idle.VMware's recommendations for appropriate resources for high-performance databasevirtual machines are generally applicable to an AVE virtual machine.
Network Time Protocol (NTP) server best practicesWith AVE release 7.3, support for synchronizing the AVE with a Network TimeProtocol (NTP) server has been added. Best practice is to identify at least one NTPserver to synchronize with the AVE host. If no NTP server is identified, the defaultbehavior is to leave the NTP service disabled and to synchronize with the VMwarehost. If one or more NTP server is identified during network configuration,synchronization with the VMware host is disabled and the NTP service is enabled.
During network configuration, you can enter one or more optional NTP servers ineither IPv4 or IPv6 format or in hostname format.
Upgrade requirements and best practicesThe procedures in this document can be used for upgrading Avamar Virtual Editionservers at release level 7.3 and above to newer versions of the AVE. Upgrades of AVEfrom releases prior to 7.3 must be performed by EMC personnel.
Note
We recommend that you upgrade to Avamar 7.4 Service Pack 1, rather than upgradingto Avamar 7.3 Service Pack 1. For further information, see the Avamar UpgradePrerequisites Knowledgebase article: https://support.emc.com/kb/303934.
Installation
18 EMC Avamar Virtual Edition 7.3 for VMware Installation Guide
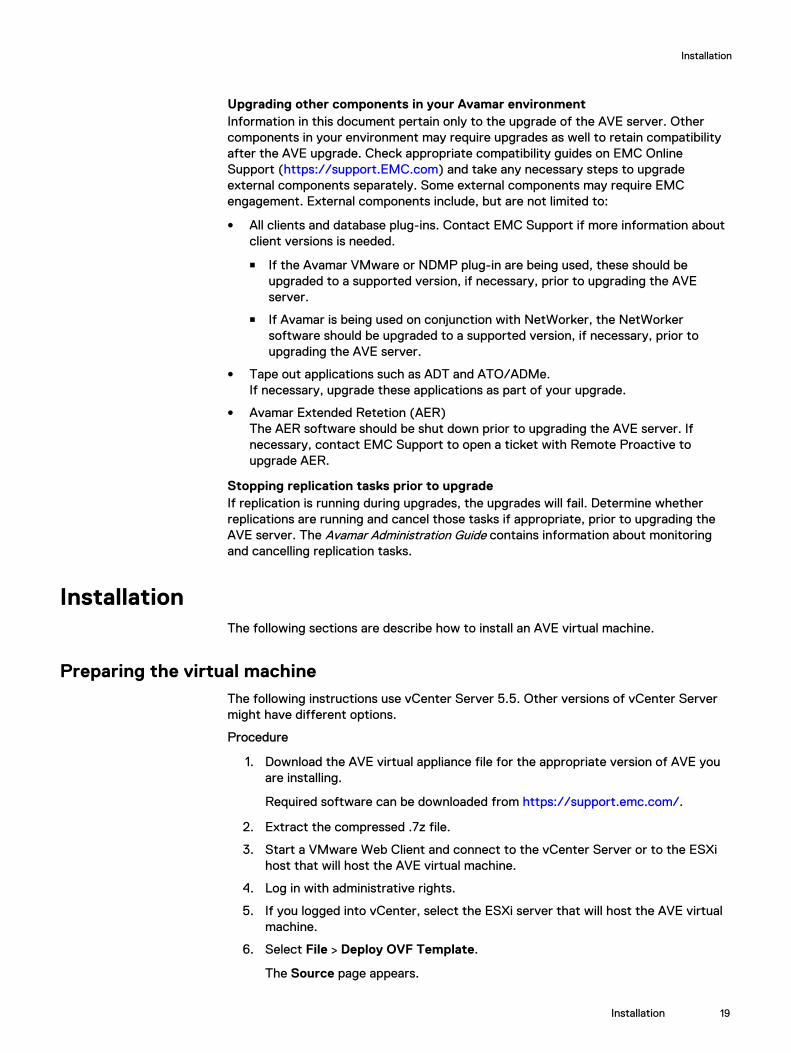
Upgrading other components in your Avamar environmentInformation in this document pertain only to the upgrade of the AVE server. Othercomponents in your environment may require upgrades as well to retain compatibilityafter the AVE upgrade. Check appropriate compatibility guides on EMC OnlineSupport (https://support.EMC.com) and take any necessary steps to upgradeexternal components separately. Some external components may require EMCengagement. External components include, but are not limited to:
l All clients and database plug-ins. Contact EMC Support if more information aboutclient versions is needed.
n If the Avamar VMware or NDMP plug-in are being used, these should beupgraded to a supported version, if necessary, prior to upgrading the AVEserver.
n If Avamar is being used on conjunction with NetWorker, the NetWorkersoftware should be upgraded to a supported version, if necessary, prior toupgrading the AVE server.
l Tape out applications such as ADT and ATO/ADMe.If necessary, upgrade these applications as part of your upgrade.
l Avamar Extended Retetion (AER)The AER software should be shut down prior to upgrading the AVE server. Ifnecessary, contact EMC Support to open a ticket with Remote Proactive toupgrade AER.
Stopping replication tasks prior to upgradeIf replication is running during upgrades, the upgrades will fail. Determine whetherreplications are running and cancel those tasks if appropriate, prior to upgrading theAVE server. The Avamar Administration Guide contains information about monitoringand cancelling replication tasks.
InstallationThe following sections are describe how to install an AVE virtual machine.
Preparing the virtual machineThe following instructions use vCenter Server 5.5. Other versions of vCenter Servermight have different options.
Procedure
1. Download the AVE virtual appliance file for the appropriate version of AVE youare installing.
Required software can be downloaded from https://support.emc.com/.
2. Extract the compressed .7z file.
3. Start a VMware Web Client and connect to the vCenter Server or to the ESXihost that will host the AVE virtual machine.
4. Log in with administrative rights.
5. If you logged into vCenter, select the ESXi server that will host the AVE virtualmachine.
6. Select File > Deploy OVF Template.
The Source page appears.
Installation
Installation 19

7. Select Deploy from a file or URL and browse to the AVE virtual machine file(OVF extension) and click Next.
The OVF Template Details page appears.
8. Verify the template details are correct and click Next.
The End User License Agreement page appears.
9. Click Accept to accept the End User License Agreement and click Next.
The Name and Location page appears.
10. Type in the AVE name, select the inventory location, and then click Next.
The Storage page appears.
11. Select the storage for AVE and click Next.
The Disk Format page appears.
12. Select Thick Provision Lazy Zeroed format and click Next.
Thin provisioning is not supported with AVE.
The Network Mapping page appears.
13. Select the destination network and click Next.
The Networking Properties page appears.
14. At the Networking Properties page:
l If the AVE .ovf file will be used to perform installation, click Next withoutcompleting the information in this window.
Note
When the AVE .ovf file is used to perform the installation, networkingproperties information is entered using the avenetconfig script, as describedin Configuring network settings on page 22
l If the AVE .ova file will be used to perform the installation, complete therequired and optional networking information as described in theNetworking Properties page and click Next.
Note
For the Hostname FQDN field, the hostname can only include alphanumericcharacters (a-z, A-Z, and 0-9), hyphen (-), and period(.). Hyphen andperiods are only allowed if surrounded by other characters.
The Ready to Complete page appears.
15. Confirm the deployment settings are correct and click Finish.
The installation may take several minutes. A Deployment CompletedSuccessfully message appears when the installation is complete.
16. Click Close.
17. If the AVE .ova file will be used to perform installation and the system will have2 or 4 TB AVE configurations, remove existing 250 GB virtual disks.
This step should not be performed for 0.5 and 1.0 TB AVE configurations or ifthe AVE .ovf file will be used to perform installation.
a. Right-click the AVE virtual machine and select Edit Settings.
Installation
20 EMC Avamar Virtual Edition 7.3 for VMware Installation Guide
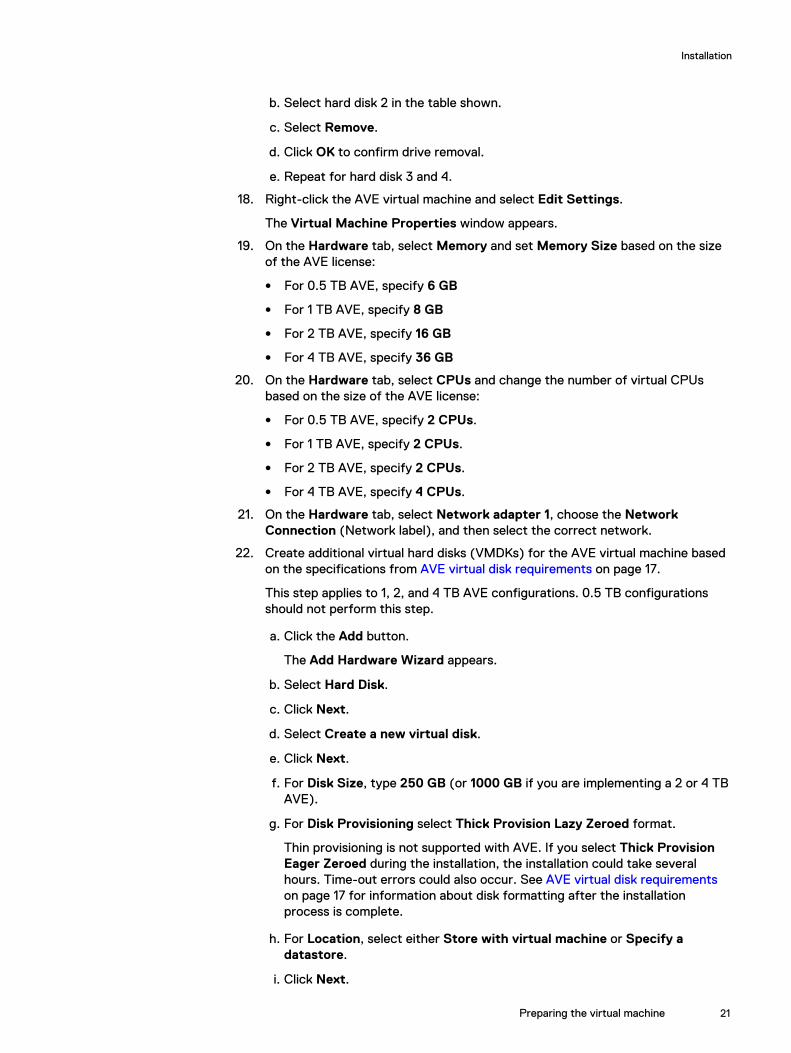
b. Select hard disk 2 in the table shown.
c. Select Remove.
d. Click OK to confirm drive removal.
e. Repeat for hard disk 3 and 4.
18. Right-click the AVE virtual machine and select Edit Settings.
The Virtual Machine Properties window appears.
19. On the Hardware tab, select Memory and set Memory Size based on the sizeof the AVE license:
l For 0.5 TB AVE, specify 6 GB
l For 1 TB AVE, specify 8 GB
l For 2 TB AVE, specify 16 GB
l For 4 TB AVE, specify 36 GB
20. On the Hardware tab, select CPUs and change the number of virtual CPUsbased on the size of the AVE license:
l For 0.5 TB AVE, specify 2 CPUs.
l For 1 TB AVE, specify 2 CPUs.
l For 2 TB AVE, specify 2 CPUs.
l For 4 TB AVE, specify 4 CPUs.
21. On the Hardware tab, select Network adapter 1, choose the NetworkConnection (Network label), and then select the correct network.
22. Create additional virtual hard disks (VMDKs) for the AVE virtual machine basedon the specifications from AVE virtual disk requirements on page 17.
This step applies to 1, 2, and 4 TB AVE configurations. 0.5 TB configurationsshould not perform this step.
a. Click the Add button.
The Add Hardware Wizard appears.
b. Select Hard Disk.
c. Click Next.
d. Select Create a new virtual disk.
e. Click Next.
f. For Disk Size, type 250 GB (or 1000 GB if you are implementing a 2 or 4 TBAVE).
g. For Disk Provisioning select Thick Provision Lazy Zeroed format.
Thin provisioning is not supported with AVE. If you select Thick ProvisionEager Zeroed during the installation, the installation could take severalhours. Time-out errors could also occur. See AVE virtual disk requirementson page 17 for information about disk formatting after the installationprocess is complete.
h. For Location, select either Store with virtual machine or Specify adatastore.
i. Click Next.
Installation
Preparing the virtual machine 21

j. For Mode select Independent. Use the default setting for Persistent.
k. Click Next.
l. Verify the configuration and select Finish.
m. Repeat these steps based on your AVE configuration:
l For 1 TB AVE, repeat five more times (for a total of six 250 GB harddrives; three original drives and three new drives).
l For 2 TB AVE, repeat two more times (for a total of three 1000 GB harddrives).
l For 4 TB AVE repeat five more times (for a total of six 1000 GB harddrives).
23. Finalize virtual machine configuration by completing the following steps:
a. Click OK.
b. In the Recent Tasks status area (bottom of screen), observe the progressof the hard drive creation.
When the status of the reconfigured Virtual Machine is complete, a Completedmessage appears.
24. Right-click the virtual machine and select Power > Power On. This commandboots the virtual machine.
25. Open the Virtual Console to monitor installation progress.
An insufficient licensing message at this point might indicate either a shortageof ESXi Server licenses or an inability to connect to a license server. Resolvethis problem with the network administrator.
26. On the Summary tab, verify the status for VMware Tools changes toRunning, Unmanaged, or out-of-date.
Configuring network settingsThe following procedure is used to configure AVE network configuration for a single IPaddress or dual stack environment. Use this procedure only if you are using theAVE .ovf file to install the AVE software.
The avenetconfig command will run automatically when the virtual machine is firstbooted, in which case you should proceed to 4 on page 22
Procedure
1. In the vSphere client, right-click on the virtual machine and select OpenConsole.
2. Log in as root using the password changeme.
3. At the command prompt, type the following command:
avenetconfig
4. To enter the IPv4 IP Configuration, press 1.
a. Press 1 again to enter the IPv4 Address and Prefix (for example,10.6.1.2/24 or 10.6.1.2/255.255.255.0).
b. Press 2 to enter the IPv4 Default Gateway address.
c. Press 4 when complete to return to the main menu.
Installation
22 EMC Avamar Virtual Edition 7.3 for VMware Installation Guide

5. To enter the IPv6 IP Configuration, press 2.
a. Press 1 to enter theIPv6 Address and Prefix (for example, 2000:10A::5/64).
b. Press 2 to enter the IPv6 Default Gateway address.
c. Press 4 when complete to return to the main menu.
6. Press 3 to enter the DNS Settings.
a. Press 1 to enter the Primary Nameserver IP address. Both IPv4 and IPv6addresses are supported. Enter additional optional nameservers by pressing2 and 3.
b. Press appropriate number to enter Alternative Search Domain(s)(originally the number is 4, but increases based on the number of AlternativeSearch Domains you enter). This is optional and represents a list of domainnames that will be added to the DNS search path. By default, only thedomain portion of the AVE hostname is added.
c. Press the appropriate number to enter the Hostname/FQDN (originally thenumber is 5, but increases based on the number of Alternative SearchDomains you entered above). This is optional and is the Fully QualifiedDomain Name to be used as the hostname of this AVE. If not provided, theAVE will attempt to determine its hostname from DNC using the IPaddresses provided above.
d. Press the appropriate number when complete to return to the main menu.
7. Press 4 to enter or change the NTP Settings.
The NTP Settings is optional and can be a single IP address or comma-separated list of IP addresses for Network Time Protocol servers. If left blank,the default behavior is to use the WMware host's timesync. If one or moreaddress is included here, the VMware host's timesync is disabled and the NTPservice is enabled.
a. Press 1 to enter the IP address(s) for the NTP server(s).
b. Press 3 to return to the main menu.
8. At the main menu, review your configuration and press 5 to save the changesand exit.
Installing and configuring Avamar softwareTo install Avamar software on a new AVE virtual machine, follow the instructionsincluded in the help file for the AVE installation workflow on the SW Releases page ofthe Avamar Installation Manager.
Procedure
1. Open a web browser and log in to Avamar Installation Manager:
The Avamar Administration Guide contains information about the AvamarInstallation Manager.
a. Type the following URL:
https://Avamar-server/aviwhere Avamar-server is the IP address or the resolvable hostname of theAvamar server.
The Avamar Installation Manager login page appears.
Installation
Installing and configuring Avamar software 23
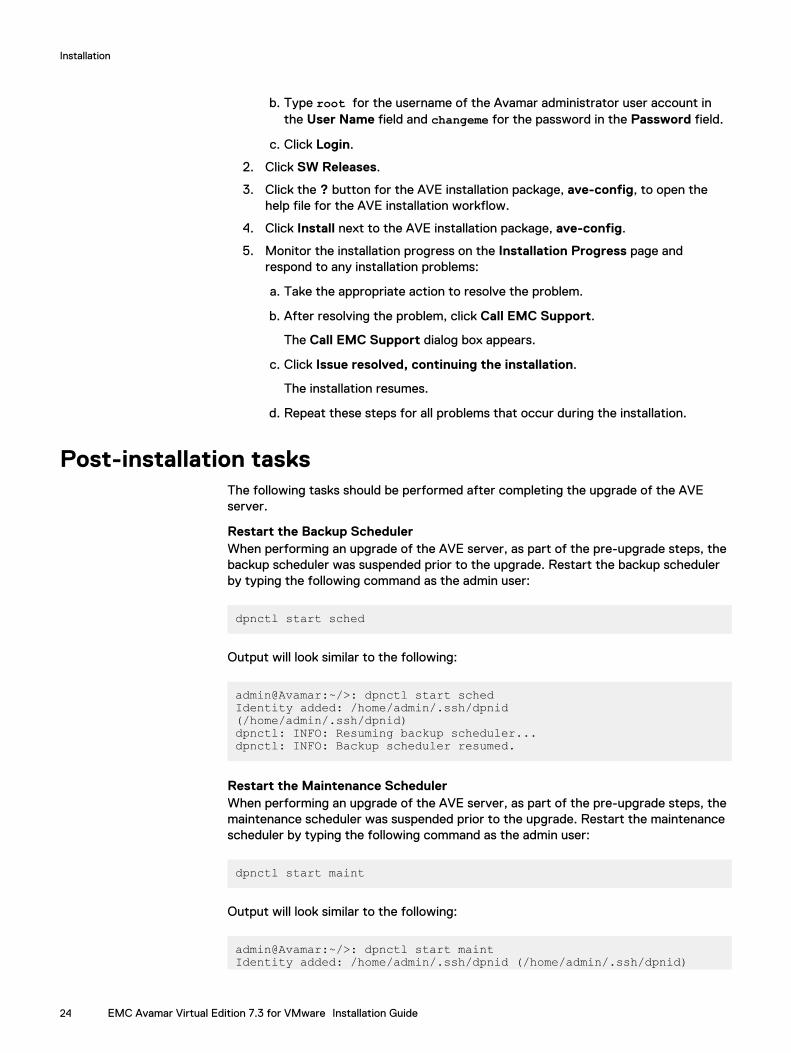
b. Type root for the username of the Avamar administrator user account inthe User Name field and changeme for the password in the Password field.
c. Click Login.
2. Click SW Releases.
3. Click the ? button for the AVE installation package, ave-config, to open thehelp file for the AVE installation workflow.
4. Click Install next to the AVE installation package, ave-config.
5. Monitor the installation progress on the Installation Progress page andrespond to any installation problems:
a. Take the appropriate action to resolve the problem.
b. After resolving the problem, click Call EMC Support.
The Call EMC Support dialog box appears.
c. Click Issue resolved, continuing the installation.
The installation resumes.
d. Repeat these steps for all problems that occur during the installation.
Post-installation tasksThe following tasks should be performed after completing the upgrade of the AVEserver.
Restart the Backup SchedulerWhen performing an upgrade of the AVE server, as part of the pre-upgrade steps, thebackup scheduler was suspended prior to the upgrade. Restart the backup schedulerby typing the following command as the admin user:
dpnctl start sched
Output will look similar to the following:
admin@Avamar:~/>: dpnctl start schedIdentity added: /home/admin/.ssh/dpnid(/home/admin/.ssh/dpnid)dpnctl: INFO: Resuming backup scheduler...dpnctl: INFO: Backup scheduler resumed.
Restart the Maintenance SchedulerWhen performing an upgrade of the AVE server, as part of the pre-upgrade steps, themaintenance scheduler was suspended prior to the upgrade. Restart the maintenancescheduler by typing the following command as the admin user:
dpnctl start maint
Output will look similar to the following:
admin@Avamar:~/>: dpnctl start maintIdentity added: /home/admin/.ssh/dpnid (/home/admin/.ssh/dpnid)
Installation
24 EMC Avamar Virtual Edition 7.3 for VMware Installation Guide

dpnctl: INFO: Resuming maintenance windows scheduler...dpnctl: INFO: maintenance windows scheduler resumed.
Reboot Avamar proxy clientsWhen performing an upgrade of the AVE server, if Avamar proxy clients are installed,reboot the proxy clients using the following command:
sudo mccli mcs reboot-proxy --all=true
Output will look similar to the following:
0,22357,Initiated request to recycle proxy power.
Testing Data Domain integrationIf the AVE is being used in conjunction with Data Domain, verify the status of the DataDomain integration and open any necessary service requests with EMC Support ifproblems occur. The Avamar and Data Domain System Integration Guide containsinformation about performing replication.
Generating new certificates with Data Domain systemsWhen the AVE is connected to a Data Domain system, is upgraded to Avamar release7.3 or greater, and session ticket authentication is enabled during upgrade, newcertificates must be generated on the Data Domain system. The Avamar ProductSecurity Guide contains further information.
Setting the passphrase on Data Domain systemsWhen the AVE is connected to a Data Domain system and is upgraded to Avamarrelease 7.3 or greater, the DDBoost user must have a passphrase enabled.
1. Log into the Data Domain system.
2. Enter the following command at the Data Domain CLI:system passphrase set
3. When prompted, enter a passphrase.
Note
The DDBoost user must have admin rights.
Testing replicationIf replication was configured prior to upgrading the AVE server, verify the status ofreplication and open any necessary service requests with EMC Support if problemsoccur. The Avamar Administration Guide contains information about performingreplication.
Upgrade Avamar clients downloadsThe EMC Avamar Client Downloads and Client Manager Installer Upgrades technical note,available on EMC Online Support (https://support.emc.com) contains informationabout how to upgrade client installation packages.
Install the server hotfixes and the Avamar Platform Security RollupPeriodically, EMC Avamar creates and distributes hotfixes for the server, and alsoproduces a quarterly Platform Security Rollups which should be installed on exsitingAVE systems. When available, you should install hotfixes and the security rollup on theAVE server. The Avamar Administration Guide contains information about installing
Installation
Post-installation tasks 25

hotfixes, and the EMC Support KB article https://support.emc.com/kb/335359provides instructions for installing the security rollup.
Upgrading Avamar softwareTo upgrade Avamar software on a new AVE virtual machine, follow the instructionsincluded in the help file for the AVE upgrade workflow on the SW Releases page ofthe Avamar Installation Manager.
Note
We recommend that you upgrade to Avamar 7.4 Service Pack 1, rather than upgradingto Avamar 7.3 Service Pack 1. For further information, see the Avamar UpgradePrerequisites Knowledgebase article: https://support.emc.com/kb/303934.
Procedure
1. Download the AVE virtual appliance file for the appropriate version of AVE youare installing.
Required software can be downloaded from https://support.emc.com/. Youcan also use the Avamar Download Manager to download the software. TheAvamar Administration Guide contains information about configuring and usingthe Avamar Download Manager.
2. Open a web browser and log in to Avamar Installation Manager:
The Avamar Administration Guide contains information about the AvamarInstallation Manager.
a. Type the following URL:
https://Avamar-server/aviwhere Avamar-server is the IP address or the resolvable hostname of theAvamar server.
The Avamar Installation Manager login page appears.
b. Type root for the username of the Avamar administrator user account inthe User Name field and changeme for the password in the Password field.
c. Click Login.
3. Upload the AVE virtual appliance file downloaded in 1 on page 26 to the AVE:
a. Click Repository.
The Repository tab appears.
b. For Package Upload, click Browse and select the package to upload.
Once the package upload completes, it automatically appears in theRepository table.
4. Click SW Upgrade.
The SW Upgrade tab appears.
5. Click the ? button for the AVE installation package, AvamarUpgrade-version.avp, to open the help file for the AVE installation workflow.
6. Click Upgrade next to the AVE installation package, AvamarUpgrade-version.avp.
Installation
26 EMC Avamar Virtual Edition 7.3 for VMware Installation Guide

7. Monitor the installation progress on the Installation Progress page andrespond to any installation problems:
a. Take the appropriate action to resolve the problem.
b. After resolving the problem, click Call EMC Support.
The Call EMC Support dialog box appears.
c. Click Issue resolved, continuing the installation.
The installation resumes.
d. Repeat these steps for all problems that occur during the installation.
Installation
Upgrading Avamar software 27

Installation
28 EMC Avamar Virtual Edition 7.3 for VMware Installation Guide