aw-cu300a v3
TRANSCRIPT

1
The information contained herein is the exclusive property of AzureWave and shall not be distributed, reproduced, or disclosed in whole or in part without prior written permission of AzureWave.
AW-CU300A V3
IoT Connectivity Module for AWS IoT Core
Getting Started Guide
Rev. 0.2

2
The information contained herein is the exclusive property of AzureWave and shall not be distributed, reproduced, or disclosed in whole or in part without prior written permission of AzureWave.
Revision History Version Revision Date Description Initials Approved
0.1 2021/01/04 Initial version Renton Tao
Jackson Boon N.C. Chen S.C Chueh
0.2 2021/10/28 Add introduction of “Over-the-Air Updates”
Josh Lin Patrick Lin

3
The information contained herein is the exclusive property of AzureWave and shall not be distributed, reproduced, or disclosed in whole or in part without prior written permission of AzureWave.
Table of Contents
1. Introduction of AW-CU300A V3 ................................................................................................ 4
1.1 Product Overview ....................................................................................................................................... 4
1.2 Block Diagram ............................................................................................................................................ 5
1.3 Schematics .................................................................................................................................................. 6 1.4 Layout Guide and SMT Process Notification ....................................................................................... 8
2. AWS Command Example .......................................................................................................... 9
2.1 Getting Started with AWS IoT Core ....................................................................................................... 9 2.2 Publish and Monitor MQTT message on the cloud.......................................................................... 13
2.3 Over-the-Air Updates ............................................................................................................................... 15
4
The information contained herein is the exclusive property of AzureWave and shall not be distributed, reproduced, or disclosed in whole or in part without prior written permission of AzureWave.
1. Introduction of AW-CU300A V3
1.1 Product Overview
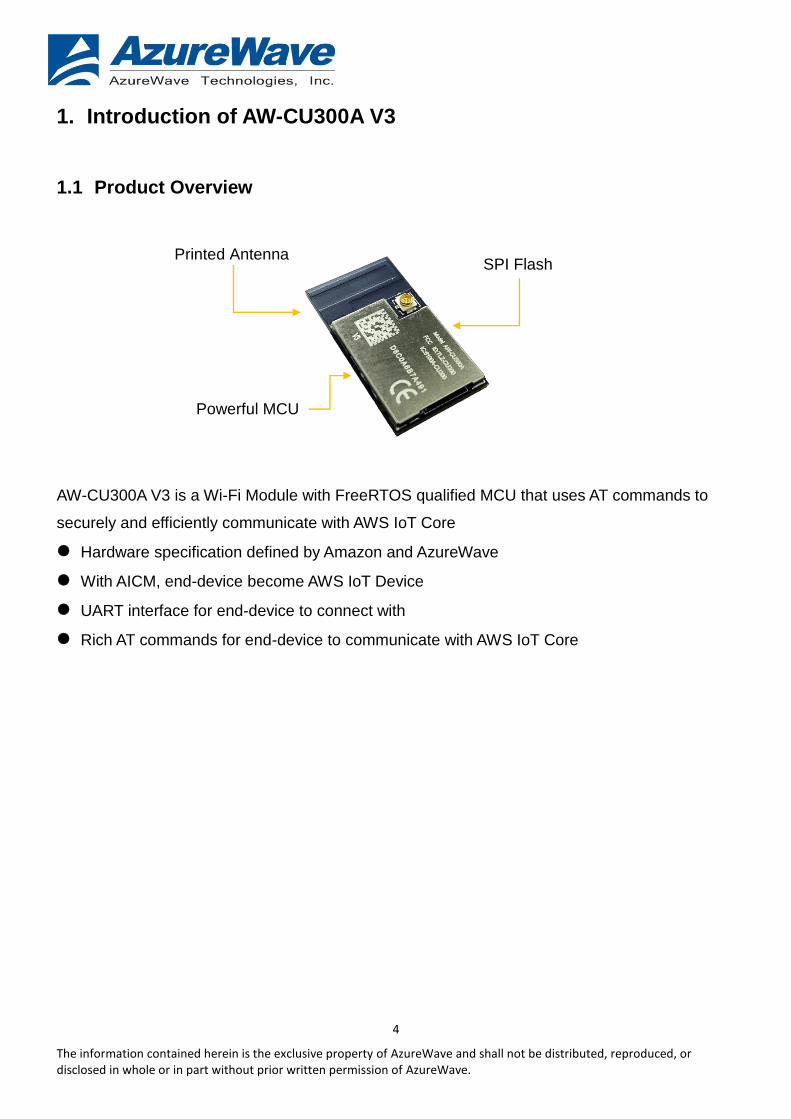
AW-CU300A V3 is a Wi-Fi Module with FreeRTOS qualified MCU that uses AT commands to
securely and efficiently communicate with AWS IoT Core
Hardware specification defined by Amazon and AzureWave
With AICM, end-device become AWS IoT Device
UART interface for end-device to connect with
Rich AT commands for end-device to communicate with AWS IoT Core
Printed Antenna
Powerful MCU
SPI Flash

5
The information contained herein is the exclusive property of AzureWave and shall not be distributed, reproduced, or disclosed in whole or in part without prior written permission of AzureWave.
1.2 Block Diagram

6
The information contained herein is the exclusive property of AzureWave and shall not be distributed, reproduced, or disclosed in whole or in part without prior written permission of AzureWave.
1.3 Schematics
Module pinout for AW-CU300A V3
Pin No Definition Basic Description Type Level
E7 B_3V3 3.3V Power input PWR 3.3V
D7 M_3V3 3.3V Power input PWR 3.3V
K1 GPIO_4 EN pin I/O 3.3V
K2 GPIO_5 INT pin I/O 3.3V
J7 GPIO_10 MSG pin I/O 3.3V
G8 GPIO_26 32KHzCLK_OUT I/O 3.3V
G1 GPIO_48 UART TXD I/O 3.3V
G2 GPIO_49 UART RXD I/O 3.3V
G7 GPIO_25 32KHz_CLK_IN I/O 3.3V
K7 RESETN RESETN I/O 3.3V(internal pull
high 51k ohm)

7
The information contained herein is the exclusive property of AzureWave and shall not be distributed, reproduced, or disclosed in whole or in part without prior written permission of AzureWave.
E4(1) GPIO_28 I/O 3.3V
E5(1) GPIO_29 I/O 3.3V
D6(1) GPIO_30 I/O 3.3V
D4(1) GPIO_31 I/O 3.3V
E3(1) GPIO_32 I/O 3.3V
D5(1) GPIO_33 I/O 3.3V
NOTE (1): Dummy pin E4, E5, D6, D4, E3, and D5.

8
The information contained herein is the exclusive property of AzureWave and shall not be distributed, reproduced, or disclosed in whole or in part without prior written permission of AzureWave.
1.4 Layout Guide and SMT Process Notification
For mounting AW-CU300A V3 on your device, please refer to Layout Guide and SMT Process Notification

9
The information contained herein is the exclusive property of AzureWave and shall not be distributed, reproduced, or disclosed in whole or in part without prior written permission of AzureWave.
2. AWS Command Example
Please find the command details in AWS CONNECTOR AT Command Set.
Below are commands for the demo:
1. Turn on Wi-Fi module: AT+WIFI_On 2. Retrieve the Wi-Fi AP | Station Mode: AT+WIFI_GetMode 3. Perform a Wi-Fi network scan: AT+WIFI_Scan 4. Set and store the Wi-Fi AP information when AW-CU300A V3 in Station Mode:
AT+WIFI_SetAP=SSID,password,security type SSID: SSID of AP (case sensitive) password: password for AP (case sensitive) security type: OPEN | WEP | WPA | WPA2
5. Connect to the AP: AT+WIFI_Connect 6. Define and store Thing-specific configuration:
AT+THING_Set=client ID,endpoint,client certificate,client private key client ID: Thing name(Client ID) endpoint: AWS IoT endpoint URL client certificate: Certificate for this Thing client private key: Private key for this Thing
7. Connect the client to MQTT broker: AT+MQTT_Connect 8. Subscribe to and save MQTT topic: AT+MQTT_Subscribe=<topic>,<qos> 9. Publish to MQTT topic:
AT+MQTT_Publish=topic,message,qos topic: Topic to publish to message: Message to publish qos: 0 | 1
2.1 Getting Started with AWS IoT Core
Step 0: The below link is a documents of how to setup AWS IOT, you can refer to it for full AWS
IOT knowledge.
https://docs.aws.amazon.com/iot/latest/developerguide/iot-gs.html
But, if you want to setup AzureWave AWS Connector, you would just refer to the following steps.
10
The information contained herein is the exclusive property of AzureWave and shall not be distributed, reproduced, or disclosed in whole or in part without prior written permission of AzureWave.
Step 1: Create AWS Account, Create an IAM user.
Please refer to the below link to setup AWS Account and IAM user.
https://docs.aws.amazon.com/iot/latest/developerguide/setting-up.html
If you have created an IAM user, please refer to the following setting to connect these two
policies (AmazonFreeRTOSFullAccess, AWSIoTFullAccess) to your IAM.
https://docs.aws.amazon.com/freertos/latest/userguide/freertos-account-and-permissions.html
Step 2: Create a thing.
A thing represents a specific device or instance that can communicate with AWS IOT.
Please refer to the following link to create a thing.
https://docs.aws.amazon.com/iot/latest/developerguide/create-aws-thing.html
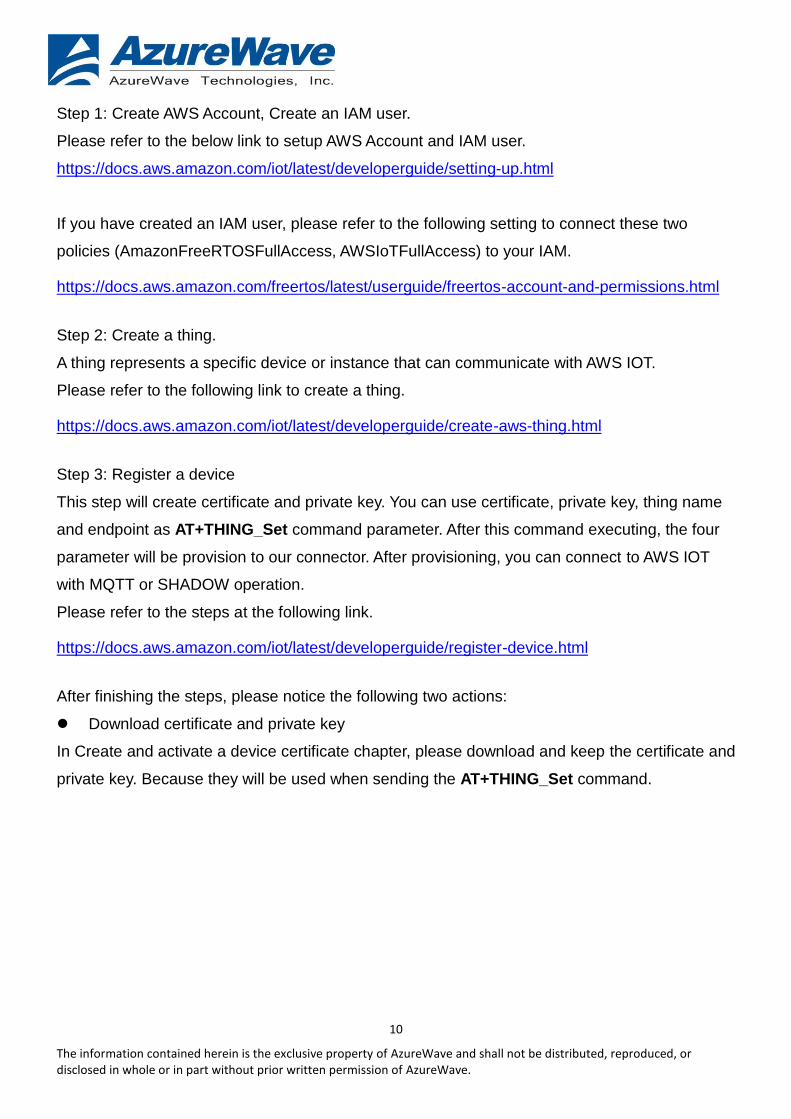
Step 3: Register a device
This step will create certificate and private key. You can use certificate, private key, thing name
and endpoint as AT+THING_Set command parameter. After this command executing, the four
parameter will be provision to our connector. After provisioning, you can connect to AWS IOT
with MQTT or SHADOW operation.
Please refer to the steps at the following link.
https://docs.aws.amazon.com/iot/latest/developerguide/register-device.html
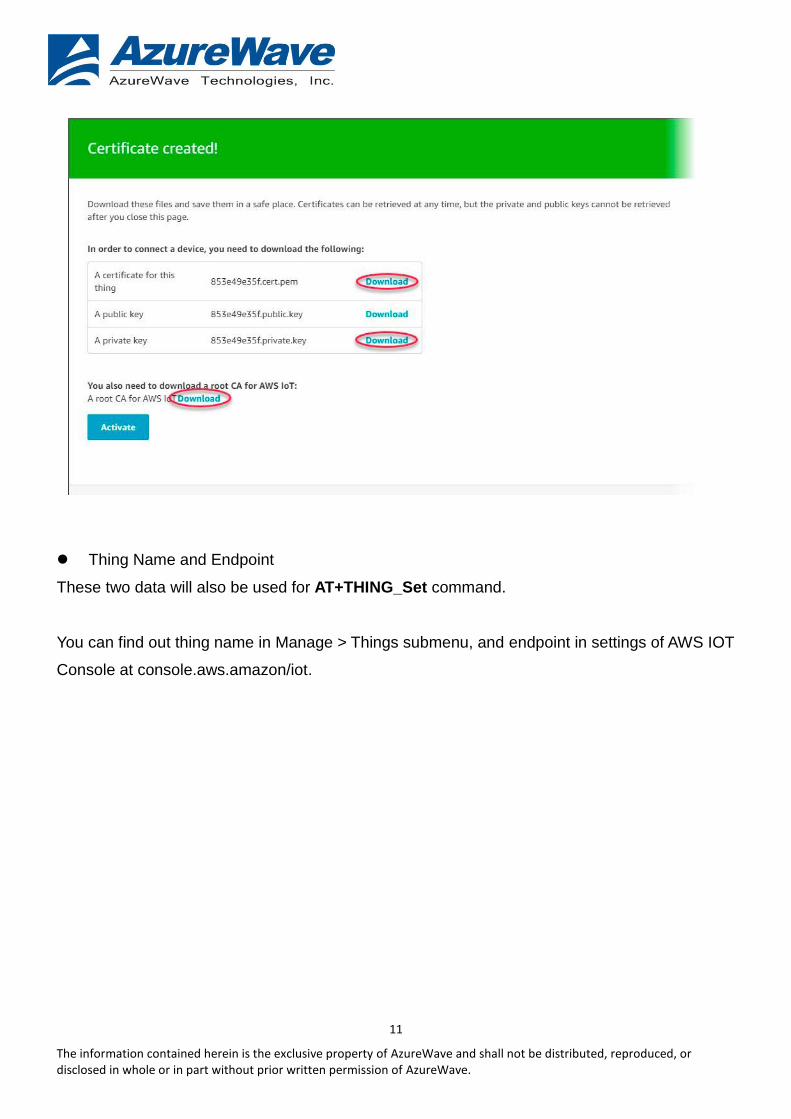
After finishing the steps, please notice the following two actions:
Download certificate and private key
In Create and activate a device certificate chapter, please download and keep the certificate and
private key. Because they will be used when sending the AT+THING_Set command.
11
The information contained herein is the exclusive property of AzureWave and shall not be distributed, reproduced, or disclosed in whole or in part without prior written permission of AzureWave.
Thing Name and Endpoint
These two data will also be used for AT+THING_Set command.
You can find out thing name in Manage > Things submenu, and endpoint in settings of AWS IOT
Console at console.aws.amazon/iot.

12
The information contained herein is the exclusive property of AzureWave and shall not be distributed, reproduced, or disclosed in whole or in part without prior written permission of AzureWave.

13
The information contained herein is the exclusive property of AzureWave and shall not be distributed, reproduced, or disclosed in whole or in part without prior written permission of AzureWave.
2.2 Publish and Monitor MQTT message on the cloud
Step 0: Make sure the AP under test is connected to the internet using other Wi-Fi enabled devices. Assume the SSID, password and security type of the AP is MySSID, MyPassword, wpa2.
Step 1: Connect the AW-CU300A V3 to the system (refer to 2. Hardware Setup) and turn off the wireless devices near the AW-CU300A V3 (except for the device under test). Turn on the Wi-Fi module of the AW-CU300A V3 using AT+WIFI_On
Step 2: Check if AW-CU300A V3 is in station mode using AT+WIFI_GetMode
Step 3: Set and store information of the AP using AT+WIFI_SetAP= MySSID,MyPassword,wpa2
AT+WIFI_SetAP=SSID,password,security type SSID: SSID of AP (case sensitive) password: password for AP (case sensitive) security type: OPEN | WEP | WPA | WPA2
Step 4: Connect to the AP: AT+WIFI_Connect
Step 5: Define and store Thing-specific configuration using AT+THING_Set command
AT+THING_Set=client ID,endpoint,client certificate,client private key client ID: Thing name(Client ID) endpoint: AWS IoT endpoint URL client certificate: Certificate for this Thing (downloaded in 3.1 step 3) client private key: Private key for this Thing (downloaded in 3.1 step 3)
You should create command as format below:
AT+THING_Set=98c6, a3qjEXAMPLEffp-ats.iot.ap-northeast-1.amazonaws.com, -----BEGIN CERTIFICATE-----\n…base64 data…\n-----END CERTIFICATE-----\n, -----BEGIN RSA PRIVATE KEY-----\n…base64 data…\n-----END RSA PRIVATE KEY-----\n
Note: a3qjEXAMPLEffp is just an example endpoint, your endpoint URL should replace it. Please follow the instructions to find the endpoint.
Navigate to the AWS IoT console
Choose Settings in the navigation pane
The endpoint is can be found under Custom endpoint

14
The information contained herein is the exclusive property of AzureWave and shall not be distributed, reproduced, or disclosed in whole or in part without prior written permission of AzureWave.
Step 6: Connect the client to MQTT broker: AT+MQTT_Connect.
Step 7: Subscribe to and save MQTT topic using AT+MQTT_Subscribe=iotdemo/1,0
Step 8: Publish to MQTT topic using AT+MQTT_Publish=iotdemo/1, hello, 0
AT+MQTT_Publish=topic,message,qos topic: Topic to publish to message: Message to publish qos: 0 | 1
Step 9: Use the MQTT client in the AWS IoT console to monitor the messages that device sends
to the AWS Cloud.
Sign in to the AWS IoT console.
https://console.aws.amazon.com/iotv2/
In the navigation pane, choose Test to open the MQTT client.
In Subscription topic, enter iotdemo/#, and then choose Subscribe to topic.
You should see the message send from device as like below.

15
The information contained herein is the exclusive property of AzureWave and shall not be distributed, reproduced, or disclosed in whole or in part without prior written permission of AzureWave.
2.3 Over-the-Air Updates
This section descripts how to setup OTA on AWS server side and how to create an OTA job for
our AWS connector to update firmware.
The first three steps descript what requirements of OTA on AWS server side you have to setup.
The last step descripts how to create an OTA job.
Create S3 bucket to store update.
AWS S3 is an object storage service and we will put update firmware in it.
Please reference https://docs.aws.amazon.com/freertos/latest/userguide/dg-ota-bucket.html
Note: Please make sure you have enable versioning on you S3 bucket setting.
Create Service Role and Policy.
This section will descript how to setup Role and Policy to have right to access AWS S3 storage.
Service Role
Please reference
https://docs.aws.amazon.com/freertos/latest/userguide/create-service-role.html
If you want to find out your Account id, please enter the following link.
https://console.aws.amazon.com/billing/home?#/account

16
The information contained herein is the exclusive property of AzureWave and shall not be distributed, reproduced, or disclosed in whole or in part without prior written permission of AzureWave.
User Policy
Please reference
https://docs.aws.amazon.com/freertos/latest/userguide/create-ota-user-policy.html
Create code-signing certificate
Because there are several configures in this topic, please use the following link to complete
code-signing certificate.
https://docs.aws.amazon.com/freertos/latest/userguide/ota-code-sign-cert-win.html
AWS CLI and openssl are necessary softwares to complete this task.
Create OTA update Job
After all prepared procedure finished, you can create an OTA update job on this thing name and
use AT+MOD_OTA command to trigger OTA update procedure.
1. Create OTA Job
Please enter AWS IOT console, choose Manager, and press Jobs and then press Create
button.

17
The information contained herein is the exclusive property of AzureWave and shall not be distributed, reproduced, or disclosed in whole or in part without prior written permission of AzureWave.
2. Please choice a FreeRTOS OTA update job and press “create OTA update job”

18
The information contained herein is the exclusive property of AzureWave and shall not be distributed, reproduced, or disclosed in whole or in part without prior written permission of AzureWave.
3. Select a Things to create OTA job and then press NEXT
4. On next page, please only select MQTT to be update protocol and select Sign a new
firmware for me. Then choose the code signing profile we create on previous chapter.
After that, you can select a exist firmware or upload a new image from local.

19
The information contained herein is the exclusive property of AzureWave and shall not be distributed, reproduced, or disclosed in whole or in part without prior written permission of AzureWave.
Then, please enter slash in Pathname of firmware image on device and choose the Role
we create on previous chapter. Then press NEXT button.

20
The information contained herein is the exclusive property of AzureWave and shall not be distributed, reproduced, or disclosed in whole or in part without prior written permission of AzureWave.
5. Entering a unique ID in ID field. You can’t use the same ID you created before. Other fields
just keep default setting and press Create button.

21
The information contained herein is the exclusive property of AzureWave and shall not be distributed, reproduced, or disclosed in whole or in part without prior written permission of AzureWave.
6. Finally, you can see a job to be created on Jobs page. If you don’t see it, please press f5 to
refresh the webpage. The Job will be in IN PROGRESS status.