basic piecing - s3. · pdf file2 em dash block skill builder block #3 material list ☐ (4)...
TRANSCRIPT

Basic PiecingFebruary Skill Builder BOM Technique
This month we will be making our blocks using basic piecing techniques, but in some cases we will be working with bias seams. When sewing on the bias you must be very careful, because the bias stretches and can distort your block. This is where starch REALLY comes in handy. So please please give starch a try. A few weeks ago I posted a video tutorial on how to properly starch your fabrics you can find here.
This lesson is fairly easy and simple, so there was no need for a video tutorial, nor was there much preliminary information needed so lets dive right in.
Before we begin, here are the tools you will need.
TOOL LIST // basic piecing
☐ 12.5” x 12.5” Ruler
☐ 6.5” X 24” Ruler with 60 degree mark
☐ Scissors
☐ Rotary Cutter and Rotary Mat
☐ Chalk Pencil or Water Soluble Pen
☐ Heavy Starch and Iron
☐ Lint Roller
☐ Basting Pins or Basting Spray or Basting Thread
BLOCk LESSOn #2FEBRuARY 14, 2013
1

2
EM DASH BLOCKSkill Builder Block #3
MATERIAL LIST
☐ (4) 6.5” squares in colored fabric
☐ (8) 3.5” squares of background fabric
☐ (1) set of 2.5” strips for block borders
☐ (1) 17” x 17” piece of batting
☐ (1) 18” x 18” piece of backing fabric
CHOOSInG FABRICS FOR THE BLOCkFor this block you really have a lot of freedom on which color fabrics you use. In my block I wanted to use the 2 colors in a 2 values each. Have fun and choose something you think you will love.

3
STEP #1
Press and Starch the fabrics you will be using for this block before you begin cutting. See a tutorial on pressing here.
STEP #2
Cut out all the required fabrics for the block.
STEP #4
Lay the 3.5” background square on the upper right hand corner of one of the 6.5” colored squares. Lay them right sides together, with the line facing as the photo shows. Carefully stitch directly on the marked line. You will be sewing on the bias, so go slow, do not pull or tug. Sewing on the bias can cause streching and distortion, so you must be careful.
STEP #3
using a ruler and marking pencil, draw a line on the (8) 3.5” background squares, defining a half square triangle.

4
STEP #5
With a ruler, measure 1/4” from the stitch line and trim the excess fabric off. Open the pieces and press the seams toward your background fabric.
STEP #6
Lay a second 3.5” background square on the same 6.5” colored square right sides together, but now in the bottom left hand corner. Align the marking line perpindicular to the corner just sewn.
STEP #8
Sew the other 3 colored blocks exactly the same, until you have all 4 blocks. You may chain piece this to speed up the process. Trim and press.
STEP #7
Carefully stitch directly on the line. You will be sewing on the bias, so go slow, do not pull or tug. Sewing on the bias can cause streching and distortion, so you must be careful. With a ruler, measure 1/4” from the stitch line and trim the excess fabric off. Open the pieces and press the seams toward your background fabric.

5
STEP #9
Press each block gently with a light amount of starch and a hot iron. Make sure you press all the block seams
outwards toward the background fabric.
STEP #10
Layout your blocks finding the shape and color arrangement you like best. This block could acctually
be made into many shapes such as an X. The true em-dash style would have all the blocks turned the
same direction
STEP #12
Sew the two blocks together with a scant 1/4” seam. If you lined them up properly the center background
points should match up just perfect. (see circle)
STEP #11
Take two of the blocks next to each other horizontally, and lay them right sides together,
carefully lining up the corner points and edge. Pin together.

6
STEP #13
Take the next two blocks and lay them right sides together, carefully lining up the corner points and edge. Pin together. Sew the blocks with a scant 1/4” seam. If you lined them up properly the center background points should match up just perfect. Press your seams OPEn.
STEP #14
now you should have two rows. Lay these two rows right sides together. Start by lining up the center seams of the rows and placing a pin directly into the seam. Line up the rest of the row and pin. Sew these rows together with a scant 1/4” seam. Press your seams OPEn. Gently press your block with a light amount of starch, making sure to keep all the seams pressed properly.
STEP #16
You now have an Em-Dash Block!! If you plan to QAYG, than add your borders using the additional borders tutorial and mark with the 1” border line. Baste the block using your preferred method and you will be prepared for the FMQ lesson.
STEP #15
Your block should finish at 12.5”. If you need to square or trim up at all do so now.

THE MOOD BLOCKSkill Builder Block #2
MATERIAL LIST ☐ (1) 5.25” x 4.5” piece for section A
☐ (1) 5.125” x 3.25” piece for section B
☐ (1) 1” x 4.5” piece for section C
☐ (1) 7.5” x 4.5” piece for section D
☐ (1) 12.5” x 2.5” piece for section E
☐ (1) 7” x 6.5” piece for section F
☐ (1) 1” x 6.5” piece for section G
☐ (1) 5.75” x 7” piece for section H
☐ (1) 5.75” x 7” piece for section I
☐ (1) set of 2.5” strips for block borders
☐ (1) 17” x 17” piece of batting
☐ (1) 18” x 18” piece of backing fabric
CHOOSInG FABRICS FOR THE BLOCkFor this block, same as the Em-Dash block you really have a lot of freedom on which color fabrics you use. In my block I used 2 values of purple, 2 values of orange, and my highlight color was kona Putty.
7
8
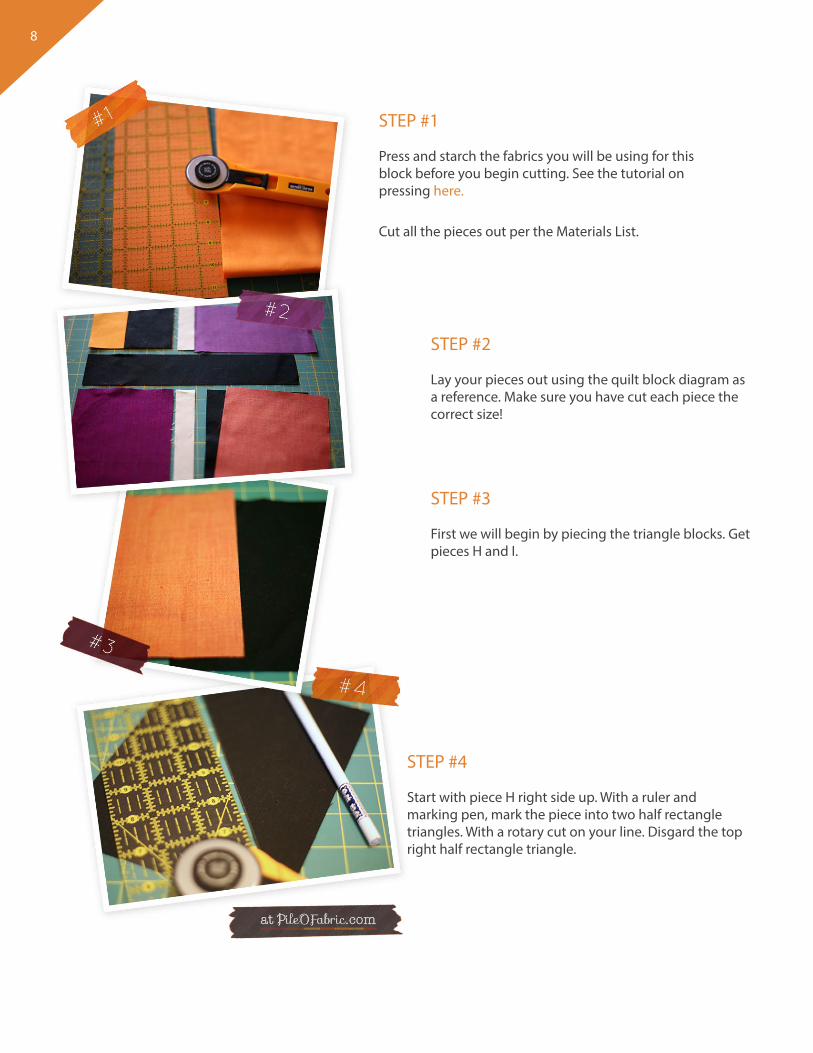
STEP #1
Press and starch the fabrics you will be using for this block before you begin cutting. See the tutorial on pressing here.
Cut all the pieces out per the Materials List.
STEP #2
Lay your pieces out using the quilt block diagram as a reference. Make sure you have cut each piece the correct size!
STEP #4
Start with piece H right side up. With a ruler and marking pen, mark the piece into two half rectangle triangles. With a rotary cut on your line. Disgard the top right half rectangle triangle.
STEP #3
First we will begin by piecing the triangle blocks. Get pieces H and I.
9
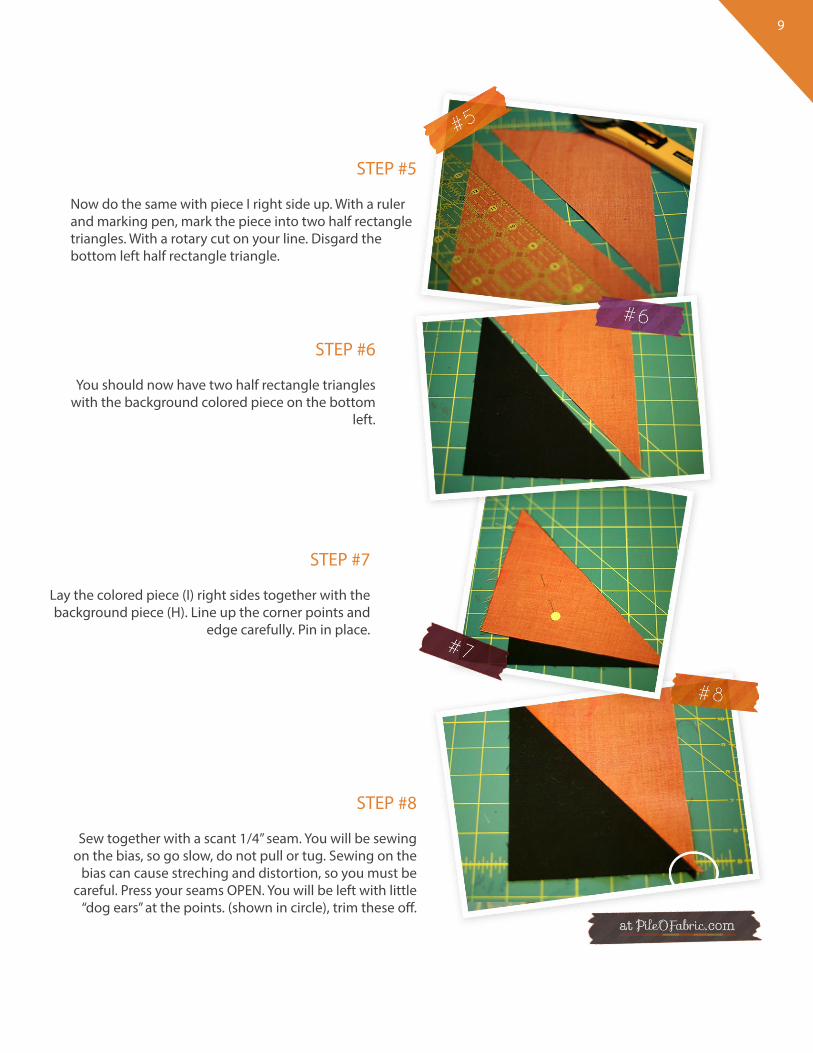
STEP #5
now do the same with piece I right side up. With a ruler and marking pen, mark the piece into two half rectangle triangles. With a rotary cut on your line. Disgard the bottom left half rectangle triangle.
STEP #6
You should now have two half rectangle triangles with the background colored piece on the bottom
left.
STEP #8
Sew together with a scant 1/4” seam. You will be sewing on the bias, so go slow, do not pull or tug. Sewing on the
bias can cause streching and distortion, so you must be careful. Press your seams OPEn. You will be left with little
“dog ears” at the points. (shown in circle), trim these off.
STEP #7
Lay the colored piece (I) right sides together with the background piece (H). Line up the corner points and
edge carefully. Pin in place.

10
STEP #9
now we will piece triangle A and B. Lay piece B right side up. With a ruler and marking pen, mark the piece into two half rectangle triangles. With a rotary cut on your line. Disgard the bottom left half rectangle triangle.
STEP #10
now you will need piece A and a ruler with degree markings (usually 60, 45, 30). Lay piece A right side up, take your ruler and line up the 60 degree mark with the right edge of the piece. now angle your ruler two degrees to the left so that your angle is now 58 degrees. (see circles) Carefully mark the angle with your marking pen.
STEP #12
You should now have 2 shapes. The upper right background triangle (B) will seem a little too big, but this is correct.
STEP #11
Move your ruler to a comfortable position and cut on your marking line. Disgard the smaller upper right triangle.

11
STEP #13
With right sides together line up the edges of piece A and B. The top point on piece B should hang of the edge
of piece A a scant 1/4”. (see circle) This is a proper “dog ear”. Pin the pieces together.
STEP #14
Sew pieces together with a scant 1/4” seam. You will be sewing on the bias, so go slow, do not pull
or tug. Sewing on the bias can cause streching and distortion, so you must be careful. Press your seams
OPEn. Trim off the “dog ears”.
STEP #16
Sew together section A/B to piece C with a scant 1/4” seam. Press seams toward the A/B section.
STEP #15
Layout your pieces as the block will be pieced.

12
STEP #17
Sew together section A/B/C to piece D with a scant 1/4” seam. Press the seams toward piece D. (in the photo you will see the piecing order 1, 2, 3)
STEP #18
Sew together piece F to G with a scant 1/4” seam. Press seams toward piece F. Sew together section F/G to H/I with a scant 1/4” seam. Press seams toward H/I. (in the photo you will see the piecing order 1, 2, 3)
STEP #19
now you will piece the three rows. Sew together Row 1 to piece E with a scant 1/4” seam. Press seams inward towards piece E. Sew together Row 3 to piece E with a scant 1/4” seam. Press seams inward toward piece E. (in the photo you will see the piecing order 1, 2, 3)
STEP #20
Lightly starch the block and press with a hot dry iron. Make sure all seam allowances stay in the correct position when pressing.
You now have a Mood Block!! If you plan to QAYG, then add your borders using the additional tutorial and mark with the 1” border line. Baste the block using your preferred method and you will be prepared for the FMQ lesson.
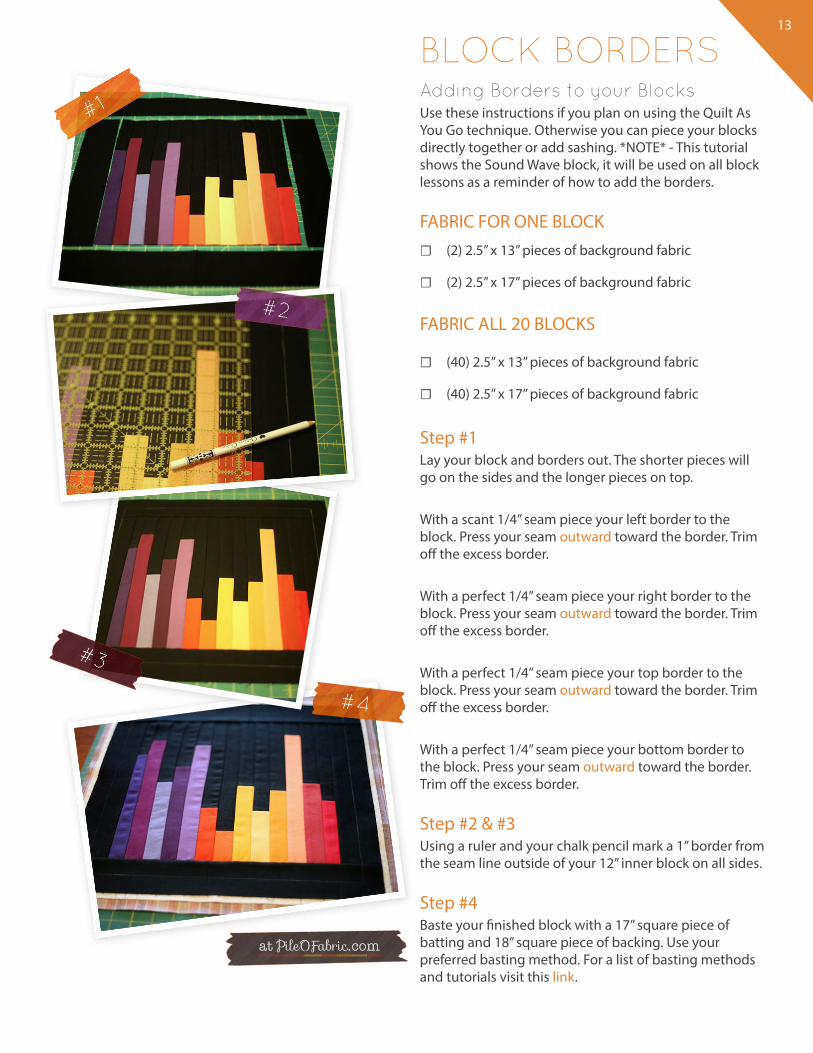
BLOCK BOrDErS Adding Borders to your Blocksuse these instructions if you plan on using the Quilt As You Go technique. Otherwise you can piece your blocks directly together or add sashing. *nOTE* - This tutorial shows the Sound Wave block, it will be used on all block lessons as a reminder of how to add the borders.
FABRIC FOR OnE BLOCk ☐ (2) 2.5” x 13” pieces of background fabric
☐ (2) 2.5” x 17” pieces of background fabric
FABRIC ALL 20 BLOCkS
☐ (40) 2.5” x 13” pieces of background fabric
☐ (40) 2.5” x 17” pieces of background fabric
Step #1Lay your block and borders out. The shorter pieces will go on the sides and the longer pieces on top.
With a scant 1/4” seam piece your left border to the block. Press your seam outward toward the border. Trim off the excess border.
With a perfect 1/4” seam piece your right border to the block. Press your seam outward toward the border. Trim off the excess border.
With a perfect 1/4” seam piece your top border to the block. Press your seam outward toward the border. Trim off the excess border.
With a perfect 1/4” seam piece your bottom border to the block. Press your seam outward toward the border. Trim off the excess border.
Step #2 & #3using a ruler and your chalk pencil mark a 1” border from the seam line outside of your 12” inner block on all sides.
Step #4Baste your finished block with a 17” square piece of batting and 18” square piece of backing. use your preferred basting method. For a list of basting methods and tutorials visit this link.
13

EM DASH

THE MOOD
