bbq lazy susan plan - picnic table plans · lazy susan plan this plan shows you how to make a lazy...
TRANSCRIPT
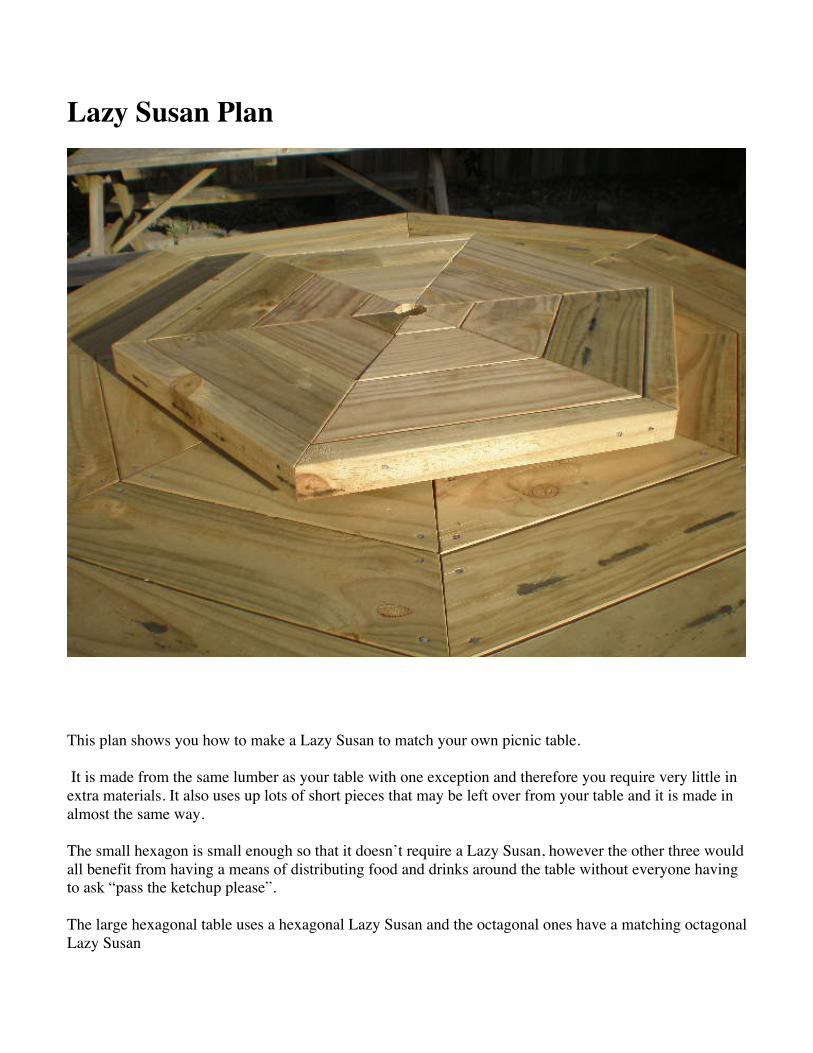
Lazy Susan Plan
This plan shows you how to make a Lazy Susan to match your own picnic table.
It is made from the same lumber as your table with one exception and therefore you require very little inextra materials. It also uses up lots of short pieces that may be left over from your table and it is made inalmost the same way.
The small hexagon is small enough so that it doesn’t require a Lazy Susan, however the other three wouldall benefit from having a means of distributing food and drinks around the table without everyone havingto ask “pass the ketchup please”.
The large hexagonal table uses a hexagonal Lazy Susan and the octagonal ones have a matching octagonalLazy Susan

Materials required
Large Hexagon Small Octagon Large Octagon
Lumber
1/2” Plywood 30”*30” square 35’*35’ square 50”*50” square6*1 1/2 11’ 20’ 32’2*4” 4’ 5’ 7’
Nails / Screws
3” gal nails 24 32 321 1/2” screws 54 80 128(Or gal clouts)
Turntable swivel A 12” to 14” will be suitable for all three Lazy Susans
Angles 30 degrees 45 degrees 45 degrees
Outside frame 14 3/4” 13 1/2” 19”
The plywood needs to be suitable for exterior use.
Tools Required
No other tools are required beyond what was needed for the picnic table.
1) Electric circular saw. (Skilsaw) (However if you have access to a power compound miter saw, theproject will be quicker, easier and more accurate.)
2) A drill and hole saw to make the hole for the umbrella.3) Hammer.4) Tape measure. Small hand plane. Adjustable square. Pencil.5) Battery drill to screw all the screws in. (Or a screwdriver.)
Step by step construction
Step 1
Cut the 2*4 accurately in half with the circular saw. This now gives you 2 pieces 2”*2”.If you have anelectric plane, smooth the saw cut. Now cut the 6 or 8 pieces (depending which size you are making.) tothe size required and to the angle required for making the outside frame.
Large hexagon - cut 6 pieces to 14 3/4” (on the long side) at 60 degrees opposite angles.Small octagon – cut 8 pieces to 13 1/2” at 45 degrees opposite angles.Large octagon – cut 8 pieces to 19” at 45 degrees opposite angles.
Make sure that the cut side is down so that the saw cutting is not visible.
Step 2
Arrange the pieces on a flat surface in a hexagon or octagon and nail them together.
Step 3
Place the frame onto the plywood board and accurately measure corner to corner until you get the frameperfectly “square”. When you have it exactly right draw a pencil line right around the inside of the frameon the plywood. (Note. If there are any gaps in the outside corners of your frame you may need to dosome slight adjustments because this is what you are going to see.)
Step 4
Shift the plywood onto a bench and cut accurately along the line with the circular saw. Tidy up with thehand plane. You now have a perfect hexagon or octagon to fit exactly inside the 2*2 frame. Place it insidethe frame on a flat surface and rule lines between the opposite corners onto the plywood
Step 5
Now measure each board, cut and fit the outside row of 6*1 1/2. Plane the cut edge to give it a bevel.Don’t nail anything. When the outside row is complete start on the next row and then the next until all thecentre is filled.
Step 6
Nail 2 nails through each section of frame into the outside row of 6*1 1/2. Now turn the Lazy Susan over.Draw lines between the corners. Take a piece of 6*1 1/2 to use as a guide and draw where the boardswould be on the other side. Do each board in turn because this gives you a guide as to where to put thenails or screws.

When you know where all the screws go screw the plywood to the Lazy Susan top. In this way there areno nails or screw showing on the Lazy Susan top.
Step 7
Turn it over so that it is right way up. You should clearly see where the centre of the umbrella hole goes.Use the hole saw to make the umbrella hole.
Step 8
Centre the turntable swivel accurately and screw into place.
The Lazy Susan is now complete.