bedienungsanleitung präzisionsthermometer...h63.0.21.6c-01 greisinger electronic gmbh d - 93128...
TRANSCRIPT

H63.0.21.6C-01
GREISINGER electronic GmbH
D - 93128 Regenstauf, Hans-Sachs-Straße 26 +49 (0) 9402 / 9383-0 +49 (0) 9402 / 9383-33 [email protected]
as of version 2.1 GMR 110
Operating Manual
Resistive material moisture measuring instrument
with integrated measuring needles
WEEE-Reg.-Nr. DE 93889386

H63.0.21.6C-01 Operating Manual GMR 110 page 2 of 12 _____________________________________________________ _____________________________________________________________________________
Index
1 GENERAL NOTE .......................................................................................................................................2
2 SAFETY ........................................................................................................................................................3
2.1 INTENDED USE .........................................................................................................................................3 2.2 SAFETY SIGNS AND SYMBOLS ...................................................................................................................3
2.3 SAFETY GUIDELINES .................................................................................................................................3
3 PRODUCT SPECIFICATION ...................................................................................................................4
3.1 SCOPE OF SUPPLY .....................................................................................................................................4 3.2 OPERATION AND MAINTENANCE ADVICE ..................................................................................................4
4 HANDLING .................................................................................................................................................4
4.1 DISPLAY ELEMENTS .................................................................................................................................4 4.2 CONTROL ELEMENTS ................................................................................................................................4
4.3 START OF OPERATION ...............................................................................................................................4 4.4 SELECTION OF THE CHARACTERISTIC CURVE ............................................................................................4
5 PRINCIPLES OF THE MEASUREMENTS ............................................................................................5
5.1 MOISTURE RATING ( WET - MEDIUM - DRY ) ....................................................................................5
5.2 MOISTURE U AND WATER CONTENT W ......................................................................................................5 5.3 TEMPERATURE COMPENSATION ................................................................................................................6 5.4 AUTO-HOLD FUNCTION ............................................................................................................................6
5.5 MEASURING IN WOOD ..............................................................................................................................6 5.6 MEASURING IN PLASTER ...........................................................................................................................7
5.7 MOISTURE ESTIMATION ('WET' - 'MEDIUM' - 'DRY') .........................................................................7 5.8 DISPLAY VALUES AT AIR ..........................................................................................................................7
5.9 MEASURING OTHER MATERIALS ...............................................................................................................8
6 CONFIGURATION OF THE DEVICE ....................................................................................................9
7 ERROR AND SYSTEM MESSAGES ......................................................................................................9
8 RESHIPMENT AND DISPOSAL ............................................................................................................10
9 SPECIFICATION ......................................................................................................................................10
10 APPENDIX A: ADDITIONAL WOOD SORTS .................................................................................11
1 General Note Read this document carefully and get used to the operation of the device before you use it. Keep this document within easy reach near the device for consulting in case of doubt.
Mounting, start-up, operating, maintenance and removing from operation must be done by quali-fied, specially trained staff that have carefully read and understood this manual before starting any work.
The manufacturer will assume no liability or warranty in case of usage for other purpose than the intended one, ignoring this manual, operating by unqualified staff as well as unauthorized modifica-tions to the device. The manufacturer is not liable for any costs or damages incurred at the user or third parties be-cause of the usage or application of this device, in particular in case of improper use of the device, misuse or malfunction of the connection or of the device.
The manufacturer is not liable for misprints.

H63.0.21.6C-01 Operating Manual GMR 110 page 3 of 12 _____________________________________________________ _____________________________________________________________________________
2 Safety
2.1 Intended Use The GMR 110 is a material moisture measuring device with moisture display and rating. Before measuring the material is chosen by selecting an suitable curve from the list at the backside of the instrument and entering it via key .
The measuring is done by pressing the measuring needles into the material – after a short time the measuring value is displayed. Due to its construction it is especially suited to measure firewood and construction timber. Additional many construction materials can be evaluated.
2.2 Safety signs and symbols Warnings are labelled in this document with the followings signs:
DANGER
Caution! This symbol warns of imminent danger, death, serious injuries and significant damage to property at non-observance.
Attention! This symbol warns of possible dangers or dangerous situations which can provoke damage to the device or environ-ment at non-observance.
Note! This symbol point out processes which can indirectly influ-ence operation or provoke unforeseen reactions at non-observance.
2.3 Safety guidelines This device has been designed and tested in accordance with the safety regulations for electronic devices. However, its trouble-free operation and reliability cannot be guaranteed unless the stan-dard safety measures and special safety advises given in this manual will be adhered to when using the device.
1. Trouble-free operation and reliability of the device can only be guaranteed if the device is not subjected to any other climatic conditions than those stated under "Specification". If the device is transported from a cold to a warm environment condensation may cause in a fail-ure of the function. In such a case make sure the device temperature has adjusted to the am-bient temperature before trying a new start-up.
2. If there is a risk whatsoever involved in running it, the device has to be switched off immediately and to be marked accordingly to avoid re-starting. Operator safety may be a risk if - there is visible damage to the device. - the device is not working as specified. - the device has been stored under unsuitable conditions for a longer time. In case of doubt, please return device to manufacturer for repair or maintenance.
3. Do not use these products as safety or emergency stop devices or in any other ap-plication where failure of the product could result in personal injury or material dam-age. Failure to comply with these instructions could result in death or serious injury and material damage.
4. This device must not be used at potentially explosive areas!
The usage of this device at potentially explosive areas increases danger of defla-gration, explosion or fire due to sparking.
5. Avoid injuries by handling the sharp measuring needles carefully! Mount needle protection caps after usage. Keep away from children!
DANGER
DANGER
DANGER
DANGER

H63.0.21.6C-01 Operating Manual GMR 110 page 4 of 12 _____________________________________________________ _____________________________________________________________________________
3 Product Specification
3.1 Scope of supply The scope of supply includes:
Handheld meter GMR 110
Needle protection caps
9V battery
Operating Manual
3.2 Operation and maintenance advice
a.) Battery operation: If „bAt‟ is shown in the lower display the battery has been used up and needs to be replaced. However, the device will operate correctly for a certain time.
The battery has to be taken out, when storing device above 50 °C. We recommend taking out battery if device is not used for a longer period of time. After recommissioning the real-time clock has to be set again.
b.) Treat device and measuring needles carefully. Use only in accordance with above specification. (do not throw, hit against etc.). Protect from soiling.
4 Handling
4.1 Display elements
1: Main display Display of the current moisture or water content
2: Material display The name of the selected material cha-racteristic curve is displayed
3: Moisture display Moisture rating via bar graph:
4: HLD The measuring value is „frozen„ (hold-key)
4.2 Control elements
Key 1: Ein on/off key, Press long: switch device off Press shortly: changeover between measuring display
and temperature adjustment
Key 2: sort Selection of characteristic curve: p.r.t. chapter 4.4
Key 3: hold: press shortly: The measuring current value is ‚frozen„ ('HLD' is displayed)
4.3 Start of operation
Switch the device on with the key .
After segment test the device displays some information to its configuration:
P.OF if the automatic-off-function is activated (p.r.t. chapter0)
The device is ready for measuring afterwards.
4.4 Selection of the characteristic curve Selection of characteristic curve: by pressing the next characteristic curve will be selected.

H63.0.21.6C-01 Operating Manual GMR 110 page 5 of 12 _____________________________________________________ _____________________________________________________________________________
A list of the materials is shown at the backside of the in
The use of inappropriate characteristics can cause faulty measurements!
Selectable material characteristics:
# Material
ref reference (without temperature-compensation)
h.01 Spruce, Pine
h.02 Maple, Birch, Beech, Larch(EUR), Ash(EUR), Fir
h.03 Oak, Ash (AM), Poplar, Douglas Fir
c.01 Cement screed, concrete
c.02 Anhydrite screed
c.03 Gypsum, lime mortar
c.04 Cement mortar
c.05 Aerated concrete
c.06 Limestone
c.07 Brick
c.08 Gypsum plaster
5 Principles of the measurements
5.1 Moisture rating ( WET - MEDIUM - DRY ) In addition to the measuring value there is a moisture rating via bar graph: Therefore the determination „wet‟ or „dry‟ is easy and comfortable for most applications and has no longer be deduced from literature and tables.
However, this rating can only be a first approximate value, because factors like the ap-plication field of the measured material have to be taken into account for the final rating. Experience and knowledge can only be supported by this instrument, not replaced!
5.2 Moisture u and water content w Either moisture u or water content w is needed according to the application. The BaleCheck 100 is supposed to be used the unit moisture u (relating to oven-dry mass). In some cases, like rating of combustibles, the water content w may be more suitable. The instrument can be configured to both of the values, please refer to chapter 6.
Moisture u (relating to oven-dry mass) – recommended setting
The unit is %u (also common: % atro, weight percent)
mass wet : mass of the sample (= total mass = mass water + mass dry) mass water : mass of the water contained in the sample mass dry : mass of the oven-dried sample after (water has been evaporated)
Example: 1 kg wet hay that contains 500 g water has a moisture u of 100%
Water content w (= moisture relating to wet total mass)
The unit is % w.
Example: 1 kg wet wood that contains 500 g water has a water content of 50%
moisture u[%] = ( (mass wet - mass dry ) / mass dry) *100
or: moisture u[%] = (mass water / mass dry) *100
water content [%] = ( (mass wet - mass dry) / mass wet) *100
or: water content [%] = (masse water / mass wet) *100

H63.0.21.6C-01 Operating Manual GMR 110 page 6 of 12 _____________________________________________________ _____________________________________________________________________________
5.3 Temperature compensation The temperature compensation is important for a reliable moisture-measuring. There for the device features a automatic temperature compensation (Atc) or manual temperature compensation input. The choice between the two possibilities is done in the Menu (Atc on/off) According to the selected material characteristic curve the device will use the associated tempera-ture compensation.
Calling temperature when using automatig temperature compensation (Atc on):
• press shortly : in the display will appear: t.°C or t.°F and the temperature
• press again to switch back to the measuring display.
Temperature selection:
• press shortly : in the display will appear: t.°C or t.°F and the temperature
or . • set the temperature by pressing
• press again to switch back to the measuring display.
5.4 Auto-Hold function Particularly when measuring dry materials, electrostatic charges and other similar noise could dither the measuring value. With activated auto-hold function the device will acquire an exact measuring value automatically. During that, the device could be put down to avoid noise through discharge of the clothing etc. After having acquired the measuring value, the display will change to „HLD‟: The value will be fro-zen as long as a new measuring is initiated by pressing key 3 (hold).
5.5 Measuring in wood For measuring wood, punch in the measuring-pikes across to the wood-grain, having a good con-tact between the pikes and the wood (measuring along wood-grain deviates minimal).
DO NOT HIT ONTO THE DEVICE OR PUNCH THE NEEDLES IN PEPPY
The device may be damaged. Select correct wood-sort (see chapter 4.4 or Appendix A). Ensure to have entered the correct temperature (see chapter 5.3). Now read the measuring-value or when having activated the auto-hold-function initiate a new measuring by pressing hold (key 3) . The measured resistance will be extremely high when measuring dry wood (<15%) thus the meas-uring will need more time to achieve its terminal value among other things static discharge could momentarily falsify the measuring. Therefore beware of static discharge and wait long enough until a stable measuring value is displayed (unstable: „%“ blinking) or use the auto-hold-function (see chapter 5.4 Auto-Hold function). When measuring very wet wood (e.g.>50%u) the measuring value may suffer from polarisation ef-fects (steadily decreasing measuring value). In this case the value 5 seconds after the insertion of the electrodes respectively after switching on the instrument is valid.
Very accurate measures can be carried out within the range of 6 to 30%. Beyond this range the accuracy will lessen, but the device will deliver reference values still sufficient for the practitioner. It is measured between the measuring-pikes insulated among each other. Requirements for an ex-act measurement: - choose correct place to measure: place should be free of irregularities like resin–clusters, knurls,
rifts, etc. - choose correct measure depth: Recommendation: for trimmed timber: punch in the pikes up to
1/3 of the material thickness.

H63.0.21.6C-01 Operating Manual GMR 110 page 7 of 12 _____________________________________________________ _____________________________________________________________________________
- Perform multiple measurements: the more measurements will be averaged, the more exact the result will be.
- Pay attention to temperature-compensation: enter the exact temperature manually. Frequent sources of errors: - Attention with oven-dried wood: the moisture dispersion may be irregular, often in the core is
more moisture than on the edge. - Surface-moisture: The wood-edge could be more humid than the core if the wood had been
stored outside and e.g. was in rain. - Wood preservative and other treatment could falsify the measuring. - Fouling at the connections and round the pikes could result in erroneous measurement, espe-
cially with dry wood.
5.6 Measuring in plaster Press needles into the plaster to detect moisture. Select material „c.08“. The more moisture the plaster is containing, the higher is the display, also keep an eye on the moisture estimation (see chapter below). Attention: Because of the different consistencies of plasters and the influence dam-age by moisture, the precision of the measuring is not as high as the precision when measuring in wood! However „precise measuring values‟ aren‟t necessary in the most cases -> when moisture appears, it makes large changes in the measuring value compared to dry parts e.g. of the meas-ured wall, moist sections can easily be detected by the instrument. Also changes in the state (in-creasing/decreasing moisture) can be monitored by periodical measurings.
5.7 Moisture estimation ('WET' - 'MEDIUM' - 'DRY') Additionally to the measuring value, an individual moisture estimation will be displayed simultane-ously: The decision either wet or dry has no longer be affiliated from literature and tables for the most applications. This moisture estimation is only a guidance value, mainly for join-ers/carpenters/floorers use, the final evaluation is depending on the application of the material. E.g. firewood may be already usable while instrument still displays „wet‟! Corresponding standards and instructions must be observed! The Device can only complement the skill of a tradesman or investigator but cannot replace it!
5.8 Display values at air If the probe is not correctly in contact to material, the instrument may display any value! This is caused by the design and measurement method.

H63.0.21.6C-01 Operating Manual GMR 110 page 8 of 12 _____________________________________________________ _____________________________________________________________________________
5.9 Measuring other materials
5.9.1 ‘Hard‘ materials (concrete or similar):
The needles are not intended for measuring hard building materials. For measuring those materials we suggest you the adapter cable GMK3810 and the brush probes GBSL91 or GBSK91. Unscrew the needle holder and mount the adapters for the banana jacks. The red jack has to be connected to the right-hand socket, this decreases susceptibility of electromagnetic interference.
Drill two holes with Ø6mm (GBSK91) or Ø 8mm (GBSL91) at intervals of 8 to 10cm into the material to be measured. Do not use edgeless drills: the re-sulting heat will evaporate the moisture which will result in faulty measures. Wait for at least 10min, blow out the holes to clean them from dust. Apply conductivity compound on the brush-type probes and stick them into the holes. Choose material accord-ing to list on backside of the instrument, then read value. Observe that the holes dry out by-and-by, and the device will measure a value too low, if you want to use them several times. This effect can be compensated by using conductiv-ity compound: insert profuse conductivity compound between the holes and the brush-type probe, and let the electrode stick in the hole for about 30min before measuring (with the device switched off ). Tempera-ture-compensation plays no role when using the building material measuring. Measuring with brush probe GBSL91
5.9.2 ‘Soft‘ Materials:
The most important thing is a good contact between the materials and the measuring needles. Whenever this is not possible because of the material texture, we suggest you to use the adapter cable GMK3810 with appropriate electrodes, such as impact electrode GSE91 or GSG91, recipro-cating piston electrode GHE91. Unscrew the needle holder and mount the adapters for the banana jacks. The red jack has to be connected to the right-hand socket, this decreases susceptibility of electromagnetic interference. Procedure as described in chapter measuring in wood.
5.9.3 Measuring bulk cargo, bales and other special measures
Usable probes: measuring pins GMS 300/91 mounted on GSE91 or GSG91 with adapter cable GMK3810 (red connector to the right-hand socket). Measuring of splints, wood chips, insulating material and similar: When using measuring pins oscillating movements have to be avoided when pushing in the probes. Otherwise hollows between the probes and the material may falsify the measuring. The material should be sufficiently compressed. When in doubt repeat the measuring a few times: the higher measuring values are the decisive ones.

H63.0.21.6C-01 Operating Manual GMR 110 page 9 of 12 _____________________________________________________ _____________________________________________________________________________
6 Configuration of the device Follow these instructions to configure the functions of the device:
Switch the device off.
Press and keep it pressed, while turning the device on (press shortly).
Release the sort-button not before the first parameter “P.OF” is displayed.
Set parameter with up or down .
Jump to the next parameter by pressing .
Parameter Value Information
. Auto Power-Off (turn-off delay) factory setting: 20 min.
1 … 120
Auto Power-Off (turn-off delay) in minutes. If no key is pressed for the time adjusted here, the device is automati-cally switched off (adjustable 1 .. 120 min.).
0F Auto power-off is deactivated (continuous operation)
. Display unit of moisture factory setting: %u
%u Measuring value displayed in moisture %u
%w Measuring value displayed in water content %w
. Display unit of temperature input factory setting: °C
° ( Temperature input in °C
° F Temperature input in °F
AtC
Automatic temperature compensation AtC factory setting: on
0F AtC deactivated: manual input of temperature.
ON AtC activated: instruments temperature is used for compensa-tion.
.
Auto Hold factory setting: OF
0F AutoHold deactivated: pressing hold-key freezes measuring and re-leases it again.
ON AutoHold activated: hold-key starts new measuring, the display will be „frozen‟ as soon as a stable measuring value was detected.
Press again to store the changed settings, the device restarts (segment test).
NOTE: If there is no key pressed within the menu mode within 2 minutes, the configuration will be cancelled, the entered settings are lost!
7 Error and System Messages
E. 1 Value exceeding measuring range, value too high
E. 7 System error - the device has detected a system error (device defective or not within operating temperature)
Value below display range
The blinking bAt display indicates low battery voltage, device will continue to work for a short time.
The battery is consumed and has to be changed. Measurements are no longer possible.
H63.0.21.6C-01 Operating Manual GMR 110 page 10 of 12 _____________________________________________________ _____________________________________________________________________________
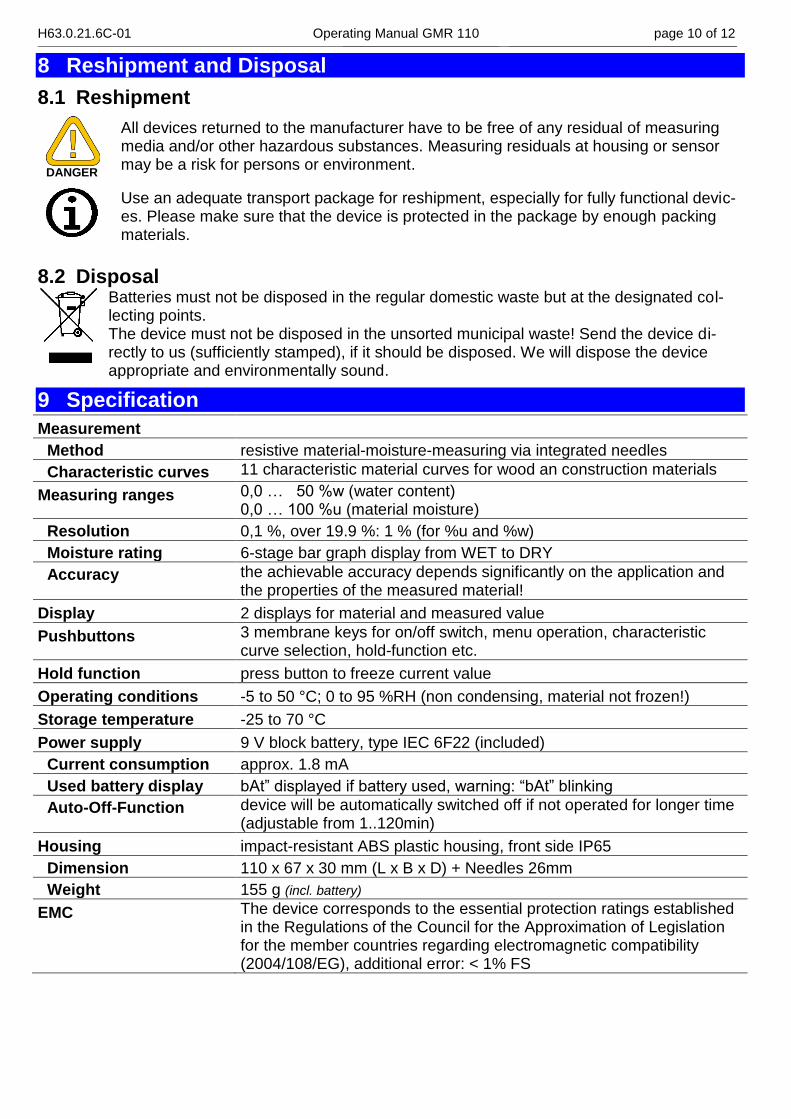
8 Reshipment and Disposal
8.1 Reshipment
DANGER
All devices returned to the manufacturer have to be free of any residual of measuring media and/or other hazardous substances. Measuring residuals at housing or sensor may be a risk for persons or environment.
Use an adequate transport package for reshipment, especially for fully functional devic-es. Please make sure that the device is protected in the package by enough packing materials.
8.2 Disposal
Batteries must not be disposed in the regular domestic waste but at the designated col-lecting points. The device must not be disposed in the unsorted municipal waste! Send the device di-rectly to us (sufficiently stamped), if it should be disposed. We will dispose the device appropriate and environmentally sound.
9 Specification
Measurement
Method resistive material-moisture-measuring via integrated needles
Characteristic curves 11 characteristic material curves for wood an construction materials
Measuring ranges 0,0 … 50 %w (water content) 0,0 … 100 %u (material moisture)
Resolution 0,1 %, over 19.9 %: 1 % (for %u and %w)
Moisture rating 6-stage bar graph display from WET to DRY
Accuracy the achievable accuracy depends significantly on the application and the properties of the measured material!
Display 2 displays for material and measured value
Pushbuttons 3 membrane keys for on/off switch, menu operation, characteristic curve selection, hold-function etc.
Hold function press button to freeze current value
Operating conditions -5 to 50 °C; 0 to 95 %RH (non condensing, material not frozen!)
Storage temperature -25 to 70 °C
Power supply 9 V block battery, type IEC 6F22 (included)
Current consumption approx. 1.8 mA
Used battery display bAt” displayed if battery used, warning: “bAt” blinking
Auto-Off-Function device will be automatically switched off if not operated for longer time (adjustable from 1..120min)
Housing impact-resistant ABS plastic housing, front side IP65
Dimension 110 x 67 x 30 mm (L x B x D) + Needles 26mm
Weight 155 g (incl. battery)
EMC The device corresponds to the essential protection ratings established in the Regulations of the Council for the Approximation of Legislation for the member countries regarding electromagnetic compatibility (2004/108/EG), additional error: < 1% FS

H63.0.21.6C-01 Operating Manual GMR 110 page 11 of 12 _____________________________________________________ _____________________________________________________________________________
10 Appendix A: Additional wood sorts abura Hallea ciliata h.02 jarrah Eucalyptus marginata h.01
african alstonia Alstonia congensis h.01 kambala (= iroko) Chlorophora excelsa h.02
african canarium Canarium schweinfurthii h.01 karri Eucalyptus diversicolor h.01
african walnut Lovoa trichilioides h.01 keruing Dipterocarpus (spp.) h.01
afrormosia Pericopsis elata h.03 khaya Khaya ivorensis h.01
afzelia Afzelia spp. h.02 kokrodua African afrormosia h.03
agba Gossweilerodendron balsamiferum h.01 kosipo (= omu) Entandrophragma candollei h.01
alder h.01 lapacho (= ipe) Tabebuia (spp.) h.02
alder, common Alnus glutinosa h.01 limba Terminalia superba h.01
alder, red Alnus rubra h.01 lime Tilia cordata h.02
alerce Fitzroya cupressoides h.01 lime, american h.02
alstonia Alstonia congensis h.01 logwood Haematoxlon Campechianum h.01
andiroba Carapa guianensis h.01 mahogany Swietenia macrophylla h.01
balsa Ochroma lagopus h.01 makore Tieghemella africana h.01
basralocus Dicorynia paraensis h.01 makoré (african pear) Tieghemella heckelii h.01
berlinia Berlinia bracteosa h.01 maritime pine Pinus pinaster h.01
black afara h.02 melêze h.01
briar Erica arborea h.01 mockernut Carya alba h.02
ceder h.02 niangon Heritiera utilis h.02
ceiba Ceiba pentandra h.01 niové Staudtia stipitata h.02
cembra pine Pinus cembra h.01 niové bidinkala h.03
cherry tree Prunus (spp.) h.01 oak, holm Quercus ilex h.01
chestnut, horse Aescu!us hippocastanum h.01 oak, sessile Quercus petraea h.01
chestnut, sweet Castanea sativa h.01 obeche Triplochiton scleroxylon h.02
common beech Fagus sylvatica h.02 okoumé Aucoumea klaineana h.02
cypress Cupressus (spp.) omu Entandrophragma candollei h.01
cypress, c. lusit h.02 oregon pine Pseudotsuga menziesii h.01
cypress, real h.01 parana pine Araucaria angustifolia h.02
dahoma Piptadeniastrum africanum h.02 patagonian cypress Fitzroya cupressoides h.01
daniellia (= ogea) Daniellia ogea h.01 pear Pyrus communis h.02
douka (= makore) Tieghemella africana h.01 pencil cedar Juniperus h.01
ebony h.02 plum tree h.01
ekki Lophira alate h.01 purpleheart Peltogyne (spp.) h.01
elm Ulmus h.01 red oak, american Quercus rubra h.02
emien (= african alstonia) Alstonia congensis h.01 red sandelwood h.01
european aspen Populus tremula h.01 rio rosewood Dalbergia nigra h.02
fromager (= ceiba) Ceiba pentandra h.01 rosewood Dalbergia (spp.) h.02
gaboon Aucoumea klaineana h.02 stone pine Pinus pinea h.01
hevea Hevea brasiliensis h.03 teak Tectona grandis h.02
hickory Carya (spp.) h.02 tola, branca h.01
hickory, bitternut h.02 tola, real h.03
hickory, poplar h.01 tola, red h.03
hickory, swap h.02 trembling poplar populus tremula h.01
holm oak Quercus ilex h.01 walnut h.01
hornbeam Carpinus betulus h.01 western red cedar Thuja plicata h.01
ilomba Pycnanthus angolensis h.02 white oak, american Quercus alba h.02
imbuia Ocotea porosa h.03 white poplar Populus alba h.01
ipe Tabebuia (spp.) h.02 willow Sa!ix (spp.) h.02
iroko Chlorophora excelsa h.02 yellow birch Betula alleghaniensis h.01
izombé Testulea gabonensis h.01 yellow pine h.01
jacareuba Calophyllum brasiliense h.01
Cardboard h.02 Melamine-fake boards h.03 Wood fibre insulating wall panel h.01
Cork h.03 Paper h.01 Textiles h.01
Fibre board h.01 Phenolic resin-fake boards h.03
Kauramin-fake boards h.01 Wood fibre hard disks h.01

H63.0.21.6C-01 Operating Manual GMR 110 page 12 of 12 _____________________________________________________ _____________________________________________________________________________