benefit charges e-response web site - itsc.org public documents/e-response... · 5 notice of...
TRANSCRIPT

BENEFIT CHARGES
E-RESPONSE WEB SITE
USER GUIDE
Version: 1.4
Date: September 2019
Copyright © 2019, National Association of State Workforce Agencies.
All Rights Reserved.
i
1 Introduction ............................................................................................................................. 1
2 Getting Started ......................................................................................................................... 1
2.1 Minimum Requirements, Credentials, and Conventions ................................................. 1
2.2 Credentials. ....................................................................................................................... 1
2.3 Conventions. ..................................................................................................................... 2
3 Logging In ............................................................................................................................... 2
4 Features Included in Multiple Screens .................................................................................... 4
5 Notice of Benefit Charges Screen ........................................................................................... 5
6 Creating a Response ................................................................................................................ 6
7 Deleting a Response .............................................................................................................. 15
8 Amending a Submitted Response .......................................................................................... 16
1
1 Introduction
SIDES E-Response makes it possible for employers to respond electronically to requests for
information from participating State Unemployment Insurance agencies. This guide provides
step-by-step guidance for responding to Benefit Charges, including samples of the screens that
you will see when you log-in to E-Response and enter information related to a specific
claim/individual. The E-Response system performs a check of the information to ensure that it is
complete before it is submitted. When a response is submitted, E-Response provides a
confirmation number for your records.
2 Getting Started
2.1 Minimum Requirements, Credentials, and Conventions
Minimum Requirements.
The minimum system requirements to use SIDES E-Response are:
• Internet Explorer version 11.0 or higher.
• Chrome V44 or higher.
• Firefox V37 or higher.
• Javascript must be turned on.
• A minimum screen resolution of 1024 x 768.
2.2 Credentials.
Before logging into SIDES E-Response, you will need the following credentials:
• Federal Employer Identification Number (FEIN)
• State Employer Identification Number (SEIN) if used by requesting State.
• Personal Identification Number (PIN) / Access Code
The State Unemployment Insurance (UI) agency posting information for review and necessary
action will provide your PIN either with the notice that requests information or through another
avenue. Some States may assign a business one PIN for access to all requests sent; other states
may assign a separate PIN for access to each request. If you have questions regarding
credentials for logging in to E-Response, please contact the State UI agency from which you
have received a notice.
2
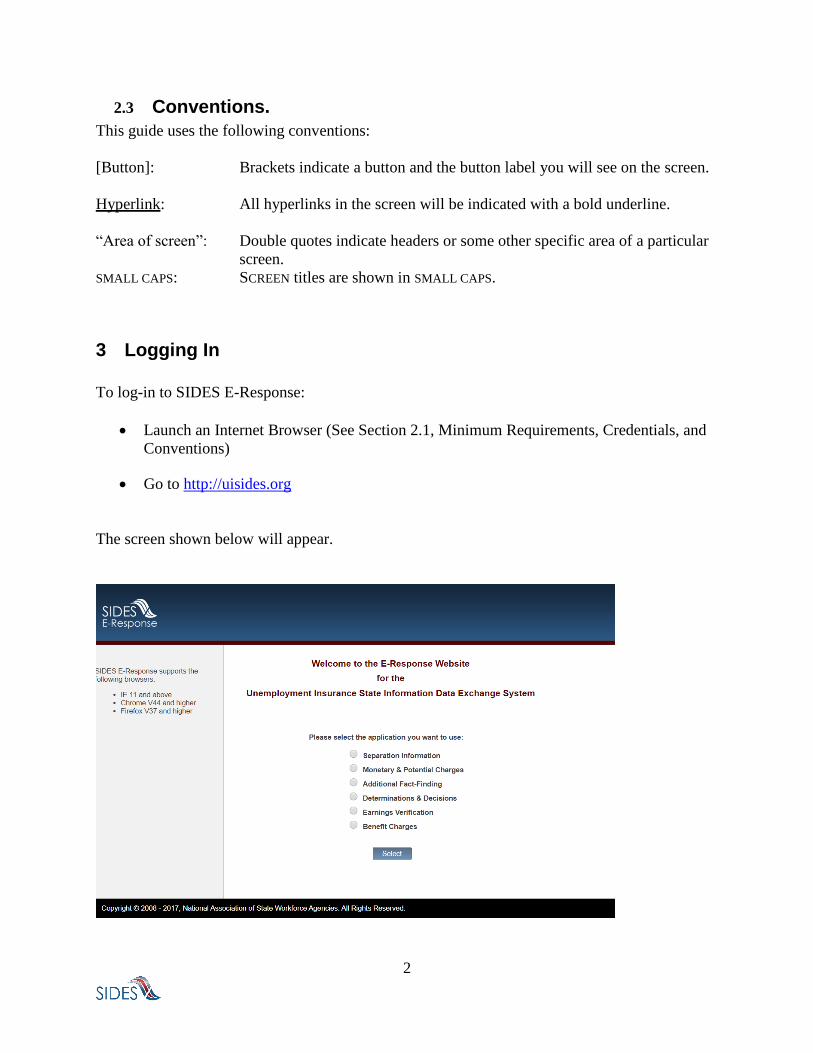
2.3 Conventions.
This guide uses the following conventions:
[Button]: Brackets indicate a button and the button label you will see on the screen.
Hyperlink: All hyperlinks in the screen will be indicated with a bold underline.
“Area of screen”: Double quotes indicate headers or some other specific area of a particular
screen.
SMALL CAPS: SCREEN titles are shown in SMALL CAPS.
3 Logging In
To log-in to SIDES E-Response:
• Launch an Internet Browser (See Section 2.1, Minimum Requirements, Credentials, and
Conventions)
• Go to http://uisides.org
The screen shown below will appear.

3
On the WELCOME screen, select Benefit Charges, and click the [Select] button.
The BENEFIT CHARGES APPLICATION RESPONSE ENTRY screen shown below will appear.
On the BENEFIT CHARGES APPLICATION RESPONSE ENTRY (Log-In) screen, do the following:
• Select the appropriate State from the drop-down list;
• Enter your Federal Employer Identification Number (FEIN) without dashes or other
punctuation;
• Enter your State Employer Identification Number (SEIN) without dashes or other
punctuation;
• Enter the PIN / Access Code provided to you by the requesting State UI agency, and
Note: PINs are case SenSiTive
• Click the [Login] button.
If the login is unsuccessful, first try again, being very careful with your keystrokes. If you
continue to have a problem, either your credentials are incorrect or there are no Benefit Charges
pending at this time. Contact the requesting State UI agency if you received correspondence that
a notice is pending, and you cannot log into the system to enter your response.

4
4 Features Included in Multiple Screens
• Identifying Information. Your FEIN and SEIN will be displayed in the upper right
portion of the screens.
• Information Bar. A vertical section on the left side of the screen provides specific
instructions to help you navigate specific screens.
• Site Navigation Buttons. At the bottom of most screens you will find the following
buttons:
o [Back]—saves your work and takes you to the previous screen.
o [Cancel]—deletes unsaved data from the screen, and you remain on the same
screen.
o [Save]—saves data entered and runs validations, but you remain on the same
screen.
o [Main Menu]—does not save data entered and returns you to the Benefit Charges
screen.
o [Next]—saves data entered and moves to the next screen.
o [Go]—a drop down menu allows you to select and jump to a particular screen.
Note: Using the browser navigation button to go back or go forward will NOT ensure the
proper functioning of the site and could cause you to lose work.
• Sign Out Button. The [Sign Out] button located in the upper far-right portion of each
screen will log you out of the E-Response website. Be sure you have saved your work
before signing out.
• Help Icon. This symbol indicates help is available for the particular field where it is
found. Simply hover over the icon to open a help screen.

5
• Screen Identification Number. The number in the bottom right corner of each screen
identifies it. Should you have questions or problems with a screen, please refer to this
screen number when contacting your State UI agency.
• Standard Web Interface Features. Many screens include navigation and functions that are
common on most websites, including clickable radio buttons, check boxes, drop-down
menus, and text fields. Remember to use only the navigation features built into the site.
Using browser navigation features to go back, forward, or print could cause you to lose
your work.
5 Notice of Benefit Charges Screen
After logging in to E-Response you will see the Benefit Charges request or requests that are
associated with the PIN that you entered. A sample screen is shown below.
At the top left is a “Search by Date” box. If the list of pending requests is lengthy, you can
locate a specific request by entering the Date to which it relates in this box and clicking [Search].
The list shows the date that the Benefit Charges response was sent and, if included, the date due
to the requesting state. It is important that each response be submitted by its due date to ensure
that if you question, appeal, or protest the charges the information is returned in time for the state

6
UI agency to accept your response. Always submit your question/appeal/protest even if late
because a UI agency may still act on it.
Response Status Buttons. The buttons shown for each pending request indicates its status.
• If the response has not yet been started, the button will show [View Notice]
• If the response is in progress, you can choose the buttons [Edit Response] or [Delete
Response]
• If the response has been submitted, the button will show [Create Amendment].
6 Creating a Response
This section takes you step-by-step through the process of creating and submitting a response. As
you navigate the screens, required fields on each screen must be completed before you are
permitted to move to the next screen. Any required field left blank will produce an error
message. At any point in the process, you can save your work and come back to it later. When
you login to work on it later, click the [Edit Response] button which will take you back to the
last screen you completed. You also have the option of deleting all the information that you have
entered and starting fresh by clicking the [Delete Response] button.
Note: Only a limited character set (numbers and letters) may be keyed into text fields. Use care
when cutting and pasting from other applications, such as Microsoft Word. Invisible characters
such as a paragraph symbol may be pasted into the text field that will cause an error message to
be displayed.
To begin work on a response, click [View Notice]. You will then see the STATE AND
EMPLOYER IDENTIFICATION screen. A sample is shown below.
text
Note: The benefit charge exchange maybe customized to permit USERS to either protest a
charge, appeal a charge, question a charge, protest/question a charge or appeal/question a
charge. The button and screen labels will change based on the settings submitted by the state
in their request. For the purpose of this manual most of the screens that will be displayed will
be to Question a charge.

7
This screen includes a series of pre-populated fields including “Requesting State” information,
“Employer Information” and “Charge Statement Information.” This information cannot be
changed.
Immediately below this section, there is an opportunity to check a box indicating that the request
has been sent to you in error if you are a TPA because you do not represent the employer for
whom the individual worked. If you check this box, click [Next] this will take you to the
PREPARER INFORMATION screen to complete and then submit the response.
If there are attachments, download the attachments, review, and complete any that must be
returned with your response.
After reviewing the information on the State and Employer Information screen, click [Next].
This will take you to the BENEFIT CHARGES screen. A sample is shown below.

8
The BENEFIT CHARGES screen displays all charges for a specific due date and
Account/Subaccount number. From this screen you may indicated whether you want to view
individual charges or if you want to question a claim.
If you select [View Details] you will be directed to the BENEFIT CHARGE WEEKLY CHARGE
screen where you may view each week(s) charge. See below.
If you select [Question] you will be directed to the QUESTION INDIVIDUAL BENEFIT CHARGE
screen. See below.

9
After reviewing this screen, click [Back] to return to the BENEFIT CHARGE screen or click
[Question]. The [Question] will direct you to the QUESTION INDIVIDUAL BENEFIT CHARGE
screen.
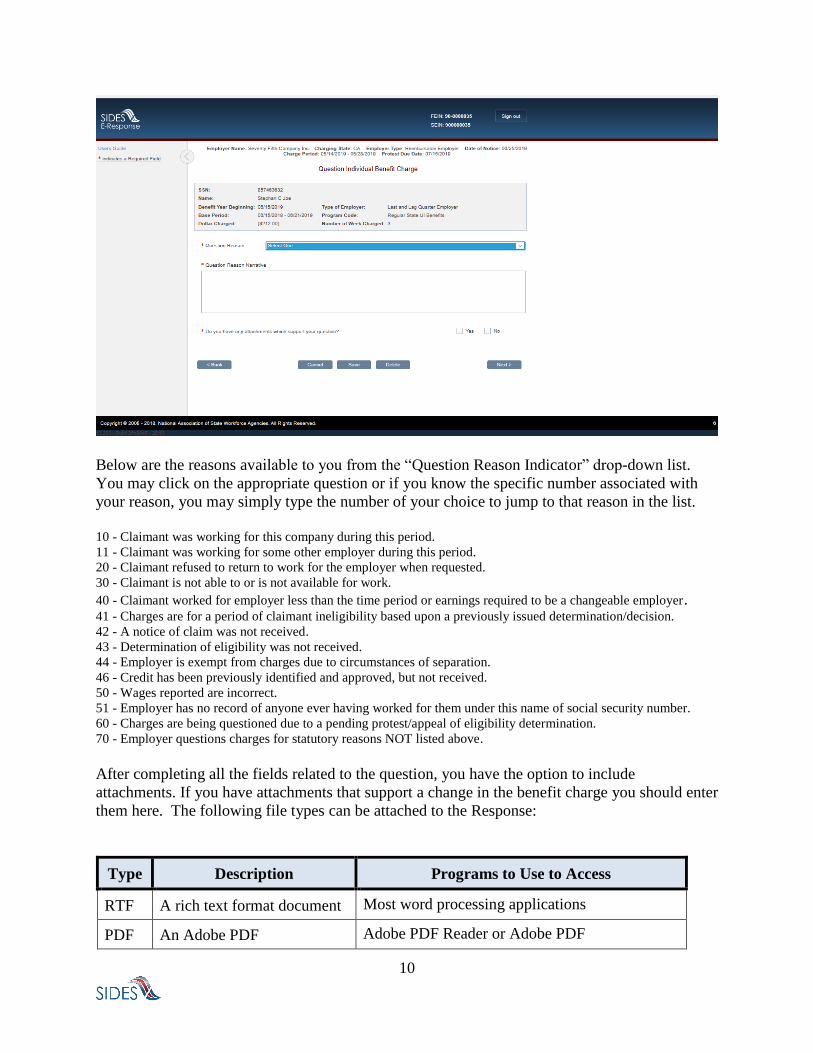
10
Below are the reasons available to you from the “Question Reason Indicator” drop-down list.
You may click on the appropriate question or if you know the specific number associated with
your reason, you may simply type the number of your choice to jump to that reason in the list.
10 - Claimant was working for this company during this period.
11 - Claimant was working for some other employer during this period.
20 - Claimant refused to return to work for the employer when requested.
30 - Claimant is not able to or is not available for work.
40 - Claimant worked for employer less than the time period or earnings required to be a changeable employer. 41 - Charges are for a period of claimant ineligibility based upon a previously issued determination/decision.
42 - A notice of claim was not received.
43 - Determination of eligibility was not received.
44 - Employer is exempt from charges due to circumstances of separation.
46 - Credit has been previously identified and approved, but not received.
50 - Wages reported are incorrect.
51 - Employer has no record of anyone ever having worked for them under this name of social security number.
60 - Charges are being questioned due to a pending protest/appeal of eligibility determination.
70 - Employer questions charges for statutory reasons NOT listed above.
After completing all the fields related to the question, you have the option to include
attachments. If you have attachments that support a change in the benefit charge you should enter
them here. The following file types can be attached to the Response:
Type Description Programs to Use to Access
RTF A rich text format document Most word processing applications
PDF An Adobe PDF Adobe PDF Reader or Adobe PDF
11
Type Description Programs to Use to Access
TXT A text file All word processing applications and all text
editors (Notepad, vi, etc…)
TIFF A tiff image file Graphical tools and picture tools
CSV A comma-separated values
file
Most spreadsheet programs and database
management systems
When you have attached the desired attachments to the response, click [Next]. You may then
question another charge following the same procedure. When you are done questioning all the
charges desired, click [Next] on the BENEFIT CHARGES screen. You will be brought to a
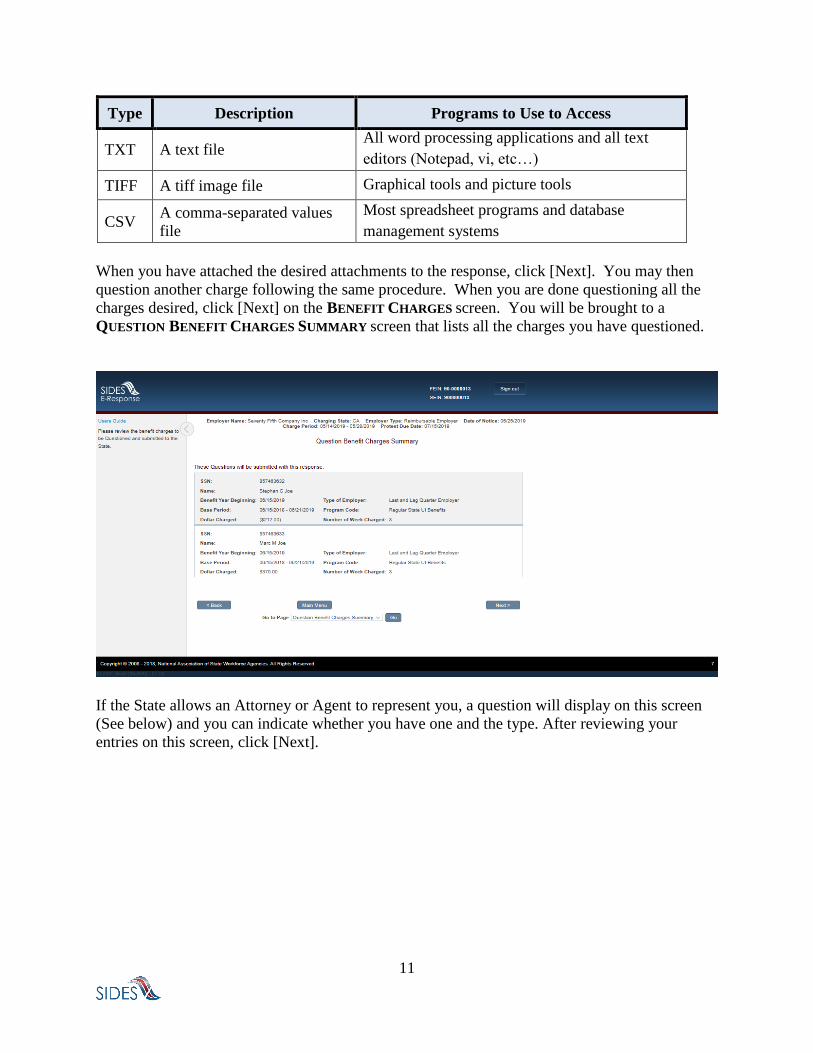
QUESTION BENEFIT CHARGES SUMMARY screen that lists all the charges you have questioned.
If the State allows an Attorney or Agent to represent you, a question will display on this screen
(See below) and you can indicate whether you have one and the type. After reviewing your
entries on this screen, click [Next].

12
The SUPPLEMENTAL QUESTION INFORMATION screen will be displayed if you have selected an
agent or attorney on the BENEFIT CHARGES SUMMARY screen, or if the state has permitted you
to provide further information on unavailable date/times for a hearing, interpreter languages
required or any other special needs.
If the State does not allow for Attorney or Agents or permit further information at this level
when you click [Next] the PREPARER INFORMATION screen will be displayed.
After entering the information on the screen above, click [NEXT] you will be directed to the
PREPARER INFORMATION screen.
13
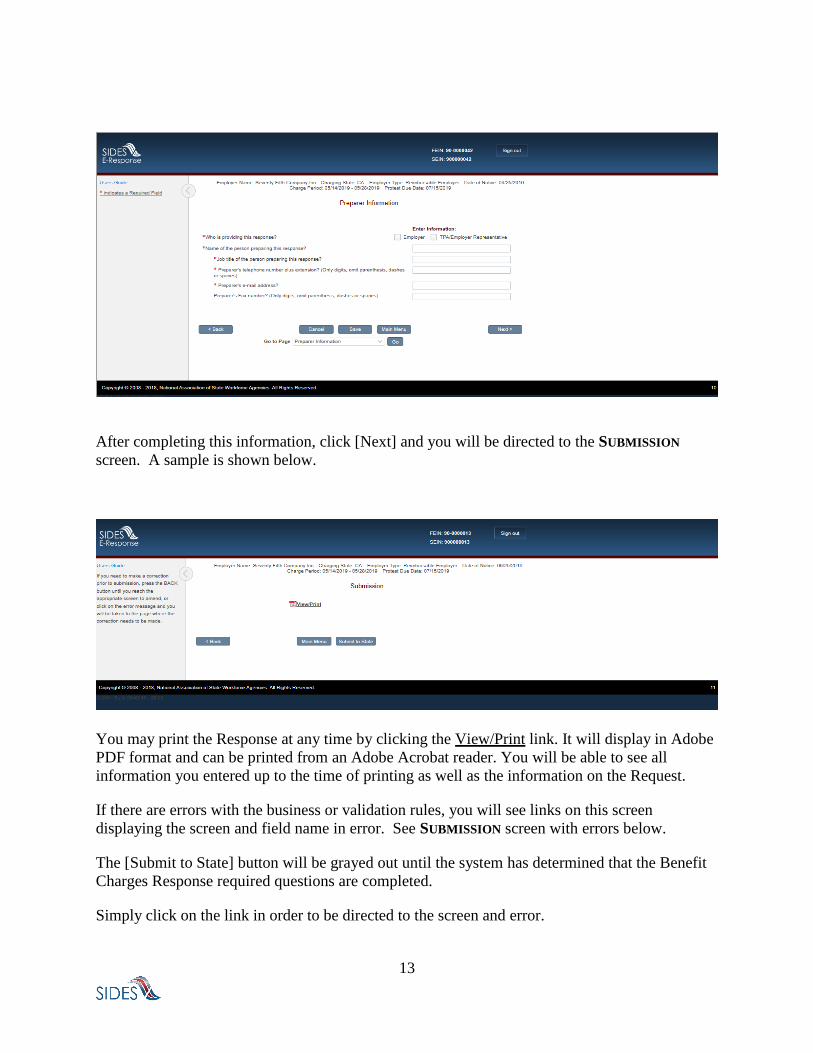
After completing this information, click [Next] and you will be directed to the SUBMISSION
screen. A sample is shown below.
You may print the Response at any time by clicking the View/Print link. It will display in Adobe
PDF format and can be printed from an Adobe Acrobat reader. You will be able to see all
information you entered up to the time of printing as well as the information on the Request.
If there are errors with the business or validation rules, you will see links on this screen
displaying the screen and field name in error. See SUBMISSION screen with errors below.
The [Submit to State] button will be grayed out until the system has determined that the Benefit
Charges Response required questions are completed.
Simply click on the link in order to be directed to the screen and error.

14
When the Response has been successfully completed, click [Submit to State]. You will be
directed to the SUBMISSION CONFIRM screen.
After you click [Submit] the THANK YOU screen will display. See sample below.

15
The THANK YOU screen provides your confirmation number. Keep this confirmation number in
your files. The confirmation number will also appear at the top of the PDF under the View/Print
link. We strongly recommend you print a copy of your submission for your records or save an
electronic copy of the PDF document.
7 Deleting a Response
Should you find that a response is erroneous before you have submitted it to the state agency,
you can delete an un-submitted response and start over. Go to the NOTICE OF BENEFIT
CHARGES screen and click [Delete Response]. Before the response is deleted, you will see the
DELETE AN IN PROGRESS RESPONSE screen shown below.
If you click the [Delete] button, this action will delete all the data you entered for this individual
request, and it is not possible to retrieve the data; the screens will be reset as if no data had been
entered for that request.
16
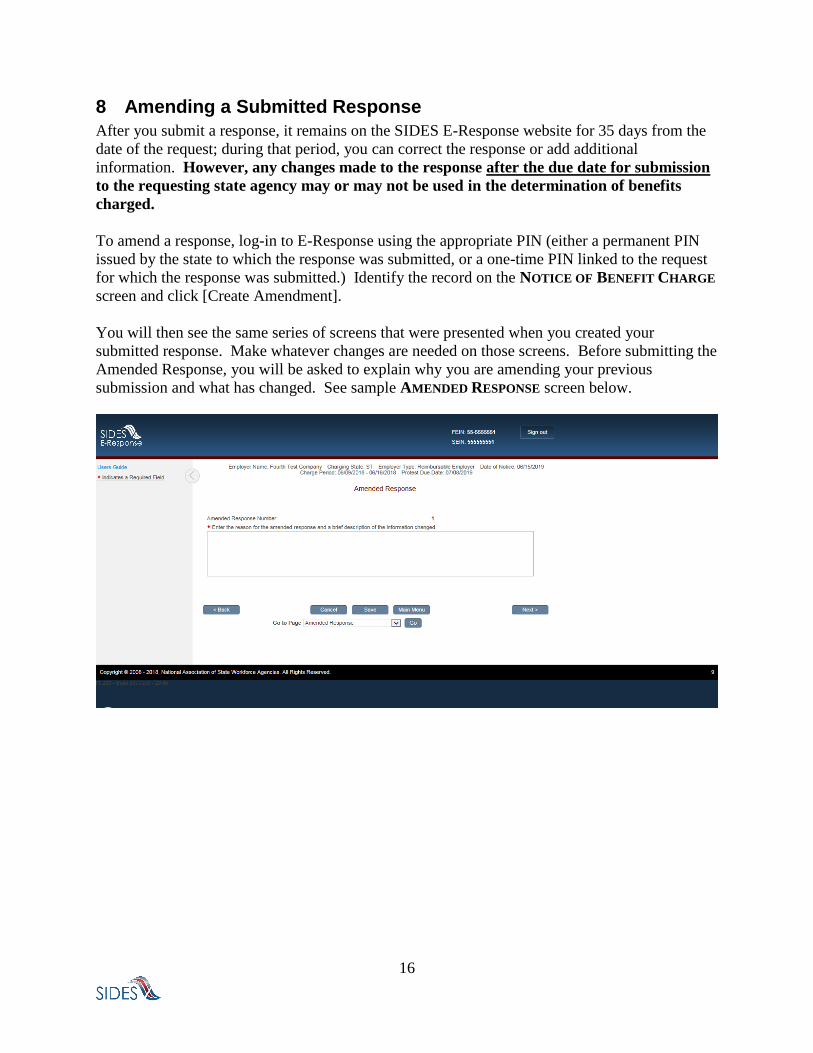
8 Amending a Submitted Response
After you submit a response, it remains on the SIDES E-Response website for 35 days from the
date of the request; during that period, you can correct the response or add additional
information. However, any changes made to the response after the due date for submission
to the requesting state agency may or may not be used in the determination of benefits
charged.
To amend a response, log-in to E-Response using the appropriate PIN (either a permanent PIN
issued by the state to which the response was submitted, or a one-time PIN linked to the request
for which the response was submitted.) Identify the record on the NOTICE OF BENEFIT CHARGE
screen and click [Create Amendment].
You will then see the same series of screens that were presented when you created your
submitted response. Make whatever changes are needed on those screens. Before submitting the
Amended Response, you will be asked to explain why you are amending your previous
submission and what has changed. See sample AMENDED RESPONSE screen below.
17