better novel app - getting started
TRANSCRIPT
introduction for early adopters
1

outlining in the workspace
2
3
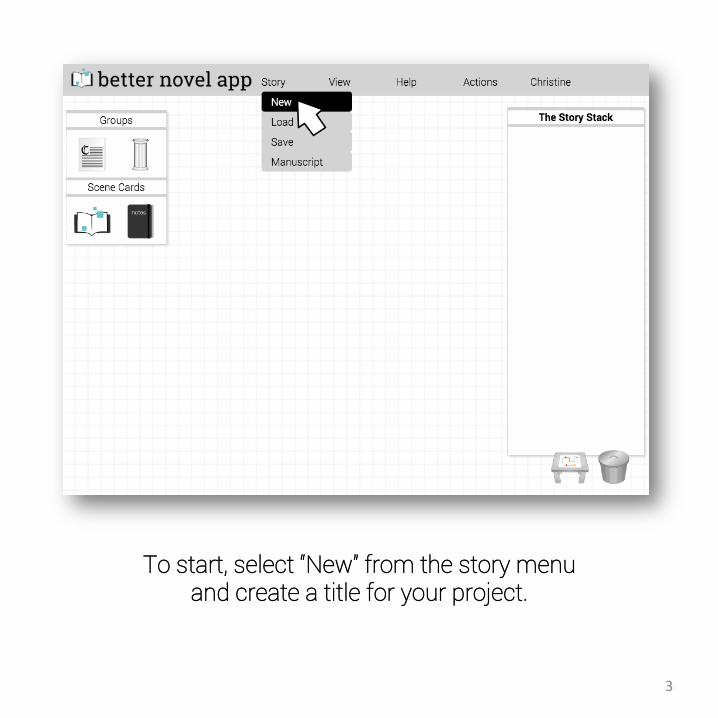
To start, select “New” from the story menu and create a title for your project.
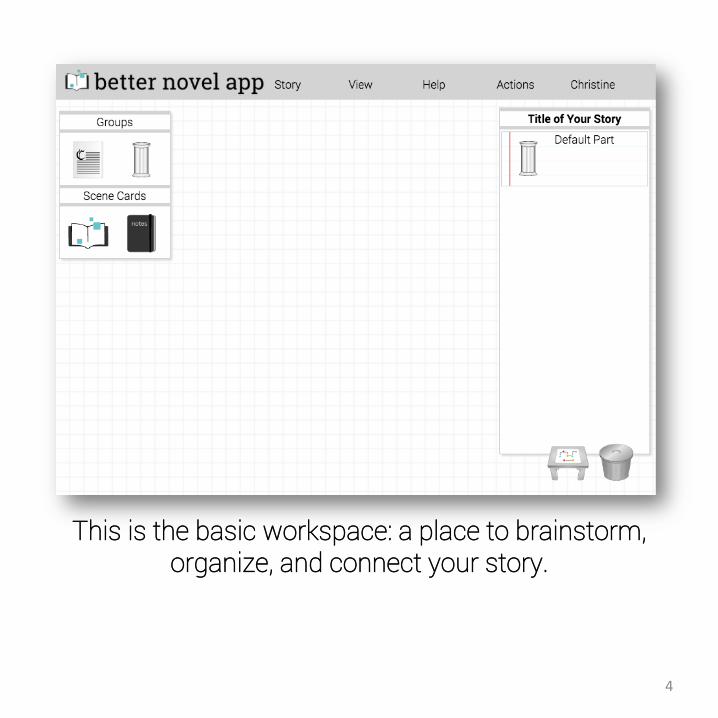
This is the basic workspace: a place to brainstorm, organize, and connect your story.
4

Story cards represent different scenes, chapters, and parts. You can also use story cards to store ideas and notes.
5

Drag and drop story cards– parts, chapters, scenes, and notes— into the workspace.
6

Right-click on a scene card to change its icon.
7

Link scene cards together by dragging one on to another.
8

To add notes to a scene, right click on a scene card and select “Contents.”
Later, these bulleted notes will also
appear in the text editor. 9

Back in the workspace, keep connecting scenes by dragging a scene card onto another scene card.
10

Drag and drop groups of scene cards into chapters.
11
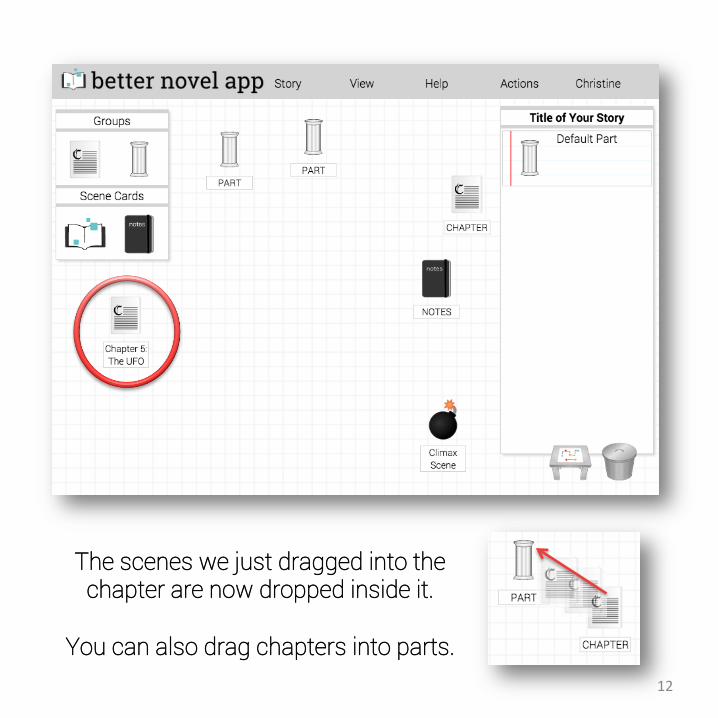
The scenes we just dragged into the chapter are now dropped inside it.
You can also drag chapters into parts.
12

To view your scenes inside a chapter, right click on the chapter and select “Contents.”
Here, you can add notes to the chapter or to
individual scenes.
13

You can also rearrange scenes inside the chapter.
To move a scene out of the chapter and back to the workspace, drag the scene card to the workspace icon.
If you want to delete it, drag it to the trashcan.
14
organizing with the story stack
15
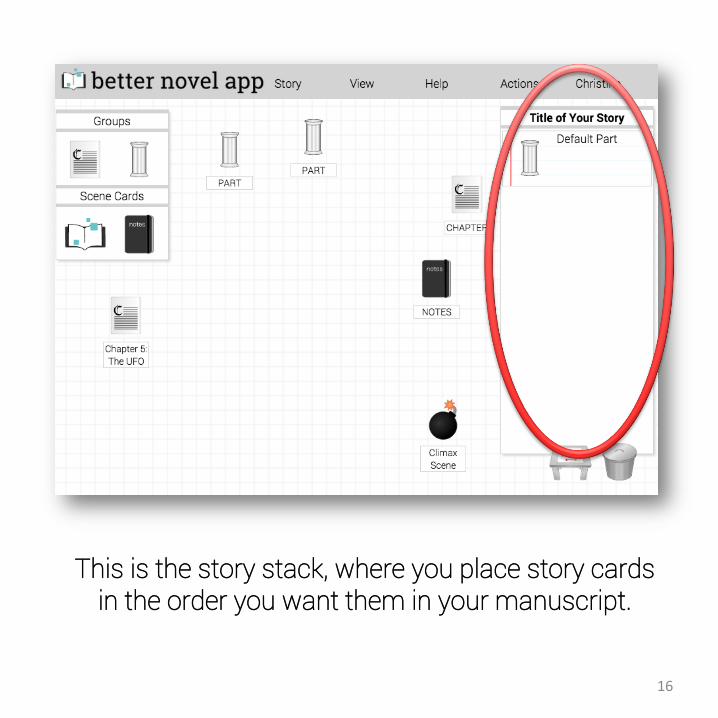
This is the story stack, where you place story cards in the order you want them in your manuscript.
16

Drag story cards into the story stack to view your work linearly.
Click the parts and chapters to reveal their contents.
You can rearrange the scenes here too, or drag them back into the workspace to remove them.
17

writing with the text editor
18
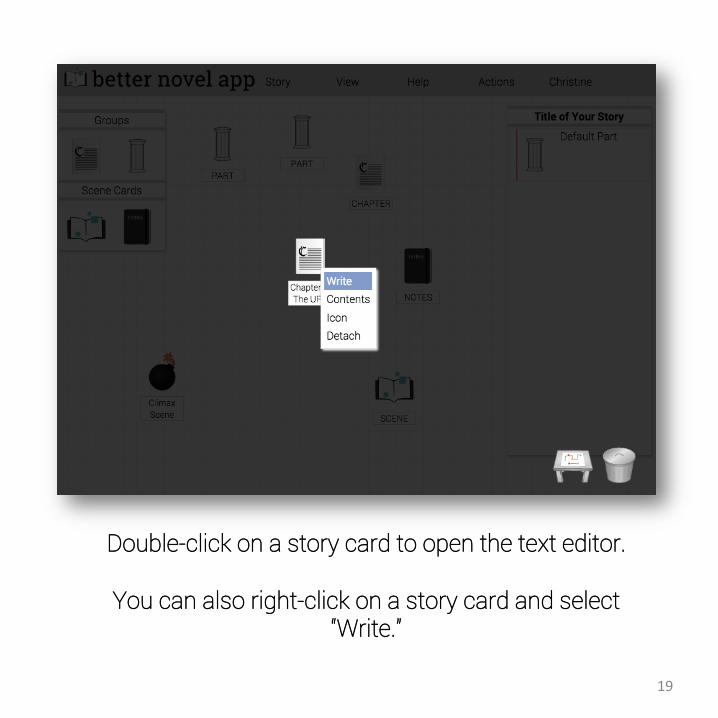
Double-click on a story card to open the text editor.
You can also right-click on a story card and select “Write.”
19

The text editor is where you write the text of your story.
Click the check mark to return to the workspace. (Your work is automatically saved.)
20

Your chapter titles and chapter notes are visible at the top of the screen.
(Your chapter notes are just for you– they won’t be visible in your finished manuscript.)
21

Your scenes are matched up with your scene notes.
(Your scene titles and notes are just for you-- they won’t be visible in your finished manuscript.)
22

sharing your manuscript
23
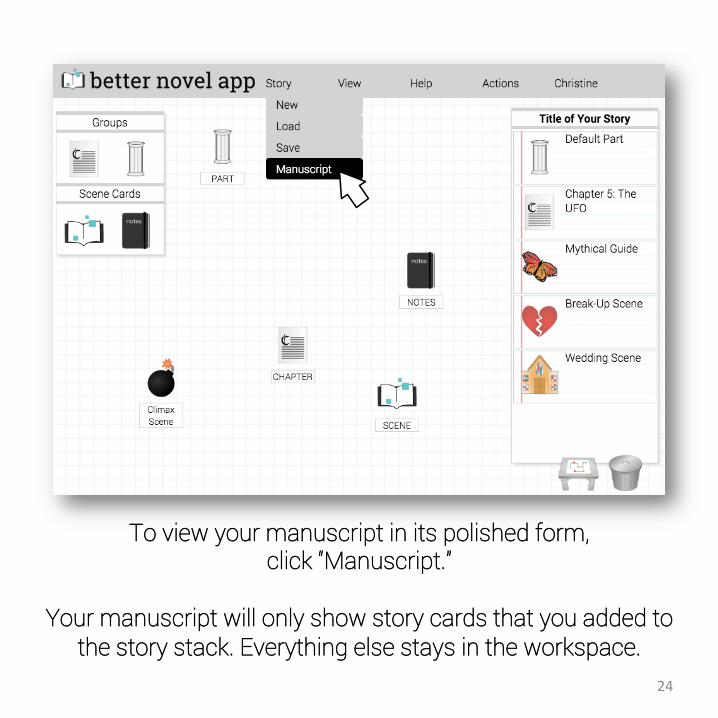
To view your manuscript in its polished form, click “Manuscript.”
Your manuscript will only show story cards that you added to
the story stack. Everything else stays in the workspace. 24

Your lovely manuscript opens in a new tab.
*More sharing/exporting options coming soon!
Your custom chapter titles remain visible, while your scene titles and notes are hidden. 25
THANKS!
Please send us your questions, suggestions, and bugs...
no issue is too small.
26