biomechanical preparation
TRANSCRIPT
Introduction
In an endodontic treatment, the root canal system is
our road map to success. In the past, we have been
thinking only vertically. Many students were taught
that the first concern in root canal preparation was
“working length”. Now, we understand that the critical
issue is three-dimensionality.
Root canals exist as multiple inter-relationships. Root
canal systems are not cylinders but ribbons, sheets and
banners. Eccentrically and abnormality are “normal”.
Almost 30 years ago, Schilder introduced the concept
“cleaning and shaping”.
These 2 concepts are inseparable. The secret to successful
clinical endodontics is proper shaping.
1

Cleaning:
Refers to the removal of all contents of the root canal
system before and during shaping.
Substrates, microflora, bacterial products, foods, caries etc.
Shaping
Refers to a specific cavity form with particular design
objectives. The shape permits vertical pluggers to fit
freely within the root canal system and to general
hydraulics required to transform and capture a
maximum cushion of gutta-percha and sealer into all
foramina.
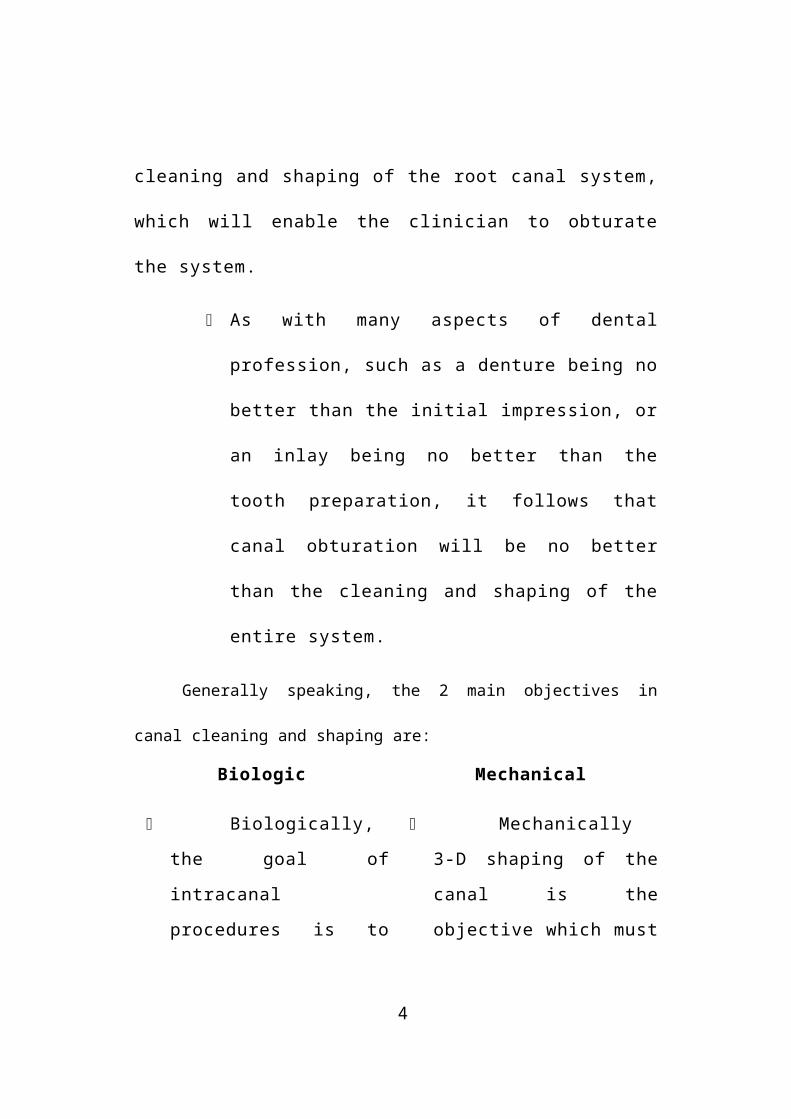
The purpose of this seminar is to provide the rationale and
techniques for proper cleaning and shaping of the root canal
system, which will enable the clinician to obturate the system.
As with many aspects of dental profession, such as a
denture being no better than the initial impression, or
an inlay being no better than the tooth preparation, it
2
follows that canal obturation will be no better than the
cleaning and shaping of the entire system.
Generally speaking, the 2 main objectives in canal cleaning and shaping
are:
Biologic Mechanical
Biologically, the
goal of intracanal
procedures is to remove all
pulp tissue remnants and
micro-organism and their
substrates along with
infected dentin.
Mechanically 3-D
shaping of the canal is the
objective which must be
accomplished to achieve
biologic cleaning.
BIOLOGIC OBJECTIVES
1. Confine all instrumentation within the root canal space to
maintain its spatial integrity.
Repeated instrumentation extending beyond the
constriction is unwarranted. It causes peri-radicular
inflammation and often destroys the normal biologic
constriction of the root apex.
3
2. Avoid pushing contaminated debris past the confines of the
apical constriction.
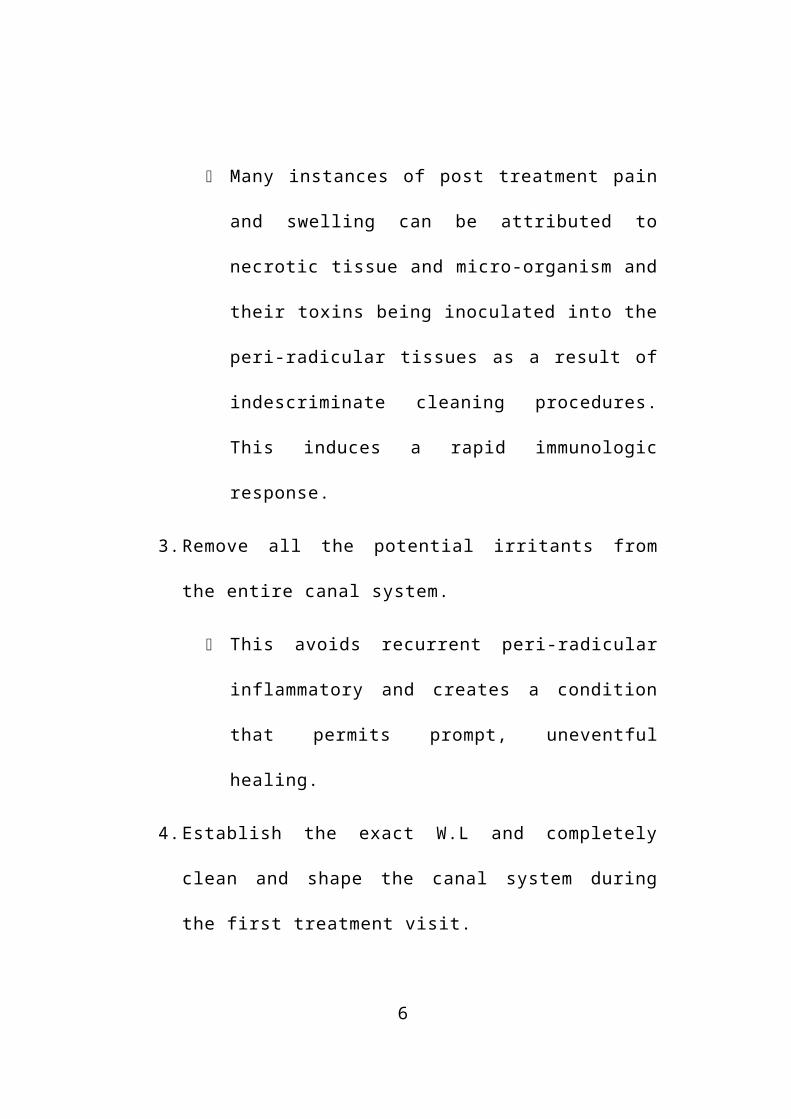
Many instances of post treatment pain and swelling can
be attributed to necrotic tissue and micro-organism and
their toxins being inoculated into the peri-radicular
tissues as a result of indescriminate cleaning
procedures. This induces a rapid immunologic
response.
3. Remove all the potential irritants from the entire canal
system.
This avoids recurrent peri-radicular inflammatory and
creates a condition that permits prompt, uneventful
healing.
4. Establish the exact W.L and completely clean and shape the
canal system during the first treatment visit.
5. Create sufficient width in the coronal half of the canal system
to allow for copious flushing and debridement.
4
MECHANICAL OBJECTIVES
1. Develop a continuously tapering conical form in the root
canal preparation.
The final preparation of this system should be an exact
replica of the original canal configuration in shape,
taper, and flow only larger. Only too often, canals are
simply “bored out” with the clinician failing to
consider the spatial relationship of the canal to the
overall root anatomy.
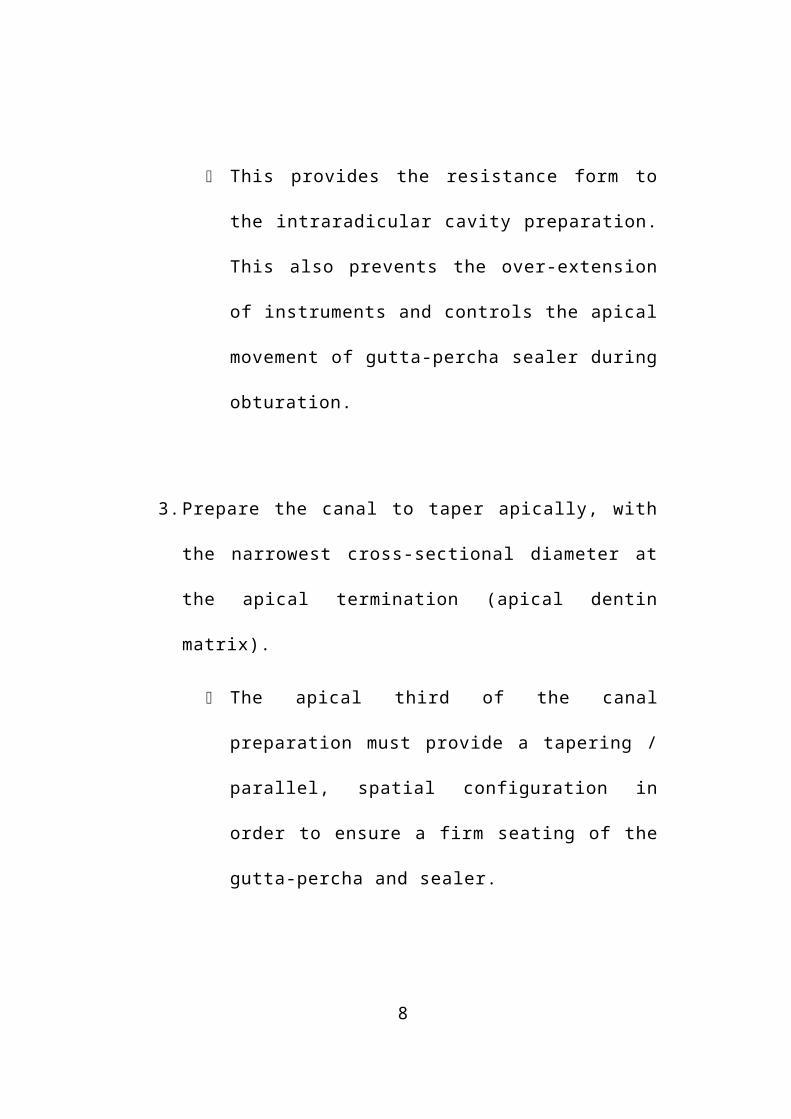
2. Prepare a sound apical dentine matrix at the DC junction.
This provides the resistance form to the intraradicular
cavity preparation. This also prevents the over-
extension of instruments and controls the apical
movement of gutta-percha sealer during obturation.
5
3. Prepare the canal to taper apically, with the narrowest cross-
sectional diameter at the apical termination (apical dentin
matrix).
The apical third of the canal preparation must provide
a tapering / parallel, spatial configuration in order to
ensure a firm seating of the gutta-percha and sealer.
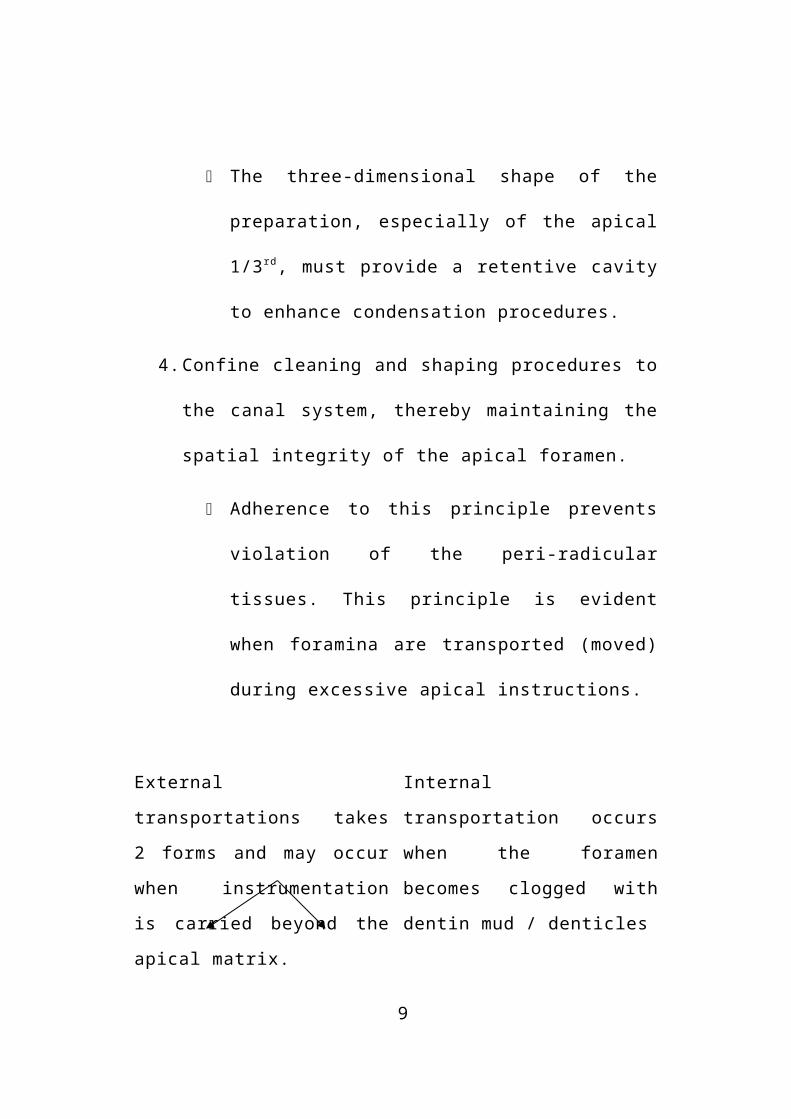
The three-dimensional shape of the preparation,
especially of the apical 1/3 rd, must provide a retentive
cavity to enhance condensation procedures.
4. Confine cleaning and shaping procedures to the canal system,
thereby maintaining the spatial integrity of the apical
foramen.
Adherence to this principle prevents violation of the
peri-radicular tissues. This principle is evident when
foramina are transported (moved) during excessive
apical instructions.
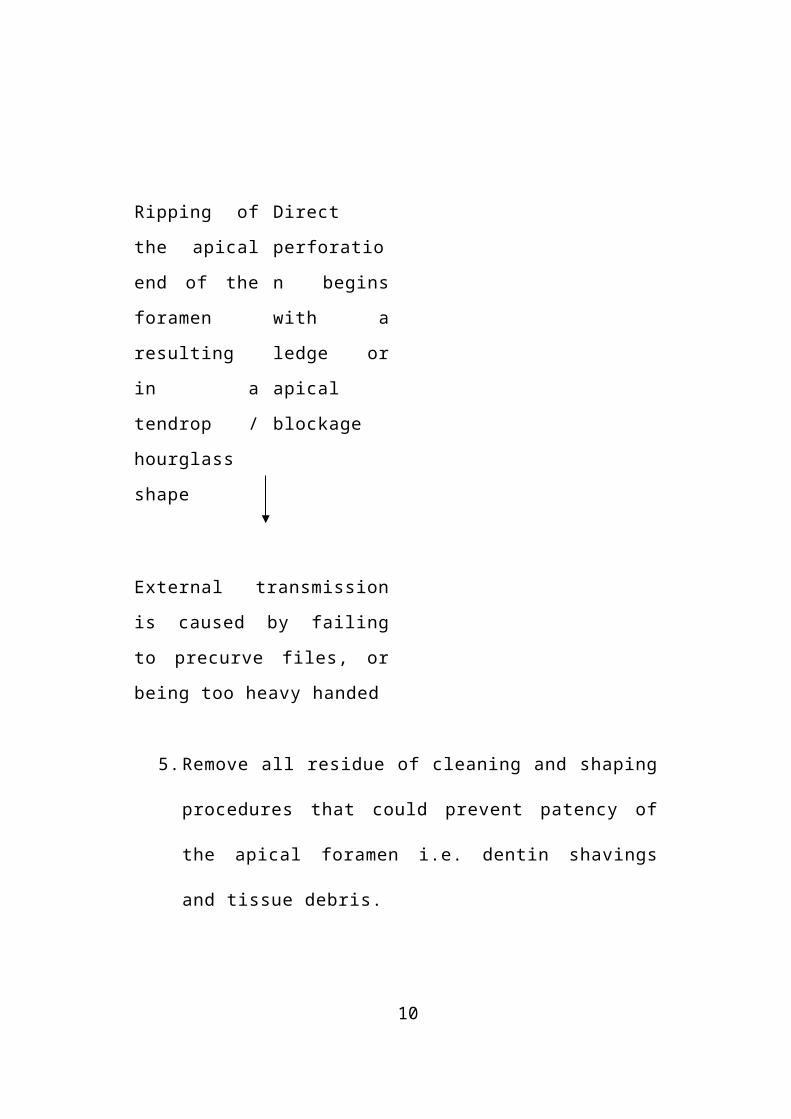
6

External transportations takes 2
forms and may occur when
instrumentation is carried
beyond the apical matrix.
Internal transportation occurs
when the foramen becomes
clogged with dentin mud /
denticles
Ripping of the
apical end of
the foramen
resulting in a
tendrop /
hourglass shape
Direct
perforation
begins with a
ledge or apical
blockage
External transmission is caused
by failing to precurve files, or
being too heavy handed
5. Remove all residue of cleaning and shaping procedures that
could prevent patency of the apical foramen i.e. dentin
shavings and tissue debris.
Recapitulation is essential to all cleaning procedures
ignoring this important step will often lead to ledges,
loss of canal length, dev of false canals etc.
7
Preparatory procedures
1) MAF-Master apical file
Is the largest file that binds slightly at correct WL after
straight line assess. It is determined by passively
placing the successively larger files at the C.W.L. until
correct size is reached which binds at the tip.
2) Pre curving of instruments
A precurved file is a valuable tool for feeling canal
passages and for moving around calcification, ledges
and around curved foramina.
It is used also in an attempt to alleviate the diverse
effects of canal curvature.
The primary difficulty is limited areas coronal to the
curvature.
May be done with a cotton wool roll, commercial
devices.
8
Methods of Cleaning and Shaping
Cleaning and shaping are dynamically delicate
motions, flowing, rhythmic, and energetic. In order to
use files and reamers efficiently, the movements
require distinction. There are 6 distinctive motions of
files and reamers.
A) Follow:
Usually performed with files.
Are used initially during cleaning and shaping or any
time an obstruction blocks the foramen.
Irrigating, precurving different kinds of curves,
curving al the way to the tip of the instrument, and
multiple curves in multiple directions of the instrument
are all part of follow.
B) Follow-withdraw
Files are used.
9
This motion is used once the foramen has been reched
and the next step is to create the path from access
cavity to foramen.
The motion is follow, then withdraw or “follow and
pull” or “follow and remove”. It is simply an in – or –
out, passive motion that makes no attempt to shape the
canal.
C) Cart
Refers to the extension of a reamer, to or near the
radiographic terminus.
The reamer should gently and randomly touch the
dentinal walls and “cart” away debris.
D) Carve
Is for shaping.
Reamers are used.
10
The key is not to press the instrument apically but
simply and to touch the dentin with a precurves reamer
and shape on withdrawal randomly.
E) Smooth
Is accomplished with files.
In the past, most endo procedures were performed with
a smoothing or circumferential filing motion.
If the previous four motions are followed smoothing is
rarely required.
F) Patency
Is achieved with files/ reamers.
It means that the portal of exit has been cleared of any
debris in the path.
11
Motion of instrumentation / envelopes of motion:
A) Filing:
Indicates a push-pull action with the instrument. The
inward passage of the file is powered by the hand and
the rigidity of the file. A canal wall can be damaged
very quickly by this motion (use of passive insertion
and pulling withdrawal from canal).
This is an effective technique with H-file since they do
not engage during the insertion action and cut
efficiently during the withdrawal motion.
Disadvantages:
With H-file that it can easily cut three middle of a
curvature and cause strip perforation.
B) Reaming
Indicates clockwise / right-hand rotation of an
instrument. The instrument must be restrained from
12
insertion to generate a cutting effect. Instrument # is
increased when this motion is employed.
C) Turn-and-pull
Is a combination of reaming and filling, the file is
inserted with a ¼ turn clockwise and inwardly directed
hand pressure (i.e. reaming) positioned into the canal
by this action, the file is subsequently withdrawn (i.e.
filling).
The rotation during placement sets the cutting edges of
the file into dentin and the non-rotating withdrawal breaks
local the dentin that has been engaged.
Disadvantages:
Hourglass canal shapes were observed by Weine.
According to Schilder
Clockwise rotation of a half-revolution followed by
withdrawal. The file is not inserted towards the apex,
13
rather, he gradually allows the preparation to progress
out of the canal.
¼ turn to right followed by straight pull out
D) Watch-winding
Is the back-and-forth oscilation of a file (30-60°) right
and (30-60°) left as the instrument is pushed into the
canal.
It is an expanded use of the insertion technique
described by Ingle as “Vaiven”.
This back-and-forth movement causes the files and
reamers to plane the walls efficiently.
In a way, this is a predecessor to the balanced force
technique, as the 30-60° of clockwise rotation pushes
the file tip and working edges into the canal and the
30-60° of counter clockwise motion partially cuts away
the engaged dentin.
14
E) Watch-winding and pull
When used with H-files, watch winding cannot cut
dentin with the backstroke. It can only wiggle and
wedge the edges tightly into the wall.
With each clockwise turn, the instrument moves
apically until it meets resistance and must be freed with a
pull stroke.
F) Balanced force technique
This calls for oscillation of the preparation instruments
right and left with different arcs in either direction.
To insert an instrument, it is rotated to the right
(clockwise) a quarter turn. This pulls the instrument
into the canal and positions the cutting edges into the
walls.
Next, it is rotated left (counterclockwise) at least 1/3 rd
of the revolution to unthread the instrument and drive
it from the canal.
15
Advantages:
Simultaneous apical and counter-clockwise rotation of
file strikes a balance between the tooth structure and
instrument elastic memory. This balance locates the
instrument very near the canal axis, even in severely
curved canals, so this technique avoids transportation.
It works effectively without pre-curving.
16
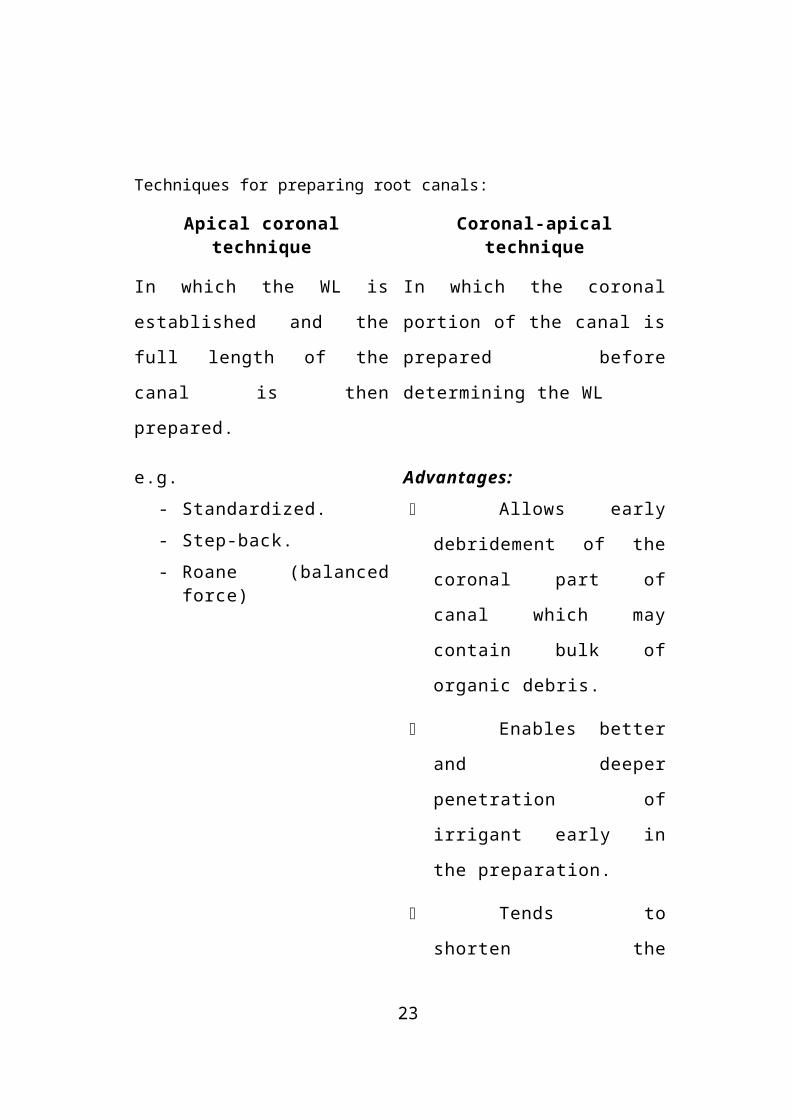
Techniques for preparing root canals:
Apical coronal technique Coronal-apical technique
In which the WL is established
and the full length of the canal is
then prepared.
In which the coronal portion of
the canal is prepared before
determining the WL
e.g.
- Standardized.
- Step-back.
- Roane (balanced force)
Advantages:
Allows early
debridement of the coronal
part of canal which may
contain bulk of organic
debris.
Enables better and
deeper penetration of irrigant
early in the preparation.
Tends to shorten the
effective WL and determining
the WL after such
enlargement will reduce the
problem of its alteration
during preparation.
Allows better control
over apical instrumentation.
e.g. :
- Step-down.
- Double-flare.
17
- Crown-down pressureless.
- Canal-master
Apical coronal
1) Standardized preparation:
- Done in narrow canals with circular cross-sections.
WL determined.
Smallest instrument adjusted to WL.
Sequentially enlarged entire canal.
Obturation with silver cone.
Disadvantages:
- Risk of extrusion of debris.
- Alteration of WL.
- Vertical root # is overinstrumentation is carried out.
2) Step back preparation:
WL determined.
Instrument that fills to correct WL is chosen.
Enlarge 3 No’s larger at the apex.
18

Reduce the WL length by 1mm and continue to enlarge canal / flaring.
Recapitulate, irrigate for patency.
Coronal preparation done using GGD.
Disadvantages:
- Extrusion of debris.
- Apical blockage.
- Alteration of W.L.
- Tendency for canal deviations.
3) Roane Technique (Balanced Force)
Three of its main features are:
- Canals are prepared to predesigned dimensions of which 3
are recognized and are 45, 60 and 80 according to the size of
apical preparation.
- These dimensions refer to the size of the file used at the third
step back.
- Each step-back from the master apical file at the PDL is
0.5mm shorter than the previous one. This is termed as the
“apical control zone”.
19
- Flex R files are used.
- WL determined to the radiographic apex with the largest file
placed without force. This helps in determining the selection
of predesigned preparation (45, 60, 80).
Coronal apical technique
1) Step down technique:
- Is a modification of the step-back technique.
Prepare the coronal portion to 16-18 mm /beginning of the curve with anti-curvature filling.
GGD’s are used to refine the coronal part.
Determine WL.
Using step-back, complete the apical preparation.
Disadvantages:
- Ledge formation.
- Apical blockage.
- Perforation.
Through this technique overcomes most of the disadvantages
of the step-back technique.
20
2) Double Flared Technique:
Determine W.L.
Prepare till 14 mm / coronal to the curve.
Irrigate and clean.
Go 1mm deeper, maintaining instrumentation coronal to the curve and file.
Again 1mm deeper.
Continue till WL is achieved.
Prepare using step-back
Indications:
- For straight canals or
- For straight portions of curved canals.
Contra indications:
- In calcified canals.
- In young permanent teeth with open apices.
3) Crown-down pressureless technique:
- For curved canals without causing deviations. Rotary action
is used to cut dentine with the apical part of files.
21
Determine WL and prepare till # 35 till 16mm (widen the canal with smaller files first)
Reduce size + go down and enlarge till apex.
Change to #40 + repeat.
4) Canal master technique:
- Its aim is to aid the maintenance of curves using a rotary
instrument designed so that only the apical 1-2mm is engaged
in dentine removal.
Advantages:
- Avoids the need for recapitulation.
- The apical 0.75mm of the hand instrument is safe-ended to
facilitate maintenance of canal curvature.
Determine WL
Prepare to the beginning of the curve
Use canal master in step-back fashion.
22
Hybrid-technique
- Consists of reaming the apical third and filing the coronal
two-thirds.
- The coronal preparation is obturated using gutta-percha.
CURVATURE-THE ENGINE OF COMPLICATIONS
- As an instrument is curved, elastic forces develop internally.
These forces attempt to return the instrument to its original
shape and are responsible for straightening of the final canal
shape and location.
- These internal elastic forces (i.e. restoring forces) act on the
canal wall during preparation and influence the amount of
dentin removed. They are particularly influential at the
junction of the instrument tip and its cutting edges. This
region is the most efficient cutting surface along an
instrument, and when activated by the restoring forces, it
removes more tissue. This phenomenon is responsible for
apical transportation and its consequences.
23
1) Pre-curving of instruments.
2) Anti-curvature filing
- Is the controlled and directed preparation into the
bulky/safety zones and away from the thinner portions or
danger zones of the root structure, where perforation or
stripping of the canal walls can occur.
Need:
- It is a method of applying instrument pressure so that shaping
will occur away from the inside of the root curvature in the
coronal and middle 1/3 rd of a canal.
- Was described by Abou-Rose, Frank and Glick. They
emphasized that during shaping procedures, files should be
pulled from canals as pressure is applied to the outside canal
wall. This dimensionally applied pressure, prevents
dangerous midcurvature straightening in curved canals.
24
Advantages:
- It maintains the integrity of canal walls at their thin portion
and reduces the possibility of root perforation / stripping.
- Maintains digital control over the instrument and the
preparation of the curved canal is used.
Top of the handle is pulled
into the curvature while the
shank is pulled away (anti-
curvature)
3) Radicular access
- Was first promoted by Schilder.
- This creates space in the more coronal regions of the canal
which enhances placing and manipulating subsequent files as
it increases the depth and effectiveness of irrigation.
- May be accompanied by rotary instrument / circumferential
filing.
25
4) Reversible Flaring / Pre-flaring
- Is the presently preferred development of flaring whereby the
coronal portion of the preparation is flared before the
completion of the apical portion.
- In the standard flaring technique, the apical portion of the
tooth is completed before any filling is performed.
- In the reverse flaring and aspects of preparations are carried
out.
- Minimal filling at the tip enlargement of the coronal part
apex is completed apical flaring.
Advantages:
- Irrigants are allowed to get down the canal earlier and farther
to produce cleaning.
- In curved canals, more effective preparation of the apical
area is provided when the file has fewer obstructions in the
coronal part.
26

- Files, pluggers, filling material can penetrate to the apex
more easily three a larger orifice.
Instruments used for Reverse Flaring
- 0.4 taper instruments (Ni-Ti).
- MeXIM
Available in 5 instruments – 25.0.25 at Do (0.03, 0.04,
0.045, 0.05, 0.055 /mm – tapers).
Used in gear reduction handpieces at 340 rpm.
Made from Ni-Ti in H-style.
Designed by MacSpadden.
Ritano Files.
Hand instrument with H-configuration with several
tapers.
Made in lengths shorter than 21mm.
27

Preparation using Automated Devices
Disadvantages:
- Loss of tactile sense and lack of control of where and how
much dentine is removed from the root canal wall.
Classification:
I) Rotary
- Used in slow running standard handpiece e.g., GGD, Peeso,
Canal master – used only in the structure part.
- Latest deviation is the new 16:1 gear reduction handpiece
NiTi matic at 300rpm.
- Ni-Ti files are used.
- Used for preparation of severely curved canals.
- Files are manufactured with an off-centre tip that facilitates
negotiating around curvatures and ledges.
28
II) Reciprocal quarter turn:
- This uses a special handpiece that contrarotates the
instrument three 90°.
- E.g. Giromatic (1964).
- Endocursor.
- Endolift – has a vertical component in addition to the
rotation.
Disadvantages of Automated
- Hand instrument requires the same amount of time as
automated.
- Flare preparation with hand instrument tends to remove
debris from within the canal system than automated.
- Automated is difficult to use in the most post regions of the
oral cavity.
- There is greater propensity for the automated system to
produce zipped canals, ledges etc.
29
- A controlled power-assisted system designed to eliminate the
original problems encountered by Giromatic appeared in
1981.
- Dynatrak
- Uses stainless steel instruments with increased flexibility
consist flute depth and curved canals and rounded tip to
minimize and control ledges, zips, etc.
III) Vertical
- Canal finder.
- Has a vertical movement of 3-1 mm and free rotational
movement.
- Instrument used is canal master (H-file with a safe ended
tip).
- Canal Lender.
- Vertical movement of 0.4-0.8 mm
30
3 instrument K-file with a safe ended tip.
H-file.
Universal file (flexible H-file with a safe-ended tip).
IV) Random
- E.g. Excalibur.
- K-files.
- 20,000-25,000rpm.
V) Sonics
- Endostar 5
- Endosonic Air 3000
Advantages:
- Reduces fatigue and stress during preparation.
VI) Ultrasonics
Magnetostrictive Peizoelectric
- Requires H2O cooling - Most common
- No H2O cooling
- May produce apical widening
and ledges in curved canals.
Advantages:
31
- Cleaning effect is by acoustic streaming.
BIOMECHANICAL PREPARATION
Contents
Introduction
Mechanical & Biological Objectives
Methods of Cleaning & Shaping
Methods of Instrumentation
Techniques for Preparing Root canal
Hand Automated
Apical coronal Coronal Apical
Cleaning & Shaping in curved canals
32