bionic fish bionic fish with fin ray effect · 3 festo ag & co. kg | festo didactic se...
TRANSCRIPT

-1
Bionic Fish
Bionic fish with Fin Ray Effect®
2 Festo AG & Co. KG | Festo Didactic SE Bionics4Education
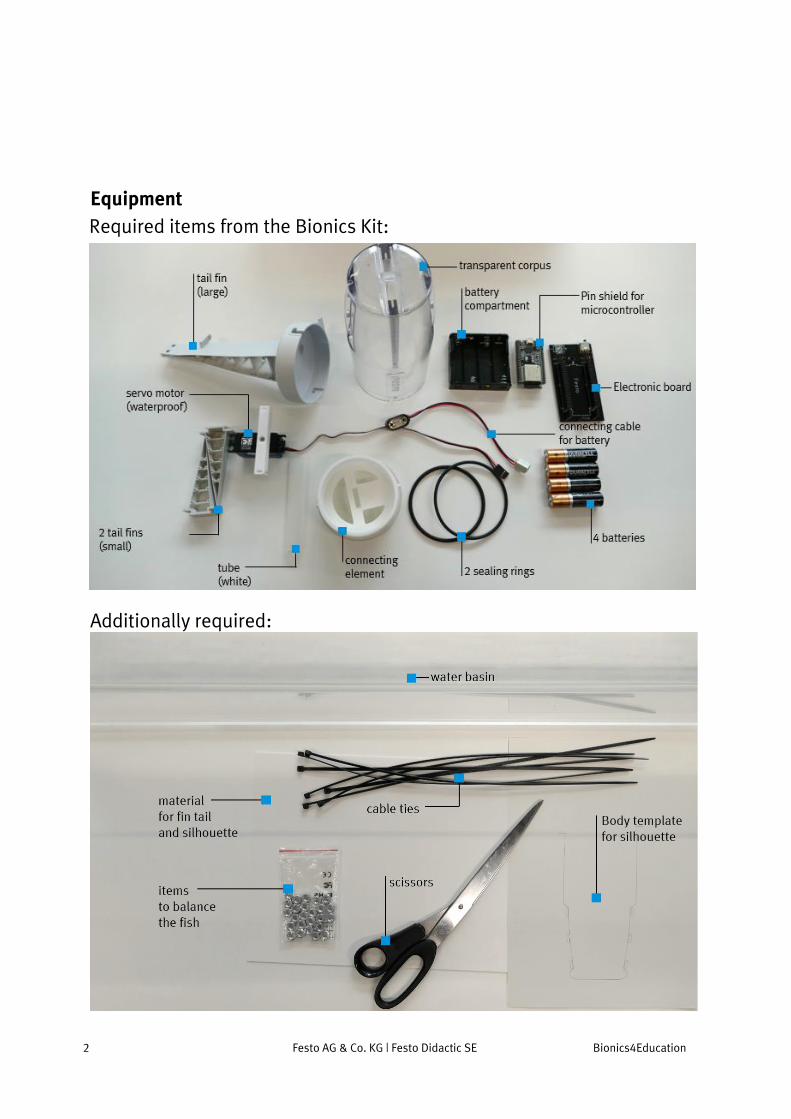
Equipment
Additionally required:
Required items from the Bionics Kit:

3 Festo AG & Co. KG | Festo Didactic SE Bionics4Education
Instructions
Required items: 2 sealing rings, connecting element Put the two sealing rings on each end of the connecting element.
Required items: tail fin (large)
Attach the large tail fin to one side of the connecting element.
1
2

4 Festo AG & Co. KG | Festo Didactic SE Bionics4Education
Required items: white tube
Attach the white tube to the opening of the large tail fin.
Required items: servo motor (waterproof)
Attach the waterproof servo motor to the holder (provided for this purpose) on the large tail fin, such that the rudder horn of the motor points downwards. Guide the cable of the servo motor through the white tube.
3
4
5 Festo AG & Co. KG | Festo Didactic SE Bionics4Education
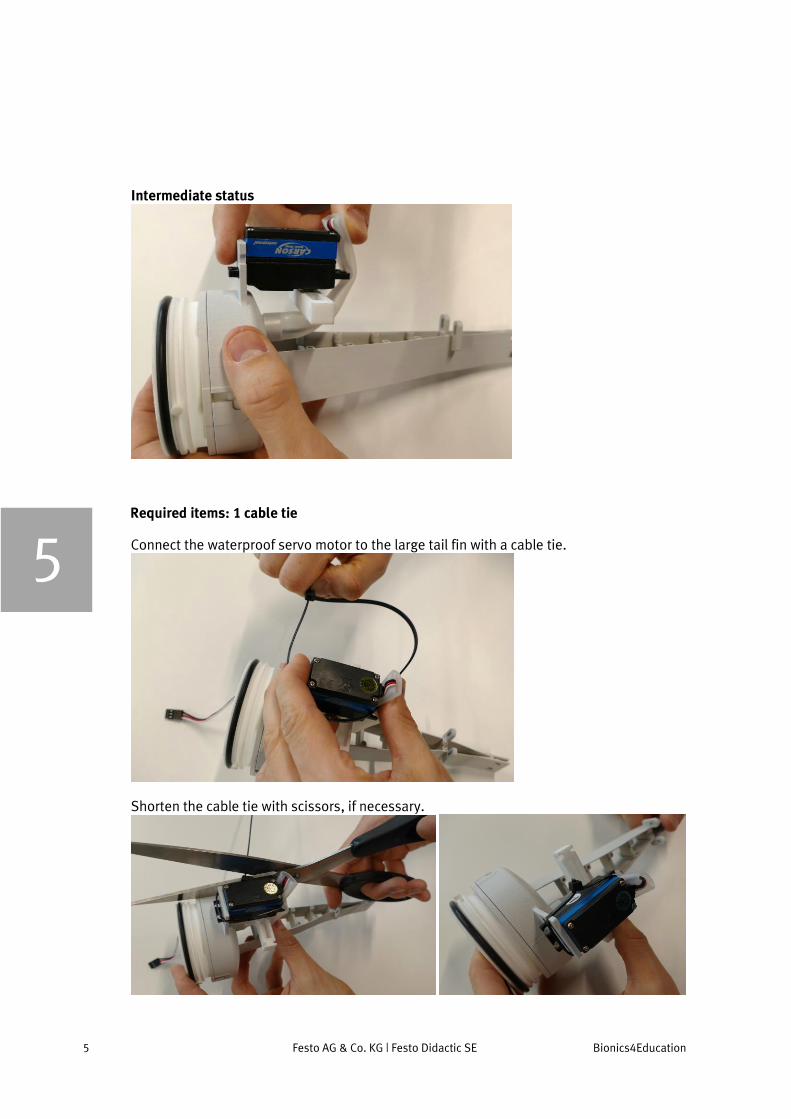
Intermediate status
Required items: 1 cable tie
Connect the waterproof servo motor to the large tail fin with a cable tie.
Shorten the cable tie with scissors, if necessary.
5
6 Festo AG & Co. KG | Festo Didactic SE Bionics4Education
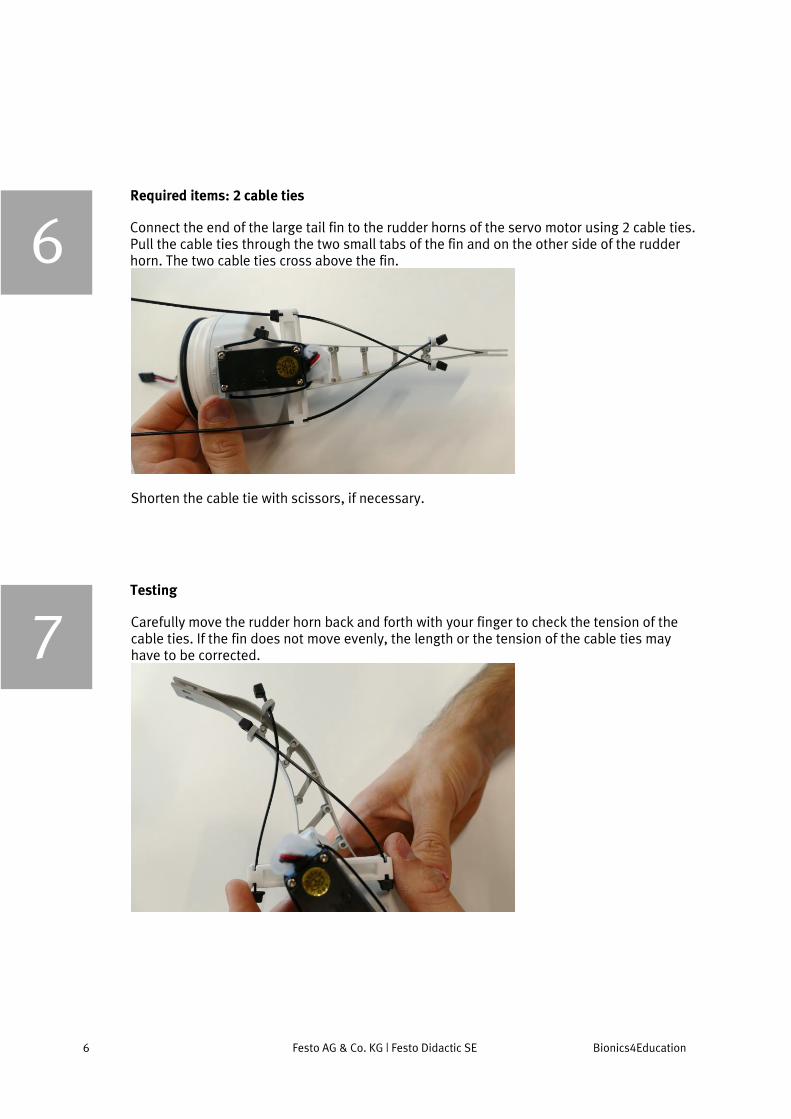
Required items: 2 cable ties
Connect the end of the large tail fin to the rudder horns of the servo motor using 2 cable ties. Pull the cable ties through the two small tabs of the fin and on the other side of the rudder horn. The two cable ties cross above the fin.
Shorten the cable tie with scissors, if necessary.
Testing
Carefully move the rudder horn back and forth with your finger to check the tension of the cable ties. If the fin does not move evenly, the length or the tension of the cable ties may have to be corrected.
6
7

7 Festo AG & Co. KG | Festo Didactic SE Bionics4Education
Required items: battery compartment, 4 batteries Insert four batteries in the battery compartment.
Required items: Pin shield for micro controller, electronic board If the pin shield for microcontroller has not yet been plugged onto the electronic board, carefully plug the two components in. Make sure that the USB slot of the pin shield is located above the USB symbol of the electronic board.
8
9
8 Festo AG & Co. KG | Festo Didactic SE Bionics4Education
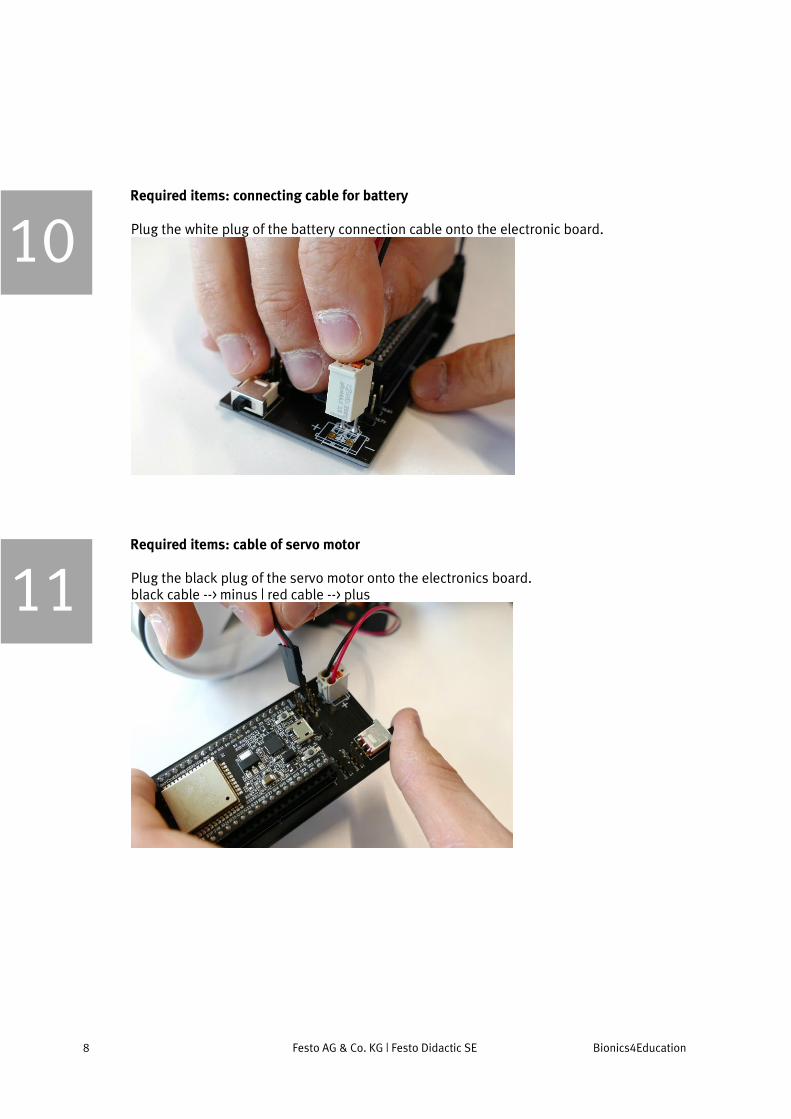
Required items: connecting cable for battery Plug the white plug of the battery connection cable onto the electronic board.
Required items: cable of servo motor Plug the black plug of the servo motor onto the electronics board. black cable --> minus | red cable --> plus
10
11

9 Festo AG & Co. KG | Festo Didactic SE Bionics4Education
Required items: Electronic board, transparent corpus Insert the assembled electronic board with pin shield into the body and slide it into the rail provided for this purpose.
Required items: connecting cable for battery, battery compartment Put the black plug of the battery connection cable on the battery compartment.
12
13
10 Festo AG & Co. KG | Festo Didactic SE Bionics4Education
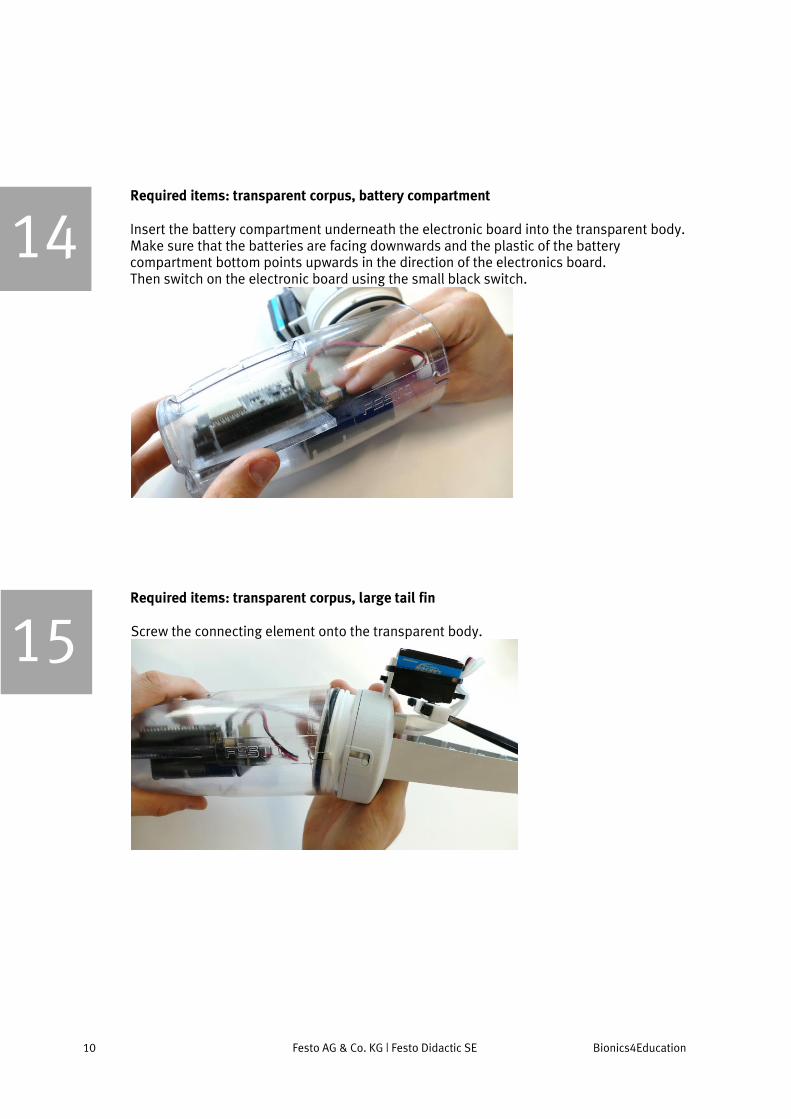
Required items: transparent corpus, battery compartment Insert the battery compartment underneath the electronic board into the transparent body. Make sure that the batteries are facing downwards and the plastic of the battery compartment bottom points upwards in the direction of the electronics board. Then switch on the electronic board using the small black switch.
Required items: transparent corpus, large tail fin Screw the connecting element onto the transparent body.
14
15

11 Festo AG & Co. KG | Festo Didactic SE Bionics4Education
Make sure that the battery compartment in the body is facing down and the servo motor points upwards.
Required items: 2 small tail fins, 1 cable tie Fasten the two small tail fins around the transparent corpus with the help of a cable tie. Pass the cable tie through the prepared openings of the body.
16

12 Festo AG & Co. KG | Festo Didactic SE Bionics4Education
The two small tail fins serve as lateral fins. Shorten the cable tie with scissors if necessary.
Intermediate status

13 Festo AG & Co. KG | Festo Didactic SE Bionics4Education
Required items: scissors, material for fin
Draw the desired fin shape on the material and cut it out.
Then make two small holes in the fin so that it can be attached to the tip of the large tail fin in the next step.
17

14 Festo AG & Co. KG | Festo Didactic SE Bionics4Education
Required items: 1 cable tie Fasten the fin at the pointed end of the large tail fin with the help of a cable tie.
Shorten the cable tie with scissors, if necessary.
Optional: make a silhouette Would you like to add another individually designed element to your robotic fish besides the tail fin? Simply print the silhouette template (available in the Downloads section) and draw any shape for your fish around the body.
18
19

15 Festo AG & Co. KG | Festo Didactic SE Bionics4Education
Cut out the silhouette and attach it to the body by using a cable tie.
Your Bionic Fish is ready!