bios setup - download.gigabyte.com · bios setup - 4 - bios (basic input and output system) records...
TRANSCRIPT

BIOS Setup(for Cavium Platform)
User’s GuideRev.1.0

Copyright© 2017 GIGA-BYTE TECHNOLOGY CO., LTD. All rights reserved.The trademarks mentioned in this manual are legally registered to their respective owners.
DisclaimerInformation in this manual is protected by copyright laws and is the property of GIGABYTE. Changes to the specifications and features in this manual may be made by GIGABYTE without prior notice. No part of this manual may be reproduced, copied, translated, transmitted, or published in any form or by any means without GIGABYTE's prior written permission.
Documentation ClassificationsIn order to assist in the use of this product, GIGABYTE provides the following types of documentations: For detailed product information, carefully read the User's Manual.
For more information, visit our website at:
http://b2b.gigabyte.com
You are a professional? Get an access to our complete source of sales, marketing & technical materials at:
http://reseller.b2b.gigabyte.com
https://www.facebook.com/gigabyteserver
- 3 -
Table of Contents
Chapter 1 BIOS Setup ....................................................................................................41-1 The Main Menu ................................................................................................ 6
1-1-1 Memory Slot Information ..........................................................................................91-2 Advanced Menu ............................................................................................. 10
1-2-1 S5 RTC Wake Settings ...........................................................................................111-2-2 Serial Port Console Redirection .............................................................................121-2-3 Network Stack ........................................................................................................151-2-4 SATAConfiguration.................................................................................................171-2-5 InfoReportConfiguration .......................................................................................181-2-6 NVMEConfiguration ...............................................................................................191-2-7 USBConfiguration ..................................................................................................201-2-8 ChipsetConfiguration .............................................................................................21
1-3 Security Menu ................................................................................................ 221-4 Boot Menu ...................................................................................................... 231-5 Exit Menu ....................................................................................................... 251-6 Server Management Menu ............................................................................. 27
1-6-1 System Event Log ..................................................................................................281-6-2 BMC Self Test Log ..................................................................................................291-6-3 View FRU Information ............................................................................................301-6-4 BMCnetworkconfiguration ....................................................................................311-6-5 IPv6BMCnetworkconfiguration ............................................................................32
BIOS Setup - 4 -
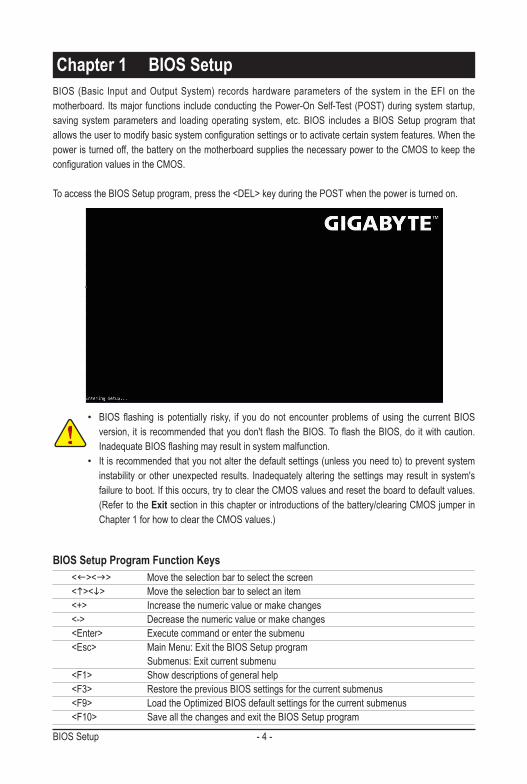
BIOS (Basic Input and Output System) records hardware parameters of the system in the EFI on the motherboard. Its major functions include conducting the Power-On Self-Test (POST) during system startup, saving system parameters and loading operating system, etc. BIOS includes a BIOS Setup program that allowstheusertomodifybasicsystemconfigurationsettingsortoactivatecertainsystemfeatures.Whenthepower is turned off, the battery on the motherboard supplies the necessary power to the CMOS to keep the configurationvaluesintheCMOS.
To access the BIOS Setup program, press the <DEL> key during the POST when the power is turned on.
Chapter 1 BIOS Setup
• BIOSflashing is potentially risky, if youdonot encounter problemsof using the currentBIOSversion, it isrecommendedthatyoudon'tflashtheBIOS.ToflashtheBIOS,do itwithcaution.InadequateBIOSflashingmayresultinsystemmalfunction.
• It is recommended that you not alter the default settings (unless you need to) to prevent system instability or other unexpected results. Inadequately altering the settings may result in system's failure to boot. If this occurs, try to clear the CMOS values and reset the board to default values. (Refer to the Exit section in this chapter or introductions of the battery/clearing CMOS jumper in Chapter 1 for how to clear the CMOS values.)
BIOS Setup Program Function Keys <f><g> Move the selection bar to select the screen <h><i> Move the selection bar to select an item <+> Increase the numeric value or make changes <-> Decrease the numeric value or make changes <Enter> Execute command or enter the submenu <Esc> Main Menu: Exit the BIOS Setup program Submenus: Exit current submenu <F1> Show descriptions of general help <F3> Restore the previous BIOS settings for the current submenus <F9> Load the Optimized BIOS default settings for the current submenus <F10> Save all the changes and exit the BIOS Setup program
- 5 - BIOS Setup
Main This setup page includes all the items in standard compatible BIOS. Advanced This setup page includes all the items of AMI BIOS special enhanced features. (ex:Autodetectfanandtemperaturestatus,automaticallyconfigureharddiskparameters.) Security Change,set,ordisablesupervisoranduserpassword.Configurationsupervisorpasswordallowsyouto
restrict access to the system and BIOS Setup. A supervisor password allows you to make changes in BIOS Setup. A user password only allows you to view the BIOS settings but not to make changes. Boot Thissetuppageprovidesitemsforconfigurationofbootsequence. Save & Exit Save all the changes made in the BIOS Setup program to the CMOS and exit BIOS Setup. (Pressing
<F10> can also carry out this task.) Abandon all changes and the previous settings remain in effect. Pressing <Y> to the confirmation
message will exit BIOS Setup. (Pressing <Esc> can also carry out this task.) Server Management Server additional features enabled/disabled setup menus.
BIOS Setup - 6 -
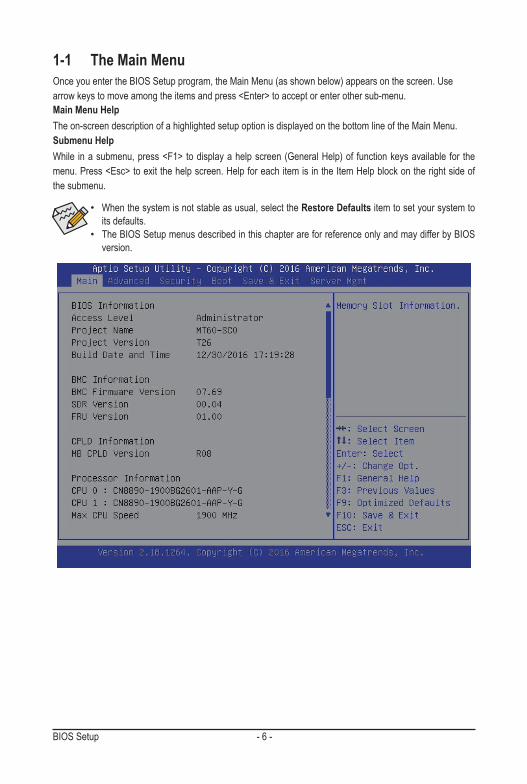
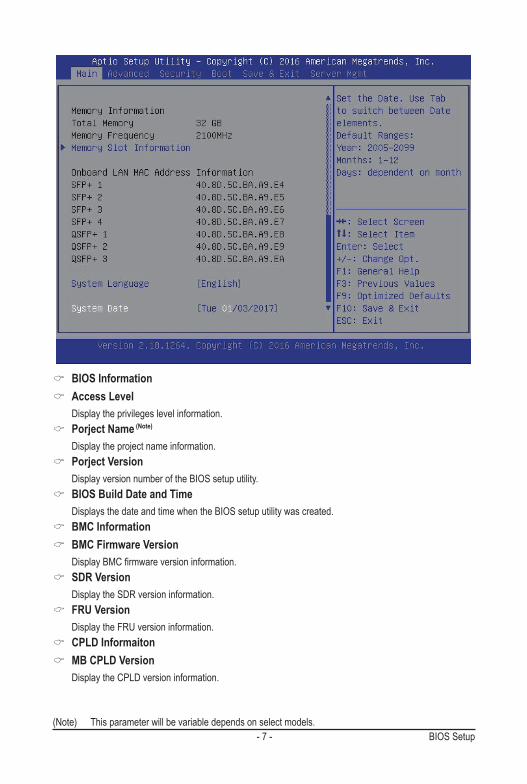
1-1 The Main MenuOnce you enter the BIOS Setup program, the Main Menu (as shown below) appears on the screen. Use arrow keys to move among the items and press <Enter> to accept or enter other sub-menu.Main Menu HelpThe on-screen description of a highlighted setup option is displayed on the bottom line of the Main Menu.Submenu HelpWhile in a submenu, press <F1> to display a help screen (General Help) of function keys available for the menu. Press <Esc> to exit the help screen. Help for each item is in the Item Help block on the right side of the submenu.
• When the system is not stable as usual, select the Restore Defaults item to set your system to its defaults.
• The BIOS Setup menus described in this chapter are for reference only and may differ by BIOS version.
- 7 - BIOS Setup
BIOS Information Access Level
Display the privileges level information. Porject Name (Note)
Display the project name information. Porject Version
Display version number of the BIOS setup utility. BIOS Build Date and Time
Displays the date and time when the BIOS setup utility was created. BMC Information BMC Firmware Version
DisplayBMCfirmwareversioninformation. SDR Version
Display the SDR version information. FRU Version
Display the FRU version information. CPLD Informaiton MB CPLD Version
Display the CPLD version information.
(Note) This parameter will be variable depends on select models.
BIOS Setup - 8 -
ProcessorConfiguration CPU 0/1/MAX CPU Speed/ICPU Data Cache/CPU Instruction Cache
Displaysthetechnicalspecificationsfortheinstalledprocessor. Memory Information Total Memory/Memory Frequency
Displaysthetechnicalspecificationsfortheinstalledmemory. Onboard LAN MAC Address Information (Note)
Display onboard LAN device MAC address. System Language
Select preference language. Option available: English.
System Date Set the date following the weekday-month-day- year format.
System Time Set the system time following the hour-minute- second format.
(Note) This parameter will be variable depends on select models.
- 9 - BIOS Setup
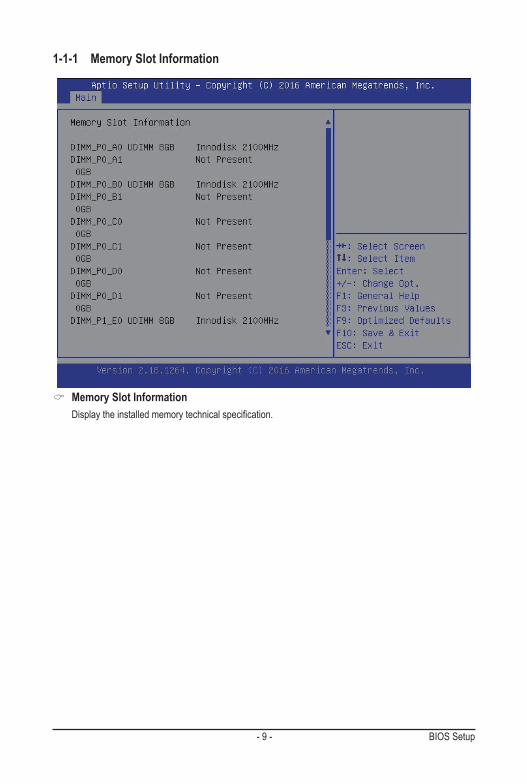
1-1-1 Memory Slot Information
Memory Slot Information Displaytheinstalledmemorytechnicalspecification.
BIOS Setup - 10 -
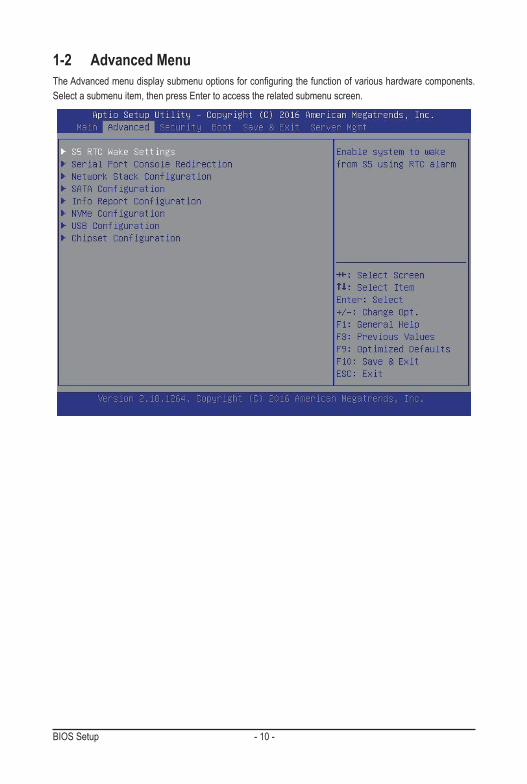
1-2 Advanced MenuTheAdvancedmenudisplaysubmenuoptionsforconfiguringthefunctionofvarioushardwarecomponents.Select a submenu item, then press Enter to access the related submenu screen.
- 11 - BIOS Setup
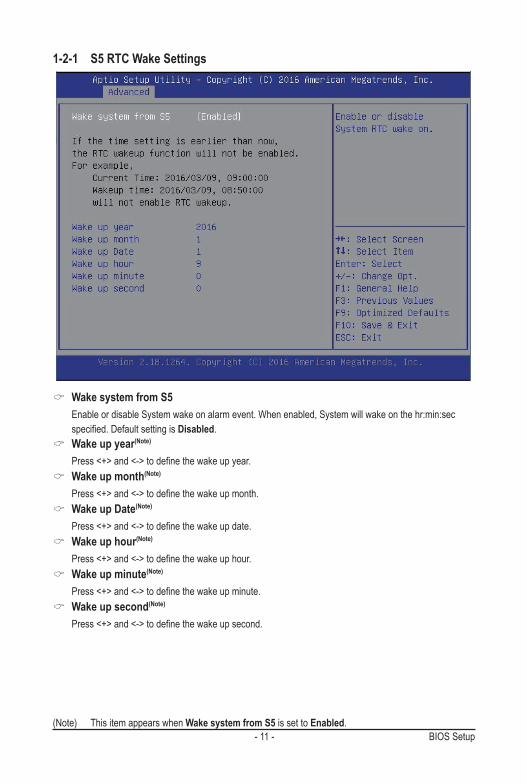
1-2-1 S5 RTC Wake Settings
(Note) This item appears when Wake system from S5 is set to Enabled.
Wake system from S5 Enable or disable System wake on alarm event. When enabled, System will wake on the hr:min:sec specified.DefaultsettingisDisabled.
Wake up year(Note)
Press<+>and<->todefinethewakeupyear. Wake up month(Note)
Press<+>and<->todefinethewakeupmonth. Wake up Date(Note)
Press<+>and<->todefinethewakeupdate. Wake up hour(Note)
Press<+>and<->todefinethewakeuphour. Wake up minute(Note)
Press<+>and<->todefinethewakeupminute. Wake up second(Note)
Press<+>and<->todefinethewakeupsecond.
BIOS Setup - 12 -
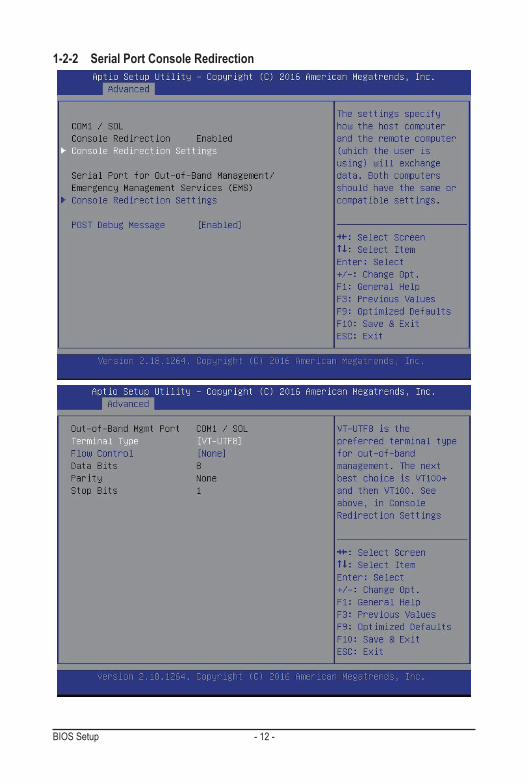
1-2-2 Serial Port Console Redirection
- 13 - BIOS Setup(Note) Advanceditemspromptwhenthisitemisdefined.
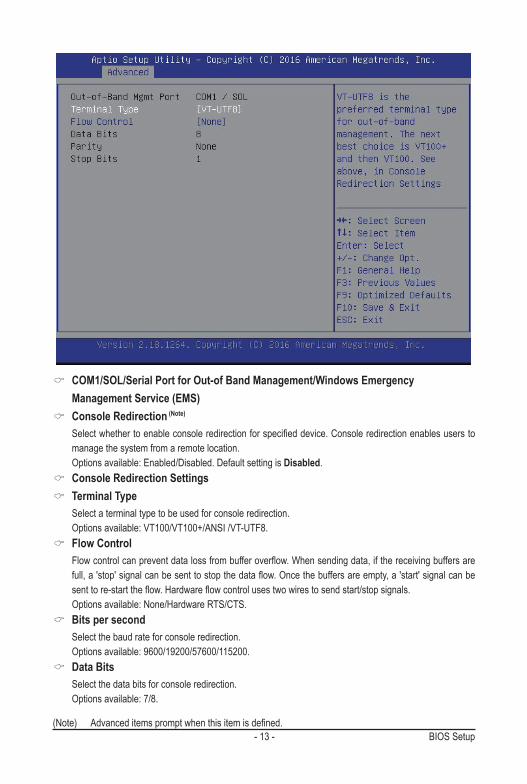
COM1/SOL/Serial Port for Out-of Band Management/Windows Emergency Management Service (EMS)
Console Redirection (Note) Selectwhethertoenableconsoleredirectionforspecifieddevice.Consoleredirectionenablesusersto
manage the system from a remote location. Options available: Enabled/Disabled. Default setting is Disabled.
Console Redirection Settings Terminal Type
Select a terminal type to be used for console redirection. Options available: VT100/VT100+/ANSI /VT-UTF8.
Flow Control Flowcontrolcanpreventdatalossfrombufferoverflow.Whensendingdata,ifthereceivingbuffersare
full,a'stop'signalcanbesenttostopthedataflow.Oncethebuffersareempty,a'start'signalcanbesenttore-starttheflow.Hardwareflowcontrolusestwowirestosendstart/stopsignals.
Options available: None/Hardware RTS/CTS. Bits per second
Select the baud rate for console redirection. Options available: 9600/19200/57600/115200.
Data Bits Select the data bits for console redirection. Options available: 7/8.

BIOS Setup - 14 -
Parity A parity bit can be sent with the data bits to detect some transmission errors. Even: parity bi is 0 if the num of 1's in the data bits is even. Odd: parity bit is0if num of 1's the data bits is odd. Mark: parity bit is always 1. Space: Parity bit is always 0. Mark and Space Parity do not allow for error detection. Options available: None/Even/Odd/Mark/Space.
Stop Bits Stop bits indicate the end of a serial data packet. (A start bit indicates the beginning). The standard setting is 1 stop bit. Communication with slow devices may require more than 1 stop bit.
- 15 - BIOS Setup
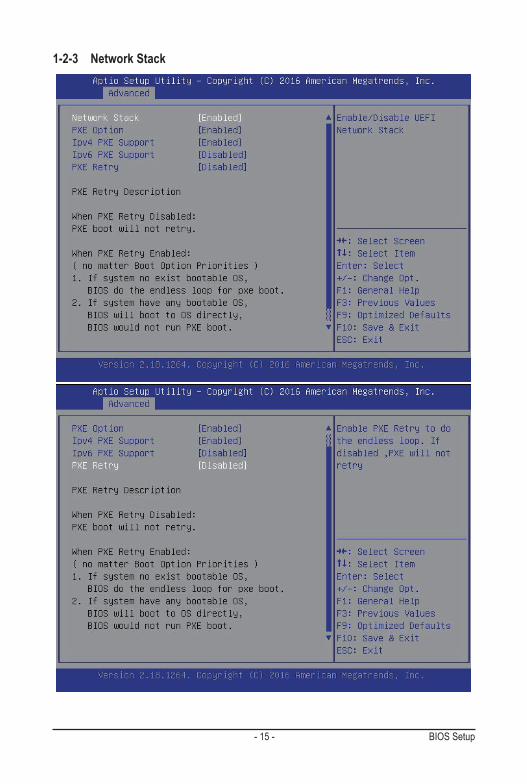
1-2-3 Network Stack
BIOS Setup - 16 -
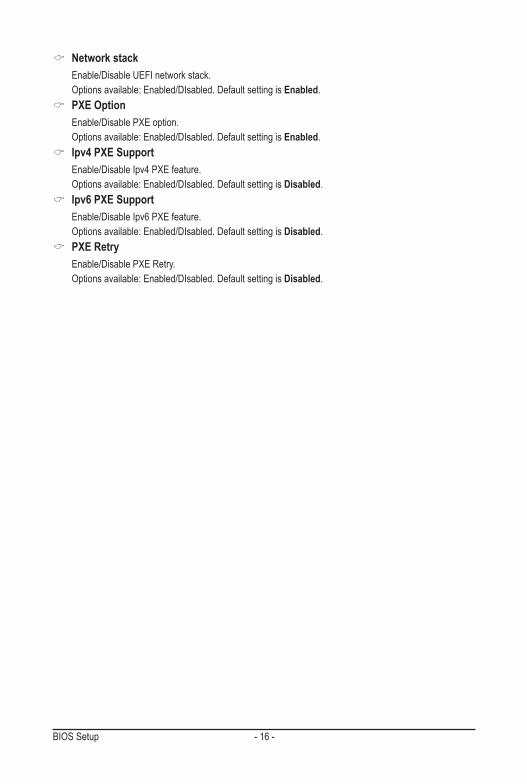
Network stack Enable/Disable UEFI network stack. Options available: Enabled/DIsabled. Default setting is Enabled.
PXE Option Enable/Disable PXE option. Options available: Enabled/DIsabled. Default setting is Enabled.
Ipv4 PXE Support Enable/Disable Ipv4 PXE feature. Options available: Enabled/DIsabled. Default setting is Disabled.
Ipv6 PXE Support Enable/Disable Ipv6 PXE feature. Options available: Enabled/DIsabled. Default setting is Disabled.
PXE Retry Enable/Disable PXE Retry. Options available: Enabled/DIsabled. Default setting is Disabled.
- 17 - BIOS Setup
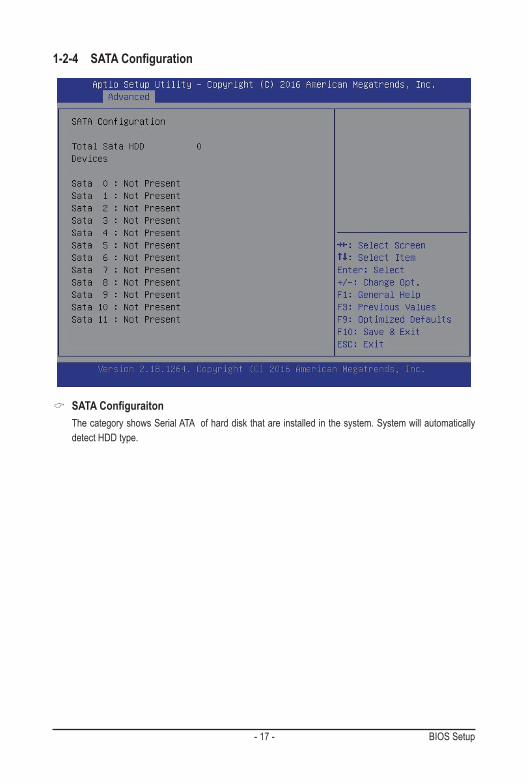
1-2-4 SATAConfiguration
SATAConfiguraiton The category shows Serial ATA of hard disk that are installed in the system. System will automatically
detect HDD type.
BIOS Setup - 18 -
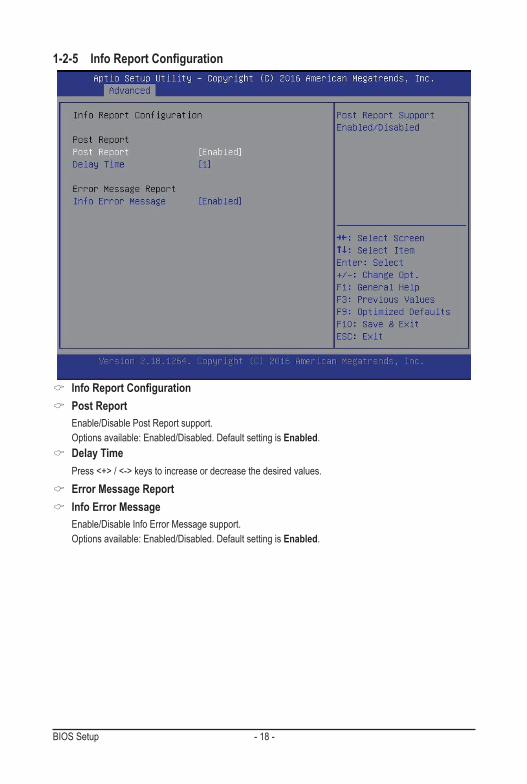
1-2-5 InfoReportConfiguration
InfoReportConfiguration Post Report
Enable/Disable Post Report support. Options available: Enabled/Disabled. Default setting is Enabled.
Delay Time Press <+> / <-> keys to increase or decrease the desired values.
Error Message Report Info Error Message
Enable/Disable Info Error Message support. Options available: Enabled/Disabled. Default setting is Enabled.
- 19 - BIOS Setup
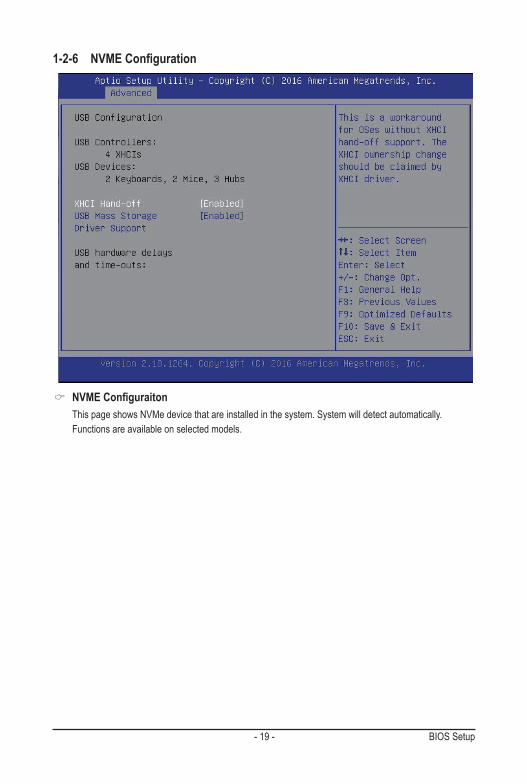
1-2-6 NVMEConfiguration
NVMEConfiguraiton This page shows NVMe device that are installed in the system. System will detect automatically. Functions are available on selected models.
BIOS Setup - 20 -
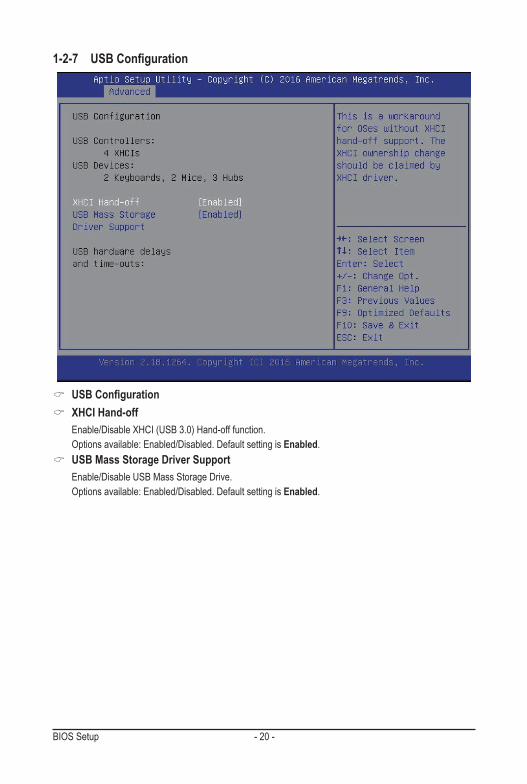
1-2-7 USBConfiguration
USBConfiguration XHCI Hand-off
Enable/Disable XHCI (USB 3.0) Hand-off function. Options available: Enabled/Disabled. Default setting is Enabled.
USB Mass Storage Driver Support Enable/Disable USB Mass Storage Drive. Options available: Enabled/Disabled. Default setting is Enabled.
- 21 - BIOS Setup
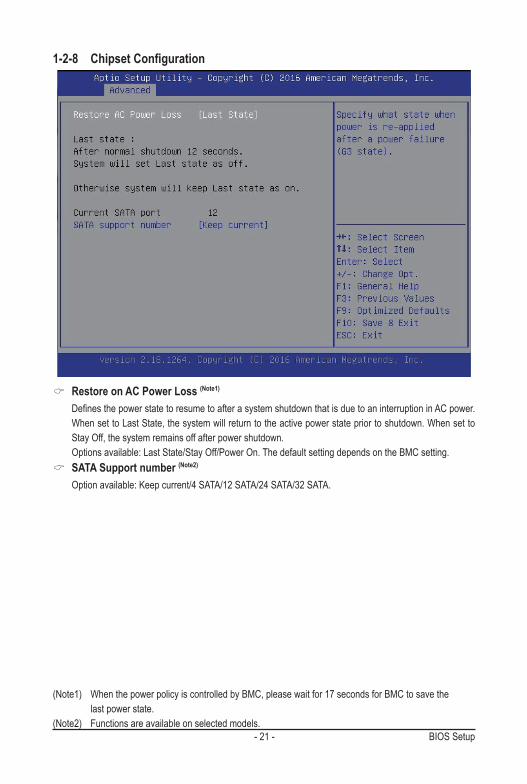
Restore on AC Power Loss (Note1) DefinesthepowerstatetoresumetoafterasystemshutdownthatisduetoaninterruptioninACpower.
When set to Last State, the system will return to the active power state prior to shutdown. When set to Stay Off, the system remains off after power shutdown.
Options available: Last State/Stay Off/Power On. The default setting depends on the BMC setting. SATA Support number (Note2)
Option available: Keep current/4 SATA/12 SATA/24 SATA/32 SATA.
1-2-8 ChipsetConfiguration
(Note1) When the power policy is controlled by BMC, please wait for 17 seconds for BMC to save the last power state.(Note2) Functions are available on selected models.
BIOS Setup - 22 -
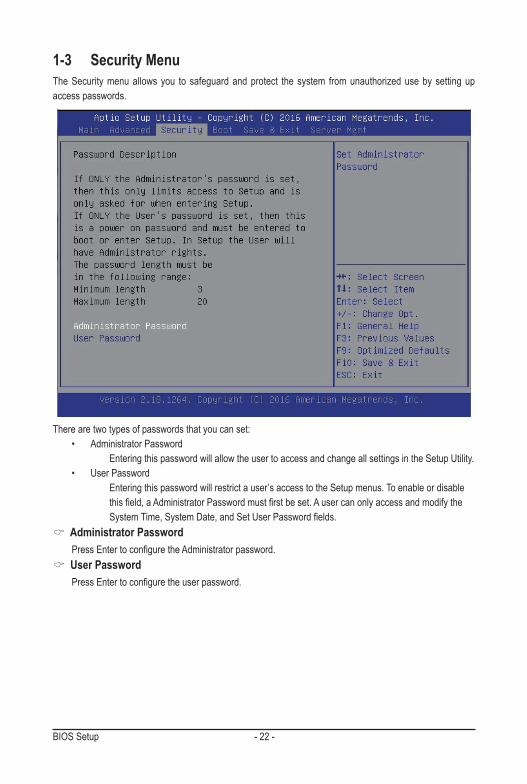
There are two types of passwords that you can set:• Administrator Password Entering this password will allow the user to access and change all settings in the Setup Utility. • User Password Entering this password will restrict a user’s access to the Setup menus. To enable or disable thisfield,aAdministratorPasswordmustfirstbeset.Ausercanonlyaccessandmodifythe SystemTime,SystemDate,andSetUserPasswordfields.
Administrator Password PressEntertoconfiguretheAdministratorpassword.
User Password PressEntertoconfiguretheuserpassword.
1-3 Security MenuThe Security menu allows you to safeguard and protect the system from unauthorized use by setting up access passwords.
- 23 - BIOS Setup
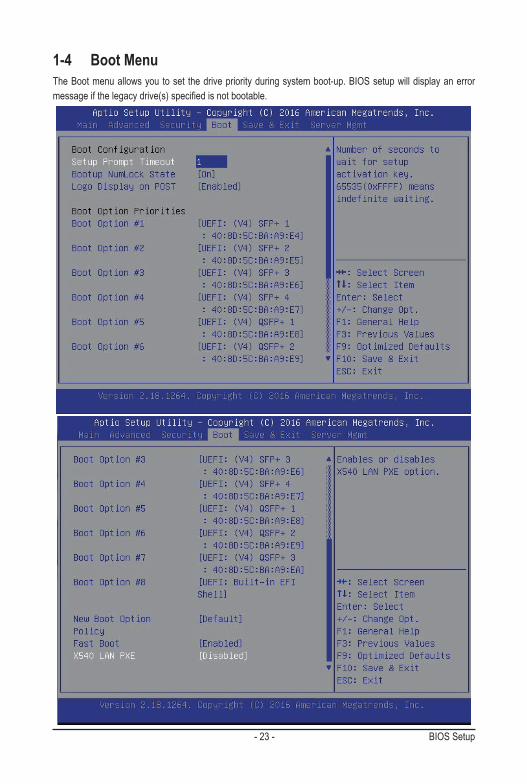
1-4 Boot MenuThe Boot menu allows you to set the drive priority during system boot-up. BIOS setup will display an error messageifthelegacydrive(s)specifiedisnotbootable.
BIOS Setup - 24 -
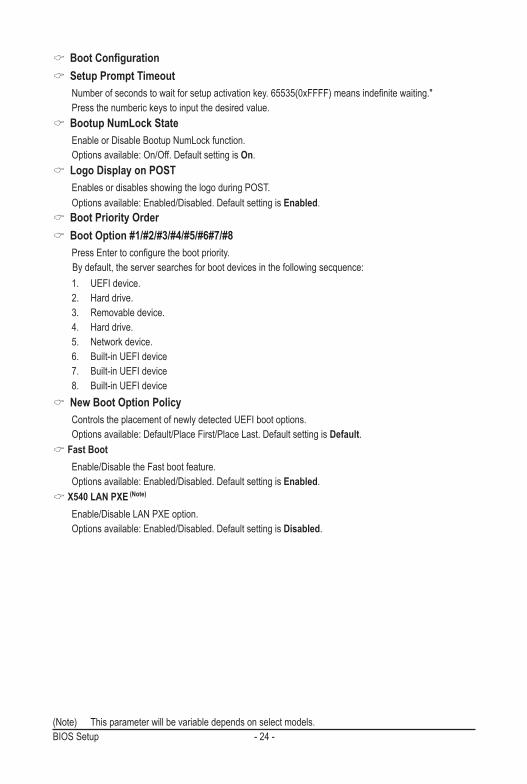
BootConfiguration Setup Prompt Timeout
Numberofsecondstowaitforsetupactivationkey.65535(0xFFFF)meansindefinitewaiting." Press the numberic keys to input the desired value.
Bootup NumLock State Enable or Disable Bootup NumLock function. Options available: On/Off. Default setting is On.
Logo Display on POST Enables or disables showing the logo during POST. Options available: Enabled/Disabled. Default setting is Enabled.
Boot Priority Order Boot Option #1/#2/#3/#4/#5/#6#7/#8
PressEntertoconfigurethebootpriority. By default, the server searches for boot devices in the following secquence:
1. UEFI device.2. Hard drive.3. Removable device. 4. Hard drive.5. Network device.6. Built-in UEFI device7. Built-in UEFI device8. Built-in UEFI device
New Boot Option Policy Controls the placement of newly detected UEFI boot options. Options available: Default/Place First/Place Last. Default setting is Default.
Fast Boot Enable/Disable the Fast boot feature. Options available: Enabled/Disabled. Default setting is Enabled.
X540 LAN PXE (Note)
Enable/Disable LAN PXE option. Options available: Enabled/Disabled. Default setting is Disabled.
(Note) This parameter will be variable depends on select models.
- 25 - BIOS Setup
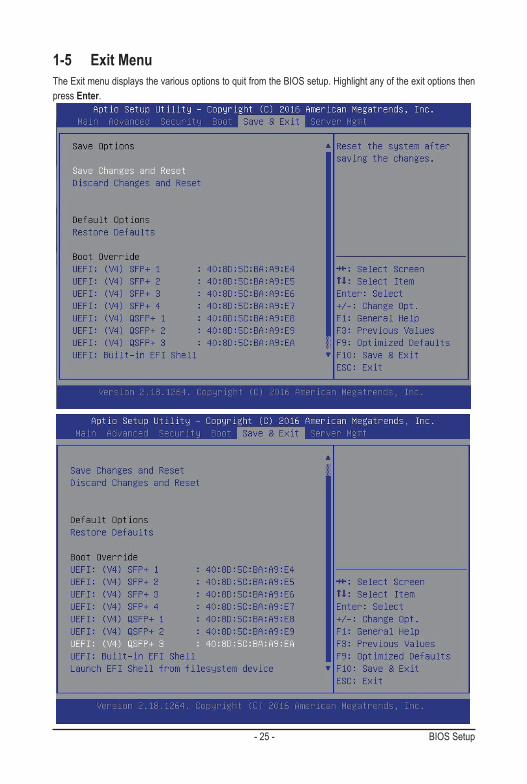
1-5 Exit MenuThe Exit menu displays the various options to quit from the BIOS setup. Highlight any of the exit options then press Enter.

BIOS Setup - 26 -
SaveOptions Save Changes and Reset
Saves changes made and reset the system. Options available: Yes/No.
Discard Changes and Reset Discards changes made and reset the system. Options available: Yes/No.
Default Options Restore Defaults
Loads the default settings for all BIOS setup parameters. Setup Defaults are quite demanding in terms of resources consumption. If you are using low-speed memory chips or other kinds of low-performance components and you choose to load these settings, the system might not function properly.
Options available: Yes/No. Boot Override
Allows you to select a device to boot immediately. Press <Enter> on the device you select and select Yestoconfirm.Yoursystemwillrestartautomaticallyandbootfromthatdevice.
UEFI: Built-in in EFI Shell Press<Enter>onthisitemtoLaunchEFIShellfromfilesystemdevice.
- 27 - BIOS Setup
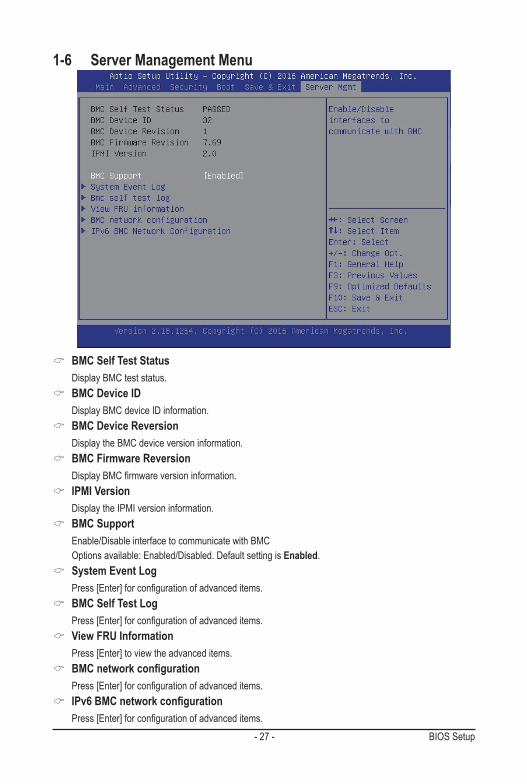
1-6 Server Management Menu
BMC Self Test Status Display BMC test status.
BMC Device ID Display BMC device ID information.
BMC Device Reversion Display the BMC device version information.
BMC Firmware Reversion DisplayBMCfirmwareversioninformation.
IPMI Version Display the IPMI version information.
BMC Support Enable/Disable interface to communicate with BMC Options available: Enabled/Disabled. Default setting is Enabled.
System Event Log Press[Enter]forconfigurationofadvanceditems.
BMC Self Test Log Press[Enter]forconfigurationofadvanceditems.
View FRU Information Press [Enter] to view the advanced items.
BMCnetworkconfiguration Press[Enter]forconfigurationofadvanceditems.
IPv6BMCnetworkconfiguration Press[Enter]forconfigurationofadvanceditems.
BIOS Setup - 28 -
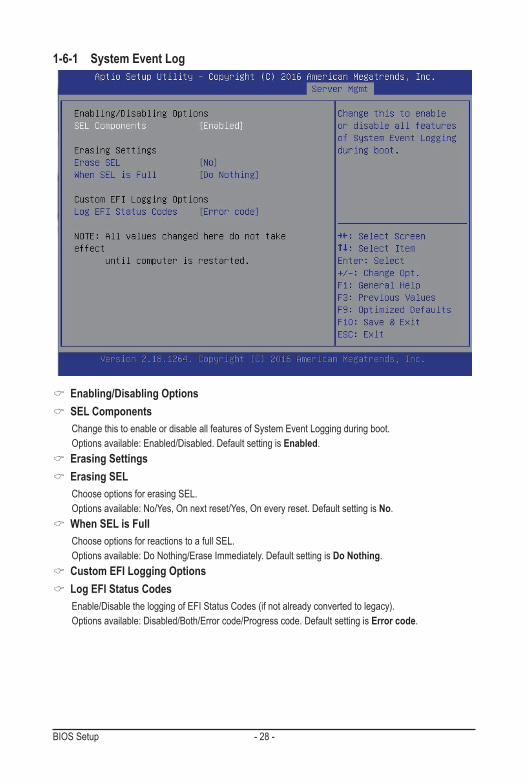
1-6-1 System Event Log
Enabling/Disabling Options SEL Components
Change this to enable or disable all features of System Event Logging during boot. Options available: Enabled/Disabled. Default setting is Enabled.
Erasing Settings Erasing SEL
Choose options for erasing SEL. Options available: No/Yes, On next reset/Yes, On every reset. Default setting is No.
When SEL is Full Choose options for reactions to a full SEL. Options available: Do Nothing/Erase Immediately. Default setting is Do Nothing.
Custom EFI Logging Options Log EFI Status Codes
Enable/Disable the logging of EFI Status Codes (if not already converted to legacy). Options available: Disabled/Both/Error code/Progress code. Default setting is Error code.

- 29 - BIOS Setup
1-6-2 BMC Self Test Log
Erase Log Choose options for erasing log. Options available: No/Yes, On next reset/Yes, On every reset. Default setting is No.
When Log is Full Choose options for reactions to a full log. Options available: Do Nothing/Clear Log. Default setting is Clear Log.
BIOS Setup - 30 -
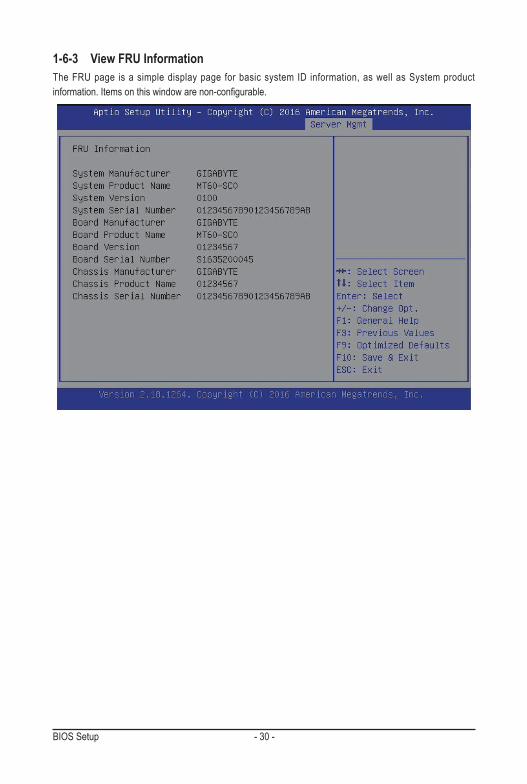
1-6-3 View FRU InformationThe FRU page is a simple display page for basic system ID information, as well as System product information.Itemsonthiswindowarenon-configurable.
- 31 - BIOS Setup
1-6-4 BMCnetworkconfiguration
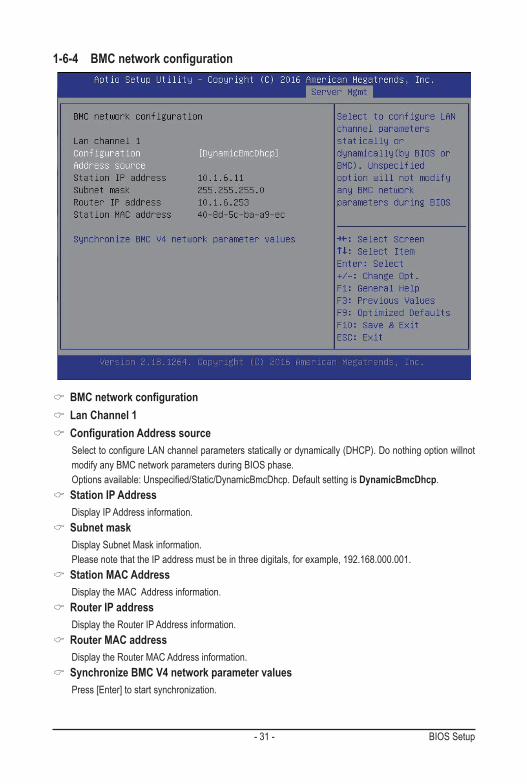
BMCnetworkconfiguration Lan Channel 1 ConfigurationAddresssource
SelecttoconfigureLANchannelparametersstaticallyordynamically(DHCP).Donothingoptionwillnotmodify any BMC network parameters during BIOS phase.
Optionsavailable:Unspecified/Static/DynamicBmcDhcp.DefaultsettingisDynamicBmcDhcp. Station IP Address
Display IP Address information. Subnet mask
Display Subnet Mask information. Please note that the IP address must be in three digitals, for example, 192.168.000.001.
Station MAC Address Display the MAC Address information.
Router IP address Display the Router IP Address information.
Router MAC address Display the Router MAC Address information.
Synchronize BMC V4 network parameter values Press [Enter] to start synchronization.
BIOS Setup - 32 -
1-6-5 IPv6BMCnetworkconfiguration
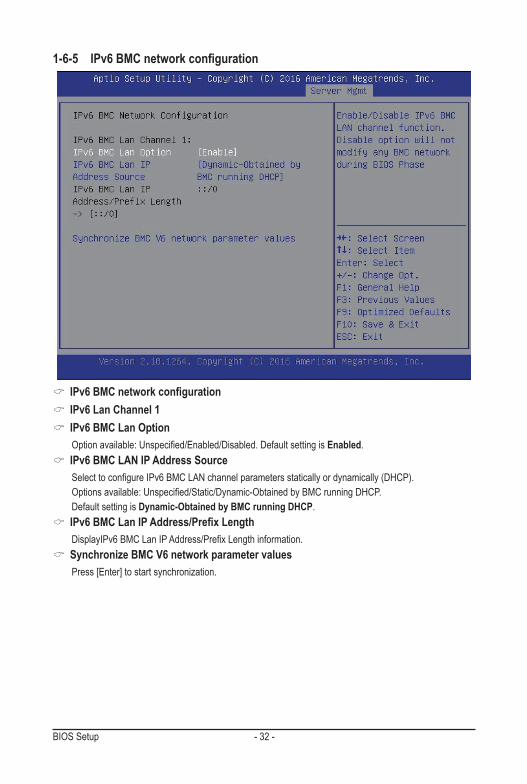
IPv6BMCnetworkconfiguration IPv6 Lan Channel 1 IPv6 BMC Lan Option
Optionavailable:Unspecified/Enabled/Disabled.DefaultsettingisEnabled. IPv6 BMC LAN IP Address Source
SelecttoconfigureIPv6BMCLANchannelparametersstaticallyordynamically(DHCP). Optionsavailable:Unspecified/Static/Dynamic-ObtainedbyBMCrunningDHCP. Default setting is Dynamic-Obtained by BMC running DHCP.
IPv6BMCLanIPAddress/PrefixLength DisplayIPv6BMCLanIPAddress/PrefixLengthinformation.
Synchronize BMC V6 network parameter values Press [Enter] to start synchronization.