bleaching agents1 / orthodontic courses by indian dental academy
TRANSCRIPT
BLEACHING
CONTENTS
I) Introduction
II) Historya) Vital bleachingb) Non-vital
bleaching
III) Causes of Discolouration and Indications
IV) Contraindications of Bleaching Teeth
V) Mechanism of Action
VI) Histologic Effects of Bleaching
VII) Treatment Planning
VIII) Techniques for Vital Bleaching
IX) Techniques for Non-vital Bleaching
X) References
I) INTRODUCTION
Bleaching is an age old treatment whose time has finally come. The technique has been performed for over a century. It is one of the most documented clinical techniques in dentistry and yet for reasons unknown, it has escaped the acceptance that it deserves.
To define The lightening of the color of the tooth through the application of chemical agents to oxidize the organic pigmentation in the tooth is referred to as bleaching.
The current trend toward cosmetic dentistry has generated more interest in bleaching as patients are asking for whiter and more beautiful teeth. Our society tends to dislike yellowing of teeth that comes with age or the various intrinsic stains that occur developmentally.
Products to “whiten” teeth are plentiful in the market place. Bleaching alone can significantly change the appearance of teeth, sometimes in only one office visit and almost less invasively and less expensively than procedures such as crowning, bonding or veneering. There is now little reason to accept discoloured teeth when bleaching, in conjunction with other cosmetic dental technique is now readily available.
II) HISTORY
Bleaching as yet another means to achieve that dazzling smile is not new; the first reported cases date in the 19th century, but it is less well known and less understood than bonding and veneers.
History of bleaching vital teeth
V.M. Torres Zaragoza has reported extensively about bleaching of vital teeth. His report shows the earliest efforts at bleaching were focused on the search for an effective bleaching agent.
The first publication of bleaching was in 1877 by Chapple, the agent of his choice was oxalic acid.
Taft and Atkinson suggested the use of chlorine for bleaching.
In late 1960’s, home bleaching using 10% carbamide peroxide was discovered by Klusimer.
In 1884, Harlan published first reports of peroxide used in bleaching. He called it hydrogen dioxide.
1

In 1895, various practitioners began to experiment with electric current to speed the process of bleaching.
Rossental suggested the use of UV waves to help bleaching in 1911.
By 1918, Abbot had introduced the forerunner of the combination used today; Superoxol and an accelerated reaction by heat and light.
The technique of nightguard vital bleaching went technically unnoticed until Heywood and Heymann described the technique in March 1989 and a similar product was introdced by a manufacturing company in the same month. The night guard vital bleaching and over the counter kits have kindled a resurgence of interest in tooth bleaching.
History of bleaching non-vital teeth
- As early as 1848, non-vital tooth bleaching with chloride of lime was practiced.
- Truman is credited for introducing well before 1864, the most effective method of bleaching non-vital teeth, which used chlorine from a solution of calcium hydrochlorite and acetic acid. The commercial derivative of this, known as Labarrque’s solution, was a liquid chloride of soda.
- In 1895, Garretson published the first report of bleaching non-vital teeth..
- Superoxol (30% H2O2) was introduced by a manufacturing company early in the 1900’s.
- In 1950, Pearson left the solution of Superoxol for 2-3 days in the pulp chamber.
- Pyrozon (ether-peroxide) was used effectively for non-vital teeth in the late 1950’s and early 1960s.
- Nutting and Poe carried out the approach of “walking bleach” in 1967. They elected to use ‘Superoxol’ instead of ‘Pyrozone’, for safety and combined it with sodium perborate to achieve synergistic effect. They recommended the use of sodium peroxyborate monohydrate because it released more oxygen than sodium perborate. They also advised that guttapercha be sealed before the treatment is initiated and sealed the solution in the pulp chamber for 1 week.
III) CAUSES OF DISCOLOURATION OF INTRINSIC DISCOLORATION
EXTRINSIC DISCOLORATION
IV)
V) INTERNALIZED DISCOLORATION
VI) Stains that occur subsequent to dental development, entering hard tissues through enamel defects.
VII) TEETH AND INDICATIONS
1. Extrinsic discolouration
Definition : Discoloration present on the enamel or aquired pellicle generally of metallic or nonmetallic origin
2

- Occurs when some agent literally stains or damages the enamel surfaces of the teeth. They are found on the outer surface of teeth and are usually of local origin which can be removed by oral prophylaxis.
- Cigarettes, cigars and pipes will produce a yellowish brown to black discolouration, usually in the cervical portion of the teeth and primarily on the lingual surfaces.
- Chewing tobacco stains frequently penetrate the enamel producing a deeper stain.
- Coffee and tea cause severe tenacious discolourations, usually brown to black stains.
2. Intrinsic discolouration
Definition : Discoloration is a result of change in the structural form or the composition of dental hard tissues
These are stains within the enamel and dentin caused by the deposition or incorporation of substances within these structures, such as tetracycline stains, dentinogenesis imperfect, a fluorosis by products released into the dentinal tubules during illness (e.g., bilirabin involved with jaundice) trauma (primarily the breakdown of haemoglobin), or pigmentation escaped from
the medicaments and materials used in restorative dentistry.
1) Tetracycline staining
Tetracycline staining was first reported in mid-1950s, less than a decade after widespread use of this antibiotic.
- Teeth are most susceptible to tetracycline discolouration during their formation i.e. during the second trimerster in utero to roughly 8 years after birth.
- The tetracycline molecules appears to chelate with calcium and becomes incorporated into the hydroxyapatite crystals.
- The tetracycline involves predominantly the dentin.
- Severity of the stains depends on the time and duration and the dosage of the drug administration, so also the type of tetracycline.
Categories of tetracycline discolouration
According to Jordan and Boksman
First degree tetracycline staining:
- is a light yellow, brown or gray staining.
- uniformly distributed throughout the crown.
- no evidence of banding or localized concentration.
Responds well to bleaching in two or three sessions.
Second degree tetracycline staining.
- dark or gray staining.
- extensive than first degree with no banding.
Responds well to bleaching in 4 to 6 sessions.
3

Third degree tetracycline staining:
- dark gray or blue with marked banding.
Responds to bleaching but bands usually evident following even extensive treatment. It may be removed with some veneering technique.
Fourth degree tetracycline staining:
- Created to include those stains that are too dark to attempt vital bleaching.
2) Fluorosis staining
- Mottled enamel that occurs when children ingest excessive fluoride during development of enamel and dentin.
- Damage occurs during development usually during third month of gestation through eighth year of life.
- High concentration of fluoride in excess of 1ppm (more than 4ppm – moderate to severe discolouration) is believed to cause a metabolic alteration in the ameloblasts resulting in defective matrix and improper calcification.
- Prevalence – premolars, 2nd molars, maxillary incisors, canines, 1st molars and mandibular incisors.
- There are two types of damages:1. Discolouration.2. Surface defects.
Types :
1. Simple fluorosis staining appears as brown pigmentation on a smooth enamel surface.
- Responds well to bleaching.
2. Opaque fluorosis appears as flat gray or white fleeks on enamel surface.
- Responds poorly to bleaching because tooth cannot be bought to lightness in the affected area.
3. Fluoride staining with pitting has dark pigmentation with surface defects, necessitates bleaching followed by composite resin bonding.
3) Discolouration from pulp necrosis
4

a) Trauma-related discolouration
- Trauma can cause haemorrhage as blood vessels rupture in the pulp chamber.
- Blood is hydraulically driven into the dentinal tubules, where the RBC undergo hemolysis emitting haemoglobin. Haemoglobin is degraded releasing iron than forms a black compound by combining with hydrogen sulfide to become iron sulfide.
- Immediately after injury, crown remains pink as blood breaks down. The tooth becomes orange, then blue, then brown or black.
b) Pulp degeneration without haemorrhage
- Necrotic tissue contains various protein degradation products which create a grayish brown discolouration of the crown.
- This responds well to non-vital bleaching technique.
4) Iatrogenic Discolouration
Considered intrinsic because it effects inner structure of the tooth.
a) Trauma during pulp extirpation Haemorrhage.
b) Failure to remove all pulpal remnants. Responds well to non-vital bleaching technique.
c) Medications and materials used in dental restorations if they leak.
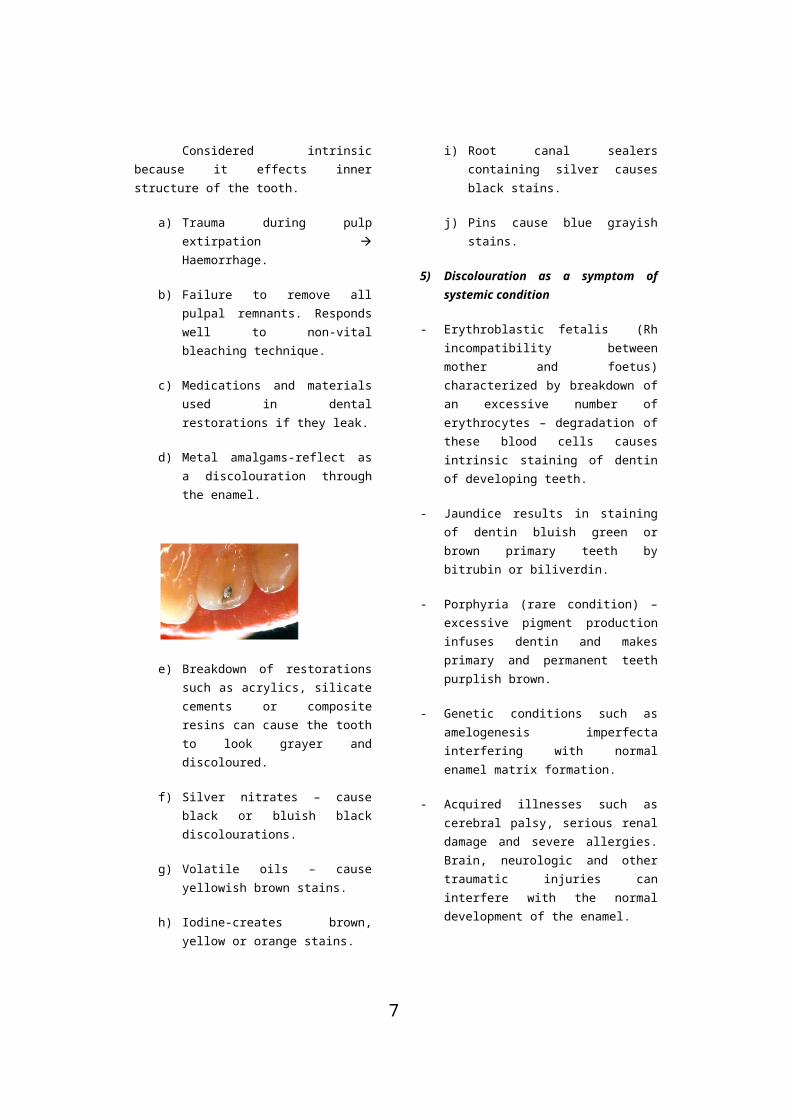
d) Metal amalgams-reflect as a discolouration through the enamel.
e) Breakdown of restorations such as acrylics, silicate cements or composite resins can cause the tooth to look grayer and discoloured.
f) Silver nitrates – cause black or bluish black discolourations.
g) Volatile oils – cause yellowish brown stains.
h) Iodine-creates brown, yellow or orange stains.
i) Root canal sealers containing silver causes black stains.
j) Pins cause blue grayish stains.
5) Discolouration as a symptom of systemic condition
- Erythroblastic fetalis (Rh incompatibility between mother and foetus) characterized by breakdown of an excessive number of erythrocytes – degradation of these blood cells causes intrinsic staining of dentin of developing teeth.
- Jaundice results in staining of dentin bluish green or brown primary teeth by bitrubin or biliverdin.
- Porphyria (rare condition) – excessive pigment production infuses dentin and makes primary and permanent teeth purplish brown.
5

- Genetic conditions such as amelogenesis imperfecta interfering with normal enamel matrix formation.
- Acquired illnesses such as cerebral palsy, serious renal damage and severe allergies. Brain, neurologic and other traumatic injuries can interfere with the normal development of the enamel.
- Enamel hypoplasia caused by deficiencies of vitamins A, C, D and calcium and phosphorous during the formative period.
If these conditions cause tooth deformity or white spots, they respond poorly to bleaching.
INTERNALIZED DISCOLORATION
Stains that occur subsequent to dental development, entering hard tissues through enamel defects.
6) Discolouration due to heredity and dental history
- Some people are genetically programmed to have lighter or darker teeth.
- Dental caries may be seen as an opaque halo or as a gray discolouration. Bleaching not effective until the cause of discolouration is removed.
-
- Deeper pigmentation as a result of bacterial degradation of food debris in areas of tooth decay or decomposition.
If breakdown is repaired, bleaching may not be necessary.
7) Discolouration due to aging
1. More stains of coffee and food.
2. Due to wearing away of enamel.
Advantage in older patients pulp recession makes aging a boon in terms of bleaching, since, it makes the patient less sensitive to the bleaching compound.
IV) CONTRAINDICATIONS OF BLEACHING TOOTH
Bleaching should not be advised when the pertinent tooth has:
1. Cracks and hypoplastic or severely undermined enamel.
2. Extensive silicate, acrylic or composite restorations.
- these teeth may not have enough enamel to respond properly to bleaching.
3. Discolouration by metallic salts, particularly silver amalgam, the dentinal tubules can become virtually saturated by these alloys causing stains that no amount of bleaching can significantly improve.
4. Enlargement of the pulp or other disease that makes the tooth sensitive to bleaching solutions or may require special care and desensitization.
6
V) MECHANISM OF ACTION
How does bleaching work?
The mechanisms of bleaching are not completely understood and may be somewhat different for different types of stains.
- For stains in which pellicle or other organic substances appear on the surface or subsurface of the tooth, the bleaching agent may oxidize these substances.
- The reason why etching sometimes enhances the effects of bleaching may well be that, this procedure removes surface organic material and penetrates the enamel slightly, possibly exposing slightly deeper areas of enamel to bleach.
- We know that substances can penetrate the enamel and dentin, even into the pulp and it is probably this mechanism that allows the bleaching agents to do their work.
- The use of high intensity lighting and longer exposure times for the bleaching agent may work to increase this permeation.
- The mechanism by which bleaching works on the interior of teeth may be a process of oxidation in which the molecules causing the discolouration are released. The theories of photooxidation or ion exchange are both claimed to be viable reactions.
- For non-vital teeth, the pulp chamber can be packed with a bleaching agent. Although some researchers have presented evidence that hydrogen peroxide can penetrate pulp chamber externally to facilitate oxidation of the staining agents, it is not known whether it should affect the products of haemolysis or degraded substances.
- Hydrogen peroxide, in various concentrations, is the primary material currently used by the profession in the bleaching process. Current in office techniques for vital teeth and the “walking bleach” technique typically use 30-35% concentration of H2O2. H2O2
naturally occurs in the body even in the eyes, in low concentrations. It is manufactured and regulated by the body and often involved in wound healing. In higher concentrations, it is bacteriostatic and in very high concentrations is mutagenic, possibly by disrupting the DNA strand. However, the body has mechanisms for immediate repair of natural damage, low concentrations of H2O2 do not cause serious problems. The carcinogenic capabilities of H2O2 are more often caused by other peroxide derivatives and the body uses the peroxidases and other mechanisms for regulating H2O2.
- The mechanisms of action of H2O2 in tooth bleaching is considered to be oxidation, although the process is not well understood. It is felt that the oxidizers remove some unattached organic matter from the tooth without dissolving the enamel matrix but also may change the discoloured portion to a colorless state. There is some concern that continued long term treatment will result in dissolution of the enamel matrix, but reports to date on nightguard vital bleaching techniques have not supported this theory.
7

AT LOW PH
H2 o2 H2O + O(Weaker free radical)
H+HO2 (Lower percentage of stronger free radical)
AT HIGH PH (9.5 - 10.8.)
H2 o2 H2O + O(Weaker free radical)
H+HO2 (higher percentage of stronger free radical)
- Tetracycline stains are more resistant to oxidation because the molecule is tightly bound to the mineral in the enamel prism matrix during formation and hence is less accessible to immediate action. Teeth stained with tetracycline therefore require prolonged treatment times before any results are demonstrated and often are unresponsive to the procedure.
- The majority of products currently on the market for the nightguard vital bleaching technique use a 10% carbamide peroxide solution. A 10% carbamide peroxide degrades into 3% H2O2 and 7% urea and hydrogen peroxide can be considered its active ingredient. The urea may provide some beneficial side effects because it tends to raise the hydrogen ion concentration (pH) of the solution.
- For non-vital teeth, the pulp chamber can be packed with a bleaching agent. Although some researchers have presented evidence that H2O2 can penetrate pulp chamber externally to facilitate oxidation of the staining agents, it is not known whether, it would
affect the products of haemolysis or degraded substances.
- In the walking bleach technique for non-vital teeth, sodium perborate was used with hydrogen peroxide. Sodium perborate is a white powder which decomposes into sodium metaborate and hydrogen peroxide releasing oxygen. When mixed into a paste with H2O2, this paste decomposes into sodium metaborate, water and oxygen. When sealed into the pulp chamber, it oxidizes and discolours the stain slowly, continuing its activity over a longer period.
Teeth that have been discoloured as a result of ingestion of high amount of fluoride such as 5ppm in natural water do not respond well to ordinary techniques of bleaching. In cases of endemic fluorosis, McInnes solution containing 30% H2O2, 36% HCl acid and 0.2% anaesthetic ethers in the ratio of 5:5:1 is used. The anaesthetic ether removes surface debris, the hydrochloric acid etches the enamel and the H2O2
bleaches the enamel. The H2O2 as described earlier bleaches the enamel by the process of oxidation. The hydrochloric acid present in the solution increases the penetration of the solution and helps in faster action. But HCl acid has various deleterious effects such as loss of contour, irritation to gingiva and sensitivity of teeth.
Chen, Xu and Shing (1993) replaced HCl by 20% NaOH which also helps in decomposition of H2O2 and enhances the bleaching effect. NaOH is highly alkaline in nature and therefore dissolves calcium at a slower rate. The results suggests that 1:1 mixture of H2O2 with 20% sodium hydroxide is a effective as old Mc Innes solution and the calcium dissolved is much less with the new McInnes solution.
A study by Dr. Nangrani showed that use of Old McInnes solution resulted in loss of contour of the teeth. The time taken by New McInnes solution was double than
8

that of Old McInnes solution but it did not show loss of contour of the teeth.
Dr. Shadwala studied the amount of calcium dissolution with Opalescence night guard vital bleaching solution and Old McInnes solution and found out that Old McInnes solution caused less calcium dissolunts as compared to Night guard vital bleaching technique. The possible reason for this could be attributed to the fact that night guard vital bleaching technique uses bleaching action whch lasts for 6 hours for 2 weeks whereas McInnes solution has to be used for only about 20 minutes (3-4, 5 min application).
VI) HISTOLOGIC EFFECTS OF BLEACHING
- Since 1951, it has been shown that the bleaching procedures have potentially damaging effects on the pulp and that substances can pass through enamel and dentin and into the pulp.
- 1977, Griffin and Grower reported that Old McInnes solution kept from 2-15 minutes on the teeth showed lack of penetration into the pulp chambers. This lack of penetration may be due to the short exposure time tested.
- In 1950, Wainwright and Lemoine showed that the low molecular weight of H2O2 and its capability to denature proteins increases the movement of ions through teeth.
This study was further corroborated in 1999 by C. Hegedus et al who stated that peroxides affect not only the surface but also the inner structure of enamel as a result of its molecular weight. They affect the organic phase of enamel. This inner oxidative effects are more likely to occur in the subsurface enamel which has more organic material.
Cohen and Chase (1979) reported effects of H2O2 and heat for vital bleaching. Their conclusion was using this technique for vital bleaching may be considered harmless to pulpal tissues. The next year in
a similar study, Robertson and Melfi found mild superficial inflammation in a signifiacnt number of pulps.
VII) TREATMENT PLANNING
Esthetic dentistry is especially the appearance of the mouth as a whole and not simply one or more problem teeth. Bleaching may correct the problem or facilitate other restorative techniques to correct the problem. Bleaching is therefore the first step in any treatment plan. The exact shade of the bleached teeth cannot be predicted. By bleaching first, the advantage is that unnecessary tooth reduction need not be done and anatomic shape and form is preserved. Bleaching may need to be repeated every 1-3 years to maintain brightness of teeth.
Preparation for bleaching
1) Record keeping and photographs – Record keeping should begin at the treatment planning stage. Records should document decision for treatment and alternative. It is absolutely essential to take adequate photographs of a patients preoperative condition. No amount of description can exactly depict, how the patient looked before treatment. In addition, photographs are more reliable than memory in documenting the progress of treatment.
2) Careful diagnosis, using radiographs and transilluminating techniques: In this, the possibilities of any periapical abnormalities can be ruled out. Caries and decalcified or hypocalcified areas will be disclosed. The size and vitality of the pulp can be determined and the opacity, depth and layers of stains can be defined. Also, hypersensitivity of the teeth should be ruled out.
3) Oral prophylaxis and polishing with sodium bicarbonate: to rid teeth of all surface stains, plaque and calculus. The patient should be protected with heavy plastic wrap and safety glasses. In most
9

cases, anaesthetic must not be used. Rather, then patient should be able to tell the dentist if leakage occurs as the heat becomes too intense. All members of the dental team should wear protective eye wear, surgical rubber gloves and masks.
4) Preparation of teeth to be bleached . Isolation with:
a) Rubber dam.
b) Protective paste-Orabase or Vaseline applied to soft tissues.
c) Gauze saturated with cold water placed under rubber dam.
d) Pumice used to remove excess stain or protective paste.
e) Floss is ligated interdentally to prevent seepage of the bleaching solution into the gums.
Instruments
- Early approach used metal instruments and delivered direct heat to the teeth. Patterson developed one such instrument. Advantage is when bleaching individual tooth as in non-vital teeth.
- A later development was the use of intense light to activate the bleaching solution. Intense light has the advantage of supplying uniform heat to at least ten teeth.
VIII) BLEACHING OF VITAL TEETH
There are at least three ways of bleaching vital teeth.
1) In office bleaching or power bleaching techniques:
Thermocatalytic method - Light - Heat McInnes solution - Old - New
2) Night guard vital bleaching.3) Over the counter preparation.
1. In office bleaching / Power bleaching
First vital bleaching technique.
ADA products ADA accepted
Superoxol (Sultan Chemists)
Starbrite in office bleaching.
For tetracycline stains
Teeth are covered with gauze saturated with 35% H2O2.
The peroxide solution may be activated by heat or light.
Bleaching light positioned 13 inches from the teeth with the light shining directly on them. A rheostat setting of 5 usually used.
Where heat is used a temperature setting of 46-60°C for vital teeth.
The gauze should be kept wet by dispensing fresh bleaching solution with a cotton swab.
The bleaching agent should be kept in contact and light/heat applied to the teeth for 30 minutes.
Excess solution rinsed off with copious amounts of warm water. Brush and then polish.
- At one time, it was considered to etch the teeth with phosphoric acid before bleaching, supposedly to enhance the effect. However, etching is not actually necessary.
- Tetracycline stains generally requires 5-10 visits. Best scheduled every 2-4 weeks.
b) For fluorosis stains
- Because fluorosis stains causes much more heterogenous pattern of staining, the bleaching method is more selective.
- Bleaching agent – Old / New McInnes solution
10

(Acidic medium)
Alkaline medium)
Old McInnes
Ratio
New McInnes
Ratio
Bleaching enamel
a) 30% H2O2
5 part
s
30% H2O2
1 part
Etches enamel
b) 36% HCl
5 part
s
Removes surface debris
0.2% ether
1 part
20% NaO
H1 part
- After pretreatment procedures are carried out cotton applicators carrying fresh bleaching agent applied for 5 minutes and repeated after an interval of 1 minute.
- Application was repeated till the desired bleaching effect was observed.
- With Old McInnes solution the solution was neutralized with baking soda.
- Warm water is flushed on the enamel before rubber dam is removed.
- Polishing is done to achieve a high enamel luster.
Disadvantages:
1) Repeated isolation is a problem.
2) Power bleach only can be applied on anterior teeth.
3) 35% H2O2 is caustic and should avoid burning themselves or patient.
4) Discomfort during and sensitivity for a week after treatment.
5) No reliable way of predicting success.
2) Night guard bleaching (NGVB, dentist prescribed home applied technique, dentist home bleaching or matrix bleaching).
- Introduced by Haywood and Heymann in 1989.
- Custom fitted prosthesis filled with 10% carbamide peroxide is worn for few hours each day for a few weeks.
- Carbamide peroxide composed of approximately 3% H2O2 and 7% urea. H2O2 degrades into H2O2 and O2 while urea degrades into ammonia and CO2. All these materials occur naturally in the body and are easily managed. Usually 10% carbamide peroxide solution was used.
- Lesser concentration of carbamide peroxide (5% instead of 10 and 16%) can also be used. They take longer time but may lead to less sensitivity as compared to the higher concentration solutions.
- Carbopol (B.F. Goodrich) is added to this solution to make it stickier, and prolong the oxygen release.
11

This type of material favours overnight wear.
- For patients who find it uncomfortable to wear it overnight, they are advised to place it 2-4 hours before sleeping. Disadvantage is that the treatment time is prolonged.
ADA accepted bleaching products for NGVB
- Colgate Platinum Overnight Professional Tooth Whitening system.
- Nite White classic.
- Opalescence whitening gel.
- Patterson Brand tooth whitening gel.
- Rembrandt Lighter bleaching gel.
3) Over the counter bleaching systems (eg: perfect Smile System)
- Shortly after the dentist home systems were introduced, several systems were sold directly to the consumers.
- Also called ‘home bleaching’ systems but are more appropriately referred as OTC home bleaching systems.
- Some of the earlier systems have a 3-step procedure.
an acidic pre-rinse.
application of a lower strength peroxide material without a prosthesis.
a final application.
- Later developed were home systems which use same strength of bleaching solution as the dentist home system but apply the material with a “boil and form” mouthguard.
Enamel Microabrasion Technique
One of the relatively new techniques for removal of stains in endemic fluorosis cases is the use of enamel microabrasion technique.
In 1916, Dr. Walter Kane, of Colorado Springs, used 18% hydrochloric acid with a warm instrument to successfully remove stains associated with endemic fluorosis. Since 1916, numerous investigators have used hydrochloric acid alone on fluorosis stains. In 1984. Mc Closkey described Kanes work and demonstrated successful cases of his own. He found that brown fluorosis stains can permanently be removed by rubbing the enamel with an 18% HCl acid soaked cotton pellet wrapped around and amalgam condenser.
Two years later Croll and Cavananaugh developed a similar technique that involves pressure application of 18% HCl with pumice to achieve colour modification. This was called the enamel microabrasion technique. The chief mechanism of stain removal would be limited to enamel abrasion, rather than enamel dissolution by the acid. Dr. Croll believed that the acid abrasive action of the compound gives the enamel surfaces, a super fine polishing as a microscopic layer of enamel is removed. The freshly polished surface then develops a shiny glass like texture, resembling a highly polished microfilled composite resin restoration, as the tooth subsequently remineralized.
Jacobsson-Hunt (1988) reported 30-second applications of the acid abrasive compound using a mandrel and gear reduction handpiece on extracted human teeth results in a enamel loss of less than 200µm. In 1989 Kendell reported that 5 second application of HCl acid pumice mixture removes 46µm of enamel which should be considerably tolerated.
An important concern about the safety of the hydrochloric acid pumice
12

abrasion procedure is the low viscosity and high concentration of 18% HCl. To eliminate this problem and ensure safety of this technique, the viscosity of the acidic solution is increased by mixing 18% HCl acid with quartz particles so that the solution takes on a water soluble gel like form. This came to be known as the modified 18% HCl acid quartz-pumice abrasion technique.
The procedure is as follows:
1. The gingiva was protected by a layer of petroleum jelly.
2. The involved teeth were isolated with rubber dam.
3. After the teeth were dried with air, the paste which consisted of 18% HCl acid quartz-pumice particles, was applied with a cotton tip applicator to the stained areas of enamel.
4. The paste was allowed to remain 5 seconds and then for 10 seconds, the enamel microabrasion was effectuated with a cotton swab pressure.
5. After 10 seconds, a marked degree of success was obtained and the stain was removed.
6. After 15 seconds of treatment, the enamel of the teeth turned to a normal shade.
7. At the end of the treatment, the teeth were washed and dried before removal of rubber dam was neutralized with a neutral sodium gel.
In this procedure, the quartz particles convert the acid into a gel form and functions as an additional abrasive agent. Six months following this treatment on several patients showed that the objectives of the treatment was achieved.
The advantage of this technique is that it is relatively economical, involving no
laboratory costs, making this technique readily acceptable to children.
IX) BLEACHING OF NON-VITAL TEETH
Preparation of the affected non-vital teeth:
1) In office bleaching.
2) Out of office bleaching (walking bleach technique).
3) Other bleaching techniques.
Isolation is done with a rubber dam.
The tooth is meticulously cleaned internally.
Establish a lingual opening of sufficient size to provide access to the pulp chamber and orifice of the root canal.
A slowly rotating bur is used to remove debris and a surface layer of dentin within the pulp chamber.
In endodontically treated teeth, root canal filling material should be removed to a depth of 2-3mm apical to the cervical line.
Zinc polycarboxylate cement, cavit or zinc oxyphosphate cement can be used to refill, 1-2mm coronally to the CEJ.
Bleaching should never be attempted on any tooth that does not have a complete seal in the root canal. The agent could escape through a porous root canal filling and cause the patient extreme discomfort as well as probably loss of tooth.
Surface stains visible on the inside of the preparation are removed, the entire preparation is swabbed with chloroform or acetone to dissolve any fatty material and
13
facilitate the purification of the bleaching agent into the tubules.
1) In-office bleaching (Thermocatalytic techniques)
The pulp chamber is filled loosely with cotton fibres and the labial surface is covered with a few strands of cotton fibre to form a matrix for retaining the bleaching solution.
This is saturated with 35% H2O2
using a glass syringe fitted with a stainless steel needle. The solution should be discharged slowly to saturate the cotton inside the pulp chamber and on the labial surface excess should be wiped immediately.
A thin tapered tip from a single tooth bleaching instrument can be inserted into the pulp chamber. The heated tip is exposed for 5 minutes, in a sequence of 1 minute on 15 seconds off.
It has been established by Caldwell that a non-vital tooth can be treated to a temperature of 73°C without causing the patient discomfort.
An alternative to activate the H2O2
is the use of light and heat from a heat and light bleaching powerful light. The tooth is subjected to 6, 5 minute exposures and one replenishes the bleaching agent at frequent intervals.
The heating instrument and cotton can then be removed. Repeat the above process 4-6 times or for 20-30 minutes each time placing new cotton fibres.
This technique can be used alone or in combination with walking bleach.
2) Out Office bleaching (Walking bleach)
First described by Nutting and Poe in 1963.
This procedure consists of filling the prepared chamber (as described previously) with a paste consisting of 35% H2O2 and sodium perborate. (their effect is thought to be synergistic).
Sodium perborate is a white powder which decompose into sodium metaborate and H2O2
releasing O2. When mixed into a paste with Superoxol, this paste decomposes into sodium metaborate, water and oxygen.
When sealed into the pulp chamber, it oxidizes and discoloures the stain slowly, continuing its activity over a longer period.
A small pledget of cotton wool is placed on the paste and the cavity is sealed with polycarboxylate cement kept under pressure till the cement sets.
The maximum bleaching is attained 24 hours after treatment.
The patient should return in 3-7 days.
If shade dark then repeat procedure
light then permanent restoration with silicate or GIC.
-Generally two treatment sessions although in some cases one treatment is sufficient.
3) Other methods of non-vital bleaching
a) Inside-outside bleaching (Leonard and Stettembrim et al 1997)
Fabrication of a study model.
14

Light cured composite is placed on the model of the tooth or teeth to be treated. This acts as a reservoir to be created in a vacuum processed mouthguard whose thickness usually varies from 0.20 and 0.30 inch.
Mouthguard trimmed at the cervical margins on the labial and lingual portions and tried in the patients mouth.
The GP is the root canal is sealed off from the pulp chamber with GIC or resin modified GIC.
Patient is taught how to inject 10% carbamide peroxide into the canal orifice and into the mouthguard with a syringe.
Excess CP gel can be removed by brushing or using a paper tissue.
The patient may either sleep with the gel or remove the mouthguard after 1 or 2 hours. If the patient prefers the latter, it will take a few days longer.
At the end of the daily treatment, patient rinses his or her mouth and then places a cotton pellet to prevent food from getting into the opening.
An explorer can be used by the patient to remove the cotton pellet before the next procedure.
The total treatment proceeds and rapidly concludes with the results in as few as 3 or 4 days.
b) Anderson Takeo Hara, and L.A.F. Punenta (1999) (suggested by Spassier) used a technique where sodium perborate and water was used as a walking bleach technique instead of H2O2 to prevent cervical resorption. Sodium perborate broke down to sodium metaborate and H2O2. Two year results were satisfactory with this technique.
Clinical measurement of tooth whitening
A number of methods are available
for measuring the colour of teeth and the
colour changes undergone during tooth
whitening procedures. One of the most
common methods is the simultaneous
comparison of the tooth with a standard
shade guide. This has been used in a large
number of tooth whitening studies where
longitudinal changes in tooth colour have
been measured. It is a subjective method
and a number of factors can influence this
process. For examples,lighting conditions,
experience, age, fatigue of the human eye,
make-up, room decor and colour blindness.
Therefore, caremust be taken to standardise
and control these factors.
Colourimeters are instruments
designed to measure the colour of objects.
The colour is often expressed in terms of the
Commission Internationale de l’E´ clairage
(CIE) Lab colour space. The CIE Lab colour
space represents a uniform colour space,
with equal distances corresponding to equal
perceived colour differences. In this three-
dimensional colour space the three axes are
L*, a* and b*. The L* value is a measure of
the lightness of an object and is quantified
on a scale such that a perfect black has an
L* value of zero and a perfect reflecting
diffuser an L* value of 100. The a* value is a
measure of redness (positive a*) or
greenness (negative a*). The b* value is a
measure of yellowness (positive b*) or
blueness (negative b*). The a* and b* co-
ordinates approach zero for neutral colours
(white, greys) and increase in magnitude for
more saturated or intense colours. The use
of a colourimeter to measure tooth colour in
15

vivo requires the fabrication of a custom
positioning jig to ensure reproducible intra-
oral positioning of the instrument’s aperture
onto the tooth surface.
Another approach for measuring tooth colour
is by using non-contact camera-based digital
imaging and analysis systems. Typically, an
image of the anterior teeth is captured under
controlled lighting conditions by a digital
camera together with suitable calibration
tiles or standards and then subsequently
analysed via computer software to
determine the colour of the individual teeth,
often expressing them in terms of CIE Lab
values. For example, after 14 days use of a
10% carbamide peroxide tray-based system,
the mean change from baseline in L* and b*
were 2.07 and _1.67, respectively.
Factors influencing tooth whiteninng
Type of bleachThe majority of contemporary tooth
whitening studies involve the use of either hydrogen peroxide or carbamide peroxide. In general, the efficacy of hydrogen peroxide containing products are approximately the same when compared with carbamide peroxide containing products with equivalent or similar hydrogen peroxide content and delivered using similar format and formulations,
An alternative source of hydrogen peroxide is sodium percarbonate and this has been used in a silicone polymer containing product that is painted onto the teeth forming a durable film for overnight bleaching procedures.
A tooth bleaching system based on sodium chlorite applied to the tooth surface and activated under acidic conditions has been described in the literature, Similarly, other potential vital tooth bleaching systems have been outlined in the literature with limited supporting evidence for their efficacy. These include sodium perborate, peroxymonosulphate, peroxide plus metal
catalysts and oxireductase enzymes. The long-term acceptability and relative efficacy of these alternative tooth bleaching systems requires significant further research.
Concentration and time
Two of the key factors in determining overall tooth whitening efficacy from peroxide containing products are the concentration of the peroxide and duration of application. Sulieman et al. compared the in vitro tooth bleaching efficacy of gels containing 5–35% hydrogen peroxide and found that the higher the concentration, the lower the number of gel applications required to produce uniform bleaching. Heat and light
The rate of chemical reactions can be increased by increasing the temperature, where a 10 0C rise can double the rate of reaction. The use of high-intensity light, for raising the temperature of the hydrogen peroxide and accelerating the rate of chemical bleaching of teeth was reported in 1918 by Abbot.
Complications of internal bleaching
1. Cervical resorption
Possible mechanism is that H2O2
percolates from the access cavity to the root surface through the acid treated patent dentinal tubules.
This stimulates an inflammatory response tending to dentin resorption.
Alternative theory – bacteria that have leaked into the pulp chamber from the gingival crevice via the dentinal tubules or directly from the access cavity may cause resorption.
Root resorption can be arrested by placing CaOH in the chamber.
16

2. Spillage of bleaching agents
Oxidizing agents are more safe to handle as a paste than a solution.
Apply rubber dam.
Any spillage must be diluted immediately with copious volumes of water.
3. Failure to bleach
Commonest is discolouration by metal ions in silver amalgam.
Incomplete removal of composite resin or GIC which prevents the bleaching agents to penetrate into dentinal tubules.
H2O2 which has passed its expiry date or improperly stored.
Over bleaching
Recommended since it may darken with time an assume desired shade.
Important not to over bleach therefore ask the patient to monitor and return in case of over bleaching.
4. Brittlene ss of tooth crown
- Bleaching causes the coronal tooth structure to be brittle. This may be caused due to removing all the discoloured dentin rather than using the bleaching agents to discolour the dentin.
c) Laser assisted bleaching
- One company uses the argon laser wavelength of 488nm for 30 second to
accelerate the activity of its bleaching gel. After the laser energy is applied, the gel is left in place for 3-4 minutes then removed. This procedure is repeated 4-6 times.
- Another product uses Ion Laser Technology. The argon laser is used as previously described. Then the CO2 laser is employed with another peroxide solution to promote penetration of the bleaching agent into the tooth to provide bleaching below the surface.
- Argon laser energy is in the form of a blue light and is absorbed by the dark colour. It seems to be the ideal instrument to be used in tooth whitening when used with 50% H2O2 and a patented catalyst. The affinity to dark stains ensures that the yellow-brown colours can be easily removed.
- The CO2
laser has no colour requirement. It is unrelated to the colour of the tooth and the energy is emitted, in the form of heat. It is invisible and penetrates only 0.1mm into water and H2O2, where it is absorbed. This energy can enhance the effect of whitening after the initial argon laser process.
X) REFERENCES
1. “Bleaching teeth” Ronald Feinman, Ronald Goldstein and David Garber, Quintessence Publishing Co. Inc., 1987.
2. “History safety and effectiveness of current bleaching techniques and applications of the night guard vital bleaching technique”. Haywood Van B., Quintessence Int., 1992; 23 : 471-488.
3. “An atomic force microscopy study on the effect of bleaching agents on
17
the enamel surface”. C. Hegedus et al, J. Dent., 27 : 1999, 509-515.
4. “Estimation of dissolution of calcium by Old McInnes and New McInnes solution”.Nageswar Rao R. and Nangrani V., Ind. End. J., 1998; 50-53.
5. “Bleaching teeth : New materials – new role”. Ronald E. Goldstein, J.A.D.A., 1987; 43-52.
6. “Historical development of Whiteners: Clinical safety and efficacy”. Van B. Haywood, Dental Update, 1997 April.
7. “A technique for bleaching non-vital teeth”. Leonard Settembrim et al, J.A.D.A., 1997 September, 1283-5.
8. “Non-vital tooth bleaching : A 2 year case report”. A.T. Hara, L.A.F. Pimenta, Quintessence Int., 1999; 30 : 748-54.
9. “Laser assisted bleaching : An update”. JADA, Vol. 129, Oct. 98 Pg. 1484-1487.
10. “The effectiveness of a modified hydrochloric acid quartz-pumice abrasion technique on fluorosis stains: A case report” Gamze Erdogan, Quint. Int., 1998; 29 : 119-122.
11. “Enamel microabrasion : The technique”. Croll T.B., Quint. Int., 1989; 20 : 395-400.
18