blind folio: 209 oracle-regular / hands-on oracle …€¦ · the steps for uploading and executing...
TRANSCRIPT

Oracle-Regular / Hands-On Oracle Database 10g Express Edition for Windows / Steve Bobrowski / 226331-8 / Chapter 6 Blind folio: 209
CHAPTER 6
Build an Application with Oracle Application Express
209
ch06.indd 209 6/21/06 2:00:16 PM

Oracle-Regular / Hands-On Oracle Database 10g Express Edition for Windows / Steve Bobrowski / 226331-8 / Chapter 6 Oracle-Regular / Hands-On Oracle Database 10g Express Edition for Windows / Steve Bobrowski / 226331-8 / Chapter 6
210 Hands-On Oracle Database 10g Express Edition for Windows
Oracle-Regular / Hands-On Oracle Database 10g Express Edition for Windows / Steve Bobrowski / 226331-8 / Chapter 6 Oracle-Regular / Hands-On Oracle Database 10g Express Edition for Windows / Steve Bobrowski / 226331-8 / Chapter 6
Chapter 6: Build an Application with Oracle Application Express 211
his chapter teaches you how to quickly design, build, test, and deploy a simple database application from start to finish using the Oracle Application Express application development environment that is an integral part of Oracle XE. In many ways, this chapter is the most important chapter in the book, because it sheds light on how
you are expected to use many of the skills that you have learned in the previous chapters. This chapter’s topics include the following:
The stages of the application development lifecycle
Software modeling and the Unified Modeling Language (UML)
The steps for uploading and executing SQL scripts that build an application schema
The steps for loading data into a schema from structured data files
The steps for creating, modifying, and deploying Oracle Application Express applications
Chapter PrerequisitesTo practice the hands-on exercises in this chapter, you need to start SQL*Plus as instructed in Exercise 2.11 and run the following command script:
location\handsonxe\sql\chap06.sql
where location is the file directory where you expanded the support archive that accompanies this book. For example, after starting SQL*Plus, you can run this chapter’s SQL command script using the SQL*Plus command @, as in the following example (assuming that your chap06.sql file is in C:\temp\handsonxe\sql):
SQL> @C:\temp\handsonxe\sql\chap06.sql;
Once you reply to all of the prompts and the script completes successfully, you can exit SQL*Plus by using an EXIT command.
NOTERelative to the previous chapters in this book, this chapter contains more involved exercises that might take longer to complete. Consequently, you are not expected to complete the entire chapter in one sitting. Feel free to start, stop, and pick up where you left off as you go through the material in this chapter. As with other chapters, I encourage you to repeat the chapter’s exercises as many times as you like; just remember to re-execute the chap06.sql support script between iterations.
■
■
■
■
■
T
ch06.indd 210 6/21/06 2:00:17 PM

Oracle-Regular / Hands-On Oracle Database 10g Express Edition for Windows / Steve Bobrowski / 226331-8 / Chapter 6 Oracle-Regular / Hands-On Oracle Database 10g Express Edition for Windows / Steve Bobrowski / 226331-8 / Chapter 6
210 Hands-On Oracle Database 10g Express Edition for Windows
Oracle-Regular / Hands-On Oracle Database 10g Express Edition for Windows / Steve Bobrowski / 226331-8 / Chapter 6 Oracle-Regular / Hands-On Oracle Database 10g Express Edition for Windows / Steve Bobrowski / 226331-8 / Chapter 6
Chapter 6: Build an Application with Oracle Application Express 211
Introducing the Application Development LifecycleBefore you start building an application, it is very worthwhile to learn more about the process of developing computer applications, and specifically database applications. The procedure for developing a database application seems like it might be a straightforward concept, right? Designing everything on the fly as you go, you build a set of tables and related schema objects along with an application interface that, altogether, does something that you have a relatively good understanding of. This approach could not be more wrong, but surprisingly many applications are built this way. Such haphazard development styles typically result in an application that does not meet its objectives, is not easy to use, and does not perform well. Significant amounts of time are then necessary to rework the application.
People with experience developing computer applications know that, just like any other type of problem-solving task, application development requires a systematic approach to yield good results. A general, recognized model known as the application development lifecycle (ADLC) outlines a sequence of well-defined stages for building first-rate computer applications from the ground up, as Figure 6-1 outlines and the following sections discuss.
FIGURE 6-1. The application development lifecycle (ADLC)
AnalyzeGather
requirements
MaintainRespond to feedback
for new features
DeployAllow users to access
the application
TestEnsure everything
works properly
DesignDesign considering
requirements
The ApplicationDevelopment Lifecycle
(ADLC)
ImplementBuild the application
using the design
ch06.indd 211 6/21/06 2:00:17 PM

Oracle-Regular / Hands-On Oracle Database 10g Express Edition for Windows / Steve Bobrowski / 226331-8 / Chapter 6 Oracle-Regular / Hands-On Oracle Database 10g Express Edition for Windows / Steve Bobrowski / 226331-8 / Chapter 6
212 Hands-On Oracle Database 10g Express Edition for Windows
Oracle-Regular / Hands-On Oracle Database 10g Express Edition for Windows / Steve Bobrowski / 226331-8 / Chapter 6 Oracle-Regular / Hands-On Oracle Database 10g Express Edition for Windows / Steve Bobrowski / 226331-8 / Chapter 6
Chapter 6: Build an Application with Oracle Application Express 213
Analyzing Processes and Defining RequirementsThe first phase in an ADLC is commonly referred to as the analysis stage. The purpose of this stage is to carefully analyze and define the processes that you are trying to computerize with the proposed application. Using your newfound understanding, it’s important to meticulously document a list of requirements that the application must meet to successfully computerize the associated processes.
The analysis stage typically includes interviews of people who play a role in the current processes that you aim to computerize—after all, these are the people who can best explain the current processes of interest and suggest possible improvements to implement when building the application.
For example, assume that you are hired to help organize the day-to-day operations of a technical services support group that manages more than a hundred database applications and Oracle databases executing on dozens of host computers. Your first day on the job, you ask a coworker: “Where can I find the latest documentation on your environment and all of the system’s components? Hostnames, database names, application names, that kind of thing.” The answer: “Well, let’s see, your new account e-mail messages for each host should help you get started on the names of the host computers. To see what databases are on a host, just log in to the host and look in its configuration files. Oh, and there’s a company web page and a spreadsheet or two on the shared network drive that have some information about the applications out there.” Immediately, you realize that the worst first problem that you must solve is simple to understand: a lack of organization. Your initial application requirements are to pull together all of the scattered information about the environment into a central database, and then build an application that the group can use going forward to keep track of the system. Subsequent meetings with system administrators (SAs), database administrators (DBAs), and application administrators (AAs) provide you with insight into the daily operations carried out by staff members. The initial list of requirements that you assemble for the planned application ends up looking something like this:
Maintain information about each host computer, including its name, operating system, operating system version, and number of CPUs.
Maintain information about each database, including its name, Oracle version number, and supporting host computer.
Maintain information about each application, including its name, purpose, version, and supporting database.
Provide a web-based interface for the application that is intuitive and easy to use.
Do not spend any money for software.
Use minimal hardware resources on an existing server.
■
■
■
■
■
■
ch06.indd 212 6/21/06 2:00:18 PM

Oracle-Regular / Hands-On Oracle Database 10g Express Edition for Windows / Steve Bobrowski / 226331-8 / Chapter 6 Oracle-Regular / Hands-On Oracle Database 10g Express Edition for Windows / Steve Bobrowski / 226331-8 / Chapter 6
212 Hands-On Oracle Database 10g Express Edition for Windows
Oracle-Regular / Hands-On Oracle Database 10g Express Edition for Windows / Steve Bobrowski / 226331-8 / Chapter 6 Oracle-Regular / Hands-On Oracle Database 10g Express Edition for Windows / Steve Bobrowski / 226331-8 / Chapter 6
Chapter 6: Build an Application with Oracle Application Express 213
Continue reading to learn how to use the list of requirements going forward to build an application that allows SAs, DBAs, and AAs to update information about the system environment on an ongoing basis.
NOTEThe example application/system introduced in this section is carried forward throughout the remaining sections of the chapter. The example application is henceforth referred to as SysMgmt.
Designing the Application to Meet the RequirementsThe next stage in the ADLC is the design stage. The purpose of this stage is to design an application that meets the requirements previously documented during the analysis stage. The quality of an application’s design ultimately determines how well the initial version of the application meets its objectives.
The design stage is the time to experiment. Try this, try that—determine the application design that best meets the agreed-upon objectives. Make your designs available for review by the eventual users of the proposed application and encourage them to point out omissions and weaknesses of your designs. The initial design that you lay out might work just fine, but be prepared to go through umpteen different iterations of the design to get something that everyone is finally happy with.
Implementing the Application Using the DesignThe implementation stage of the ADLC is the creative part of the process. The purpose of the implementation stage is to build the first version of an application based on a design that meets all requirements.
Before implementing, be careful that you pick a development tool or development environment that can build an application that meets all requirements. For example, based on the list of requirements and budget available for the SysMgmt application, the choice is easy: use Oracle XE to build a database that pulls together all available information about the system components, and build an Oracle Application Express web-based application that everyone can use to maintain system information.
The implementation of a database application usually has at least two distinct phases: build the database schema (tables, sequences, triggers, etc.), and then build the application interface. The specific procedures for completing each task depend on the tools that you choose for building the application. For example, if you use a UML diagramming tool during the design phase that can generate SQL DDL commands from class diagrams, creating the database schema for the application is trivial: you simply run a SQL command script using a utility like SQL*Plus. Many UML tools can also generate class definitions for programming languages
ch06.indd 213 6/21/06 2:00:18 PM

Oracle-Regular / Hands-On Oracle Database 10g Express Edition for Windows / Steve Bobrowski / 226331-8 / Chapter 6 Oracle-Regular / Hands-On Oracle Database 10g Express Edition for Windows / Steve Bobrowski / 226331-8 / Chapter 6
214 Hands-On Oracle Database 10g Express Edition for Windows
Oracle-Regular / Hands-On Oracle Database 10g Express Edition for Windows / Steve Bobrowski / 226331-8 / Chapter 6 Oracle-Regular / Hands-On Oracle Database 10g Express Edition for Windows / Steve Bobrowski / 226331-8 / Chapter 6
Chapter 6: Build an Application with Oracle Application Express 215
such as Java and C++. On the other hand, if you did not use UML diagrams to design the application or are using a minimal diagramming tool, the implementation process will no doubt require a much more manual approach.
NOTEThe bulk of the exercises in this chapter explain how to accomplish the implementation phase in detail while using Oracle Application Express.
Testing That the Application Meets the RequirementsDuring the test stage of the application development lifecycle, provide access to a “beta” version of the application in a test environment so that people can test the application, test it some more, and then test it again until everyone is satisfied that the application adequately meets all requirements. You should also put together a rigorous test plan that strictly validates the functionality of each and every application component; this type of regression testing helps ensure that the application itself does not introduce unforeseen data integrity violations that are not necessarily prevented by database integrity constraints. If necessary, modify the components of the system to adjust for any problems uncovered during the test stage.
You might want to limit access to the application so that only developers or a particular group of users can test it. At other times, it might make sense to provide unrestricted access to the application for testing. The decision is up to you based on your plan for ensuring that the application meets all requirements.
To test the response time and load generated by a new application, make sure to test it in an environment that is representative of the environment in which you plan to deploy it. For example:
If you plan to deploy an application on a server that is shared among multiple applications, test it on a server that carries a similar load.
If you expect an application’s table to accumulate a large number of rows, build scripts to load sets of fictitious data into the application’s tables so that users can see how well the application performs with a representative amount of data.
Deploying the ApplicationThe next stage of the ADLC is the deployment stage. Once you are satisfied that the application has been thoroughly tested and validated, you can move the application to a “production” environment where users can begin using the new application and realizing the benefits of computerizing the associated operations.
■
■
ch06.indd 214 6/21/06 2:00:18 PM

Oracle-Regular / Hands-On Oracle Database 10g Express Edition for Windows / Steve Bobrowski / 226331-8 / Chapter 6 Oracle-Regular / Hands-On Oracle Database 10g Express Edition for Windows / Steve Bobrowski / 226331-8 / Chapter 6
214 Hands-On Oracle Database 10g Express Edition for Windows
Oracle-Regular / Hands-On Oracle Database 10g Express Edition for Windows / Steve Bobrowski / 226331-8 / Chapter 6 Oracle-Regular / Hands-On Oracle Database 10g Express Edition for Windows / Steve Bobrowski / 226331-8 / Chapter 6
Chapter 6: Build an Application with Oracle Application Express 215
Maintaining the ApplicationAfter the production version of the application has been in use for a while, users inevitably find bugs or make enhancement requests. The maintenance stage of the ADLC is the stage in which you respond to such issues. For enhancements, make sure to complete the analysis, design, implementation, testing, and deployment stages with respect to the new features.
Software Modeling and the Unified Modeling LanguageSoftware modeling is a tool that every application developer should use during the design stage of application development. Software models are blueprints of an application’s processes, database elements, component interactions, etc. Software models of an application design are an effective means for communicating your plan, ensuring that the design meets all necessary requirements, and identifying the design’s weaknesses before coding actually begins.
There are many different software-modeling approaches that are popular. Among these is the Unified Modeling Language (UML). With UML, you construct models of your software. If you have experience with object-oriented problem solving, many UML concepts should already be familiar to you, such as the following:
A model is an abstraction or visual representation of a problem.
A domain is the environment from which a problem originates.
A model is made up of objects that interact by sending each other messages.
An object is defined from a class; a class is essentially a blueprint for an object.
A class definition includes attributes that describe the data that objects of the class can maintain.
A class definition also includes operations (methods) that describe the things that objects of the class can perform.
An object’s attribute values determine its state.
NOTESearch the Web or refer to a good book if you need some background information about object-oriented concepts.
■
■
■
■
■
■
■
ch06.indd 215 6/21/06 2:00:18 PM

Oracle-Regular / Hands-On Oracle Database 10g Express Edition for Windows / Steve Bobrowski / 226331-8 / Chapter 6 Oracle-Regular / Hands-On Oracle Database 10g Express Edition for Windows / Steve Bobrowski / 226331-8 / Chapter 6
216 Hands-On Oracle Database 10g Express Edition for Windows
Oracle-Regular / Hands-On Oracle Database 10g Express Edition for Windows / Steve Bobrowski / 226331-8 / Chapter 6 Oracle-Regular / Hands-On Oracle Database 10g Express Edition for Windows / Steve Bobrowski / 226331-8 / Chapter 6
Chapter 6: Build an Application with Oracle Application Express 217
The latest UML specification defines many types of diagrams that are generally categorized as structure or behavior diagrams. Structure diagrams illustrate the static structure of the system that you are modeling. Behavior diagrams show the dynamic interaction of system components. The intention of this section is merely to introduce UML and provide examples of some basic UML diagrams that demonstrate their value during the design stage of the ADLC; for a complete presentation of UML, modeling diagrams, and techniques, please use the many useful links to documentation and tutorials available at www.uml.org.
Use Case DiagramsDuring the software development design stage, behavior diagrams known as use case diagrams help you to flesh out and communicate the requirements of particular systems that the application intends to computerize. A use case diagram illustrates what a particular system does by way of actors, use cases, and communications. An actor, represented by a stick figure, is the person or thing that initiates the events that occur. A use case, represented by an oval, is a single task or goal. A communication, represented by a line, is the connection between an actor and a use case.
Figure 6-2 is a simple use case diagram for the SysMgmt application that illustrates the tasks that an SA performs in our case-study application. The diagram clearly identifies the SA as an actor in the domain whose tasks include creating, altering, and dropping host computers. Figures 6-3 and 6-4 are use case diagrams that illustrate similar tasks for DBAs with databases and AAs with applications. Modeling even very simple use case diagrams such as these forces you to think methodically about what things are happening in the system and, as a result, what tasks the proposed application must support. When others review your use case diagrams, expect feedback such as “You forgot about this” and “Those people don’t do that, they do this.” Then, it’s back to the drawing board until you have a crystal clear picture of everything that is going on before you start trying to build the application.
FIGURE 6-2. A use case diagram that shows the host computer system management tasks performed by system administrators in the SysMgmt application
Create Host
Alter Host
Drop Host
SystemAdministrator
(SA)
ch06.indd 216 6/21/06 2:00:19 PM

Oracle-Regular / Hands-On Oracle Database 10g Express Edition for Windows / Steve Bobrowski / 226331-8 / Chapter 6 Oracle-Regular / Hands-On Oracle Database 10g Express Edition for Windows / Steve Bobrowski / 226331-8 / Chapter 6
216 Hands-On Oracle Database 10g Express Edition for Windows
Oracle-Regular / Hands-On Oracle Database 10g Express Edition for Windows / Steve Bobrowski / 226331-8 / Chapter 6 Oracle-Regular / Hands-On Oracle Database 10g Express Edition for Windows / Steve Bobrowski / 226331-8 / Chapter 6
Chapter 6: Build an Application with Oracle Application Express 217
Class DiagramsThe design stage should also include diagrams known as class diagrams to illustrate the structure of the system, including the system’s classes and class associations. A class, the design for a new type of object, appears in a class diagram as a rectangle divided into three stacked layers: the class name, its attributes, and its operations. Each attribute has a name, a type, and an optional default value. Each operation has a name, parameter list, and return value type.
A line connecting two classes represents a relationship or association between the two classes. You can indicate several different types of associations in a class diagram. For example:
Bidirectional association Signifies that both classes in the relationship know about each other; show this type of relationship with a solid line between two classes.
■
FIGURE 6-3. A use case diagram that shows the database management tasks performed by database administrators in the SysMgmt application
CreateDatabase
AlterDatabase
DropDatabase
DatabaseAdministrator
(DBA)
FIGURE 6-4. A use case diagram that shows the application management tasks performed by application administrators in the SysMgmt application
CreateApplication
AlterApplication
DropApplication
ApplicationAdministrator
(AA)
ch06.indd 217 6/21/06 2:00:20 PM

Oracle-Regular / Hands-On Oracle Database 10g Express Edition for Windows / Steve Bobrowski / 226331-8 / Chapter 6 Oracle-Regular / Hands-On Oracle Database 10g Express Edition for Windows / Steve Bobrowski / 226331-8 / Chapter 6
218 Hands-On Oracle Database 10g Express Edition for Windows
Oracle-Regular / Hands-On Oracle Database 10g Express Edition for Windows / Steve Bobrowski / 226331-8 / Chapter 6 Oracle-Regular / Hands-On Oracle Database 10g Express Edition for Windows / Steve Bobrowski / 226331-8 / Chapter 6
Chapter 6: Build an Application with Oracle Application Express 219
Unidirectional association Indicates that two classes have a relationship, but that only one class knows about the relationship; draw this type of relationship using a solid line with an open arrowhead pointing to the known class.
Inheritance (also called generalization) A relationship between a child class and a super class in which the child class inherits all attributes and operations from its super class. A child class can optionally add new functionality or override inherited functionality. Show inheritance with a solid line that has a closed arrowhead pointing at the super class.
The multiplicity value at the end of an association specifies the possible instances of the class associated with a single instance of the class on the other end. Multiplicities are single numbers or ranges of numbers.
Figure 6-5 is the class diagram for the proposed SysMgmt application. Notice how easy it is to understand the type of data and operations necessary to manage
■
■
FIGURE 6-5. A class diagram that shows the static structure of the SysMgmt application
ch06.indd 218 6/21/06 2:00:20 PM

Oracle-Regular / Hands-On Oracle Database 10g Express Edition for Windows / Steve Bobrowski / 226331-8 / Chapter 6 Oracle-Regular / Hands-On Oracle Database 10g Express Edition for Windows / Steve Bobrowski / 226331-8 / Chapter 6
218 Hands-On Oracle Database 10g Express Edition for Windows
Oracle-Regular / Hands-On Oracle Database 10g Express Edition for Windows / Steve Bobrowski / 226331-8 / Chapter 6 Oracle-Regular / Hands-On Oracle Database 10g Express Edition for Windows / Steve Bobrowski / 226331-8 / Chapter 6
Chapter 6: Build an Application with Oracle Application Express 219
hosts, databases, and applications. When others review a class diagram, expect feedback such as “For databases, we also need to keep track of…” and “The version number for a host’s operating system needs to allow for longer string values.” Again, make necessary changes until everyone agrees on the plan going forward.
Building the Application SchemaWith our application’s design in hand, it is now a relatively trivial task to actually build the schema necessary to support the application. You have a few choices for creating the schema:
You can start a SQL*Plus session or use the SQL Commands page of Application Express to manually code SQL DDL statements that create objects in the schema.
You can use the Object Browser page of Application Express to manually build the objects in the schema.
If you use a UML tool that can generate SQL scripts from your class diagrams, you can simply load and run the SQL scripts using Application Express.
The third alternative is by far the easiest, most reliable, and fastest approach you can take, if available, and the method that the next exercise demonstrates.
EXERCISE 6.1: Upload and Run a SQL ScriptIn the interest of brevity, this book’s support archive includes a SQL script generated by a UML tool called Dia (http://dia-installer.sourceforge.net). The tool generates the SQL script, a series of SQL DDL commands, from a class diagram that corresponds to our case-study application. This exercise teaches you how to upload the sysmgmt1 .sql script and run it to create the SysMgmt application’s schema.
Launch the Database Home Page of Oracle Application Express as explained in Exercise 2.13. Establish a connection using this chapter’s practice account, HANDSONXE06, with the password PASSWORD.
Once you launch the Database Home Page, complete the following steps to upload the sysmgmt1.sql script:
1. From the Database Home Page, click SQL | SQL Scripts to display the SQL Scripts page.
2. Click Upload to display the Upload Script page.
3. Click Browse and navigate your file system to select the sysmgmt1.sql script extracted from this book’s support archive.
4. Specify SYSMGMT1 or any other suitable name in the Script Name field of the Upload Script page.
■
■
■
ch06.indd 219 6/21/06 2:00:21 PM

Oracle-Regular / Hands-On Oracle Database 10g Express Edition for Windows / Steve Bobrowski / 226331-8 / Chapter 6 Oracle-Regular / Hands-On Oracle Database 10g Express Edition for Windows / Steve Bobrowski / 226331-8 / Chapter 6
220 Hands-On Oracle Database 10g Express Edition for Windows
Oracle-Regular / Hands-On Oracle Database 10g Express Edition for Windows / Steve Bobrowski / 226331-8 / Chapter 6 Oracle-Regular / Hands-On Oracle Database 10g Express Edition for Windows / Steve Bobrowski / 226331-8 / Chapter 6
Chapter 6: Build an Application with Oracle Application Express 221
5. Click Upload.
6. Notice the new script icon in the SQL Scripts page, as shown in Figure 6-6.
To run the newly uploaded script and create the schema objects for the SysMgmt application in the current HANDSONXE06 schema, complete the following steps:
1. Click the script’s icon on the SQL Scripts page.
2. Browse the contents of the script to become familiar with the SQL DDL commands that make up the script.
3. Click Run.
4. Click Run to confirm your request to run the script.
FIGURE 6-6. The SQL Scripts page shows SQL scripts that have been uploaded and can be run to carry out work.
ch06.indd 220 6/21/06 2:00:21 PM

Oracle-Regular / Hands-On Oracle Database 10g Express Edition for Windows / Steve Bobrowski / 226331-8 / Chapter 6 Oracle-Regular / Hands-On Oracle Database 10g Express Edition for Windows / Steve Bobrowski / 226331-8 / Chapter 6
220 Hands-On Oracle Database 10g Express Edition for Windows
Oracle-Regular / Hands-On Oracle Database 10g Express Edition for Windows / Steve Bobrowski / 226331-8 / Chapter 6 Oracle-Regular / Hands-On Oracle Database 10g Express Edition for Windows / Steve Bobrowski / 226331-8 / Chapter 6
Chapter 6: Build an Application with Oracle Application Express 221
5. The Manage Script Results page is a summary report of all script runs. Notice that the initial status of the script run is Submitted.
6. Wait a few seconds and then click Go. The status of the script run should change to Complete.
7. Click View Results for the script run.
8. Browse the success or failure of various SQL statements in the script. It is expected that certain statements will fail depending on whether this is the first time you are running the script; for example, there are several DROP statements that will fail if this is the first time you are executing the script.
To check the work that the script performed, complete the following steps:
1. Click Home.
2. Click Object Browser.
3. Select Tables and then confirm the existence and browse the structure of the following tables: APPLICATIONS, DATABASES, and HOSTS. For example, the HOSTS table should appear as in Figure 6-7.
4. Select Sequences and then confirm the existence and browse the structure of the following sequences: AP_IDS, DB_IDS, and HOST_IDS.
EXERCISE 6.2: Set User Interface DefaultsTo promote consistent interfaces and functionality among the pages in an Oracle Application Express application, you should set user interface defaults for all tables and views in the application schema before you start to build the application. This exercise teaches you how to set user interface defaults for the tables in the application schema.
TIPWhen the Detail pane contains a wide set of information that is not completely viewable, click the button along the left edge of the Detail pane to temporarily maximize the Detail pane to the full window. Click the same button again to make the Object Selection pane viewable once again.
1. On the Object Browser page, select Tables.
2. Select APPLICATIONS (that is, the APPLICATIONS table from the list of tables).
ch06.indd 221 6/21/06 2:00:21 PM

Oracle-Regular / Hands-On Oracle Database 10g Express Edition for Windows / Steve Bobrowski / 226331-8 / Chapter 6 Oracle-Regular / Hands-On Oracle Database 10g Express Edition for Windows / Steve Bobrowski / 226331-8 / Chapter 6
222 Hands-On Oracle Database 10g Express Edition for Windows
Oracle-Regular / Hands-On Oracle Database 10g Express Edition for Windows / Steve Bobrowski / 226331-8 / Chapter 6 Oracle-Regular / Hands-On Oracle Database 10g Express Edition for Windows / Steve Bobrowski / 226331-8 / Chapter 6
Chapter 6: Build an Application with Oracle Application Express 223
3. Click UI Defaults.
4. If this is the first time that you are setting user interface defaults for a particular table, click Create Defaults; otherwise, skip to the next step.
5. Browse the report of default user interface settings for the APPLICATIONS table. Notice that you can set user interface defaults for a table’s columns on both reports and forms. When looking at this report, use the following information to help make your decisions:
Both forms and reports use a column’s Label to identify it on the page. In general, you should translate the default labels generated for cryptic column names into user-friendly labels.
A column’s Report Sequence and Form Sequence indicate the order of presentation for the column with respect to other columns on a report or form, respectively. Modify these settings if the default column order is not appropriate.
■
■
FIGURE 6-7. The HOSTS table in the Object Browser, as created by the SQL script
ch06.indd 222 6/21/06 2:00:21 PM

Oracle-Regular / Hands-On Oracle Database 10g Express Edition for Windows / Steve Bobrowski / 226331-8 / Chapter 6 Oracle-Regular / Hands-On Oracle Database 10g Express Edition for Windows / Steve Bobrowski / 226331-8 / Chapter 6
222 Hands-On Oracle Database 10g Express Edition for Windows
Oracle-Regular / Hands-On Oracle Database 10g Express Edition for Windows / Steve Bobrowski / 226331-8 / Chapter 6 Oracle-Regular / Hands-On Oracle Database 10g Express Edition for Windows / Steve Bobrowski / 226331-8 / Chapter 6
Chapter 6: Build an Application with Oracle Application Express 223
A report can include a Search field that makes it convenient for users to find specific records in the report. A column’s default Searchable setting indicates whether Oracle Application Express generates a report with Search field criteria that considers the column’s data for filtering the results in a report. Make a column searchable only if users often search for records in the table using the data in the column as search criteria. Primary key and foreign key columns that contain nonmeaningful numeric keys typically should not be searchable, to avoid false positives for searches of numerical data. A subsequent exercise explains more about searchable report columns.
A column’s Required attribute indicates whether the column can contain nulls. Oracle Application Express determines the default setting for each column based on whether the column is part of a primary key or is declared as not null. As long as you correctly declare constraints for your tables, no changes should be necessary for each column’s Required attribute.
6. Click Grid Edit to display a form for editing the APPLICATION table’s user interface defaults.
7. Replace the text in the Form Region Title field with Create/Edit Application.
8. Replace the text in the Report Region Title field with Application.
9. Specify the following in the Label field of the table’s columns:
Application for the AP_ID column
Name for the AP_NAME column
Description for the AP_DESCRIPTION column
Version for the AP_VERSION column
Database for the DB_ID column
10. Select Yes for every column’s Include in Reports and Include in Forms lists.
11. Select Yes for the Searchable list of the AP_NAME, AP_DESCRIPTION, and AP_VERSION columns; set all other columns to No.
12. Click Apply Changes to save your work.
Repeat the preceding steps to create, display, and edit the user interface defaults for the remaining two tables, DATABASES and HOSTS. To save yourself a few mouse clicks, click User Interface Defaults on the breadcrumbs menu after you update a table’s settings. Next, click the icon for the new table that you want to work with, click Create User Interface Defaults to create defaults for the table, and then click Grid Edit.
■
■
■
■
■
■
■
ch06.indd 223 6/21/06 2:00:22 PM

Oracle-Regular / Hands-On Oracle Database 10g Express Edition for Windows / Steve Bobrowski / 226331-8 / Chapter 6 Oracle-Regular / Hands-On Oracle Database 10g Express Edition for Windows / Steve Bobrowski / 226331-8 / Chapter 6
224 Hands-On Oracle Database 10g Express Edition for Windows
Oracle-Regular / Hands-On Oracle Database 10g Express Edition for Windows / Steve Bobrowski / 226331-8 / Chapter 6 Oracle-Regular / Hands-On Oracle Database 10g Express Edition for Windows / Steve Bobrowski / 226331-8 / Chapter 6
Chapter 6: Build an Application with Oracle Application Express 225
NOTEUser interface defaults remain in the Oracle Application Express repository, even after you drop a table from a database. If you are repeating this chapter’s exercises, you will notice that you do not have to create user interface defaults for each of the example tables.
For the DATABASES table:
1. Specify Create/Edit Database in the Form Region Title field.
2. Specify Database in the Report Region Title field.
3. Specify the following in the Label field of the table’s columns:
Database for the DB_ID column
Name for the DB_NAME column
Version for the DB_VERSION column
Host for the HOST_ID column
4. Select Yes for every column’s Include in Reports and Include in Forms lists.
5. Select Yes for the Searchable list of the DB_NAME and DB_VERSION columns; set all other columns to No.
6. Click Apply Changes to save your work.
For the HOSTS table:
1. Specify Create/Edit Host in the Form Region Title field.
2. Specify Host in the Report Region Title field.
3. Specify the following in the Label field of the table’s columns:
Host for the HOST_ID column
Name for the HOST_NAME column
Operating System (OS) for the HOST_OS column
OS Version for the HOST_OS_VERSION column
CPUs for the HOST_CPUS column
■
■
■
■
■
■
■
■
■
ch06.indd 224 6/21/06 2:00:22 PM

Oracle-Regular / Hands-On Oracle Database 10g Express Edition for Windows / Steve Bobrowski / 226331-8 / Chapter 6 Oracle-Regular / Hands-On Oracle Database 10g Express Edition for Windows / Steve Bobrowski / 226331-8 / Chapter 6
224 Hands-On Oracle Database 10g Express Edition for Windows
Oracle-Regular / Hands-On Oracle Database 10g Express Edition for Windows / Steve Bobrowski / 226331-8 / Chapter 6 Oracle-Regular / Hands-On Oracle Database 10g Express Edition for Windows / Steve Bobrowski / 226331-8 / Chapter 6
Chapter 6: Build an Application with Oracle Application Express 225
4. Select Yes for every column’s Include in Reports and Include in Forms lists.
5. Select Yes for the Searchable list of every column except HOST_ID.
6. Click Apply Changes to save your work.
At this point, you are done modifying the user interface defaults for all tables in your schema.
Loading Schema DataBefore starting to build the application, it is a good idea to quickly add some data to your tables. Otherwise, the first cut of your application will be hard to grade because reports and forms based on an empty table display nothing more than a message indicating that there are no records to display.
To load data into a table with Oracle Application Express, you have a few options:
You can manually create records with the Object Browser page.
You can load data from comma-separated or tab-delimited text files.
You can load data from XML files.
The following sections cover all three methods.
Loading Data ManuallyThe previous chapter explains how to insert rows into a table using the Object Browser page. To review your skills and reveal a weakness in your application schema, complete the following exercises.
EXERCISE 6.3: Manually Enter DataComplete the following steps to insert a new record into the HOSTS table:
1. Click Home.
2. Click Object Browser.
3. Select Tables | HOSTS in the Object Selection pane.
4. Click Data.
5. Click Insert Row.
■
■
■
ch06.indd 225 6/21/06 2:00:22 PM

Oracle-Regular / Hands-On Oracle Database 10g Express Edition for Windows / Steve Bobrowski / 226331-8 / Chapter 6 Oracle-Regular / Hands-On Oracle Database 10g Express Edition for Windows / Steve Bobrowski / 226331-8 / Chapter 6
226 Hands-On Oracle Database 10g Express Edition for Windows
Oracle-Regular / Hands-On Oracle Database 10g Express Edition for Windows / Steve Bobrowski / 226331-8 / Chapter 6 Oracle-Regular / Hands-On Oracle Database 10g Express Edition for Windows / Steve Bobrowski / 226331-8 / Chapter 6
Chapter 6: Build an Application with Oracle Application Express 227
6. Specify the following information for the fields of the HOSTS table:
The HOST_ID field should be populated by the HOST_IDS sequence. Therefore, generate a new sequence number by referencing the NEXTVAL pseudocolumn of the sequence. For example, specify handsonxe06.host_ids.nextval.
Specify server1.mycompany.com in the HOST_NAME field.
Specify AIX in the HOST_OS field.
Specify 5.2.0.0 in the HOST_OS_VERSION field.
Specify 4 in the HOST_CPUS field.
7. Click Create.
EXERCISE 6.4: Create Triggers to Generate Primary KeysThe previous exercise reveals an opportunity for improvement in the current version of your schema—explicit references to a sequence are necessary to generate the primary key when inserting a new row into a table. In this exercise, you create a simple trigger for each table that automatically generates primary keys for new rows:
1. From the Object Browser page, click Create | Trigger.
2. Specify HOSTS in the Table Name field (or select the table name from the pop-up select list).
3. Click Next.
4. Specify HOSTS_TPK in the Trigger Name field.
5. Select BEFORE from the Firing Point list.
6. Select insert from the Options list.
7. Select For Each Row.
8. Specify the following statement in the Trigger Body field. The simple trigger generates a new sequence number and assigns the value to the HOST_ID field for the new row being inserted.
SELECT handsonxe06.host_ids.nextval
INTO :new.host_id
FROM dual;
■
■
■
■
■
ch06.indd 226 6/21/06 2:00:22 PM

Oracle-Regular / Hands-On Oracle Database 10g Express Edition for Windows / Steve Bobrowski / 226331-8 / Chapter 6 Oracle-Regular / Hands-On Oracle Database 10g Express Edition for Windows / Steve Bobrowski / 226331-8 / Chapter 6
226 Hands-On Oracle Database 10g Express Edition for Windows
Oracle-Regular / Hands-On Oracle Database 10g Express Edition for Windows / Steve Bobrowski / 226331-8 / Chapter 6 Oracle-Regular / Hands-On Oracle Database 10g Express Edition for Windows / Steve Bobrowski / 226331-8 / Chapter 6
Chapter 6: Build an Application with Oracle Application Express 227
9. Notice a subtle point about how the trigger body references the sequence: the reference to the synonym is fully qualified; that is, the reference to the sequence is prefixed by the encompassing schema name. When reviewing application code, fully qualified references to schema objects in an application make it much easier for other developers and system tuners to readily understand what objects the application uses. It is always good practice to follow this example of fully qualified object references when designing new applications.
10. Click Next.
11. Optionally, click SQL to review the CREATE TRIGGER statement that the Object Browser page generates:
create or replace trigger "HOSTS_TPK"
BEFORE
insert on "HOSTS"
for each row
begin
SELECT handsonxe06.host_ids.nextval
INTO :new.host_id
FROM dual;
end;
/
12. Click Finish.
The new trigger should appear in the Object Browser page similar to what’s shown in Figure 6-8.
To complete this exercise, repeat the preceding steps to create similar before-insert-row triggers for the DATABASES and APPLICATIONS tables:
The DATABASES_TPK trigger should use the DB_IDS sequence, as follows:
create or replace trigger "DATABASES_TPK"
BEFORE
insert on "DATABASES"
for each row
begin
SELECT handsonxe06.db_ids.nextval
INTO :new.db_id
FROM dual;
end;
/
■
ch06.indd 227 6/21/06 2:00:22 PM

Oracle-Regular / Hands-On Oracle Database 10g Express Edition for Windows / Steve Bobrowski / 226331-8 / Chapter 6 Oracle-Regular / Hands-On Oracle Database 10g Express Edition for Windows / Steve Bobrowski / 226331-8 / Chapter 6
228 Hands-On Oracle Database 10g Express Edition for Windows
Oracle-Regular / Hands-On Oracle Database 10g Express Edition for Windows / Steve Bobrowski / 226331-8 / Chapter 6 Oracle-Regular / Hands-On Oracle Database 10g Express Edition for Windows / Steve Bobrowski / 226331-8 / Chapter 6
Chapter 6: Build an Application with Oracle Application Express 229
The APPLICATIONS_TPK trigger should use the AP_IDS sequence, as follows:
create or replace trigger "APPLICATIONS_TPK"
BEFORE
insert on "APPLICATIONS"
for each row
begin
SELECT handsonxe06.ap_ids.nextval
INTO :new.ap_id
FROM dual;
end;
/
Make sure that all three triggers exist and are valid before continuing; otherwise, subsequent exercises will fail.
■
FIGURE 6-8. When inserting a new row into the HOSTS table, the HOSTS_TPK trigger generates a new sequence number from the HOST_IDS sequence for the HOST_ID column of the new row.
ch06.indd 228 6/21/06 2:00:23 PM

Oracle-Regular / Hands-On Oracle Database 10g Express Edition for Windows / Steve Bobrowski / 226331-8 / Chapter 6 Oracle-Regular / Hands-On Oracle Database 10g Express Edition for Windows / Steve Bobrowski / 226331-8 / Chapter 6
228 Hands-On Oracle Database 10g Express Edition for Windows
Oracle-Regular / Hands-On Oracle Database 10g Express Edition for Windows / Steve Bobrowski / 226331-8 / Chapter 6 Oracle-Regular / Hands-On Oracle Database 10g Express Edition for Windows / Steve Bobrowski / 226331-8 / Chapter 6
Chapter 6: Build an Application with Oracle Application Express 229
Loading Spreadsheet and Text File DataOrganizations typically have useful data stored all over the place and in various formats: spreadsheets, PC databases, text files, and so on. Fortunately, Oracle XE and Oracle Application Express have utilities that make it easy to load structured data from various file formats into a database. The next two exercises teach you how to load such data.
EXERCISE 6.5: Load Data from a Text FileMost spreadsheet and PC database programs can export data to simple text files in one of two structured formats: with fields separated by commas (comma-separated values, or CSVs) or fields delimited by tabs (tab delimited). This exercise teaches you how to load records from text files into the DATABASES table of our application.
Each UNIX server (in our fictitious application) that manages Oracle databases in our system has a configuration file named /etc/oratab that contains each database’s name, version, and other information. For example, here’s what the server1 .mycompany.com server’s /etc/oratab file might look like:
db1:/usr/opt/oracle/product/10.2.0.1:Y db2:/usr/opt/oracle/product/9.2.0.7:Y db3:/usr/opt/oracle/product/10.2.0.1:Y db4:/usr/opt/oracle/product/10.2.0.1:Y db5:/usr/opt/oracle/product/9.2.0.7:Y db6:/usr/opt/oracle/product/9.2.0.7:Y db7:/usr/opt/oracle/product/9.2.0.7:Y db8:/usr/opt/oracle/product/9.2.0.7:Y
Notice that the file uses colons to delimit fields and carriage returns to start new records. For each record, the first field indicates the database’s name (for example, db1); the second field indicates the database’s ORACLE_HOME (for example, /usr/opt/oracle/product/10.2.0.1); and the third field indicates whether the database should automatically start after a system reboot (for example, Y).
Using a text editor and some basic search-and-replace commands, you can easily transform this type of file into the db1.csv file in this book’s support archive, as shown in the following code. The CSV file contains only the data relevant to the DATABASES table: the database name, its Oracle version, and the HOST_ID of server1.mycompany .com. To make the load easier to complete, you can add field names that correspond to the DATABASES table in the first row of the file.
db_name,db_version,host_id db1,10.2.0.1,1 db2,9.2.0.7,1 db3,10.2.0.1,1 db4,10.2.0.1,1 db5,9.2.0.7,1
ch06.indd 229 6/21/06 2:00:23 PM

Oracle-Regular / Hands-On Oracle Database 10g Express Edition for Windows / Steve Bobrowski / 226331-8 / Chapter 6 Oracle-Regular / Hands-On Oracle Database 10g Express Edition for Windows / Steve Bobrowski / 226331-8 / Chapter 6
230 Hands-On Oracle Database 10g Express Edition for Windows
Oracle-Regular / Hands-On Oracle Database 10g Express Edition for Windows / Steve Bobrowski / 226331-8 / Chapter 6 Oracle-Regular / Hands-On Oracle Database 10g Express Edition for Windows / Steve Bobrowski / 226331-8 / Chapter 6
Chapter 6: Build an Application with Oracle Application Express 231
db6,9.2.0.7,1 db7,9.2.0.7,1 db8,9.2.0.7,1
Notice that the file omits the DB_ID for each record: the data load will rely on the newly created DATABASES_TPK trigger (and DB_IDS sequence) to automatically generate primary keys for each new record.
To load the records from the CSV file into the DATABASES table, complete the following steps:
1. Click Home.
2. Click Utilities.
3. Click Data Load/Unload.
4. Click Load.
5. Click Load Text Data to display the Load Data page.
6. Select Existing Table for the Load To field.
7. Select Upload from for the Load From field.
8. Click Next.
9. Confirm that you are loading data into the HANDSONXE06 schema. Then click Next.
10. Select DATABASES from the Table Name list.
11. Click Next.
12. Click Browse and navigate the file systems that are accessible from your local computer to select the db1.csv file extracted from this book’s support archive. Do not modify any other page settings.
13. Click Next.
14. The page displays a formatted version of the records and fields pending for the load. If necessary, you can eliminate fields in the data file from loading, rearrange fields, and so forth: in our example, no work is necessary. After reviewing the information, click Load Data to commence the data load.
15. Review the Text Data Load Repository page to confirm that the load completed without errors, as shown in Figure 6-9.
16. Optionally, return to the Object Browser page (using steps that should be familiar to you by now) to view the new records inserted in the DATABASES table.
ch06.indd 230 6/21/06 2:00:23 PM

Oracle-Regular / Hands-On Oracle Database 10g Express Edition for Windows / Steve Bobrowski / 226331-8 / Chapter 6 Oracle-Regular / Hands-On Oracle Database 10g Express Edition for Windows / Steve Bobrowski / 226331-8 / Chapter 6
230 Hands-On Oracle Database 10g Express Edition for Windows
Oracle-Regular / Hands-On Oracle Database 10g Express Edition for Windows / Steve Bobrowski / 226331-8 / Chapter 6 Oracle-Regular / Hands-On Oracle Database 10g Express Edition for Windows / Steve Bobrowski / 226331-8 / Chapter 6
Chapter 6: Build an Application with Oracle Application Express 231
Loading XML DataExtensible Markup Language (XML) data files are another common format that many software programs support for storing data in a structured format. XML allows applications and application designers to create customized tags that enable the definition, transmission, validation, and interpretation of data between applications and organizations.
EXERCISE 6.6: Load Data from an XML FileThis exercise teaches you how to use Oracle XE to upload data into an Oracle database from an XML file. This book’s support archive contains a file named ap1 .xml. This XML file was generated by a spreadsheet and contains information about
FIGURE 6-9. The Text Data Load Repository page displays historical records of data uploaded from text files.
ch06.indd 231 6/21/06 2:00:24 PM

Oracle-Regular / Hands-On Oracle Database 10g Express Edition for Windows / Steve Bobrowski / 226331-8 / Chapter 6 Oracle-Regular / Hands-On Oracle Database 10g Express Edition for Windows / Steve Bobrowski / 226331-8 / Chapter 6
232 Hands-On Oracle Database 10g Express Edition for Windows
Oracle-Regular / Hands-On Oracle Database 10g Express Edition for Windows / Steve Bobrowski / 226331-8 / Chapter 6 Oracle-Regular / Hands-On Oracle Database 10g Express Edition for Windows / Steve Bobrowski / 226331-8 / Chapter 6
Chapter 6: Build an Application with Oracle Application Express 233
a few of the applications running on the fictitious server1.mycompany.com. To load data from this XML file into the APPLICATIONS table, complete the following steps:
1. Click Home.
2. Click Utilities.
3. Click Data Load/Unload.
4. Click Load.
5. Click Load XML Data to display the Load XML Data page.
6. Confirm that you are loading data into the HANDSONXE06 schema. Then click Next.
7. Specify APPLICATIONS in the Table field (or use the pop-up list).
8. Click Next.
9. Click Browse and navigate the file systems that are accessible from your local computer to select the ap1.xml file extracted from this book’s support archive.
10. Click Load Data.
11. Optionally, return to the Object Browser page to view the new records inserted in the APPLICATIONS table.
NOTEThe XML file that you attempt to load must be well formed; if it is not, the load fails and Oracle XE returns an error. Detailed information about XML is beyond the scope of this book; please refer to Oracle Database 10g XML & SQL: Design, Build & Manage XML Applications in Java, C, C++ & PL/SQL (McGraw-Hill/Osborne, 2004) for more information.
Creating the SysMgmt ApplicationNow that each table has a few records, the following exercise teaches you just how easy it is to create a simple application with Oracle Application Express based on existing database tables. The component of Oracle Application Express that you use to build applications is called the Application Builder. The Application Builder has a tremendous number of features, most of which are beyond the context of this chapter.
ch06.indd 232 6/21/06 2:00:24 PM

Oracle-Regular / Hands-On Oracle Database 10g Express Edition for Windows / Steve Bobrowski / 226331-8 / Chapter 6 Oracle-Regular / Hands-On Oracle Database 10g Express Edition for Windows / Steve Bobrowski / 226331-8 / Chapter 6
232 Hands-On Oracle Database 10g Express Edition for Windows
Oracle-Regular / Hands-On Oracle Database 10g Express Edition for Windows / Steve Bobrowski / 226331-8 / Chapter 6 Oracle-Regular / Hands-On Oracle Database 10g Express Edition for Windows / Steve Bobrowski / 226331-8 / Chapter 6
Chapter 6: Build an Application with Oracle Application Express 233
The purpose of the subsequent exercises in this chapter is to expose you to many common Application Builder features and make you comfortable with the Application Builder development approach for rapid application development (RAD).
EXERCISE 6.7: Create the SysMgmt Application with the Create Application Wizard
To quickly create an application with Oracle Application Express that meets our business requirements, complete the following steps:
1. Click Home.
2. Click Application Builder.
3. The primary Application Builder page displays a list of applications in the Oracle Application Express repository; you are about to develop your first application, so this page should initially be empty and display the message “No applications found.”
4. Click Create to launch the Create Application wizard, which presents a few simple pages and creates a new application quickly.
5. Notice that the Create Application wizard provides two different approaches for building a new application: build an application from scratch or build a simple application from spreadsheet data. You can also install demonstration applications to learn by example. For the purposes of this exercise, click Create Application.
6. Use the Name page of the wizard to indicate basic information about your application by completing the following steps:
The Name field indicates a name for the new application. Specify SysMgmt for the Name field.
The Application field indicates a unique identifier for the application (in other words, a primary key). Make a note of the system-generated key value, but do not modify it.
The Create Application option list indicates how you want to create the new application. Select From scratch for the Create Application option list.
Select HANDSONXE06 from the Schema list.
7. Click Next.
8. Use the Pages page of the wizard to quickly add pages to the new application based on existing database tables. Oracle Application Express can create
■
■
■
■
ch06.indd 233 6/21/06 2:00:24 PM

Oracle-Regular / Hands-On Oracle Database 10g Express Edition for Windows / Steve Bobrowski / 226331-8 / Chapter 6 Oracle-Regular / Hands-On Oracle Database 10g Express Edition for Windows / Steve Bobrowski / 226331-8 / Chapter 6
234 Hands-On Oracle Database 10g Express Edition for Windows
Oracle-Regular / Hands-On Oracle Database 10g Express Edition for Windows / Steve Bobrowski / 226331-8 / Chapter 6 Oracle-Regular / Hands-On Oracle Database 10g Express Edition for Windows / Steve Bobrowski / 226331-8 / Chapter 6
Chapter 6: Build an Application with Oracle Application Express 235
many different types of pages for an application. For example, reports are read-only pages that display information in database tables; forms are read/write pages that facilitate data entry and modification; charts and graphs represent database data in visual formats. Complete the following steps to create a report and form for all three tables in the schema:
a. Both a report and a form based on the HOSTS table are necessary. Therefore, in the Add Page region of the page, click Report and Form.
b. Specify HOSTS in the Table Name field (or use the pop-up list).
c. When selected, the Include Analysis Pages check box starts another wizard to guide you through the process of creating reports that summarize information. For the purposes of this exercise, do not select Include Analysis Pages.
d. Click Add Page.
e. Notice the two new pages for the HOSTS table that are now part of the application and their hierarchical arrangement: the parent page is a report and the child page is a form. The hierarchical arrangement of the pages represents the navigation between the two pages.
f. Complete the same series of steps to add a report and form based on the DATABASES table. In the Add Page region of the page, click Report and Form.
g. The Subordinate to Page drop-down list box indicates the hierarchical relationship of the page(s) that you are adding relative to other pages in the application; for the purpose of this exercise, select Top Level Page.
h. Specify DATABASES in the Table Name field (or use the pop-up list).
i. Click Add Page.
j. Notice the two new pages for the DATABASES table that are now part of the application.
k. Complete the same series of steps to add a report and form based on the APPLICATIONS table. In the Add Page region of the page, click Report and Form.
l. Select Top Level Page in the Subordinate to Page list.
m. Specify APPLICATIONS in the Table Name field (or use the pop-up list).
n. Click Add Page.
ch06.indd 234 6/21/06 2:00:24 PM

Oracle-Regular / Hands-On Oracle Database 10g Express Edition for Windows / Steve Bobrowski / 226331-8 / Chapter 6 Oracle-Regular / Hands-On Oracle Database 10g Express Edition for Windows / Steve Bobrowski / 226331-8 / Chapter 6
234 Hands-On Oracle Database 10g Express Edition for Windows
Oracle-Regular / Hands-On Oracle Database 10g Express Edition for Windows / Steve Bobrowski / 226331-8 / Chapter 6 Oracle-Regular / Hands-On Oracle Database 10g Express Edition for Windows / Steve Bobrowski / 226331-8 / Chapter 6
Chapter 6: Build an Application with Oracle Application Express 235
o. Notice the two new pages for the APPLICATIONS table that are now part of the application.
p. Before continuing, confirm that there is a total of six pages, as shown in Figure 6-10. If you made a mistake, delete the erroneous pages and then add new versions of the correct pages by using the preceding steps.
9. Click Next.
10. Use the Tabs page of the wizard to indicate the primary means of navigation for the application. Tabs are a commonly used navigation style for web-based applications and should be effective for our example application; therefore, select One Level of Tabs.
FIGURE 6-10. The six pages of the SysMgmt application as created by the Create Application wizard of Oracle Application Express
ch06.indd 235 6/21/06 2:00:25 PM

Oracle-Regular / Hands-On Oracle Database 10g Express Edition for Windows / Steve Bobrowski / 226331-8 / Chapter 6 Oracle-Regular / Hands-On Oracle Database 10g Express Edition for Windows / Steve Bobrowski / 226331-8 / Chapter 6
236 Hands-On Oracle Database 10g Express Edition for Windows
Oracle-Regular / Hands-On Oracle Database 10g Express Edition for Windows / Steve Bobrowski / 226331-8 / Chapter 6 Oracle-Regular / Hands-On Oracle Database 10g Express Edition for Windows / Steve Bobrowski / 226331-8 / Chapter 6
Chapter 6: Build an Application with Oracle Application Express 237
11. Click Next.
12. Use the Shared Components page of the wizard to indicate whether you want to copy shared components from other Oracle Application Express applications to the new application. Because this is the first application you are developing, No is the only sensible selection.
13. Click Next.
14. Use the Attributes page to indicate several application attributes:
The Authentication Scheme list indicates how you want to enforce security for the new application. Oracle Application Express supports a variety of authentication schemes for applications; however, a complete discussion of Oracle Application Express security is beyond the scope of this book. See the Oracle Application Express User’s Guide, online at OTN, for more information about Oracle Application Express security issues. For the purposes of this exercise, select Application Express Authentication.
The Language list indicates the language that you are using to develop the application; Oracle Application Express bases all translations to other languages on this setting. For the purposes of this exercise, select English.
The User Language Preference Derived From list indicates how the application determines what language to use when someone executes the application. An Oracle Application Express application can have a static language setting or derive the language to use at run time based on, for example, the web browser’s language setting. For the purposes of this exercise, select Use Application Primary Language.
15. Click Next.
16. Use the User Interface page of the wizard to select a theme for the application. A theme is a template that governs the appearance and navigation style for applications based on the theme. Oracle Application Express has several themes for you to choose from, and also allows you to create your own themes. For the purposes of this exercise, select Theme 2.
17. That’s it! Confirm your selections and then click Create to create the new application.
Once the Create Application wizard of Oracle Application Express creates the new application, the Application Builder creates an Application Builder page for the application (not a page of the application) that displays information about
■
■
■
ch06.indd 236 6/21/06 2:00:25 PM

Oracle-Regular / Hands-On Oracle Database 10g Express Edition for Windows / Steve Bobrowski / 226331-8 / Chapter 6 Oracle-Regular / Hands-On Oracle Database 10g Express Edition for Windows / Steve Bobrowski / 226331-8 / Chapter 6
236 Hands-On Oracle Database 10g Express Edition for Windows
Oracle-Regular / Hands-On Oracle Database 10g Express Edition for Windows / Steve Bobrowski / 226331-8 / Chapter 6 Oracle-Regular / Hands-On Oracle Database 10g Express Edition for Windows / Steve Bobrowski / 226331-8 / Chapter 6
Chapter 6: Build an Application with Oracle Application Express 237
the application, including the name of the application and several links for working with the application. When you are using an iconic view (select Icons from the View list, and then click Go), the page shows nothing more than a list of icons that represent the current pages in the application, as shown in Figure 6-11.
To see more details about each page in the application, select Details from the View list and then click Go; the main Application Builder page then shows a more in-depth list of the current pages in the application, as shown in Figure 6-12.
Subsequent exercises teach you more about using this interface. For now, confirm that your new application’s attributes appear similar to those in Figures 6-11 and 6-12. In particular, notice that Oracle Application Express names the reports and forms by adopting the user interface defaults that you previously set for corresponding tables.
FIGURE 6-11. The Icons view of the SysMgmt application’s pages
ch06.indd 237 6/21/06 2:00:25 PM

Oracle-Regular / Hands-On Oracle Database 10g Express Edition for Windows / Steve Bobrowski / 226331-8 / Chapter 6 Oracle-Regular / Hands-On Oracle Database 10g Express Edition for Windows / Steve Bobrowski / 226331-8 / Chapter 6
238 Hands-On Oracle Database 10g Express Edition for Windows
Oracle-Regular / Hands-On Oracle Database 10g Express Edition for Windows / Steve Bobrowski / 226331-8 / Chapter 6 Oracle-Regular / Hands-On Oracle Database 10g Express Edition for Windows / Steve Bobrowski / 226331-8 / Chapter 6
Chapter 6: Build an Application with Oracle Application Express 239
Running and Testing the ApplicationAfter you develop an application, the next step is to run the application and see how it works. Throughout this testing stage of the application development lifecycle, make sure to take specific notes about application functionality that requires modification.
EXERCISE 6.8: Run and Test the SysMgmt ApplicationTo launch the SysMgmt application, complete the following steps:
1. From the primary Application Builder page, click the icon of the application that you want to run to display the application’s page. This step should be necessary only if you explored a bit since finishing the previous exercise.
2. From the application’s page, click Run Application.
FIGURE 6-12. The Details view of the SysMgmt application’s pages
ch06.indd 238 6/21/06 2:00:26 PM

Oracle-Regular / Hands-On Oracle Database 10g Express Edition for Windows / Steve Bobrowski / 226331-8 / Chapter 6 Oracle-Regular / Hands-On Oracle Database 10g Express Edition for Windows / Steve Bobrowski / 226331-8 / Chapter 6
238 Hands-On Oracle Database 10g Express Edition for Windows
Oracle-Regular / Hands-On Oracle Database 10g Express Edition for Windows / Steve Bobrowski / 226331-8 / Chapter 6 Oracle-Regular / Hands-On Oracle Database 10g Express Edition for Windows / Steve Bobrowski / 226331-8 / Chapter 6
Chapter 6: Build an Application with Oracle Application Express 239
3. The SysMgmt application is set to use database authentication; therefore, enter a username and password of a user who has the privileges to use the application. For the purposes of this application, specify HANDSONXE06 in the User Name field and PASSWORD in the Password field; then click Login.
Once the SysMgmt application launches, you should see the Hosts report page, similar to Figure 6-13.
EXERCISE 6.9: Navigate Application Report PagesThe top of each SysMgmt application page has a series of three tabs with the titles Hosts, Databases, and Applications. These tabs make it easy to switch among the pages related to the HOSTS, DATABASES, and APPLICATIONS tables.
1. Click the Databases tab to display a report of databases.
2. Click the Applications tab to display a report of applications.
3. Click the Hosts tab to return to the Hosts report.
FIGURE 6-13. The original Hosts report page of the SysMgmt application
ch06.indd 239 6/21/06 2:00:26 PM

Oracle-Regular / Hands-On Oracle Database 10g Express Edition for Windows / Steve Bobrowski / 226331-8 / Chapter 6 Oracle-Regular / Hands-On Oracle Database 10g Express Edition for Windows / Steve Bobrowski / 226331-8 / Chapter 6
240 Hands-On Oracle Database 10g Express Edition for Windows
Oracle-Regular / Hands-On Oracle Database 10g Express Edition for Windows / Steve Bobrowski / 226331-8 / Chapter 6 Oracle-Regular / Hands-On Oracle Database 10g Express Edition for Windows / Steve Bobrowski / 226331-8 / Chapter 6
Chapter 6: Build an Application with Oracle Application Express 241
NOTEThe bottom of each page displays the Developer’s toolbar with convenient links that make it easy to stop running the application and edit the application or a specific page. Subsequent exercises demonstrate how to use several links in the Developer’s toolbar during application development and testing.
EXERCISE 6.10: Understand Oracle Application Express URLsAs you move among the pages of the application, carefully notice how the URL changes in your web browser. Oracle Application Express URLs should be similar to the following:
http://127.0.0.1:8080/apex/f?p=100:1: ...
The first part of the URL, http://127.0.0.1:8080/apex/f, remains static as you move among pages. This portion of the URL indicates the address of the application and web server. The dynamic part of the URL that changes as you switch pages is a query string, which begins after the ? character. A query string in a URL contains one or more parameters that pass values to the application at run time. Oracle Application Express query strings contain the p parameter, which is assigned several values delimited by colons. The first value in the p parameter is the application’s ID; for example, 100. The second value in the p parameter is the page ID in the application; for example, 1. The remaining values in the p parameter pertain to session and other information not relevant to this discussion.
Notice that as you switch among pages in the application, the page number changes to indicate the number of the page you are viewing. The page number in the URL should correspond to the page number indicated in the Edit Page link in the Developer’s toolbar on the page.
EXERCISE 6.11: Browse and Review Application PagesNow that you have a general understanding of the SysMgmt application’s navigation, layout, and user interface, complete this exercise’s steps to review each page and make notes for refining their appearance and functionality:
1. Click the Applications tab.
2. Notice that the header of the report region on the Applications report page contains a Create button: this button is a link to the Create/Edit Application form page.
3. Notice that the header of the report region also includes a Search field and related items for searching report information.
ch06.indd 240 6/21/06 2:00:26 PM

Oracle-Regular / Hands-On Oracle Database 10g Express Edition for Windows / Steve Bobrowski / 226331-8 / Chapter 6 Oracle-Regular / Hands-On Oracle Database 10g Express Edition for Windows / Steve Bobrowski / 226331-8 / Chapter 6
240 Hands-On Oracle Database 10g Express Edition for Windows
Oracle-Regular / Hands-On Oracle Database 10g Express Edition for Windows / Steve Bobrowski / 226331-8 / Chapter 6 Oracle-Regular / Hands-On Oracle Database 10g Express Edition for Windows / Steve Bobrowski / 226331-8 / Chapter 6
Chapter 6: Build an Application with Oracle Application Express 241
4. Specify finch in the Search field.
5. Click Go.
6. Notice that the report now displays only one record, a record with a Description that contains the string “finch.” All other records have been filtered out of the report display.
7. Click Reset to remove the search filter and again display the first 15 records in the APPLICATIONS table.
8. Notice that the labels of the columns in the Applications report correspond to the user interface defaults that you previously set for the columns of the APPLICATIONS table.
9. Notice that the Database column of the Applications report contains each application’s foreign key that refers to the DB_ID of a parent record in the DATABASES table. Make a note to modify the appearance of the Database column’s data so that it lists the name of the database rather than the database’s DB_ID.
10. Notice that the leftmost column in the report contains icons that are links for editing the corresponding record. Click the Edit icon to edit the first record in the Applications report.
11. This is your first look at the Create/Edit Application form page of the new application. Notice that the breadcrumbs navigation menu above the form indicates that the form page is hierarchically a child page of the parent Applications report page. You can easily click the Applications link in the breadcrumbs menu to return to the Applications report page, but don’t do it yet.
12. Notice that the labels for the entry fields in the form correspond to the user interface defaults that you previously set for the columns of the APPLICATIONS table.
13. Notice that required fields have a small icon to the left of the column label.
14. Similar to the Applications report, notice that the Database field of the Create/Edit Applications form expects and displays a foreign key value that refers to the DB_ID of a parent record in the DATABASES table. Make a note to modify the Database field of the Create/Edit Applications form so that it displays a list of available databases rather than a database’s DB_ID.
Repeat the preceding steps for the reports and forms based on the HOSTS and DATABASES tables. Make notes to edit the appearance/functionality of the Host field of the report and form pages based on the DATABASES table, similar to Steps 9 and 14.
ch06.indd 241 6/21/06 2:00:26 PM

Oracle-Regular / Hands-On Oracle Database 10g Express Edition for Windows / Steve Bobrowski / 226331-8 / Chapter 6 Oracle-Regular / Hands-On Oracle Database 10g Express Edition for Windows / Steve Bobrowski / 226331-8 / Chapter 6
242 Hands-On Oracle Database 10g Express Edition for Windows
Oracle-Regular / Hands-On Oracle Database 10g Express Edition for Windows / Steve Bobrowski / 226331-8 / Chapter 6 Oracle-Regular / Hands-On Oracle Database 10g Express Edition for Windows / Steve Bobrowski / 226331-8 / Chapter 6
Chapter 6: Build an Application with Oracle Application Express 243
Refining the ApplicationApplications that you build quickly with the Oracle Application Express Create Application wizard typically require a certain degree of refinement to account for issues such as those found in the previous exercise. The exercises in this section teach you several ways that you can refine the SysMgmt application to make it appear and function better.
EXERCISE 6.12: Create Lists of Values (LOVs) for FormsA list of values (LOV) is a common application component that provides a standardized list of acceptable values for a field in a form. Technically speaking, each option in an LOV has a pair of associated values: a value that the LOV displays (a display value) and a value that the LOV returns to the associated field (a return value). LOVs are therefore useful for displaying human-readable values that correspond to cryptic code values such as foreign key values or status codes. This exercise teaches you how to create LOVs for hosts and databases that you can then use to improve the pages of the SysMgmt application.
To create a LOV for hosts, complete the following steps:
1. Click Edit Application in the Developer’s toolbar to cease running the application and return to the SysMgmt application’s page.
2. Click Shared Components to display the application’s Shared Components page. Shared components are application components that pages in one or more Oracle Application Express applications can reuse.
3. After browsing the page information, click Lists of Values in the User Interface section of the Shared Components page.
4. The Lists of Values page displays icons for all LOVs that exist. Notice that the Create Application wizard generates a standard LOV named Report Row Per Page that the report pages in the application use to control the number of rows displayed per page.
5. Click Create.
6. Select From Scratch from the Create List of Values options.
7. Click Next.
8. Specify HOSTS in the Name field.
9. Your goal is to create a list of available hosts, which is not necessarily a static list. Therefore, select Dynamic from the Type options.
10. Click Next.
ch06.indd 242 6/21/06 2:00:27 PM

Oracle-Regular / Hands-On Oracle Database 10g Express Edition for Windows / Steve Bobrowski / 226331-8 / Chapter 6 Oracle-Regular / Hands-On Oracle Database 10g Express Edition for Windows / Steve Bobrowski / 226331-8 / Chapter 6
242 Hands-On Oracle Database 10g Express Edition for Windows
Oracle-Regular / Hands-On Oracle Database 10g Express Edition for Windows / Steve Bobrowski / 226331-8 / Chapter 6 Oracle-Regular / Hands-On Oracle Database 10g Express Edition for Windows / Steve Bobrowski / 226331-8 / Chapter 6
Chapter 6: Build an Application with Oracle Application Express 243
11. To generate a dynamic LOV, you must enter a SQL query in the Query field. The query’s SELECT list must include only two expressions in the following order, as the example query in the Query field illustrates: a display value with the column alias d and a return value with the column alias r. (You should already be familiar with building queries that contain column aliases from your experience in Chapter 3.) The query that you specify generally returns more than one row and can have a WHERE clause, an ORDER BY clause, join information from one or more tables, etc.—click Examples if you would like to see example queries that are acceptable. To return a list of hosts and corresponding primary key values, enter the following query in the Query field:
SELECT host_name d, host_id r
FROM handsonxe06.hosts
ORDER BY 1
12. Click Create List of Values. Oracle Application Express checks the syntax of the query you submit to make sure it will parse at run time; if it will not, Oracle Application Express returns an error and allows you to correct your problem before continuing.
13. Notice that an icon for the new LOV appears in the Lists of Values page.
Now repeat Steps 5 through 13 to create a dynamic LOV for databases. Name the LOV DATABASES and specify the following query for the LOV:
SELECT db.db_name || '.' || h.host_name d, db_id r FROM handsonxe06.databases db NATURAL JOIN handsonxe06.hosts h ORDER BY 1
Notice that the display values that the join query returns are a concatenation of each database’s name with its corresponding server’s name; this extra information makes it clear which database to select just in case there are duplicate database names among servers in the organization (for example, db1 on server1 would be db1.server1 and db1 on server2 would be db1.server2).
EXERCISE 6.13: Add LOVs to FormsComplete this exercise to modify specific form pages of the SysMgmt application to make use of the new LOVs. For example, to add the HOSTS LOV to the Create/Edit Database page, complete the following steps:
1. In the breadcrumbs navigation menu, click the link to your application’s page (for example, Application 100).
2. From the application’s page, click the link or icon for the Create/Edit Database form page, which should be page 4.
ch06.indd 243 6/21/06 2:00:27 PM

Oracle-Regular / Hands-On Oracle Database 10g Express Edition for Windows / Steve Bobrowski / 226331-8 / Chapter 6 Oracle-Regular / Hands-On Oracle Database 10g Express Edition for Windows / Steve Bobrowski / 226331-8 / Chapter 6
244 Hands-On Oracle Database 10g Express Edition for Windows
Oracle-Regular / Hands-On Oracle Database 10g Express Edition for Windows / Steve Bobrowski / 226331-8 / Chapter 6 Oracle-Regular / Hands-On Oracle Database 10g Express Edition for Windows / Steve Bobrowski / 226331-8 / Chapter 6
Chapter 6: Build an Application with Oracle Application Express 245
3. Take a moment to observe how Oracle Application Express organizes the various components that make up a form page:
A region is an area on a page that displays content.
A page template controls the order in which regions appear on a page.
Each region can contain various elements, such as reports, HTML, menus, and lists.
Regions can also contain items such as text fields, buttons, radio button groups, select lists, etc. Oracle Application Express assigns each item on a page a unique name prefixed by the letter P, the page’s number, and an underscore (for example, P4_).
A region template controls the appearance of a region’s elements and items.
4. Your goal in this exercise is to modify the HOST_ID field of the Create/Edit Database form page so that it uses the HOSTS LOV. Therefore, click the P4_HOST_ID link in the Items section of the page.
5. Take a moment to scroll the page and learn about the many attributes that you can set for a form field.
6. Again, the goal is to modify the HOST_ID form field so that it uses the HOSTS LOV. Therefore, select Select List from the Display As list in the Name section of the page. A shortcut for carrying out this step is to click [Select List] directly underneath the Display As list.
7. Next, you must indicate the LOV to use as the field’s select list. Scroll down the page until the List of Values section is visible; click LOV at the top of the page to quickly scroll down the page directly to this section. Then select HOSTS from the Named LOV list.
8. Scroll back to the top of the page and click Apply Changes to save your work.
9. To run the application and immediately load this new version of the Create/Edit Database form page, click the streetlight icon in the top-right corner of the page. The new version of the form with the LOV should appear similar to Figure 6-14.
10. Click the Host list and notice that only one host is available. As you add new hosts to your database, the select list on this form will adapt accordingly.
Next, complete a similar series of steps so that the Database field of the Create/Edit Application form page uses the DATABASES LOV. This is a good opportunity to learn another way to use the Developer’s toolbar.
■
■
■
■
■
ch06.indd 244 6/21/06 2:00:27 PM

Oracle-Regular / Hands-On Oracle Database 10g Express Edition for Windows / Steve Bobrowski / 226331-8 / Chapter 6 Oracle-Regular / Hands-On Oracle Database 10g Express Edition for Windows / Steve Bobrowski / 226331-8 / Chapter 6
244 Hands-On Oracle Database 10g Express Edition for Windows
Oracle-Regular / Hands-On Oracle Database 10g Express Edition for Windows / Steve Bobrowski / 226331-8 / Chapter 6 Oracle-Regular / Hands-On Oracle Database 10g Express Edition for Windows / Steve Bobrowski / 226331-8 / Chapter 6
Chapter 6: Build an Application with Oracle Application Express 245
11. Click the Applications tab.
12. Click Create to display the Create/Edit Application form page.
13. On the Developer’s toolbar, click Edit Page 6.
14. Notice that you immediately navigate to the form page’s definition page.
15. Repeat Steps 4 through 10 of this exercise to make use of the DATABASES LOV for the P6_DB_ID field of the Create/Edit Application form page. Notice that when you run the new version of the page and click the Database list in the form, all of the databases (db1 through db8) are available as options. When you finish, the new version of the Create/Edit Application form page should appear similar to Figure 6-15.
FIGURE 6-14. The Create/Edit Database form page with the new list of values for the Host field
ch06.indd 245 6/21/06 2:00:27 PM

Oracle-Regular / Hands-On Oracle Database 10g Express Edition for Windows / Steve Bobrowski / 226331-8 / Chapter 6 Oracle-Regular / Hands-On Oracle Database 10g Express Edition for Windows / Steve Bobrowski / 226331-8 / Chapter 6
246 Hands-On Oracle Database 10g Express Edition for Windows
Oracle-Regular / Hands-On Oracle Database 10g Express Edition for Windows / Steve Bobrowski / 226331-8 / Chapter 6 Oracle-Regular / Hands-On Oracle Database 10g Express Edition for Windows / Steve Bobrowski / 226331-8 / Chapter 6
Chapter 6: Build an Application with Oracle Application Express 247
EXERCISE 6.14: Modify a Report’s Query and Make New Columns SearchableThe report pages in the current version of the application also display foreign key IDs: the Databases report shows the HOST_ID for its host and the Applications report shows the DB_ID for its database. This exercise teaches you one way to modify the report so that these fields contain more meaningful information that is also searchable.
To modify the Databases report page so that the Host Name column displays database names rather than database IDs, complete the following steps:
1. Click Databases (the Databases tab) to display the Databases report page.
2. On the Developer’s toolbar, click Edit Page 3.
3. Take a moment to observe how Oracle Application Express organizes the various components that make up a report page, which is somewhat different from how it organizes form pages.
FIGURE 6-15. The Create/Edit Application form page with the new list of values for the Database field
ch06.indd 246 6/21/06 2:00:28 PM

Oracle-Regular / Hands-On Oracle Database 10g Express Edition for Windows / Steve Bobrowski / 226331-8 / Chapter 6 Oracle-Regular / Hands-On Oracle Database 10g Express Edition for Windows / Steve Bobrowski / 226331-8 / Chapter 6
246 Hands-On Oracle Database 10g Express Edition for Windows
Oracle-Regular / Hands-On Oracle Database 10g Express Edition for Windows / Steve Bobrowski / 226331-8 / Chapter 6 Oracle-Regular / Hands-On Oracle Database 10g Express Edition for Windows / Steve Bobrowski / 226331-8 / Chapter 6
Chapter 6: Build an Application with Oracle Application Express 247
4. Although similar, reports have read-only column attributes that display information rather than fields that provide a means for data input on forms. To access a report’s attributes, click the link for the report: for the purposes of this exercise, click Databases (not Region) in the Regions section of the page.
5. Notice that a region on a report page has two tabs with settings that you can use to control the region’s appearance. The Region Definition tab provides access to settings that control the overall appearance of the region. The Report Attributes tab provides access to specific settings for report attributes.
6. Your goal is to modify the report so that it returns the name of a database’s host rather than the HOST_ID foreign key. You could use the HOSTS LOV to do this, but the hostname information would not be searchable because the underlying data in each Databases report record would still be the HOST_ID value. To display the hostname for each database and make the new information searchable, you need to modify the data that the report’s query actually retrieves; therefore, click the Report Definition tab, if necessary.
7. Click Source to jump to the Source section of the report definition.
8. The Region Source field contains the query that generates the information that the report displays. Notice the following points about the current query:
The query selects information for all columns in the HOSTS table.
When the P3_REPORT_SEARCH report field is not null, the query’s WHERE clause condition limits the result set of the query to rows in which the uppercase string in the P3_REPORT_SEARCH field occur at least once in either the DB_NAME or DB_VERSION field. When the P3_REPORT_SEARCH field is null, the query returns all rows in the HOSTS table.
9. Modify the query so that it joins the DATABASES and HOSTS table to retrieve the hostname for each database record; replace the HOST_ID expression in the select list with the HOST_NAME expression. Also modify the query’s WHERE clause so that the new HOST_NAME field is searchable, as follows (the edits that you should make are indicated in bold):
select
"DB_NAME",
"DB_ID",
"HOST_NAME",
"DB_VERSION"
from "DATABASES"
natural join "HOSTS"
■
■
ch06.indd 247 6/21/06 2:00:28 PM

Oracle-Regular / Hands-On Oracle Database 10g Express Edition for Windows / Steve Bobrowski / 226331-8 / Chapter 6 Oracle-Regular / Hands-On Oracle Database 10g Express Edition for Windows / Steve Bobrowski / 226331-8 / Chapter 6
248 Hands-On Oracle Database 10g Express Edition for Windows
Oracle-Regular / Hands-On Oracle Database 10g Express Edition for Windows / Steve Bobrowski / 226331-8 / Chapter 6 Oracle-Regular / Hands-On Oracle Database 10g Express Edition for Windows / Steve Bobrowski / 226331-8 / Chapter 6
Chapter 6: Build an Application with Oracle Application Express 249
where
(
instr(upper("DB_NAME"),
upper(nvl(:P3_REPORT_SEARCH,"DB_NAME"))) > 0 or
instr(upper("DB_VERSION"),
upper(nvl(:P3_REPORT_SEARCH,"DB_VERSION"))) > 0 or
instr(upper("HOST_NAME"),
upper(nvl(:P3_REPORT_SEARCH,"HOST_NAME"))) > 0
)
10. Scroll back to the top of the page and click Apply Changes to save your work.
11. To run the application and immediately load this new version of the Databases report page, click the streetlight icon in the top-right corner of the page. The new version of the report should appear similar to Figure 6-16.
FIGURE 6-16. The new version of the Databases report page with the searchable Host Name column
ch06.indd 248 6/21/06 2:00:28 PM

Oracle-Regular / Hands-On Oracle Database 10g Express Edition for Windows / Steve Bobrowski / 226331-8 / Chapter 6 Oracle-Regular / Hands-On Oracle Database 10g Express Edition for Windows / Steve Bobrowski / 226331-8 / Chapter 6
248 Hands-On Oracle Database 10g Express Edition for Windows
Oracle-Regular / Hands-On Oracle Database 10g Express Edition for Windows / Steve Bobrowski / 226331-8 / Chapter 6 Oracle-Regular / Hands-On Oracle Database 10g Express Edition for Windows / Steve Bobrowski / 226331-8 / Chapter 6
Chapter 6: Build an Application with Oracle Application Express 249
12. Notice that the Host Name column in the report now displays the name of each database’s host rather than each host’s ID.
13. Test the new search function to make sure that it works properly. For example, a search for the string server1 should display all records in the table; a search for the string server2 should display no records in the table.
TIPIt is very important to note the columns of an application’s tables that you make searchable—these are the columns that you want to create indexes for so that the application’s queries can efficiently find specific rows in a table with index scans rather than full table scans.
Now repeat steps similar to the previous steps in this exercise to replace the DB_ID column of the Applications report page with the DATABASE_NAME column. Modify the report to use the following query (the edits that you should make are indicated in bold):
select
"AP_DESCRIPTION", "AP_NAME", "DB_NAME" || '.' || "HOST_NAME" AS "DATABASE", "AP_VERSION", "AP_ID" from "APPLICATIONS" natural join "DATABASES" natural join "HOSTS" where ( instr(upper("AP_DESCRIPTION"), upper(nvl(:P5_REPORT_SEARCH,"AP_DESCRIPTION"))) > 0 or instr(upper("AP_NAME"), upper(nvl(:P5_REPORT_SEARCH,"AP_NAME"))) > 0 or instr(upper("AP_VERSION"), upper(nvl(:P5_REPORT_SEARCH,"AP_VERSION"))) > 0 or instr(upper("DB_NAME" || '.' || "HOST_NAME"), upper(nvl(:P5_REPORT_SEARCH,"DB_NAME" || '.' || "HOST_NAME"))) > 0 )
Again, make sure to test the new search function. For example, a search for the string db3 should display only the applications that are served by db3.server1 .mycompany.com; a search for db6 should display no records. When you finish, the new version of the Applications report page should appear similar to Figure 6-17.
ch06.indd 249 6/21/06 2:00:29 PM

Oracle-Regular / Hands-On Oracle Database 10g Express Edition for Windows / Steve Bobrowski / 226331-8 / Chapter 6 Oracle-Regular / Hands-On Oracle Database 10g Express Edition for Windows / Steve Bobrowski / 226331-8 / Chapter 6
250 Hands-On Oracle Database 10g Express Edition for Windows
Oracle-Regular / Hands-On Oracle Database 10g Express Edition for Windows / Steve Bobrowski / 226331-8 / Chapter 6 Oracle-Regular / Hands-On Oracle Database 10g Express Edition for Windows / Steve Bobrowski / 226331-8 / Chapter 6
Chapter 6: Build an Application with Oracle Application Express 251
Maintaining the ApplicationAn application’s requirements will inevitably change over the lifecycle of the application. For example, after you develop, refine, and finish testing the first version of the SysMgmt application, suppose that the DBAs request a new requirement: the need to track information about all daily database backups. To meet the latest requirement, make sure that you take the time to analyze and design for the new feature.
For example, during a meeting with the staff DBAs to review the functionality of the SysMgmt application, they indicate the need to track information about technical support service requests for databases. Consequently, you draw a new use case diagram (see Figure 6-18) that shows how DBAs must be able to create, modify, and drop service request information related to the various databases in the system.
FIGURE 6-17. The new version of the Applications report page with the searchable Database column
ch06.indd 250 6/21/06 2:00:29 PM

Oracle-Regular / Hands-On Oracle Database 10g Express Edition for Windows / Steve Bobrowski / 226331-8 / Chapter 6 Oracle-Regular / Hands-On Oracle Database 10g Express Edition for Windows / Steve Bobrowski / 226331-8 / Chapter 6
250 Hands-On Oracle Database 10g Express Edition for Windows
Oracle-Regular / Hands-On Oracle Database 10g Express Edition for Windows / Steve Bobrowski / 226331-8 / Chapter 6 Oracle-Regular / Hands-On Oracle Database 10g Express Edition for Windows / Steve Bobrowski / 226331-8 / Chapter 6
Chapter 6: Build an Application with Oracle Application Express 251
An updated class diagram (see Figure 6-19) clearly identifies the attributes that DBAs consider important when tracking database service requests, which includes the following:
The database that the service request corresponds to
The version of the database, host operating system, and host operating system version at the time that the service request was filed
An optional reference identifier that corresponds to a technical service request filed with Oracle’s technical support department, MetaLink
A summary of the problem that the service request addresses
Detailed information about the problem
Detailed information about the problem resolution
A database can have zero or many database service requests.
Next, you design new application components that are necessary to meet the new requirements. In this example, the database requires a new table to track the required information for database service requests. Each database service request should have a unique ID generated by a sequence. The new table must have a foreign key that refers to the existing DATABASES table. The application itself requires a new form for creating, modifying, and deleting database service requests, and a new report for displaying information about them. To populate the historical fields in the table, you decide to create a trigger.
Now that you have a plan, this section’s exercises introduce you to some techniques that you can use to adapt an existing Oracle Application Express application as needs change.
■
■
■
■
■
■
■
FIGURE 6-18. A use case diagram that shows the database service request management tasks performed by database administrators in the SysMgmt application
Create DatabaseService Request
Alter DatabaseService Request
Drop DatabaseService Request
DatabaseAdministratior
(DBA)
ch06.indd 251 6/21/06 2:00:30 PM

Oracle-Regular / Hands-On Oracle Database 10g Express Edition for Windows / Steve Bobrowski / 226331-8 / Chapter 6 Oracle-Regular / Hands-On Oracle Database 10g Express Edition for Windows / Steve Bobrowski / 226331-8 / Chapter 6
252 Hands-On Oracle Database 10g Express Edition for Windows
Oracle-Regular / Hands-On Oracle Database 10g Express Edition for Windows / Steve Bobrowski / 226331-8 / Chapter 6 Oracle-Regular / Hands-On Oracle Database 10g Express Edition for Windows / Steve Bobrowski / 226331-8 / Chapter 6
Chapter 6: Build an Application with Oracle Application Express 253
EXERCISE 6.15: Create a New TableThe first task to meet the new requirements is to create a new table named DATABASE_SERVICE_REQUESTS. This exercise lists steps for using the familiar Object Browser page to accomplish related tasks.
1. If necessary, click Edit Application in the Developer’s toolbar to cease running the application.
2. Click Home.
3. Click Object Browser.
4. Click Create | Table.
FIGURE 6-19. An updated class diagram that shows the static structure of the SysMgmt application
ch06.indd 252 6/21/06 2:00:30 PM

Oracle-Regular / Hands-On Oracle Database 10g Express Edition for Windows / Steve Bobrowski / 226331-8 / Chapter 6 Oracle-Regular / Hands-On Oracle Database 10g Express Edition for Windows / Steve Bobrowski / 226331-8 / Chapter 6
252 Hands-On Oracle Database 10g Express Edition for Windows
Oracle-Regular / Hands-On Oracle Database 10g Express Edition for Windows / Steve Bobrowski / 226331-8 / Chapter 6 Oracle-Regular / Hands-On Oracle Database 10g Express Edition for Windows / Steve Bobrowski / 226331-8 / Chapter 6
Chapter 6: Build an Application with Oracle Application Express 253
5. Specify DATABASE_SERVICE_REQUESTS in the Table Name field.
6. On the Columns page, enter the following column specifications (Column Name, Type, etc.):
Specify the DB_SR_ID and DB_ID columns using the NUMBER datatype constrained to a precision of 3 and a scale of 0.
Specify the DB_SR_START_DATE and DB_SR_END_DATE columns using the DATE datatype.
Specify the DB_VERSION, HOST_OS, HOST_OS_VERSION, and DB_SR_METALINK_REF columns using the VARCHAR2 datatype with a size of 25.
Specify the DB_SR_SUMMARY column using the VARCHAR2 datatype with a size of 250.
Specify the DB_SR_HISTORY and DB_SR_RESOLUTION columns using the CLOB datatype.
Mark the DB_ID, DB_SR_START_DATE, and DB_SR_SUMMARY columns as Not Null.
7. Click Next or Primary Key to continue.
8. On the Primary Key page, complete the following steps:
Unlike with previous application tables, you need to create a sequence for the new table’s primary key. To do it conveniently while creating the table, select the Populated from a new sequence radio button.
Specify DATABASE_SERVICE_REQUESTS_PK in the Primary Key Constraint Name field.
Specify DB_SR_IDS in the Sequence Name field.
Select DB_SR_ID(NUMBER) in the Primary Key list.
9. Click Next or Foreign Key to continue.
10. On the Foreign Key page, complete the following steps to add a foreign key for the DB_ID column of the DATABASE_SERVICE_REQUESTS table that refers to the DB_ID column of the DATABASES table. The goals are to ensure that the DB_ID field of each record in the DATABASE_SERVICE_REQUESTS table refers to a DB_ID in the DATABASES table and to prevent transactions from updating the primary keys in or deleting rows from the DATABASES table.
Specify DATABASE_SERVICE_REQUESTS_FK1 in the Name field.
To enforce the delete cascade referential action for the new referential integrity constraint, select the Disallow Delete radio button.
■
■
■
■
■
■
■
■
■
■
■
■
ch06.indd 253 6/21/06 2:00:30 PM

Oracle-Regular / Hands-On Oracle Database 10g Express Edition for Windows / Steve Bobrowski / 226331-8 / Chapter 6 Oracle-Regular / Hands-On Oracle Database 10g Express Edition for Windows / Steve Bobrowski / 226331-8 / Chapter 6
254 Hands-On Oracle Database 10g Express Edition for Windows
Oracle-Regular / Hands-On Oracle Database 10g Express Edition for Windows / Steve Bobrowski / 226331-8 / Chapter 6 Oracle-Regular / Hands-On Oracle Database 10g Express Edition for Windows / Steve Bobrowski / 226331-8 / Chapter 6
Chapter 6: Build an Application with Oracle Application Express 255
To indicate the column that makes up the foreign key in the new DATABASE_SERVICE_REQUESTS table, select the DB_ID column in the Select Key Column(s) field and then click the right-arrow button to move the selected column to the Key Column(s) field.
To indicate the referenced column in the parent DATABASES table, specify DATABASES in the References Table field, show the specified table’s columns, select the DB_ID column in the Select Reference Column(s) field, and then click the right-arrow button to move the selected column to the Reference Column(s) field.
Click Add.
Confirm the declaration of the new foreign key in the list of foreign keys at the top of the page.
11. The table does not require any check or unique constraints; therefore, click Confirm to continue.
12. Click SQL and confirm the SQL DDL statements that the wizard builds:
CREATE table "DATABASE_SERVICE_REQUESTS" (
"DB_SR_ID" NUMBER(3,0),
"DB_ID" NUMBER(3,0) NOT NULL,
"DB_SR_START_DATE" DATE NOT NULL,
"DB_SR_END_DATE" DATE,
"DB_VERSION" VARCHAR2(25),
"HOST_OS" VARCHAR2(25),
"HOST_OS_VERSION" VARCHAR2(25),
"DB_SR_METALINK_REF" VARCHAR2(25),
"DB_SR_SUMMARY" VARCHAR2(250) NOT NULL,
"DB_SR_HISTORY" CLOB,
"DB_SR_RESOLUTION" CLOB,
constraint "DATABASE_SERVICE_REQUESTS_PK"
primary key ("DB_SR_ID")
)
/
CREATE sequence "DB_SR_IDS"
/
CREATE trigger "BI_DATABASE_SERVICE_REQUESTS"
before insert on "DATABASE_SERVICE_REQUESTS"
for each row
begin
select "DB_SR_IDS".nextval into :NEW.DB_SR_ID from dual;
end;
/
■
■
■
■
ch06.indd 254 6/21/06 2:00:30 PM

Oracle-Regular / Hands-On Oracle Database 10g Express Edition for Windows / Steve Bobrowski / 226331-8 / Chapter 6 Oracle-Regular / Hands-On Oracle Database 10g Express Edition for Windows / Steve Bobrowski / 226331-8 / Chapter 6
254 Hands-On Oracle Database 10g Express Edition for Windows
Oracle-Regular / Hands-On Oracle Database 10g Express Edition for Windows / Steve Bobrowski / 226331-8 / Chapter 6 Oracle-Regular / Hands-On Oracle Database 10g Express Edition for Windows / Steve Bobrowski / 226331-8 / Chapter 6
Chapter 6: Build an Application with Oracle Application Express 255
ALTER TABLE "DATABASE_SERVICE_REQUESTS"
ADD CONSTRAINT "DATABASE_SERVICE_REQUESTS_FK1"
FOREIGN KEY ("DB_ID")
REFERENCES "DATABASES" ("DB_ID")
/
13. Click Create to create the HANDSONXE05.DATABASE_SERVICE_REQUESTS table and related objects.
EXERCISE 6.16: Set UI Defaults for the New TableAfter you create a new table for an application, remember to set associated user interface defaults before starting to design new application pages based on the table. Complete the following steps to set UI defaults for the new DATABASE_SERVICE_REQUESTS table:
1. From the Object Browser page (click Home | Object Browser), select Tables | DATABASE_SERVICE_REQUESTS if the table is not already selected.
2. Click UI Defaults.
3. Click Create Defaults.
4. Click Grid Edit.
5. Specify Create/Edit Database Service Request in the Form Region Title field.
6. Specify Database Service Requests in the Report Region Title field.
7. Specify the following in the Label field of the table’s columns:
Service Request for the DB_SR_ID column
Database for the DB_ID column
Start Date for the DB_SR_START_DATE column
End Date for the DB_SR_END_DATE column
Oracle Version for the DB_VERSION column
Operating System (OS) for the HOST_OS column
OS Version for the HOST_OS_VERSION column
Metalink for the DB_SR_METALINK_REF column
Summary for the DB_SR_SUMMARY column
History for the DB_SR_HISTORY column
Resolution for the DB_SR_RESOLUTION column
■
■
■
■
■
■
■
■
■
■
■
ch06.indd 255 6/21/06 2:00:31 PM

Oracle-Regular / Hands-On Oracle Database 10g Express Edition for Windows / Steve Bobrowski / 226331-8 / Chapter 6 Oracle-Regular / Hands-On Oracle Database 10g Express Edition for Windows / Steve Bobrowski / 226331-8 / Chapter 6
256 Hands-On Oracle Database 10g Express Edition for Windows
Oracle-Regular / Hands-On Oracle Database 10g Express Edition for Windows / Steve Bobrowski / 226331-8 / Chapter 6 Oracle-Regular / Hands-On Oracle Database 10g Express Edition for Windows / Steve Bobrowski / 226331-8 / Chapter 6
Chapter 6: Build an Application with Oracle Application Express 257
8. Select Yes for the Searchable field of the DB_VERSION, HOST_OS, HOST_OS_VERSION, DB_SR_METALINK_REF, and DB_SR_SUMMARY columns; all other columns should be set to No.
9. Do not adjust any other UI defaults.
10. Click Apply Changes to save your work.
EXERCISE 6.17: Create a New TriggerTo make data entry easier for a new database service request, you decide to create a trigger that populates the DB_SR_START_DATE, DB_VERSION, HOST_OS, and HOST_OS_VERSION columns with default values based on corresponding information at the time a new service request is created. To create the new trigger, complete the following steps:
1. Click Home | Object Browser.
2. Select the DATABASE_SERVICE_REQUESTS table.
3. Click Triggers.
4. Click Create.
5. Specify DATABASE_SERVICE_REQUESTS_T1 for the Trigger Name field.
6. Select BEFORE in the Firing Point list.
7. Select insert in the Options list.
8. Select For Each Row.
9. Specify the following in the Trigger Body field:
SELECT SYSDATE INTO :NEW.db_sr_start_date FROM dual;
SELECT db_version, host_os, host_os_version
INTO :NEW.db_version, :NEW.host_os, :NEW.host_os_version
FROM handsonxe06.databases
NATURAL JOIN handsonxe06.hosts
WHERE db_id = :NEW.db_id;
10. Click Next.
11. Click SQL and confirm that the following SQL statement displays:
create or replace trigger "DATABASE_SERVICE_REQUESTS_T1"
BEFORE
insert on "DATABASE_SERVICE_REQUESTS"
for each row
ch06.indd 256 6/21/06 2:00:31 PM

Oracle-Regular / Hands-On Oracle Database 10g Express Edition for Windows / Steve Bobrowski / 226331-8 / Chapter 6 Oracle-Regular / Hands-On Oracle Database 10g Express Edition for Windows / Steve Bobrowski / 226331-8 / Chapter 6
256 Hands-On Oracle Database 10g Express Edition for Windows
Oracle-Regular / Hands-On Oracle Database 10g Express Edition for Windows / Steve Bobrowski / 226331-8 / Chapter 6 Oracle-Regular / Hands-On Oracle Database 10g Express Edition for Windows / Steve Bobrowski / 226331-8 / Chapter 6
Chapter 6: Build an Application with Oracle Application Express 257
begin
SELECT SYSDATE INTO :NEW.db_sr_start_date FROM dual;
SELECT db_version, host_os, host_os_version
INTO :NEW.db_version, :NEW.host_os, :NEW.host_os_version
FROM handsonxe06.databases
NATURAL JOIN handsonxe06.hosts
WHERE db_id = :NEW.db_id;
end;
/
12. Click Finish to create the new trigger.
EXERCISE 6.18: Add Rows to the DATABASE_SERVICE_REQUESTS TableComplete the following steps to insert two rows into the DATABASE_SERVICE_REQUESTS table and test the new triggers:
1. Select Home | Object Browser | Browse | Tables.
2. Select DATABASE_SERVICE_REQUESTS.
3. Click Data.
4. Click Insert Row.
5. Specify the following information for the fields of the DATABASE_SERVICE_REQUESTS table:
The DB_SR_ID field will be automatically populated by the DB_SR_IDS sequence and BI_DATABASE_SERVICE_REQUESTS trigger; therefore, do not specify anything for this field.
Specify 1 in the DB_ID field.
The DB_SR_START_DATE, DB_VERSION, HOST_OS, and HOST_OS_VERSION fields will automatically be populated by the DATABASE_SERVICE_REQUESTS_T1 trigger; therefore, do not specify anything for these fields.
Do not specify anything for the DB_SR_END_DATE field; this value is unknown as of this time.
Specify 5983257.1 in the DB_SR_METALINK_REF field.
Specify The data file for the USERS tablespace was damaged by a disk failure and required recovery. in the DB_SR_SUMMARY field.
You cannot specify anything for the DB_SR_HISTORY and DB_SR_RESOLUTION fields because they are CLOB columns, which the Create Row page of the Object Browser does not support.
■
■
■
■
■
■
■
ch06.indd 257 6/21/06 2:00:31 PM

Oracle-Regular / Hands-On Oracle Database 10g Express Edition for Windows / Steve Bobrowski / 226331-8 / Chapter 6 Oracle-Regular / Hands-On Oracle Database 10g Express Edition for Windows / Steve Bobrowski / 226331-8 / Chapter 6
258 Hands-On Oracle Database 10g Express Edition for Windows
Oracle-Regular / Hands-On Oracle Database 10g Express Edition for Windows / Steve Bobrowski / 226331-8 / Chapter 6 Oracle-Regular / Hands-On Oracle Database 10g Express Edition for Windows / Steve Bobrowski / 226331-8 / Chapter 6
Chapter 6: Build an Application with Oracle Application Express 259
6. Click Create and Create Another.
7. Similar to Step 5, specify the following values for another new row:
Skip the DB_SR_ID field to rely on the trigger.
Specify 2 in the DB_ID field.
Skip the DB_SR_START_DATE, DB_VERSION, HOST_OS, and HOST_OS_VERSION fields to rely on triggers.
Do not specify anything for the DB_SR_END_DATE field.
Specify 5823552.1 in the DB_SR_METALINK_REF field.
Specify During a large data load, the archiving location ran out of space and made the instance hang. in the DB_SR_SUMMARY field.
Skip the DB_SR_HISTORY and DB_SR_RESOLUTION fields.
8. Click Create.
9. Notice how the triggers automatically populate several fields for the new rows, as expected.
EXERCISE 6.19: Add New Application PagesNow complete the following steps to create a new report and form page based on the DATABASE_BACKUPS table:
1. Click Home | Application Builder.
2. Click SysMgmt (its icon).
3. Click Create Page.
4. Notice the many types of pages that you can add to an application. For complete information about the various types of pages supported by Oracle Application Express, use the help system or read the Oracle Application Express documentation that is online at OTN. For the purposes of this exercise, click Form.
5. You want to add both a form and a report; therefore, click Form on a Table with Report.
6. Confirm that you are working with the HANDSONXE06 schema, and then click Next.
7. Specify DATABASE_SERVICE_REQUESTS in the Table/View Name field (or use the select window feature).
■
■
■
■
■
■
■
ch06.indd 258 6/21/06 2:00:31 PM

Oracle-Regular / Hands-On Oracle Database 10g Express Edition for Windows / Steve Bobrowski / 226331-8 / Chapter 6 Oracle-Regular / Hands-On Oracle Database 10g Express Edition for Windows / Steve Bobrowski / 226331-8 / Chapter 6
258 Hands-On Oracle Database 10g Express Edition for Windows
Oracle-Regular / Hands-On Oracle Database 10g Express Edition for Windows / Steve Bobrowski / 226331-8 / Chapter 6 Oracle-Regular / Hands-On Oracle Database 10g Express Edition for Windows / Steve Bobrowski / 226331-8 / Chapter 6
Chapter 6: Build an Application with Oracle Application Express 259
8. Click Next.
9. Specify the following information for this page of the Create Report Page wizard:
Select Yes for the Use User Interface Defaults option list.
Specify the next available page number in the Page field; for example, 7. You can use the adjacent button to show a pop-up list of current application pages and their page numbers.
Specify Database Service Requests in both the Page Name and Region Title fields.
Do not change any of the remaining settings.
10. Click Next.
11. Select Use an existing tab set and reuse an existing tab within that tab set from the Tab Options list.
12. Select TS1 (Hosts, Databases, Applications) from the Tab Set list.
13. Click Next.
14. The new report page should appear in the application under the Databases tab; therefore, select T_DATABASES from the Use Tab list.
15. Click Next.
16. The new report page should include all columns of the DATABASE_SERVICE_REQUESTS table; therefore, select all columns in the Select Column(s) list.
17. Click Next.
18. Use the default Edit Link Image so that it matches the appearance of the other report pages in the application; click Next.
19. Specify the following information for this page of the Create Form Page wizard:
Specify the next available page number in the Page field; for example, 8. You can use the adjacent button to show a list of current application pages and their page numbers.
Specify Create/Edit Database Service Request in both the Page Name and Region Title fields.
Do not change any of the remaining settings.
■
■
■
■
■
■
■
ch06.indd 259 6/21/06 2:00:32 PM

Oracle-Regular / Hands-On Oracle Database 10g Express Edition for Windows / Steve Bobrowski / 226331-8 / Chapter 6 Oracle-Regular / Hands-On Oracle Database 10g Express Edition for Windows / Steve Bobrowski / 226331-8 / Chapter 6
260 Hands-On Oracle Database 10g Express Edition for Windows
Oracle-Regular / Hands-On Oracle Database 10g Express Edition for Windows / Steve Bobrowski / 226331-8 / Chapter 6 Oracle-Regular / Hands-On Oracle Database 10g Express Edition for Windows / Steve Bobrowski / 226331-8 / Chapter 6
Chapter 6: Build an Application with Oracle Application Express 261
20. Click Next.
21. Select Use an existing tab set and reuse an existing tab within that tab set from the Tab Options list.
22. Select TS1 (Hosts, Databases, Applications) from the Tab Set list.
23. Click Next.
24. Select T_DATABASES from the Use Tab list.
25. Click Next.
26. Select DB_SR_ID from the Primary Key list.
27. Click Next.
28. The table already has a trigger to generate primary keys; therefore, click Existing Trigger.
29. Click Next.
30. The new form page should include all columns of the DATABASE_SERVICE_REQUESTS table; therefore, select all columns in the Select Column(s) list.
31. Click Next.
32. The new form should allow all DML operations; therefore, select Yes for the Insert, Update, and Delete lists to enable all options for the form page.
33. Click Next.
34. Confirm your selections and click Finish.
35. Click Run Page to view the new report page. Notice that the DB_ID is listed for the Database column; you will want to change this so that the more meaningful database name appears.
36. Click the edit icon in the first row of the report or the Create button to view the new form page. Notice that the date fields for the form have date pickers to facilitate easy date entry in the new form.
37. Click the Hosts tab.
38. Click the Databases tab.
39. Notice that there is no way to show the new Database Service Requests report page. That’s a hitch.
ch06.indd 260 6/21/06 2:00:32 PM

Oracle-Regular / Hands-On Oracle Database 10g Express Edition for Windows / Steve Bobrowski / 226331-8 / Chapter 6 Oracle-Regular / Hands-On Oracle Database 10g Express Edition for Windows / Steve Bobrowski / 226331-8 / Chapter 6
260 Hands-On Oracle Database 10g Express Edition for Windows
Oracle-Regular / Hands-On Oracle Database 10g Express Edition for Windows / Steve Bobrowski / 226331-8 / Chapter 6 Oracle-Regular / Hands-On Oracle Database 10g Express Edition for Windows / Steve Bobrowski / 226331-8 / Chapter 6
Chapter 6: Build an Application with Oracle Application Express 261
EXERCISE 6.20: Add a Navigation MenuThe most glaring problem that requires attention immediately after adding the new report and form pages is that there is no way to navigate to them. Oracle Application Express offers many different components that you can use to facilitate navigation within an application, including breadcrumbs, lists, navigation bar entries, tabs, and trees. Considering that the SysMgmt application is likely to evolve and require many new pages under each top-level page (Hosts, Databases, and Applications), an extensible strategy is to add a menu to each top-level page that makes it easy to navigate to each related subpage in the application. This exercise teaches you how to add a navigation menu to the Databases report page that users can use to navigate to the related Database Service Requests report page. Follow these steps:
1. Click Edit Application in the Developer’s toolbar.
2. Click Databases.
3. Click the Create button (+) in the Lists section to create a new list.
4. Specify LINKS_1 in the Name field.
5. Select Vertical Unordered List without Bullet in the List Template list.
6. Click Create.
That was easy; however, immediately after you create a new list, the list is empty, so it doesn’t serve any purpose. To make the list useful, you need to make the new list a collection of the navigation links that you want to appear on the Databases report page. At this time, the navigation menu requires just a single entry (link) that targets the new Database Service Requests report page. To add the new entry to the list, complete the following steps:
1. Click Create List Entry.
2. In the Entry section of the page, specify Database Service Requests in the List Entry Label field; this is the text that Oracle Application Express displays for the new entry in the list. Notice that it’s possible to specify an image as well.
3. In the Target section of the page, use the page selection list or specify the page number for the Database Service Requests report page in the Page field. The expected page is page 7.
4. Click Create.
5. Notice that the List Entries page displays information about the list’s entries, as shown in Figure 6-20.
ch06.indd 261 6/21/06 2:00:32 PM

Oracle-Regular / Hands-On Oracle Database 10g Express Edition for Windows / Steve Bobrowski / 226331-8 / Chapter 6 Oracle-Regular / Hands-On Oracle Database 10g Express Edition for Windows / Steve Bobrowski / 226331-8 / Chapter 6
262 Hands-On Oracle Database 10g Express Edition for Windows
Oracle-Regular / Hands-On Oracle Database 10g Express Edition for Windows / Steve Bobrowski / 226331-8 / Chapter 6 Oracle-Regular / Hands-On Oracle Database 10g Express Edition for Windows / Steve Bobrowski / 226331-8 / Chapter 6
Chapter 6: Build an Application with Oracle Application Express 263
Now complete the following steps to add the new list to the current page:
1. Click Add this list to the current page (look under the list’s entries).
2. To add the list to the Databases report page, you must first create a new region to contain the list. Specify Related Links in the Title field to specify the title for the new region.
3. A page template controls the appearance of a page’s layout. A region template controls the appearance of a particular region on a page. Select Reports Region for the Region Template list.
4. A region’s display point controls the display sequence of a region relative to other regions on the same page. For a visual representation of the region’s display point, click the flashlight icon adjacent to the Display Point list. To make the new navigation menu appear in the upper-right corner of the reports region of the page, click the Region Pos 03 link in the pop-up window. The pop-up window then closes and updates the Display Point list
FIGURE 6-20. A new list that contains navigation links
ch06.indd 262 6/21/06 2:00:32 PM

Oracle-Regular / Hands-On Oracle Database 10g Express Edition for Windows / Steve Bobrowski / 226331-8 / Chapter 6 Oracle-Regular / Hands-On Oracle Database 10g Express Edition for Windows / Steve Bobrowski / 226331-8 / Chapter 6
262 Hands-On Oracle Database 10g Express Edition for Windows
Oracle-Regular / Hands-On Oracle Database 10g Express Edition for Windows / Steve Bobrowski / 226331-8 / Chapter 6 Oracle-Regular / Hands-On Oracle Database 10g Express Edition for Windows / Steve Bobrowski / 226331-8 / Chapter 6
Chapter 6: Build an Application with Oracle Application Express 263
with your selection (Page Template Region Position 3). In the future, you can make your selection directly from the Display Point list or use the shortcut links below the select list.
5. Click Next to continue.
6. Select LINKS_1 in the List select list.
7. Click Create List Region.
8. Notice that the Regions section of the page definition now shows the new region to display the list.
Now test the new list to see if it works:
1. Click Run (the streetlight icon) in the upper-right corner to run the current page.
2. Notice the new Related Links section on the Databases report page, as shown in Figure 6-21.
3. Click Database Service Requests to display the Display Service Requests report page. From here, you can navigate to the related form page with the edit icons and Create button.
The new menu now provides an avenue to navigate to the new Database Service Requests report and related form. But notice that it is unclear where you are in the application, and that there is no way to navigate back to the Databases page without multiple mouse clicks. The next exercise corrects this navigation problem.
EXERCISE 6.21: Copy Breadcrumbs to the New Report and Form PagesA breadcrumbs menu is an application component that provides two useful benefits: navigation and a visual representation of your current location in the application. This exercise teaches you how to add new links for the new report and form pages to the application’s breadcrumb menu, and then add the breadcrumb region and menu to the new pages:
1. While the SysMgmt application is executing, click the Hosts tab.
2. Click Edit Page 1 on the Developer’s toolbar.
3. Notice that the Regions section of the page includes a region to display the breadcrumbs menu. The easiest way to add the same breadcrumbs region and menu to the new pages is to copy the region from one page to another. Click the Copy icon in the upper-right corner of the Regions section.
ch06.indd 263 6/21/06 2:00:33 PM

Oracle-Regular / Hands-On Oracle Database 10g Express Edition for Windows / Steve Bobrowski / 226331-8 / Chapter 6 Oracle-Regular / Hands-On Oracle Database 10g Express Edition for Windows / Steve Bobrowski / 226331-8 / Chapter 6
264 Hands-On Oracle Database 10g Express Edition for Windows
Oracle-Regular / Hands-On Oracle Database 10g Express Edition for Windows / Steve Bobrowski / 226331-8 / Chapter 6 Oracle-Regular / Hands-On Oracle Database 10g Express Edition for Windows / Steve Bobrowski / 226331-8 / Chapter 6
Chapter 6: Build an Application with Oracle Application Express 265
4. Click Breadcrumbs to copy the Breadcrumbs regions.
5. Specify 7 in the To Page field, or click the button adjacent to the To Page field and select the Database Service Requests page from the pop-up window.
6. Click Next.
7. Click Copy Region to accept the defaults for the new region.
8. Navigate to page 7 and notice that it now includes a new Breadcrumbs region to display the breadcrumbs menu.
9. Repeat the steps similar to Steps 3 through 7 to copy the Breadcrumbs region from the current page to the Create/Edit Database Service Requests page (page 8).
FIGURE 6-21. The new version of the Databases report page with a Related Links navigation menu
ch06.indd 264 6/21/06 2:00:33 PM

Oracle-Regular / Hands-On Oracle Database 10g Express Edition for Windows / Steve Bobrowski / 226331-8 / Chapter 6 Oracle-Regular / Hands-On Oracle Database 10g Express Edition for Windows / Steve Bobrowski / 226331-8 / Chapter 6
264 Hands-On Oracle Database 10g Express Edition for Windows
Oracle-Regular / Hands-On Oracle Database 10g Express Edition for Windows / Steve Bobrowski / 226331-8 / Chapter 6 Oracle-Regular / Hands-On Oracle Database 10g Express Edition for Windows / Steve Bobrowski / 226331-8 / Chapter 6
Chapter 6: Build an Application with Oracle Application Express 265
Now, both new pages have the ability to display the application’s breadcrumb menu, but will not do so until we add links for each page to the menu. To add entries (links) to the breadcrumbs menu, complete the following steps.
1. To edit the breadcrumbs menu itself, click Breadcrumb (not Breadcrumbs) in the Regions section of whatever application page definition you are currently viewing.
2. The Breadcrumb Entries page displays the existing entries for the breadcrumbs menu. Notice the hierarchical arrangement, display sequence numbers, and referenced application pages of the existing entries. The highest display sequence should be 60.
3. Click Create Breadcrumb Entry to create a new entry.
4. The Breadcrumb section of the Create/Edit Breadcrumb Entry page indicates the page on which the breadcrumb entry is current; specify 7 in the Page field, or use the pop-up window to select the page number of the Database Service Requests page.
5. The Entry section of the Create/Edit Breadcrumb Entry page indicates the details for the breadcrumb entry.
Specify a higher sequence number than 60 such as 70 in the Sequence field.
The parent page for the Database Service Requests page is the Databases page; therefore, select Databases in the Parent Entry list.
Enter Database Service Requests in both the Short Name and Long Name fields.
6. The Target section of the Create/Edit Breadcrumb Entry page specifies the page to navigate to when a user clicks the link; specify 7 in the Page field, or use the pop-up window to select the page number of the Database Service Requests page.
7. Click Create to create the new entry.
8. Notice the new entry for the Database Service Requests page in the Breadcrumb Entries page and its hierarchical arrangement relative to entry for the Databases page.
9. Repeat steps similar to Steps 3 through 8 for the Create/Edit Database Service Requests page. Make sure that the parent of the new entry is set to the Database Service Requests page. When you are finished, the breadcrumbs menu entries should appear as in Figure 6-22.
■
■
■
ch06.indd 265 6/21/06 2:00:33 PM

Oracle-Regular / Hands-On Oracle Database 10g Express Edition for Windows / Steve Bobrowski / 226331-8 / Chapter 6 Oracle-Regular / Hands-On Oracle Database 10g Express Edition for Windows / Steve Bobrowski / 226331-8 / Chapter 6
266 Hands-On Oracle Database 10g Express Edition for Windows
Oracle-Regular / Hands-On Oracle Database 10g Express Edition for Windows / Steve Bobrowski / 226331-8 / Chapter 6 Oracle-Regular / Hands-On Oracle Database 10g Express Edition for Windows / Steve Bobrowski / 226331-8 / Chapter 6
Chapter 6: Build an Application with Oracle Application Express 267
To test your new breadcrumbs menu, click Run to run the current page. The Create/Edit Database Service Request form page should appear as in Figure 6-23.
EXERCISE 6.22: Add Search and Display Controls to the New ReportThe new Database Service Requests report page lacks the search functionality that the other report pages in the application currently support. This relatively long exercise teaches you how to add the same capability to the new report page, along with a control for repagination.
The first part of the job is to create page components that facilitate the search function and repagination on the new report page; the easiest way to accomplish this task and ensure that the new report page is consistent with other report pages is to copy the components from one page to another:
FIGURE 6-22. The modified version of the SysMgmt’s breadcrumb menu
ch06.indd 266 6/21/06 2:00:33 PM

Oracle-Regular / Hands-On Oracle Database 10g Express Edition for Windows / Steve Bobrowski / 226331-8 / Chapter 6 Oracle-Regular / Hands-On Oracle Database 10g Express Edition for Windows / Steve Bobrowski / 226331-8 / Chapter 6
266 Hands-On Oracle Database 10g Express Edition for Windows
Oracle-Regular / Hands-On Oracle Database 10g Express Edition for Windows / Steve Bobrowski / 226331-8 / Chapter 6 Oracle-Regular / Hands-On Oracle Database 10g Express Edition for Windows / Steve Bobrowski / 226331-8 / Chapter 6
Chapter 6: Build an Application with Oracle Application Express 267
1. While the SysMgmt application is executing, navigate to the Databases report page any way you choose.
2. Notice that the Databases report contains four different items to support the search and display functionality: a Reset button to clear nondefault display settings; a Search text field where you can enter search string criteria; a Display list to control how many records the report displays; and a Go button to update the display of the report based on the settings of the previously mentioned two items. Your goal is to duplicate this functionality on the Database Service Requests report page.
3. Click Edit Page 3 in the Developer’s toolbar to display the current page’s definition.
FIGURE 6-23. The modified Create/Edit Database Service Request page with a breadcrumbs menu
ch06.indd 267 6/21/06 2:00:34 PM

Oracle-Regular / Hands-On Oracle Database 10g Express Edition for Windows / Steve Bobrowski / 226331-8 / Chapter 6 Oracle-Regular / Hands-On Oracle Database 10g Express Edition for Windows / Steve Bobrowski / 226331-8 / Chapter 6
268 Hands-On Oracle Database 10g Express Edition for Windows
Oracle-Regular / Hands-On Oracle Database 10g Express Edition for Windows / Steve Bobrowski / 226331-8 / Chapter 6 Oracle-Regular / Hands-On Oracle Database 10g Express Edition for Windows / Steve Bobrowski / 226331-8 / Chapter 6
Chapter 6: Build an Application with Oracle Application Express 269
4. To copy the RESET button, complete the following steps:
a. Notice that the RESET button appears in the report region of page 3. This is the region where the button should be on page 7.
b. Click the Copy icon in the upper-right corner of the Buttons section.
c. Click RESET to copy the RESET button.
d. Specify 7 in the Target Page field (or use the pop-up window to select the Database Service Requests page).
e. Click Next.
f. Specify RESET in the Button Name field.
g. Specify Reset in the Label field.
h. Select Database Service Requests in the Region list.
i. To make the new RESET button appear before the CREATE button in the same region, specify 5 in the Sequence field.
j. Click Copy Button.
5. To copy the P3_REPORT_SEARCH text field, complete the following steps:
a. Notice that the P3_REPORT_SEARCH text field appears in the report region of page 3. This is the region where the text field should be on page 7.
b. Click the Copy icon in the upper-right corner of the Items section.
c. Click P3_REPORT_SEARCH to copy the P3_REPORT_SEARCH text field.
d. Specify 7 in the Target Page field.
e. Click Next.
f. Specify P7_REPORT_SEARCH in the Item Name field. Notice that the prefix for the text field’s name reflects the page on which it exists (P7_).
g. Specify Search in the Label field.
h. Select Database Service Requests in the Region list.
i. Specify 10 in the Sequence field.
j. The text field is used to enter search criteria. Therefore, select Static Assignment (value equals source attribute) in the Source Type list.
k. Click Copy Item.
ch06.indd 268 6/21/06 2:00:34 PM

Oracle-Regular / Hands-On Oracle Database 10g Express Edition for Windows / Steve Bobrowski / 226331-8 / Chapter 6 Oracle-Regular / Hands-On Oracle Database 10g Express Edition for Windows / Steve Bobrowski / 226331-8 / Chapter 6
268 Hands-On Oracle Database 10g Express Edition for Windows
Oracle-Regular / Hands-On Oracle Database 10g Express Edition for Windows / Steve Bobrowski / 226331-8 / Chapter 6 Oracle-Regular / Hands-On Oracle Database 10g Express Edition for Windows / Steve Bobrowski / 226331-8 / Chapter 6
Chapter 6: Build an Application with Oracle Application Express 269
6. To copy the P3_ROWS select list, complete the following steps:
a. Notice that the P3_ROWS select list appears in the report region of page 3. This is the region where the select list should be on page 7.
b. Click the Copy icon in the upper-right corner of the Items section.
c. Click P3_ROWS to copy the P3_ROWS select list.
d. Specify 7 in the Target Page field.
e. Click Next.
f. Specify P7_ROWS in the Item Name field. Notice that the prefix for the text field’s name reflects the page on which it exists (P7_).
g. Specify Display in the Label field.
h. Select Database Service Requests in the Region list.
i. Specify 20 in the Sequence field.
j. Do not modify the copied settings for the Source Type list and Source fields, which should be Static Assignment and 15, respectively.
k. Click Copy Item.
7. To copy the P3_GO button, complete the following steps:
a. Notice that the P3_GO button appears in the report region of page 3. This is the region where the button should be on page 7.
b. Click the Copy icon in the upper-right corner of the Items section.
c. Click P3_GO to copy the P3_GO button.
d. Specify 7 in the Target Page field.
e. Click Next.
f. Specify P7_GO in the Item Name field. Notice that the prefix for the text field’s name reflects the page on which it exists (P7_).
g. Specify Go in the Label field.
h. Select Database Service Requests in the Region list.
i. Specify 30 in the Sequence field.
j. The Source Type list determines what the button does when it is clicked. Select Static Assignment so that the button assigns a value when it is clicked.
ch06.indd 269 6/21/06 2:00:34 PM

Oracle-Regular / Hands-On Oracle Database 10g Express Edition for Windows / Steve Bobrowski / 226331-8 / Chapter 6 Oracle-Regular / Hands-On Oracle Database 10g Express Edition for Windows / Steve Bobrowski / 226331-8 / Chapter 6
270 Hands-On Oracle Database 10g Express Edition for Windows
Oracle-Regular / Hands-On Oracle Database 10g Express Edition for Windows / Steve Bobrowski / 226331-8 / Chapter 6 Oracle-Regular / Hands-On Oracle Database 10g Express Edition for Windows / Steve Bobrowski / 226331-8 / Chapter 6
Chapter 6: Build an Application with Oracle Application Express 271
k. The Source field determines the value to assign based on the setting of the Source Type list. Specify Go in the Source field.
l. Click Copy Item.
8. Navigate from the definition of page 3 to the definition of page 7: specify 7 in the Page field in the upper-left corner of the page definition page and then click Go.
9. Notice the items recently copied to this page (page 7), as shown in Figure 6-24.
To support the search functionality, the next part of the job is to modify the report’s query so that it takes into account the current value of the new P7_REPORT_SEARCH field. To do this, modify the report query by adding a WHERE clause using
FIGURE 6-24. The modified Database Service Requests report page with copied items
ch06.indd 270 6/21/06 2:00:35 PM
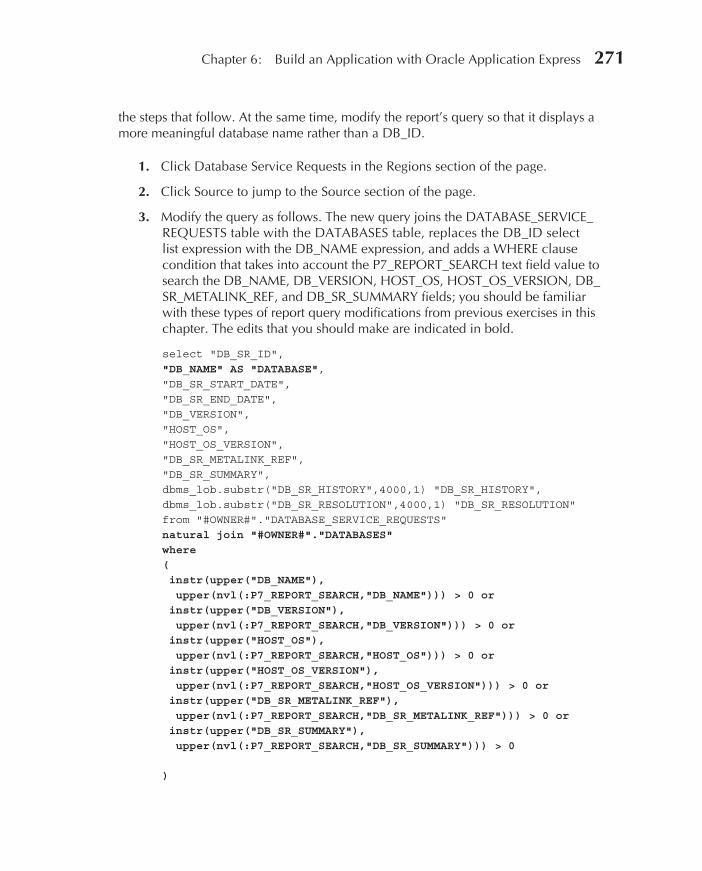
Oracle-Regular / Hands-On Oracle Database 10g Express Edition for Windows / Steve Bobrowski / 226331-8 / Chapter 6 Oracle-Regular / Hands-On Oracle Database 10g Express Edition for Windows / Steve Bobrowski / 226331-8 / Chapter 6
270 Hands-On Oracle Database 10g Express Edition for Windows
Oracle-Regular / Hands-On Oracle Database 10g Express Edition for Windows / Steve Bobrowski / 226331-8 / Chapter 6 Oracle-Regular / Hands-On Oracle Database 10g Express Edition for Windows / Steve Bobrowski / 226331-8 / Chapter 6
Chapter 6: Build an Application with Oracle Application Express 271
the steps that follow. At the same time, modify the report’s query so that it displays a more meaningful database name rather than a DB_ID.
1. Click Database Service Requests in the Regions section of the page.
2. Click Source to jump to the Source section of the page.
3. Modify the query as follows. The new query joins the DATABASE_SERVICE_REQUESTS table with the DATABASES table, replaces the DB_ID select list expression with the DB_NAME expression, and adds a WHERE clause condition that takes into account the P7_REPORT_SEARCH text field value to search the DB_NAME, DB_VERSION, HOST_OS, HOST_OS_VERSION, DB_SR_METALINK_REF, and DB_SR_SUMMARY fields; you should be familiar with these types of report query modifications from previous exercises in this chapter. The edits that you should make are indicated in bold.
select "DB_SR_ID",
"DB_NAME" AS "DATABASE",
"DB_SR_START_DATE",
"DB_SR_END_DATE",
"DB_VERSION",
"HOST_OS",
"HOST_OS_VERSION",
"DB_SR_METALINK_REF",
"DB_SR_SUMMARY",
dbms_lob.substr("DB_SR_HISTORY",4000,1) "DB_SR_HISTORY",
dbms_lob.substr("DB_SR_RESOLUTION",4000,1) "DB_SR_RESOLUTION"
from "#OWNER#"."DATABASE_SERVICE_REQUESTS"
natural join "#OWNER#"."DATABASES"
where
(
instr(upper("DB_NAME"),
upper(nvl(:P7_REPORT_SEARCH,"DB_NAME"))) > 0 or
instr(upper("DB_VERSION"),
upper(nvl(:P7_REPORT_SEARCH,"DB_VERSION"))) > 0 or
instr(upper("HOST_OS"),
upper(nvl(:P7_REPORT_SEARCH,"HOST_OS"))) > 0 or
instr(upper("HOST_OS_VERSION"),
upper(nvl(:P7_REPORT_SEARCH,"HOST_OS_VERSION"))) > 0 or
instr(upper("DB_SR_METALINK_REF"),
upper(nvl(:P7_REPORT_SEARCH,"DB_SR_METALINK_REF"))) > 0 or
instr(upper("DB_SR_SUMMARY"),
upper(nvl(:P7_REPORT_SEARCH,"DB_SR_SUMMARY"))) > 0
)
ch06.indd 271 6/21/06 2:00:35 PM

Oracle-Regular / Hands-On Oracle Database 10g Express Edition for Windows / Steve Bobrowski / 226331-8 / Chapter 6 Oracle-Regular / Hands-On Oracle Database 10g Express Edition for Windows / Steve Bobrowski / 226331-8 / Chapter 6
272 Hands-On Oracle Database 10g Express Edition for Windows
Oracle-Regular / Hands-On Oracle Database 10g Express Edition for Windows / Steve Bobrowski / 226331-8 / Chapter 6 Oracle-Regular / Hands-On Oracle Database 10g Express Edition for Windows / Steve Bobrowski / 226331-8 / Chapter 6
Chapter 6: Build an Application with Oracle Application Express 273
Next, bind the Display list to control the number of rows that the report displays at any given time. To do this, complete the following steps:
1. Scroll to the top of the page and click the Report Attributes tab. Oracle Application Express implicitly saves your report definition modifications.
2. Click Layouts and Pagination to jump to the Layouts and Pagination section.
3. Specify P7_ROWS in the Number of Rows (Item) field to link the setting of the P7_ROWS select list to the number of rows to display on the report page.
4. Click Apply Changes to save your work.
At this point, all of the controls necessary to control the display of rows in the report are built and configured. However, items that control application behavior, such as buttons, do not know what actions to perform until you build associated processes and branches that explicitly explain what to do when a user utilizes each control. A page process does something when Oracle Application Express renders or submits a page. For example, when you reset a report page, a process can repaginate the report so that the report displays the original result set of the report. A branch forks application processing to display a page or URL, or execute a PL/SQL procedure. For example, to reset a report page’s display after entering some search criteria or changing the number of rows to display, the page can create and use a branch back to itself.
To code the desired behavior for the new controls in the Database Service Requests report, the following processes and branch are necessary:
When the user clicks the Go button (P7_GO) to submit a page, a process must repaginate the report to display the first set of rows in the result set.
When a user clicks the Reset button (RESET) to submit a page, a process must reset the Search field (P7_REPORT_SEARCH) and Display list (P7_ROWS) to their default settings.
In the previous two scenarios, when the Database Service Requests report submits, the page branches back to itself.
Complete the following steps to create a process that resets the Database Service Requests report when someone clicks the P7_GO button:
1. On the page definition page for the Database Service Requests report, click Create in the Processes section to create a new process.
2. Click Reset Repagination.
3. The process should take place after submitting the page; therefore, select On Submit – After Computations and Validations from the Point select list.
■
■
■
ch06.indd 272 6/21/06 2:00:35 PM

Oracle-Regular / Hands-On Oracle Database 10g Express Edition for Windows / Steve Bobrowski / 226331-8 / Chapter 6 Oracle-Regular / Hands-On Oracle Database 10g Express Edition for Windows / Steve Bobrowski / 226331-8 / Chapter 6
272 Hands-On Oracle Database 10g Express Edition for Windows
Oracle-Regular / Hands-On Oracle Database 10g Express Edition for Windows / Steve Bobrowski / 226331-8 / Chapter 6 Oracle-Regular / Hands-On Oracle Database 10g Express Edition for Windows / Steve Bobrowski / 226331-8 / Chapter 6
Chapter 6: Build an Application with Oracle Application Express 273
4. Specify Reset Pagination – Go Button for the Name field.
5. Specify 10 for the Sequence field.
6. The new process should execute whenever someone clicks the Go button; therefore, select P7_GO for the When Button Pressed select list.
7. The new process should unconditionally fire whenever someone clicks the P7_GO button; therefore, select Process Not Conditional from the Condition Type list.
8. Click Create Process.
Complete the following steps to create a process that resets the settings of the P7_REPORT_SEARCH field and P7_ROWS list to their default values when someone clicks the RESET button:
1. On the page definition page for the Database Service Requests report, click Create in the Processes section to create a new process.
2. Click Session State.
3. The process is necessary to clear the settings of values currently cached by Oracle Application Express for the previously mentioned page items; therefore, select the Clear Cache for Items (ITEM,ITEM,ITEM) option and then click Next.
4. Specify Reset Display for the Name field.
5. Specify 20 for the Sequence field.
6. The process should take place after submitting the page; therefore, select On Submit – After Computations and Validations from the Point select list.
7. Click Next.
8. Notice the required syntax for specifying the page items that you want to clear (comma separated, no spaces). Specify P7_REPORT_SEARCH,P7_ROWS.
9. Click Next.
10. Oracle Application Express can display a different message when the process succeeds or fails. Specify Page reset. for the Success Message field; specify Reset failed. for the Failure Message field.
11. Click Next.
12. The new process should execute whenever someone clicks the Reset button; therefore, select RESET for the When Button Pressed select list.
ch06.indd 273 6/21/06 2:00:35 PM

Oracle-Regular / Hands-On Oracle Database 10g Express Edition for Windows / Steve Bobrowski / 226331-8 / Chapter 6 Oracle-Regular / Hands-On Oracle Database 10g Express Edition for Windows / Steve Bobrowski / 226331-8 / Chapter 6
274 Hands-On Oracle Database 10g Express Edition for Windows
Oracle-Regular / Hands-On Oracle Database 10g Express Edition for Windows / Steve Bobrowski / 226331-8 / Chapter 6 Oracle-Regular / Hands-On Oracle Database 10g Express Edition for Windows / Steve Bobrowski / 226331-8 / Chapter 6
Chapter 6: Build an Application with Oracle Application Express 275
13. The new process should unconditionally fire whenever someone clicks the RESET button; therefore, select Process Not Conditional from the Condition Type list.
14. Click Create Process.
Complete the following steps to create a branch that “reloads” the Database Service Requests page:
1. On the page definition page for the Database Service Requests report, click Create in the Branches section to create a new branch.
2. The branch should take place after submitting the page; therefore, select On Submit – After Computations and Validations from the Branch Point select list.
3. The branch target is a page in the application; therefore, select Branch to Page from the Branch Type select list.
4. Click Next.
5. The branch target is the Database Service Requests report page itself, which should be page 7; therefore, specify 7 in the Branch to Page field (or use the pop-up window to select the page).
6. Click Next.
7. Do not associate the branch with a particular button; select Select Button from the When Button Pressed select list.
8. Click Create Branch.
Finally, it’s time to test the new display functionality on the Database Service Requests report page. Click Run and then test the Search field, Display list, and Go and Reset buttons to make sure that they work just as they do on the other report pages of the application. For example:
Specify 598 in the Search field and then click Go. The report should only display the database service request that has the MetaLink reference 5983257.1.
Specify 582 in the Search field and then click Go. The report should only display the database service request that has the MetaLink reference 5823552.1.
Click Reset. The report should display both records in the table.
■
■
■
ch06.indd 274 6/21/06 2:00:36 PM

Oracle-Regular / Hands-On Oracle Database 10g Express Edition for Windows / Steve Bobrowski / 226331-8 / Chapter 6 Oracle-Regular / Hands-On Oracle Database 10g Express Edition for Windows / Steve Bobrowski / 226331-8 / Chapter 6
274 Hands-On Oracle Database 10g Express Edition for Windows
Oracle-Regular / Hands-On Oracle Database 10g Express Edition for Windows / Steve Bobrowski / 226331-8 / Chapter 6 Oracle-Regular / Hands-On Oracle Database 10g Express Edition for Windows / Steve Bobrowski / 226331-8 / Chapter 6
Chapter 6: Build an Application with Oracle Application Express 275
More thorough testing is appropriate: for example, make sure that the new search functionality correctly filters data from the report for all fields that are searchable.
EXERCISE 6.23: Add an Analysis Page to the ApplicationJust when you think everything is perfect, another new enhancement request appears: the DBAs would like a page that summarizes information about the versions of Oracle that are deployed in the environment so that they can better track their migration project from Oracle9i to Oracle Database 10g. This exercise shows you how to add a chart to the application and demonstrates how to extend the Related Links navigation menu on the Databases page.
To add a new Chart page to the application that summarizes the versions of Oracle currently in use, complete the following steps:
1. Click Edit Application in the Developer’s toolbar.
2. Click Create Page.
3. Click Chart.
4. The DBAs want exact numbers of each version of Oracle that is deployed. Considering this requirement, click “Bar, Vertical.”
5. Specify the next available page number in the Page field, which should be page 9.
6. Specify Database Versions in Use in the Page Name field.
7. Select Chart Region in the Region Template list.
8. Specify Chart in the Region Name field.
9. Do not modify the default setting in the Chart Color Theme list.
10. Click Next.
11. Select “Use an existing tab set and reuse an existing tab within that tab set.”
12. Select TS1 in the Tab Set list.
13. Click Next.
14. The information in this new chart is related to databases; therefore, select T_DATABASES in the Use Tab list.
15. Click Next.
ch06.indd 275 6/21/06 2:00:36 PM

Oracle-Regular / Hands-On Oracle Database 10g Express Edition for Windows / Steve Bobrowski / 226331-8 / Chapter 6 Oracle-Regular / Hands-On Oracle Database 10g Express Edition for Windows / Steve Bobrowski / 226331-8 / Chapter 6
276 Hands-On Oracle Database 10g Express Edition for Windows
Oracle-Regular / Hands-On Oracle Database 10g Express Edition for Windows / Steve Bobrowski / 226331-8 / Chapter 6 Oracle-Regular / Hands-On Oracle Database 10g Express Edition for Windows / Steve Bobrowski / 226331-8 / Chapter 6
Chapter 6: Build an Application with Oracle Application Express 277
16. Use the Identify Query page of the wizard to specify a query that returns the data for the new chart. Oracle Application Express expects the first SELECT list expression to be used as link text (to drill down for more information), the second expression to be used as the data label, and the third expression to be the data value; to see an example, click the Query Example link below the wizard form. For the purposes of this exercise, specify the following query in the SQL field. Notice that the first expression in the SELECT list returns NULL for every row (links are not required), and that the other two expressions in the SELECT list declare column aliases so that the labels in the chart are more comprehensible.
SELECT NULL, db_version as "DATABASE VERSION",
count(db_version) AS "NUMBER"
FROM handsonxe06.databases
GROUP BY db_version
17. Click Next.
18. Confirm your settings, and then click Finish.
19. Click Run Page to see the initial version of the new Database Versions in Use page, which should appear as shown in Figure 6-25.
NOTECertain web browsers such as Mozilla Firefox may not be able to display charts generated by Oracle Application Express until after you install an SVG plug-in.
The application’s new Database Versions in Use page looks great. However, the page has similar navigation problems as when you added the other new pages to the application. To modify the Related Links navigation menu on the Databases page, complete the following steps:
1. Click Edit Application in the Developer’s toolbar.
2. Navigate to the Databases page.
3. Click LINKS_1 in the Lists section to modify the list.
4. Click Create List Entry.
5. Select No Parent Entry in the Parent List Entry list.
6. Specify 20 in the Sequence field.
7. Specify Database Versions Summary in the List Entry Label field.
ch06.indd 276 6/21/06 2:00:36 PM

Oracle-Regular / Hands-On Oracle Database 10g Express Edition for Windows / Steve Bobrowski / 226331-8 / Chapter 6 Oracle-Regular / Hands-On Oracle Database 10g Express Edition for Windows / Steve Bobrowski / 226331-8 / Chapter 6
276 Hands-On Oracle Database 10g Express Edition for Windows
Oracle-Regular / Hands-On Oracle Database 10g Express Edition for Windows / Steve Bobrowski / 226331-8 / Chapter 6 Oracle-Regular / Hands-On Oracle Database 10g Express Edition for Windows / Steve Bobrowski / 226331-8 / Chapter 6
Chapter 6: Build an Application with Oracle Application Express 277
8. Specify 9 in the Page field of the Target section (or use the pop-up window to select the Database Versions in Use page).
9. Click Create.
To create a new entry in the breadcrumbs menu, complete the following steps:
1. Navigate to the main SysMgmt application page.
2. Click Shared Components.
3. Click Breadcrumbs.
4. Click Breadcrumb.
5. Click Create Breadcrumb Entry.
6. Specify 9 in the Page field of the Breadcrumb section (or use the pop-up window to select the Database Versions in Use page).
FIGURE 6-25. The initial version of the Database Versions in Use page
ch06.indd 277 6/21/06 2:00:36 PM

Oracle-Regular / Hands-On Oracle Database 10g Express Edition for Windows / Steve Bobrowski / 226331-8 / Chapter 6 Oracle-Regular / Hands-On Oracle Database 10g Express Edition for Windows / Steve Bobrowski / 226331-8 / Chapter 6
278 Hands-On Oracle Database 10g Express Edition for Windows
Oracle-Regular / Hands-On Oracle Database 10g Express Edition for Windows / Steve Bobrowski / 226331-8 / Chapter 6 Oracle-Regular / Hands-On Oracle Database 10g Express Edition for Windows / Steve Bobrowski / 226331-8 / Chapter 6
Chapter 6: Build an Application with Oracle Application Express 279
7. Specify 90 in the Sequence field.
8. Select Databases in the Parent Entry list.
9. Specify Database Versions Summary in the both the Short Name and Long Name fields.
10. Specify 9 in the Page field of the Target section (or use the pop-up window to select the Database Versions in Use page).
11. Click Create.
To copy the breadcrumbs menu to the new page, complete the following steps:
1. Navigate to the main SysMgmt application page.
2. Click any page other than the new Database Versions in Use page.
FIGURE 6-26. The updated Related Links menu of the Databases page
ch06.indd 278 6/21/06 2:00:37 PM

Oracle-Regular / Hands-On Oracle Database 10g Express Edition for Windows / Steve Bobrowski / 226331-8 / Chapter 6 Oracle-Regular / Hands-On Oracle Database 10g Express Edition for Windows / Steve Bobrowski / 226331-8 / Chapter 6
278 Hands-On Oracle Database 10g Express Edition for Windows
Oracle-Regular / Hands-On Oracle Database 10g Express Edition for Windows / Steve Bobrowski / 226331-8 / Chapter 6 Oracle-Regular / Hands-On Oracle Database 10g Express Edition for Windows / Steve Bobrowski / 226331-8 / Chapter 6
Chapter 6: Build an Application with Oracle Application Express 279
3. Click the Copy icon in the upper-right corner of the Regions section.
4. Click Breadcrumbs to copy the Breadcrumbs regions.
5. Specify 9 in the To Page field, or click its adjacent button and select the Database Versions in Use page from the pop-up window.
6. Click Next.
7. Click Copy Region to accept the defaults for the new region.
Now test the new navigation functionality to and from the Database Versions in Use page. The Databases page should appear as shown in Figure 6-26 (on the opposite page).
The Database Versions in Use page should now have a breadcrumb menu, as shown in Figure 6-27.
FIGURE 6-27. The updated Database Versions in Use page with the breadcrumbs menu
ch06.indd 279 6/21/06 2:00:37 PM

Oracle-Regular / Hands-On Oracle Database 10g Express Edition for Windows / Steve Bobrowski / 226331-8 / Chapter 6 Oracle-Regular / Hands-On Oracle Database 10g Express Edition for Windows / Steve Bobrowski / 226331-8 / Chapter 6
280 Hands-On Oracle Database 10g Express Edition for Windows
Oracle-Regular / Hands-On Oracle Database 10g Express Edition for Windows / Steve Bobrowski / 226331-8 / Chapter 6 Oracle-Regular / Hands-On Oracle Database 10g Express Edition for Windows / Steve Bobrowski / 226331-8 / Chapter 6
Chapter 6: Build an Application with Oracle Application Express 281
Deploying the ApplicationOnce you finish building, testing, and tweaking an Oracle Application Express application, you can deploy it whenever necessary. The first choice you have to make is where you want to deploy the application. Oracle Application Express has facilities that make it easy to deploy an application wherever Oracle Application Express and Oracle are available. The exercises in this section teach you how to put an application into “production” mode on the same computer that you are using to develop the application, and how to move an application from a development environment to a production server.
EXERCISE 6.24: Modify Application Attributes for DeploymentIt’s a trivial task to deploy an Oracle Application Express application on the same computer that you use to develop the application: all that is necessary is the modification of a few simple application attributes. For example, complete the following steps to deploy the example SysMgmt application on the same computer that you have used to develop the application:
1. Navigate to the application’s main page.
2. Click Edit Attributes.
3. Click Edit Standard Attributes.
4. Use the Standard Attributes page to modify basic application settings such as the application’s name, version number, and availability. For the purposes of this brief exercise, focus on the following settings:
Specify SysMgmt in the Application Alias field. You can use this alias or the application ID in a URL when you want to run the application.
The setting of the Status list controls whether the application is available for use. For example, select Available to make the application available to all types of users but without the Developer’s toolbar; select Available with Edit Links to make the application available to all types of users with the Developer’s toolbar; and select Available to Developer’s Only to make the application available only to users who have developer privileges. See the online help system or the Oracle Application Express User’s Guide for more information about other options of the Status list. For the purposes of this exercise, select Available.
The setting of the Build Status list determines whether the application is still in development or not; specify Run and Build Application for the purposes of this exercise.
5. Click Apply Changes.
■
■
■
ch06.indd 280 6/21/06 2:00:37 PM

Oracle-Regular / Hands-On Oracle Database 10g Express Edition for Windows / Steve Bobrowski / 226331-8 / Chapter 6 Oracle-Regular / Hands-On Oracle Database 10g Express Edition for Windows / Steve Bobrowski / 226331-8 / Chapter 6
280 Hands-On Oracle Database 10g Express Edition for Windows
Oracle-Regular / Hands-On Oracle Database 10g Express Edition for Windows / Steve Bobrowski / 226331-8 / Chapter 6 Oracle-Regular / Hands-On Oracle Database 10g Express Edition for Windows / Steve Bobrowski / 226331-8 / Chapter 6
Chapter 6: Build an Application with Oracle Application Express 281
To test the execution of the application, complete the following steps:
1. Click Logout to end your current session.
2. Load the application’s URL in your web browser using the application’s ID or the alias that you previously set. For example, load the following URL:
http://127.0.0.1:8080/apex/f?p=SysMgmt
3. Specify HANDSONXE06 in the User Name field and PASSWORD in the Password field, and then click Login.
4. Feel free to navigate and use the application. As you use the application, notice that the Developer’s toolbar is no longer available.
When you need to modify an application that is Available with a Build Status set to Run and Build Application, launch the Database Home Page, log in, and then use the Application Builder to load and modify the application.
EXERCISE 6.25: Deploy the Application on Another ComputerIn the real world, it’s unlikely that you will deploy a production Oracle Application Express application on the same computer that you use to develop it. Fortunately, it is very easy to copy an Oracle Application Express application from one computer to another for deployment. The steps in this exercise demonstrate this process.
When you create an application with Oracle Application Express, you are creating metadata in database tables that Oracle Application Express can use to dynamically generate the application’s web pages and logic at run time. Moving an application from one computer to another requires nothing more than exporting the application’s metadata and importing it into another Oracle database.
To copy an application, two primary steps are necessary: generate a SQL DDL script that you can use to create the application’s schema, and export and import the application’s metadata. If two computers are available to you with Oracle XE, or you would like to simulate the application copy process by creating a second version of the SysMgmt application on your development computer, use the steps in this exercise.
To quickly generate a SQL DDL script that can build the current version of the HANDSONXE06 schema, complete the following steps:
1. Start a web browser on the computer targeted for application deployment. This exercise assumes that Oracle XE is installed and started on the target computer, or that Oracle Application Express 2.x and a supporting version of Oracle are installed and started on the target computer.
2. Launch the Database Home Page on the development computer (not the target computer) and log in as HANDSONXE06.
ch06.indd 281 6/21/06 2:00:37 PM

Oracle-Regular / Hands-On Oracle Database 10g Express Edition for Windows / Steve Bobrowski / 226331-8 / Chapter 6 Oracle-Regular / Hands-On Oracle Database 10g Express Edition for Windows / Steve Bobrowski / 226331-8 / Chapter 6
282 Hands-On Oracle Database 10g Express Edition for Windows
Oracle-Regular / Hands-On Oracle Database 10g Express Edition for Windows / Steve Bobrowski / 226331-8 / Chapter 6 Oracle-Regular / Hands-On Oracle Database 10g Express Edition for Windows / Steve Bobrowski / 226331-8 / Chapter 6
Chapter 6: Build an Application with Oracle Application Express 283
3. Click Utilities.
4. Click Generate DDL.
5. Click Create Script.
6. Click Next.
7. Select all Object Type options.
8. Use either of the following techniques to create a SQL script on the target computer:
Select Display Inline from the Output options, click Generate DDL, copy the contents of the output from your clipboard into a text editor, and then save it as a simple text file that is available within the target computer’s file system.
Select Save as Script File from the Output options, click Generate DDL, specify a name for the script (for example, sysmgmt_ddl), and click Create Script; this process generates a script in the Oracle Application Express repository (not in your file system). From the SQL Scripts page, click the new script, click Download, and then specify a filename that is valid for a file system available to the target computer.
Complete the following steps to export the SysMgmt application itself:
1. Click Home.
2. Click Application Builder.
3. Click SysMgmt.
4. Click Export/Import.
5. Click Export.
6. Do not modify the default settings for the application export; click Export Application.
7. Use your browser to save the generated SQL script to a file system available to the target computer.
At this point, you have two SQL scripts that you can use to deploy the application on any computer on which Oracle Application Express is available. Complete the following steps to use the scripts for application deployment:
■
■
ch06.indd 282 6/21/06 2:00:38 PM

Oracle-Regular / Hands-On Oracle Database 10g Express Edition for Windows / Steve Bobrowski / 226331-8 / Chapter 6 Oracle-Regular / Hands-On Oracle Database 10g Express Edition for Windows / Steve Bobrowski / 226331-8 / Chapter 6
282 Hands-On Oracle Database 10g Express Edition for Windows
Oracle-Regular / Hands-On Oracle Database 10g Express Edition for Windows / Steve Bobrowski / 226331-8 / Chapter 6 Oracle-Regular / Hands-On Oracle Database 10g Express Edition for Windows / Steve Bobrowski / 226331-8 / Chapter 6
Chapter 6: Build an Application with Oracle Application Express 283
1. Click Logout to end your Oracle Application Express session on the development computer.
2. Launch the Database Home Page on the target computer.
3. Create the HANDSONXE06 user/schema in the target database to support the SysMgmt application. You can use this chapter’s support script, chap06.sql, to quickly carry out this step. If you are creating a second version of the SysMgmt application on the development computer, skip this step.
4. Using steps similar to those in Exercise 6.1, upload and run the SQL script that contains the DDL statement necessary to create the application schema in the target database’s HANDSONXE06 schema.
Complete the following steps to import the SysMgmt application into the target computer’s Oracle Application Express repository:
1. Click Home.
2. Click Application Builder.
3. Click Import.
4. Click Browse and navigate your file system to select the SQL script that contains the SysMgmt application’s metadata.
5. Click Next.
6. Click Install.
7. After the application installs, click Run Application to test the application on the target computer.
Managing Application Access and Application UsersApplication deployment is not complete until after you grant application access to users that plan to utilize the application. The authentication scheme that you choose for an application dictates what you need to do in order to provide user access to the application. A complete discussion of the authentication schemes that Oracle Application Express supports is beyond the scope of this chapter. However, this short section demonstrates the steps necessary to manage user access to the example SysMgmt application that uses the Application Express Authentication scheme.
ch06.indd 283 6/21/06 2:00:38 PM

Oracle-Regular / Hands-On Oracle Database 10g Express Edition for Windows / Steve Bobrowski / 226331-8 / Chapter 6 Oracle-Regular / Hands-On Oracle Database 10g Express Edition for Windows / Steve Bobrowski / 226331-8 / Chapter 6
284 Hands-On Oracle Database 10g Express Edition for Windows
Oracle-Regular / Hands-On Oracle Database 10g Express Edition for Windows / Steve Bobrowski / 226331-8 / Chapter 6 Oracle-Regular / Hands-On Oracle Database 10g Express Edition for Windows / Steve Bobrowski / 226331-8 / Chapter 6
Chapter 6: Build an Application with Oracle Application Express 285
EXERCISE 6.26: Create an Application Express UserWhen an application uses the Application Express Authentication scheme, you manage application access with Application Express end-user accounts. Application Express end users do not have the privileges for application development, and can only access applications that do not use an external authentication scheme.
To create an Application Express user account, complete the following steps:
1. Log out of the application if it is executing.
2. Launch the Database Home Page.
3. Log in as HANDSONXE06.
4. Click Application Builder.
5. Click Manage Application Express Users.
6. Click Create User.
7. Specify STEVE in the User Name field.
8. Specify PASSWORD in the Password field. Specify the same password in the Confirm Password field. Note that Application Express end-user account passwords are case sensitive.
9. Specify [email protected] in the Email Address field.
10. Click Create User.
11. Repeat steps similar to Steps 6 through 10 for as many users as you need to create.
To test the new user account with the SysMgmt application, complete the following steps:
1. Click Logout.
2. Start the application with the application’s URL. For example:
http://myserver:8080/f?p=SysMgmt
3. Log in using the new user account.
Chapter SummaryThis chapter has been a brief introduction to the application development process, with special focus on Oracle Application Express. You learned the following concepts:
ch06.indd 284 6/21/06 2:00:38 PM

Oracle-Regular / Hands-On Oracle Database 10g Express Edition for Windows / Steve Bobrowski / 226331-8 / Chapter 6 Oracle-Regular / Hands-On Oracle Database 10g Express Edition for Windows / Steve Bobrowski / 226331-8 / Chapter 6
284 Hands-On Oracle Database 10g Express Edition for Windows
Oracle-Regular / Hands-On Oracle Database 10g Express Edition for Windows / Steve Bobrowski / 226331-8 / Chapter 6 Oracle-Regular / Hands-On Oracle Database 10g Express Edition for Windows / Steve Bobrowski / 226331-8 / Chapter 6
Chapter 6: Build an Application with Oracle Application Express 285
The application development lifecycle (ADLC) includes analysis, design, implementation, test, deployment, and maintenance stages.
Software modeling with Unified Modeling Language (UML) diagrammers can greatly improve the efficiency and effectiveness of the design stage. Structure diagrams such as class diagrams illustrate the static structure of the system that you are modeling. Behavior diagrams such as use case diagrams show the dynamic interaction of system components.
To build an application schema quickly, you can use Oracle XE to upload and run SQL scripts generated from UML class diagrams.
Oracle XE can easily load data from structured data file formats such as comma-separated values, tab-delimited fields, and XML files generated by spreadsheet and PC database programs.
The component of Oracle Application Express that you use to build web-based applications is called the Application Builder. The many wizards of the Application Builder make it easy to quickly build web pages for reports, forms, and charts based on an Oracle database.
An Oracle Application Express application is generated at run time from metadata in a database. Deploying an application from one computer to another requires nothing more than exporting the application’s metadata and importing it into another Oracle database.
■
■
■
■
■
■
ch06.indd 285 6/21/06 2:00:38 PM