brand drywall finishing products construction guide€¦ · brand drywall finishing products...
TRANSCRIPT

ProForm®
BRAND
Drywall Finishing ProductsConstruction Guide
09 29 00/NGC

2
SECTION PAGE
GREENGUARD Indoor Air Quality Certified® . . . . . . . . . . .2
Ready Mix Products . . . . . . . . . . . . . . . . . . . . . . . . . . . . . . . . . . .3
Effects of Environmental Conditions on Drying Times . . . . . .7
Setting Compounds . . . . . . . . . . . . . . . . . . . . . . . . . . . . . . . . . . . .8
Tapes . . . . . . . . . . . . . . . . . . . . . . . . . . . . . . . . . . . . . . . . . . . . . . .10
Materials Estimating & Coverage Information . . . . . . . . . . . .11
Texture Products . . . . . . . . . . . . . . . . . . . . . . . . . . . . . . . . . . . . .12
Five Levels of Finish . . . . . . . . . . . . . . . . . . . . . . . . . . . . . . . . . .14
Problems and Solutions . . . . . . . . . . . . . . . . . . . . . . . . . . . . . . .16
Glossary . . . . . . . . . . . . . . . . . . . . . . . . . . . . . . . . . . . . . . . . . . . .21
Submittal Sheet information . . . . . . . . . . . . . . . . . . . . . . . . . . .23
Table of Contents
Research indicates Americanadults spend up to 90 percent of their time indoors, and thatindoor air is two to five timesmore polluted than outdoor air.That’s why National Gypsum hasachieved GREENGUARD Indoor Air Quality Certified® statusand/or GREENGUARD Children &Schools CertificationSM for itscomplete line of ProForm®
BRAND
ready-mixed joint compounds.
The GREENGUARD CertificationProgramSM is an industry indepen-dent, third-party program thathas been certifying products forlow non-toxic emissions since2001. To achieve GREENGUARDIndoor Air Quality Certified status,National Gypsum’s productspassed rigorous sample testingand review of the manufacturingprocesses to meet strict standardsset by the GREENGUARDEnvironmental Institute (GEI) – aglobally recognized leader in indoorair quality – to determine theirimpact on indoor air pollution.
The GREENGUARD Indoor Air Quality Certified Mark is a registered certification markused under license through the GREENGUARD Environmental Institute.
Improving indoor air quality to protect the health and
safety of building occupants and meeting the criteria for
LEED certification requires a higher standard of quality
and performance. National Gypsum is focused on providing
innovative solutions for sustainable design and green
building practices.
3
ProForm®BRAND
Ready Mix Products
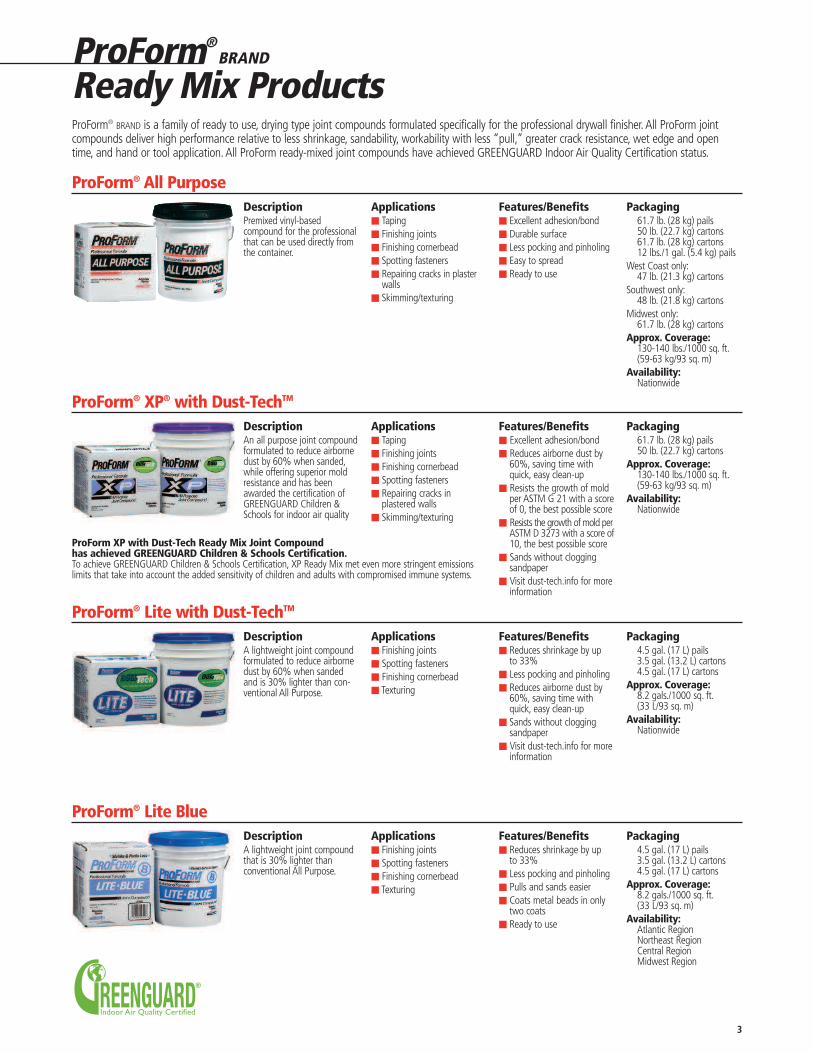
ProForm® All Purpose
DescriptionPremixed vinyl-based compound for the professionalthat can be used directly fromthe container.
Applications� Taping
� Finishing joints
� Finishing cornerbead
� Spotting fasteners
� Repairing cracks in plaster walls
� Skimming/texturing
Features/Benefits� Excellent adhesion/bond
� Durable surface
� Less pocking and pinholing
� Easy to spread
� Ready to use
Packaging61.7 lb. (28 kg) pails 50 lb. (22.7 kg) cartons61.7 lb. (28 kg) cartons12 lbs./1 gal. (5.4 kg) pails
West Coast only: 47 lb. (21.3 kg) cartons
Southwest only: 48 lb. (21.8 kg) cartons
Midwest only: 61.7 lb. (28 kg) cartons
Approx. Coverage:130-140 lbs./1000 sq. ft. (59-63 kg/93 sq. m)
Availability:Nationwide
ProForm® XP® with Dust-TechTM
DescriptionAn all purpose joint compoundformulated to reduce airbornedust by 60% when sanded,while offering superior moldresistance and has beenawarded the certification ofGREENGUARD Children &Schools for indoor air quality
Applications� Taping
� Finishing joints
� Finishing cornerbead
� Spotting fasteners
� Repairing cracks in plastered walls
� Skimming/texturing
Features/Benefits� Excellent adhesion/bond
� Reduces airborne dust by 60%, saving time with quick, easy clean-up
� Resists the growth of mold per ASTM G 21 with a score of 0, the best possible score
� Resists the growth of mold per ASTM D 3273 with a score of 10, the best possible score
� Sands without clogging sandpaper
� Visit dust-tech.info for more information
Packaging61.7 lb. (28 kg) pails50 lb. (22.7 kg) cartons
Approx. Coverage:130-140 lbs./1000 sq. ft. (59-63 kg/93 sq. m)
Availability:Nationwide
ProForm® Lite Blue
DescriptionA lightweight joint compoundthat is 30% lighter than conventional All Purpose.
Applications� Finishing joints
� Spotting fasteners
� Finishing cornerbead
� Texturing
Features/Benefits� Reduces shrinkage by up to 33%
� Less pocking and pinholing
� Pulls and sands easier
� Coats metal beads in only two coats
� Ready to use
Packaging4.5 gal. (17 L) pails 3.5 gal. (13.2 L) cartons4.5 gal. (17 L) cartons
Approx. Coverage:8.2 gals./1000 sq. ft. (33 L/93 sq. m)
Availability:Atlantic RegionNortheast RegionCentral RegionMidwest Region
ProForm® Lite with Dust-TechTM
DescriptionA lightweight joint compoundformulated to reduce airbornedust by 60% when sandedand is 30% lighter than con-ventional All Purpose.
Applications� Finishing joints
� Spotting fasteners
� Finishing cornerbead
� Texturing
Features/Benefits� Reduces shrinkage by up to 33%
� Less pocking and pinholing
� Reduces airborne dust by 60%, saving time with quick, easy clean-up
� Sands without clogging sandpaper
� Visit dust-tech.info for more information
Packaging4.5 gal. (17 L) pails 3.5 gal. (13.2 L) cartons4.5 gal. (17 L) cartons
Approx. Coverage:8.2 gals./1000 sq. ft. (33 L/93 sq. m)
Availability:Nationwide
ProForm®BRAND is a family of ready to use, drying type joint compounds formulated specifically for the professional drywall finisher. All ProForm joint
compounds deliver high performance relative to less shrinkage, sandability, workability with less “pull,” greater crack resistance, wet edge and opentime, and hand or tool application. All ProForm ready-mixed joint compounds have achieved GREENGUARD Indoor Air Quality Certification status.
ProForm XP with Dust-Tech Ready Mix Joint Compound has achieved GREENGUARD Children & Schools Certification. To achieve GREENGUARD Children & Schools Certification, XP Ready Mix met even more stringent emissionslimits that take into account the added sensitivity of children and adults with compromised immune systems.
4
ProForm®BRAND
Ready Mix Products
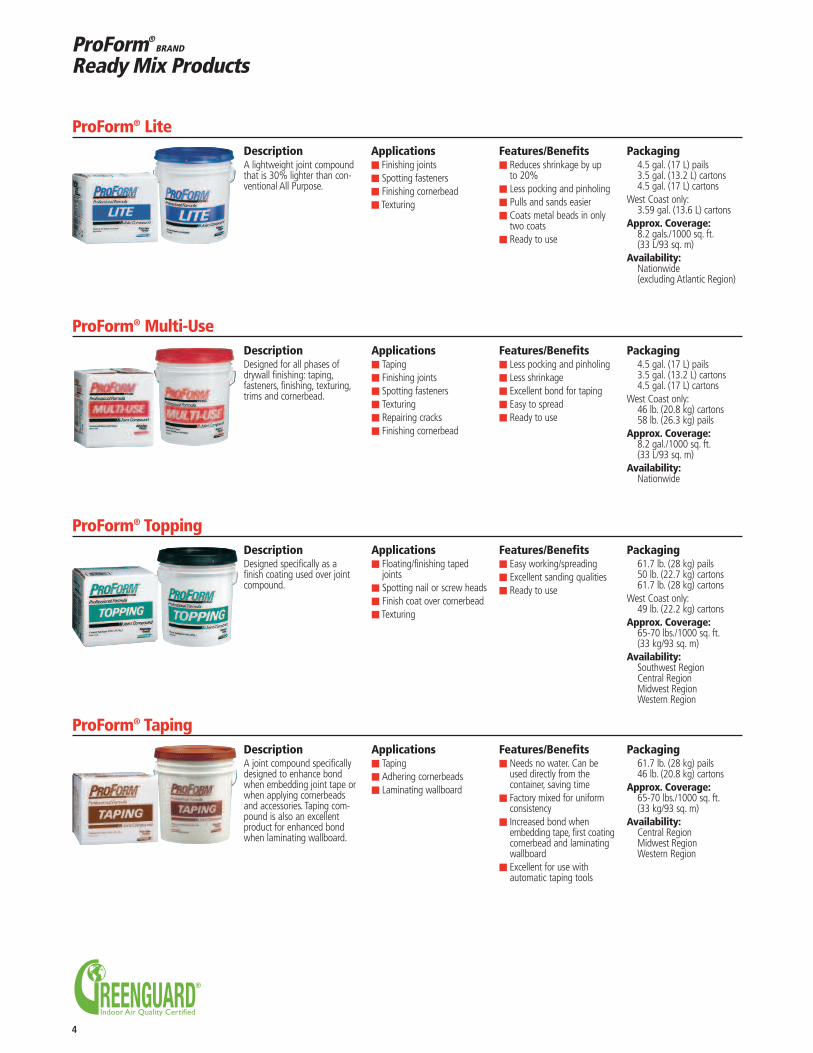
ProForm® Lite
DescriptionA lightweight joint compoundthat is 30% lighter than con-ventional All Purpose.
Applications� Finishing joints
� Spotting fasteners
� Finishing cornerbead
� Texturing
Features/Benefits� Reduces shrinkage by up to 20%
� Less pocking and pinholing
� Pulls and sands easier
� Coats metal beads in only two coats
� Ready to use
Packaging4.5 gal. (17 L) pails 3.5 gal. (13.2 L) cartons4.5 gal. (17 L) cartons
West Coast only: 3.59 gal. (13.6 L) cartons
Approx. Coverage:8.2 gals./1000 sq. ft. (33 L/93 sq. m)
Availability:Nationwide(excluding Atlantic Region)
ProForm® Multi-Use
DescriptionDesigned for all phases of drywall finishing: taping, fasteners, finishing, texturing,trims and cornerbead.
Applications� Taping
� Finishing joints
� Spotting fasteners
� Texturing
� Repairing cracks
� Finishing cornerbead
Features/Benefits� Less pocking and pinholing
� Less shrinkage
� Excellent bond for taping
� Easy to spread
� Ready to use
Packaging4.5 gal. (17 L) pails 3.5 gal. (13.2 L) cartons4.5 gal. (17 L) cartons
West Coast only: 46 lb. (20.8 kg) cartons58 lb. (26.3 kg) pails
Approx. Coverage:8.2 gal./1000 sq. ft. (33 L/93 sq. m)
Availability:Nationwide
ProForm® Topping
DescriptionDesigned specifically as a finish coating used over jointcompound.
Applications� Floating/finishing taped joints
� Spotting nail or screw heads
� Finish coat over cornerbead
� Texturing
Features/Benefits� Easy working/spreading
� Excellent sanding qualities
� Ready to use
Packaging61.7 lb. (28 kg) pails 50 lb. (22.7 kg) cartons61.7 lb. (28 kg) cartons
West Coast only: 49 lb. (22.2 kg) cartons
Approx. Coverage:65-70 lbs./1000 sq. ft. (33 kg/93 sq. m)
Availability:Southwest RegionCentral RegionMidwest RegionWestern Region
ProForm® Taping
DescriptionA joint compound specificallydesigned to enhance bondwhen embedding joint tape orwhen applying cornerbeadsand accessories. Taping com-pound is also an excellentproduct for enhanced bondwhen laminating wallboard.
Applications� Taping
� Adhering cornerbeads
� Laminating wallboard
Features/Benefits� Needs no water. Can be used directly from the container, saving time
� Factory mixed for uniform consistency
� Increased bond when embedding tape, first coating cornerbead and laminating wallboard
� Excellent for use with automatic taping tools
Packaging61.7 lb. (28 kg) pails 46 lb. (20.8 kg) cartons
Approx. Coverage:65-70 lbs./1000 sq. ft. (33 kg/93 sq. m)
Availability:Central RegionMidwest RegionWestern Region

5
ProForm®BRAND
Ready Mix Products
ProForm® All Purpose Machine Grade
DescriptionPremixed vinyl-based compoundfor the professional that canbe used in automatic tapingand finishing tools directlyfrom the container.
Applications� Taping
� Finishing joints
� Spotting fasteners
� Repair cracks in plaster walls
� Skimming/texturing
Features/Benefits� Designed for use in taping and finishing tools
� Excellent adhesion/bond
� Durable surface
� Less pocking and pinholing
� Easy to spread
� Ready to use
Packaging61.7 lb. (28 kg) pails50 lb. (22.7 kg) cartons
Approx. Coverage:130-140 lbs./1000 sq. ft. (59-63 kg/93 sq. m)
Availability:Central RegionMidwest RegionSoutheast Region
ProForm® All Purpose Orange
DescriptionPremixed vinyl-based compoundfor the professional that canbe used in automatic tapingand finishing tools directlyfrom the container.
Applications� Taping
� Finishing joints
� Spotting fasteners
� Repairing cracks in plaster walls
� Skimming/texturing
Features/Benefits� Designed for use in taping and finishing tools
� Excellent adhesion/bond
� Durable surface
� Less pocking and pinholing
� Easy to spread
� Ready to use
Packaging61.7 lb. (28 kg) pails
Approx. Coverage:130-140 lbs./1000 sq. ft. (59-63 kg/93 sq. m)
Availability:Northeast RegionAtlantic Region
ProForm® Heavy Viscosity
DescriptionAn all purpose compound formulated for the professionalthat prefers a heavier viscositythan standard All Purpose. Itmay be used directly from thecontainer.
Applications� Taping
� Finishing joints
� Spotting fasteners
� Repairing cracks in plaster walls
� Skimming/texturing
Features/Benefits� Excellent adhesion/bond
� Durable surface
� Less pocking and pinholing
� Easy to spread
� Ready to use
Packaging61.7 lb. (28 kg) pails 50 lb. (22.7 kg) cartons
Approx. Coverage:130-140 lbs./1000 sq. ft. (59-63 kg/93 sq. m)
Availability:Southeast RegionGulf Region
ProForm® Taping Lite
DescriptionA lightweight joint compoundthat is 40% lighter than conventional Taping compound.
Applications� Taping
� Adhering cornerbeads
� Laminating wallboard
Features/Benefits� Lightweight. Approximately 40% lighter than standard taping compound.
� Excellent adhesion/bond.
� Great for use in taping tools.
� Ready to use right from the container.
Packaging3.5 gal. (13.2 L) cartons 4.5 gal. (17 L) pails 4.5 gal. (17L) cartons
Approx. Coverage:8.2 gals./1000 sq. ft. (33 L/93 sq. m)
Availability:Central RegionMidwest Region

6
ProForm® Texture Grade
DescriptionAn all-purpose, ready-to-usematerial specially formulatedfor texturing walls and ceilings.Bonds well with many surfacesincluding gypsum panels, concrete, primed plaster, interiormasonry and non-stainingwood surfaces.
Applications� Any non-aggregated texture
� Stipple texture
� Knockdown
� Orange Peel
� Skip Trowel
Features/Benefits� Ready-mixed, easy to apply
� Allows great pattern versatility
� Conceals minor cracks and other minor imperfections
Packaging61.7 lb. (28 kg) pails 50 lb. (22.7 kg) cartons
Approx. Coverage:61.7 lbs./500-1,250 sq. ft. (28 kg/45-112 sq. m)
Availability:Southwest Region – carton only
ProForm® Concrete Cover Compound
DescriptionA premixed vinyl base com-pound specifically formulatedfor enhanced bond when skimming to interior abovegrade monolithic concretewalls, ceilings and columns. It can be sprayed, brushed,rolled, trowel-applied orapplied with drywall finishingboxes and/or taping tools.
Applications� Smoothing or texturing monolithic concrete ceilings or columns
� Taping
� Laminating
� First-fill coat on drywall fasteners beads or trim.
Features/Benefits� Excellent adhesion/bond.
� Creates a variety of textures.
� Can be sprayed, brushed, rolled, trowel-applied or applied with drywall finishing boxes and/or taping tools.
� Dries white.
� Ready to use right from the container.
Packaging61.7 lb. (28 kg) pails 61.7 lb. (28 kg) cartons 48 lb. (21.8 kg) cartons
Approx. Coverage:@ 1/16" thickness
48 lbs./64-100 sq. ft.(21.8 kg/5.9-9.2 sq. m)
61.7 lbs./95-120 sq. ft.(28 kg/8.8-11 sq. m)
Availability:Atlantic RegionGulf RegionCentral RegionMidwest Region
ProForm®BRAND
Ready Mix Products
Choose The Best ProForm Products For Your Project.
When you want to: Embed Fill or Trim Finish Spot Nails Texture Skim Coat Do RepairTape Cornerbeads Joints & Screws Work
You want: Good Tape Low Low Low Shrinkage, Good Bond, Smooth Float, Quick Dry,Bond Shrinkage Shrinkage Easy Sanding Low Shrinkage Easy Sanding Low Shrinkage
ProForm All Purpose BEST GOOD GOOD GOOD BETTER BETTER BETTER
ProForm XP w/Dust-Tech BEST GOOD GOOD GOOD BETTER BETTER BEST
ProForm Lite Blue GOOD BEST BETTER BEST GOOD BETTER GOOD
ProForm Lite w/Dust-Tech GOOD BEST BETTER BEST GOOD BETTER BEST
ProForm Lite GOOD BEST BETTER BEST GOOD BETTER GOOD
ProForm Multi-Use BETTER BETTER BETTER BETTER GOOD BETTER BETTER
ProForm Topping Not Recommended BETTER BEST BETTER BETTER BEST Not Recommended
ProForm Taping BEST Not Recommended Not Recommended Not Recommended GOOD GOOD Not Recommended
ProForm Taping Lite BEST Not Recommended Not Recommended Not Recommended Not Recommended Not Recommended Not Recommended
ProForm Machine Grade BEST GOOD GOOD GOOD GOOD GOOD GOOD
All Purpose Orange BEST GOOD GOOD GOOD GOOD GOOD GOOD
ProForm Texture Grade GOOD Not Recommended Not Recommended Not Recommended BEST GOOD GOOD

7
EnvironmentalConditionsVarying weather conditions canimpact both the quality andappearance of taped drywall joints.Relative humidity, plus temperature,will affect the working characteristicsof all joint compounds.
For bonding of adhesive, joint treatment, texturing and decorativefinishes, temperatures within thebuilding should be maintained atminimum 50˚F (10˚C), both day andnight, during joint finishing and drying. Adequate ventilation shouldbe provided to eliminate excessmoisture.
For example, cool wet weather will slow down the drying processwhile hot, dry weather hastens thedrying process. Exposure to winds,breezes or drafts while drying canalso affect the performance of jointcompounds. Typical problems fromimproper drying can be cracking,excessive shrinkage, ridging andbeading, banding or bond failure. A further explanation of these condi-tions is outlined in the “Problemsand Solutions” section of this guide.
Proper precautions at the job siteshould always be taken to minimizethe adverse effects of weather ondrying. These precautions will ultimately reduce the applicationtime and expense from call backsand rework.
Storage, Ready MixStorage life varies with climaticconditions, up to 6 months undergood conditions. Store compoundaway from extreme cold or heat toavoid accelerated aging. Regularlycheck production dates and rotateinventory on a first-in, first-out plan.
Ready Mix freezes, allow materialto thaw at room temperature for atleast 24 hours. When thawed, turnthe container upside-down for atleast 15 minutes. Turn pail right sideup, remove lid and immediatelyremix with an electric drill. ReadyMix should be lump free and readyto use within 1 minute. Discard allReady Mix that does not remix to alump-free consistency.
StackingReady Mix pails or cartons shouldnot be stacked more than two pallets in height.
Note: To ensure best results, only National Gypsum productsshould be used together in construction systems. Mixing withother brands is not recommended.
All National Gypsum joint compounds are formulated withoutasbestos and therefore comply with Consumer Product SafetyStandards.
Relative TemperatureHumidity 32° 40° 50° 60° 70° 80° 100°
0% 38/H 28/H 19/H 13/H 9/H 6/H 3/H
20% 2/D 34/H 23/H 16/H 11/H 8/H 4/H
40% 2.5/D 44/H 29/H 20/H 14/H 10/H 5/H
50% 3/D 2/D 36/H 24/H 17/H 12/H 6/H
60% 3.5/D 2.5/D 42/H 29/H 20/H 13.5/H 8/H
70% 4.5/D 3.5/D 2.25/D 38/H 26/H 19.5/H 10/H
80% 7/D 4.5/D 3.25/D 2.25/D 38/H 27/H 14/H
90% 13/D 9/D 6/D 4.5/D 3/D 49/H 26/H
98% 53/D 37/D 26/D 18/D 12/D 9/D 5/D
Note: D = Days (24 hour period) H = Hours
The chart above is a helpful guide in determining approximate drying times for jointcompounds under a variety of humidity/temperature conditions. Shaded area isbelow the minimum application temperature requirement of 50°F and is not recom-mended for the application of joint compound.
Approximate Drying Times: All Purpose/Lite Ready Mix Joint Compound
Joint Compound Drying Times
Mold and MildewGrowthProForm BRAND XP® Ready Mixwith Dust-TechTM
ProForm BRAND XP® Ready Mix withDust-TechTM was designed to pro-vide extra protection against moldand mildew compared to standardready mix compound. When testedby an independent lab per ASTM D3273 (“Standard Test Method forResistance to Growth of Mold onthe Surface of Interior Coatings in an Environmental Chamber”), XP Ready Mix with Dust-Techachieved a score of 10, the bestpossible score for this test.
ProForm XP with Dust-Tech alsoresists the growth of mold perASTM G 21 (Standard Practice forDetermining Resistance ofSynthetic Polymeric Materials toFungi) with a score of 0, the bestpossible score.
When tested in a system withProForm BRAND Paper Joint Tape,Gold Bond® BRAND XP® GypsumBoard or Gold Bond® BRAND e2XP®Interior ExtremeTM Gypsum Panels,the XP® system achieves a score of“10” for ASTM D 3273 and a scoreof “0” for ASTM G 21. These arethe best possible mold resistantscores for these tests.
Planning and PreventionMold and Mildew Resistance
Planning and prevention is themost effective way to avert thegrowth of mold or mildew. Gypsumwallboard and finishing productsshould be delivered to projects asnear to the time it will be used aspossible. Wallboard delivered to ajob site must be placed undercover immediately, properly pro-tected and not exposed to outsideelements such as rain, snow orother high moisture conditions.
If building materials get wet fromany moisture source, that sourcemust first be identified and correct-ed. If mold or mildew growthoccurs, or if you suspect it mightoccur due to environmental condi-tions and moisture, a determina-tion must be made to eitherattempt to dry and clean theaffected areas or to replace theaffected materials. Care must betaken in this evaluation, and if youdo not have the training or experi-ence to recognize and to makeproper decisions about repair orremoval, you should consult a pro-fessional.
No material can be considered“mold proof,” nor is it certain thatany material will resist mold ormildew indefinitely. When used inconjunction with good design, han-dling and construction practices, XPReady Mix with Dust-Tech can pro-vide increased mold resistance ver-sus standard ready-mixed com-pounds. As with any buildingmaterial, avoiding water exposureduring handling, storage andinstallation and after installation iscomplete is the best way to avoidthe formation of mold or mildew.

8
ProForm®BRAND
Quick Set TM Setting Compounds
ProForm® Quick SetTM Compound
DescriptionQuick setting/hardening com-pound that is not affected byhumidity once it has set anddried. Available in 20, 45, 90and 210 minute set times.
Applications� Use in poor drying conditions
� Heavy fills, beads and trims
� Can recoat as soon as previous coat sets
� Allows same-day joint finishing
Features/Benefits� Unaffected by humidityonce set/dried
� Low shrinkage
� Greater scheduling flexibility
� Resists ridging and beading
� Visit quick-set.info for more information
Packaging25 lb. (11.3 kg) bags
Approx. Coverage:45-55 lbs./1000 sq. ft. (22-29 kg/100 sq. m)
Mixing:Mix 13-14 pts. (6.2-6.6 L) clean, room temperature,drinkable water per bag.
Availability:Nationwide
ProForm® Quick SetTM Lite Compound
DescriptionA lightweight setting compoundoffering the advantages of asetting type compound that is30% lighter and also sandable.Available in 5, 20, 45, 90 and210 minute set times.
Applications� Use in poor drying conditions
� Heavy fills, beads and trims
� Can recoat as soon as previous coat sets
� Allows same-day joint finishing
Features/Benefits� 30% lighter than regular Quick Set
� Easier sanding
� Unaffected by humidity once set/dried
� Low shrinkage
� Greater scheduling flexibility
� Resists ridging and beading
� Visit quick-set.info for more information
Packaging18 lb. (8.2 kg) bags
Approx. Coverage:45-55 lbs./1000 sq. ft. (22-27 kg/100 sq. m)
Mixing:Mix 11-12 pts. (5.2-5.7 L) clean, room temperature, drinkable water per bag.
Availability:Nationwide
ProForm®BRAND Quick SetTM Setting Compounds are quick setting (hardening) type compounds that are not affected by humidity once they have set and dried.
They were developed to reduce joint deformities such as ridging and beading and provide shortened joint finishing time. ProFormQuick Set Compounds aresuitable for filling voids left in above-grade interior concrete. Required for finishing joints on exterior soffit board.
ProForm® Fire-Shield® 90 Compound
DescriptionA setting type compounddesigned to provide protectionin fire-stopping penetrationsthrough fire-rated partitions orassemblies in both new andretrofit construction. ProFormFS 90 seals out smoke, toxicgas and water, plus it providesa seal to stop sound and dustinfiltration.
Applications� Seals out smoke, toxic gas and water
� Provides seal to stop sound and dust infiltration
Features/Benefits� Tinted reddish/pink to distinguish from other joint treatment products
� Comes in powder form so that only amount needed can be mixed (less waste)
Packaging25 lb. (11.3 kg) bags
Approx. Coverage:25 lb. bag/850 cu. in.
Mixing:Mix 12-13 pts. (5.7-6.2 L) clean drinkable water per bag. If less than a full bag will be needed, then plan on a ratio of 2 parts dry powder to 1 part water.
Availability:Nationwide

9
MixingMix no more compound than canbe applied in the designated settime. Place the amount of waterrecommended on the compoundpackaging in a clean 5-gallon pail.A plastic container is recommendedbecause of its ease in cleaningbetween batches. Add the com-pound gradually to room tempera-ture clean, drinkable water. Mix thecompound until it is smooth andfree of lumps. Allow to stand(soak) for one minute, then remixuntil consistency is smooth anduniform. If a thinner or thicker mixis desired, add water or powdersparingly. When power mixing isused, the motor speed should notexceed 600 RPM since high speedand prolonged mixing will shortenthe working time of the product.
Estimated Working TimesOne of the most crucial things forselecting the proper ProForm Quick Set Joint Compound ismatching its working time and setting time ranges to the project.
It should be noted that workingtime and setting time are not the same.
Working Time refers to the period during which the ProFormQuick Set is usable for application.At the end of this time, the materialbegins to stiffen and can no longerbe spread easily. Working timeshould correspond to the requiredtime for actual application.
Setting Time refers to the timeafter which the applied ProFormQuick Set Compound will becomeadequately hardened so thatanother layer can be applied. Formanufactured or modular builders,the setting time should match yourtimetable for moving a floor alongthe line.
ProForm®BRAND
Quick Set TM Setting Compounds
Limitations� Not to be applied over moistsurfaces or surfaces subject todirect moisture.
� Do not mix with any othermaterial. Use only clean, roomtemperature, drinkable water.
�Mixing equipment and toolsmust be thoroughly cleanedbetween batches.
� Each fresh batch of compoundmust be kept free of previousbatches; otherwise the workingtime will be shortened.
� High-speed mixing or excessivemixing will shorten the workingtime of the ProForm Quick SetCompounds.
� Do not add water or remix aftercompound begins to thickenand harden.
� Cleanup difficulties with automatic taping tools mayoccur when using a setting-typecompound.
� Close opened bag as tight aspossible for storage or settingtime may be affected.
� Storage life in high humidityarea is 6 months; other areas upto 12 months maximum.
� In cold weather, temperatureswithin the building should bemaintained at a minimum 50˚F(10˚C), both day and night, during joint finishing. Adequateventilation should be providedto eliminate excess moisture.
Frequently AskedQuestions1)Why is the product
lumpy after mixing?
�Water was added to the ProFormQuick Set, rather than the com-pound being added to the water.
� ProForm Quick Set was notallowed to soak (for approximatelyone minute) after initial mixbefore remixing was initiated.
2)Why is the product setting much faster than the advertised range?
� Dirty mixing water and/or application tools.
� Excessive mixing of the compound.
� Foreign material (accidentally ordeliberately) added to the mixture.
�Mixing water too hot.
3)Why is the product setting much slower than the advertised range?
� Too much water was used.
� Impure water source (dissolved organics in the watergenerally retard the set time).
� Foreign material (accidentally ordeliberately) added to the mixture.
�Water too cold.
� Product was remixed after initialstiffening began.
4)Why does the product display weak strength?
� Too much water was used.
� Foreign material (accidentally ordeliberately) added to the mixture.
APPROXIMATE WORKING TIME VS. SET/HARDENING TIME
Quick Set/ Working Time Set/Hardening TimeQuick Set Lite (Minutes) (Minutes)
5 3–7 10–20
20 15–20 20–40
45 35–45 45–70
90 70–90 90–125
210 180–210 210–280

10
ProForm®BRAND
Joint Tapes
ProForm® Paper Joint Tape
DescriptionConceals and reinforces wallboard joints. Tape is 2-1/6"wide and is buffed on bothsides to ensure the best working qualities and bond.Center crease allows easy folding for use in corners. Can be used with all ProFormReady Mix and Quick SetSetting Compounds.
PackagingAvailable in:75' rolls (22.9 m)20 rolls per carton
250' rolls (76.2 m)20 rolls per carton
500' rolls (152.4 m)10 rolls per carton
Approx. Coverage:375 ft./1000 sq. ft. of wallboard
(114 m/93 sq. m)
Availability:Nationwide
ProForm® Fiberglass Joint Tape
DescriptionA 1.9" wide, self-adheringfiberglass tape for use withQuick Set setting compounds.For use with setting-type compounds only.
Not recommended for use withveneer plaster.
PackagingAvailable in:300' rolls (91.4 m) 12 rolls per carton
Approx. Coverage:375 ft./1000 sq. ft. of wallboard
(114 m/93 sq. m)
Availability:Nationwide
ProForm® Multi-Flex Tape
DescriptionA 2" wide combination of jointtape and metal strips laminatedto form an outside or insidecorner for gypsum wallboard. It is particularly recommendedfor inside corners on cathedralceilings, kneewalls, stairways,or any outside or inside cornerless or greater than 90°. It isapplied with the metal side to the face of the gypsumwallboard and is embeddedinto the joint compound.
PackagingAvailable in:100' rolls (30.5 m) 10 rolls per carton
Approx. Coverage:100 linear feet per roll
Availability:Nationwide
ProForm BRAND Joint Tape is designed for use with ready mixed or setting type compounds to conceal and reinforce joints of interior walls and ceilings.

11
Joint & CornerFinishing Application1. ProForm BRAND Quick Setcompounds should be mixed inaccordance with the printedinstructions on the package.
2. A uniformly thin layer of jointcompound should be applied overthe joint approximately 4" wide.Tape should be centered over thejoint and embedded into the compound leaving sufficient jointcompound under the tape forproper bond. Ceiling and wallangles plus all inside corner anglesshould be reinforced with tapefolded to conform to angles andembedded into the compound.
3. After compound is thoroughlydry or hard (approximately 24hours for Regular compound or 2 hours for Quick Set), joint tapeshould be covered with a coat ofjoint or topping compound. Thecompound should be spread overthe tape approximately 3" on eachside and feathered out at edges.After thoroughly dry, another coatof joint or topping compoundshould be applied with a slight uniform crown over the joint. Thiscoat should be smoothed andfeathered approximately 3" beyondthe preceding coat.
4. All inside corners should becoated with at least one coat ofjoint or topping compound and the edges feathered out.
5. All nail or screw head dimplesshould receive three coats. Thismay be applied along with eachjoint coat.
6. Flanges of wallboard cornerbeadshould be concealed by at leasttwo coats of compound. The secondcoat should be feathered outapproximately 9" on both sides of the exposed metal nose.
7. For joint and corner treatmentwith Quick Set Compound, fill jointand bed tape simultaneously. After Quick Set Compound hashardened, apply any ProForm JointCompound.
8. For wet sanding, allow eachapplication of compound to dry orharden. If dry sanding is performed,ventilate work area and/or use aNIOSH/MSHA-approved respirator.Safety glasses are also recom-mended. Caution should be usedto avoid roughing the wallboardpaper. All wallboard and treatedareas should be smooth and readyfor decoration.
ESTIMATING TABLE
Perfect Perfect Spray Wall & CeilingReady Mix* Quick Set Spray EM & HF Spray Joint Tape
Quantity per 1,000 sq. ft. of Gypsum Board 140 lbs. 55 lbs. 120 lbs. 50-100 lbs. 50-100 lbs. 350 ft.
ESTIMATING TABLE
Sq. Ft. of Gypsum Board SizeWall/Ceiling 4’x8’ 4’x10’ 4’x12’ Ready Mix*/lbs. Joint Tape/ft. Quick Set/lbs. Nails/ct. Screws/ct.
100 4 3 3 14 35 6 168 90
200 7 5 5 28 70 11 294 150
300 10 8 7 42 105 17 420 240
400 13 10 9 56 140 22 546 300
500 16 13 11 70 175 28 672 390
600 19 15 13 84 210 33 798 456
700 22 18 15 98 245 39 924 528
800 25 20 17 112 280 44 1050 600
900 29 23 19 126 315 50 1218 696
1000 32 25 21 140 350 55 1344 768
1100 35 28 23 154 385 61 1470 840
1200 38 30 25 168 420 66 1596 912
1300 41 33 28 182 455 72 1722 984
1400 44 35 30 196 490 77 1848 1056
1500 47 38 32 210 525 83 1974 1128
*Based on ProForm BRAND All Purpose
Materials Estimating & Coverage Guide

12
ProForm®BRAND
Texture Products
ProForm® Perfect Spray
DescriptionA decorative texture productwith shredded polystyreneaggregate for fast spray application to interior ceilingsurfaces. Available in fine,medium and coarse textures.
Applications� Interior ceilings that are formed of new, primed or previously painted gypsum wallboard or monolithic concrete or plaster
Features/Benefits� Easy mixing, low fallout
� Works with standard spray equipment
� Greater whiteness, better hide and bold accent
� Provides innovative time/ money savings option to ordinary painting
Packaging40 lb. (18.2 kg) bags
Approx. Coverage:300-400 sq. ft. (27-37 sq. m)/bag
Mixing:3-4 gal. (11.3-15.1 L)water/bag
Availability:Nationwide
ProForm® Perfect Spray EM
DescriptionA non-aggregated textureproduct used to create a widerange of wall and ceiling surfaces. When spraying walls,can be applied without overspray affecting ceiling.
By adjusting mixture consistencyand/or varying the pressure,creates an endless variety oftextures – Spray Spatter,Spatter Knockdown andOrange Peel.
Applications� Used for both walls and ceilings
� Wall surface should be finished with a coat of paint
� Concrete should be coated with an alkali-resistant primer/sealer prior to texturing
Features/Benefits� Time and money-saving option to ordinary painted ceilings
� Textures available in several light-reflecting finishes
� Formulated for easy mixing and easy pumping
� Surface can be finished with a coat of paint
Packaging50 lb. (22.7 kg) bags
Approx. Coverage:500-1,500 sq. ft.(46-139 sq. m)/bag
Mixing:4-5 gal. (15-19 L) water/bag
Availability:Nationwide (excluding Western Region)
ProForm® Wall & Ceiling Spray
DescriptionA non-aggregated textureproduct used to create a widerange of wall and ceiling surfaces. When spraying walls,can be applied without overspray affecting ceiling.
By adjusting mixture consistencyand/or varying the pressure,creates an endless variety oftextures – Spray Spatter,Spatter Knockdown andOrange Peel.
Applications� Used for both walls and ceilings
� Wall surface should be finished with a coat of paint
� Concrete should be coated with an alkali-resistant primer/sealer prior to texturing
Features/Benefits� Time and money-saving option to ordinary painted ceilings
� Textures available in several light-reflecting finishes
� Formulated for easy mixing and easy pumping
� Surface can be finished with a coat of paint
Packaging50 lb. (22.7 kg) bags
Approx. Coverage:500-1,500 sq. ft.(46-139 sq. m)/bag
Mixing:4-5 gal. (15-19 L) water/bag
Availability:Nationwide
For new construction or remodeling, ProForm®BRAND offers a complete line of interior ceiling and wall textures. Textures provide an innovative time and
money-saving option to ordinary painting. Textures are available in several light-reflecting finishes which provide a wide range of texturing possibilitieson surfaces such as drywall, concrete, plaster, wood and metal. (Surfaces must be primed with a good quality primer recommended for the substrate.)
ProForm® Perfect Spray HF
DescriptionA non-aggregated textureproduct used to create a widerange of wall and ceiling surfaces. When spraying walls,can be applied without overspray affecting ceiling.
By adjusting mixture consistency and/or varying thepressure, creates an endlessvariety of textures – SpraySpatter, Spatter Knockdownand Orange Peel.
Applications� Used for both walls and ceilings
� Wall surface should be finished with a coat of paint
� Concrete should be coated with an alkali-resistant primer/sealer prior to texturing
Features/Benefits� Time and money-saving option to ordinary painted ceilings
� Textures available in several light-reflecting finishes
� Formulated for easy mixing and easy pumping
� Surface can be finished with a coat of paint
Packaging50 lb. (22.7 kg) bags
Approx. Coverage:500-1,500 sq. ft.(46-139 sq. m)/bag
Mixing:4-5 gal. (15-19 L) water/bag
Availability:Central Region Midwest Region

13
RecommendedConstructionPracticesAPPLICATION GYPSUMWALLBOARD:
Surfaces, including joint-treated areas,must be smooth, clean and dry.First apply a coat of sealing primer.Allow primer to dry thoroughly,and maintain adequate drying conditions after application. Primeris to minimize sagging of gypsumwallboard and discoloration or difference in sheen on ceiling surface. Add dry texture to water.Use a piston pump or Mono-typepump with a texture gun.Minimum 3/4" I.D. material hose.A hopper-type gun with adequateair supply is also suitable. Typicalcoverage is 8-10 sq. ft. per lb. foraggregated and 10-30 sq. ft. perlb. for nonaggregated textures.Mask appropriate areas beforespraying and promptly remove overspray from unprotected surfacesafterward. Follow the instructions ofthe spray equipment manufacturerfor adjusting controls and cleaning.If a second coat is desired, allowthe first coat to dry thoroughly.
Note: Gypsum wallboard ceilingsurfaces to be decorated withwater-thinned spray texture shallbe 1/2" or 5/8" thick and appliedperpendicular to the framing.Framing shall not exceed 16" o.c.for Gold Bond® BRAND 1/2" RegularWallboard and 24" o.c. for 1/2"High Strength™ Ceiling Board andGold Bond® BRAND 5/8" Wallboard.
CONCRETE:
Allow concrete to cure for at least28 days. Clip protruding wire endsand spot with rust-inhibitiveprimer. Remove all form oil, greaseand dirt, or any loose or water-soluble material. Grind down anyform ridges, and level any remainingunevenness with ProForm®
Quick Set Joint Compound. Applya coat of alkali-resistant sealingprimer over the entire surface to be textured.
SPRAY TEXTURES
Mixing Water Typical CoverageProForm BRAND Application Aggregate Bag Size per Bag per Bag
Perfect Spray ceilings shredded polystyrene 40 lbs. 3–4.5 gal. 300–400 sq. ft.
Perfect Spray EM walls & ceilings none 50 lbs. 4–5 gal. 500–1,500 sq. ft.Wall & Ceiling Spray
Perfect Spray HF walls & ceilings none 40 lbs. 3.5–4.5 gal. 400–1,200 sq. ft.
NOTE: Burning Characteristics: Flame Spread–10, Smoke Developed–25
Perfect Spray Fine
Perfect Spray Medium
Perfect Spray Coarse
Perfect Spray EM, HF and Wall & Ceiling Spray– Spatter + Knockdown
Perfect Spray EM, HF and Wall & Ceiling Spray– Orange Peel
Perfect Spray EM, HF and Wall & Ceiling Spray– Spatter

14
to as “fire-taping.” Where a fire-resistance rating is required for thegypsum board assembly, details ofconstruction shall be in accordancewith reports of fire tests of assem-blies that have met the fire-ratingrequirement.
Level 2
All joints and interior angles shallhave tape embedded in joint compound and wiped with a jointknife, leaving a thin coating of jointcompound over all joints and interiorangles. Fastener heads and acces-sories shall be covered with a coatof joint compound. Surface shall be free of excess joint compound.Tool marks and ridges are accept-able. Joint compound applied overthe body of the tape at the time of tape embedment shall be considered a separate coat of jointcompound and shall satisfy theconditions of this level.
Specified where water resistantgypsum backing board (ASTM C 1396) is used as a substrate for tile; may be specified in garages,warehouse storage or other similarareas where surface appearance is not of primary concern.
LEVELS OF FINISH
The following levels of finish areestablished as a guide for specificfinal decoration. The minimumrequirements for each level shall be as described herein.
Level 0
No taping, finishing, or accessoriesrequired.This level of finish may beuseful in temporary construction or whenever the final decoration has not been determined.
Level 1
All joints and interior angles shallhave tape set in joint compound.Surface shall be free of excess jointcompound. Tool marks and ridgesare acceptable.
Frequently specified in plenum areasabove ceilings, in attics, in areaswhere the assembly would generallybe concealed, or in building servicecorridors, and other areas not normally open to public view.Accessories optional at specifierdiscretion in corridors and otherareas with pedestrian traffic.
Some degree of sound and smokecontrol is provided; in some geo-graphic areas this level is referred
Levels of GypsumBoard FinishThe following has been excerptedfrom a consensus document prepared by the Association of theWall and Ceiling Industries –International (AWCI), Ceilings &Interior Systems ConstructionAssociation (CISCA), GypsumAssociation (GA), Drywall FinishingCouncil (DWFC) and Painting andDecorating Contractors of America(PDCA) as a guide to gypsum boardfinishing. The members of theseinternational trade organizationsare dedicated to providing the bestpossible job for the most reasonablecost. By incorporating the appropri-ate sections of this recommendedspecification into the project documents, the architect, generalcontractor, and building owner can better anticipate the finalappearance of the decorated walland ceiling system.
This has also been issued by theGypsum Association as documentGA-214.
SCOPE
This recommended specificationdescribes various levels of finish ofgypsum board surfaces prior to theapplication of specific types of finaldecoration. The recommended levelof finish of gypsum board wall andceiling surfaces varies with the finaldecoration to be applied and canalso be dependent on their locationin a structure and the type of illu-mination striking the surface. Eachrecommended level of finish isdescribed with typical applications.
TERMINOLOGY
The following definitions areapplicable to this document.
Accessories: Metal or plasticbeads, trim, or moulding used toprotect or conceal corners, edges,or abutments of the gypsum board construction.
Critical Lighting: Strong sidelighting from windows or surface-mounted light fixtures(severe lighting).
Joint Photographing: The shadowing of the finished jointareas through the surface decoration (telegraphing).
Drywall Primer: A paint materialspecifically formulated to fill thepores and equalize the suction difference between gypsum board surface paper and the compoundused on finished joints, angles, fastener heads, and accessoriesand over skim coatings.
Skim Coat: A thin coat of jointcompound, or a material manufac-tured especially for this purpose,applied over the entire surface tofill imperfections in the joint work,smooth the paper texture, and provide a uniform surface for decorating. Excess compound isimmediately sheared off, leaving a film of skim coating compoundcompletely covering the paper.
Spotting: To cover fastener headswith joint compound.
Texture: A decorative treatmentof gypsum board surfaces.
Texturing: Regular or irregularpatterns typically produced byapplying a mixture of joint com-pound and water, or proprietarytexture materials including latexbase texture paint, to a gypsumboard surface previously coatedwith primer/sealer.
Five Levels of Finish
Setting Types Drying Types
Quick Set Ready Mix
Level 1Tape Embedded � � � � �
Level 2Tape � � � � �Cover � � � � � �
Level 3Tape � � � � �Cover � � � � � �Fill � � � � �Primer
Level 4Tape � � � � �Cover � � � � � �Fill � � � � �Finish � � � � �Primer
Level 5Tape � � � � �Cover � � � � � �Fill � � � � �Finish � � � � �Primer
National Gypsum Joint Treatment Products Used To Achieve The Levels Of Finish
Lite
Regula
r
All P
urp
ose
Toppin
gCom
pound
Lite
Multi-Use

15
specified for new gypsum board surfaces prior to the application of texture materials and gloss,semi-gloss and flat latex wall paints.
An alkali and moisture-resistantprimer and a tinted enamel undercoat may be required underenamel paints. Consult with thefinish paint manufacturer for specific recommendations.
For wallcoverings: White, selfsizing,water base, “universal” (all purpose)wallcovering primers have recentlybeen introduced into the market-place for use on new gypsumboard surfaces. These products areclaimed to minimize damage ifwallcoverings are subsequentlyremoved, bind poor latex paint,allow hanging over glossy surfacesand existing vinyls, hide wall colors,and to be water washable.
TEXTURING
Texture material is applied by brush,roller, spray, or trowel, or a combi-nation of these tools, depending onthe desired result. Textured wallsurfaces are normally overpaintedwith the desired finish; overpaintingof textured ceiling surfaces maynot be deemed necessary where anadequate amount of material isapplied to provide sufficient hidingproperties.
Tool, Marks and Ridges
A smooth surface may be achievedby lightly sanding or wiping jointcompound with a dampenedsponge. Care shall be exercised toensure that the nap of the gypsumboard facing paper is not raisedduring sanding operations. Foradditional information on the finishing of gypsum board surfacesconsult ASTM Standard C 840.
A Word About Drywall Primer
The guidelines for these levels of fin-ishing were prepared by AWCI, CISCA,GA and PDCA. The specificationdescribes a drywall primer as “apaint material specifically formulatedto fill the pores and equalize the suction difference between gypsumboard surface paper and the compound used on finished joints,angles, fastener heads and accessories over skim coatings.”
are specified or where severe lighting conditions occur.
This highest quality finish is themost effective method to provide auniform surface and minimize thepossibility of joint photographingand of fasteners showing throughthe final decoration.
COMMENTS
Critical (Severe) Lighting Areas
Wall and ceiling areas abuttingwindow mullions or skylights, longhallways, or atriums with large surface areas flooded with artificialand/or natural lighting are a fewexamples of critical lighting areas.Strong sidelighting from windowsor surface-mounted light fixturesmay reveal even minor surfaceimperfections. Light striking thesurface obliquely, at a very slightangle, greatly exaggerates surfaceirregularities. If critical lighting cannot be avoided, the effects canbe minimized by skim coating thegypsum board surfaces, by decorat-ing the surface with medium toheavy textures, or by the use ofdraperies and blinds which softenshadows. In general: gloss, semi-gloss, and enamel finishes high-light surface defects; textures hideminor imperfections.
ManufacturerRecommendationsThe recommendations of individualmanufacturers of gypsum board,joint tapes and compounds, acces-sories, drywall primers, wallcoverings,adhesives, texture materials, andpaints may vary from what is recommended herein and as suchare not a part of this recommendedspecification.
DRYWALL PRIMER
Applied as a first coat to the entireprepared gypsum board surfacewith brush, roller, or spray, prior todecoration. Where final appearanceis critical, the application of highquality, high solids, drywall primerwill minimize most decoratingproblems.
For finish paints: A good quality,white, latex drywall primer formu-lated with higher binder solids,applied undiluted, is typically
Level 3
All joints and interior angles shallhave tape embedded in joint compound and one additional coatof joint compound applied over alljoints and interior angles. Fastenerheads and accessories shall be covered with two separate coats ofjoint compound. All joint compoundshall be smooth and free of toolmarks and ridges. Note: It is recommended that the preparedsurface be coated with a drywallprimer prior to the application of final finishes. See painting/wallcovering specification in thisregard.
Typically specified in appearanceareas which are to receive heavy-or medium- texture (spray or hand applied) finishes before finalpainting, or where heavy-gradewallcoverings are to be applied asthe final decoration. This level of finish is not recommended wheresmooth painted surfaces or light tomedium wallcoverings are specified.
Level 4
All joints and interior angles shallhave tape embedded in joint compound and two separate coatsof joint compound applied over allflat joints and one separate coat ofjoint compound applied over interiorangles. Fastener heads and acces-sories shall be covered with threeseparate coats of joint compound.All joint compound shall be smoothand free of tool marks and ridges.Note: It is recommended that theprepared surface be coated with adrywall primer prior to the applicationof final finishes. See painting/ wall-covering specification in this regard.
This level should be specifiedwhere flat paints, light textures, orwallcoverings are to be applied.
In critical lighting areas, flat paintsapplied over light textures tend toreduce joint photographing. Gloss,semi-gloss, and enamel paints are notrecommended over this level of finish.
The weight, texture, and sheenlevel of wallcoverings applied over this level of finish should becarefully evaluated. Joints and fasteners must be adequately con-cealed if the wallcovering materialis lightweight, contains limited pattern, has a gloss finish, or anycombination of these finishes ispresent. Unbacked vinyl wall-coverings are not recommendedover this level of finish.
Level 5
All joints and interior angles shallhave tape embedded in joint compound and two separate coatsof joint compound applied over allflat joints and one separate coat ofjoint compound applied over interiorangles. Fastener heads and acces-sories shall be covered with threeseparate coats of joint compound. Athin skim coat of joint compound, or a material manufactured especiallyfor this purpose, shall be applied tothe entire surface. The surface shallbe smooth and free of tool marksand ridges. Note: It is recommendedthat the prepared surface be coatedwith a drywall primer prior to theapplication of finish paint. Seepainting specification in this regard.
This level of finish is highly recom-mended where gloss, semi-glossenamel or nontextured flat paints

16
Conditions
JOINT PROBLEMS
Tape Photographing
Starved Joint
High Joint
Beading/Ridging
NAIL PROBLEMS
Nail Pops
Depressed Nails
Probable Cause
Slow drying of finishing coats. Toomuch compound under tape. Jointcompound too thin.
Compound applied too thin in viscosity and thickness. Too littlecompound over joint. Excessivesanding.
Excess joint compound under thetape. Excess joint compound overthe tape and improper feathering.Poor framing. Improper wallboardapplication. Improper sanding. Useof compound too heavy.
Lumber expansion and contraction.Improper heating and ventilation.Cold weather with high humidity.Improper application of wallboard.Excess compound over joints and needless wide joints. Rough orpoorly cut butt joint.
Framing out of alignment. Lumbershrinkage. Improper wallboardapplication. Improper heating and ventilation.
Framing out of alignment. Lumber expansion due to moistureabsorption. Improper wallboardapplication. Too few nails, improperfurring, structural movement. Nails dimpled too deeply.
Preventive Action
Correct drying conditions. Embedtape properly. Use joint compoundthicker. Use ProForm BRAND JointTape.
Use finishing compound at heavierviscosity and proper thickness ofcoats. Do not over-sand.
Proper thickness of compounds for taping and finishing. Featherfinishing coats wider than previouscoats. Correct poor framing andimproper wallboard application toensure proper alignment. Sandproperly.
Use Quick Set System to minimize beading or ridging.Alternatives include: double-layerlamination system.
Provide heat and ventilation to dryframing lumber. Align framing lumber. Nail center of wallboardfirst. Hold wallboard firm to nailingmember when nailing. Use propernails. Check all nails before nailspotting. Systems recommended toreduce or eliminate nail popsinclude: double-layer lamination,double nailing system, floatingangle system, adhesive nail-on system and screw application.
Align framing lumber. Allow drylumber to become acclimated.Correct wallboard application asdescribed for nail pops. Use propernail spacing. When furring, use noless than 2" x 2". Use systems recommended to reduce or elimi-nate nail pops. Avoid fracturingpaper when driving nails.
Corrective Action
Sand down the tape outline andseal. Refloat if necessary beforedecoration. Prevent finish coatmoisture from re-wetting the tapeby applying a thinner coat for fastdrying.
Allow to thoroughly dry, then applyan additional coat of topping orjoint compound.
Sand joint to near flush withoutsanding into tape. Apply a widerfinishing coat properly feathered, ifnecessary. Apply a second finishingcoat or skim coat.
Allow one full heating cycle -- sixmonths to one year -- beforerepairing, then sand ridge flushand apply one or more finishingcoats of joint or topping com-pound. Use critical lighting todetermine if bead is eliminatedprior to decoration.
When nail pops occur before deco-ration, repair immediately. If problemoccurs after decoration, repair afterframing lumber is dry (usually oneheating cycle). To repair, drive aGWB-54 nail 1-1/2" from eachside of popped nail while holdingwallboard firm to the nailing member. Countersink popped nail,remove loose joint compound,then apply finishing coats of jointor topping compound.
Repair as described for nail pops,unless most nails are depressedand wallboard is loose (usuallyceilings). Re-nail entire surfaceusing proper spacing. Dimpledepressed nails and apply finishingcoats of joint or topping com-pound.
Problems and Solutions

17
Conditions
PAPER PROBLEMS
Joint Blisters
Wallboard Blisters
End Ply Separation
CRACKING PROBLEMS
Edge Cracking
Cracking
Inside Corner Cracking
Probable Cause
Too little joint compound undertape. Joint compound too drybefore embedding tape. Improperbedding of the tape into the jointcompound. Loss of bond (see bondfailure). End ply separation.Ruptured wallboard ends or edges.Joints too wide and unfilled.
Usually caused by ruptured board.
Mishandling of wallboard, especially when damp or wet.
Fast drying with low humidity.Rapid temperature and humiditychanges. Improper application.Joint compound too thin or tooheavy under tape. Edges of tapetoo thick. Excessive wet expansionand contraction of joint tape. Poorbond (see Bond Failure).
Adverse drying conditions. Hightemperatures and low humidityand drafts or low temperature andhigh humidity. Joint or toppingcompound applied in excessivethickness.
Joint too wide or not filled.Improper drying between coats.Excess thickness of compound overtape at apex of corner. Extremelyfast or slow drying conditions.Applying compound to both sidesof inside corner at same time.
Preventive Action
Follow joint compound mixing andapplication instructions. Embedtape properly into ample joint compound. Cut out any rupturedends or edges of wallboard and fillall wide holes and joints with Quick Set prior to taping (see endply separation).
Check field of board prior to deco-ration for imperfections. Make anynecessary repairs.
Allow wallboard to thoroughlydry, tear back all loose face paperprior to taping.
Correct drying conditions to avoidrapid surface drying. Keep tempera-tures and humidity as consistent aspossible by controlling ventilation.Use roller to wet joints with waterprior to each joint treatment opera-tion. Use Quick Set or ProFormjoint compounds and tape. Embedtape properly, avoiding excessivecompound under tape (maximumof 1/32" thickness of compoundunder edges of tape) and wipedown tape immediately. Use jobprevention for bond problems.
Fill all wide wallboard joints with Quick Set. Correct drying con-ditions. Apply thinner layers of jointor topping compound. Allow thor-ough drying between layers.
Fill wide joints with Quick Set priorto taping. Embed tape properly,allow to dry. Apply compound toone side and allow to dry, thentreat other side.
Corrective Action
Repair tape blisters by slitting andfilling with joint compound andsmooth out with finishing knife.Cut out other loose areas, fill withjoint compound when necessary.Let dry, then re-tape and finish.
Before decoration, cut out loosearea, fill flush with joint compound,if deep. Tape and finish.
After joints are finished, determinethe distance of looseness from themill end. Make a cut on each sideof the tape across the wallboardand a cut at each end, forming arectangle around the loose area.Peel off loose paper, tape joint.Once dry, fill flush with joint compound. After compound dries,finish with one or more coats ofjoint or topping compound, feath-ering beyond the cutout area.
Correct drying conditions duringrepairs and painting when edgecracks appear before second finish-ing coat. Brush one or two coats of good quality flat latex paint about4" wide over tape, then apply finish-ing coat. When cracks appear afterfinishing coat or painting, apply twoor more coats of good quality flatlatex paint over cracks that are flushwith surface to bridge them beforedecoration. Where cracks are curled,groove out cracks and apply onecoat of flat latex paint. Once dry, fill with Quick Set or ProForm joint compound.
Additional coats of joint or toppingcompound will fill the cracks with-out reoccurrence.
Fill wide cracks with joint or top-ping compound. For hairline cracks,run a pointed object (10D or 16Dnail) along the apex of corner withadequate pressure to close crack.

18
Conditions
CRACKING PROBLEMS (cont.)
Bond Failure
Discoloration/BandingDirt Collection
Variation in Surface Textures
Joint Darkening or Lightening
Joint Yellowing
TEXTURING PROBLEMS
Lumping
Mix Too Thin
Aggregate Fallout (During Spraying)
Aggregate Floatout
Probable Cause
Improper heating and drying condi-tions. Old stock. Excessive thinningof compounds. Too little compoundunder tape. Unbuffed joint tape.Oily surfaces. Mixing with dirty orexcessively cold water. Compoundtoo dry before embedding tape.
Dirt collection may occur morerapidly over nail or screw heads,nailing members or over voids ininsulation due to a greater heatloss and condensation.
Failure to sand properly, causingscratching of compound and scuffing of the wallboard paper. No primer or poor quality primer. Over-thinning of primer. Sprayapplication of primer.
Joints not dry when painted.Painting under humid conditions.Painting with low-grade latex andpaints. Suction variations of jointcompounds.
Slow drying. Fumes from partiallycombusted gases. Painting over wetjoints and high alkaline material.
Too much water added to initialmix. Adding water to powder.
Too much water added in initialmix or inadequate soaking time incold water.
Spray gun too close to surfaceand/or excessive air pressure atnozzle.
Too much water added during ini-tial mix and/or inadequate mixingafter initial water is added.
Preventive Action
Proper drying conditions. Mix inclean container with clean tap water.Rotate stocks. Avoid over-thinningof compound and removing toomuch compound from under tape.Use Quick Set or ProForm compounds and tape.
Two-layer laminated system. Foil-backed gypsum board. Proper insulation. Eliminate protrusion ofnails through wood furring onexterior walls and ceiling.
Use finer grit sandpaper with careto prevent raising nap of paper. Usewet sanding method. Prime all sur-faces with a quality drywall primeras directed. Brush or roll primer.Back roll after spray application.
Allow joints to thoroughly dry.Avoid painting under extremelyhigh humidity conditions. UseNational Gypsum Joint Treatmentproducts. Prime entire surface withquality drywall primer prior toapplying texture finish as finishdecoration. Apply two coats ofgood quality latex paint.
Use permanent heat in cold weather. Avoid painting over wetjoints. Avoid painting in highhumidity conditions.
Add powder to water using lesswater than initially specified. Aftermix is smooth and lump-free, addremaining water to adjust mix to aworkable viscosity.
Use recommended water require-ments in initial mix. Allow mixedingredients to soak for several minutes, when necessary, if usingcold water.
Hold spray gun at proper distanceand angle from surface to prevent aggregate fallout.
Use recommended water require-ments and make sure water isproperly blended into mix.
Corrective Action
Remove all loose joint tape andcompounds by sanding or scrapingand repair as necessary.
Wash or repaint. Decrease dustparticles in the air by filtration inforced air heating and exhaustfans in kitchen.
When condition exists after paint-ing, sand as necessary and primebefore finish coat of paint.
Allow thorough drying. Select testarea where condition is mostprevalent and repaint with goodquality sealing latex primer. If con-dition persists, apply a good qualityprimer/sealer, then repaint.
Apply a good quality primer/sealer,then repaint.
Add powder until mix thickens.Continue mixing until lumps disappear.
Add powder until mix thickens.
Lower air pressure. Hold spray gunat proper distance and angle fromsurface to prevent excessive fallout.
Add powder until mix thickens.

19
Conditions
TEXTURING PROBLEMS (cont.)
Poor Coverage
Poor Hide
Poor Bond or Hardness
Clogged Spray Equipment
Material Pumping Problems
Unsatisfactory Spray Pattern
Texture Buildup
Joint Show-Through
Joint Shows Through As White Band
Probable Cause
Mix too thick for proper spray vis-cosity and/or improper applicationsuch as spraying too slow, over-loading surface with spray materialand using incorrect spray pressures.
Over-thinned mix causing a reduc-tion in both wet and dry hide. Mixtoo thick causing poor atomizationresulting in surface show-through.Improper application/over-extendingspray. Selecting improper spraypressures. No primer used prior to texturing.
Over-thinned mix results in over-dilution of latex binder inspray texture. Improper surfacepreparation. Contamination withother materials.
Contamination of mix with over-sized particles can sometimes clogspray nozzle orifice.
Mixed spray material too heavy.Pump equipment old and worn.Equipment improper size for sprayproduct.
Worn spray equipment (either fluidor spray nozzle) and/or improperair pressure. Improper spray technique and/or poor spray mix consistency.
Spraying or texturing over surfaceswith major differences in surfaceporosity or suction (improperlyprimed). Thin texture will tend tobuild up over high suction surfaces.
Over-extended and over-thinnedprimer won’t adequately hide thecontrast between finished jointsand gypsum wallboard paper.
Spraying over unprimed surfacesduring cool, humid, slow dryingconditions. Joint stays white, watersolubles in gypsum wallboardpaper bleed through.
Preventive Action
Use recommended water volumefor mixing to ensure sprayable vis-cosity. Use proper spray applicationto ensure uniform dispersion ofaggregate and proper coverage.
Use recommended water volumefor mixing to ensure sprayable vis-cosity. Use proper spray applicationto ensure uniform dispersion ofaggregate and proper coverage.Use a good quality drywall primer.
Use recommended water volumefor mixing. Remove all loose material, dust, grease, oil and primesurface with a quality drywall primer.Do not intermix with other products.Always use a clean mixing contain-er and clean water.
Prevent contamination during mixing and spraying. Use correctnozzle size for aggregate beingsprayed.
Use recommended water volumefor mixing. Make sure properequipment is being used and thatspray machine is in good repair.
Inspect spray nozzles to ensuregood working condition. Replaceany worn parts.
Prime entire surface with a goodquality drywall primer. Follow mixing instructions.
Use recommended water volumewhen mixing texture and apply atrecommended coverage rates.Prime surface with a good qualitydrywall primer prior to applicationof spray texture.
Prime surface with a good qualitydrywall primer before applying texture.
Corrective Action
Carefully add water to mix. Useproper spray techniques. Adjustspray pressure.
Add powder or water dependingon mix consistency. Adjust spraypressure. Use proper spray technique. Apply finished paintover textured surface.
Scrape down surface and repeatapplication following recommenda-tions under “Prevention.”
Check mix for contamination and/oroversized particles. If contaminated,screen out contaminants or discardand remix new batch.
Thin mix if too heavy for pumping.
Improve spraying technique. Addrecommended water volume toensure proper spraying consistency.
Remove all texture from sprayedsurface and re-apply followinginstructions under “Prevention.”
Allow spray to thoroughly dry, thenprime with a quality drywall primerand re-spray or paint textured surface.
Allow spray to thoroughly dry, thenpaint textured surface.

20
Conditions
SHRINKAGE PROBLEMS
Shrinkage
Delayed Shrinkage
Misinterpreted Shrinkage
MISCELLANEOUS PROBLEMS
Pock Marking
Probable Cause
Compound used too thin orwatery. Applied too soon after mixing. Improper drying betweencoats. Painting before joints arethoroughly dry. Too deep fills inone coat. Slow drying.
Improper drying conditions.Painting before compound andwallboard are thoroughly dry.Under high humidity, slow dryingconditions, joints and wallboardmay hold moisture for weeks.
Improper wallboard applicationincluding: nails dimpled too deep,fractured core of wallboard, fractured face paper, corner beadapplied improperly, tape photo-graphing.
Entrapment of air in the mixedcompound and in application.Over-mixing of compound.Compound mixed too thin. Heavyfills. Improper application technique.Compound applied too loosely.
Preventive Action
Use compound at heaviest workable consistency. Allow tostand before using. Allow thoroughdrying of compound between coats and prior to painting. Applyadditional coats on deep fills.Provide proper drying.
Provide proper drying conditions.Allow complete drying before eachcoat of joint treatment and beforerepainting.
Less dimple of nails. Press wallboardsnug to nailing member beforedimpling nail. Use Gold BondGypsum Wallboard. Re-nail wherenecessary. Use Quick Set com-pound for at least the first coat onnails and corner bead. (See tapephotographing.)
Mix compound as quickly as possibleand let stand until binder is in solu-tion before remixing. Mechanicalmixers should have 500 RPM maximum. Use heavier mix. Makeadditional passes over joints andbead with hand or mechanicaltools. File trowel edges square regularly to avoid entrapment inapplication. Apply compound thinly and use more pressure onfinish coat.
Corrective Action
Allow to thoroughly dry and re-coat.Provide proper drying.
Allow to thoroughly dry and re-coataffected joints.
Nails: re-nail where necessary. Cutout any loose areas and fill withtwo or more coats of Quick Set orregular joint compound. Re-coatcorner bead. (See tape photo-graphing.)
Remove sanding dust that maycollect in “pocks” prior to paintingand refloat joint as necessary. Whencondition exists after painting, floatwith compound and repaint.

21
Atomization . . . . . . . . . . . . . . . . . .The use of compressed air to break up (atomize) a spray texture at spray gun orifice/tip.
Beading/Ridging . . . . . . . . . . . . . .A condition where flat joints become visible under critical lighting showing a narrow bead or ridge in the center of the joint. No loss of bond. Syn: ridging, picture framing.
Bed Coat . . . . . . . . . . . . . . . . . . . . .First compound coat after taping. Syn: first finish coat.
Breakdown . . . . . . . . . . . . . . . . . . .1) How well material mixes into a lump-free homogenous solution. 2) Loss of viscosity a few hours after mixing.
Butt Joint . . . . . . . . . . . . . . . . . . . . .Joints formed by the mill cut ends or by job cuts without a tapered edge. Syn: end joint.
Corner Cracking . . . . . . . . . . . . . . .Hairline fracture or wider crack occurring in the apex of inside corners. Syn: shrinkage cracking, angle cracks.
Coverage . . . . . . . . . . . . . . . . . . . . .Area usually measured in square footage a given material will cover, i.e. 10 gals./1,000 sq. ft. of wallboard. Syn: mileage, distance.
Delayed Shrinkage . . . . . . . . . . . .Shrinkage of preceding coats of particularly wet joint or topping compound after joints are completed or painted.
Depressed Nails . . . . . . . . . . . . . . .Depressions in the joint or topping compound directly over the head of a nail. Syn: dimpled nail heads, recessed nail heads. Sometimes incorrectly referred to as shrinkage.
Dirt Collection . . . . . . . . . . . . . . . .A condition where dirt collects on the decorative coating directly over a nail head. Syn: nail spots.
Dry Hide . . . . . . . . . . . . . . . . . . . . . .The ability of a coating or texture to completely hide substrate when dry.
Drywall Primer . . . . . . . . . . . . . . . .A paint material specifically formulated to fill the pores and equalize the suction difference between gypsum board surface paper and the compound used on finished joints, angles, fastener heads, and accessories and over skim coatings.
Edge Cracking . . . . . . . . . . . . . . . .Straight hairline cracks at one or both edges of the joint tape. Shows through finishing coats and/or painting. Syn: hairlines.
End Ply Separation . . . . . . . . . . . .Loss of bond between gypsum and wallboard face paper resulting in butt joints showing as high joints or starved joints. Joint will have a hollow sound. Syn: end joint separation. Sometimes incorrectly referred to as ridging or high joint.
Feathering . . . . . . . . . . . . . . . . . . . .Blending of finishing coats along the edges to minimize ridges and sanding. Syn: cutting, wiping.
First Finishing Coat . . . . . . . . . . . .Application of the first coat of joint or topping compound over tape, bead and nails. Syn: second coat, filling, bedding, floating, bed-coat, pre-bedding, first-bed.
Flat Spots . . . . . . . . . . . . . . . . . . . .Areas on textured surfaces that have little or no aggregate. Syn: holidays.
Fogging In . . . . . . . . . . . . . . . . . . . .Spraying a ceiling with a fog coat or light overspray of spray texture.
Halo Effect . . . . . . . . . . . . . . . . . . .Overspray from wall texture or wall paint on ceiling texture which leaves a different color around the perimeter of the room.
Hide . . . . . . . . . . . . . . . . . . . . . . . . . .The ability of paints and textures to conceal minor imperfections, allowing a surface to appear uniform in color and texture.
High Joint . . . . . . . . . . . . . . . . . . . .Butt or tapered edge joint protruding above the plane of the board. Syn: crowned joint, crowning fat joint.
Horizontal Application . . . . . . . .Application of gypsum wallboard with the length perpendicular to the nailing members. Syn: around the room, across the joists or studs.
Joint Blister . . . . . . . . . . . . . . . . . . .Looseness of paper appearing after the first finishing coat. Syn: bubbles.
Joint Darkening . . . . . . . . . . . . . . .Joint and nail spots that appear darker than the surrounding areas. Syn: burning, flashing, photographing, shadowing.
Joint Lightening . . . . . . . . . . . . . .Joints and nail spots that appear lighter than the surrounding areas. Syn: burning, photographing, lightening, picture framing.
Joint Shadowing . . . . . . . . . . . . . .Joints that appear darker when viewed from an oblique angle yet show no color differentiation when seen from a right angle. Usually caused by texture variation, low or high joints. Syn: Incorrectly referred to as burning, flashing, photographing and joint darkening.
Joint Yellowing . . . . . . . . . . . . . . .Joint and nail spots that appear yellowish. Severity of discoloration may vary depending on paint color. Syn: flashing, bleeding, yellowing.
Let Down . . . . . . . . . . . . . . . . . . . . .Drop in viscosity of the joint or topping compound after mixing. Syn: thinning, watering down, drop off, slack off, milking.
Nail Dimpling . . . . . . . . . . . . . . . . .Depression in the wallboard surface resulting from setting nails with a wallboard hammer.
Nail Pops . . . . . . . . . . . . . . . . . . . . .Protrusions or bumps directly over a nail head. This condition normally occurs when wallboard is not in close contact with the nailing members or lumber shrinkage. Syn: pops.
Glossary of Terms

22
Open Time . . . . . . . . . . . . . . . . . . . .Length of time after applying joint or topping compound in which joint can be crossed without roughing the surface of the compound. Syn: tearing, scuffing, roll up.
Photographing Joint . . . . . . . . . .Joints and nail spots that appear as a different color or sheen after painting.and Nail Spots Syn: photographs, poor hide, flashing, picture framing.
Pock Marking . . . . . . . . . . . . . . . . .Small openings in the surface of the joint or topping compound. Syn: air bubbles, cratering, pocking, bubbling, balloons.
Pumpability . . . . . . . . . . . . . . . . . .Ease with which a spray material pumps through spray equipment.
Ridging/Beading . . . . . . . . . . . . . .A condition where flat joints become visible under critical lighting showing a narrow bead or ridge in the center of the joint. No loss of bond. Syn: ridging, picture framing.
Second Finishing Coat . . . . . . . . .Application of the second coat of joint or topping compound over tape, bead and nails. Syn: third coat, finishing, finish bed, polishing, feather coat, skimming.
Sheen Variation . . . . . . . . . . . . . . .Joints or nail spots that appear with more or less sheen than the wallboard. Commonly seen with semi-gloss paints, but can also show with latex or oil flat paints without prime coating. Syn: high sheen, low sheen, highlighting.
Shooting Fat . . . . . . . . . . . . . . . . . .Applying spray material at a heavy consistency.
Shooting Loose . . . . . . . . . . . . . . .Applying spray material at a thin consistency.
Shrinkage Cracking . . . . . . . . . . .Cracking that occurs with joint or topping compound when applied too thick in one application. Cracks are irregular and common along metal corner bead and over wide joints. Syn: map checking, map cracking.
Skim Coat . . . . . . . . . . . . . . . . . . . .A thin coat of joint compound, or a material manufactured especially for this purpose, applied over the entire surface to fill imperfections in the joint work, smooth the paper texture, and provide a uniform surface for decorating. Excess compound is immediately sheared off, leaving a film of skim coating compound completely covering the paper.
Solution Time . . . . . . . . . . . . . . . . .Time required after mixing joint or topping compound to obtain optimum working qualities. Syn: take up, let down.
Spotting Nails . . . . . . . . . . . . . . . .Application of joint finishing compound to nail heads and dimples. Syn: spotting, nail coating.
Starved Joint . . . . . . . . . . . . . . . . .Depression in the joint over tapered joints. Also seen as depressions on each side of the tape on a butt joint. Syn: low point, delayed shrinkage, concave joint.
Surging . . . . . . . . . . . . . . . . . . . . . . .Spray equipment problem which results in material not pumping in a steady stream.
Tape Photographing . . . . . . . . . .Outline of tape is visible in corners and flat joints after joints are finished. Syn: railroading, tape floating, tape ghosting. Sometimes incorrectly called shrinkage.
Taping . . . . . . . . . . . . . . . . . . . . . . . .Application of joint compound and joint tape on gypsum wallboard joints. Syn: embedding tape, first coat, hanging, laying tape, bedding, roughing, joint finishing.
Texturing . . . . . . . . . . . . . . . . . . . . .Application of texture by roller, spray, brush or other method. Syn: stippling.
Tooth . . . . . . . . . . . . . . . . . . . . . . . . .Surface porosity and its ability to promote bond with joint or topping compound, textures and paints. Syn: porosity, suction, grab.
Vertical Application . . . . . . . . . . .Application of gypsum wallboard with the length parallel to the nailing members. Syn: with the studs and joists.
Wet Edge . . . . . . . . . . . . . . . . . . . . .Length of time joint or topping compound can be worked while maintaining a smooth feathered edge. Syn: fast drying, poor water retention, bodying, thickening, roll up, ragging.
Wet Hide . . . . . . . . . . . . . . . . . . . . .The ability of a coating or texture to completely hide substrate when wet.
Wipe Down . . . . . . . . . . . . . . . . . . .Cleanup of overspray on walls after spraying ceilings using a long-handled wide steel blade.
Working Life . . . . . . . . . . . . . . . . . .Length of time joint or topping compound can be worked and re-used. Syn: water retention, plasticity.

23
Submittal SheetsFor specific application recommen-dations using National GypsumProForm®
BRAND Joint Treatmentand Texture products, refer to submittal sheets listed here.
You may obtain copies of theseand all product submittal sheets by calling Technical Services at 1-800-NATIONAL or by visiting ourweb site at: nationalgypsum.com.
READY MIX PRODUCTS
ProForm®All Purpose Joint Compound110778
ProForm® XP® with Dust-Tech110965
ProForm® Lite Blue110904
ProForm® Lite with Dust-Tech111103
ProForm® Lite Joint Compound110779
ProForm®Multi-Use Joint Compound110685
ProForm® Topping Joint Compound110777
ProForm® Taping Joint Compound110971
ProForm® Taping Lite Compound 111131
ProForm®All Purpose Machine Grade110975
All Purpose Orange Compound110778
ProForm® All Purpose Texture Grade110972
SETTING COMPOUNDS
Quick Set Joint Compound111108
Quick Set Lite Joint Compound111104
ProForm® Fire-Shield 90 Joint Compound110684
TAPES
ProForm® Paper Joint Tape110936
ProForm® Fiberglass Mesh Tape111065
Joint Tape Heavy111064
All Purpose Heavy Viscosity111128
ProForm Concrete-Cover Compound111139
TEXTURE PRODUCTS
ProForm® Perfect Spray110629
ProForm® Perfect Spray EM110630
ProForm®Wall & Ceiling Spray 111020
ProForm® Perfect Spray HF110841
Submittal Sheets

104594 Rev. 3/11
Corporate Headquarters
National Gypsum Company2001 Rexford RoadCharlotte, NC 28211
Phone: (704) 365-7300Web: nationalgypsum.com
nationalgypsum.com/espanol
Technical Information
Phone: (800) NATIONAL(800) 628-4662
Fax: (800) FAX-NGC1(800) 329-6421
� Atlantic AreaPhone: (800) 237-9167Fax: (877) 252-0430
� Central AreaPhone: (800) 252-1065Fax: (866) 232-0440
� Gulf AreaPhone: (800) 343-4893Fax: (866) 482-8940
� Midwest AreaPhone: (800) 323-1447Fax: (866) 692-8590
• ProForm Manufacturing Facilities
� Northeast AreaPhone: (800) 253-3161Fax: (866) 632-1480
� Southeast AreaPhone: (800) 548-9394Fax: (866) 732-1990
� Southwest AreaPhone: (800) 548-9396Fax: (866) 792-7520
� Western AreaPhone: (800) 824-4227Fax: (800) 438-6266
National AccountsPhone: (800) 440-1230Fax: (866) 622-3590
Manufactured HousingPhone: (800) 455-3185Fax: (800) 639-1714
CUSTOMER SERVICE SALES AREAS
A Profe
ssio
na
l Th
e M
ark Of
LIMITED WARRANTY AND REMEDIES
Products manufactured and sold by NationalGypsum are warranted by National Gypsumto its customers to be free from defects inmaterials and workmanship at the time ofshipment. Additional or different expresslimited warranties, limitations and exclusionsmay apply to specific National Gypsumproducts. Current warranty information onsuch products for both commercial and residential applications is available atnationalgypsum.com. THIS EXPRESS WARRANTY IS THE ONLY WARRANTYAPPLICABLE TO SUCH PRODUCTS, AND ISIN LIEU OF AND EXCLUDES ALL OTHEREXPRESS ORAL OR WRITTEN WARRANTIESAND ALL IMPLIED WARRANTIES, INCLUDINGBUT NOT LIMITED TO THE IMPLIED WARRANTIES OF MERCHANTABILITY ANDFITNESS FOR A PARTICULAR PURPOSE.
National Gypsum will not be liable for anyincidental, indirect or consequential losses,damages or expenses. The customer’sexclusive remedy for any type of claim oraction for defective products will be limitedto the replacement of the products (in theform originally shipped) or, at NationalGypsum’s option, to a payment or creditnot greater than the original purchase price of the products.
National Gypsum will not be liable forproducts claimed to be defective where thedefect resulted from causes not withinNational Gypsum’s control, or which aroseor occurred after shipment, including butnot limited to accidents, misuse, mishandling,improper installation, contamination oradulteration by other materials or goods, or abnormal conditions of temperature,moisture, dirt or corrosive matter.
Any claim that products sold by NationalGypsum were defective or otherwise didnot conform to the contract of sale iswaived unless the customer submits it inwriting to National Gypsum within thirty(30) days from the date the customer discovered or should have discovered thedefect or nonconformance. No legal actionor proceeding complaining of goods soldby National Gypsum may be brought by thecustomer more than one year after thedate the customer discovered or shouldhave discovered the defect or problem ofwhich it complains.
EL CHAPULÍN COLORADO™ logo and characters are trademarks of Roberto Gómez Bolaños
© all rights reserved 1972-2011.
THE BRAND OF THE CHAPULÍN