buxton & district u3a digital photography beginners… · buxton & district u3a digital...
TRANSCRIPT

Buxton & District U3A Digital Photography Beginners’ Group
19 November 2013
Lesson 6: Understanding Exposure
Buxton & District
Digital Photography Beginners
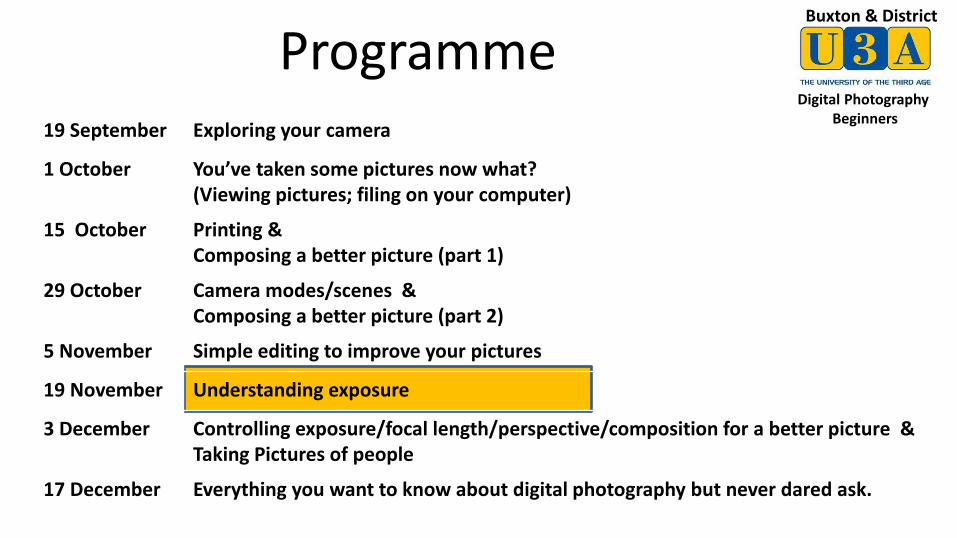
Programme 19 September Exploring your camera
1 October You’ve taken some pictures now what? (Viewing pictures; filing on your computer)
15 October Printing & Composing a better picture (part 1)
29 October Camera modes/scenes & Composing a better picture (part 2)
5 November Simple editing to improve your pictures
19 November Understanding exposure
3 December Controlling exposure/focal length/perspective/composition for a better picture & Taking Pictures of people
17 December Everything you want to know about digital photography but never dared ask.
Buxton & District
Digital Photography Beginners
Last Time
• Using Windows Photo Gallery to edit photos – Fixing “Red eye” – Straightening – Cropping – Adjusting exposure – Retouching
• Using Picasa to edit photos • A quick look at what Photoshop can do
Buxton & District
Digital Photography Beginners
Homework
1. Try editing a few of your own pictures in Windows Live Photo Gallery or in Picasa:
• Fix red-eye
• Straighten
• Crop
• Adjust exposure
• Adjust colour
2. Bring any questions along next time
Buxton & District
Digital Photography Beginners
This Time
How to improve my pictures.
• Understanding Exposure

Buxton & District
Digital Photography Beginners
What is exposure?
Exposure is “measuring and controlling the amount of light from a scene which is captured in a picture”.
Under exposed Over exposed
Buxton & District
Digital Photography Beginners
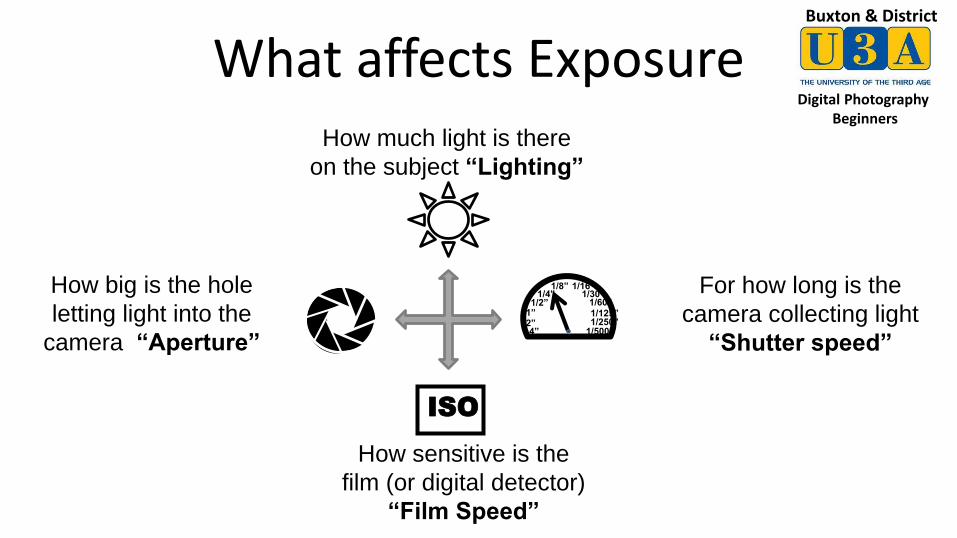
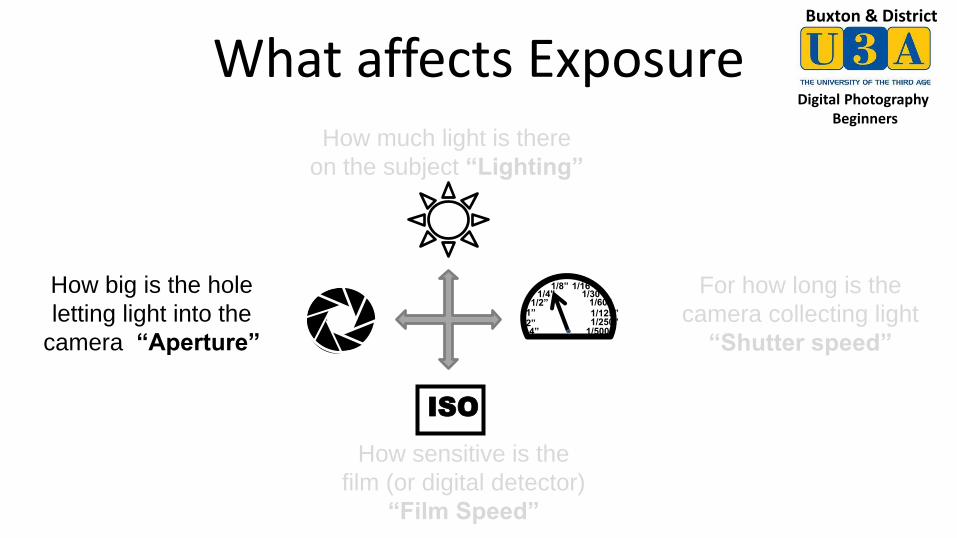
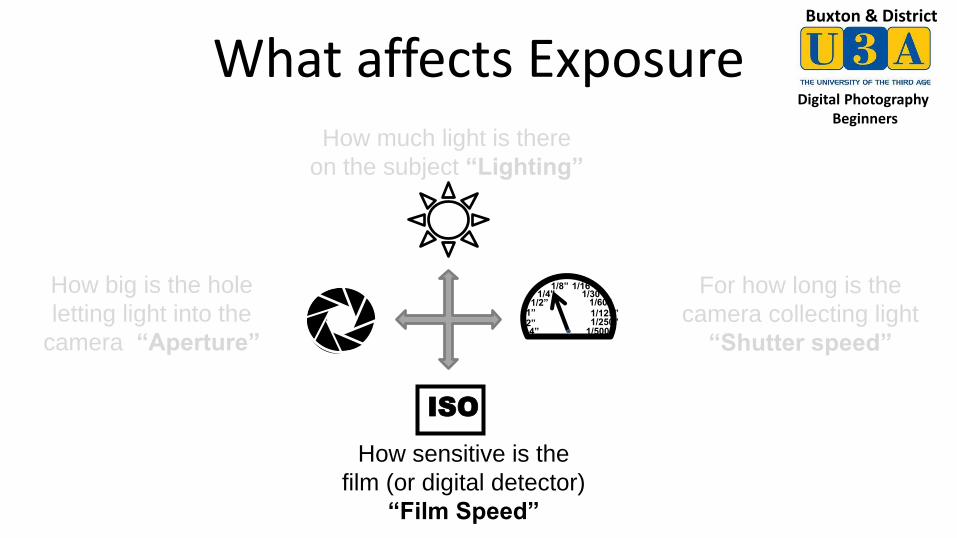
What affects Exposure
How sensitive is the
film (or digital detector)
“Film Speed”
How much light is there
on the subject “Lighting”
How big is the hole
letting light into the
camera “Aperture”
For how long is the
camera collecting light
“Shutter speed” 4”
2” 1” 1/2”
1/250” 1/125” 1/60”
1/30” 1/16” 1/8”
1/4”
1/500”
ISO
Buxton & District
Digital Photography Beginners
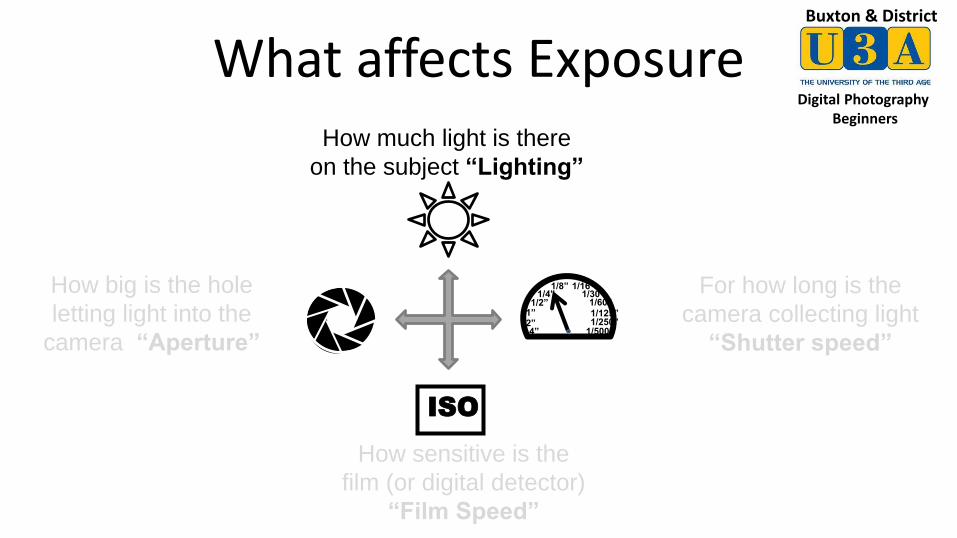
What affects Exposure
How sensitive is the
film (or digital detector)
“Film Speed”
How much light is there
on the subject “Lighting”
How big is the hole
letting light into the
camera “Aperture”
For how long is the
camera collecting light
“Shutter speed” 4”
2” 1” 1/2”
1/250” 1/125” 1/60”
1/30” 1/16” 1/8”
1/4”
1/500”
ISO

Buxton & District
Digital Photography Beginners
Why should I care?
Auto and “program” modes measure the lighting and automatically adjust exposure
Sometimes you can get a different effects with different settings.
Sometimes Auto is just wrong.
So many cameras give you extra modes to set the exposure differently
ISO
ISO
Buxton & District
Digital Photography Beginners
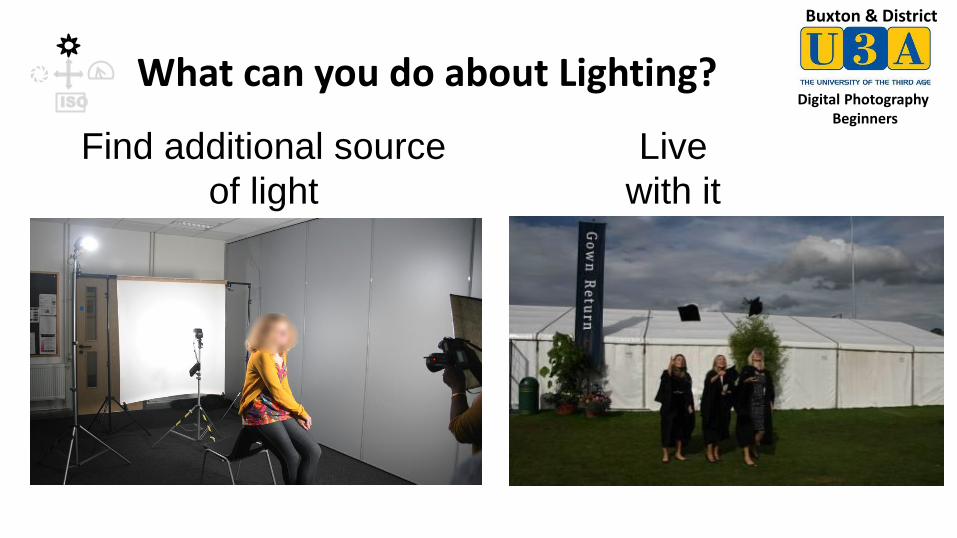
What can you do about Lighting?
Live
with it
Find additional source
of light
ISO
Buxton & District
Digital Photography Beginners
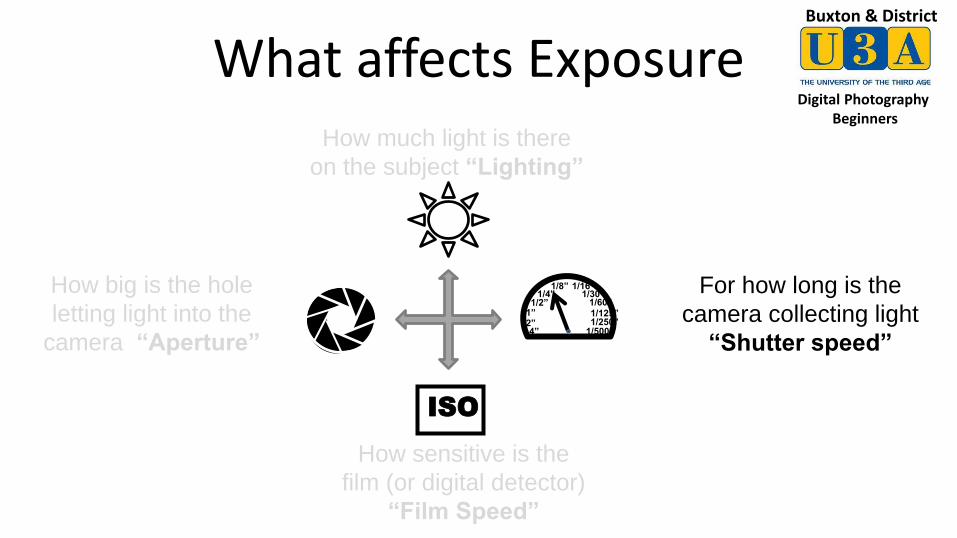
What affects Exposure
How sensitive is the
film (or digital detector)
“Film Speed”
How much light is there
on the subject “Lighting”
How big is the hole
letting light into the
camera “Aperture”
For how long is the
camera collecting light
“Shutter speed” 4”
2” 1” 1/2”
1/250” 1/125” 1/60”
1/30” 1/16” 1/8”
1/4”
1/500”
ISO
Buxton & District
Digital Photography Beginners
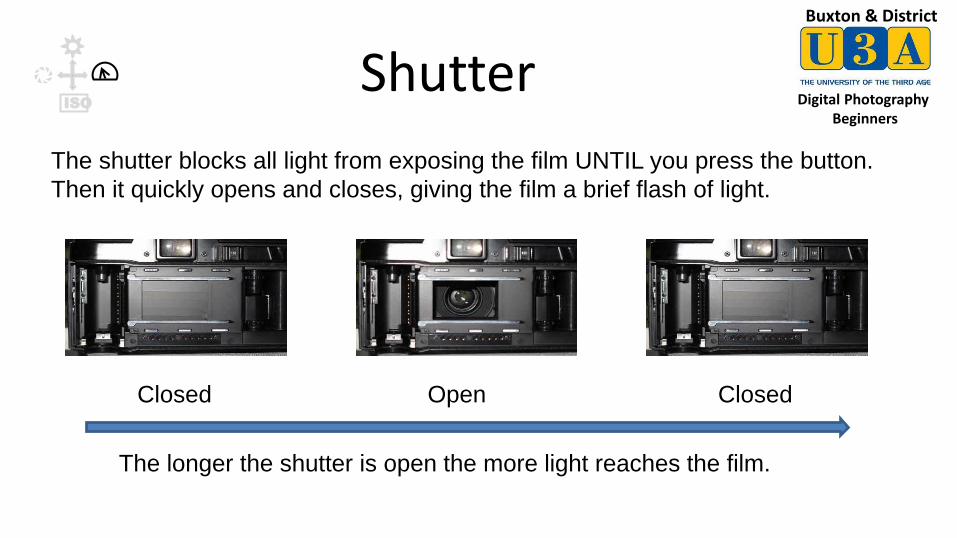
Shutter
The shutter blocks all light from exposing the film UNTIL you press the button.
Then it quickly opens and closes, giving the film a brief flash of light.
Closed Open Closed
The longer the shutter is open the more light reaches the film.
ISO
Buxton & District
Digital Photography Beginners
What affects Exposure
How sensitive is the
film (or digital detector)
“Film Speed”
How much light is there
on the subject “Lighting”
How big is the hole
letting light into the
camera “Aperture”
For how long is the
camera collecting light
“Shutter speed” 4”
2” 1” 1/2”
1/250” 1/125” 1/60”
1/30” 1/16” 1/8”
1/4”
1/500”
ISO
Buxton & District
Digital Photography Beginners
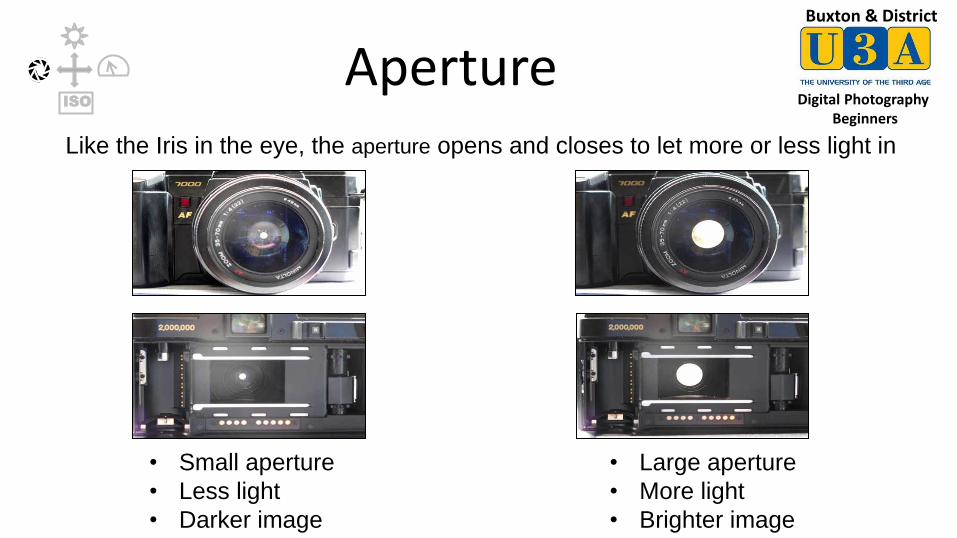
Aperture Like the Iris in the eye, the aperture opens and closes to let more or less light in
• Small aperture
• Less light
• Darker image
• Large aperture
• More light
• Brighter image
ISO
Buxton & District
Digital Photography Beginners
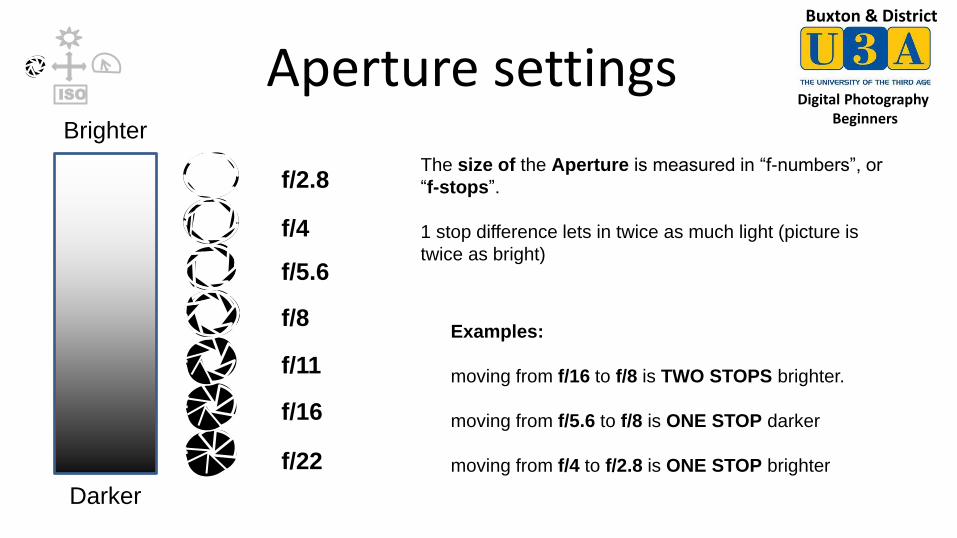
Aperture settings
The size of the Aperture is measured in “f-numbers”, or
“f-stops”.
1 stop difference lets in twice as much light (picture is
twice as bright)
Examples:
moving from f/16 to f/8 is TWO STOPS brighter.
moving from f/5.6 to f/8 is ONE STOP darker
moving from f/4 to f/2.8 is ONE STOP brighter
f/2.8
f/4
f/5.6
f/8
f/11
f/16
f/22
Brighter
Darker
ISO

Buxton & District
Digital Photography Beginners
Shutter speed settings You can control the length of time the shutter remains open by setting
the SHUTTER SPEED
Examples:
½ sec exposure is ONE
STOP darker than a 1 sec
exposure.
1/125 exposure is TWO
STOPS brighter than a
1/500 exposure.
A 1/1000 exposure is
THREE STOPS darker
than a 1/125 exposure.
2 sec 1 sec 1/2 sec 1/4 sec
1/15 sec 1/30 sec 1/60 sec 1/125 sec 1/250 sec 1/500 sec 1/1000 sec 1/2000 sec
Open for long time / slow shutter
speed / more light / brighter
Open for short time / fast shutter
speed / less light / darker
1/8 sec
ISO
Buxton & District
Digital Photography Beginners
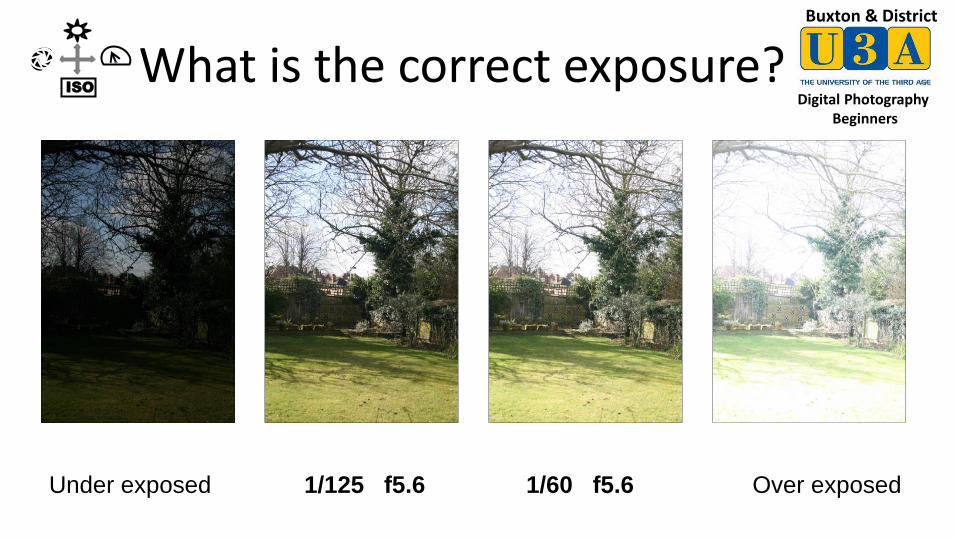
What is the correct exposure?
Under exposed Over exposed 1/125 f5.6 1/60 f5.6
ISO

Buxton & District
Digital Photography Beginners
Exercise 1- Automatic Exposure
1. Set your camera to Auto mode. 2. Find where your camera tells you what shutter speed and aperture it is
going to use when you are about to take a picture. 3. Take some pictures, taking particular notice of the shutter speed and
aperture as you take each picture. 4. Take pictures in a variety of lighting conditions:
i. Indoors and outdoors ii. Scenes with bright and dark areas iii. Sunny day & grey day (if you can find them!) iv. Sun behind you / sun in front of you.
5. Are you happy with the exposure in all of the pictures?
ISO
Buxton & District
Digital Photography Beginners
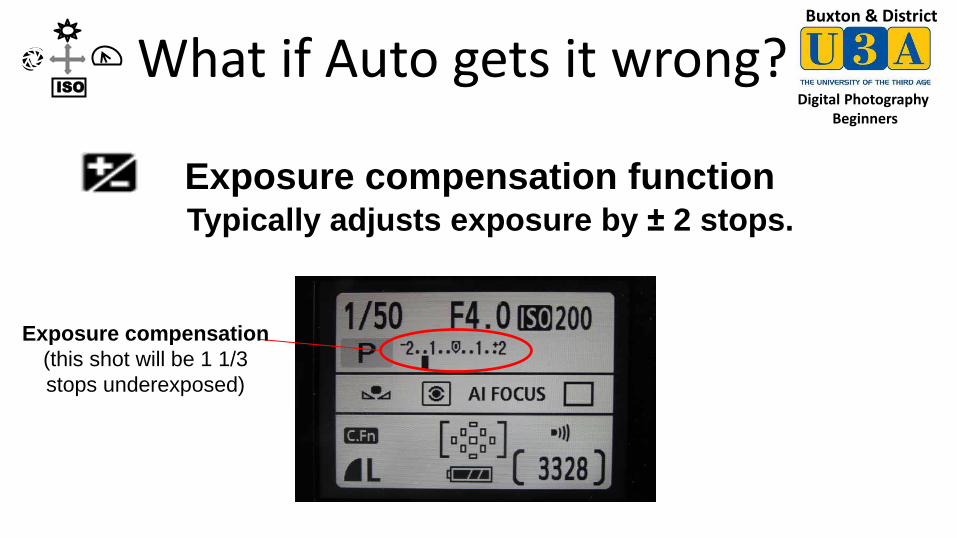
What if Auto gets it wrong?
Exposure compensation function Typically adjusts exposure by ± 2 stops.
Exposure compensation
(this shot will be 1 1/3
stops underexposed)
ISO
Buxton & District
Digital Photography Beginners
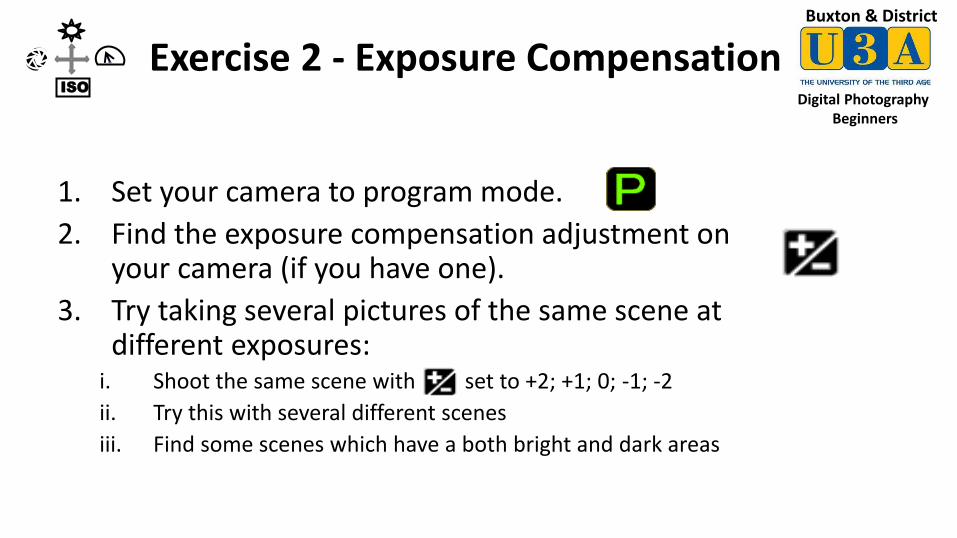
Exercise 2 - Exposure Compensation
1. Set your camera to program mode.
2. Find the exposure compensation adjustment on your camera (if you have one).
3. Try taking several pictures of the same scene at different exposures:
i. Shoot the same scene with set to +2; +1; 0; -1; -2
ii. Try this with several different scenes
iii. Find some scenes which have a both bright and dark areas
ISO
Buxton & District
Digital Photography Beginners
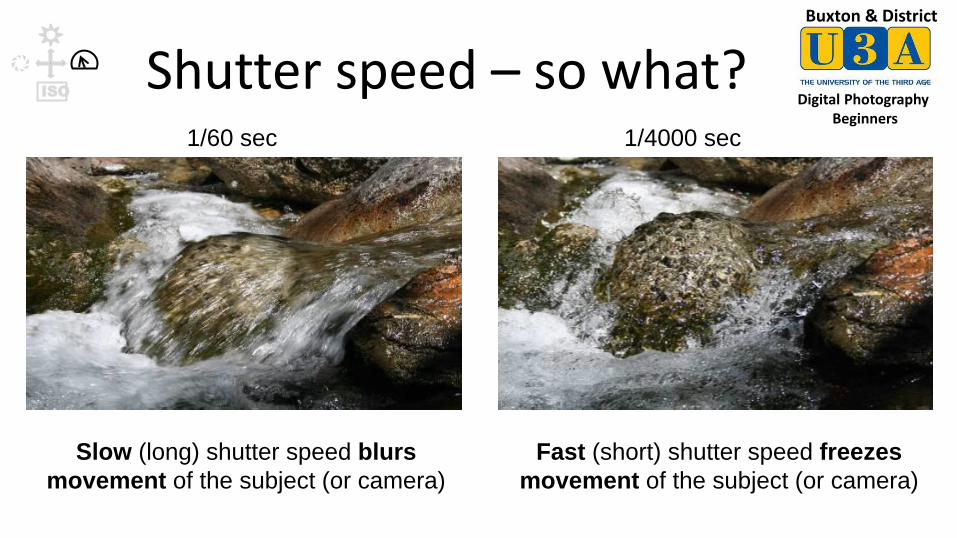
Shutter speed – so what? 1/60 sec 1/4000 sec
Fast (short) shutter speed freezes
movement of the subject (or camera)
Slow (long) shutter speed blurs
movement of the subject (or camera)
ISO
Buxton & District
Digital Photography Beginners
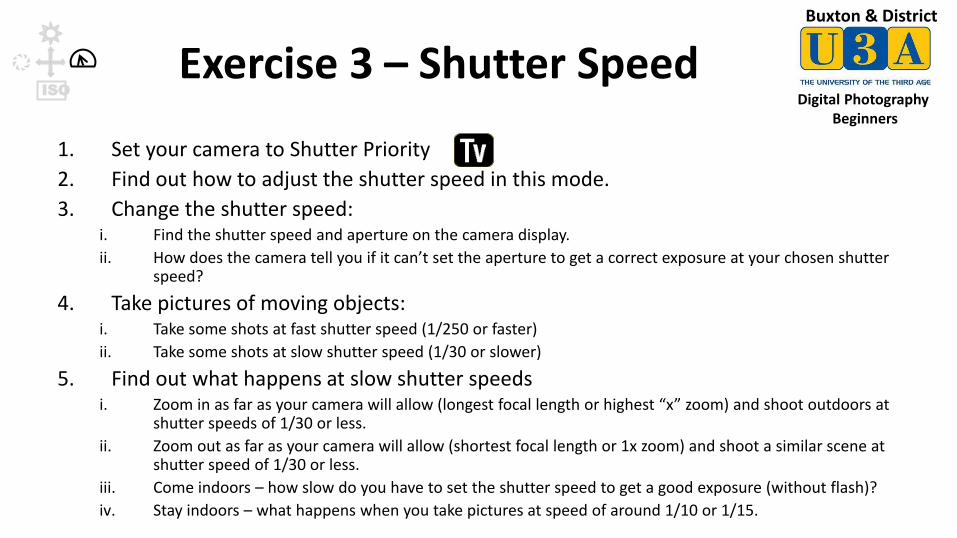
Exercise 3 – Shutter Speed
1. Set your camera to Shutter Priority
2. Find out how to adjust the shutter speed in this mode.
3. Change the shutter speed: i. Find the shutter speed and aperture on the camera display.
ii. How does the camera tell you if it can’t set the aperture to get a correct exposure at your chosen shutter speed?
4. Take pictures of moving objects: i. Take some shots at fast shutter speed (1/250 or faster)
ii. Take some shots at slow shutter speed (1/30 or slower)
5. Find out what happens at slow shutter speeds i. Zoom in as far as your camera will allow (longest focal length or highest “x” zoom) and shoot outdoors at
shutter speeds of 1/30 or less.
ii. Zoom out as far as your camera will allow (shortest focal length or 1x zoom) and shoot a similar scene at shutter speed of 1/30 or less.
iii. Come indoors – how slow do you have to set the shutter speed to get a good exposure (without flash)?
iv. Stay indoors – what happens when you take pictures at speed of around 1/10 or 1/15.
ISO
Buxton & District
Digital Photography Beginners
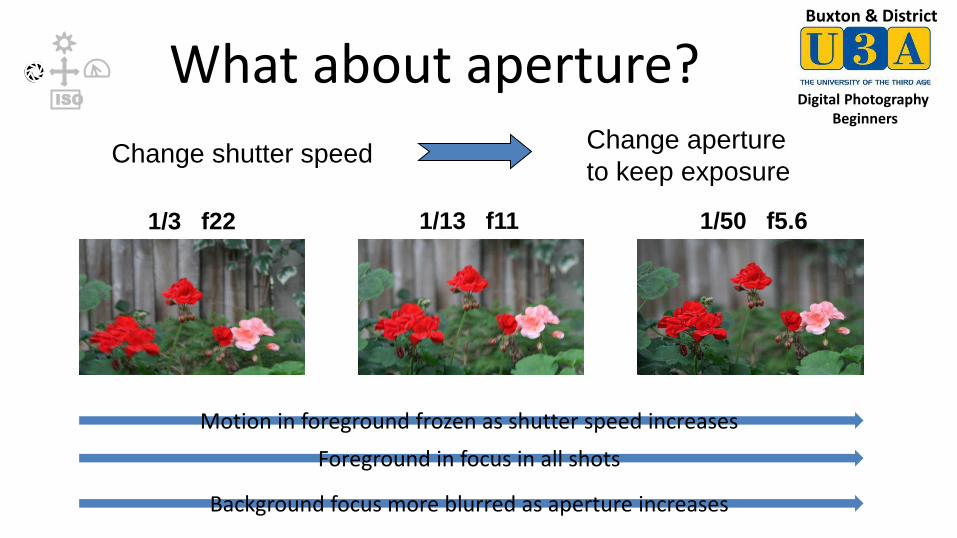
What about aperture?
Change shutter speed Change aperture
to keep exposure
1/3 f22 1/13 f11 1/50 f5.6
Motion in foreground frozen as shutter speed increases
Foreground in focus in all shots
Background focus more blurred as aperture increases
ISO
Buxton & District
Digital Photography Beginners
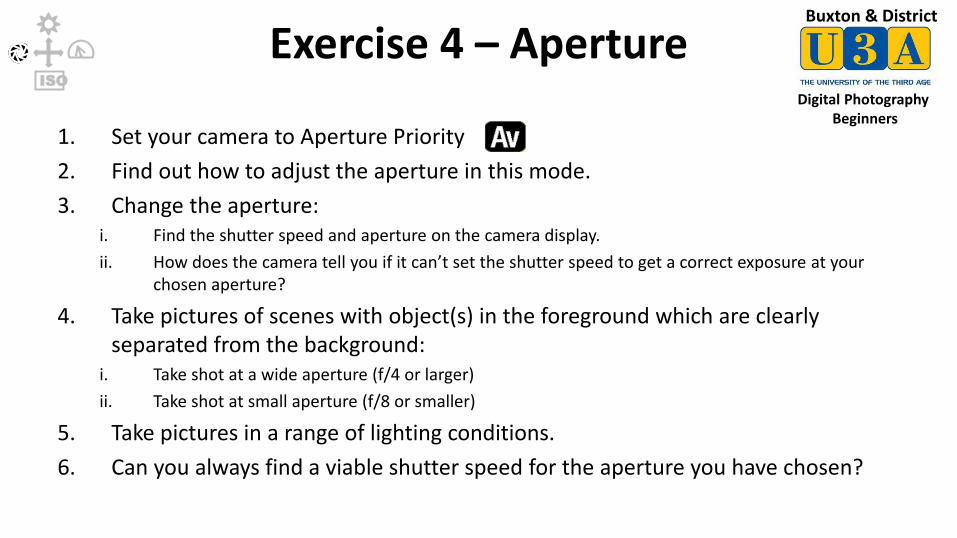
Exercise 4 – Aperture
1. Set your camera to Aperture Priority
2. Find out how to adjust the aperture in this mode.
3. Change the aperture: i. Find the shutter speed and aperture on the camera display.
ii. How does the camera tell you if it can’t set the shutter speed to get a correct exposure at your chosen aperture?
4. Take pictures of scenes with object(s) in the foreground which are clearly separated from the background:
i. Take shot at a wide aperture (f/4 or larger)
ii. Take shot at small aperture (f/8 or smaller)
5. Take pictures in a range of lighting conditions.
6. Can you always find a viable shutter speed for the aperture you have chosen?
ISO
Buxton & District
Digital Photography Beginners
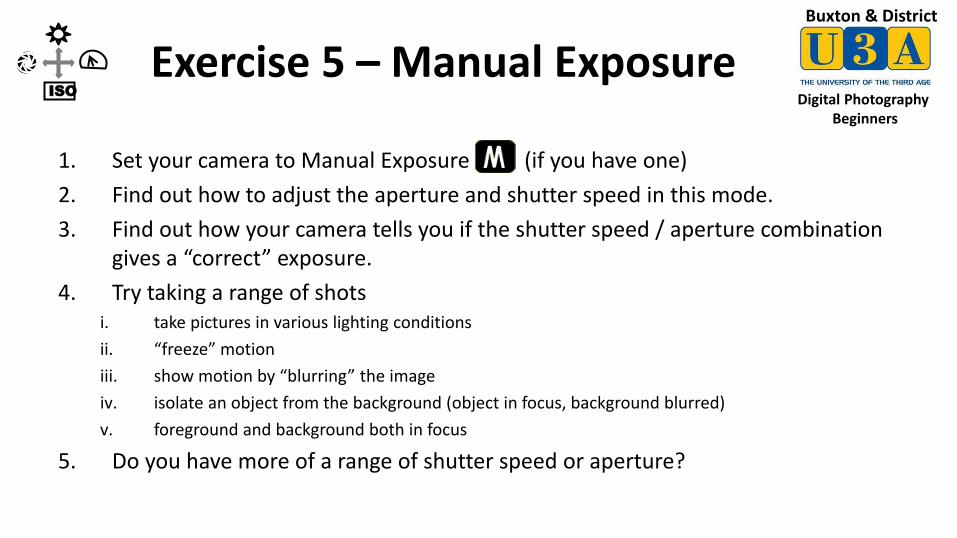
Exercise 5 – Manual Exposure
1. Set your camera to Manual Exposure (if you have one)
2. Find out how to adjust the aperture and shutter speed in this mode.
3. Find out how your camera tells you if the shutter speed / aperture combination gives a “correct” exposure.
4. Try taking a range of shots i. take pictures in various lighting conditions
ii. “freeze” motion
iii. show motion by “blurring” the image
iv. isolate an object from the background (object in focus, background blurred)
v. foreground and background both in focus
5. Do you have more of a range of shutter speed or aperture?
ISO
Buxton & District
Digital Photography Beginners
What affects Exposure
How sensitive is the
film (or digital detector)
“Film Speed”
How much light is there
on the subject “Lighting”
How big is the hole
letting light into the
camera “Aperture”
For how long is the
camera collecting light
“Shutter speed” 4”
2” 1” 1/2”
1/250” 1/125” 1/60”
1/30” 1/16” 1/8”
1/4”
1/500”
ISO
Buxton & District
Digital Photography Beginners
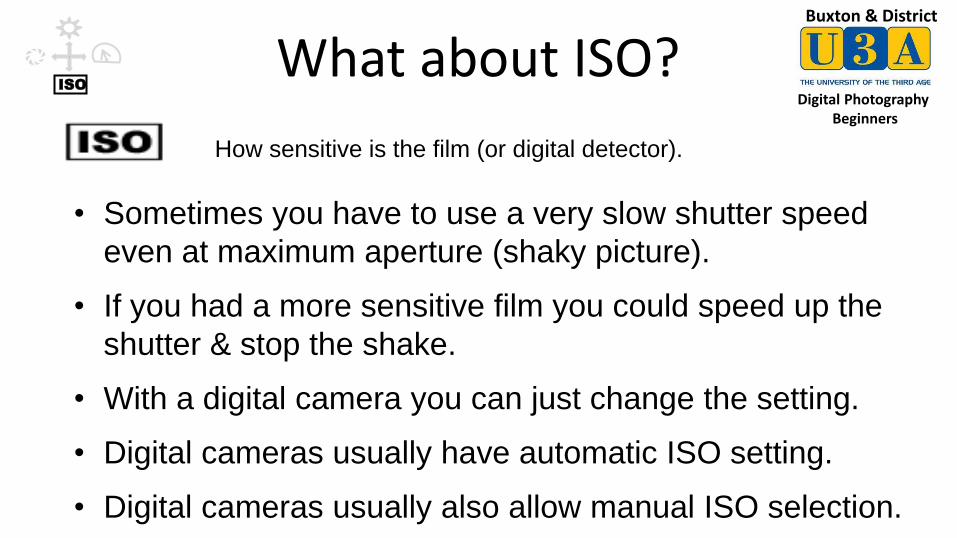
What about ISO?
How sensitive is the film (or digital detector).
• Sometimes you have to use a very slow shutter speed
even at maximum aperture (shaky picture).
• If you had a more sensitive film you could speed up the
shutter & stop the shake.
• With a digital camera you can just change the setting.
• Digital cameras usually have automatic ISO setting.
• Digital cameras usually also allow manual ISO selection.
ISO
Buxton & District
Digital Photography Beginners
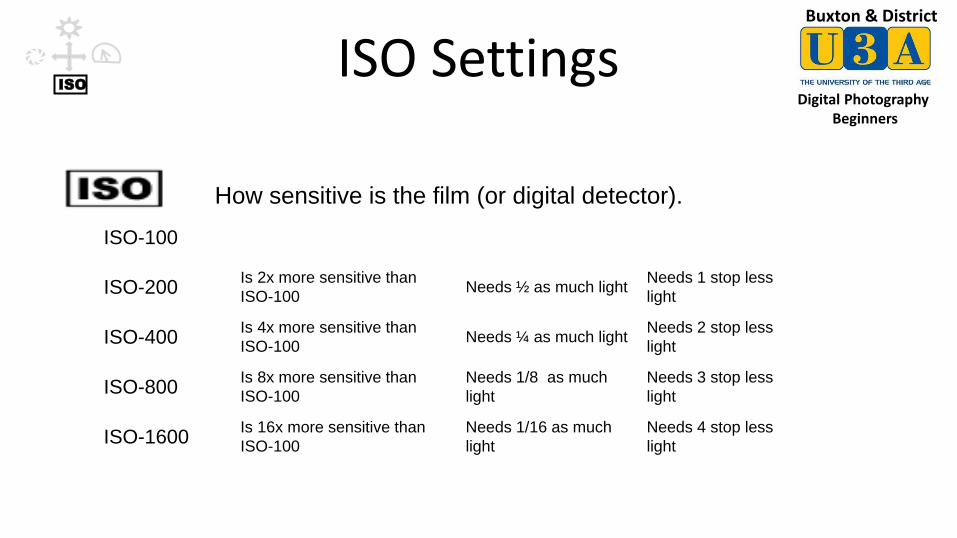
ISO Settings ISO
ISO-100
ISO-200 Is 2x more sensitive than
ISO-100 Needs ½ as much light
Needs 1 stop less
light
ISO-400 Is 4x more sensitive than
ISO-100 Needs ¼ as much light
Needs 2 stop less
light
ISO-800 Is 8x more sensitive than
ISO-100
Needs 1/8 as much
light
Needs 3 stop less
light
ISO-1600 Is 16x more sensitive than
ISO-100
Needs 1/16 as much
light
Needs 4 stop less
light
How sensitive is the film (or digital detector).
Buxton & District
Digital Photography Beginners
Exercise 6 – ISO
1. Find out how to adjust the ISO on your camera.
2. Set ISO to Auto.
3. Take pictures in a range of lighting conditions – note the ISO, shutter speed and aperture.
4. Choose the shutter speed (shake/freeze/blur) and aperture (depth of field) then see if you can adjust the ISO to get a correct exposure.
5. Take a picture with the lowest ISO you have and a similar picture with the highest ISO. Can you see any difference in quality of the image?
ISO
Buxton & District
Digital Photography Beginners
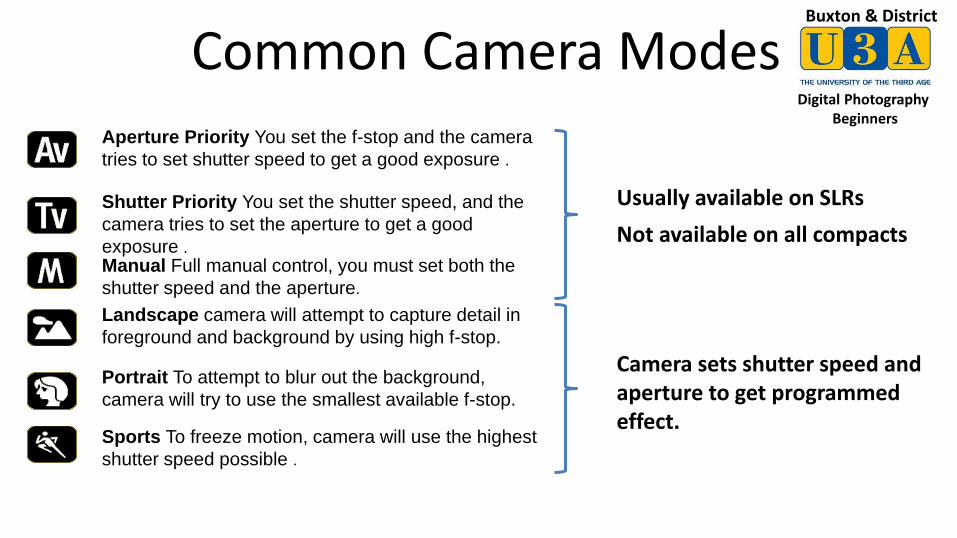
Common Camera Modes
Portrait To attempt to blur out the background,
camera will try to use the smallest available f-stop.
Landscape camera will attempt to capture detail in
foreground and background by using high f-stop.
Sports To freeze motion, camera will use the highest
shutter speed possible .
Aperture Priority You set the f-stop and the camera
tries to set shutter speed to get a good exposure .
Shutter Priority You set the shutter speed, and the
camera tries to set the aperture to get a good
exposure . Manual Full manual control, you must set both the
shutter speed and the aperture.
Usually available on SLRs
Not available on all compacts
Camera sets shutter speed and aperture to get programmed effect.
Buxton & District
Digital Photography Beginners
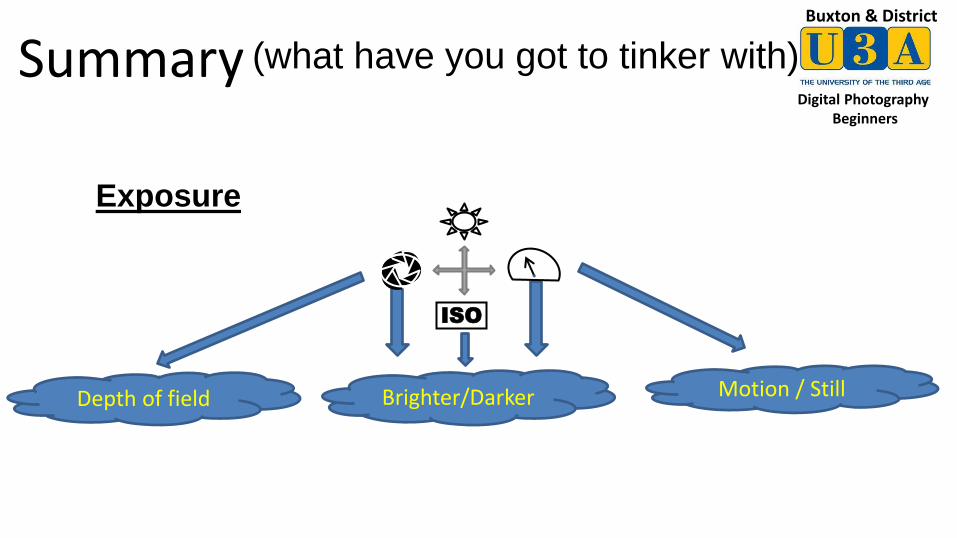
Summary (what have you got to tinker with)
Exposure
Brighter/Darker Depth of field Motion / Still
ISO
Buxton & District
Digital Photography Beginners
Homework
Go through Exercises 1-6 again at home in your own time.
Make sure you feel comfortable with:
• Controlling exposure
• Freezing / blurring motion
• Controlling depth of field
Buxton & District
Digital Photography Beginners
Next Time
How to improve my pictures.
• Drawing together exposure / focal length / perspective
• Taking pictures of people
Buxton & District
Digital Photography Beginners
Course notes I will put this presentation on the Buxton and District U3A website at : http://u3asites.org.uk/code/u3asite.php?site=179&page=25298 Or 1. Go to www.buxtonu3a.org.uk 2. Select “Groups” 3. Select “Digital Photography: Beginners” 4. Select “materials from previous sessions” from the links on right hand
side of page