c a p i t a l k n i t s -...
TRANSCRIPT
Version 1.2 January 2015
c a p i t a l
K N I T S
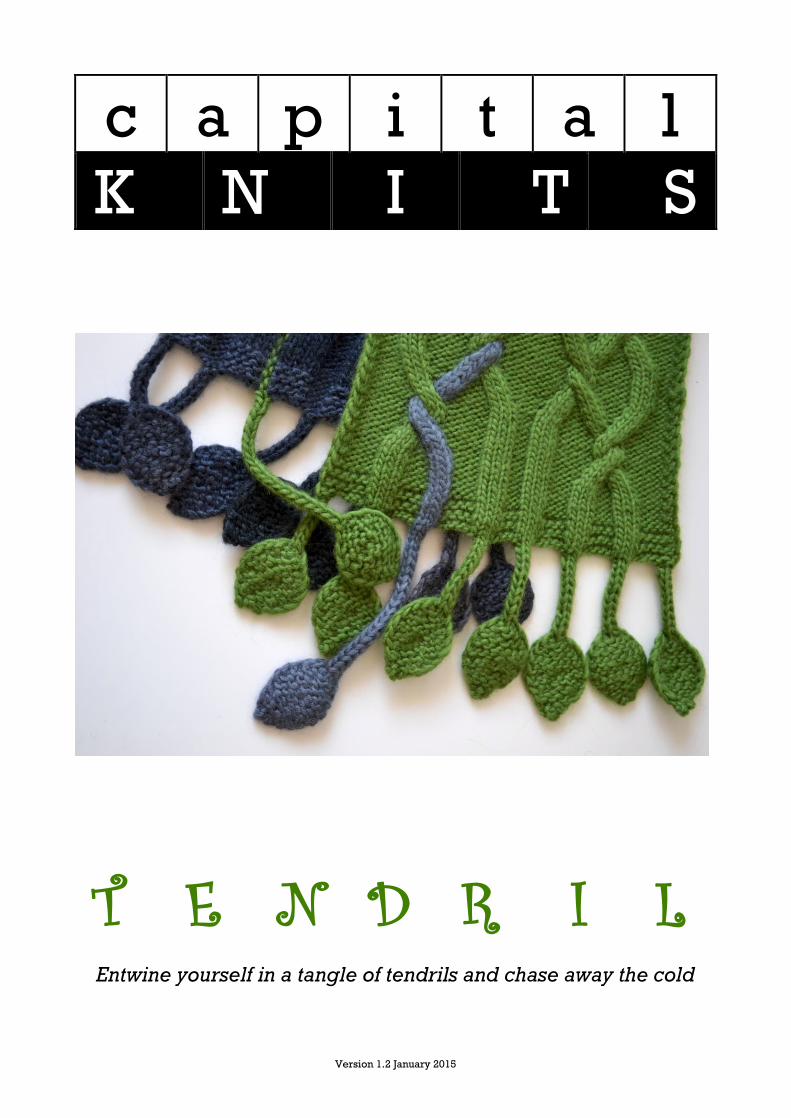
T E N D R I L
Entwine yourself in a tangle of tendrils and chase away the cold

© Fiona Oliver 2015 Page 2 of 2
c a p i t a l
K N I T S
My Construction Notes
______________________________________________________________________________________
______________________________________________________________________________________
______________________________________________________________________________________
______________________________________________________________________________________
______________________________________________________________________________________
______________________________________________________________________________________
______________________________________________________________________________________
______________________________________________________________________________________
______________________________________________________________________________________
______________________________________________________________________________________
______________________________________________________________________________________
______________________________________________________________________________________
______________________________________________________________________________________
______________________________________________________________________________________
______________________________________________________________________________________
______________________________________________________________________________________
______________________________________________________________________________________
______________________________________________________________________________________
______________________________________________________________________________________
______________________________________________________________________________________
______________________________________________________________________________________
______________________________________________________________________________________
______________________________________________________________________________________
______________________________________________________________________________________
______________________________________________________________________________________
______________________________________________________________________________________
______________________________________________________________________________________
______________________________________________________________________________________

© Fiona Oliver 2015 Page 3 of 3
c a p i t a l
K N I T S
Tendril
About this design
This sinuous cable scarf initially grew out of a desire to explore two colour cables but it
developed into something much more botanical. The tendrils of the cables seemed to take on a
life of their own until they grew off each end of the scarf and burst into foliage.
This top down scarf design uses a variety of interesting techniques including a provisional cast
on, two colour (intarsia) cables and i-cords.
The scarf is quite long and can be wrapped around the neck twice. The pattern can be easily
adjusted to make a shorter scarf if desired.
Size
One size fits all. Finished blocked dimensions are
25.5 centimetres (10 inches) wide and 183
centimetres (72 inches) long. Foliage Fringe ranges in
depth from 10-15 centimetres (4-6 inches). The width
of the scarf will narrow with wear to approximately 20
– 22 centimetres (8 – 9 inches).
Tension
19 stitches x 30 rows in stocking (stockinette) stitch
knitted on 4.5 mm (US size 7, UK size 7) needles on a
10 cm (4 in) blocked swatch. A perfect match for
tension is not super critical for this pattern. However,
if your gauge is significantly different, move up or
down a needle size and swatch one more time. Also,
you may find that you use more or less yarn if your
gauge is significantly different.
Materials
Yarn
325 metres (355 yards) of each colour of any roving style yarn in the double knit (8 ply) to
worsted (10) ply range that knits to the tension gauge. Yarn thickness is approximately 14
wraps per inch.
This scarf has been knitted with Cleckheaton California double knit (8 ply) 100% wool.
Contrast Colour 1: Fennel (colour 0018) 2 balls with 46 metres (50 yards) left over
Contrast Colour 2: Grey Scale (colour 5804) 2 balls with 46 metres (50 yards) left over
Although listed on the label as a double knit (8 ply) yarn, this yarn is more like a worsted
(10 ply) weight yarn.

© Fiona Oliver 2015 Page 4 of 4
c a p i t a l
K N I T S
Needles
4.5 mm (US size 7, UK size 7) needles
Cable needle of a size to match the main needles (optional)
4.5 mm (US size 7, UK size 7) double pointed needles (optional)
Notions
Worsted (10 ply) waste yarn for provisional cast on
4.5 mm (US size 7, UK size 7) crochet hook for provisional cast on
Tapestry/darning needle for finishing
Construction Notes
This scarf is knitted from the back of the neck down in two colour (intarsia) cables to each
foliage-fringed end. This construction method means that the first half of the scarf commences with a crochet provisional cast on. Once the first half is finished, the stitches held by the
provisional cast on are picked up and the second half of the scarf is knitted from the neck down
to the other foliage-fringed end. Depending on your preference, you can knit your cables with
or without a cable needle. The foliage fringe is constructed from i-cords that end in garter
stitch leaf motifs. You can either knit your i-cords with double pointed needles or just slip
stitches if not using double pointed needles.
An Intarsia colour change is necessary when you swap between the contrast colours when
working the tendril. Once you have knitted the final stitch in the current colour, twist the two
yarns around each other and then continue with the new colour. Twist yarns over again when
you resume working with the first contrast colour. Twisting the yarns together ensures that
there are no gaps and also allows you to carry the main colour across the wrong side of your
work when contrast coloured stitches are being worked.
Instructions for working all these techniques are given in the References section of this pattern.
Abbreviations
BO Bind off
CC1 Contrast Colour 1
CC2 Contrast Colour 2
CO Cast on
dpn Double pointed needle(s)
k Knit
kf&b Knit front and back in the same stitch
kw Knit-wise
k2togtbl Knit 2 together through the back loop
3/1 LPC Slip 3 stitches to cable needle and hold in front, p1, k3 from cable needle.
3/3 LC Slip 3 stitches to cable needle and hold in front, k3, k3 from cable needle.
LH Left hand
p Purl
pw Purl-wise
psso Pass slipped stitch over
puk Pick up and knit
pup Pick up and purl
rep Repeat
3/1 RPC Slip 1 stitch to cable needle and hold in back, k3, p1 from cable needle.
3/3 RC Slip 3 stitches to cable needle and hold in back, k3, k3 from cable needle.
RH Right hand
RS Right side
© Fiona Oliver 2015 Page 5 of 5
c a p i t a l
K N I T S
s1 With the working yarn in back, insert the right needle into the next stitch as if to
purl and transfer the stitch from the left needle to the right.
s1 wyif With the working yarn in front, insert the right needle into the next stitch as if to
purl and transfer the stitch from the left needle to the right.
ssk Slip the next two stitches knitwise, insert LH needle into the fronts of the two
slipped stitches and knit them together
st Stitch(es)
WS Wrong side
w&t Wrap and turn
WY Waste yarn
Instructions
Scarf (First Half)
Using WY and a crochet hook, make a loose chain of 55 stitches. This is the foundation for the
provisional CO.
CO: Using CC1 on the crochet chain, puk 3 st, pup 6 st, puk 6 st, pup 6 st. Swap to
CC2 and puk 3 st (this is the tendril). Drop CC2 and carry CC1 behind these 3 st
to pup 3 st, puk 3 st, pup 6 st, puk 6 st, pup 6 st, puk 3 (51 st). This is a RS row.
Next row: k9, p6, k6, p3, k3, p3, k6, p6, k8, sl wyif. This is a WS row.
From this point onward you can follow either the written or the charted
instructions. Continue to swap CC1 and CC2 as you reach the 3 tendril stitches
that are worked in CC2. Don’t forget to twist Otherwise just treat these 3 tendril
stitches as per the written or charted instructions.
Written Instructions
Row 1: K3, p6, 3/3 LC, p6, [k3, p3] twice, p3, 3/3 RC, p6, k2, s1 wyif. This is a RS row.
Row 2: K9, p6, k6, [p3, k3] twice, k3, p6, k8, s1 wyif.
Row 3: K3, p5, 3/1 RPC, 3/1 LPC, p4, 3/1 RPC, p3, 3/1 LPC, p4, 3/1 RPC, 3/1 LPC, p5, k2,
s1 wyif.
Row 4: K8, [p3, k2] twice, k2, p3, k1, [k4, p3] twice, k2, p3, k7, s1 wyif.
Row 5: K3, p4, 3/1 RPC, p2, 3/1 LPC, p2, 3/1 RPC, p5, 3/1 LPC, p2, 3/1 RPC, p2, 3/1 LPC,
p4, k2, s1 wyif.
Row 6: K7, p3, [k4, [p3, k2] twice, k1] twice, k1, p3, k6, s1 wyif.
Row 7: K3, p3, 3/1 RPC, [p4, 3/1 LPC, 3/1 RPC, p3] twice, p1, 3/1 LPC, p3, k2, s1 wyif.
Row 8: K6, p3, [k6, p6, k3] twice, k3, p3, k5, s1 wyif.
Row 9: [K3, p3] twice, p3, 3/3 LC, p9, 3/3 RC, p6, k3, p3, k2, s1 wyif.
Row 10: K6, p3, [k6, p6, k3] twice, k3, p3, k5, s1 wyif.
Row 11: K3, p3, 3/1 LPC, [p4, 3/1 RPC, 3/1 LPC, p3] twice, p1, 3/1 RPC, p3, k2, s1 wyif.
Row 12: K7, p3, [k4, [p3, k2] twice, k1] twice, k1, p3, k6, s1 wyif.
Row 13: K3, p4, 3/1 LPC, p2, 3/1 RPC, p2, 3/1 LPC, p5, 3/1 RPC, p2, 3/1 LPC, p2, 3/1 RPC,
p4, k2, s1 wyif.
Row 14: K8, [p3, k2] twice, k2, p3, k1, [k4, p3] twice, k2, p3, k7, s1 wyif.
Row 15: K3, p5, 3/1 LPC, 3/1 RPC, p4, 3/1 LPC, p3, 3/1 RPC, p4, 3/1 LPC, 3/1 RPC, p5, k2,
s1 wyif.
Row 16: K9, p6, k6, [p3, k3] twice, k3, p6, k8, s1 wyif.
Row 17: K3, p6, 3/3 LC, p6, [k3, p3] twice, p3, 3/3 RC, p6, k2, s1 wyif.
Row 18: K9, p6, k6, [p3, k3] twice, k3, p6, k8, s1 wyif.
Row 19: [K3, p6, k3] twice, p3, k3, p6, k6, p6, k2, s1 wyif.
Row 20: K9, p6, k6, [p3, k3] twice, k3, p6, k8, s1 wyif.
Row 21: K3, p6, 3/3 LC, p6, [k3, p3] twice, p3, 3/3 RC, p6, k2, s1 wyif.
© Fiona Oliver 2015 Page 6 of 6
c a p i t a l
K N I T S
Row 22: K9, p6, k6, [p3, k3] twice, k3, p6, k8, s1 wyif.
Row 23: K3, p5, 3/1 RPC, 3/1 LPC, p4, 3/1 RPC, p3, 3/1 LPC, p4, 3/1 RPC, 3/1 LPC, p5, k2, s1 wyif.
Row 24: K8, [p3, k2] twice, k2, p3, k1, [k4, p3] twice, k2, p3, k7, s1 wyif.
Row 25: K3, p4, 3/1 RPC, p2, 3/1 LPC, p2, 3/1 RPC, p5, 3/1 LPC, p2, 3/1 RPC, p2, 3/1 LPC,
p4, k2, s1 wyif.
Row 26: K7, p3, [k4, [p3, k2] twice, k1] twice, k1, p3, k6, s1 wyif.
Row 27: K3, p3, 3/1 RPC, [p4, 3/1 LPC, 3/1 RPC, p3] twice, p1, 3/1 LPC, p3, k2, s1 wyif.
Row 28: K6, p3, [k6, p6, k3] twice, k3, p3, k5, s1 wyif.
Row 29: [K3, p3] twice, p3, 3/3 LC, p9, 3/3 RC, p6, k3, p3, k2, s1 wyif.
Row 30: K6, p3, [k6, p6, k3] twice, k3, p3, k5, s1 wyif.
Row 31: K3, p3, k3, [p6, k6, p3] twice, p3, k3, p3, k2, s1 wyif.
Row 32: K6, p3, [k6, p6, k3] twice, k3, p3, k5, s1 wyif.
Rep rows 9 – 32 8 times and then continue from rows 33 – 54 for the final pattern rep and to set
up for the foliage fringe. If you wish to make a shorter scarf then reduce the number of times
that you rep rows 9 – 32.
Row 33: [K3, p3] twice, p3, 3/3 LC, p9, 3/3 RC, p6, k3, p3, k2, s1 wyif.
Row 34: K6, p3, [k6, p6, k3] twice, k3, p3, k5, s1 wyif.
Row 35: K3, p3, 3/1 LPC, [p4, 3/1 RPC, 3/1 LPC, p3] twice, p1, 3/1 RPC, p3, k2, s1 wyif.
Row 36: K7, p3, [k4, [p3, k2] twice, k1] twice, k1, p3, k6, s1 wyif.
Row 37: K3, p4, 3/1 LPC, p2, 3/1 RPC, p2, 3/1 LPC, p5, 3/1 RPC, p2, 3/1 LPC, p2, 3/1 RPC,
p4, k2, s1 wyif.
Row 38: K8, [p3, k2] twice, k2, p3, k1, [k4, p3] twice, k2, p3, k7, s1 wyif.
Row 39: K3, p5, 3/1 LPC, 3/1 RPC, p4, 3/1 LPC, p3, 3/1 RPC, p4, 3/1 LPC, 3/1 RPC, p5, k2,
s1 wyif.
Row 40: K9, p6, k6, [p3, k3] twice, k3, p6, k8, s1 wyif.
Row 41: K3, p6, 3/3 LC, p6, [k3, p3] twice, p3, 3/3 RC, p6, k2, s1 wyif.
Row 42: K9, p6, k6, [p3, k3] twice, k3, p6, k8, s1 wyif.
Row 43: [K3, p6, k3] twice, p3, k3, p6, k6, p6, k2, s1 wyif.
Row 44: K9, p6, k6, [p3, k3] twice, k3, p6, k8, s1 wyif.
Row 45: K3, p6, 3/3 LC, p6, [k3, p3] twice, p3, 3/3 RC, p6, k2, s1 wyif.
Row 46: K9, p6, k6, [p3, k3] twice, k3, p6, k8, s1 wyif.
Row 47: K3, p5, 3/1 RPC, 3/1 LPC, p5, [k3, p3] twice, p2, 3/1 RPC, 3/1 LPC, p5, k2, s1 wyif.
Row 48: K8, p3, [k2, p3, k5, p3, k1] twice, k1, p3, k7, s1 wyif.
Row 49: K3, p4, 3/1 RPC, p2, k4, p4, [k3, p3] twice, p1, 3/1 RPC, p2, 3/1 LPC, p4, k2, s1 wyif.
Row 50: K4, [[k3, p3, k1] twice, k3, p3] twice, k6, s1 wyif.
Row 51: K3, p1, [[p3, k3, p1] twice, p3, k3] twice, p4, k2, s1 wyif.
Rows 52-53: Repeat rows 50-51.
Row 54: K4, [[k3, p3, k1] twice, k3, p3] twice, k6, s1 wyif.
© Fiona Oliver 2015 Page 7 of 7
c a p i t a l
K N I T S
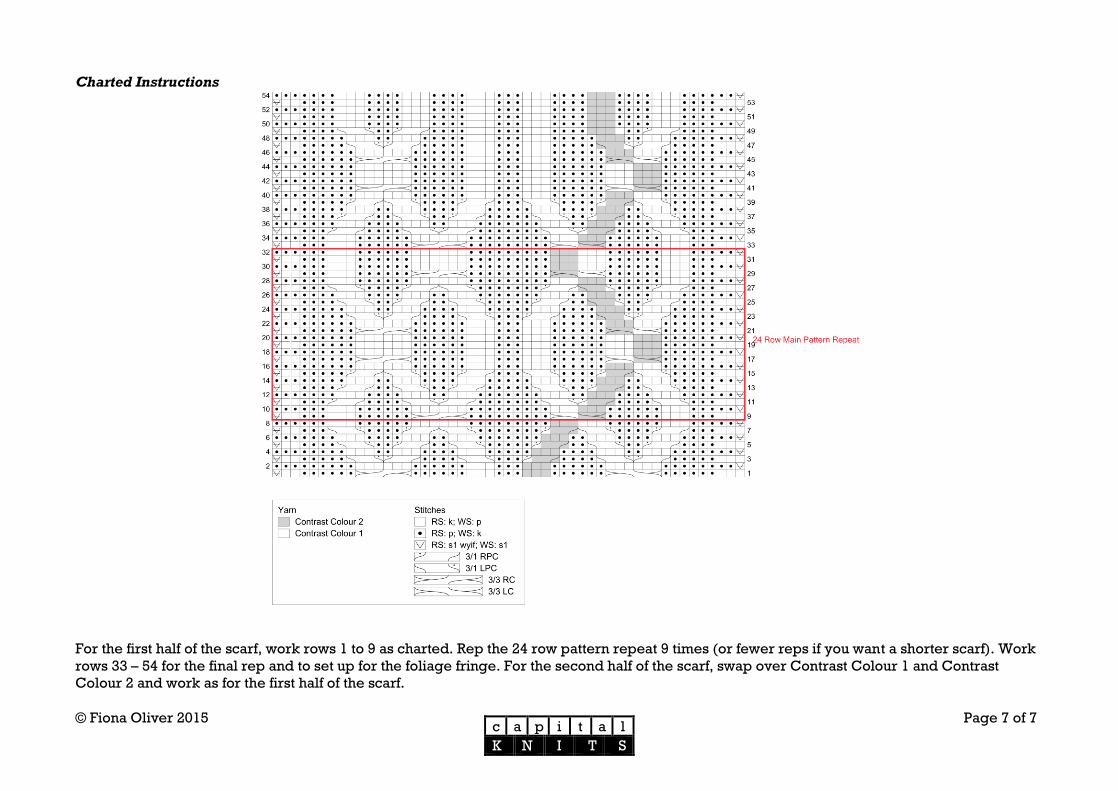
Charted Instructions
For the first half of the scarf, work rows 1 to 9 as charted. Rep the 24 row pattern repeat 9 times (or fewer reps if you want a shorter scarf). Work
rows 33 – 54 for the final rep and to set up for the foliage fringe. For the second half of the scarf, swap over Contrast Colour 1 and Contrast
Colour 2 and work as for the first half of the scarf.
© Fiona Oliver 2015 Page 8 of 8
c a p i t a l
K N I T S
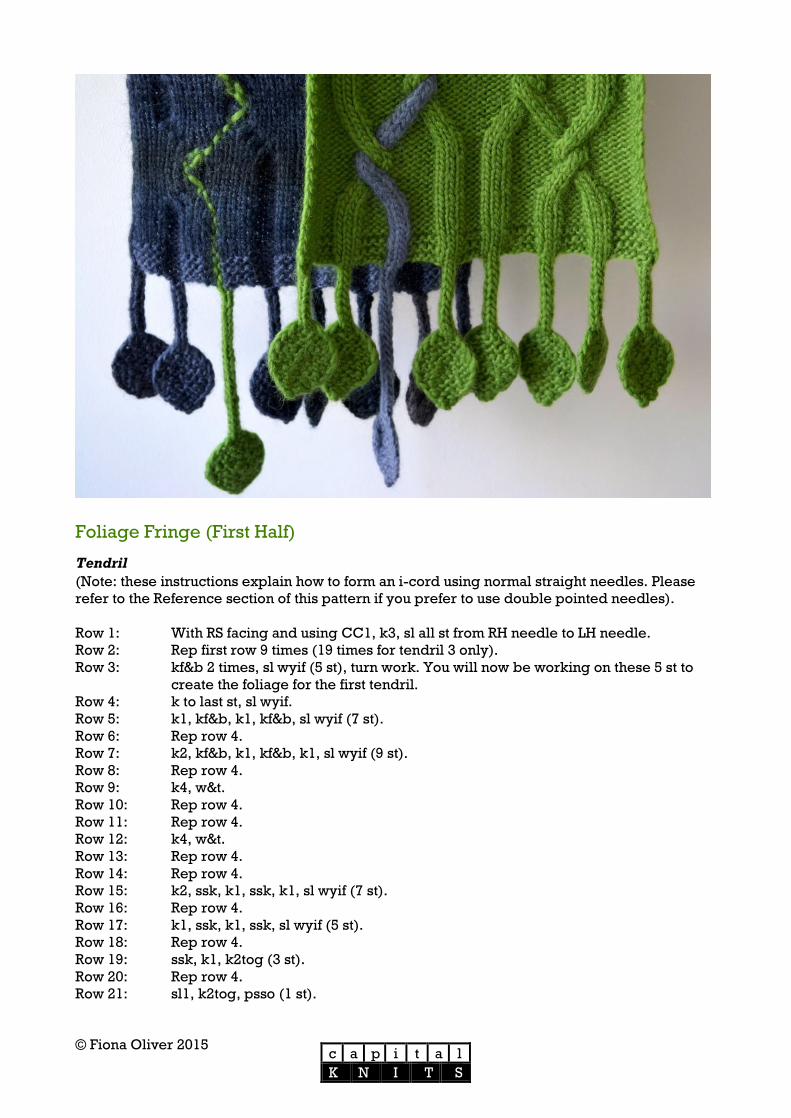
Foliage Fringe (First Half)
Tendril
(Note: these instructions explain how to form an i-cord using normal straight needles. Please
refer to the Reference section of this pattern if you prefer to use double pointed needles).
Row 1: With RS facing and using CC1, k3, sl all st from RH needle to LH needle.
Row 2: Rep first row 9 times (19 times for tendril 3 only).
Row 3: kf&b 2 times, sl wyif (5 st), turn work. You will now be working on these 5 st to
create the foliage for the first tendril.
Row 4: k to last st, sl wyif.
Row 5: k1, kf&b, k1, kf&b, sl wyif (7 st).
Row 6: Rep row 4.
Row 7: k2, kf&b, k1, kf&b, k1, sl wyif (9 st).
Row 8: Rep row 4.
Row 9: k4, w&t.
Row 10: Rep row 4.
Row 11: Rep row 4.
Row 12: k4, w&t.
Row 13: Rep row 4.
Row 14: Rep row 4.
Row 15: k2, ssk, k1, ssk, k1, sl wyif (7 st).
Row 16: Rep row 4.
Row 17: k1, ssk, k1, ssk, sl wyif (5 st).
Row 18: Rep row 4.
Row 19: ssk, k1, k2tog (3 st).
Row 20: Rep row 4.
Row 21: sl1, k2tog, psso (1 st).
© Fiona Oliver 2015 Page 9 of 9
c a p i t a l
K N I T S
Cut yarn and pull tail through the remaining stitch.
Space between Tendril 1 and Tendril 2
BO 3 st in the following way:
1. Sl 2 from the LH needle to the RH needle.
2. Pass first st on the LH needle over the second st (counting right to left).
3. Sl 1 from the LH needle to the RH needle.
4. Pass first st on the LH needle over the second st (counting right to left).
5. Sl 1 from the LH needle to the RH needle.
6. Pass first st on the LH needle over the second st (counting right to left).
Second Tendril
Using CC1, rep rows 1 to 21 to produce the second tendril.
Space between Tendril 2 and Tendril 3
BO 4 st in the following way:
1. Sl 2 from the LH needle to the RH needle.
2. Pass first st on the LH needle over the second st (counting right to left).
3. Sl 1 from the LH needle to the RH needle.
4. Pass first st on the LH needle over the second st (counting right to left).
5. Sl 1 from the LH needle to the RH needle.
6. Pass first st on the LH needle over the second st (counting right to left).
7. Sl 1 from the LH needle to the RH needle.
8. Pass first st on the LH needle over the second st (counting right to left).
Third Tendril
Using CC2, rep rows 1 to 21 to produce the third tendril.
Space between Tendril 3 and Tendril 4
Using CC1, rep instructions for space between Tendril 2 and Tendril 3.
Fourth Tendril
Using CC1, rep rows 1 to 21 to produce the fourth tendril.
Space between Tendril 4 and Tendril 5
Using CC1, rep instructions for space between Tendril 1 and Tendril 2.
Fifth Tendril
Using CC1, rep rows 1 to 21 to produce the fifth tendril.
Space between Tendril 5 and Tendril 6
Using CC1, rep instructions for space between Tendril 2 and Tendril 3.
Sixth Tendril
Using CC1, rep rows 1 to 21 to produce the sixth tendril.
Space between Tendril 6 and Tendril 7
Using CC1, rep instructions for space between Tendril 2 and Tendril 3.
Seventh Tendril
Using CC1, rep rows 1 to 21 to produce the seventh tendril.
Space between Tendril 7 and Tendril 8
Using CC1, rep instructions for space between Tendril 1 and Tendril 2.
© Fiona Oliver 2015 Page 10 of 10
c a p i t a l
K N I T S
Eighth Tendril
Using CC1, rep rows 1 to 21 to produce the eighth tendril.
Scarf and Foliage Fringe (Second Half)
Carefully remove the provisional CO and pick up all the released stitches.
Set-up row: With WS facing and using CC2, k7, kf&b, p6, k5, k2tog. Swap to CC1, p3. Swap
back to CC2, k1, kf&b, p3, K5, k2tog, p6, k8, sl wyif (51 st). This is a WS row.
Continue to swap CC2 and CC1 as you reach the 3 tendril stitches that are
worked in CC1. Otherwise just treat these 3 tendril stitches as per the written or charted instructions remembering to swap CC1 for CC2 in the charted
instructions.
Next row: k3, p6, k6, p6, k3, p3, k3, p6, k6, p6, k2, sl wyif. This is a RS row.
Next row: k9, p6, k6, p3, k3, p3, k6, p6, k8, sl wyif. This is a WS row.
Commencing at Row 1, repeat instructions for Scarf (First Half) and Foliage Fringe (First Half) remembering to swap CC1 for CC2 in all the instructions.
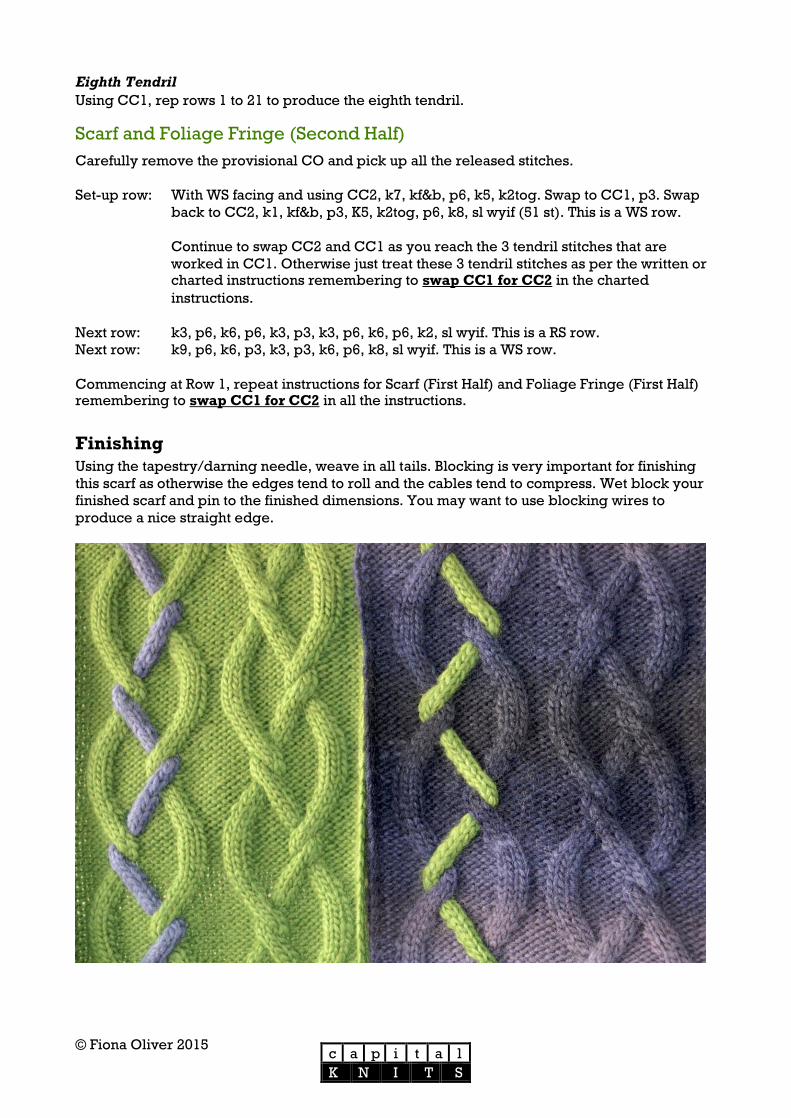
Finishing
Using the tapestry/darning needle, weave in all tails. Blocking is very important for finishing
this scarf as otherwise the edges tend to roll and the cables tend to compress. Wet block your
finished scarf and pin to the finished dimensions. You may want to use blocking wires to
produce a nice straight edge.
© Fiona Oliver 2015 Page 11 of 11
c a p i t a l
K N I T S
References
Two colour (intarsia) cables
This excellent knitpicks.com video provides excellent instructions on how to work two colour
(intarsia) cables. Imagine my surprise when I realised that the instructor was using the exact
same cable pattern (Jubilee Cable) for her demonstration that I have used in my Tendrils Scarf.
http://youtu.be/h5T943GkwDk
Cabling with and without a cable needle
This pair of videos by Knit Purl Hunter provides simple demonstrations of each technique for
forming cables.
With a cable needle: http://youtu.be/7jH9Bra_0Bk
Without a cable needle: http://youtu.be/Qq-qWMz1lQY
i-cord
This video by Knit Purl Hunter shows how to form i-cords using double pointed needles.
http://youtu.be/sSRKgE3wd3M
Crochet provisional cast on
This video by Stacey Perry of verypink.com provides a lovely demonstration of the crochet
provision cast on.
http://youtu.be/3OGG0AiJ3XE
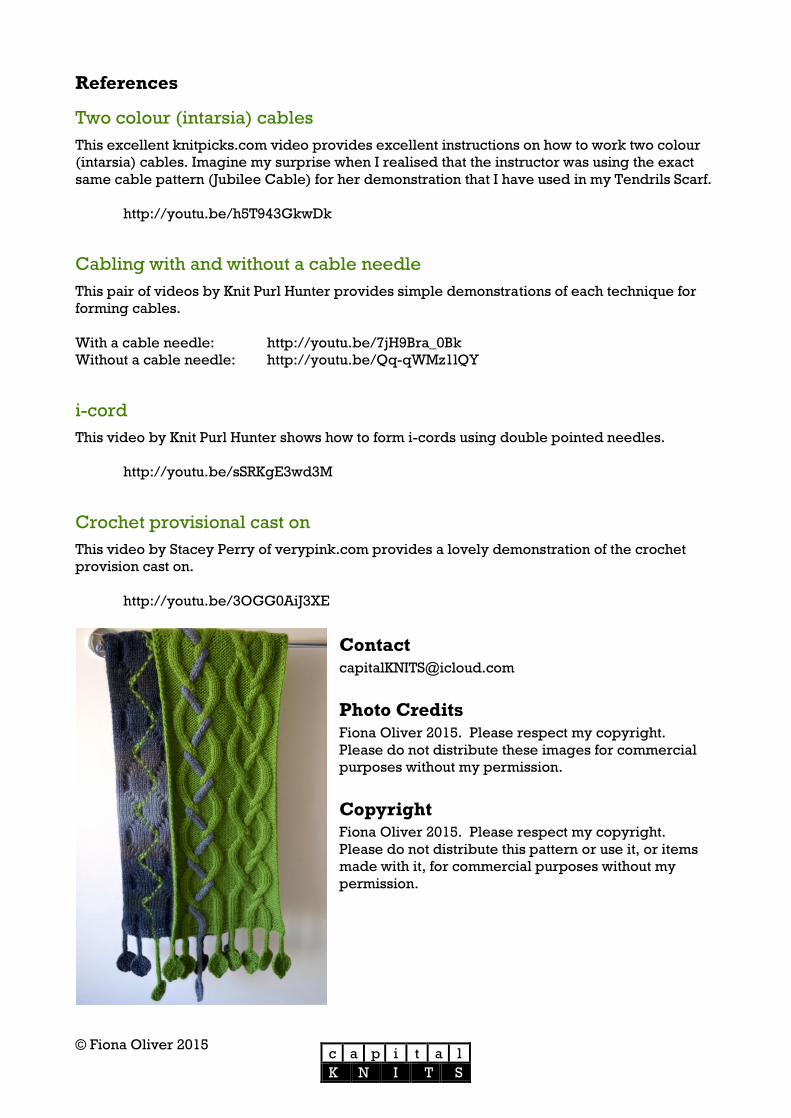
Contact
Photo Credits
Fiona Oliver 2015. Please respect my copyright.
Please do not distribute these images for commercial
purposes without my permission.
Copyright
Fiona Oliver 2015. Please respect my copyright.
Please do not distribute this pattern or use it, or items
made with it, for commercial purposes without my
permission.

© Fiona Oliver 2015 Page 12 of 12
c a p i t a l
K N I T S

© Fiona Oliver 2015 Page 13 of 13
c a p i t a l
K N I T S