casting feather blanks by shane whitlock -...
TRANSCRIPT

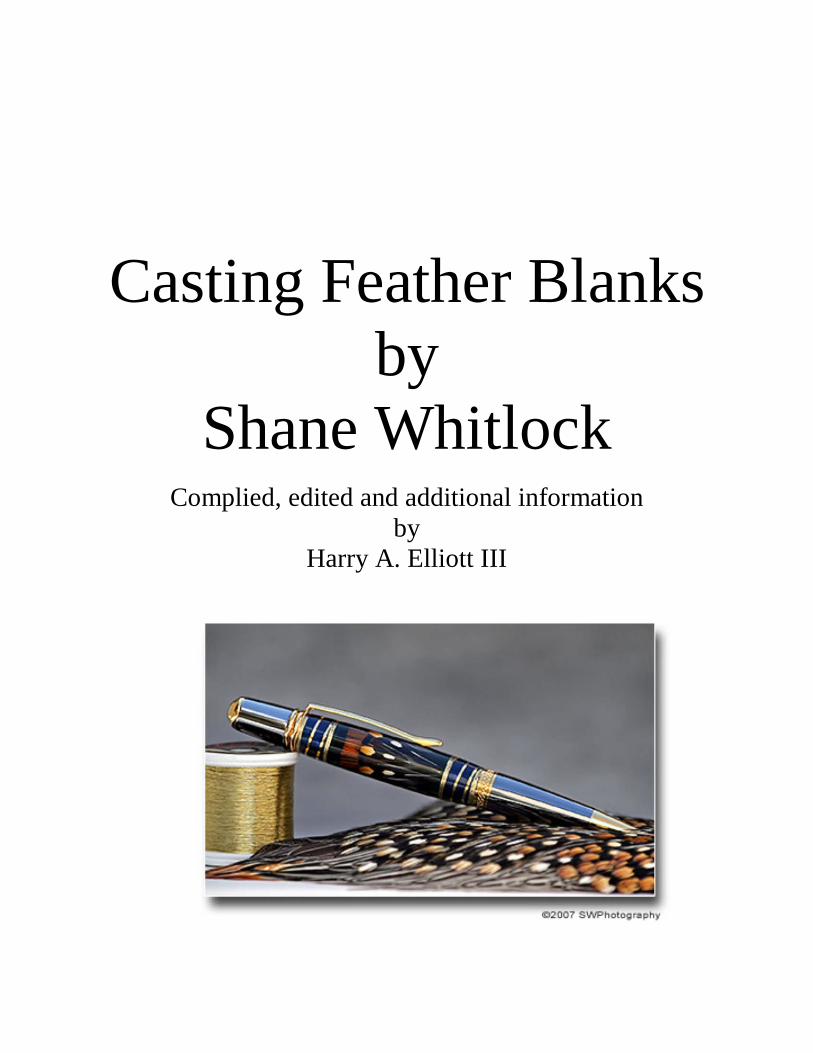
Casting Feather Blanks
by Shane Whitlock
Complied, edited and additional information
by Harry A. Elliott III
A.K.A “Padre”
This tutorial was downloaded from
http://www.penturners.org
The International Association of Penturners
Casting Feather Blanks by
Shane Whitlock
Complied, edited and additional information by
Harry A. Elliott III
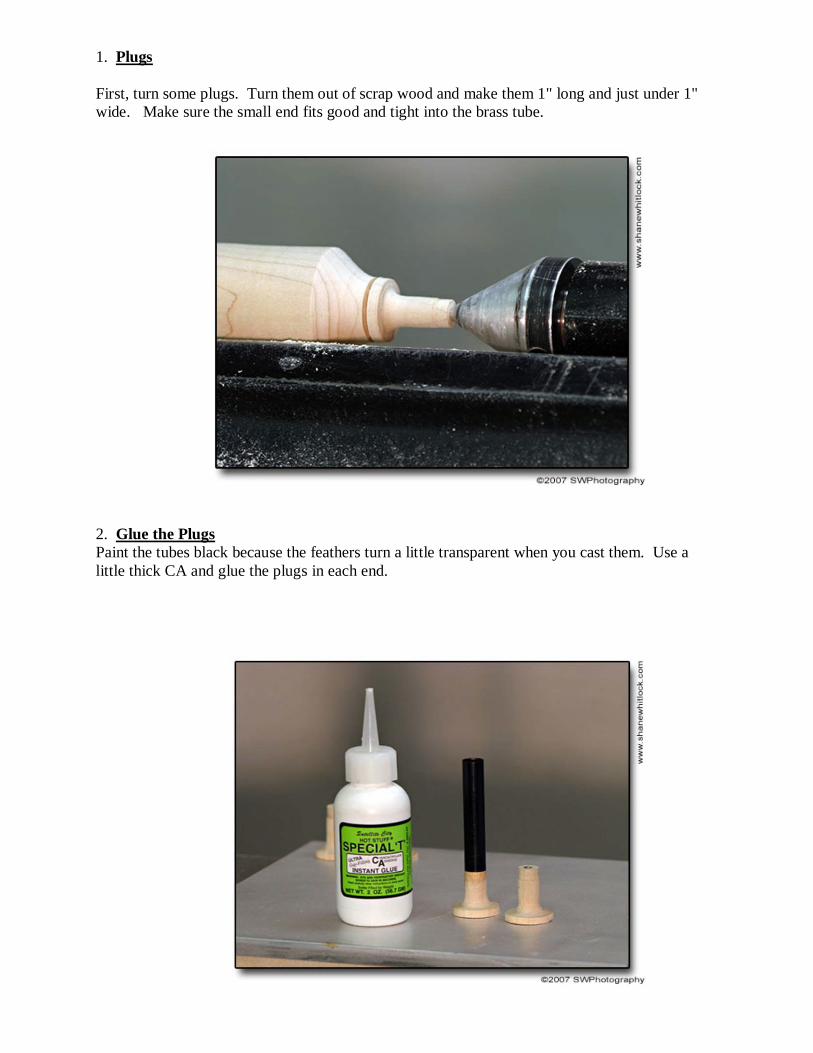
1. Plugs First, turn some plugs. Turn them out of scrap wood and make them 1" long and just under 1" wide. Make sure the small end fits good and tight into the brass tube.
2. Glue the Plugs Paint the tubes black because the feathers turn a little transparent when you cast them. Use a little thick CA and glue the plugs in each end.

3. Mount the Tube Next use some hot glue and glue the tube and plugs to the end of the spindle that you cut the plugs out of. Bring the tail stock up and use it to line everything up. Mounting the plug to the lathe like this works like a large rotating fly tying vise. It comes in handy being able to rotate the piece by hand while you are tying the feathers. 4. Tie the Thread Wrap and tie the thread on to each plug. You may want to use fly tying bobbins to wrap the thread. These are cheap, 4 or 5 bucks, and can be picked up at any fly tying shop. Any thread will work and color doesn't matter since it won’t be a part of the blank when you are finished.

5. Pick Out Feathers The feathers shown are dyed Grizzly Hackle. Pick out the feathers that you want to use. 6. Tie One End of the Feathers Lay the feather on to the plug and tightly wrap the thread around it 3 or 4 times.
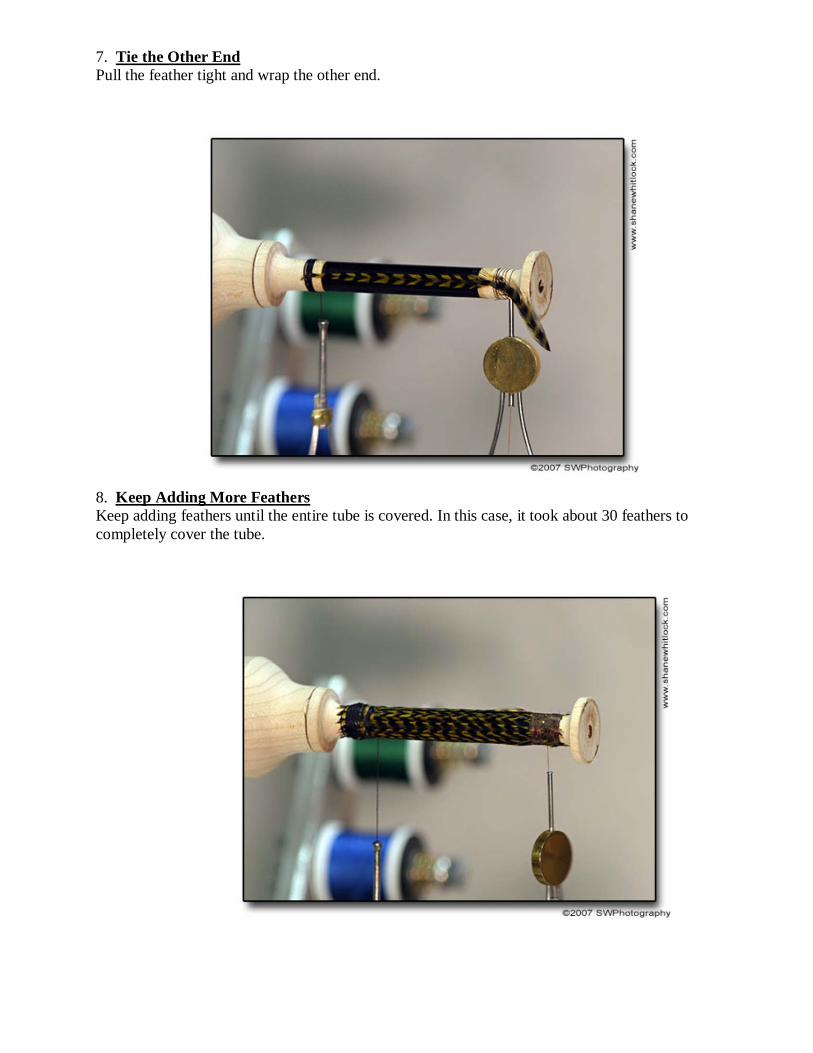
7. Tie the Other End Pull the feather tight and wrap the other end. 8. Keep Adding More Feathers Keep adding feathers until the entire tube is covered. In this case, it took about 30 feathers to completely cover the tube.
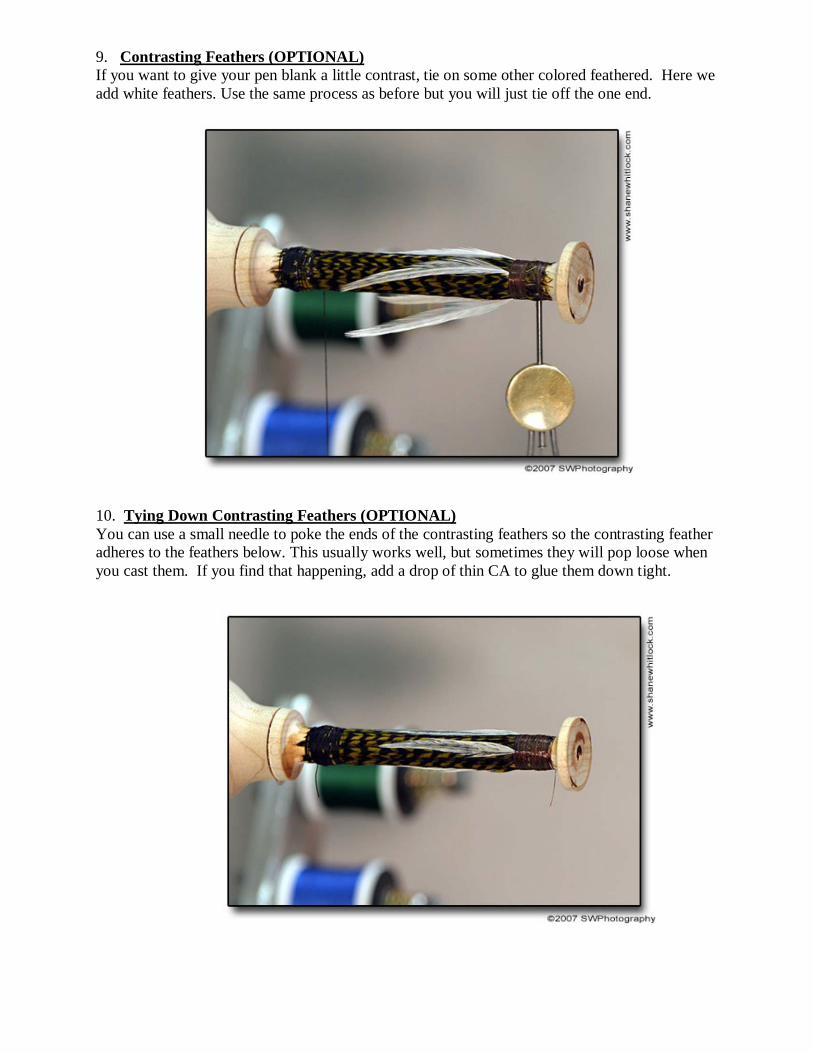
9. Contrasting Feathers (OPTIONAL) If you want to give your pen blank a little contrast, tie on some other colored feathered. Here we add white feathers. Use the same process as before but you will just tie off the one end. 10. Tying Down Contrasting Feathers (OPTIONAL) You can use a small needle to poke the ends of the contrasting feathers so the contrasting feather adheres to the feathers below. This usually works well, but sometimes they will pop loose when you cast them. If you find that happening, add a drop of thin CA to glue them down tight.

11. Wrapping Finish off the blanks by wrapping the threads on the plug towards the tube. This will help the feathers lay down flat and tight to the tube. Stop the thread about a 1/16" from the brass tube. This will let you know where you need to cut the blank when it comes time to cut off the plugs. 12. Molds In this tutorial, the molds are made out of 1 inch wide sheet metal that is cut just a little longer than the blank. Use sheet metal tape and tape it together. In the background you can see a few more feather blanks. You can also use other types of molds such as silicon, plastic and many other materials. Good silicon molds are available from NewLondon88 of IAP.

13. Blank in Mold If using a sheet metal mold, add a little hot glue to each end of the plug and glue it into the mold. This keeps the blank from floating when you cast it. An alternative to using hot glue is to put small bb’s or small fishing sinkers in the tube before mounting the plugs to give the tube added weight. This will also stop the tube from floating and you can remove the bb’s when you unplug the tube. 14. Casting Resin You can get clear casting resin from most arts and crafts stores, such as A.C. Moore and Michaels. There are many types of resin: Alumilite and polyester resin (sold under many brand names) are two of the most popular. Warning: polyester resin should only be used in a well ventilated area. The fumes are very strong. Alumilite can be cast anywhere. There is a lot of good information on the web. For more information on this you can go to http://www.penturners.org/forum/showthread.php?t=1488
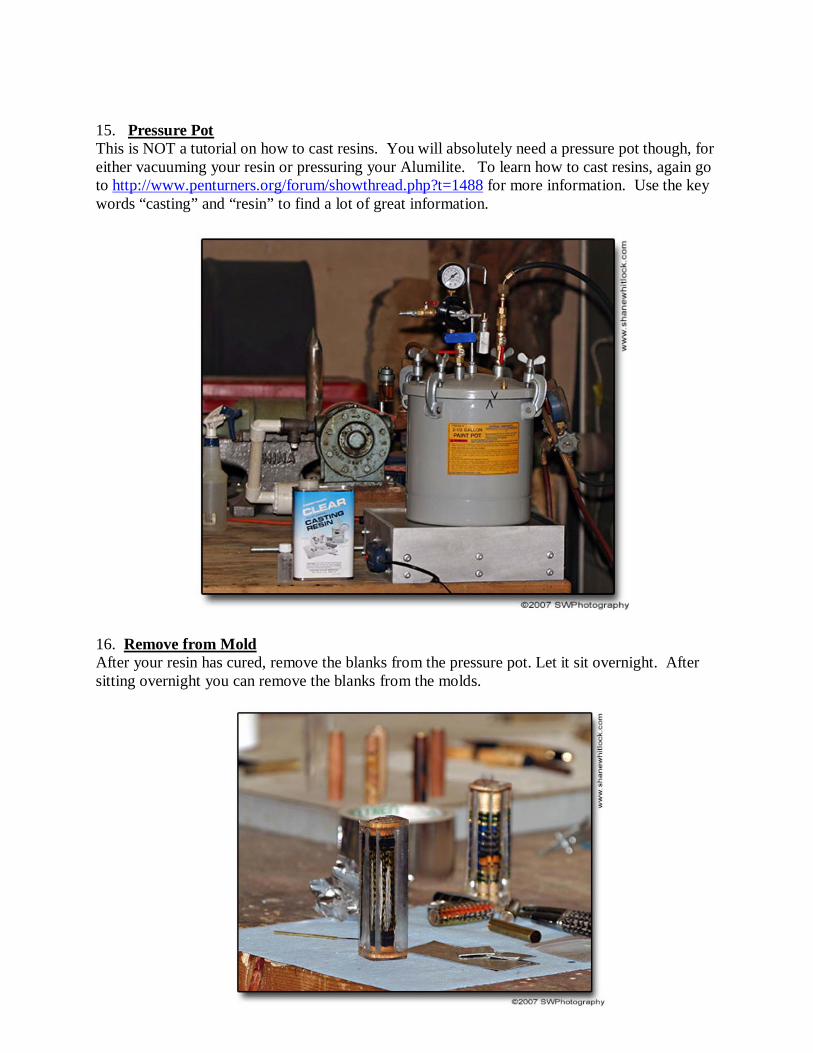
15. Pressure Pot This is NOT a tutorial on how to cast resins. You will absolutely need a pressure pot though, for either vacuuming your resin or pressuring your Alumilite. To learn how to cast resins, again go to http://www.penturners.org/forum/showthread.php?t=1488 for more information. Use the key words “casting” and “resin” to find a lot of great information. 16. Remove from Mold After your resin has cured, remove the blanks from the pressure pot. Let it sit overnight. After sitting overnight you can remove the blanks from the molds.
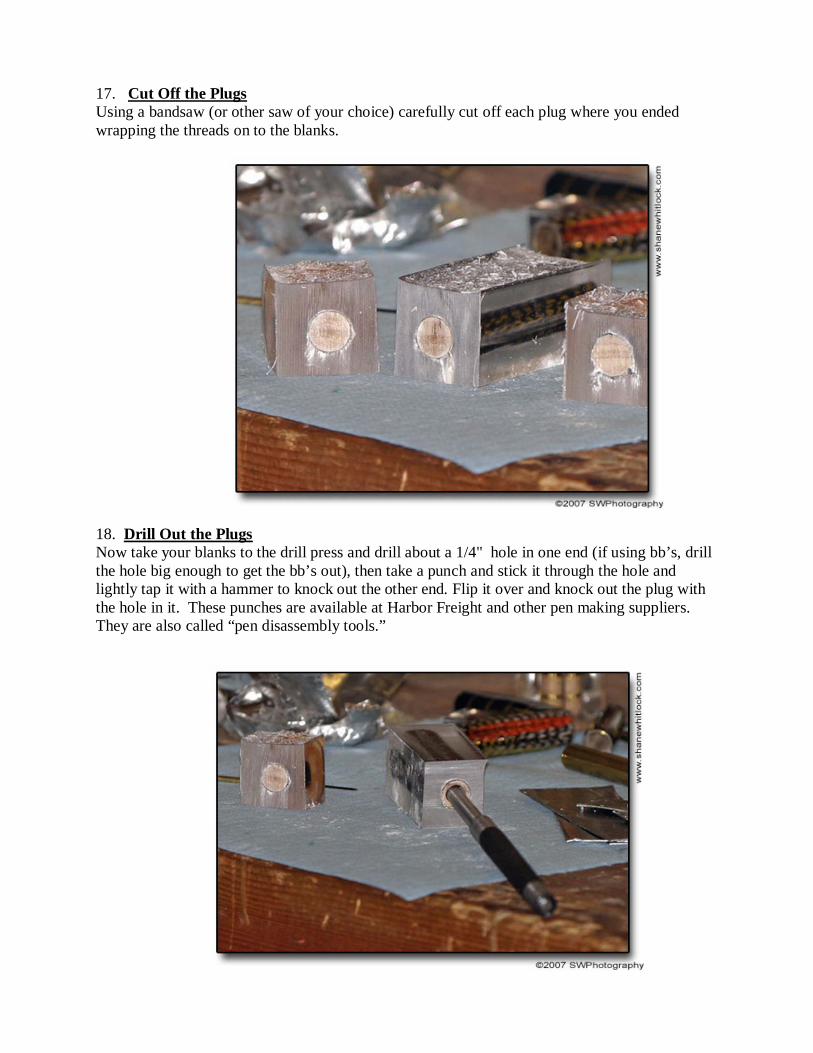
17. Cut Off the Plugs Using a bandsaw (or other saw of your choice) carefully cut off each plug where you ended wrapping the threads on to the blanks. 18. Drill Out the Plugs Now take your blanks to the drill press and drill about a 1/4" hole in one end (if using bb’s, drill the hole big enough to get the bb’s out), then take a punch and stick it through the hole and lightly tap it with a hammer to knock out the other end. Flip it over and knock out the plug with the hole in it. These punches are available at Harbor Freight and other pen making suppliers. They are also called “pen disassembly tools.”
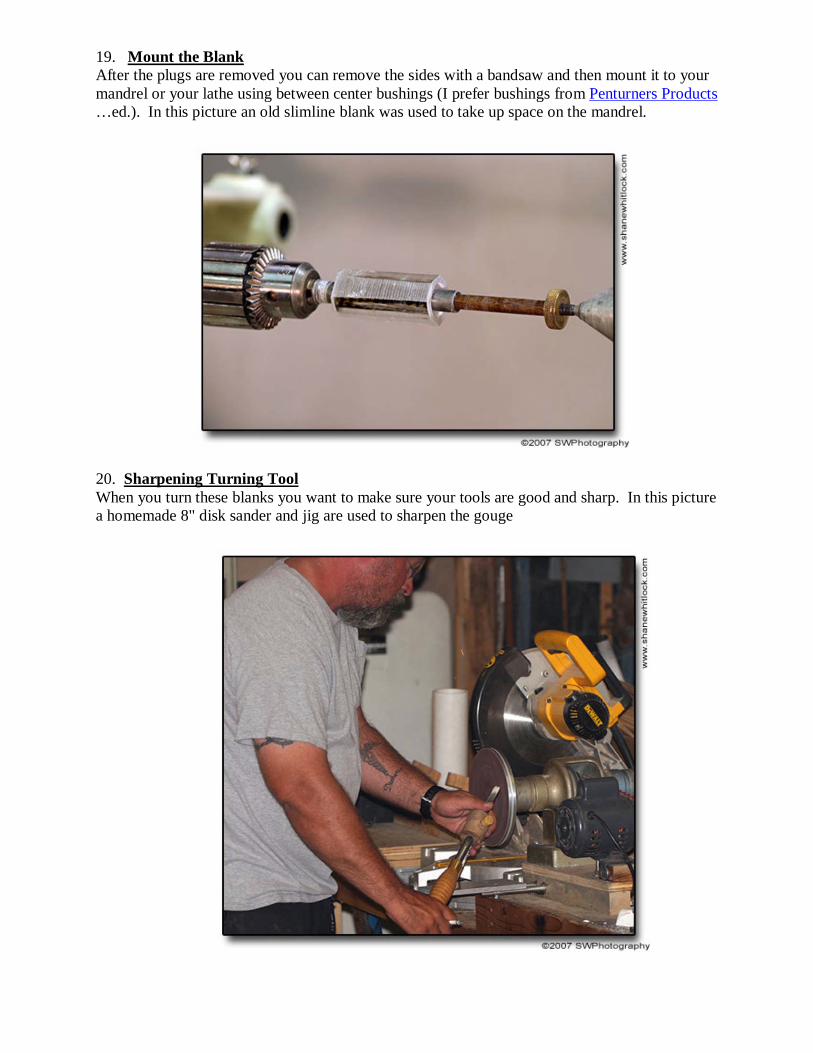
19. Mount the Blank After the plugs are removed you can remove the sides with a bandsaw and then mount it to your mandrel or your lathe using between center bushings (I prefer bushings from Penturners Products …ed.). In this picture an old slimline blank was used to take up space on the mandrel. 20. Sharpening Turning Tool When you turn these blanks you want to make sure your tools are good and sharp. In this picture a homemade 8" disk sander and jig are used to sharpen the gouge
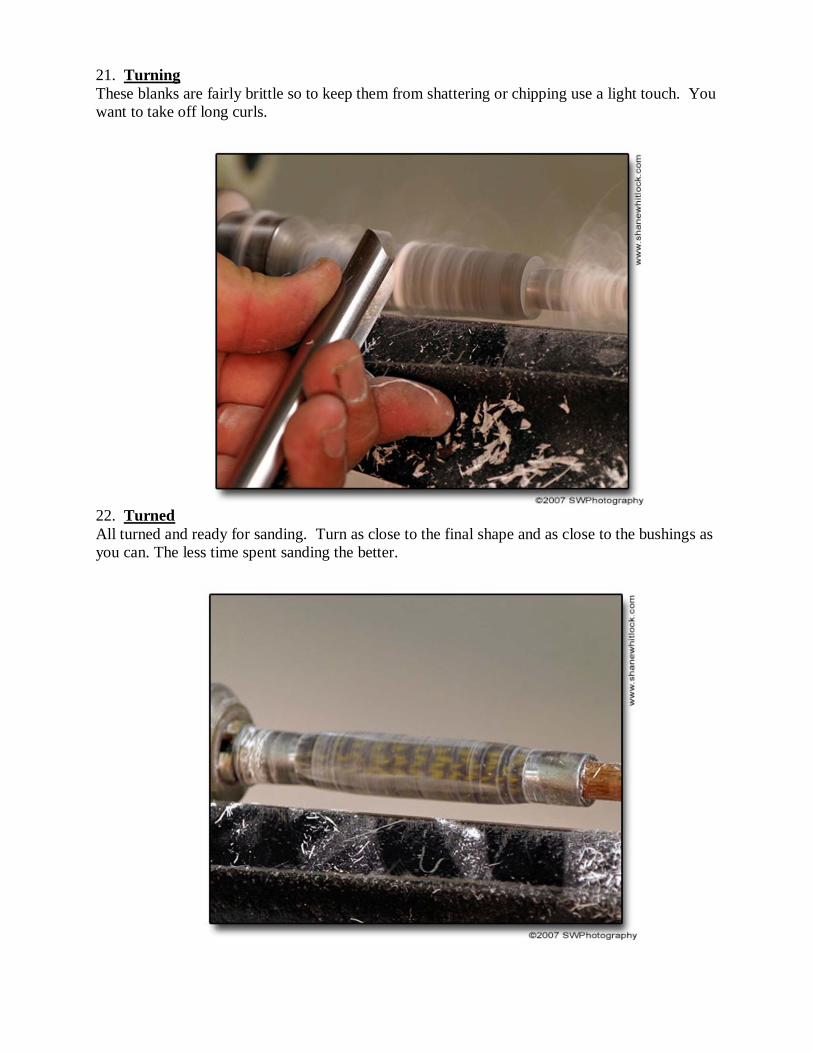
21. Turning These blanks are fairly brittle so to keep them from shattering or chipping use a light touch. You want to take off long curls. 22. Turned All turned and ready for sanding. Turn as close to the final shape and as close to the bushings as you can. The less time spent sanding the better.
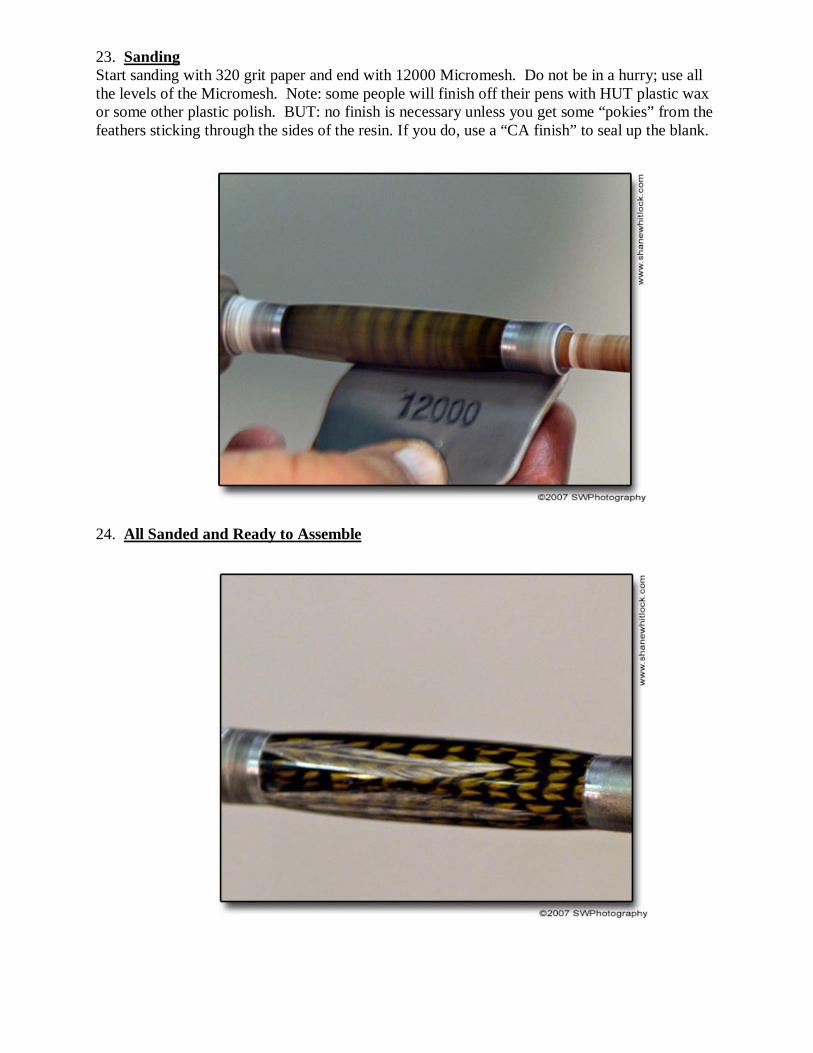
23. Sanding Start sanding with 320 grit paper and end with 12000 Micromesh. Do not be in a hurry; use all the levels of the Micromesh. Note: some people will finish off their pens with HUT plastic wax or some other plastic polish. BUT: no finish is necessary unless you get some “pokies” from the feathers sticking through the sides of the resin. If you do, use a “CA finish” to seal up the blank. 24. All Sanded and Ready to Assemble
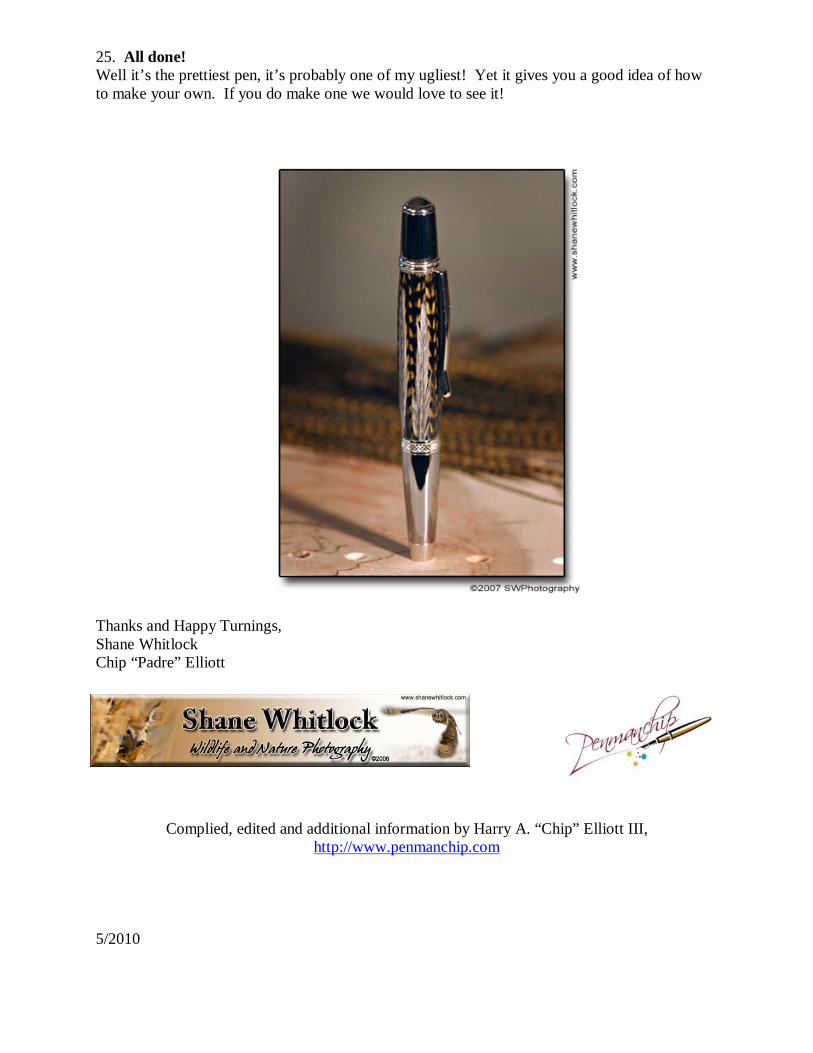
25. All done! Well it’s the prettiest pen, it’s probably one of my ugliest! Yet it gives you a good idea of how to make your own. If you do make one we would love to see it! Thanks and Happy Turnings, Shane Whitlock Chip “Padre” Elliott
Complied, edited and additional information by Harry A. “Chip” Elliott III, http://www.penmanchip.com
5/2010