centerline-c++ programmer’s guide and reference · 2016-07-01 · centerline-c++ programmer’s...
TRANSCRIPT
CenterLine-C++ Programmer’s Guide and Reference
Version 2
CenterLine Software, Inc.10 Fawcett Street
Cambridge, Massachusetts 02138
CenterLine Software, Inc. reserves the right to make changes inspecifications and other information contained in this publicationwithout prior notice. The reader should in all cases consultCenterLine Software to determine whether any such changes havebeen made.
This Manual contains proprietary information that is the soleproperty of CenterLine Software. This Manual is furnished toauthorized users of CenterLine-C++ solely to facilitate the use ofCenterLine-C++ as specified in written agreements.
No part of this publication may be reproduced, stored in a retrievalsystem, translated, transcribed, or transmitted, in any form, or byany means without prior explicit written permission fromCenterLine Software.
The software programs described in this document are copyrightedand are confidential information and proprietary products ofCenterLine Software.
CenterLine, CodeCenter, ObjectCenter, and ViewCenter aretrademarks of CenterLine Software, Inc.
Motif is a trademark of The Open Software Foundation, Inc.
Sun, Sun-2, Sun-3, Sun-4, Solaris 2, Sun386i, SunCD, SunInstall,SunOS, NFS, SunView, ToolTalk, and OpenWindows aretrademarks of Sun Microsystems, Inc.
SPARC is a registered trademark of SPARC International, Inc.Products bearing the SPARC trademark are based on an architecturedeveloped by Sun Microsystems, Inc. SPARCstation is a trademarkof SPARC International, Inc. licensed exclusively to SunMicrosystems, Inc.
UNIX and OPEN LOOK are registered trademarks of UNIX SystemLaboratories in the U.S.A. and other countries.
X Window System and X11 are trademarks of the MassachusettsInstitute of Technology.
This book was written, illustrated, and produced usingFrameMaker workstation publishing software.
© 1993 CenterLine Software, Inc. All rights reserved.Printed in the United States of America.
This book was written, illustrated, and produced usingFrameMaker workstation publishing software.
Some parts of this manual are based on information in AT&T C++Language System documents.
CenterLine-C++ Programmer’s Guide and Reference iii
Distribution The CenterLine GNU Debugger and the CenterLine C Preprocessorare free; this means that everyone is free to use them and free toredistribute them on a free basis. They are not in the public domain;they are copyrighted and there are restrictions on their distribution,but these restrictions are designed to permit everything that a goodcooperating citizen would want to do. What is not allowed is to tryto prevent others from further sharing any version of the CenterLineGNU Debugger or CenterLine C Preprocessor that they might getfrom you. The precise conditions are found in the GNU GeneralPublic License that appears in Appendix A.
If you have access to the Internet, you can get the latest distributionversion of the CenterLine GNU Debugger or the CenterLine CPreprocessor via anonymous login from the following host:
ftp.centerline.com
The following file on that host contains the source for theCenterLine GNU Debugger:
/pub/TOOLS/PDM.TAR.Z
The following file on that host contains the documentation for theGNU Debugger:
/pub/Doc/gdb-info
The following file on that host contains the source for theCenterLine C Preprocessor:
/pub/TOOLS/CLPP.TAR.Z
If you do not have access to the Internet, send mail to CenterLine,and we will send you instructions on how to obtain a copy. Theaddress is as follows:
CenterLine Software, Inc.10 Fawcett StreetCambridge, Massachusetts 02138

CenterLine-C++ Programmer’s Guide and Reference v
About this manual
About this manual
What this manual isabout
This manual is a guide to using the CenterLine-C++ compilationsystem and pdm, our process debugger. It also contains referenceinformation for the debugger commands.
What you shouldknow beforestarting
We designed this book for readers who are familiar with the C++programming language, an operating system like UNIX , and agraphical user interface based on either Motif or OPEN LOOK .
This manual does not describe the C++ language in detail. For acomplete description please refer to the AT&T C++ Language SystemProduct Reference Manual, which we provide with CenterLine-C++.
We’ve listed several other books about C++ and object-orientedprogramming in “Suggested reading”on page vi.
For moreinformation
The C++ language supported by CenterLine-C++ at the time ofrelease of this manual is Release 3.0.2 of the AT&T C++ LanguageSystem. Check the Release Bulletin or Platform Guide accompanyingyour software for the version supported by your software. TheCenterLine-C++ documentation includes two manuals shipped byAT&T:
• The AT&T C++ Language System Product Reference Manualprovides a complete definition of the C++ language supportedby Release 3.0 of the C++ Language System.
• The AT&T C++ Language System Library Manual describes theclass libraries shipped with Release 3.0.
We also provide some sections of the AT&T C++ Language SystemRelease Notes and AT&T C++ Language System Selected Readingsonline, together with README files provided by AT&T. You canview these files using the Man Browser, which is described in“Using the Man Browser”on page 122. You can also find them inthis directory:
full_path/CenterLine/clc++/docs
where full_path represents the path to your CenterLine directory.
The CenterLine-C Programmer’s Guide and Reference describes theCenterLine-C compiler.
About this manual
vi CenterLine-C++ Programmer’s Guide and Reference
Installing and Managing CenterLine Products describes how to installCenterLine-C++ and administer it, including how to reserve licensesfor particular users.
See your Platform Guide for system requirements and otherinformation specific to your platform.
See the Release Bulletin for information generated too late to beincluded in the other manuals.
Suggested reading You may find these books discussing C++ and object-orientedprogramming useful:
The Annotated C++ Reference Manual, Ellis & Stroustrup,Addison-Wesley 1991, 0-201-51459-1.
The C++ Programming Language (2nd. edition), Stroustrup,Addison-Wesley 1991, 0-201-53992-6.
A C++ Primer (2nd Edition), Lippman, Addison-Wesley 1991,0-201-54848-8.
C++ Programming Guidelines, Plum & Saks, Plum/Hall Publishers1991, 0-911-537-10-4.
C++ Programming Style, Cargill, Addison-Wesley 1992, 0-201-56365-7.
C++ Strategies and Tactics, Murray, Addison-Wesley 1992,0-201-56382-7.
Effective C++, Meyers, Addison-Wesley 1992, 0-201-56364-9.
The C++ Answer Book, Hansen, Addison-Wesley 1989, 0-201-11497-6.
A C++ Toolkit, Shapiro, Prentice Hall 1991, 0-13-127663-8.
Advanced C++ Programming Styles and Idioms, James Coplien,Addison-Wesley 1992, 0-201-54855-0.
An Introduction to Object-Oriented Programming, Budd,Addison-Wesley 1991, 0-201-54709-0.
Object-Oriented Design with Applications, Booch, Benjamin Cummings1991, 0-8053-0091-0.
Object-Oriented Programming Using C++, Pohl, Addison-Wesley 1993,0-8053-5382-8.
Object Orientation: Concepts, Languages, Databases, User Interfaces,Khoshafian & Abnous, John Wiley 1990, 0-471-51801-8.
CenterLine-C++ Programmer’s Guide and Reference vii
About this manual
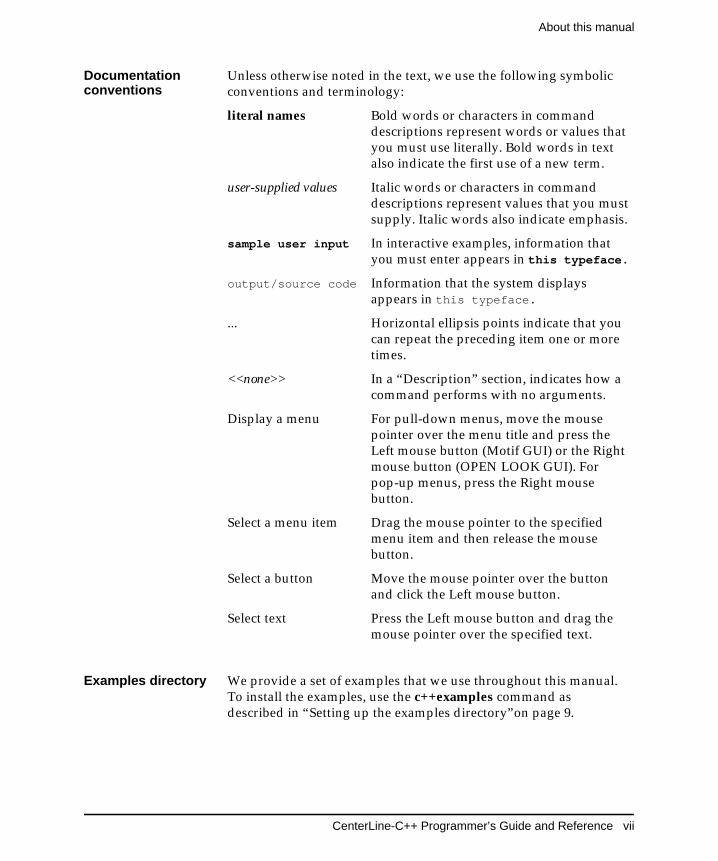
Documentationconventions
Unless otherwise noted in the text, we use the following symbolicconventions and terminology:
literal names Bold words or characters in commanddescriptions represent words or values thatyou must use literally. Bold words in textalso indicate the first use of a new term.
user-supplied values Italic words or characters in commanddescriptions represent values that you mustsupply. Italic words also indicate emphasis.
sample user input In interactive examples, information thatyou must enter appears in this typeface.
output/source code Information that the system displaysappears in this typeface.
... Horizontal ellipsis points indicate that youcan repeat the preceding item one or moretimes.
<<none>> In a “Description” section, indicates how acommand performs with no arguments.
Display a menu For pull-down menus, move the mousepointer over the menu title and press theLeft mouse button (Motif GUI) or the Rightmouse button (OPEN LOOK GUI). Forpop-up menus, press the Right mousebutton.
Select a menu item Drag the mouse pointer to the specifiedmenu item and then release the mousebutton.
Select a button Move the mouse pointer over the buttonand click the Left mouse button.
Select text Press the Left mouse button and drag themouse pointer over the specified text.
Examples directory We provide a set of examples that we use throughout this manual.To install the examples, use the c++examples command asdescribed in “Setting up the examples directory”on page 9.

CenterLine-C++ Programmer’s Guide and Reference ix
Contents
ContentsAbout this manual v
Chapter 1 Introduction to CenterLine-C++ 1
Introduction to CenterLine-C++ 3
Chapter 2 Compiling with CenterLine-C++ 11
Invoking CC 13
Phases of the CenterLine-C++ compilation system 14
CC command-line switches 16
Using gprof to generate profiling information 20
Precompiled header files 21
Demand-driven code generation 27
Using libraries and header files 29
Environment variables used by CC 34
Chapter 3 Preprocessing 37
The CenterLine-C++ Preprocessor 39
Header file inclusion 41
Macro definition and expansion 43
Conditional compilation 48
Line control 51
Reporting diagnostic messages 51
Implementation-dependent behavior 52
Preprocessor switches 52
Chapter 4 Using Templates 55
Using templates 57
Basic concepts and syntax 58
Using templates with CenterLine-C++ 63
The instantiation process 67
Contents
x CenterLine-C++ Programmer’s Guide and Reference
Coding conventions 70
Lookup schemes 73
Map files 75
Switches for templates 78
Usage scenarios 80
Specializations 85
Examples 87
Avoiding the most common pitfalls when using templates 91
Troubleshooting 92
Tools 95
Summary of terminology 97
Chapter 5 Introduction to the Debugger: A Tutorial 99
Debugging basics 101
Correcting compiler and make errors 107
Debugging a corefile 110
Chapter 6 Debugging with CenterLine-C++ 117
Selecting an editor to use with the debugger 119
Starting up the debugger 120
Finding out more about the debugger 122
Using menus and text fields 125
Copying and pasting text between windows 128
Invoking Workspace commands 130
Invoking shell commands 134
Using aliases for Workspace commands 135
Editing Workspace input 136
Loading files for debugging 141
Listing source code 142
Editing source code 144
Building and reloading executables 146
CenterLine-C++ Programmer’s Guide and Reference xi
Contents
Finding and fixing errors 147
Setting breakpoints and watchpoints 149
Setting actions 154
Examining and deleting debugging items 157
Using Workspace break levels 159
Running, continuing, and stepping 162
Moving in the execution stack 165
Examining data structures 168
Handling signals 176
Debugging an executable with a corefile 177
Debugging a running process 181
Debugging machine instructions 185
Saving your debugging session 189
Customizing your startup file 190
Customizing buttons and commands 192
Customizing environment variables 199
Quitting from the debugger 200
Chapter 7 Command Reference 201
alias 203
assign 204
attach 205
build 206
catch 207
cd 209
cont 210
contents 211
debug 212
delete 214
detach 215
display 216
Contents
xii CenterLine-C++ Programmer’s Guide and Reference
down 217
dump 218
edit 219
email 220
file 221
gdb 222
gdb_mode 223
help 224
history 225
ignore 226
list 228
listi 230
make 231
man 232
next 233
nexti 234
print 235
printenv 236
quit 237
rerun 238
reset 239
run 240
set 242
setenv 243
sh 245
shell 246
source 247
status 248
step 249
stepi 250
CenterLine-C++ Programmer’s Guide and Reference xiii
Contents
stepout 251
stop 252
stopi 254
unalias 255
unsetenv 256
up 257
use 258
whatis 259
when 260
where 262
whereami 263
whereis 265
Appendix A GNU General Public License 267
Index 277
Contents
xiv CenterLine-C++ Programmer’s Guide and Reference
List of Tables Table 1 CC Command-Line Switches 16
Table 2 Environment Variables Used by CC 34
Table 3 Preprocessor command names 40
Table 4 Macros Recognized by CenterLine-C++ 47
Table 5 clpp Preprocessor Switches 52
Table 6 Template Instantiation Switches 78
Table 7 Pop-up Menus 125
Table 8 Emacs Keyboard Shortcuts in Text Fields 127
Table 9 Workspace commands by function 130
Table 10 Syntax for Repeating Previous Input 136
Table 11 Line Editing Commands 137
Table 12 Shells Used with the run Command 240
List of FiguresFigure 1 CenterLine-C++ Processes 8
Figure 2 Instantiation and Declaration: From Template to Class to Object 59
Figure 3 From List Class Template to A_Bank Class Object 60
Figure 4 From Function Template to Function Call 62
Figure 5 Steps in the Template Instantiation Process 69
1 Introduction toCenterLine-C++
This chapter introduces you to CenterLine-C++.We cover the following topics:
• Invoking CC and the debugger• Version of C++ supported• Our underlying C compiler• Runtime libraries and header files• Our process debugger• CenterLine-C++ processes• Setting up the examples directory

CenterLine-C++ Programmer’s Guide and Reference 3
Introduction to CenterLine-C++
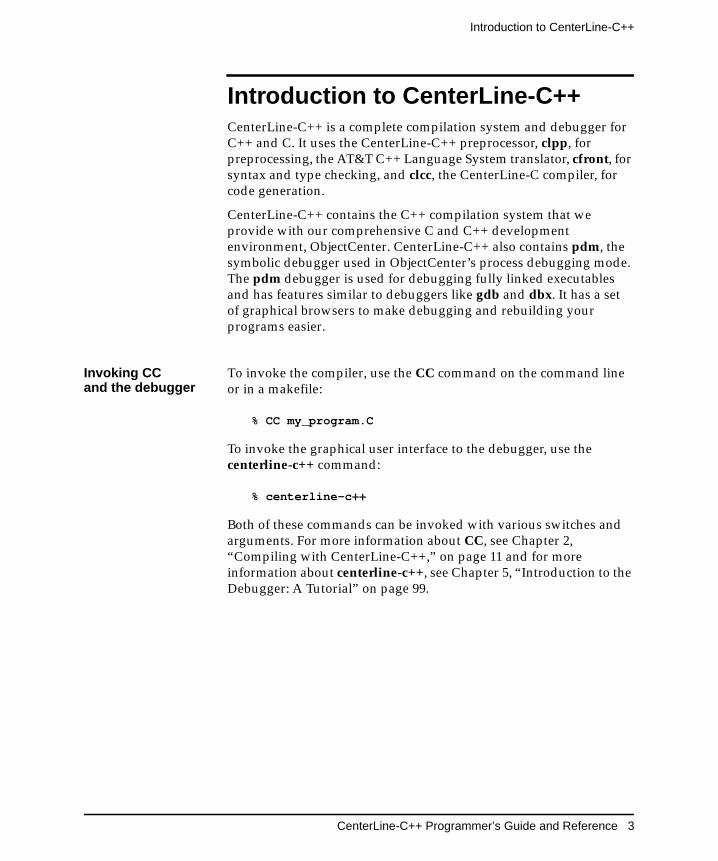
Introduction to CenterLine-C++CenterLine-C++ is a complete compilation system and debugger forC++ and C. It uses the CenterLine-C++ preprocessor, clpp, forpreprocessing, the AT&T C++ Language System translator, cfront, forsyntax and type checking, and clcc, the CenterLine-C compiler, forcode generation.
CenterLine-C++ contains the C++ compilation system that weprovide with our comprehensive C and C++ developmentenvironment, ObjectCenter. CenterLine-C++ also contains pdm, thesymbolic debugger used in ObjectCenter’s process debugging mode.The pdm debugger is used for debugging fully linked executablesand has features similar to debuggers like gdb and dbx. It has a setof graphical browsers to make debugging and rebuilding yourprograms easier.
Invoking CCand the debugger
To invoke the compiler, use the CC command on the command lineor in a makefile:
% CC my_program.C
To invoke the graphical user interface to the debugger, use thecenterline-c++ command:
% centerline-c++
Both of these commands can be invoked with various switches andarguments. For more information about CC, see Chapter 2,“Compiling with CenterLine-C++,” on page 11 and for moreinformation about centerline-c++, see Chapter 5, “Introduction to theDebugger: A Tutorial” on page 99.
Introduction to CenterLine-C++
4 CenterLine-C++ Programmer’s Guide and Reference
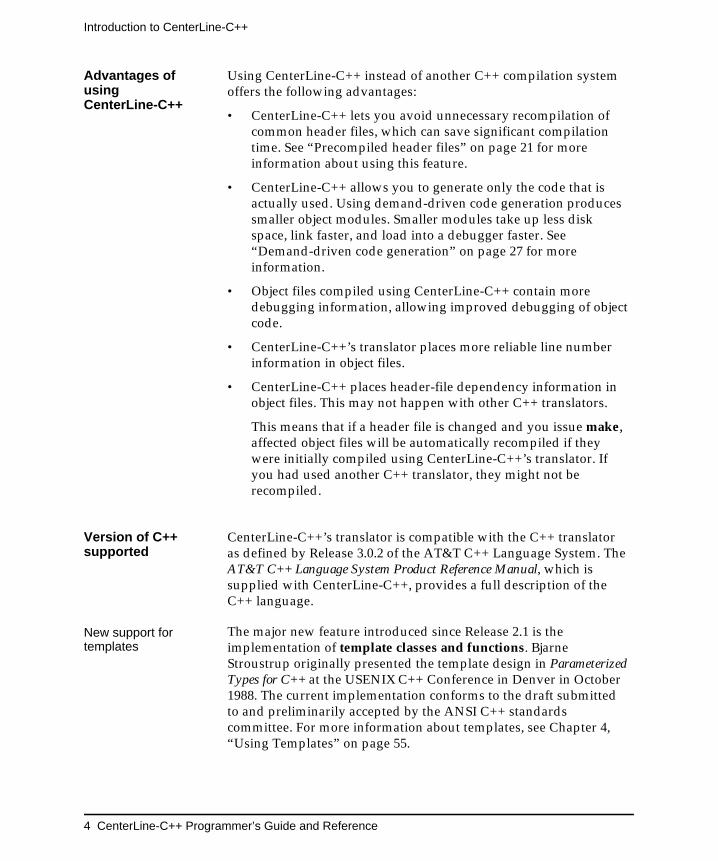
Advantages ofusingCenterLine-C++
Using CenterLine-C++ instead of another C++ compilation systemoffers the following advantages:
• CenterLine-C++ lets you avoid unnecessary recompilation ofcommon header files, which can save significant compilationtime. See “Precompiled header files” on page 21 for moreinformation about using this feature.
• CenterLine-C++ allows you to generate only the code that isactually used. Using demand-driven code generation producessmaller object modules. Smaller modules take up less diskspace, link faster, and load into a debugger faster. See“Demand-driven code generation” on page 27 for moreinformation.
• Object files compiled using CenterLine-C++ contain moredebugging information, allowing improved debugging of objectcode.
• CenterLine-C++’s translator places more reliable line numberinformation in object files.
• CenterLine-C++ places header-file dependency information inobject files. This may not happen with other C++ translators.
This means that if a header file is changed and you issue make,affected object files will be automatically recompiled if theywere initially compiled using CenterLine-C++’s translator. Ifyou had used another C++ translator, they might not berecompiled.
Version of C++supported
CenterLine-C++’s translator is compatible with the C++ translatoras defined by Release 3.0.2 of the AT&T C++ Language System. TheAT&T C++ Language System Product Reference Manual, which issupplied with CenterLine-C++, provides a full description of theC++ language.
New support fortemplates
The major new feature introduced since Release 2.1 is theimplementation of template classes and functions. BjarneStroustrup originally presented the template design in ParameterizedTypes for C++ at the USENIX C++ Conference in Denver in October1988. The current implementation conforms to the draft submittedto and preliminarily accepted by the ANSI C++ standardscommittee. For more information about templates, see Chapter 4,“Using Templates” on page 55.
CenterLine-C++ Programmer’s Guide and Reference 5
Introduction to CenterLine-C++
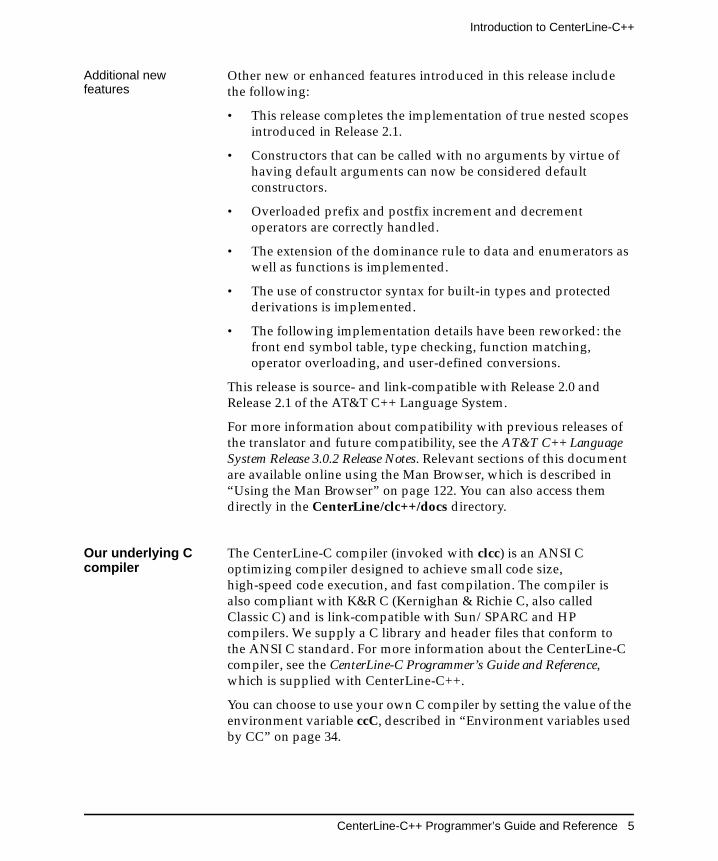
Additional newfeatures
Other new or enhanced features introduced in this release includethe following:
• This release completes the implementation of true nested scopesintroduced in Release 2.1.
• Constructors that can be called with no arguments by virtue ofhaving default arguments can now be considered defaultconstructors.
• Overloaded prefix and postfix increment and decrementoperators are correctly handled.
• The extension of the dominance rule to data and enumerators aswell as functions is implemented.
• The use of constructor syntax for built-in types and protectedderivations is implemented.
• The following implementation details have been reworked: thefront end symbol table, type checking, function matching,operator overloading, and user-defined conversions.
This release is source- and link-compatible with Release 2.0 andRelease 2.1 of the AT&T C++ Language System.
For more information about compatibility with previous releases ofthe translator and future compatibility, see the AT&T C++ LanguageSystem Release 3.0.2 Release Notes. Relevant sections of this documentare available online using the Man Browser, which is described in“Using the Man Browser” on page 122. You can also access themdirectly in the CenterLine/clc++/docs directory.
Our underlying Ccompiler
The CenterLine-C compiler (invoked with clcc) is an ANSI Coptimizing compiler designed to achieve small code size,high-speed code execution, and fast compilation. The compiler isalso compliant with K&R C (Kernighan & Richie C, also calledClassic C) and is link-compatible with Sun/SPARC and HPcompilers. We supply a C library and header files that conform tothe ANSI C standard. For more information about the CenterLine-Ccompiler, see the CenterLine-C Programmer’s Guide and Reference,which is supplied with CenterLine-C++.
You can choose to use your own C compiler by setting the value of theenvironment variable ccC, described in “Environment variables usedby CC” on page 34.
Introduction to CenterLine-C++
6 CenterLine-C++ Programmer’s Guide and Reference
Run-time librariesand header files
We provide static, shared, and profiling versions of the C++run-time library, libC, that is supplied with the AT&T C++Language System. We also provide the complex mathematicslibrary, libcomplex. We do not supply the AT&T task library.
We discuss the location of these libraries and how to link to them in“Using libraries and header files” on page 29. The libraries aredescribed in detail in the AT&T C++ Language System Library Manual,which we provide with CenterLine-C++.
The CenterLine-C ANSI C library is installed inCenterLine/clcc/arch-os/lib/libc.a, and is described in the CenterLine-CProgrammer’s Guide and Reference.
Our processdebugger
CenterLine-C++’s process debugger, pdm, enables you to examine aprogram while it executes. You can use the debugger to debug anexecutable file, a corefile, or a running process. When you invokethe debugger, you can choose a Motif or OPEN LOOK graphicaluser interface. You can also use a command-line (ASCII) interface.
Here are some of the tasks you can perform using pdm:
• Edit source code using integrated vi and GNU Emacs texteditors
• Set breakpoints, conditional breakpoints, and action points
• Enter debugging commands in a Workspace that also supportsevaluation of simple expressions and tcsh and Emacs features
• Find and fix compiler and make errors using the Error Browser
• Understand unfamiliar code by looking at the graphicalrepresentation of its data structures in the Data Browser, whichalso provides information updates during execution
• Add custom buttons and commands to the user interface
For a sample debugger session, see Chapter 5, “Introduction to theDebugger: A Tutorial,” on page 99 and for how to perform debuggingtasks, see Chapter 6, “Debugging with CenterLine-C++” on page 117.
CenterLine-C++ Programmer’s Guide and Reference 7
Introduction to CenterLine-C++
Introduction to CenterLine-C++
8 CenterLine-C++ Programmer’s Guide and Reference
CenterLine-C++processes
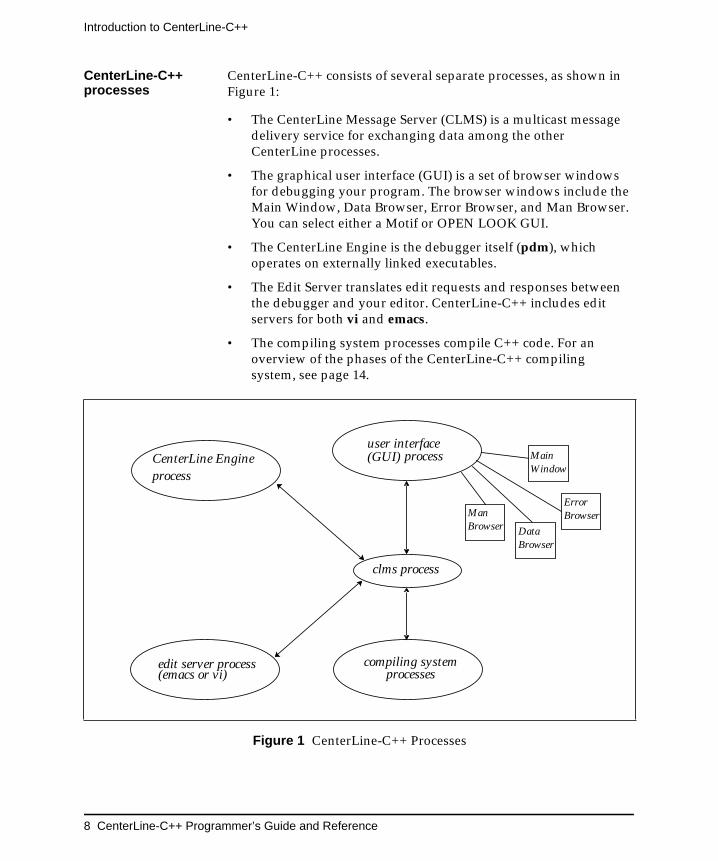
CenterLine-C++ consists of several separate processes, as shown inFigure 1:
• The CenterLine Message Server (CLMS) is a multicast messagedelivery service for exchanging data among the otherCenterLine processes.
• The graphical user interface (GUI) is a set of browser windowsfor debugging your program. The browser windows include theMain Window, Data Browser, Error Browser, and Man Browser.You can select either a Motif or OPEN LOOK GUI.
• The CenterLine Engine is the debugger itself (pdm), whichoperates on externally linked executables.
• The Edit Server translates edit requests and responses betweenthe debugger and your editor. CenterLine-C++ includes editservers for both vi and emacs.
• The compiling system processes compile C++ code. For anoverview of the phases of the CenterLine-C++ compilingsystem, see page 14.
Figure 1 CenterLine-C++ Processes
compiling systemprocesses
edit server process(emacs or vi)
CenterLine Engineprocess
Error
Data
Man Browser
Browser
Browser
user interfaceprocess Main
Window(GUI)
clms process
CenterLine-C++ Programmer’s Guide and Reference 9
Introduction to CenterLine-C++
For information on managing CenterLine-C++ processes, refer toInstalling and Managing CenterLine Products and the clms, clms_query,and clms_registry entries in the Man Browser.
Setting up theexamples directory
We provide a set of examples that we use throughout this manual.To create the examples directory in your home directory, invoke thec++examples command as follows:
% cd% c++examples
If the operating system does not find the c++examples command, thenthe CenterLine/bin directory is not in your path. Ask your systemadministrator where the CenterLine/bin directory is on your system.
The c++examples command creates a directory calledc++examples_dir in the current directory and copies the examplesfiles to the new directory. We supply a Makefile that you can use tomake the examples that we use in Chapter 5, “Introduction to theDebugger: A Tutorial” on page 99.

2 Compiling withCenterLine-C++
This chapter describes how to invoke theCenterLine-C++ compilation system and lists thecommand-line switches that you can use with CC.It also covers the following topics:
• Phases of the C++ compilation system
• Using gprof to generate profiling information
• Precompiled header files
• Demand-driven code generation
• Using libraries and header files
• Environment variables used by CC

CenterLine-C++ Programmer’s Guide and Reference 13
Invoking CC
Invoking CCThe CC command invokes the CenterLine-C++ compilation system.This is the syntax of the CC command line:
CC [ switches ] filename ...
The installation process installs the CC command in the directoryCenterLine/bin, which could be anywhere on your system. See yoursystem administrator if you don’t know where CenterLine/bin is onyour system.
For example, this command line compiles my_prog.C with debugginginformation (with the -g switch) and produces an executable with thedefault name a.out. The -I and -L switches direct the preprocessor tosearch for header files in the directory /usr/include/X11R5 and thelinker to link in the library in /usr/lib/X11R5.
% CC -g -I/usr/include/X11R5 -L/usr/lib/X11R5 my_prog.C
Getting informationabout CC
Table 1 on page 16 lists the switches you can use with CC. You canalso find this information by typing the following command at theshell prompt:
% man CC
The CenterLine installation process installs manual pages in theCenterLine/man directory. If the man command does not find theCenterLine manual page for CC, CenterLine/man may not be in theman command’s search path. Ask your system administrator, or, ifyour UNIX system supports the MANPATH environment variable,add the CenterLine/man directory to the variable. For example:
% setenv MANPATH ${MANPATH}:dir/CenterLine/man
where dir is the path to your CenterLine directory.
File suffixes The CC command accepts input files ending in .c, .C, .cpp, .cxx, .cc,or .i. It assumes the .i files are the output of the preprocessor. CCalso accepts .s and .o files and passes them on to the C compiler.
Phases of the CenterLine-C++ compilation system
14 CenterLine-C++ Programmer’s Guide and Reference
Phases of the CenterLine-C++compilation systemThe CC command invokes a command-line parser and a driver. Thedriver invokes the other components of the CenterLine-C++compilation system:
• The CenterLine ANSI C preprocessor, clpp, produces apreprocessed version of your program in a temporary file withthe suffix .i. The preprocessor is described in more detail inChapter 3, “Preprocessing.”
• The translator, cfront, performs syntax and type checking on the.i files produced by the preprocessor and produces temporary Cversions of the files with the suffix ..c. (On some platforms, thefiles have the suffix .i.) cfront also creates a temporary map filecontaining data type information, and produces additionalsymbol table information for debugging purposes if you usedthe -g switch.
• If your code uses C++ templates, the compile-time templateprocessor, ptcomp, merges the map file created by cfront intothe template repository. For more information about templates,refer to Chapter 4, “Using Templates.”
• The CenterLine-C compiler, clcc, generates assembly code in atemporary assembly source file with the suffix .s.
• The assembler provided with your platform, as, compiles the Cassembly code into object code with the suffix .o.
• The link-time template processor, ptlink, retrieves informationfrom the template repository and may create additional objectfiles in the repository if templates need to be instantiated.
• The linker provided with your platform, ld, produces anexecutable, called a.out by default, that includes start-uproutines and C and C++ library routines. (Startup routines are in/lib/crt0.o on most platforms.)
NOTE You can use ANSI C preprocessing features such astoken pasting and string literal expansion whetheror not you choose to generate ANSI C code.
CenterLine-C++ Programmer’s Guide and Reference 15
Phases of the CenterLine-C++ compilation system
• Depending on your platform, patch or munch links constructorsand destructors of nonlocal static objects in the executable orshared library.
• Diagnostic messages are filtered through c++filt, which decodes(“demangles”) tokens which look like C++ encoded symbols.
By default, CC invokes the CenterLine-C++ preprocessor, clpp, andthe CenterLine-C compiler, clcc, if it is supported on your platform.You can use a different C compiler by setting the value of theenvironment variable ccC, as described in “Environment variablesused by CC” on page 34.
You can use a different preprocessor by setting the value of theenvironment variable cppC. You can also override the value of thecppC environment variable with the -Yp command-line switch.
Examining yourcode at each phaseof compilation
CC provides several command-line switches that let you view theoutput of various stages of the compilation system.
• The -P switch runs only the preprocessor on the code and savesa copy of the output without #line directives in a file with the .isuffix.
• Alternatively, the -E switch, used with the -.suffix switch, runsonly the preprocessor and saves a copy of the preprocessed filewith #line directives in a file with the suffix you specify. If youdon’t use -.suffix, the result of preprocessing is sent to standardoutput.
• CC places a temporary copy of the C code generated by thepreprocessor and translator in a file with the suffix .c in the/usr/tmp directory. The +i switch saves a copy of this file(without #line directives) in the current directory with the namefile..c (note there are two dots before the c suffix). The +i switchdoes not interrupt processing.
• Alternatively, the -F switch, used with the -.suffix switch, runsonly the preprocessor and translator on your code and saves theouput in a file in the current directory with the name file.suffix. Ifyou don’t use -.suffix, the result of preprocessing is sent tostandard output.
• The -S switch (a C compiler switch) saves a copy of theassembly source file in a file with the .s suffix, but does notassemble the code.

CC command-line switches
16 CenterLine-C++ Programmer’s Guide and Reference
By default, CC places temporary files generated in the course ofcompilation in the /usr/tmp directory. You can override this default bychanging the value of the TMPDIR environment variable. Settingenvironment variables is described on page 34.
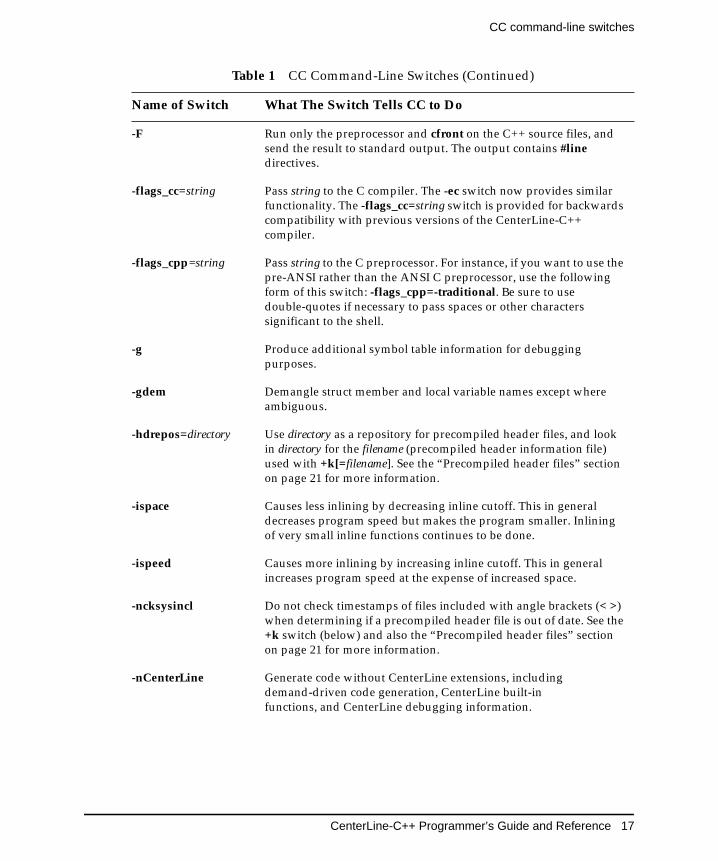
CC command-line switchesTable 1 describes the switches to the CC command.
NOTE In addition to the switches in Table 1, CCaccepts other switches and passes them on tothe C compilation system tools. See the clppmanual page or Table 5 on page 52 forpreprocessor switches, the clcc manual pagefor C compiler switches, and the ld manualpage for link editor switches.
Table 1 CC Command-Line Switches
Name of Switch What The Switch Tells CC to Do
-C Do not discard comments; pass them through to the output file.
-dd=[on|off] Use demand-driven code generation exclusively (-dd=on); this is thedefault setting. See the “Demand-driven code generation” section onpage 27 for more information.
-dryrun Show but do not execute the commands constructed by thecompilation driver.
-ec string Pass string to the C compiler. Be sure to use double-quotes ifnecessary to pass spaces or other characters significant to the shell.For example, -ec -fsingle passes -fsingle to the C compiler.
-el string Pass string to the linker. Be sure to use double-quotes if necessary topass spaces or other characters significant to the shell. For example,-el "-a archive" passes -a archive to the linker.
-E Run only the preprocessor on the C++ source files and send theresult to standard output.
CenterLine-C++ Programmer’s Guide and Reference 17
CC command-line switches
-F Run only the preprocessor and cfront on the C++ source files, andsend the result to standard output. The output contains #linedirectives.
-flags_cc=string Pass string to the C compiler. The -ec switch now provides similarfunctionality. The -flags_cc=string switch is provided for backwardscompatibility with previous versions of the CenterLine-C++compiler.
-flags_cpp=string Pass string to the C preprocessor. For instance, if you want to use thepre-ANSI rather than the ANSI C preprocessor, use the followingform of this switch: -flags_cpp=-traditional. Be sure to usedouble-quotes if necessary to pass spaces or other characterssignificant to the shell.
-g Produce additional symbol table information for debuggingpurposes.
-gdem Demangle struct member and local variable names except whereambiguous.
-hdrepos=directory Use directory as a repository for precompiled header files, and lookin directory for the filename (precompiled header information file)used with +k[=filename]. See the “Precompiled header files” sectionon page 21 for more information.
-ispace Causes less inlining by decreasing inline cutoff. This in generaldecreases program speed but makes the program smaller. Inliningof very small inline functions continues to be done.
-ispeed Causes more inlining by increasing inline cutoff. This in generalincreases program speed at the expense of increased space.
-ncksysincl Do not check timestamps of files included with angle brackets (< >)when determining if a precompiled header file is out of date. See the+k switch (below) and also the “Precompiled header files” sectionon page 21 for more information.
-nCenterLine Generate code without CenterLine extensions, includingdemand-driven code generation, CenterLine built-infunctions, and CenterLine debugging information.
Table 1 CC Command-Line Switches (Continued)
Name of Switch What The Switch Tells CC to Do
CC command-line switches
18 CenterLine-C++ Programmer’s Guide and Reference
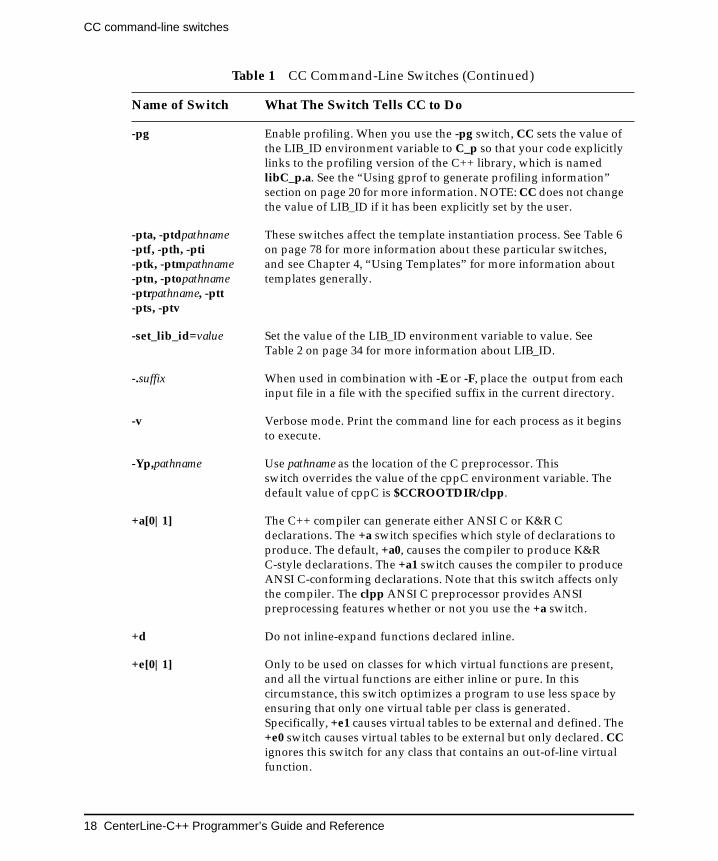
-pg Enable profiling. When you use the -pg switch, CC sets the value ofthe LIB_ID environment variable to C_p so that your code explicitlylinks to the profiling version of the C++ library, which is namedlibC_p.a. See the “Using gprof to generate profiling information”section on page 20 for more information. NOTE: CC does not changethe value of LIB_ID if it has been explicitly set by the user.
-pta, -ptdpathname-ptf, -pth, -pti-ptk, -ptmpathname-ptn, -ptopathname-ptrpathname, -ptt-pts, -ptv
These switches affect the template instantiation process. See Table 6on page 78 for more information about these particular switches,and see Chapter 4, “Using Templates” for more information abouttemplates generally.
-set_lib_id=value Set the value of the LIB_ID environment variable to value. SeeTable 2 on page 34 for more information about LIB_ID.
-.suffix When used in combination with -E or -F, place the output from eachinput file in a file with the specified suffix in the current directory.
-v Verbose mode. Print the command line for each process as it beginsto execute.
-Yp,pathname Use pathname as the location of the C preprocessor. Thisswitch overrides the value of the cppC environment variable. Thedefault value of cppC is $CCROOTDIR/clpp.
+a[0|1] The C++ compiler can generate either ANSI C or K&R Cdeclarations. The +a switch specifies which style of declarations toproduce. The default, +a0, causes the compiler to produce K&RC-style declarations. The +a1 switch causes the compiler to produceANSI C-conforming declarations. Note that this switch affects onlythe compiler. The clpp ANSI C preprocessor provides ANSIpreprocessing features whether or not you use the +a switch.
+d Do not inline-expand functions declared inline.
+e[0|1] Only to be used on classes for which virtual functions are present,and all the virtual functions are either inline or pure. In thiscircumstance, this switch optimizes a program to use less space byensuring that only one virtual table per class is generated.Specifically, +e1 causes virtual tables to be external and defined. The+e0 switch causes virtual tables to be external but only declared. CCignores this switch for any class that contains an out-of-line virtualfunction.
Table 1 CC Command-Line Switches (Continued)
Name of Switch What The Switch Tells CC to Do
CenterLine-C++ Programmer’s Guide and Reference 19
CC command-line switches
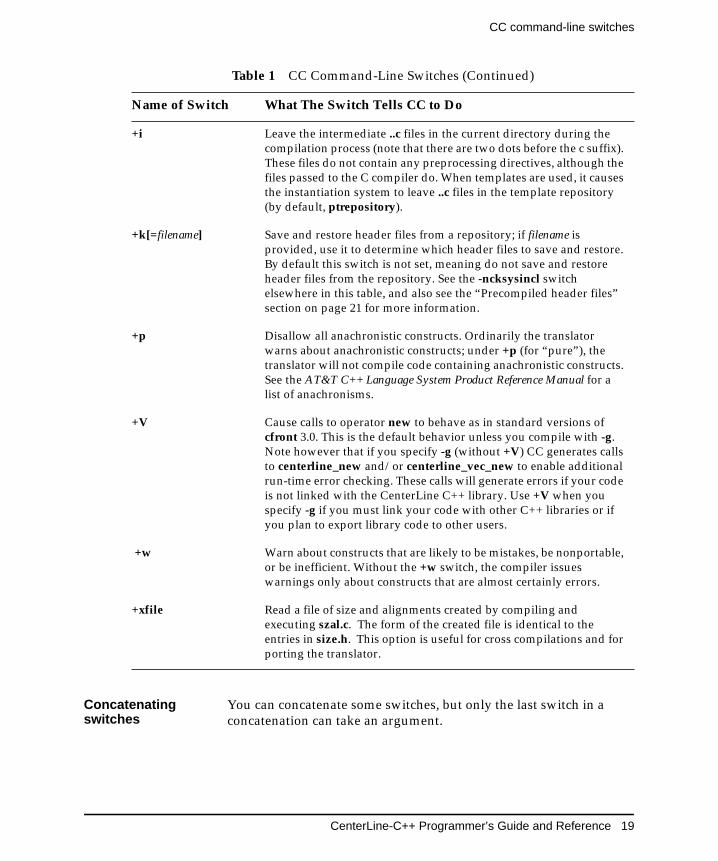
Concatenatingswitches
You can concatenate some switches, but only the last switch in aconcatenation can take an argument.
+i Leave the intermediate ..c files in the current directory during thecompilation process (note that there are two dots before the c suffix).These files do not contain any preprocessing directives, although thefiles passed to the C compiler do. When templates are used, it causesthe instantiation system to leave ..c files in the template repository(by default, ptrepository).
+k[=filename] Save and restore header files from a repository; if filename isprovided, use it to determine which header files to save and restore.By default this switch is not set, meaning do not save and restoreheader files from the repository. See the -ncksysincl switchelsewhere in this table, and also see the “Precompiled header files”section on page 21 for more information.
+p Disallow all anachronistic constructs. Ordinarily the translatorwarns about anachronistic constructs; under +p (for “pure”), thetranslator will not compile code containing anachronistic constructs.See the AT&T C++ Language System Product Reference Manual for alist of anachronisms.
+V Cause calls to operator new to behave as in standard versions ofcfront 3.0. This is the default behavior unless you compile with -g.Note however that if you specify -g (without +V) CC generates callsto centerline_new and/or centerline_vec_new to enable additionalrun-time error checking. These calls will generate errors if your codeis not linked with the CenterLine C++ library. Use +V when youspecify -g if you must link your code with other C++ libraries or ifyou plan to export library code to other users.
+w Warn about constructs that are likely to be mistakes, be nonportable,or be inefficient. Without the +w switch, the compiler issueswarnings only about constructs that are almost certainly errors.
+xfile Read a file of size and alignments created by compiling andexecuting szal.c. The form of the created file is identical to theentries in size.h. This option is useful for cross compilations and forporting the translator.
Table 1 CC Command-Line Switches (Continued)
Name of Switch What The Switch Tells CC to Do
Using gprof to generate profiling information
20 CenterLine-C++ Programmer’s Guide and Reference
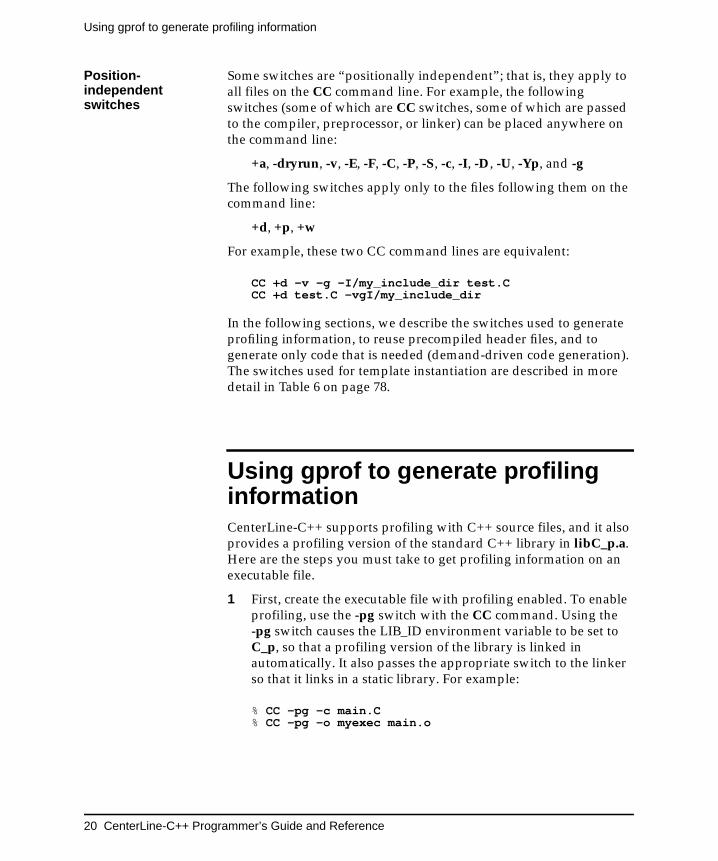
Position-independentswitches
Some switches are “positionally independent”; that is, they apply toall files on the CC command line. For example, the followingswitches (some of which are CC switches, some of which are passedto the compiler, preprocessor, or linker) can be placed anywhere onthe command line:
+a, -dryrun, -v, -E, -F, -C, -P, -S, -c, -I, -D, -U, -Yp, and -g
The following switches apply only to the files following them on thecommand line:
+d, +p, +w
For example, these two CC command lines are equivalent:
CC +d -v -g -I/my_include_dir test.CCC +d test.C -vgI/my_include_dir
In the following sections, we describe the switches used to generateprofiling information, to reuse precompiled header files, and togenerate only code that is needed (demand-driven code generation).The switches used for template instantiation are described in moredetail in Table 6 on page 78.
Using gprof to generate profilinginformationCenterLine-C++ supports profiling with C++ source files, and it alsoprovides a profiling version of the standard C++ library in libC_p.a.Here are the steps you must take to get profiling information on anexecutable file.
1 First, create the executable file with profiling enabled. To enableprofiling, use the -pg switch with the CC command. Using the-pg switch causes the LIB_ID environment variable to be set toC_p, so that a profiling version of the library is linked inautomatically. It also passes the appropriate switch to the linkerso that it links in a static library. For example:
% CC -pg -c main.C% CC -pg -o myexec main.o
CenterLine-C++ Programmer’s Guide and Reference 21
Precompiled header files
2 Next, run the executable. When you run an executable youcreated with -pg, your program generates a profiling file, whichby default is named gmon.out.
% myexec
3 To access the information in gmon.out, process the gmon.outfile with gprof. We recommend that you also use c++filt torestore the names in gmon.out to the ones you used in yourC++ code; if you don’t use c++filt, you’ll see the manglednames generated by the C++ translator instead.
% gprof myexec gmon.out | c++filt > myfile.gprof
See the UNIX manual page for the gprof command for moreinformation.
Precompiled header filesCenterLine-C++ provides a facility that keeps track of header filesthat have been compiled to avoid recompiling them unnecessarilyon subsequent compilations of the same program, or any programwith the same header files. You use the following switches to takeadvantage of the precompiled header file facility:
-hdrepos =dir_name Use dir_name as a repository, and look indir_name for the filename specified with+k=filename.
+k[=filename] Save and restore compiled header filesfrom a repository. If a filename is provided,use it to determine which header files tosave and restore. By default, this switch isnot set.
-ncksysincl Do not check timestamps of files includedwith angle brackets (< >) whendetermining if a precompiled header file isout of date.
Precompiled header files
22 CenterLine-C++ Programmer’s Guide and Reference
Using +k to reducecompilation time
You can use the +k switch with CenterLine-C++ to decreasecompilation time for large programs with multiple header fileswhere the header files have not changed between compiles. Using+k tells the C++ compiling system to use its save-and-restoremechanism for compiling header files. This mechanism saves andreuses an image of previously compiled code for header files usedby your program.
When you use the +k switch with CenterLine-C++, the compilingsystem saves the state resulting from the initial compilations ofordered lists of header files in a repository (by default,./hdrepository) and restores that state on subsequent compilationsof the same program or any program with the same ordered list ofheader files. This save-and-restore mechanism means that the firstcompilation of a program takes longer than it would otherwise, butsubsequent compiles take significantly shorter time.
Specifying aninformation file
You can specify a precompiled header information file thatcontains information needed to restore the image of the compiledfiles. Each line in the information file should contain a list offilenames followed by an optional specification for a repository.Here’s the format:
# this is a comment linefilename1 filename2 ... filenameN [-hdrepos repository_path]
where filename1, filename2, ..., and filenameN are header files enclosed ineither angle brackets (< >) or double quotation marks (" "). Use the# sign to indicate a line with a comment.
For an example of an information file, see page 23.
NOTE The switches that control the precompiledheader file mechanism are effective only withCenterLine-C++’s native C preprocessor, clpp.This means, for instance, that these switcheswill not work correctly if you change toanother preprocessor by setting the cppCenvironment variable or using the -Ypcommand-line switch.
CenterLine-C++ Programmer’s Guide and Reference 23
Precompiled header files
CenterLine-C++ looks in the information file for the longest list ofleading header files that matches the list at the beginning of eachsource file. Whenever CenterLine-C++ finds a match, it restores thefiles on the list from the repository instead of recompiling them.
The mechanism for saving and restoring header files requires thatthe #include directives specifying header files to be precompiled arethe first items in the source file. This list of #include directives forthe files may be preceded by and interspersed with semanticallymeaningless items such as comments, whitespace, and #linedirectives.
Using +k without aninformation file
If you do not specify a precompiled header information file,CenterLine-C++ interprets the initial text of each source file as a listof header files; as soon as CenterLine-C++ discovers text in thesource file that is not whitespace, a comment, or a #includedirective, it ends its list of header files for that source file.
Supplying theinformation file
Suppose you specify a precompiled header information file asfollows:
<stdio.h> <string.h> "my_hdr1.h" -hdrepos /proj/my_repos<stdio.h> <string.h> "my_hdr2.h" -hdrepos /proj/my_repos<stdio.h>
Furthermore, say the beginning of your source file is as follows:
#include <stdio.h>#include <string.h>#include "my_hdr1.h"#include "my_hdr3.h"
NOTE You can take optimal advantage ofCenterLine-C++’s precompiled header filemechanism by making sure that all the source filesin your project contain an initial list of header filesthat match exactly in their order of inclusion.
Alternatively, you can set up one "mega-include"file that contains only the list of #includedirectives for the necessary header files; then makesure that all project files #include that one"mega-include" file.
Precompiled header files
24 CenterLine-C++ Programmer’s Guide and Reference
In this example, the compiling system saves the initial compilationresults for stdio.h,string.h, and my_hdr1.h in the /proj/my_reposrepository. When another compile is needed, the compiling systemrestores these compilation results from the repository and recompilesonly my_hdr3.h.
Suppose you used the same precompiled header information file as inthe preceding example but, instead of the preceding source file, youhad a source file that begins as follows:
#include <stdio.h>#include <string.h>#include "my_hdr3.h"
In this example, the compiling system saves and restores the initialcompilation results for stdio.h only. This is because there is no matchin the precompiled header information file for any sequence of filesexcept a sequence containing only the first one, stdio.h.CenterLine-C++ saves the initial compilation results for stdio.h andrestores them as needed for later compilations; the string.h andmy_hdr3.h header files would be recompiled during everyrecompilation of this source file.
Out-of-datecompilations
CenterLine-C++ treats a previous compilation as out-of-date if itdiscovers anything that would cause the output of the C++translator to differ, such as any of the following:
• Changes to the included files.
• If you change the arguments to any CC switch, such as -D, -U,-I, or -dd={on|off}, that affects the generated C source code, itcauses the precompiled header mechanism to treat any files inthe repository as outdated. As a result, CenterLine-C++recompiles and saves the state of the newly compiled files ratherthan restoring an earlier state from the repository. Switchespassed on to the C compiler or ld do not have this effect.
• Adding a comment causes the output of the translator to vary,so it causes a recompilation.
• When the time of the machine on which CC is executing is laterthan the time of the machine that the repository is written to,CC issues this warning:
Repository file filename newer than current time,check machine times.
CenterLine-C++ Programmer’s Guide and Reference 25
Precompiled header files
If this happens, CC does not restore the state of the earliercompilation. Instead it recompiles and saves the state of the newfiles and continues without error.
A header-fileskipping example
If you have written any X Window System applications, you areprobably well aware of the number and size of the header filesinvolved. This example uses a module called x.C in the examplesdirectory. If you haven’t set up the examples directory yet, refer to“Setting up the examples directory” on page 9.
To begin, cd to the directory containing the examples and look at theheader files in x.C:
% cd c++examples_dir% head -18 x.C
Notice that x.C includes seven global header files and two local headerfiles. In general, we recommend using global header files for headerskipping rather than local header files.
To set up header-file skipping, you can create a skip information filethat provides the information needed for the translator to restore theimage of the compiled files. This information includes the names ofthe header files to be skipped and the repository in which theprecompiled versions should be stored. The header files are listed inthe exact order that they are included in the source file because thetranslator looks for the complete pattern when skipping header files.
To avoid your having to type in the contents of the skip informationfile, we have supplied it in the c++examples_dir directory. To view it:
% more skip
Notice that the file has a single line containing the name of the first sixglobal header files, separated by spaces, in the exact order they appearin x.C (we show it here on two lines). At the end of the single line isthe -hdrepos switch and SR, the name of the repository directorywhich will store the precompiled versions.
<X11/Xlib.h> <X11/Xutil.h> <X11/Xos.h> <X11/Xproto.h><stdio.h> <iostream.h> -hdrepos ./SR
Precompiled header files
26 CenterLine-C++ Programmer’s Guide and Reference
Recompiling withheader-file skipping
Now that you’ve set up the skip information file, you can recompile.Although you can recompile x.C manually by using CC with the+k=filename switch, we have supplied a special makefile target,skipping, for doing this. The skipping target recompiles x.C withoutheader-file skipping and then with header-file skipping, and it alsodisplays the time elapsed during each compile so you can see thespeed improvement.
To recompile x.C, do the following:
% make skipping
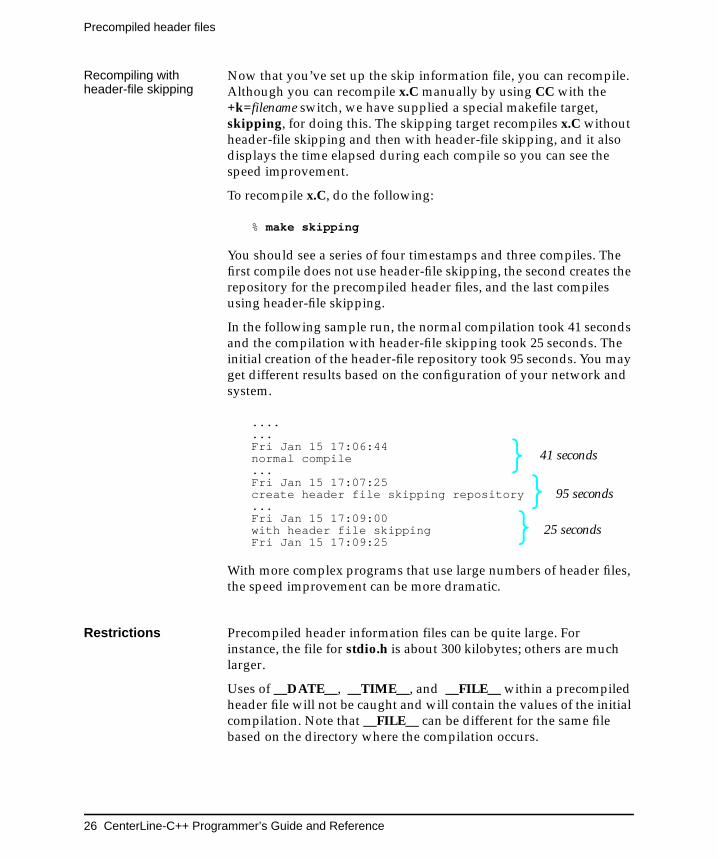
You should see a series of four timestamps and three compiles. Thefirst compile does not use header-file skipping, the second creates therepository for the precompiled header files, and the last compilesusing header-file skipping.
In the following sample run, the normal compilation took 41 secondsand the compilation with header-file skipping took 25 seconds. Theinitial creation of the header-file repository took 95 seconds. You mayget different results based on the configuration of your network andsystem.
....
...Fri Jan 15 17:06:44normal compile...Fri Jan 15 17:07:25create header file skipping repository...Fri Jan 15 17:09:00with header file skipping
}Fri Jan 15 17:09:25
With more complex programs that use large numbers of header files,the speed improvement can be more dramatic.
Restrictions Precompiled header information files can be quite large. Forinstance, the file for stdio.h is about 300 kilobytes; others are muchlarger.
Uses of __DATE__, __TIME__, and __FILE__ within a precompiledheader file will not be caught and will contain the values of the initialcompilation. Note that __FILE__ can be different for the same filebased on the directory where the compilation occurs.
} 41 seconds
}}
95 seconds
25 seconds
CenterLine-C++ Programmer’s Guide and Reference 27
Demand-driven code generation
If you specify a repository with the -hdrepos switch, you cannot usethe precompiled header mechanism to save and restore nested headerfiles enclosed in quotation marks rather than angle brackets.
For instance, suppose main.C contains the following:
#include "A.h"
and A.h, in turn, contains:
#include "B.h"
In this case, you cannot use the -hdrepos switch to compile main.C,although you can use the +k switch without -hdrepos.
Demand-driven code generationDemand-driven code generation is the process of selectivelygenerating code according to whether the code is actually used. TheCenterLine-C++ translator supports demand-driven codegeneration with the -dd=on and -dd=off switch to the CCcommand.
For example, if you use only one class in a class library,CenterLine-C++ generates only the code for the class you used with-dd=on. With -dd=off, the compiling system generates code for all theclasses in the library.
Switches fordemand-drivengeneration
These switches turn demand-driven code generation on and off.
-dd=off Generate all code, whether or not it is used; do not usedemand-driven code generation.
-dd=on(the defaultsetting)
Use demand-driven code generation exclusively.Generate only the code that is actually used in themodule that is being compiled.
In the case of functions, generate code for anydefinitions that might be used externally, even if theyare not used in the particular module being compiled.
In the case of classes, omit the class definition from thegenerated code if the class is not used.
Demand-driven code generation
28 CenterLine-C++ Programmer’s Guide and Reference
Usingdemand-drivencode generation
You can use the -dd=on and -dd=off switches on the CC commandline:
% CC -dd=on -g my_source.C
or in makefile target rules for generating object code from C++ sourcefiles:
CC_SRCS = file1.C file2.C file3.C file4.CCC_OBJS = ${CC_SRCS:.C=.o}.SUFFIXES: .C .o.C.o:
CC +d -dd=off -g -c $<
If you’re debugging your code, you can use -dd=on to save the spacethat debug information for unused declarations and inline functiondefinitions would use. Use -dd=off if you want access to all the typesand inline functions that you might like to use.
Advantages ofdemand-drivencode
There are several advantages to using demand-driven codegeneration when you compile your C++ files.
• Demand-driven code generation decreases the number ofdebugging symbols that are generated by the C++ translator.This in turn reduces the size of object modules built by theCenterLine-C++ language system.
• Generating fewer debugging symbols also means that the C++translator produces a smaller C language file, so thatcompilation by the C compiler is faster.
• Using demand-driven code generation reduces the amount ofexecutable code generated for inline functions when compilingwith the +d switch. The +d switch to the CC command specifiesthat inline functions not be expanded inline. If you compile with+d and -dd=on, CC will insert, as static functions, only thoseinline function definitions needed by the module.
CenterLine-C++ Programmer’s Guide and Reference 29
Using libraries and header files
Using libraries and header filesIn this section we discuss the libraries and header files that weprovide with CenterLine-C++ and how you access these librariesand the system libraries provided with your operating system.CenterLine-C++ automatically links in the standard libraries.
Search paths forlibraries
CenterLine-C++ uses the same rules to search for libraries as yoursystem’s ld command. Here’s a summary of the order in whichdirectories are searched:
• If you specify a directory on the command line with the -Ldirswitch to ld, the directory specified by dir is searched before thedefault directories.
If you specify a library with the -l command-line switch, youcan specify the directory to search for the library with the -Lswitch. The -L switch must precede the -l switch on thecommand line. For example,
% CC -L/usr/lib/X11R5 -lX11 x.C
• You can use an environment variable to specify a colon-separated list of directories to search for libraries. Thesedirectories are searched after any directories specified on thecommand line with -L. The name of this environment variable isplatform-specific; for example it is called LD_LIBRARY_PATHon Sun systems, and L_PATH on HP systems.
• Finally, CenterLine-C++ searches in the standard directories,/lib, /usr/lib, and, on some platforms, /usr/local/lib.
You can also use an environment variable (LD_OPTIONS on Sunsystems, LDOPTS on HP systems) to specify a default set of ldswitches. These switches are passed to ld as though they were enteredfirst on the command line.
Search paths forheader files
You can modify the search path used to locate #include files withthe -I preprocessor switch. The preprocessor first searches in thedirectory containing the source file (for header files enclosed inquotation marks), then in the directories named with -I, if any, andfinally in the system include directories. See “Locating header files”on page 41 for more information.
Using libraries and header files
30 CenterLine-C++ Programmer’s Guide and Reference
System librariesand header files
You can access the system libraries provided with your platform byusing header files that declare interfaces to those libraries. Theseheader files are usually installed in the directories /usr/include or/usr/local/include, both of which are usually in your standardsearch path. System libraries usually reside in the directories /lib or/usr/lib.
To use a function from a system library that’s declared in/usr/include/system_header.h, put this directive in your code:
#include <system_header.h>
CenterLine-C++ will include /usr/include/system_header.h unless itencounters a file of the same name earlier in its search path.
Run-time libraries The following run-time libraries are provided with CenterLine-C++:
• libC.a, the standard C++ library
• libcomplex.a, the complex mathematics library
• libc.a, the CenterLine-C ANSI C library
To use the functions declared in any of these libraries in your code,you must include the corresponding header files in your code. Youmay also need to explicitly link in the library when you compileyour code, as described in “Linking to the complex mathematicslibrary” on page 33.
The standard C++library
The standard C++ library, libC.a, includes the C++ iostream libraryand functions that handle error reporting and stack and vectortypes, run-time memory management, and invocation of staticconstructors and destructors.
The C++ iostream package is declared in iostream.h and other headerfiles as shown in “The iostream header files” on page 33. It consists ofseveral base classes that provide input/output conversion andbuffering, together with derived classes that support additionalfeatures including formatted I/O to and from files, I/O through filedescriptors, and “in-core” formatting, that is, storing and fetchingfrom arrays of bytes.
NOTE We do not support the AT&T C++ LanguageSystem task library.
CenterLine-C++ Programmer’s Guide and Reference 31
Using libraries and header files
The AT&T C++ Language System Library Manual, which is providedwith CenterLine-C++, contains examples of using the iostreampackage and manual pages for the iostream library. You can also viewmanual pages by entering the man command, for example
% man ostream
The other functions provided by libC.a are declared in generic.h,new.h, vector.h, and other header files. The generic.h header filecontains a set of simple macros used to create “pseudo-templates”before templates became part of the C++ language.
The complexmathematics library
The complex mathematics library implements the data type ofcomplex numbers as a class, complex. The class overloads thestandard input, output, arithmetic, assignment, and comparisonoperators, and the standard exponential, logarithmic, power, squareroot, and trigonometric functions. These functions are declared inthe complex.h header file.
The AT&T C++ Language System Library Manual, which is providedwith CenterLine-C++, contains manual pages for the complexmathematics library and examples of its use. You can also viewmanual pages by entering the man command, for example
% man cartpol
The ANSI C library The CenterLine-C Programmer’s Guide and Reference describes theANSI C library that we provide with CenterLine-C. This library isused only if you compile with the CenterLine-C -ansi switch. If anANSI C-compliant C library is provided with your operating systemsoftware, we do not provide the ANSI C library.
The C header files that we provide with CenterLine-C are installed inthe directory CenterLine/clcc/arch-os/inc, where CenterLine is thedirectory in which CenterLine software is installed, and arch-os is thedirectory specific to your operating system. You can view manualpages for C functions by entering the man command, for example
% man acos
Shared libraries CenterLine-C++ supports shared libraries on all systems thatprovide them. A shared library, also referred to as a dynamiclibrary, is a shared object file that is used as a library. Librarieswhose names have a .a suffix are referred to as static or archive
Using libraries and header files
32 CenterLine-C++ Programmer’s Guide and Reference
libraries. The suffixes of shared library names are platformdependent. Examples are .so and .sl. If CenterLine-C++ finds both astatic and a shared library in the same directory, it uses the sharedversion.
At run time, a shared object can be linked to more than oneexecuting program; all executing programs share access to a singlecopy of the object. Thus, using shared libraries can represent asignificant savings in storage, but it may also reduce speed ofprocessing.
Using C++ headerfiles
The C++ header files that we provide with CenterLine-C++ areinstalled in the directory CenterLine/clc++/arch-os/incl, whereCenterLine is the directory in which CenterLine software isinstalled, and arch-os is the directory specific to your operatingsystem and machine architecture. Many of these files are standardUNIX system header files with argument types added to thefunction declarations. If the system header files distributed withyour operating system support C++ constructs, the CenterLinedirectory does not contain redundant files.
CenterLine-C++ automatically links libC and libc with every C++program. To use a function from one of these libraries, you needonly include the appropriate header files in your code. For example,if you want to use the cout function, use the following #includedirective:
#include <iostream.h>
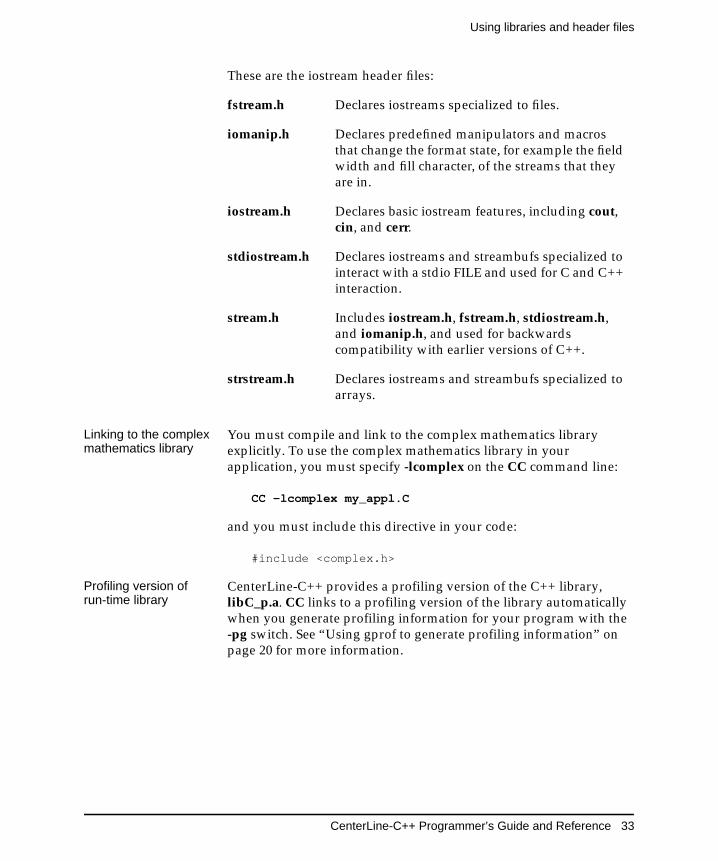
The iostream headerfiles
C++ does not have built-in input and output statements, but theiostreams package provides functions that allow you to use anynumber of input and output streams. The iostreams package is themajor component of the C++ library, libC, which is linked inautomatically by CC.
You do not have to link to the library explicitly to use iostreamsfunctions. However, you must include iostream.h for any file that usesC++ I/O streams. For many programs, you need only includeiostream.h. The stream.h header file is included for backwardscompatibility with earlier releases of the C++ compilation system.
CenterLine-C++ Programmer’s Guide and Reference 33
Using libraries and header files
These are the iostream header files:
Linking to the complexmathematics library
You must compile and link to the complex mathematics libraryexplicitly. To use the complex mathematics library in yourapplication, you must specify -lcomplex on the CC command line:
CC -lcomplex my_appl.C
and you must include this directive in your code:
#include <complex.h>
Profiling version ofrun-time library
CenterLine-C++ provides a profiling version of the C++ library,libC_p.a. CC links to a profiling version of the library automaticallywhen you generate profiling information for your program with the-pg switch. See “Using gprof to generate profiling information” onpage 20 for more information.
fstream.h Declares iostreams specialized to files.
iomanip.h Declares predefined manipulators and macrosthat change the format state, for example the fieldwidth and fill character, of the streams that theyare in.
iostream.h Declares basic iostream features, including cout,cin, and cerr.
stdiostream.h Declares iostreams and streambufs specialized tointeract with a stdio FILE and used for C and C++interaction.
stream.h Includes iostream.h, fstream.h, stdiostream.h,and iomanip.h, and used for backwardscompatibility with earlier versions of C++.
strstream.h Declares iostreams and streambufs specialized toarrays.
Environment variables used by CC
34 CenterLine-C++ Programmer’s Guide and Reference
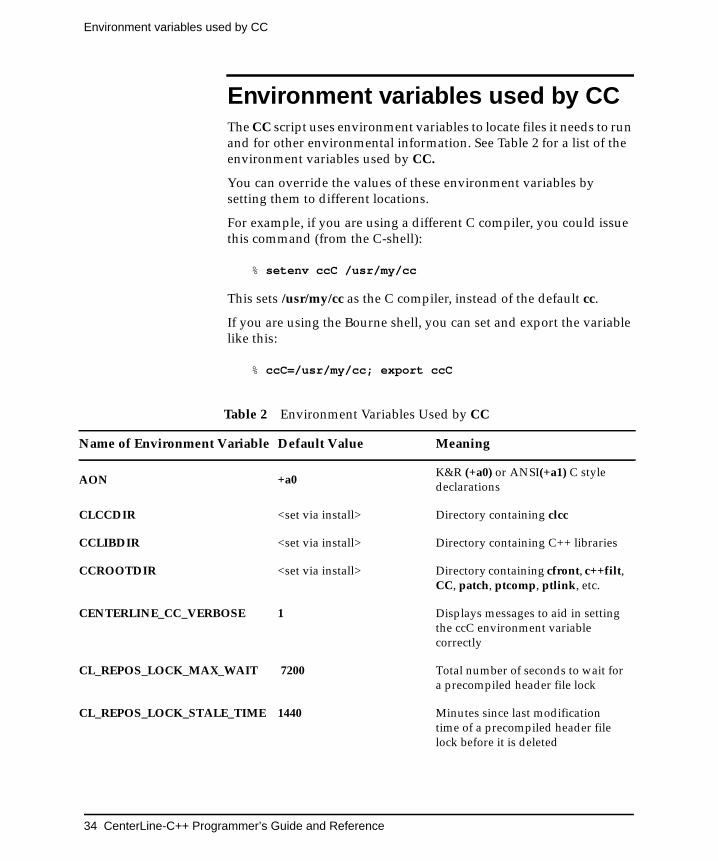
Environment variables used by CCThe CC script uses environment variables to locate files it needs to runand for other environmental information. See Table 2 for a list of theenvironment variables used by CC.
You can override the values of these environment variables bysetting them to different locations.
For example, if you are using a different C compiler, you could issuethis command (from the C-shell):
% setenv ccC /usr/my/cc
This sets /usr/my/cc as the C compiler, instead of the default cc.
If you are using the Bourne shell, you can set and export the variablelike this:
% ccC=/usr/my/cc; export ccC
Table 2 Environment Variables Used by CC
Name of Environment Variable Default Value Meaning
AON +a0K&R (+a0) or ANSI(+a1) C styledeclarations
CLCCDIR <set via install> Directory containing clcc
CCLIBDIR <set via install> Directory containing C++ libraries
CCROOTDIR <set via install> Directory containing cfront, c++filt,CC, patch, ptcomp, ptlink, etc.
CENTERLINE_CC_VERBOSE 1 Displays messages to aid in settingthe ccC environment variablecorrectly
CL_REPOS_LOCK_MAX_WAIT 7200 Total number of seconds to wait fora precompiled header file lock
CL_REPOS_LOCK_STALE_TIME 1440 Minutes since last modificationtime of a precompiled header filelock before it is deleted
CenterLine-C++ Programmer’s Guide and Reference 35
Environment variables used by CC
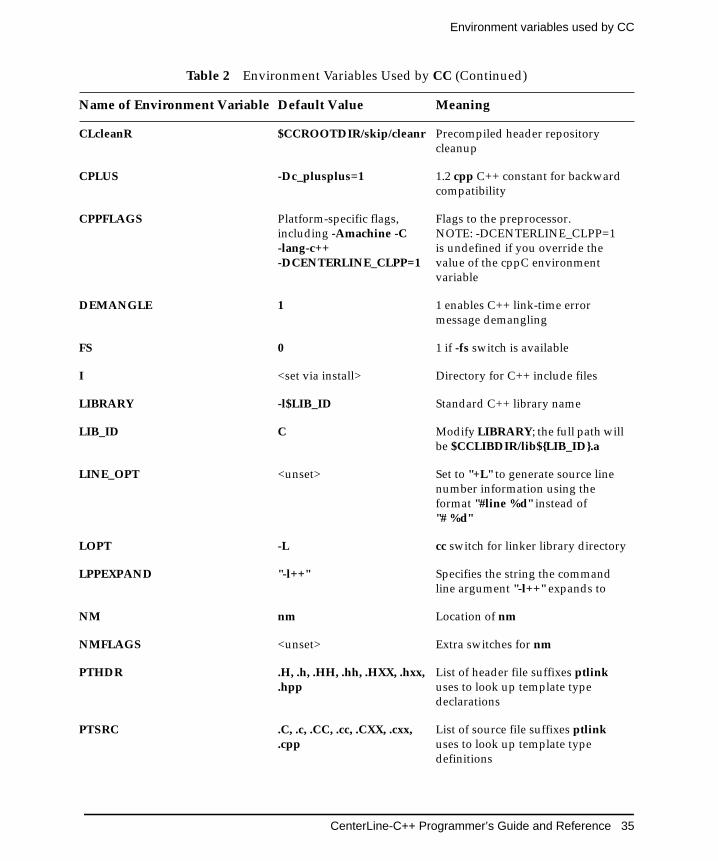
CLcleanR $CCROOTDIR/skip/cleanr Precompiled header repositorycleanup
CPLUS -Dc_plusplus=1 1.2 cpp C++ constant for backwardcompatibility
CPPFLAGS Platform-specific flags,including -Amachine -C-lang-c++-DCENTERLINE_CLPP=1
Flags to the preprocessor.NOTE: -DCENTERLINE_CLPP=1is undefined if you override thevalue of the cppC environmentvariable
DEMANGLE 1 1 enables C++ link-time errormessage demangling
FS 0 1 if -fs switch is available
I <set via install> Directory for C++ include files
LIBRARY -l$LIB_ID Standard C++ library name
LIB_ID C Modify LIBRARY; the full path willbe $CCLIBDIR/lib${LIB_ID}.a
LINE_OPT <unset> Set to "+L" to generate source linenumber information using theformat "#line %d" instead of"# %d"
LOPT -L cc switch for linker library directory
LPPEXPAND "-l++" Specifies the string the commandline argument "-l++" expands to
NM nm Location of nm
NMFLAGS <unset> Extra switches for nm
PTHDR .H, .h, .HH, .hh, .HXX, .hxx,.hpp
List of header file suffixes ptlinkuses to look up template typedeclarations
PTSRC .C, .c, .CC, .cc, .CXX, .cxx,.cpp
List of source file suffixes ptlinkuses to look up template typedefinitions
Table 2 Environment Variables Used by CC (Continued)
Name of Environment Variable Default Value Meaning
Environment variables used by CC
36 CenterLine-C++ Programmer’s Guide and Reference
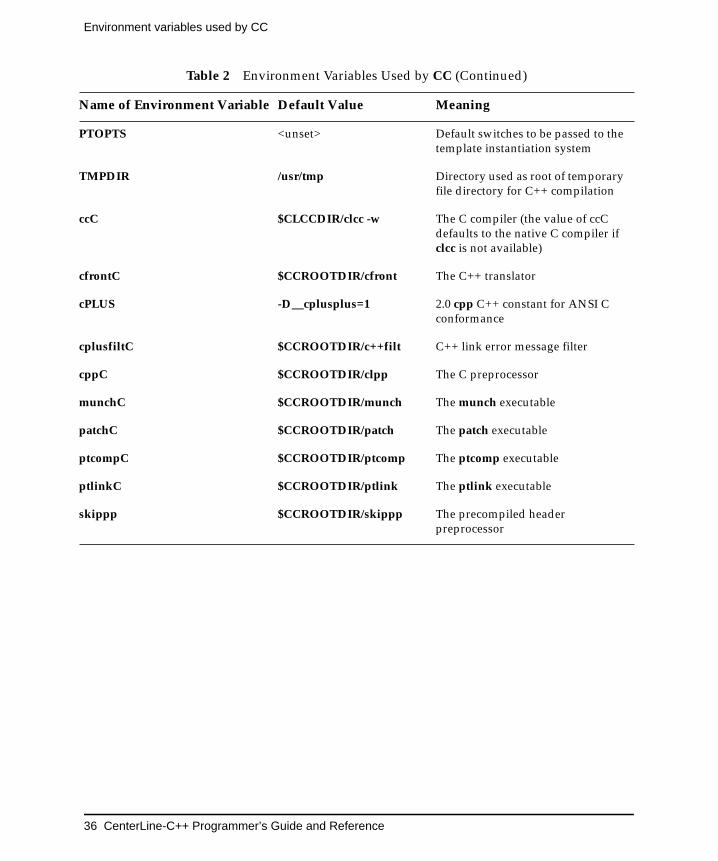
PTOPTS <unset> Default switches to be passed to thetemplate instantiation system
TMPDIR /usr/tmp Directory used as root of temporaryfile directory for C++ compilation
ccC $CLCCDIR/clcc -w The C compiler (the value of ccCdefaults to the native C compiler ifclcc is not available)
cfrontC $CCROOTDIR/cfront The C++ translator
cPLUS -D__cplusplus=1 2.0 cpp C++ constant for ANSI Cconformance
cplusfiltC $CCROOTDIR/c++filt C++ link error message filter
cppC $CCROOTDIR/clpp The C preprocessor
munchC $CCROOTDIR/munch The munch executable
patchC $CCROOTDIR/patch The patch executable
ptcompC $CCROOTDIR/ptcomp The ptcomp executable
ptlinkC $CCROOTDIR/ptlink The ptlink executable
skippp $CCROOTDIR/skippp The precompiled headerpreprocessor
Table 2 Environment Variables Used by CC (Continued)
Name of Environment Variable Default Value Meaning
3 Preprocessing
This chapter describes the CenterLine-C++preprocessor. We cover the following topics:
• Header file inclusion• Macro definition and expansion• Conditional compilation• Line control• Reporting diagnostic messages• Implementation-dependent behavior• Preprocessor switches

CenterLine-C++ Programmer’s Guide and Reference 39
The CenterLine-C++ Preprocessor
The CenterLine-C++ PreprocessorA preprocessor manipulates the text in your source file and producesinput to the compiler. This chapter describes the preprocessordistributed with CenterLine-C++.
Getting informationabout clpp
The CenterLine ANSI C preprocessor, clpp, is based on the GNU-CCompatible Compiler Preprocessor. We have enhanced it to handleCenterLine’s precompiled header file facility, described on page 21.For usage information and a listing of preprocessor switches, issuethe man command at the shell:
% man clpp
The CenterLine installation process installs manual pages in the/CenterLine/man directory. If the man command does not find theCenterLine manual page for clpp, CenterLine/man may not be in theman command’s search path. Ask your system administrator, or, ifyour UNIX system supports the MANPATH environment variable,add the CenterLine/man directory to the variable. For example:
% setenv MANPATH ${MANPATH}:dir/CenterLine/man
where dir is the path to your CenterLine directory.
What is clpp? The clpp preprocessor is a macro processor that is usedautomatically by the C compiler to transform your program beforeactual compilation. It is called a macro processor because it allowsyou to define macros, which are brief abbreviations for longerconstructs.
The preprocessor always does the following:
• Replaces C and C++-style comments with single spaces
• Deletes all backslash-newline sequences
• Expands all predefined macro names

The CenterLine-C++ Preprocessor
40 CenterLine-C++ Programmer’s Guide and Reference
In addition, the preprocessor provides the following optionalfacilities:
• Header file inclusion
• Macro expansion
• Conditional compilation
• Line control
Preprocessor directives implement each of these facilities.
Preprocessordirectives
Preprocessor directives always begin with the # sign, optionallypreceded by space and tab characters, followed by an identifiercalled the command name. They can appear anywhere in your codeand can be continued over several lines by placing a backslash (\) atthe end of the line to be continued.
There is a fixed set of command names, as shown in Table 3. Wediscuss each of the facilities these commands are used for in the restof the chapter.
Table 3 Preprocessor command names
Preprocessor command name Used for:
#include, #include_next Header file inclusion
#define, #undef Macro definition and expansion
#if, #else, #elif, #endif#ifdef, #ifndef
Conditional compilation
#line Line control
#error, #warning Reporting diagnostic messages
#pragma Implementation-dependent behavior
CenterLine-C++ Programmer’s Guide and Reference 41
Header file inclusion
Header file inclusionUse the #include directive to include the contents of other files,usually header files, before your file is compiled. When thepreprocessor encounters a #include directive, it scans the filespecified for input before continuing.
Locating headerfiles
How the preprocessor locates the file depends on which of threeforms the command argument takes:
#include <filename> Searches for the system header file calledfilename, first in the list of directories youspecify on the command line with the -Iswitch, then in a standard list of systemdirectories.
#include "filename" Searches for your own header file calledfilename, first in the directory of the currentinput file, then in the same directories usedfor system header files.
#include identifier Expands any macros contained in identifier,then completes the header file search asabove. The search path depends on whetherthe resulting expansion is enclosed in anglebrackets or double quotes. This issometimes called a computed #include.
One use of this computed #include might be to include a site-specificversion of a header file. The following example uses macro expansionand conditional compilation, which are described in the next twosections. This sequence of directives causes the preprocessor toinclude a different version of a header file called my_args.h at the sitecalled paris:
#ifdef paris#define my_args "my_args.paris.h"#else#define my_args "my_args.h"#endif#include my_args
NOTE CenterLine-C++ provides a facility that keeps trackof header files that have been compiled to avoidrecompiling. See page 21 for more information.
Header file inclusion
42 CenterLine-C++ Programmer’s Guide and Reference
Nested #includedirectives
The files that you include with the #include directive canthemselves contain #include directives. The clpp preprocessorsupports approximately 198 levels of nesting.
Substituting otherheader files with#include_next
If your program relies on a system header file that doesn’t behavethe way you need it to on all the platforms your program supports,you can write a local version of the header file that adds to thesystem header file.
You can use the #include_next command to ensure that thepreprocessor finds first your local version of the header file, then thesystem version. The #include_next command behaves like the#include command, but it begins its search for the header file in thenext directory on the search path after the directory that contains thecurrent file.
For example, if you want to modify the errno.h system header file,use this directive in your program:
#include <sys/errno.h>
In the local version of the header file, use this directive
#include_next <sys/errno.h>
Use the -I switch to the CC command to specify the directory thatcontains the local version of the header file, for example-I/usr/local/include. In this example, the preprocessor first finds thelocal version of the errno.h header file. When it encounters the#include_next command, it searches for the next header file in itssearch path called errno.h and finds and includes the systemheader file.
CenterLine-C++ Programmer’s Guide and Reference 43
Macro definition and expansion
Macro definition and expansionThe preprocessor expands predefined macros and macros that youdefine using the #define directive. We cover the following topics inthis section:
• Defining simple macros
• Defining macros with arguments
• Specifying string literals
• Concatenating tokens
• Differences between ANSI C and K&R C
• Predefined macros
Simple macros The simplest macro definition has this syntax:
#define macro_name macro_body
This form is most often used to define a constant; for example, ifyour program includes a header file that contains this directive:
#define LENGTH 600
the preprocessor replaces each occurrence of LENGTH in yourprogram with 600. The macro definition remains in force until theend of the translation unit, or until it is undefined with an #undefdirective.
You can define a macro that refers to another macro. For example:
#define WIDTH 2*LENGTH
This is not equivalent to defining WIDTH to equal 1200, because thepreprocessor doesn’t replace WIDTH with 2*LENGTH until you useWIDTH.
In C++, you can use a const declaration instead of a macro, forexample
const int LENGTH=600;
Using const has the advantage of making LENGTH available to asymbolic debugger. Also const values can have type and scope likevariables.
Macro definition and expansion
44 CenterLine-C++ Programmer’s Guide and Reference
Macros witharguments
You can define a macro that accepts arguments. The syntax is asfollows:
#define macro_name(arg1, arg2,...argn) macro_body
The opening parenthesis must follow the macro name immediatelywith no white space, otherwise the preprocessor interprets the whitespace as the macro body. The arguments can be any valid identifiers,separated by commas and optional white space. Here’s an example:
#define min(a,b) ((a) < (b) ? (a) : (b))
The parentheses around the macro body are not required, but werecommend that you use them to avoid problems that can occur dueto C’s operator precedence rules.
To use the macro, specify its name followed by a list of arguments inparentheses, separated by commas. The number of arguments you listmust match the number in the macro definition.
In C++, you can replace a macro like this with an inline or templatefunction, which has the advantage that the function name will beavailable to a symbolic debugger. For example, this inline functionreplaces the min macro defined above:
inline int min(int a,int b){
return ((a) < (b) ? (a) : (b))}
Using an inline or a template function instead of a macro also allowsthe C++ compiler to perform type checking on any call to the function.
Specifying stringliterals
You can turn a macro argument into a string literal by preceding itwith a # token (sometimes called the stringizing operator). Thisexample defines and uses a macro called print_name:
#include <iostream.h>#define print_name(name) cout << "My name is" #name "\n"
main () {print_name(Anita);}
CenterLine-C++ Programmer’s Guide and Reference 45
Macro definition and expansion
After preprocessing, main() looks like this:
main () {cout << "My name is" "Anita" "\n"}
The preprocessor later concatenates adjacent strings, so the output ofthe program is this:
My name is Anita
Concatenatingtokens
If the ## operator appears between two tokens in the macro body,the preprocessor first replaces the tokens if they are parameters,then removes the ## token and any white space surrounding it.
For example, suppose you define this macro:
#define size(name,no) new ## name = no * old ## name
If you use the size macro as follows:
size(Length,3)
You get the following expansion:
newLength = 3 * oldLength
ANSI C differencesin macro expansion
There are several differences between the ways ANSI C stylepreprocessors such as clpp and pre-ANSI preprocessors handlemacro expansion. If you’re using legacy code or pre-ANSI C headerfiles you may encounter these differences. The Annotated C++Reference Manual, in its commentary on preprocessing, describesdifferences in detail. (See ”Suggested reading” on page vi forpublication details.)
Here’s a simple example to illustrate how clpp and pre-ANSIpreprocessors handle strings, character constants, and concatenation.Suppose you have this code:
#define old_string(x) "x"#define old_char(y) 'y'#define old_join(m,z) m/* */z
#define new_string(a) #a#define new_join(c,d) c##d
Macro definition and expansion
46 CenterLine-C++ Programmer’s Guide and Reference
main() {
old_string(this is my string);old_char(this is my char);old_join(con,catenated);
new_string(this is my string);new_join(con,catenated);}
The “old” macros produce the desired result if you use a pre-ANSIpreprocessor, the “new” macros if you use clpp or another ANSI Cpreprocessor. There is no ANSI C equivalent to the “charizing” featureprovided with some pre-ANSI preprocessors, which replaces thecontents of character constants with the spelling of their formalarguments.
A traditional preprocessor produces this output:
"this is my string";'this is my char';concatenated;
#this is my string;con##catenated ;
Here’s the result when you use clpp:
"x" ;'y' ;con catenated ;
"this is my string" ;concatenated ;
Predefined macros CenterLine-C++ predefines the macros listed in Table 4. Thesemacros cannot be undefined or redefined, except as noted in thetable.
The __LINE__ and __FILE__ macros can be set by the #linedirective, as described in ”Line control” on page 51.
To allow conditional compilation for source files that are compiled byboth the C++ translator and the C compiler, CenterLine-C++predefines the macros __cplusplus and c_plusplus. These macros arepredefined to the value 1. The c_plusplus macro is included only forbackward compatibility with AT&T C++ 1.2 source code. Whenwriting new code, use the __cplusplus macro instead of c_plusplus.
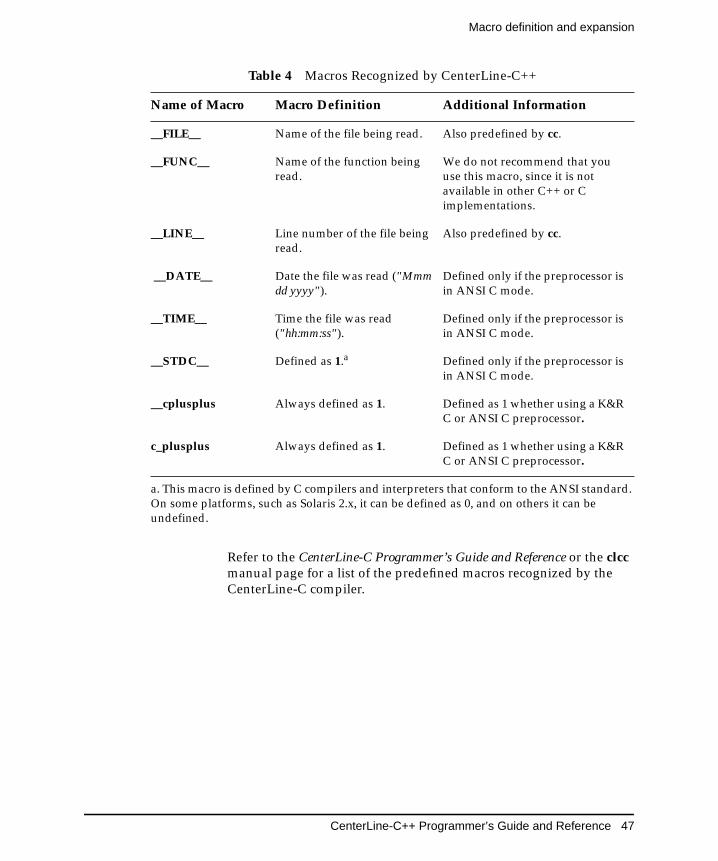
CenterLine-C++ Programmer’s Guide and Reference 47
Macro definition and expansion
Refer to the CenterLine-C Programmer’s Guide and Reference or the clccmanual page for a list of the predefined macros recognized by theCenterLine-C compiler.
a. This macro is defined by C compilers and interpreters that conform to the ANSI standard.On some platforms, such as Solaris 2.x, it can be defined as 0, and on others it can beundefined.
Table 4 Macros Recognized by CenterLine-C++
Name of Macro Macro Definition Additional Information
__FILE__ Name of the file being read. Also predefined by cc.
__FUNC__ Name of the function beingread.
We do not recommend that youuse this macro, since it is notavailable in other C++ or Cimplementations.
__LINE__ Line number of the file beingread.
Also predefined by cc.
__DATE__ Date the file was read ("Mmmdd yyyy").
Defined only if the preprocessor isin ANSI C mode.
__TIME__ Time the file was read("hh:mm:ss").
Defined only if the preprocessor isin ANSI C mode.
__STDC__ Defined as 1.a Defined only if the preprocessor isin ANSI C mode.
__cplusplus Always defined as 1. Defined as 1 whether using a K&RC or ANSI C preprocessor.
c_plusplus Always defined as 1. Defined as 1 whether using a K&RC or ANSI C preprocessor.
Conditional compilation
48 CenterLine-C++ Programmer’s Guide and Reference
Conditional compilationConditional compilation allows your program to behave differentlydepending on the conditions under which it is compiled.Conditional commands are most often used in three situations:
• When portions of the code differ depending on the platform onwhich the code will run. For example, library routines may varyamong operating systems.
• When the same source file can be compiled into two or moreapplications.
• When a section of the code is obsolete, but you want to retain itin the source file for future reference.
Conditional directives begin with the #if, #ifdef, or #ifndefcommands and end with #endif. They can also contain #else and #elifcommands.
Conditional syntax Conditional directives that begin with the #if command have thissyntax:
#if exp1text_if_exp1_true[#elif exp2text_if_exp2_true ]...[#else [ /* not exp1 and not exp2*/ ]text_if_exp1_and_exp2_false ]#endif [ /* exp1 */ ]
The text following the first expression (exp1, exp2,...) that evaluates tononzero is preprocessed and the remaining conditional directives areignored. If none of the expressions following the #if and #elifcommands are nonzero, the text following the #else command, if any,is preprocessed.
CenterLine-C++ Programmer’s Guide and Reference 49
Conditional compilation
The optional comments after the #else and #endif commands make iteasier to read nested conditional directives.
Limitations on thecontent of expressions
The expression you use in a conditional directive must be a Cexpression of integer type. It can contain integer constants, characterconstants, arithmetic operators, identifiers, and macro calls.
You cannot test the size of a variable or data type. The preprocessordoesn’t understand “sizeof” operators, “enum”-type operators,typedef names, or type keywords. In this example, BUFSIZE mustbe a macro:
#if BUFSIZE == 1020...#elif BUFSIZE == 2040...#else /* BUFSIZE != 2040 & BUFSIZE != 1020/...#endif /* BUFSIZE == 1020 */
NOTE In K&R C, #else and #endif can be followed bytokens, so that, for example, the following is a legaldirective in K&R C:
#if KERNEL...#endif KERNEL /* legal in K&R C */
For full ANSI C compliance, only comments canfollow #else and #endif statements:
#endif /* KERNEL */
NOTE The preprocessor treats all identifiers that are notmacros as 0. Also, the way it interprets characterconstants depends on the conventions of themachine and operating system on which the codeis running.
Conditional compilation
50 CenterLine-C++ Programmer’s Guide and Reference
Using #ifdef and#ifndef
You can use #ifdef or #ifndef with a macro name if a section of yourcode is relevant only under certain conditions. You can use apredefined macro or a macro you have defined yourself.
For example, if your program has sections that differ according towhether or not it’s compiled in a UNIX environment, you could usethis directive:
#ifdef unix.<code to be compiled if unix is defined>.#else /* not unix */.<code to be compiled if unix is not defined>.#endif /* unix */
The commands #if defined and #if !defined are equivalent to #ifdefand #ifndef, but they enable you to combine two conditions in oneline. For example:
#if defined (_sparc_) || defined (_hp_).<code to be compiled if _sparc_ or _hp_ is defined>.#endif
The parentheses surrounding the macro name are optional.
Retaining obsoletecode
If you want to refer to a section of your program that you’vechanged, but you no longer want it compiled, you can retain it inyour source code and use a conditional directive that alwaysevaluates to false:
#if 0.<obsolete code>.#endif
CenterLine-C++ Programmer’s Guide and Reference 51
Line control
Line controlThe output from the preprocessor is a combination of your input filesand any files you included with #include. The included files and anyconditional directives and macros you use cause the line numbers inthe preprocessor output to be different from those in the originalsource file.
To enable error or warning messages to indicate at what line, and inwhich file, inconsistencies are detected, the preprocessor uses the__LINE__ and __FILE__ predefined macros. They expand,respectively, to the current input line number and the file beingpreprocessed. After a #include directive, the __FILE__ macro containsthe name of the included file, until processing resumes on the filecontaining the #include directive.
A #line directive changes the contents of the __FILE__ and __LINE__macros. This is useful if the original source file is processed by anotherprogram, such as a parser generator, and the output from thatprogram becomes the input to the preprocessor. The parser generatorcan insert #line directives into its output so that the output from thepreprocessor can refer to the original filename and line number.
For example, the following directive sets the __LINE__ macro to 15and the __FILE__ macro to my_file:
#line 15 my_file
Reporting diagnostic messagesThe #error directive causes the preprocessor to report a fatal error. Thetext following the #error directive is the error message. For example,if your program requires a particular condition to be true, you couldtest for the condition and generate an appropriate message.
Here’s an example:
#if SIZE != 1000#error "SIZE must equal 1000"#endif
The #warning directive causes the preprocessor to print a diagnosticmessage, but it does not interrupt processing.

Implementation-dependent behavior
52 CenterLine-C++ Programmer’s Guide and Reference
Implementation-dependentbehaviorThe ANSI standard provides a preprocessor directive of the form#pragma token-string. Its effect is determined by the implementation,and it is ignored if the implementation does not recognizetoken-string.
The clpp preprocessor ignores all #pragma directives and passes themon to the C compiler. Refer to the CenterLine-C Programmer’s Guide andReference for more information about the #pragma directivesrecognized by clcc.
Preprocessor switchesTable 5 shows the switches accepted by the clpp preprocessor. Someof these switches can be used on the CC command line, but othersmust be passed to the preprocessor from the CC command line withthe -flags_cpp= switch. Here’s an example:
% CC -flags_cpp="Wtraditional -pedantic" my_prog.C
This command line generates warnings if your code violates certainpre-ANSI (-Wtraditional) or ANSI semantics (-pedantic).
Table 5 clpp Preprocessor Switches
Switch Meaning
-C Do not discard comments; pass them through to the output file. Commentsappearing in arguments of a macro call will be copied to the output before theexpansion of the macro call.
-Dname Predefine name as a macro, with definition 1.
-Dname=definition Predefine name as a macro, with definition definition. There are no restrictions onthe contents of definition, but if you are invoking the preprocessor from a shell orshell-like program you may need to use the shell’s quoting syntax to protectcharacters such as spaces that have a meaning in the shell syntax. If you usemore than one -D for the same name, the rightmost definition takes effect.

CenterLine-C++ Programmer’s Guide and Reference 53
Preprocessor switches
-dD Write to standard output your #define commands and the result ofpreprocessing. Do not list predefined macros.
-dM Write to standard output the #define directives for all the macros definedduring the execution of the preprocessor, including predefined macros. Thisgives you a way of finding out what is predefined in your version of thepreprocessor. Assuming you have no file test.h, the command touch test.h; clpp-dM test.h will show the values of any macros predefined on your platform.
-H Writes the name of each header file used to standard output.
-Idirectory Add directory to the end of the list of directories to be searched for header files.This can be used to override a system header file, substituting your own version,since these directories are searched before the system header file directories. Ifyou use more than one -I switch, the directories are scanned in left-to-rightorder; the standard system directories come after.
-I- Any directories specified with -I switches before the -I- switch (note the hyphenafter -I) are searched only for the case of #include "file"; they are not searched for#include <file>. If additional directories are specified with -I switches after the-I-, these directories are searched for all #include directives. In addition, the -I-switch inhibits the use of the current directory as the first search directory for#include "file". Therefore, the current directory is searched only if it is requestedexplicitly with -I. Specifying both -I- and -I allows you to control preciselywhich directories are searched before the current one and which are searchedafter.
-imacros file Process file as input, discarding the resulting output, before processing theregular input file. Because the output generated from file is discarded, the onlyeffect of -imacros file is to make the macros defined in file available for use in themain input. The preprocessor evaluates any -D and -U switches on thecommand line before processing -imacros file.
-include file Process file as input, and include all the resulting output, before processing theregular input file.
-lang-c-lang-c++
Specify the source language. -lang-c++ includes additional default includedirectories for C++ and enables the preprocessor to handle C++ commentsyntax.
-M Lists dependencies of the source file on standard output. The preprocessorwrites one make rule containing the object file name for the source file, a colon,and the names of all the files included with #include. If there are many includedfiles then the rule is split into several lines. This feature is used in automaticupdating of makefiles.
Table 5 clpp Preprocessor Switches (Continued)
Switch Meaning
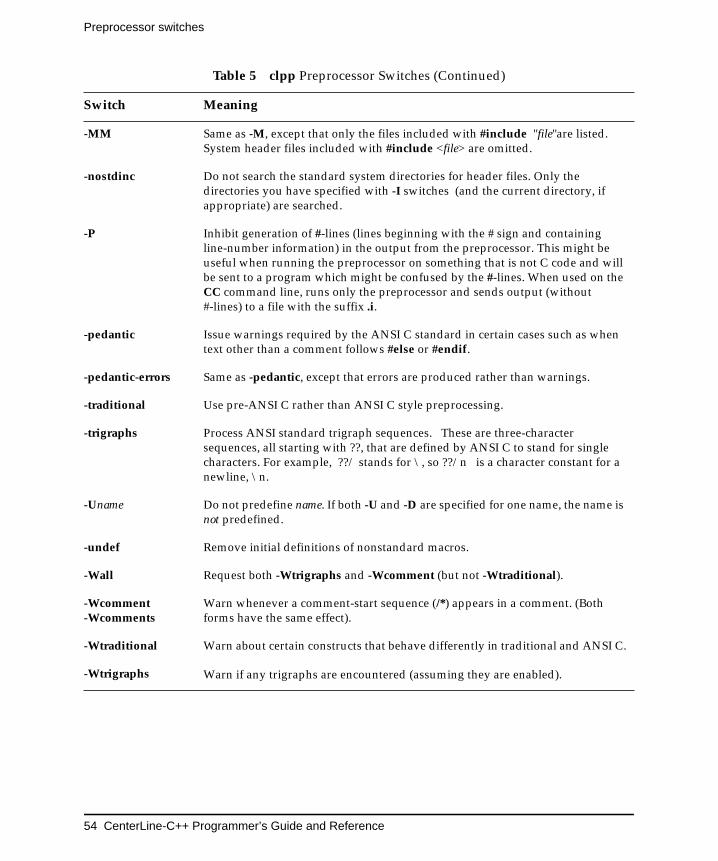
Preprocessor switches
54 CenterLine-C++ Programmer’s Guide and Reference
-MM Same as -M, except that only the files included with #include "file"are listed.System header files included with #include <file> are omitted.
-nostdinc Do not search the standard system directories for header files. Only thedirectories you have specified with -I switches (and the current directory, ifappropriate) are searched.
-P Inhibit generation of #-lines (lines beginning with the # sign and containingline-number information) in the output from the preprocessor. This might beuseful when running the preprocessor on something that is not C code and willbe sent to a program which might be confused by the #-lines. When used on theCC command line, runs only the preprocessor and sends output (without#-lines) to a file with the suffix .i.
-pedantic Issue warnings required by the ANSI C standard in certain cases such as whentext other than a comment follows #else or #endif.
-pedantic-errors Same as -pedantic, except that errors are produced rather than warnings.
-traditional Use pre-ANSI C rather than ANSI C style preprocessing.
-trigraphs Process ANSI standard trigraph sequences. These are three-charactersequences, all starting with ??, that are defined by ANSI C to stand for singlecharacters. For example, ??/ stands for \, so ??/n is a character constant for anewline, \n.
-Uname Do not predefine name. If both -U and -D are specified for one name, the name isnot predefined.
-undef Remove initial definitions of nonstandard macros.
-Wall Request both -Wtrigraphs and -Wcomment (but not -Wtraditional).
-Wcomment-Wcomments
Warn whenever a comment-start sequence (/*) appears in a comment. (Bothforms have the same effect).
-Wtraditional Warn about certain constructs that behave differently in traditional and ANSI C.
-Wtrigraphs Warn if any trigraphs are encountered (assuming they are enabled).
Table 5 clpp Preprocessor Switches (Continued)
Switch Meaning
4 Using Templates
This chapter provides an introduction to usingtemplates with CenterLine-C++. It includes adescription of the instantiation process and theswitches used for instantiation, some usagescenarios, and troubleshooting tips.

CenterLine-C++ Programmer’s Guide and Reference 57
Using templates
Using templatesTemplates are the mechanism in C++ for supporting parameterizedtypes.
Parameterized types allow you to implement generic code for a typeand then implement that type with different parameters.
For example, you can define a general container type such as List orSet as a template, and specify the type of the elements in the containeras a type parameter. Thus you could define a Set template and specifyits type parameters as int, Button, or cookbook. As a result, thecompiler could automatically create a Set of ints, a Set of Buttons, ora Set of cookbooks.
In case you are not familiar with templates, we provide somebackground information about how they are defined by the C++language and how they are implemented in CenterLine-C++. In therest of this chapter, we discuss the following aspects of templates:
• Basic concepts and syntax
• Using templates with CenterLine-C++
• The instantiation process
• Coding conventions
• Lookup schemes
• Map files
• Switches for templates
• Usage scenarios
• Specializations
• Examples
• Common pitfalls
• Troubleshooting
• Tools
• Summary of terminology
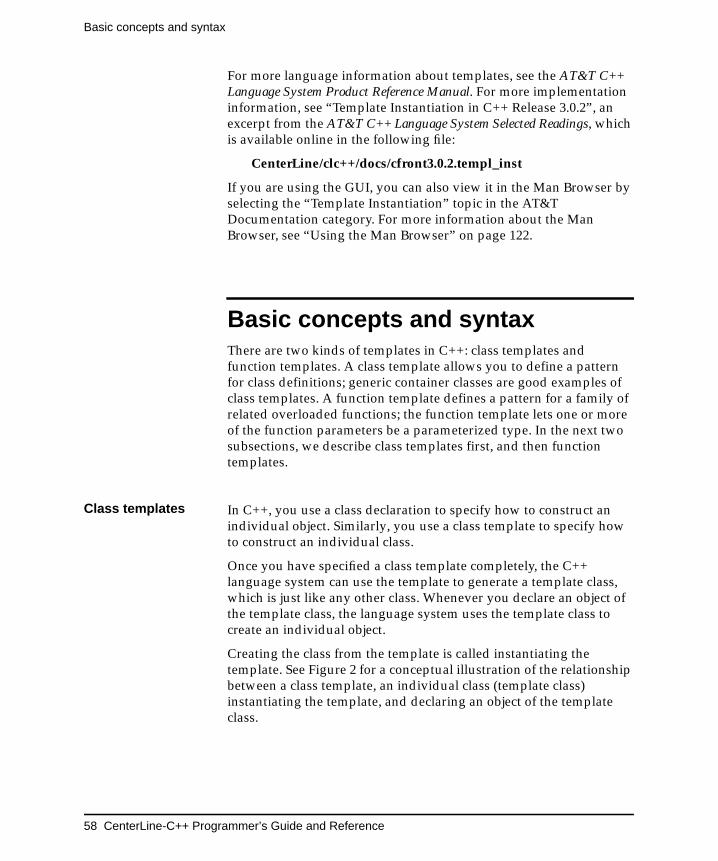
Basic concepts and syntax
58 CenterLine-C++ Programmer’s Guide and Reference
For more language information about templates, see the AT&T C++Language System Product Reference Manual. For more implementationinformation, see “Template Instantiation in C++ Release 3.0.2”, anexcerpt from the AT&T C++ Language System Selected Readings, whichis available online in the following file:
CenterLine/clc++/docs/cfront3.0.2.templ_inst
If you are using the GUI, you can also view it in the Man Browser byselecting the “Template Instantiation” topic in the AT&TDocumentation category. For more information about the ManBrowser, see “Using the Man Browser” on page 122.
Basic concepts and syntaxThere are two kinds of templates in C++: class templates andfunction templates. A class template allows you to define a patternfor class definitions; generic container classes are good examples ofclass templates. A function template defines a pattern for a family ofrelated overloaded functions; the function template lets one or moreof the function parameters be a parameterized type. In the next twosubsections, we describe class templates first, and then functiontemplates.
Class templates In C++, you use a class declaration to specify how to construct anindividual object. Similarly, you use a class template to specify howto construct an individual class.
Once you have specified a class template completely, the C++language system can use the template to generate a template class,which is just like any other class. Whenever you declare an object ofthe template class, the language system uses the template class tocreate an individual object.
Creating the class from the template is called instantiating thetemplate. See Figure 2 for a conceptual illustration of the relationshipbetween a class template, an individual class (template class)instantiating the template, and declaring an object of the templateclass.
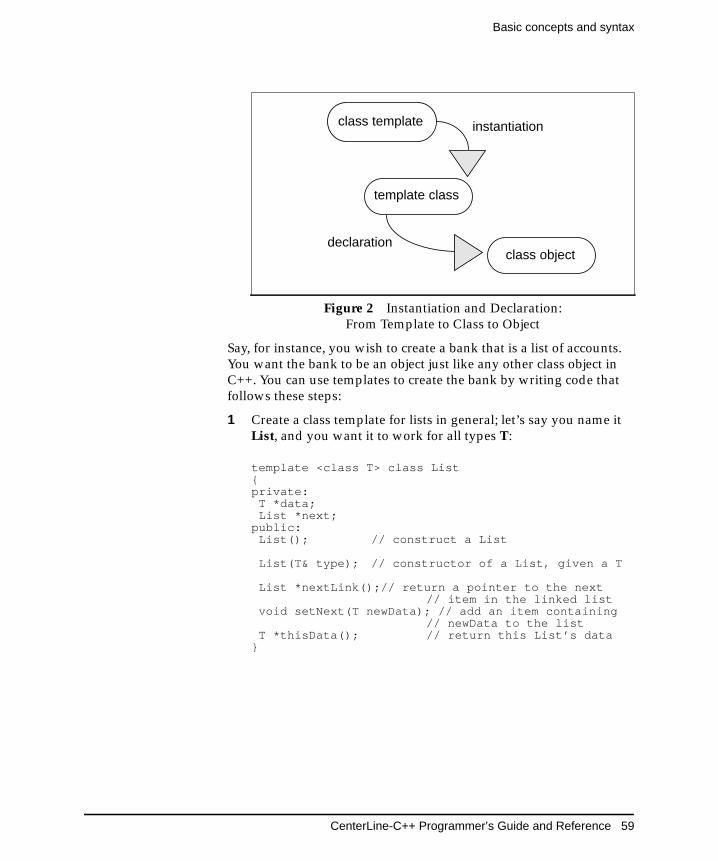
CenterLine-C++ Programmer’s Guide and Reference 59
Basic concepts and syntax
Say, for instance, you wish to create a bank that is a list of accounts.You want the bank to be an object just like any other class object inC++. You can use templates to create the bank by writing code thatfollows these steps:
1 Create a class template for lists in general; let’s say you name itList, and you want it to work for all types T:
template <class T> class List{private: T *data; List *next;public: List(); // construct a List
List(T& type); // constructor of a List, given a T
List *nextLink();// return a pointer to the next // item in the linked list
void setNext(T newData); // add an item containing // newData to the list
T *thisData(); // return this List’s data}
Figure 2 Instantiation and Declaration:From Template to Class to Object
class template
template class
class object
instantiation
declaration
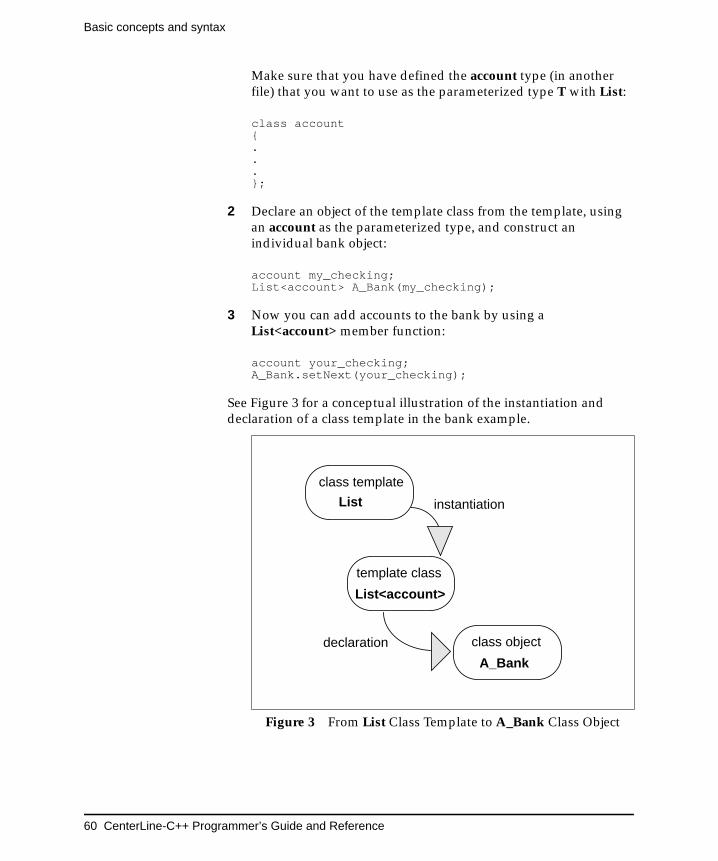
Basic concepts and syntax
60 CenterLine-C++ Programmer’s Guide and Reference
Make sure that you have defined the account type (in anotherfile) that you want to use as the parameterized type T with List:
class account{...};
2 Declare an object of the template class from the template, usingan account as the parameterized type, and construct anindividual bank object:
account my_checking;List<account> A_Bank(my_checking);
3 Now you can add accounts to the bank by using aList<account> member function:
account your_checking;A_Bank.setNext(your_checking);
See Figure 3 for a conceptual illustration of the instantiation anddeclaration of a class template in the bank example.
Figure 3 From List Class Template to A_Bank Class Object
class template
template class
class object
instantiationList
List<account>
A_Bank
declaration
CenterLine-C++ Programmer’s Guide and Reference 61
Basic concepts and syntax
Function templates C++ allows you to overload functions — that is, you can give manyfunctions the same name as long as each function definition isdistinguished by the number and/or type of its function arguments.You can think of a function template as a shorthand way to define aset of overloaded functions.
For instance, suppose you wish to define a set of overloadedfunctions so that each function returns the larger of its twoarguments. The simplest form of such a function is max(int, int):
int max(int a, int b) { return (a > b) ? a : b; }
In addition to comparing integers, you also want to overload max tocompare two classes of type Circle as well as comparing variables ofthe built-in types float and char:
Circle max(Circle a, Circle b){ return (a > b) ? a : b;}float max(float a, float b) { return (a > b) ? a : b;}char max(char a, char b) { return (a > b) ? a : b; }
Clearly each of these functions requires a definition of the greater-thanoperator (>); this definition is part of the language definition for int,float, and char, but must be defined specifically for the Circle class.
Here’s an example of a function template that defines the same patternas the preceding set of overloaded max functions:
template <class T> T max( T a, T b){ return ( a > b ) ? a : b; };
The data type for the max function template is represented by thetemplate argument: <class T>. Once you define this functiontemplate, you can use the max function with any data type for whichthe operator > is defined.
See Figure 3 for a conceptual illustration of the instantiation and useof the max function template with Circle as the parameterized type.Note that the Circle(max) function is generated implicitly by thecompiler.
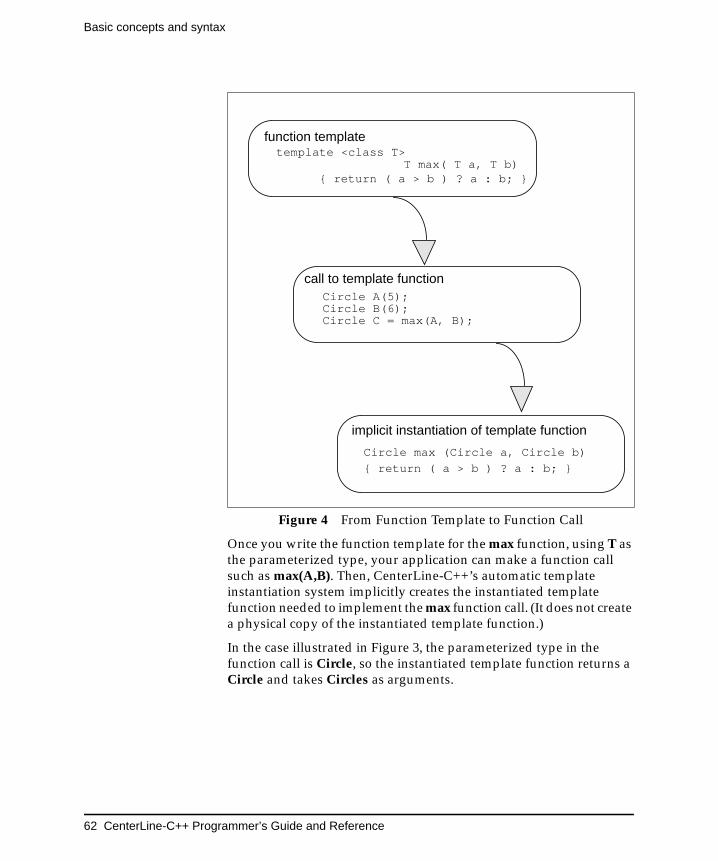
Basic concepts and syntax
62 CenterLine-C++ Programmer’s Guide and Reference
Once you write the function template for the max function, using T asthe parameterized type, your application can make a function callsuch as max(A,B). Then, CenterLine-C++’s automatic templateinstantiation system implicitly creates the instantiated templatefunction needed to implement the max function call. (It does not createa physical copy of the instantiated template function.)
In the case illustrated in Figure 3, the parameterized type in thefunction call is Circle, so the instantiated template function returns aCircle and takes Circles as arguments.
Figure 4 From Function Template to Function Call
function template
call to template function
template <class T>T max( T a, T b)
{ return ( a > b ) ? a : b; }
implicit instantiation of template function
{ return ( a > b ) ? a : b; }
Circle max (Circle a, Circle b)
Circle A(5);Circle B(6);Circle C = max(A, B);
CenterLine-C++ Programmer’s Guide and Reference 63
Using templates with CenterLine-C++
Using templates withCenterLine-C++In this section we present an overview of the use of templates withCenterLine-C++; we do so by focussing on another example of asimple class template. Later in the chapter we describe theinstantiation process and coding conventions in more detail. Thethree files used in this example, Vector.h, Vector.c, andappVector.C, are available online in the examples directory. See“Setting up the examples directory” on page 9 for how to install theexamples directory.
Declaring atemplate in a .h file
Suppose that you want to use one-dimensional arrays, or vectors,that grow dynamically as new elements are added and that cancontain different types as elements. You might declare a vector classtemplate as follows:
template <class T> class Vector{
T* data;int size;
public:Vector();T& operator[](int);
};
This class template declaration has two private data members, dataand size, and two public functions, operator[] and the constructor.There is one argument T to the template.
We put the template declaration of Vector in a file named Vector.h.As its suffix indicates, Vector.h is a header file. In the rest of thisdiscussion, we will refer to it as the template declaration file.
NOTE The template instantiation system allows youto use filenames with different suffixes. See the"Dynamic extension lookup" section on page73 and the "Map files" section on page 75 fordetails on how to do so correctly.
Using templates with CenterLine-C++
64 CenterLine-C++ Programmer’s Guide and Reference
Specifying atemplateimplementation in a.c file
By convention, if the declaration file is named Vector.h, we put theimplementation of the Vector template in a file named Vector.c.This file is generally referred to as the template definition file. Youcan use other suffixes for the template definition file, but the name(in this case Vector) must be the same as that of the templatedeclaration file.
Here’s a possible implementation for Vector:
template <class T> Vector<T>::Vector(){
// start off with 3 elementssize = 3;data = new T[size];
}
template <class T> T& Vector<T>::operator[](int n){
int os;int i;T* newdata;// grow if have toif (n >= size){
os = size;while (size <= n) size *= 2;newdata = new T[size];for (i = 0; i < os; i++)
newdata[i] = data[i];delete [] data;data = newdata;
}// return reference to data slotreturn data[n];
}
Note that the code in Vector’s declaration and implementation isparameterized — it uses a type that is unknown but represented by T.Also, note that the .c file does not include the .h file. The automaticinstantiation system will locate Vector.c according to the rulesdescribed in “Dynamic extension lookup” on page 73.
CenterLine-C++ Programmer’s Guide and Reference 65
Using templates with CenterLine-C++
Specifying atemplate class inan application
We put a simple application that uses the Vector template inappVector.C:
#include <iostream.h>#include "Vector.h"
main(){Vector<int> v;int i;
// put data in the vectorfor (i = 1; i <= 5; i++) v[i] = i * i;
// display data in the vectorfor (i = 1; i <= 5; i++)
cout << i << "" << v[i] << \n";}
This application using the Vector template specifies Vector<int>; thatis, it substitutes type int for the T in the declaration andimplementation of the template. Vector<int> is an example of atemplate class — a template with particular arguments — where <int>is a template argument.
Compiling theapplication
Compile this application with the -ptv switch so that you can seewhat the compile-time (ptcomp) and link-time (ptlink) templateprocessors are doing. The instantiation process is described onpage 67.
% CC -ptv appVector.CCC appVector.C:CC[ptcomp] locked repository [1] ...CC[ptcomp] read raw cfront information [0] ...CC[ptcomp] read old map file [0] ...CC[ptcomp] made list of unique filenames in new map file [0] ...CC[ptcomp] deleted old map file entries [0] ...CC[ptcomp] added in new map entries [0] ...CC[ptcomp] wrote new map file [1] ...CC[ptcomp] unlocked repository [0] ...
/* compiler output deleted */...
CC[ptlink] locked repository [0] ...CC[ptlink] read name map file list [0] ...CC[ptlink] read in all objects and archives [1] ...CC[ptlink] finished link simulation to pick up undefineds [0] ...CC[ptlink] made list of unique template class names [0] ...
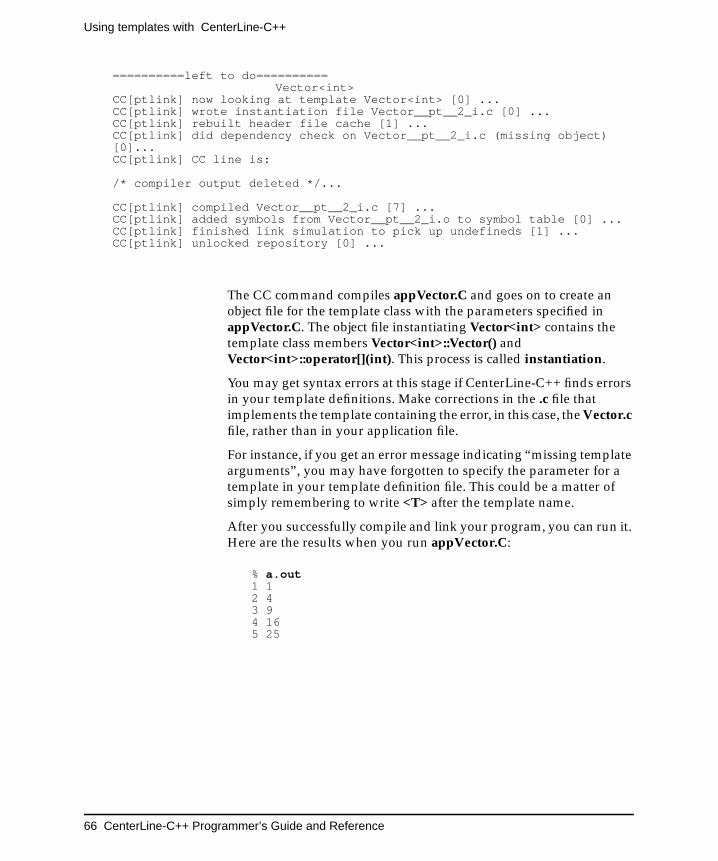
Using templates with CenterLine-C++
66 CenterLine-C++ Programmer’s Guide and Reference
==========left to do==========Vector<int>
CC[ptlink] now looking at template Vector<int> [0] ...CC[ptlink] wrote instantiation file Vector__pt__2_i.c [0] ...CC[ptlink] rebuilt header file cache [1] ...CC[ptlink] did dependency check on Vector__pt__2_i.c (missing object)[0]...CC[ptlink] CC line is:
/* compiler output deleted */...
CC[ptlink] compiled Vector__pt__2_i.c [7] ...CC[ptlink] added symbols from Vector__pt__2_i.o to symbol table [0] ...CC[ptlink] finished link simulation to pick up undefineds [1] ...CC[ptlink] unlocked repository [0] ...
The CC command compiles appVector.C and goes on to create anobject file for the template class with the parameters specified inappVector.C. The object file instantiating Vector<int> contains thetemplate class members Vector<int>::Vector() andVector<int>::operator[](int). This process is called instantiation.
You may get syntax errors at this stage if CenterLine-C++ finds errorsin your template definitions. Make corrections in the .c file thatimplements the template containing the error, in this case, the Vector.cfile, rather than in your application file.
For instance, if you get an error message indicating “missing templatearguments”, you may have forgotten to specify the parameter for atemplate in your template definition file. This could be a matter ofsimply remembering to write <T> after the template name.
After you successfully compile and link your program, you can run it.Here are the results when you run appVector.C:
% a.out1 12 43 94 165 25
CenterLine-C++ Programmer’s Guide and Reference 67
The instantiation process
The instantiation process
CenterLine-C++ stores the files it needs for template instantiation inthe template repository. The repository is a directory that cancontain a .o file, which is the template instantiation object file, alongwith a .c (instantiation source file), a .cs (checksum file), a .he file(contains information about header file dependencies—see page 83)and the default name mapping file, defmap.
By default, the repository is created in the current directory and calledptrepository. (You can specify a different name and location with the-ptr switch.)
The name mapping file contains information about templates,including the names of the files where the templates are declared andinstantiated. See the "Map files" section on page 75 for moreinformation. You may find it helpful to look at the contents of each ofthe files created in the repository directory before you read thefollowing discussion of the instantiation process.
The following steps summarize the instantiation process. For a moredetailed explanation, see “Template Instantiation in C++ Release3.0.2”, an excerpt from the AT&T C++ Language System SelectedReadings, which is available online as described on page 58.
1 At compile time, references to templates are compiled normallyinto external unresolved symbols, but nothing is instantiated.ptcomp logs every template that is declared in the default namemapping file, defmap. Every class, union, struct, or enum thatis declared is also logged. The entry includes the type name andthe basename (not the full pathname) of the file in which thedeclaration appears.
2 At link time, ptlink looks at all the files and archives, and thecurrent repository, to determine whether there are anyreferenced template symbols that are unresolved. It checksheader dependency (.he) files to make sure that anyinstantiations in the repository that are out of date are not used.If there are no unresolved symbols, the link is made.
NOTE In most cases, you can use templates withoutknowing the details of the instantiation process.However, if you’re interested, read this section formore details.
The instantiation process
68 CenterLine-C++ Programmer’s Guide and Reference
3 If there are unresolved symbols, ptlink builds a list of classtemplates and function templates that must be instantiated. Foreach template, ptlink looks at the name mapping file to find thetemplate declaration and definition files and the argumentdeclaration files for all of the template arguments. The -I paththat was passed to the compiler is used to find each of the files.
The template definition file (that is, the file containing theimplementation of the template) is assumed to be a file with thesame name as the template declaration file, except that it has adifferent suffix. The mechanism for looking up the templatetypes is described on page 74.
If ptlink can’t find any of the files, it issues an error messageand the link fails.
4 ptlink uses the template declaration file, the template definitionfile, and the argument declaration files to build a temporaryinstantiation file. It then calls the C++ compiler to instantiate thetemplate. The compiler only generates code for a specified list ofsymbols. If this is a class template, only the members that wereneeded are instantiated. The resulting object file is added to therepository.
5 If more template classes or functions need to be instantiated,Steps 3 and 4 are repeated.
6 When all the necessary templates have been instantiated, ptlinkchecks whether any of the new instantiations refer to newsymbols and goes back to Step 2 if necessary.
7 Finally, ptlink produces a set of object files containing theinstantiations that are passed to the actual link step.
See Figure 5 for a simplified conceptual illustration of the instantiationprocess.
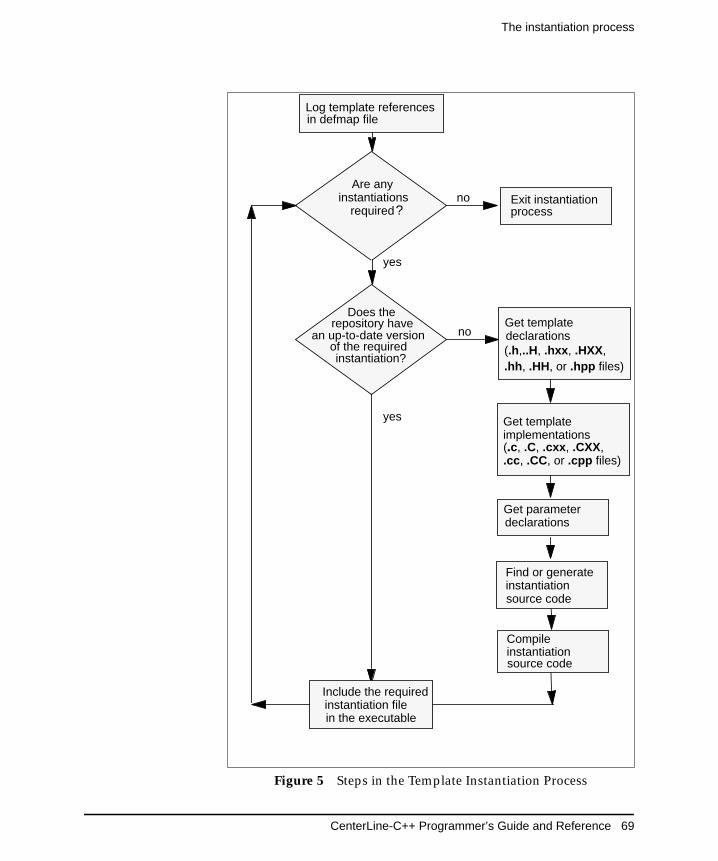
CenterLine-C++ Programmer’s Guide and Reference 69
The instantiation process
Figure 5 Steps in the Template Instantiation Process
no
no
noGet template
Get parameterdeclarations
Find or generateinstantiationsource code
Include the required
(.c, .C, .cxx, .CXX,
Does therepository have
an up-to-date versionof the requiredinstantiation?
instantiation file
Get templateyes
Are anyinstantiations
required?
yes
Exit instantiationprocess
Compileinstantiationsource code
in the executable
.implementations
.cc, .CC, or .cpp files)
(.h,..H, .hxx, .HXX,.hh, .HH, or .hpp files)
declarations
Log template referencesin defmap file
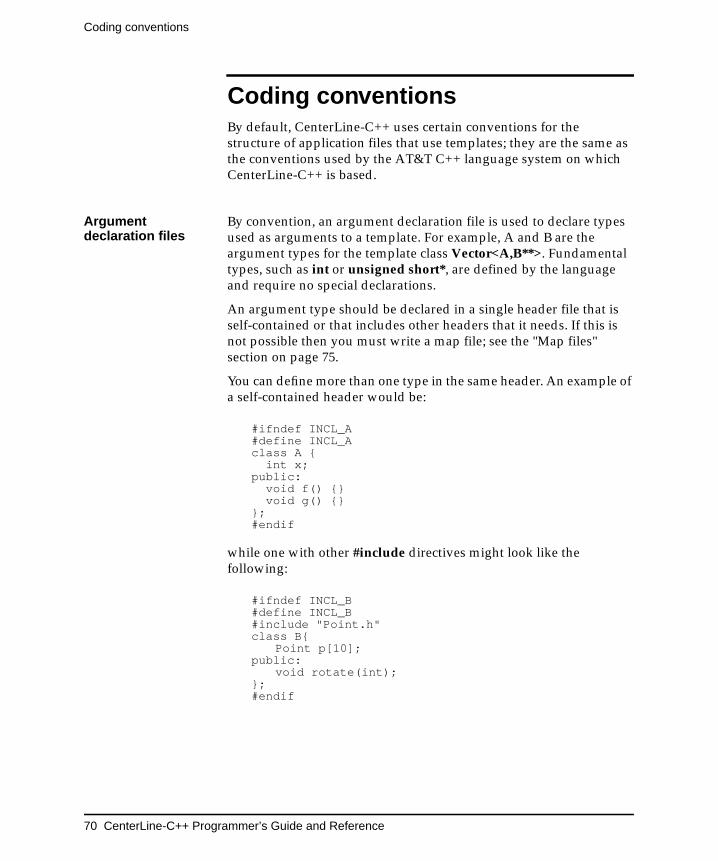
Coding conventions
70 CenterLine-C++ Programmer’s Guide and Reference
Coding conventionsBy default, CenterLine-C++ uses certain conventions for thestructure of application files that use templates; they are the same asthe conventions used by the AT&T C++ language system on whichCenterLine-C++ is based.
Argumentdeclaration files
By convention, an argument declaration file is used to declare typesused as arguments to a template. For example, A and B are theargument types for the template class Vector<A,B**>. Fundamentaltypes, such as int or unsigned short*, are defined by the languageand require no special declarations.
An argument type should be declared in a single header file that isself-contained or that includes other headers that it needs. If this isnot possible then you must write a map file; see the "Map files"section on page 75.
You can define more than one type in the same header. An example ofa self-contained header would be:
#ifndef INCL_A#define INCL_Aclass A {
int x;public:
void f() {}void g() {}
};#endif
while one with other #include directives might look like thefollowing:
#ifndef INCL_B#define INCL_B#include "Point.h"class B{
Point p[10];public:
void rotate(int);};#endif
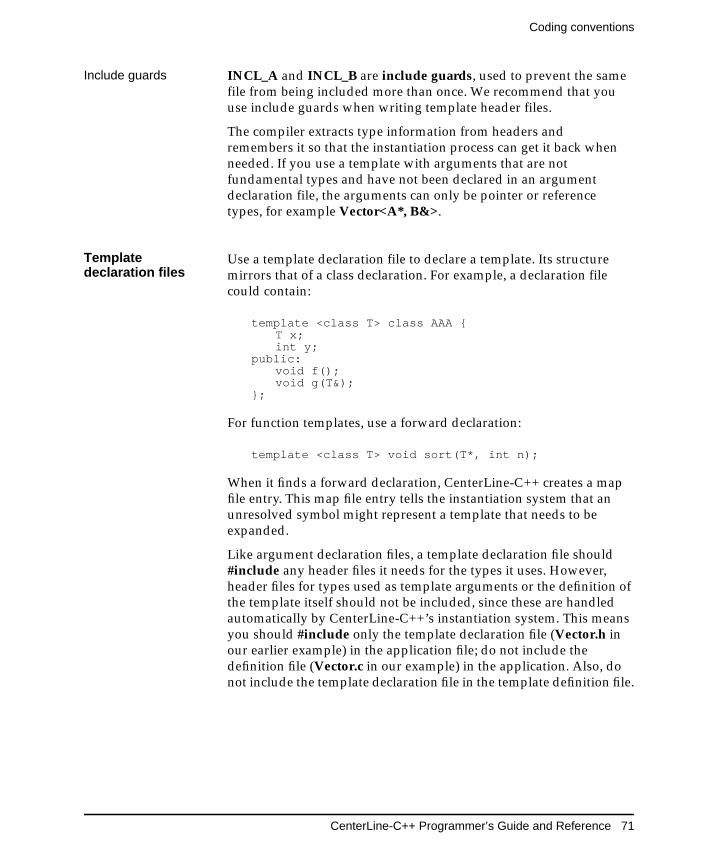
CenterLine-C++ Programmer’s Guide and Reference 71
Coding conventions
Include guards INCL_A and INCL_B are include guards, used to prevent the samefile from being included more than once. We recommend that youuse include guards when writing template header files.
The compiler extracts type information from headers andremembers it so that the instantiation process can get it back whenneeded. If you use a template with arguments that are notfundamental types and have not been declared in an argumentdeclaration file, the arguments can only be pointer or referencetypes, for example Vector<A*, B&>.
Templatedeclaration files
Use a template declaration file to declare a template. Its structuremirrors that of a class declaration. For example, a declaration filecould contain:
template <class T> class AAA {T x;int y;
public:void f();void g(T&);
};
For function templates, use a forward declaration:
template <class T> void sort(T*, int n);
When it finds a forward declaration, CenterLine-C++ creates a mapfile entry. This map file entry tells the instantiation system that anunresolved symbol might represent a template that needs to beexpanded.
Like argument declaration files, a template declaration file should#include any header files it needs for the types it uses. However,header files for types used as template arguments or the definition ofthe template itself should not be included, since these are handledautomatically by CenterLine-C++’s instantiation system. This meansyou should #include only the template declaration file (Vector.h inour earlier example) in the application file; do not include thedefinition file (Vector.c in our example) in the application. Also, donot include the template declaration file in the template definition file.
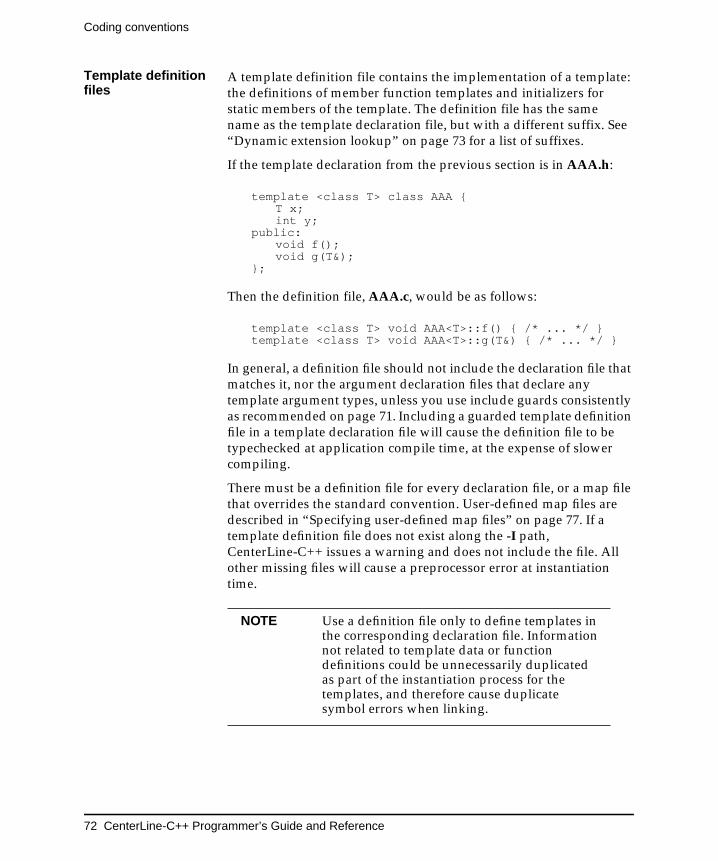
Coding conventions
72 CenterLine-C++ Programmer’s Guide and Reference
Template definitionfiles
A template definition file contains the implementation of a template:the definitions of member function templates and initializers forstatic members of the template. The definition file has the samename as the template declaration file, but with a different suffix. See“Dynamic extension lookup” on page 73 for a list of suffixes.
If the template declaration from the previous section is in AAA.h:
template <class T> class AAA {T x;int y;
public:void f();void g(T&);
};
Then the definition file, AAA.c, would be as follows:
template <class T> void AAA<T>::f() { /* ... */ }template <class T> void AAA<T>::g(T&) { /* ... */ }
In general, a definition file should not include the declaration file thatmatches it, nor the argument declaration files that declare anytemplate argument types, unless you use include guards consistentlyas recommended on page 71. Including a guarded template definitionfile in a template declaration file will cause the definition file to betypechecked at application compile time, at the expense of slowercompiling.
There must be a definition file for every declaration file, or a map filethat overrides the standard convention. User-defined map files aredescribed in “Specifying user-defined map files” on page 77. If atemplate definition file does not exist along the -I path,CenterLine-C++ issues a warning and does not include the file. Allother missing files will cause a preprocessor error at instantiationtime.
NOTE Use a definition file only to define templates inthe corresponding declaration file. Informationnot related to template data or functiondefinitions could be unnecessarily duplicatedas part of the instantiation process for thetemplates, and therefore cause duplicatesymbol errors when linking.
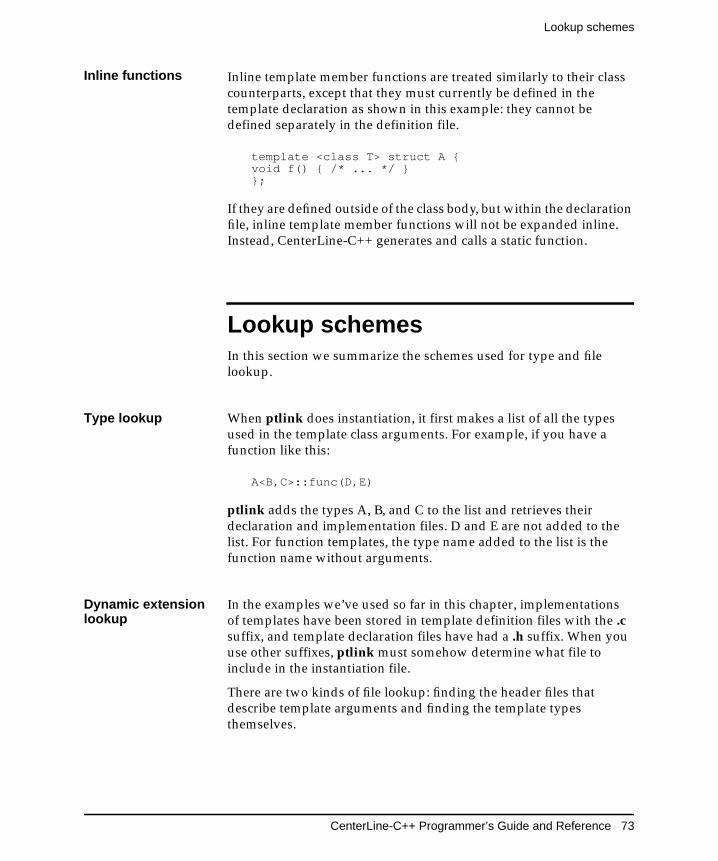
CenterLine-C++ Programmer’s Guide and Reference 73
Lookup schemes
Inline functions Inline template member functions are treated similarly to their classcounterparts, except that they must currently be defined in thetemplate declaration as shown in this example: they cannot bedefined separately in the definition file.
template <class T> struct A {void f() { /* ... */ }};
If they are defined outside of the class body, but within the declarationfile, inline template member functions will not be expanded inline.Instead, CenterLine-C++ generates and calls a static function.
Lookup schemesIn this section we summarize the schemes used for type and filelookup.
Type lookup When ptlink does instantiation, it first makes a list of all the typesused in the template class arguments. For example, if you have afunction like this:
A<B,C>::func(D,E)
ptlink adds the types A, B, and C to the list and retrieves theirdeclaration and implementation files. D and E are not added to thelist. For function templates, the type name added to the list is thefunction name without arguments.
Dynamic extensionlookup
In the examples we’ve used so far in this chapter, implementationsof templates have been stored in template definition files with the .csuffix, and template declaration files have had a .h suffix. When youuse other suffixes, ptlink must somehow determine what file toinclude in the instantiation file.
There are two kinds of file lookup: finding the header files thatdescribe template arguments and finding the template typesthemselves.
Lookup schemes
74 CenterLine-C++ Programmer’s Guide and Reference
Finding templateparameters
The instantiation system looks for header files that describetemplate parameters (argument declaration files) in the map file. If itfinds a header file for the type in the map file, it uses it. If not, itgenerates a forward declaration for the type in the instantiation file.
Finding template types To find template types, the instantiation system must locate both thedeclaration and definition (implementation) files. To do this it usesthe following procedure:
1 If there are both @dec (for declaration) and @def (for definition,or implementation) entries in the map file they are used.
2 If there is exactly one of @dec and @def in the map file, it isused to supply the basename, and then the -I settings areiterated over as an outer loop, and one of the following is usedas the inner loop; either
{".h", ".H", ".hxx", ".HXX", ".hh", ".HH", ".hpp"}
if the declaration file isn’t in the map file, or
{".c", ".C", ".cxx", ".CXX", ".cc", ".CC", ".cpp"}
if the definition file isn’t in the map file. The first file that isfound is used. This algorithm means that ptlink will attempt toexhaust all extensions in each -I directory before moving to thenext. If no file is found ptlink goes to the next step.
The list of suffixes is set by CenterLine-C++ to the default valuesshown above, or you can set them to the values you chooseusing the PTHDR and PTSRC environment variables. Forexample:
export PTHDR=".h,.H" (SysV)
setenv PTHDR ".h,.H" (BSD)
ptlink ignores any item in the set of suffixes and issues awarning if it does not begin with a dot or has more than fourtotal characters.
3 If there are no @dec nor @def entries in the map file, then thefile basename for a template type T will be T. The algorithm inStep 2 is applied independently to get the declaration anddefinition file names. If ptlink cannot find either the definitionor the declaration file names, it issues a warning and does notinclude a header file in the instantiation file.
CenterLine-C++ Programmer’s Guide and Reference 75
Map files
Map filesWhenever you compile a source file that uses templates,CenterLine-C++ creates or updates a name mapping file in therepository. A map file contains mappings from type and templatenames to the source files that contain them. A map file entry is theonly way that CenterLine-C++ can determine if an unresolvedsymbol might represent a template needing expansion.
The default map file The default name for the current name mapping file is defmap; thepreceding version is named defmap.old. This map file is maintainedby CenterLine-C++, and you should not edit it. You can override thedefmap file by specifying a user-defined name mapping file, asdescribed on page 77.
Map files for theVector example
Here’s a portion of the defmap file after we linked the Vectorexample:
@tabappVectorVector__pt__2_i@etab...@dec Vector @0 @1"Vector.h"...
The first few lines, bounded by @tab and @etab, are the string table,which is used by the instantiation system to compress the defmap file.
The entry beginning with @dec shows that type Vector is declared inVector.h. If you look at the whole file, you will see that there is no@def entry specifying where Vector is defined (implemented). Theinstantiation system uses the algorithm on page 74 to locate theimplementation for Vector in Vector.c.
In these lines:
@dec Vector @0 @1"Vector.h"
Map files
76 CenterLine-C++ Programmer’s Guide and Reference
@0 refers to the first item in the string table, appVector, and @1 to thesecond item, Vector__pt__2_i, which is the name-mangled form of thename of the template class, Vector<int>. The lines indicate that Vectoris declared in Vector.h and the type is valid for appVector (in bothsource and object form) and the template class Vector<int>.
Sharing arepository Application file names are recorded in the name mapping file to
handle the case where distinct applications share a repository. Forexample, suppose the Vector application and a banking applicationshared a repository. The string table at the top of the shared namemapping file might look like the following:
@tabbankingaccountappVectorVector__pt__2_ilongVectorVector__pt__2_l@etab
Here’s the demangled version of this string table, which has six items.
$ c++filt defmap@tabbankingaccountappVectorVector<int>longVectorVector<long>@etab
The string table is followed by lines that look like this:
@dec List @0"List,h"@dec account @0 @1"account.h"@dec Vector @2 @3 @4 @5"Vector.h"
These @dec lines indicate that the List type is valid for the bankingapplication, the account type for both the banking and accountapplications, and the Vector type for the appVector and longVectorapplications and also the Vector<int> and Vector<long> templateclasses.
CenterLine-C++ Programmer’s Guide and Reference 77
Map files
Encoding offunctions in mapfiles
In map files, operator function templates are encoded as describedin Section 7.2.1c in The Annotated C++ Reference Manual (see“Suggested reading” on page vi for publishing details). Forexample, operator << is encoded as __ls. Also, function templatetypes are recorded without parameter information; as a result theyappear as a single map file entry.
Specifyinguser-defined mapfiles
You can specify additional name mapping files by naming themnmapname and placing them in the repository; user-specified filestake precedence over the default files and are considered inalphabetical order. For example, suppose you create your own mapfiles, nmap001 and nmap2; CenterLine-C++ looks at nmap001before nmap2 before defmap.
You can create user-specified map files to override the lookupmechanism described in “Lookup schemes” on page 73.
Example of overridingdefault filenames
For instance, suppose you wanted to use the implementation ofVector that’s in Vector.newc as your “standard” definition, ratherthan the code in Vector.c. Then you could create a new mappingfile, naming it nmap1, for instance, adding the specification for @def:
nmap1:
@def Vector"Vector.newc"
Specifying applicationfiles in map files
Note that a map file entry does not have to specify application files;an entry without any applications serves as a last resort if the typecannot otherwise be found. Typically, application files are recordedto handle the case where there are distinct applications sharing onerepository. Also, you don’t have to use @0, @1 and so on as shownin “Sharing a repository” on page 76; you can spell the applicationname out. For example, instead of this:
@dec account @0 @1
you can write this:
@dec account banking account
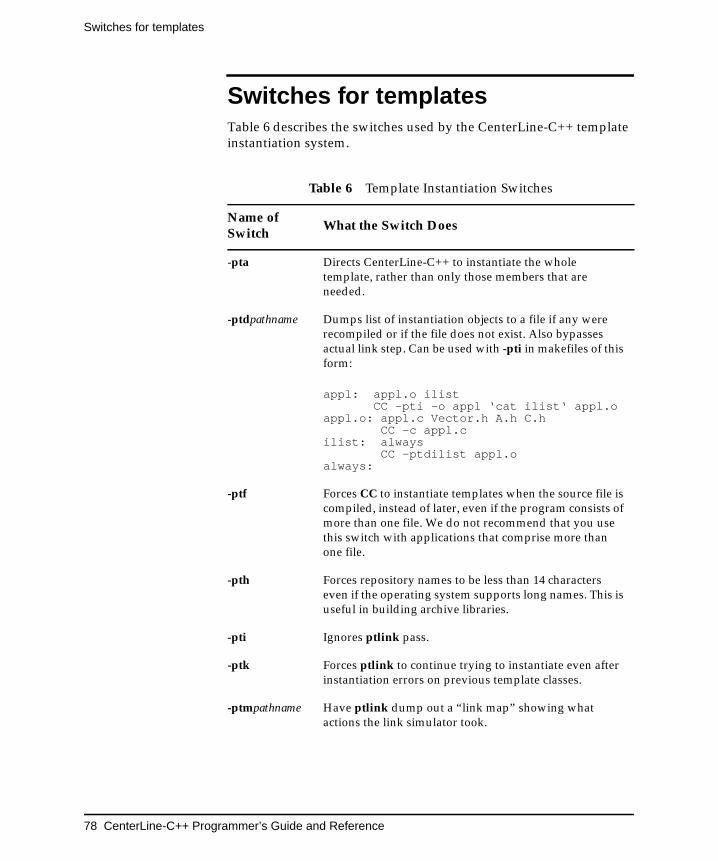
Switches for templates
78 CenterLine-C++ Programmer’s Guide and Reference
Switches for templatesTable 6 describes the switches used by the CenterLine-C++ templateinstantiation system.
Table 6 Template Instantiation Switches
Name ofSwitch
What the Switch Does
-pta Directs CenterLine-C++ to instantiate the wholetemplate, rather than only those members that areneeded.
-ptdpathname Dumps list of instantiation objects to a file if any wererecompiled or if the file does not exist. Also bypassesactual link step. Can be used with -pti in makefiles of thisform:
appl: appl.o ilistCC -pti -o appl ‘cat ilist‘ appl.o
appl.o: appl.c Vector.h A.h C.hCC -c appl.c
ilist: alwaysCC -ptdilist appl.o
always:
-ptf Forces CC to instantiate templates when the source file iscompiled, instead of later, even if the program consists ofmore than one file. We do not recommend that you usethis switch with applications that comprise more thanone file.
-pth Forces repository names to be less than 14 characterseven if the operating system supports long names. This isuseful in building archive libraries.
-pti Ignores ptlink pass.
-ptk Forces ptlink to continue trying to instantiate even afterinstantiation errors on previous template classes.
-ptmpathname Have ptlink dump out a “link map” showing whatactions the link simulator took.
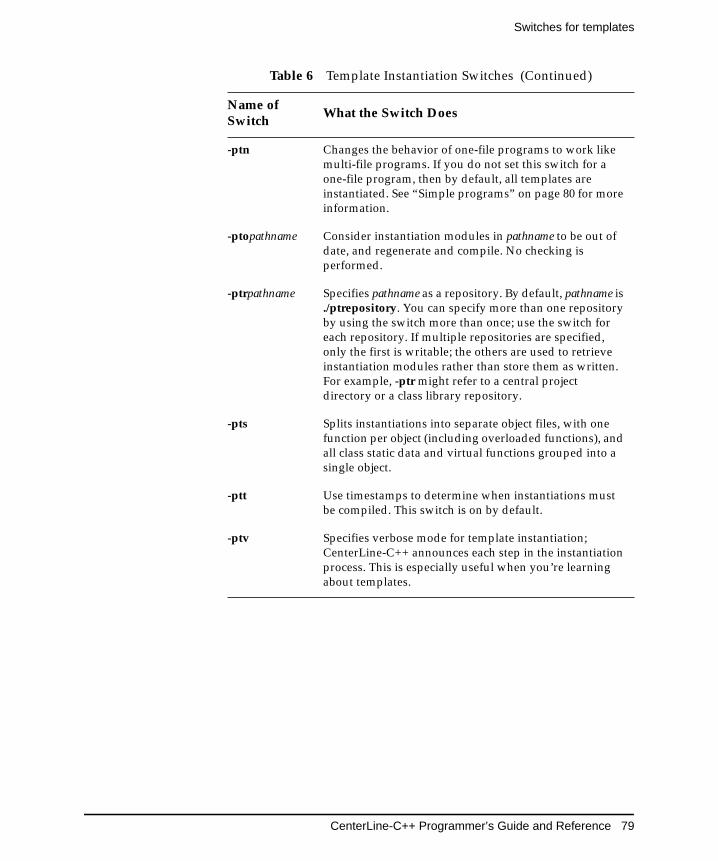
CenterLine-C++ Programmer’s Guide and Reference 79
Switches for templates
-ptn Changes the behavior of one-file programs to work likemulti-file programs. If you do not set this switch for aone-file program, then by default, all templates areinstantiated. See “Simple programs” on page 80 for moreinformation.
-ptopathname Consider instantiation modules in pathname to be out ofdate, and regenerate and compile. No checking isperformed.
-ptrpathname Specifies pathname as a repository. By default, pathname is./ptrepository. You can specify more than one repositoryby using the switch more than once; use the switch foreach repository. If multiple repositories are specified,only the first is writable; the others are used to retrieveinstantiation modules rather than store them as written.For example, -ptr might refer to a central projectdirectory or a class library repository.
-pts Splits instantiations into separate object files, with onefunction per object (including overloaded functions), andall class static data and virtual functions grouped into asingle object.
-ptt Use timestamps to determine when instantiations mustbe compiled. This switch is on by default.
-ptv Specifies verbose mode for template instantiation;CenterLine-C++ announces each step in the instantiationprocess. This is especially useful when you’re learningabout templates.
Table 6 Template Instantiation Switches (Continued)
Name ofSwitch
What the Switch Does
Usage scenarios
80 CenterLine-C++ Programmer’s Guide and Reference
Usage scenariosThis section describes various types of projects and the instantiationschemes that correspond to each.
Simple programs By default, a one-file program that is to be compiled and linkedcauses CenterLine-C++to instantiate everything it can into the objectfile for the program. This means that the link-time instantiationsystem is bypassed, if all the templates and parameter types arefound within the program itself. This behavior can be disabled usingthe -ptn switch.
Small and mediumprojects
By a small project we mean a project that has one programmer anduses one directory. Suppose that such a project needs sometemplates from a directory of template headers named/usr/template/incl. You could issue the following commands toaccomplish this:
% CC -I/usr/template/incl -c file1.c
and at link time:
% CC -I/usr/template/incl file1.o file2.o -o prog
The repository used in this example would be the default,ptrepository.
If there is more than one project in a directory, it is better to use anexplicitly named repository as a means of better separating one projectfrom another. For instance, the following commands establish rep1 asa user-specified repository:
% mkdir rep1% CC -I/usr/template/incl -ptrrep1 file1.c
Repositorypermissions
When CenterLine-C++ creates the default repository, it gives it thesame permissions as its parent directory, and files that are created inthe repository have that same access.
This means that, if you want a repository to be shareable, you mighthave to change its permissions using chmod:
% chmod 775 ptrepository
CenterLine-C++ Programmer’s Guide and Reference 81
Usage scenarios
Alternatively, you can create the repository in a directory with thedesired permissions.
CenterLine-C++ deletes files in the repository before rewriting them,so if a repository has files in it and then the repository’s permissionsare changed, no access problems will come up.
Another approach is for team members to set the default creationmask at the shell level:
%sh umask 002
Large projects andmultiplerepositories
A large project often has a centralized set of source, library, andobject files along with a local work area for each programmer. Thebest model for this kind of project is the use of multiple repositories.CenterLine-C++’s instantiation system looks first in your localrepository and then the central one, both for map files andinstantiation objects.
With such a scheme, you might issue a command such as thefollowing:
% CC -I/usr/jones/tincl -I/usr/proj/tincl\-I/usr/jones/incl -I/usr/proj/incl\-ptr/usr/jones/rep -ptr/usr/proj/rep file.c
Given the preceding command, when it instantiates templates used infile.c, CenterLine-C++ uses the following repositories:
• /usr/jones/rep (to write instantiation modules as well as retrievethem)
• /usr/proj/rep (to retrieve existing instantiation modules)
Repositorymanagement
CenterLine-C++’s instantiation system adds to the repository butdoes not delete from it (except when it rewrites files). You may wantto monitor the size of repositories periodically and delete obsoletefiles and repositories.
Usage scenarios
82 CenterLine-C++ Programmer’s Guide and Reference
Sharing code andusing archives
Instantiations in a repository are simply object files; you can easilyexport them into an archive. For example, with the defaultrepository one can say:
$ ar cr projlib.a ./ptrepository/*.o
Such an archive may or may not be useful to other projects. By default,the system instantiates only what an application needs, and thus theobject files will not contain all members of template classes. Anotherproject with different needs might not be able to use such objects.
You can solve this problem by using the -pta switch, which tellsCenterLine-C++ to instantiate everything; however, this solutionwastes binary size. A reasonable strategy might be to use -pta initiallyand turn it off later in a project cycle.
You can also use the -pts switch to split up instantiations into separateobject files for each function. This reduces problems resulting fromobject files clashing because they contain different but overlappingsubsets of symbols.
Libraries By library we mean a collection of object files, also known as anarchive. Suppose you have a library that uses templates, but endusers of the library do not know or care about templates. You canavoid the instantiation process for those users by forming theclosure of the library; forming closure means instantiatingeverything into object files and adding the objects to the library.
For example, if you wanted to form closure for a library named/usr/proj/lib.a, you could say:
$ mkdir scratch$ cd scratch$ ar x /usr/proj/lib.a$ CC -I/usr/proj/tincl -I/usr/proj/incl -pts *.o$ rm -f /usr/proj/lib.a$ ar cr /usr/proj/lib.a *.o ./repository/*.o
Use the -pts switch with CC to split the instantiations into separatefiles.
When you follow the preceding example, you may get a link error thatyou can ignore; it occurs because the code does not have a main().
CenterLine-C++ Programmer’s Guide and Reference 83
Usage scenarios
Link-simulationalgorithm
The ptlink link-simulation mechanism is designed to supportarchive libraries with partially-instantiated template classes in them,by using functions found in libraries whenever possible. Thealgorithm is as follows:
1 Standalone objects are always “linked,” and objects encounteredas the link simulator traverses the archive are linked if symbolsfrom them are needed.
2 For each text. data, or bss1 symbol in the library object to beadded, ptlink checks to see if the symbol is already in the linksimulator symbol table and if it is already defined to the correcttype. If there are no symbols already defined, the object can belinked.
3 If one or more symbols is already defined, then each text, data,or bss symbol that was previously undefined is marked asundefined and undefinable. No future object can resolve thesymbol. This step is necessary to preserve archive semantics.
Note that object filenames in the repository may be longer than the 14characters that ar will handle. You can use the -pth option to limitnames to 14 characters when you compile, or rename object files; a toolfor this purpose is described in the "Tools" section on page 95.
Dependencychecking
The template instantiation system has the following scheme forchecking whether instantiated objects are out-of-date.
CenterLine-C++ compares the timestamps of #include declarationfiles in the instantiation file with the timestamp of the instantiationobject. To handle nested #include directives, CenterLine-C++creates a cache, which it stores in the repository with a .heextension. For example, the cache for the Vector example is inVector__pt__2_i.he.
The first line of the .he file shows the -I and -D switches used withCC. Subsequent lines contain the names of all header files. An objectfile is considered out-of-date if it is older than any of the headers onthe list, or if the -I and -D switches have changed.
1. The bss section of an object file contains uninitialized data. See your system manual pagefor nm for more information.
Usage scenarios
84 CenterLine-C++ Programmer’s Guide and Reference
Forcing reinstantiation Sometimes it is desirable to get around dependency checking. Toforce reinstantiation, you can enter the following:
% touch template_name.suffix
where template_name.suffix is the name of the template definition filecontaining the implementation of the template you want to force toreinstantiate.
Alternatively, you can delete all object files in the repository; however,this works only if your makefile has an explicit dependency on thetemplate instantiation file.
Compiling andlinking
All switches that apply to the creation of an executable must be onthe CC command line, whether they pertain specifically tocompiling, linking, to both, or to the template instantiation process.
For instance, some of the switches that pertain to linking are asfollows:
-Llibrary_dir -llibname -o executable_file_name
Some switches related to compiling are as follows:
-DNAME1 -I/header/file/directory -UNAME2 -O
Some switches are used by both the linking and compiling phases;typically these switches relate to debugging:
-g +d
Using CC withtemplates in headerfiles
Template instantiation with CC combines compiling and linkinginto one operation. When you compile source files that refer totemplates, you do something like this:
% CC -g +d -DTHIS -DTHAT -I/some/directory -c app.C
In this example, all the header files are found if they exist in thecurrent directory or in /some/directory.
CenterLine-C++ Programmer’s Guide and Reference 85
Specializations
But these header file directories and macro definitions are not savedwith the object module. So your code will generate unresolvedtemplate references if your templates depend on header files in/some/directory and you try to do the following to link:
% CC -g -o app app.o ...
The original switches used in compiling app.o are not available. Theonly flags available when compiling template instantiations arethose given on the CC command line when you link.
In this case, to make header files work with CC you must dosomething like the following:
% CC -g -DTHIS -DTHAT -I/some/directory app.o ...
Using automatictools and make
In some cases you may want to separate instantiation from thelinking phase. You can do this using the -ptd switch, whichperforms instantiation without linking, and the -pti switch, whichbypasses the instantiation step. Part of a makefile that uses thisconstruction is shown in the -ptd entry in Table 6, "TemplateInstantiation Switches," on page 78.
When you compile an application that uses templates, you need tospecify the file that contains the template implementation (thetemplate definition file) as a dependency in your makefile. And, if youuse automatic tools that check for dependencies, you have tomanually indicate that template definition files are dependencies.
SpecializationsA specialization is a means of overriding the standard version of atemplate class or a particular member of the class. Typically you usespecializations to improve performance, or to reuse most of the codefor a given template while providing your own version of aparticular member function.
To use a specialization, first compile the source file containing thespecialization with the -c switch, then link the resulting .o file withyour application.
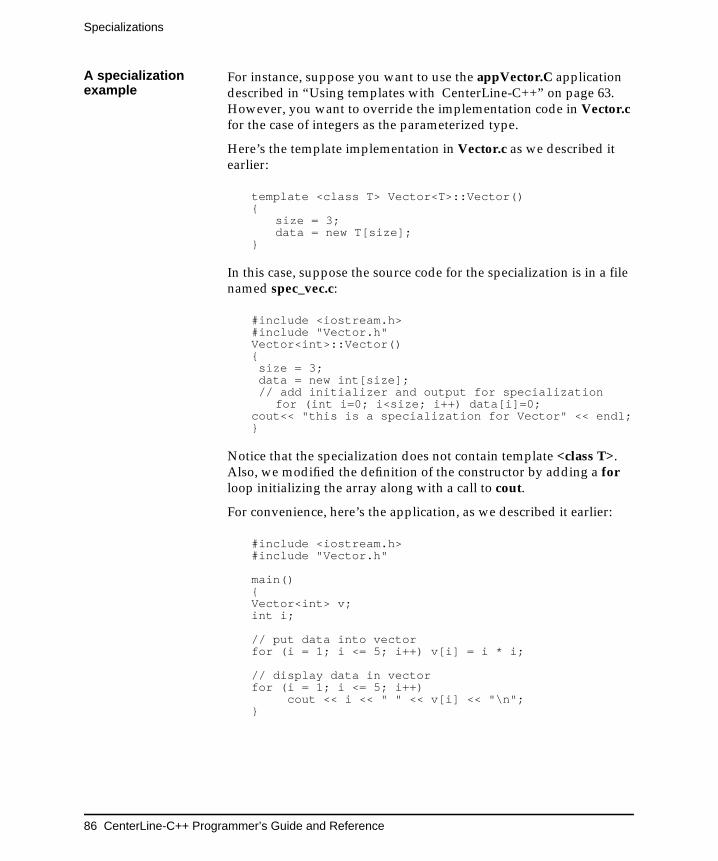
Specializations
86 CenterLine-C++ Programmer’s Guide and Reference
A specializationexample
For instance, suppose you want to use the appVector.C applicationdescribed in “Using templates with CenterLine-C++” on page 63.However, you want to override the implementation code in Vector.cfor the case of integers as the parameterized type.
Here’s the template implementation in Vector.c as we described itearlier:
template <class T> Vector<T>::Vector(){
size = 3;data = new T[size];
}
In this case, suppose the source code for the specialization is in a filenamed spec_vec.c:
#include <iostream.h>#include "Vector.h"Vector<int>::Vector(){ size = 3; data = new int[size]; // add initializer and output for specialization
for (int i=0; i<size; i++) data[i]=0;cout<< "this is a specialization for Vector" << endl;}
Notice that the specialization does not contain template <class T>.Also, we modified the definition of the constructor by adding a forloop initializing the array along with a call to cout.
For convenience, here’s the application, as we described it earlier:
#include <iostream.h>#include "Vector.h"
main(){Vector<int> v;int i;
// put data into vectorfor (i = 1; i <= 5; i++) v[i] = i * i;
// display data in vectorfor (i = 1; i <= 5; i++)
cout << i << " " << v[i] << "\n";}
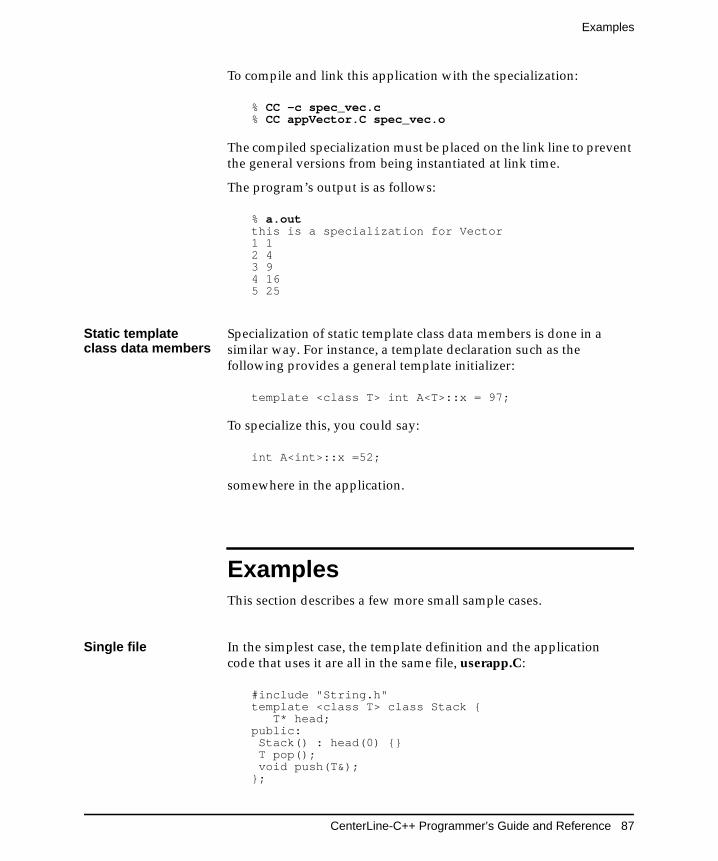
CenterLine-C++ Programmer’s Guide and Reference 87
Examples
To compile and link this application with the specialization:
% CC -c spec_vec.c% CC appVector.C spec_vec.o
The compiled specialization must be placed on the link line to preventthe general versions from being instantiated at link time.
The program’s output is as follows:
% a.outthis is a specialization for Vector1 12 43 94 165 25
Static templateclass data members
Specialization of static template class data members is done in asimilar way. For instance, a template declaration such as thefollowing provides a general template initializer:
template <class T> int A<T>::x = 97;
To specialize this, you could say:
int A<int>::x =52;
somewhere in the application.
ExamplesThis section describes a few more small sample cases.
Single file In the simplest case, the template definition and the applicationcode that uses it are all in the same file, userapp.C:
#include "String.h"template <class T> class Stack {
T* head;public: Stack() : head(0) {} T pop(); void push(T&);};
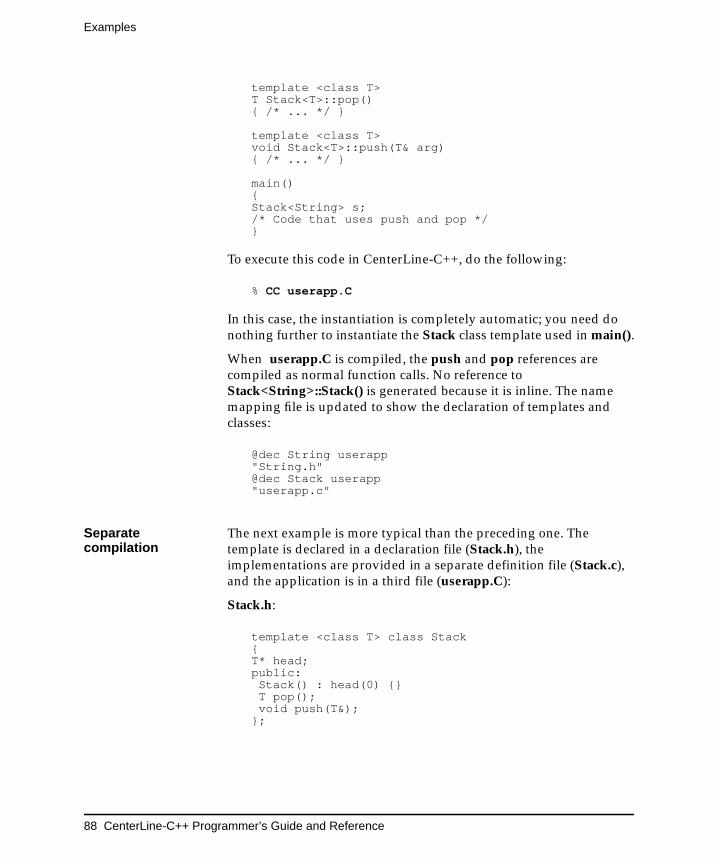
Examples
88 CenterLine-C++ Programmer’s Guide and Reference
template <class T>T Stack<T>::pop(){ /* ... */ }
template <class T>void Stack<T>::push(T& arg){ /* ... */ }
main(){Stack<String> s;/* Code that uses push and pop */}
To execute this code in CenterLine-C++, do the following:
% CC userapp.C
In this case, the instantiation is completely automatic; you need donothing further to instantiate the Stack class template used in main().
When userapp.C is compiled, the push and pop references arecompiled as normal function calls. No reference toStack<String>::Stack() is generated because it is inline. The namemapping file is updated to show the declaration of templates andclasses:
@dec String userapp"String.h"@dec Stack userapp"userapp.c"
Separatecompilation
The next example is more typical than the preceding one. Thetemplate is declared in a declaration file (Stack.h), theimplementations are provided in a separate definition file (Stack.c),and the application is in a third file (userapp.C):
Stack.h:
template <class T> class Stack{T* head;public: Stack() : head(0) {} T pop(); void push(T&);};
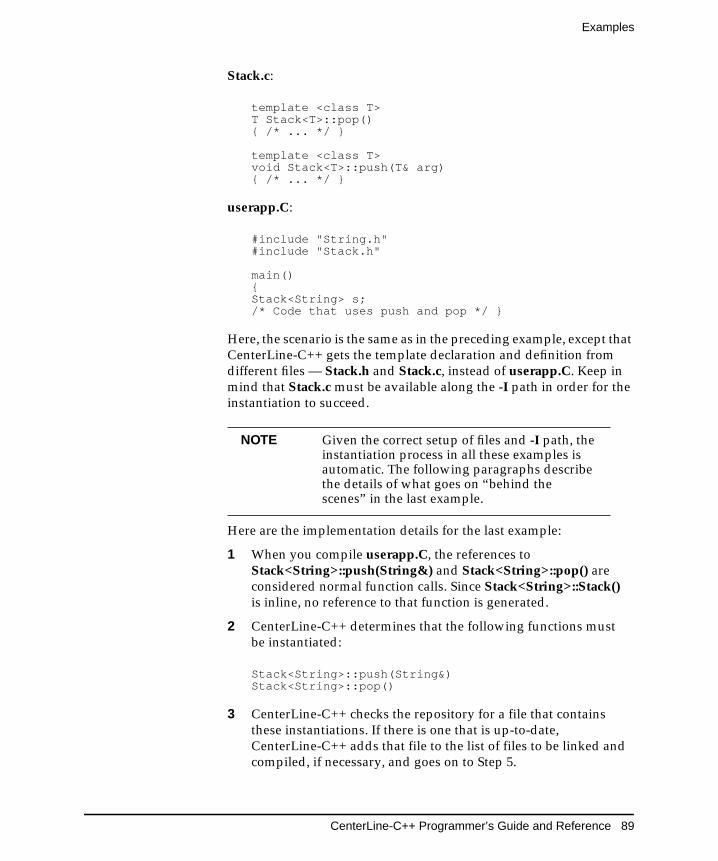
CenterLine-C++ Programmer’s Guide and Reference 89
Examples
Stack.c:
template <class T>T Stack<T>::pop(){ /* ... */ }
template <class T>void Stack<T>::push(T& arg){ /* ... */ }
userapp.C:
#include "String.h"#include "Stack.h"
main(){Stack<String> s;/* Code that uses push and pop */ }
Here, the scenario is the same as in the preceding example, except thatCenterLine-C++ gets the template declaration and definition fromdifferent files — Stack.h and Stack.c, instead of userapp.C. Keep inmind that Stack.c must be available along the -I path in order for theinstantiation to succeed.
Here are the implementation details for the last example:
1 When you compile userapp.C, the references toStack<String>::push(String&) and Stack<String>::pop() areconsidered normal function calls. Since Stack<String>::Stack()is inline, no reference to that function is generated.
2 CenterLine-C++ determines that the following functions mustbe instantiated:
Stack<String>::push(String&)Stack<String>::pop()
3 CenterLine-C++ checks the repository for a file that containsthese instantiations. If there is one that is up-to-date,CenterLine-C++ adds that file to the list of files to be linked andcompiled, if necessary, and goes on to Step 5.
NOTE Given the correct setup of files and -I path, theinstantiation process in all these examples isautomatic. The following paragraphs describethe details of what goes on “behind thescenes” in the last example.
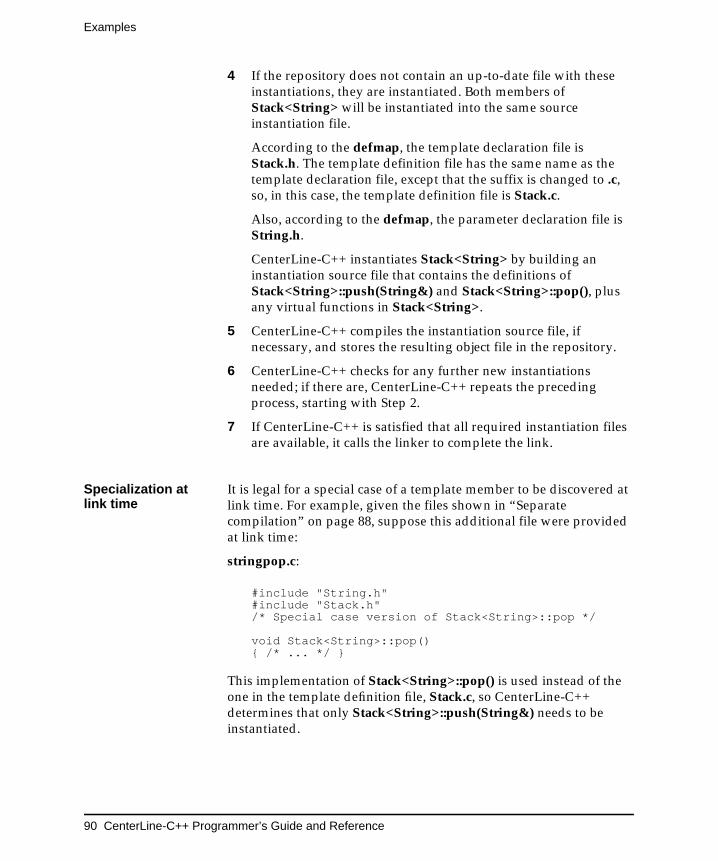
Examples
90 CenterLine-C++ Programmer’s Guide and Reference
4 If the repository does not contain an up-to-date file with theseinstantiations, they are instantiated. Both members ofStack<String> will be instantiated into the same sourceinstantiation file.
According to the defmap, the template declaration file isStack.h. The template definition file has the same name as thetemplate declaration file, except that the suffix is changed to .c,so, in this case, the template definition file is Stack.c.
Also, according to the defmap, the parameter declaration file isString.h.
CenterLine-C++ instantiates Stack<String> by building aninstantiation source file that contains the definitions ofStack<String>::push(String&) and Stack<String>::pop(), plusany virtual functions in Stack<String>.
5 CenterLine-C++ compiles the instantiation source file, ifnecessary, and stores the resulting object file in the repository.
6 CenterLine-C++ checks for any further new instantiationsneeded; if there are, CenterLine-C++ repeats the precedingprocess, starting with Step 2.
7 If CenterLine-C++ is satisfied that all required instantiation filesare available, it calls the linker to complete the link.
Specialization atlink time
It is legal for a special case of a template member to be discovered atlink time. For example, given the files shown in “Separatecompilation” on page 88, suppose this additional file were providedat link time:
stringpop.c:
#include "String.h"#include "Stack.h"/* Special case version of Stack<String>::pop */
void Stack<String>::pop(){ /* ... */ }
This implementation of Stack<String>::pop() is used instead of theone in the template definition file, Stack.c, so CenterLine-C++determines that only Stack<String>::push(String&) needs to beinstantiated.
CenterLine-C++ Programmer’s Guide and Reference 91
Avoiding the most common pitfalls when using templates
Avoiding the most common pitfallswhen using templatesTemplates are probably easier to use than most people expect; onceyou set up your files correctly, the entire process can be handledautomatically by CenterLine-C++.
Here we reiterate a few points made earlier in the section ontemplates; these tips might help you avoid some mistakes often madeby new users of templates.
• Do not compile the file containing your templateimplementation (the template definition file), and do notinclude it in your application file. Doing so interferes withCenterLine-C++’s automatic instantiation process.
• Use default naming conventions for your files, that is .h and .cor .H and .C for declaration/definition file pairs, unless youneed to use other suffixes.
• Do not include a template declaration file in the templatedefinition file, unless you use include guards, and do not usethe template definition file to define anything except templates.
• Use include guards to prevent redundant compilation ofdeclaration (header) files.
• Do not edit the defmap or any instantiation files generated byCenterLine-C++. If necessary, create an nmap file to overridethe default rules for finding template files.
• Do not specify any files to be included in the repository to thelinker explicitly; allow the automatic instantiation process to doany linking related to templates.
• Keep in mind that you might get syntax errors during the finallinking phase, since templates are instantiated later. If you doget syntax errors at the instantiation phase, edit only thetemplate definition file, not your application file.
For instance, if you get an error message indicating “missingtemplate arguments”, you may have forgotten to specify theparameter for a template in your template definition file. Thiscould be a matter of simply remembering to write <T> after thetemplate name.
Troubleshooting
92 CenterLine-C++ Programmer’s Guide and Reference
TroubleshootingThis section is based on information from AT&T about cfront. Itdescribes possible difficulties you might encounter.
Networktimestamps
If you have a network of workstations, timestamps may not besynchronized, in which case dependency checking will not workcorrectly. This problem must be solved by system administration.
External namelength limitations
Symbol names in object file symbol tables must fully describe thetemplate class used by a given function or data item. Theinstantiation process cannot resolve symbol names correctly if thesystem imposes a name length limit of 8 or 32 characters. Using atypedef to shorten a long name will not solve this problem becausethe typedef name is expanded to the underlying types whenexternal names are encoded.
Map file problems If you have many programs in the same directory using the sametype name, for example, test cases using the type T, the default mapfile will become very large. You can compress the file by using astring table, as described in “Sharing a repository” on page 76.
Some out-of-date information is deleted when a file is recompiled, butsome garbage slowly accumulates in map files.
Violation of the onedefinition rule
Because of separate compilation, the C++ compiler will accept usagesuch as:
// file 1 struct A {};// file 2 template <class T> struct A {};
even though this violates the rule that there must be only onedefinition of each object used in a program. Because type mappinginformation is collected into one file, the instantiation system willcatch many such errors. The form of the error is:
fatal error: type A defined twice in map files
CenterLine-C++ Programmer’s Guide and Reference 93
Troubleshooting
Picking up thewrong versions ofheaders
Some source code control and configuration management systemssupport named versions of source files and headers, and programcompilation is done with particular sets of versions of files (aconfiguration). Template instantiation does not cause any problemswith this, but you must ensure that the same versions of files arespecified via -I at link time as are given at compile time.
Replaying sourcefiles
If a source file looks like this:
// main.c#include <Vector.h>struct A {};main(){Vector<A> a;a.f();}
and Vector.h does not have include guards, then it will be includedtwice, once to get at the type Vector and once as an indirect result ofincluding main.c to get at the type A.
The workaround for this is either to use include guards or elsecompletely define the types in header files or in main.c.
Function templates A function template is encoded just like a C++ function. Atinstantiation time, there is no way to tell them apart. Therefore, theinstantiation system tries to instantiate function templates only if anentry is found for them in the map files. This entry will not be thereunless a forward declaration, such as
template <class T> void f(T);
has been seen.
Another problem occurs if only a function definition is given in asingle-file application, and then -ptn or -c is used to tell theinstantiation system not to instantiate:
template<class T> void f(T) {}main(){f(37);}
$ CC -ptn prog.c
Troubleshooting
94 CenterLine-C++ Programmer’s Guide and Reference
Because there is no declaration, no entry is made in the map file,resulting in an unresolved global f(int) at link time. The workaroundis to use a declaration or -ptf, or do not use -ptn for multi-fileapplications.
Specializations of function templates and parameter matching canpresent another problem. Given this function template:
template <class T> void f(Vector<T>&);
and this declaration of a specialization:
void f(char*);
If the specialization is not defined anywhere, the pre-linker will find itto be unresolved. The pre-linker will then look for f in the map filesand find it, and attempt to instantiate the f(Vector<T>&) templatewith a char* argument.
Static data memberinitialization
The instantiation system considers that the tentative definition(global common) that the C++ compiler emits for each static datamember of a template class represents an undefined external symbolthat must be defined and initialized somewhere.
For example:
template <class T> struct A { static int x;};
by itself would result in an unresolved external.
This usage follows the C++ standard, but the C++ compiler has notenforced it up to now. An initializer might look like this:
template <class T> int A<T>::x = 47;
or this:
int A<char*>::x =89;
The first of these is a general template initializer, the second aspecialization.
CenterLine-C++ Programmer’s Guide and Reference 95
Tools
Type checking oftemplate members
By default, only members of a template class that are used areinstantiated. Other members are not typechecked and thereforelegally could contain errors.
All virtual functions are instantiated because there is no way to tellwhether they are needed.
If you use the -pta or -ptf switch, CenterLine-C++ will try toinstantiate all members of needed template classes, with potentialerrors.
Renaming objectfiles
The basename of an object file is used to validate type entries in mapfiles. If the name changes, the type entry will be invalid unless otherobject files specified along with the renamed one are also found onthe basename list in the map file.
The simplest solution to this problem is to write a map file with atype entry with no list of basenames (see “Specifying applicationfiles in map files” on page 77).
Debug formats andlarge binaries
The instantiation system creates one object file for each templateclass. With some debug formats, the linker does not mergeduplicated strings and other debug information occurring in severalobject files. This can cause a large increase in binary size. Theproblem has no easy solution.
ToolsThis section describes tools provided as part of the AT&T C++Language System that we include with CenterLine-C++. They are inthe following locations:
CenterLine/clc++/arch_os/pt/tool1
CenterLine/clc++/arch_os/pt/tool2
Because the template instantiation repository is a UNIX directoryand the files in it are not special in any way, it is possible to usestandard utilities in various ways to get at information.
Tools
96 CenterLine-C++ Programmer’s Guide and Reference
For example, consider a system that has only 14-character filenames.Hash codes are used to name files in place of complete manglednames, and it would be nice to come up with a correspondence listshowing the mapping between hash codes and template names.
A shell script to do this is tool1:
#!/bin/sh
# display the template class for each instantiation# file in the repository
PATH=/bin:/usr/bin:/usr/ucb
pn=‘basename $0‘rep=$1if [ "$rep" = "" -o ! -d "$rep" ]then echo "usage: $pn repository" 1>&2
exit 1ficd $repls *.c |while read fndo
n=‘sed -n ’1s/^⁄\* ‹.*›\*⁄$/\1/p’ $fn‘echo "$fn --> $n"
done
exit 0
Another tool, tool2, can be used to package the object files in arepository into an archive, with renaming to short names for ar:
#!/bin/sh
# export contents of repository into an archive
PATH=/bin:/usr/bin:/usr/ucb
pn=‘basename $0‘
t=/tmp/$pn.$$trap "rm -rf $t; exit 2" 1 2 3 15rm -rf $tmkdir $t
if [ $# -ne 2 -o ! -d "$1" ]then
echo "usage: $pn repository archive"exit 1
fi
n=1for i in $1/*.o
CenterLine-C++ Programmer’s Guide and Reference 97
Summary of terminology
docp $i $t/${n}.on=‘expr $n + 1‘
done
rm -f $2ar cr $2 $t/*.oif [ -x /bin/ranlib -o -x /usr/bin/ranlib ]then
ranlib $2fi
rm -rf $t
exit 0
Summary of terminologyFor your convenience, we summarize some of the terminologyrelated to templates as used in CenterLine-C++. Terms are listed inalphabetical order.
argument declarationfile
A file containing the declaration of a class, struct, union, or enumtype.
defmap The default name for the name mapping file.
header cache A header dependency file with the suffix .he in the repository,which is used to store the list of headers needed by eachinstantiation.
name mapping file A file in the repository that contains information needed to defineand instantiate templates, including where each named type used ina template instance is declared.
repository A special directory created by CenterLine-C++ the first time a filecontaining a template declaration or a template instance iscompiled. If an application does not use templates, then norepository is ever created. By default, this directory is created in theworking directory and is called ptrepository.
specialization A user-supplied definition or implementation of a template class orfunction that overrides the default instantiation.
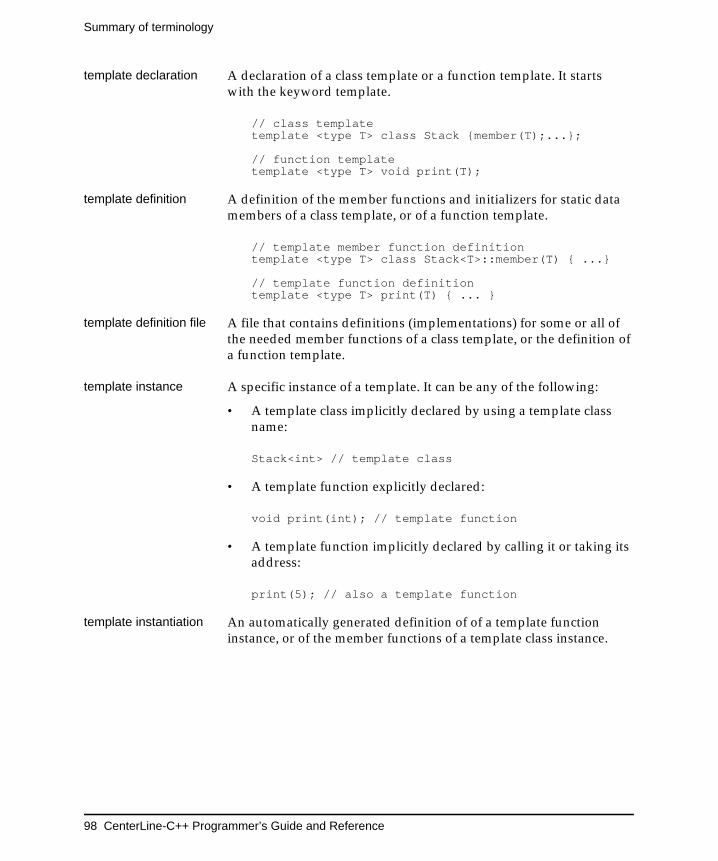
Summary of terminology
98 CenterLine-C++ Programmer’s Guide and Reference
template declaration A declaration of a class template or a function template. It startswith the keyword template.
// class templatetemplate <type T> class Stack {member(T);...};
// function templatetemplate <type T> void print(T);
template definition A definition of the member functions and initializers for static datamembers of a class template, or of a function template.
// template member function definitiontemplate <type T> class Stack<T>::member(T) { ...}
// template function definitiontemplate <type T> print(T) { ... }
template definition file A file that contains definitions (implementations) for some or all ofthe needed member functions of a class template, or the definition ofa function template.
template instance A specific instance of a template. It can be any of the following:
• A template class implicitly declared by using a template classname:
Stack<int> // template class
• A template function explicitly declared:
void print(int); // template function
• A template function implicitly declared by calling it or taking itsaddress:
print(5); // also a template function
template instantiation An automatically generated definition of of a template functioninstance, or of the member functions of a template class instance.
5 Introduction to theDebugger: A Tutorial
This chapter provides a tutorial for newcomers tothe CenterLine-C++ debugger, pdm. The tutorialguides you through a sample session that includesthe following activities:
• Debugging basics• Correcting compiler and make errors• Debugging a corefile


CenterLine-C++ Programmer’s Guide and Reference 101
Debugging basics
Debugging basicsThe CenterLine-C++ debugger is a symbolic debugger for debuggingfully linked executables. Although the CenterLine-C++ debugger issimilar to debuggers like gdb and dbx, it provides a graphical userinterface with an integrated set of graphical browsers for examiningand debugging your code more efficiently.
The CenterLine-C++ debugger is also known as pdm, which standsfor process debugging mode. Although CenterLine-C++ supportsonly this single mode of debugging, other CenterLine productssupport multiple debugging modes.
This chapter provides a tutorial to guide you through a sampledebugging session. You learn how to correct compiler and make errorsand debug a corefile. For detailed information about debugging tasks,refer to Chapter 6, “Debugging with CenterLine-C++,” on page 117.
Specifying youreditor
There are many places in the debugger where you can invoke youreditor. Before you start the debugger, you can use the EDITORenvironment variable to specify either vi or emacs as the editor forthe debugger to invoke. The debugger uses vi as the default unlessyou specify emacs.
If you specify emacs, note that the debugger supports only GNUemacs, and the version of GNU emacs must be capable of runningas an X Window System client.
Setting up theBounce program
To explore the debugger, the tutorial uses a simple program namedBounce. The Bounce program creates a new window and bounces arectangle within the window. The existing program has twodifferent problems that you will fix.
If you have not set up the CenterLine-C++ examples directory yet,refer to “Setting up the examples directory” on page 9 for instructions.Change to the examples directory:
To specify GNU Emacs as the editor for the debugger to invoke,use the following shell command before you start the debugger:
% setenv EDITOR emacs
% cd c++examples_dir
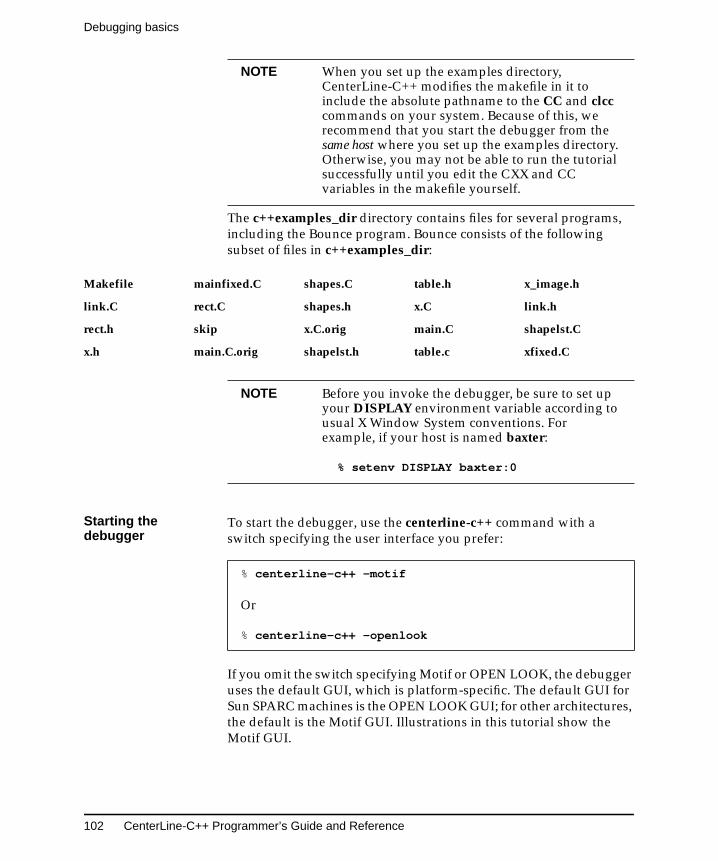
Debugging basics
102 CenterLine-C++ Programmer’s Guide and Reference
The c++examples_dir directory contains files for several programs,including the Bounce program. Bounce consists of the followingsubset of files in c++examples_dir:
Starting thedebugger
To start the debugger, use the centerline-c++ command with aswitch specifying the user interface you prefer:
If you omit the switch specifying Motif or OPEN LOOK, the debuggeruses the default GUI, which is platform-specific. The default GUI forSun SPARC machines is the OPEN LOOK GUI; for other architectures,the default is the Motif GUI. Illustrations in this tutorial show theMotif GUI.
NOTE When you set up the examples directory,CenterLine-C++ modifies the makefile in it toinclude the absolute pathname to the CC and clcccommands on your system. Because of this, werecommend that you start the debugger from thesame host where you set up the examples directory.Otherwise, you may not be able to run the tutorialsuccessfully until you edit the CXX and CCvariables in the makefile yourself.
Makefile mainfixed.C shapes.C table.h x_image.h
link.C rect.C shapes.h x.C link.h
rect.h skip x.C.orig main.C shapelst.C
x.h main.C.orig shapelst.h table.c xfixed.C
NOTE Before you invoke the debugger, be sure to set upyour DISPLAY environment variable according tousual X Window System conventions. Forexample, if your host is named baxter:
% setenv DISPLAY baxter:0
% centerline-c++ -motif
Or
% centerline-c++ -openlook
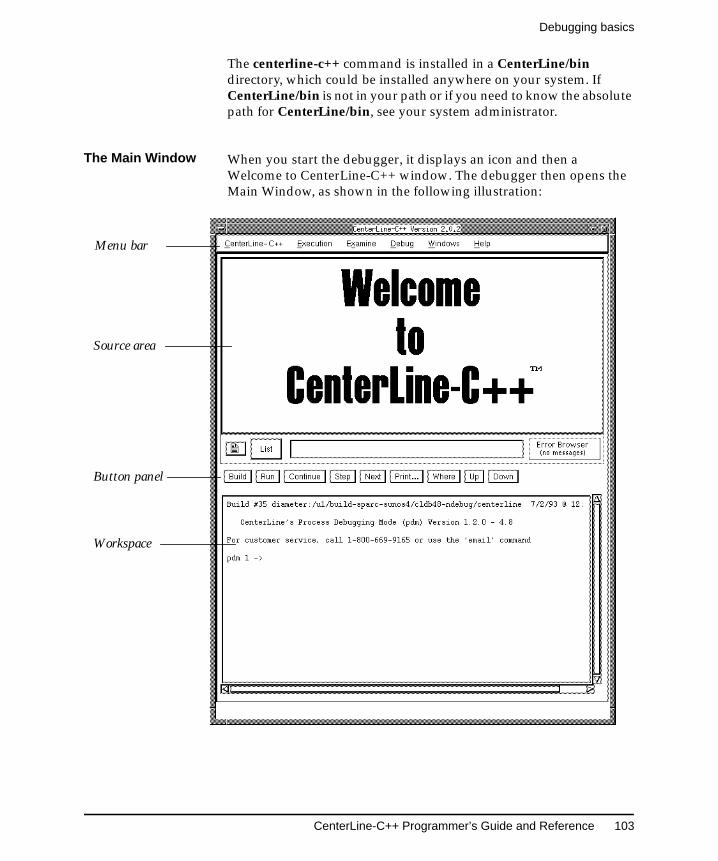
CenterLine-C++ Programmer’s Guide and Reference 103
Debugging basics
The centerline-c++ command is installed in a CenterLine/bindirectory, which could be installed anywhere on your system. IfCenterLine/bin is not in your path or if you need to know the absolutepath for CenterLine/bin, see your system administrator.
The Main Window When you start the debugger, it displays an icon and then aWelcome to CenterLine-C++ window. The debugger then opens theMain Window, as shown in the following illustration:
Source area
Workspace
Button panel
Menu bar
Debugging basics
104 CenterLine-C++ Programmer’s Guide and Reference
The Main Window provides a central work area and contains fourmain regions: the Menu bar, Source area, Button panel, andWorkspace.
• In the Menu bar, you can select commands for executing andexamining programs.
• In the Source area, you can list source code and manipulatedebugging items. For example, you can set and deletebreakpoints and actions in the Source area.
• In the Button panel, you can use buttons to execute and examineprograms.
• In the Workspace, you can enter debugging commands andview the results. The Workspace is a command processor thatallows you to enter debugging commands directly and to passshell commands to a subshell.
In general, the same features are available either by using menus,buttons, and other graphical elements of the GUI or by enteringcommands directly in the Workspace. You can choose whichevermeans of access is most convenient for you. In this tutorial, we showyou several different ways of entering the same command
The Main Window also acts as a hub for the debugger’s graphicalbrowsers. You can open these browsers with the Windows menu, andeach of the browsers also has a similar Windows menu. You’ll learnmore about the browsers later in the tutorial.
Getting help The debugger offers multiple sources of help: context-sensitive help,a Help menu, Workspace help, and the Man Browser.
Usingcontext-sensitive help
The debugger provides an extensive system of context-sensitivehelp to assist you in using the product. To get information on anygraphical object, move the cursor over the item or region and pressthe F1 or Help key. A Help window appears describing the object.
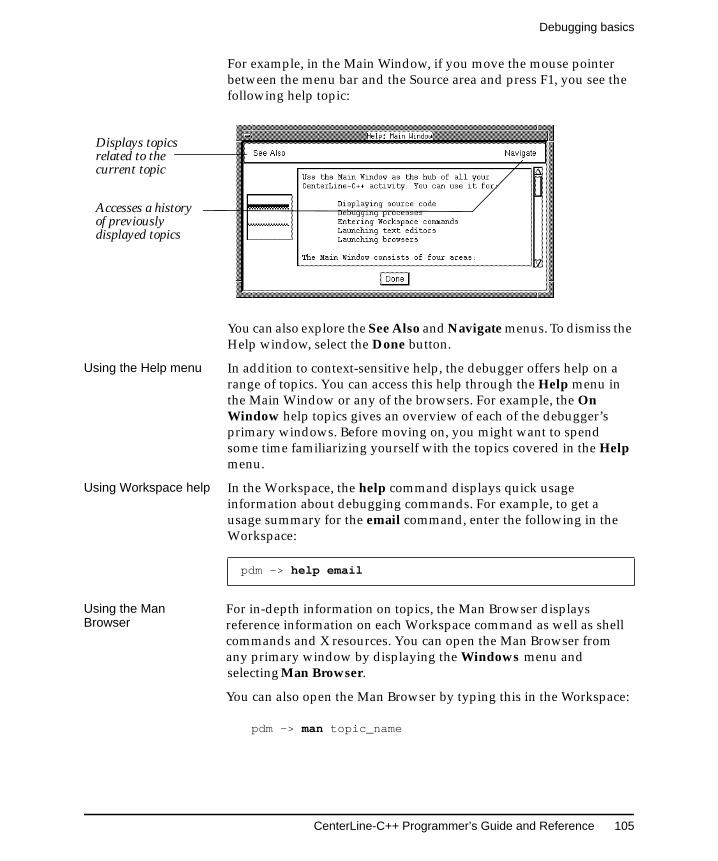
CenterLine-C++ Programmer’s Guide and Reference 105
Debugging basics
For example, in the Main Window, if you move the mouse pointerbetween the menu bar and the Source area and press F1, you see thefollowing help topic:
You can also explore the See Also and Navigate menus. To dismiss theHelp window, select the Done button.
Using the Help menu In addition to context-sensitive help, the debugger offers help on arange of topics. You can access this help through the Help menu inthe Main Window or any of the browsers. For example, the OnWindow help topics gives an overview of each of the debugger’sprimary windows. Before moving on, you might want to spendsome time familiarizing yourself with the topics covered in the Helpmenu.
Using Workspace help In the Workspace, the help command displays quick usageinformation about debugging commands. For example, to get ausage summary for the email command, enter the following in theWorkspace:
Using the ManBrowser
For in-depth information on topics, the Man Browser displaysreference information on each Workspace command as well as shellcommands and X resources. You can open the Man Browser fromany primary window by displaying the Windows menu andselecting Man Browser.
You can also open the Man Browser by typing this in the Workspace:
pdm -> man topic_name
pdm -> help email
Accesses a historyof previouslydisplayed topics
Displays topicsrelated to thecurrent topic
Debugging basics
106 CenterLine-C++ Programmer’s Guide and Reference
Managing windows If you have finished using a window, select the Dismiss or Cancelbutton to close the window. Resize a window or use the horizontaland vertical scroll bars to view any graphical code representationthat is too large to fit in the window.
Using the RunWindow
Use the Run Window to view the output from and enter the input toprograms that you are running in the debugger. The Run Window,an xterm window, is the first window to appear (it is iconified)when you start up the debugger.
Quitting thedebugger
You can exit from the debugger at any time by selecting QuitCenterLine-C++ from the CenterLine-C++ menu in the MainWindow or entering quit at the Workspace prompt.
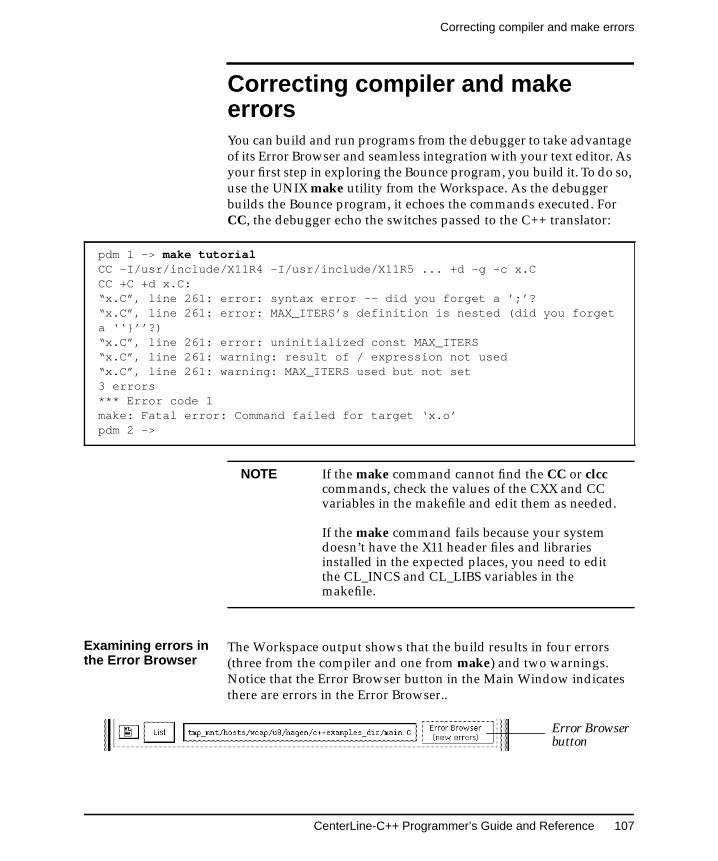
CenterLine-C++ Programmer’s Guide and Reference 107
Correcting compiler and make errors
Correcting compiler and makeerrorsYou can build and run programs from the debugger to take advantageof its Error Browser and seamless integration with your text editor. Asyour first step in exploring the Bounce program, you build it. To do so,use the UNIX make utility from the Workspace. As the debuggerbuilds the Bounce program, it echoes the commands executed. ForCC, the debugger echo the switches passed to the C++ translator:
Examining errors inthe Error Browser
The Workspace output shows that the build results in four errors(three from the compiler and one from make) and two warnings.Notice that the Error Browser button in the Main Window indicatesthere are errors in the Error Browser..
pdm 1 -> make tutorialCC -I/usr/include/X11R4 -I/usr/include/X11R5 ... +d -g -c x.CCC +C +d x.C:“x.C”, line 261: error: syntax error -- did you forget a ’;’?“x.C”, line 261: error: MAX_ITERS’s definition is nested (did you forgeta ‘‘}’’?)“x.C”, line 261: error: uninitialized const MAX_ITERS“x.C”, line 261: warning: result of / expression not used“x.C”, line 261: warning: MAX_ITERS used but not set3 errors*** Error code 1make: Fatal error: Command failed for target ‘x.o’pdm 2 ->
NOTE If the make command cannot find the CC or clcccommands, check the values of the CXX and CCvariables in the makefile and edit them as needed.
If the make command fails because your systemdoesn’t have the X11 header files and librariesinstalled in the expected places, you need to editthe CL_INCS and CL_LIBS variables in themakefile.
Error Browserbutton
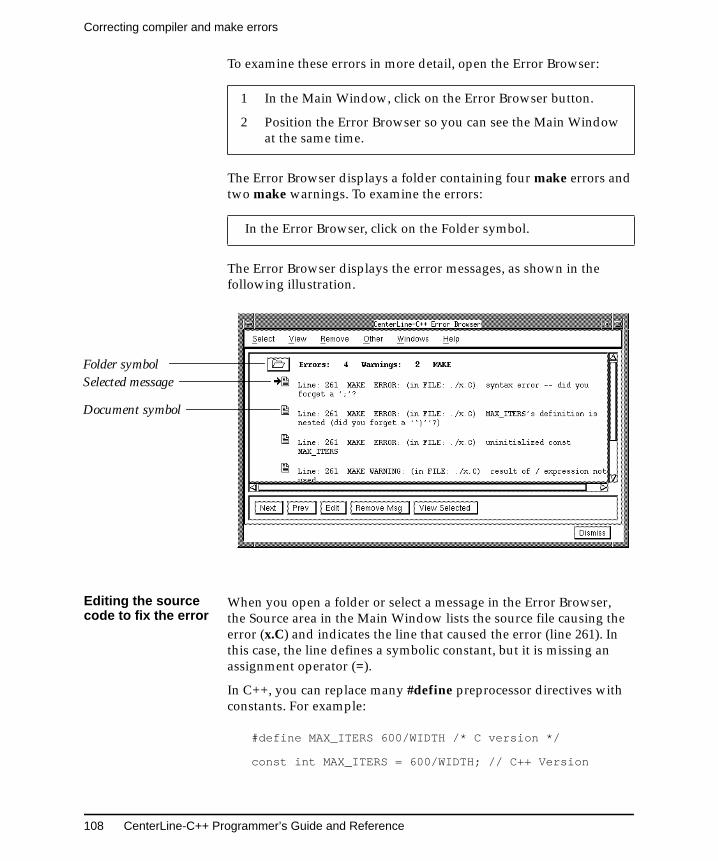
Correcting compiler and make errors
108 CenterLine-C++ Programmer’s Guide and Reference
To examine these errors in more detail, open the Error Browser:
The Error Browser displays a folder containing four make errors andtwo make warnings. To examine the errors:
The Error Browser displays the error messages, as shown in thefollowing illustration.
Editing the sourcecode to fix the error
When you open a folder or select a message in the Error Browser,the Source area in the Main Window lists the source file causing theerror (x.C) and indicates the line that caused the error (line 261). Inthis case, the line defines a symbolic constant, but it is missing anassignment operator (=).
In C++, you can replace many #define preprocessor directives withconstants. For example:
#define MAX_ITERS 600/WIDTH /* C version */
const int MAX_ITERS = 600/WIDTH; // C++ Version
1 In the Main Window, click on the Error Browser button.
2 Position the Error Browser so you can see the Main Windowat the same time.
In the Error Browser, click on the Folder symbol.
Folder symbol
Document symbol
Selected message
CenterLine-C++ Programmer’s Guide and Reference 109
Correcting compiler and make errors
In this case, the assignment operator was omitted when the line waschanged.
To invoke your editor on the source file:
Your editor opens x.C and positions the cursor at line 261. From youreditor, do the following:
Building andrunning the fixedprogram
Now that you’ve fixed the error, go to the Main Window andrebuild the tutorial target from the Workspace.
The Error Browser button indicates that there are no messages, and themessages are cleared from the Error Browser. The Bounce programcompiles without errors. You can dismiss the Error Browser:
Although the Bounce program compiles, it still has a problem that willgenerate a segmentation fault. To run the program and dump acorefile, use the following commands in a separate shell. (The corefileis about 8.5 MB in size.)
In the Error Browser, click on the Document symbol next to thefirst error.
1 Add an = between MAX_ITERS and 600/WIDTH.
2 Save the file.
3 Close the editor.
pdm 2 -> make tutorial
Select the Dismiss button.
If you use the C shell on a Sun platform, you might need touse this command to allow the whole corefile to be dumped.
% unlimit coredumpsize
To generate the corefile:
% cd ~/c++examples_dir% tutorialSegmentation fault (core dumped)
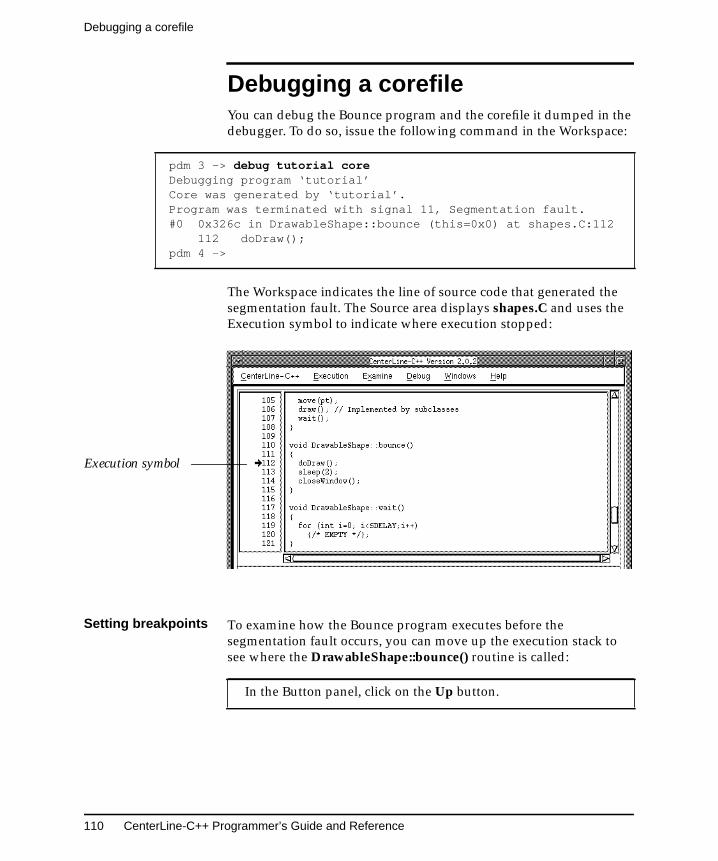
Debugging a corefile
110 CenterLine-C++ Programmer’s Guide and Reference
Debugging a corefileYou can debug the Bounce program and the corefile it dumped in thedebugger. To do so, issue the following command in the Workspace:
The Workspace indicates the line of source code that generated thesegmentation fault. The Source area displays shapes.C and uses theExecution symbol to indicate where execution stopped:
Setting breakpoints To examine how the Bounce program executes before thesegmentation fault occurs, you can move up the execution stack tosee where the DrawableShape::bounce() routine is called:
pdm 3 -> debug tutorial coreDebugging program ‘tutorial’Core was generated by ‘tutorial’.Program was terminated with signal 11, Segmentation fault.#0 0x326c in DrawableShape::bounce (this=0x0) at shapes.C:112
112 doDraw();pdm 4 ->
In the Button panel, click on the Up button.
Execution symbol
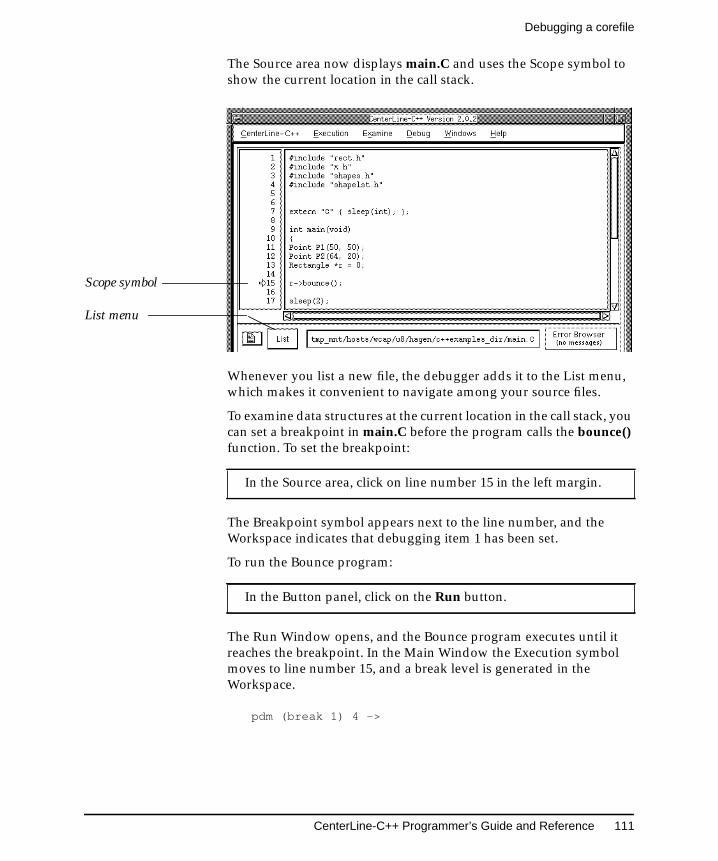
CenterLine-C++ Programmer’s Guide and Reference 111
Debugging a corefile
The Source area now displays main.C and uses the Scope symbol toshow the current location in the call stack.
Whenever you list a new file, the debugger adds it to the List menu,which makes it convenient to navigate among your source files.
To examine data structures at the current location in the call stack, youcan set a breakpoint in main.C before the program calls the bounce()function. To set the breakpoint:
The Breakpoint symbol appears next to the line number, and theWorkspace indicates that debugging item 1 has been set.
To run the Bounce program:
The Run Window opens, and the Bounce program executes until itreaches the breakpoint. In the Main Window the Execution symbolmoves to line number 15, and a break level is generated in theWorkspace.
pdm (break 1) 4 ->
In the Source area, click on line number 15 in the left margin.
In the Button panel, click on the Run button.
Scope symbol
List menu
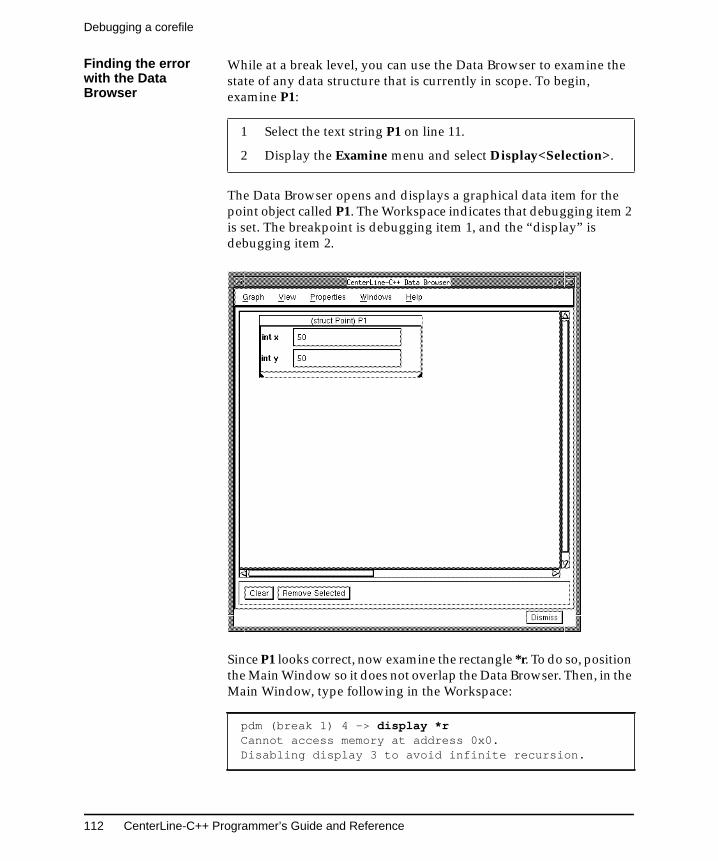
Debugging a corefile
112 CenterLine-C++ Programmer’s Guide and Reference
Finding the errorwith the DataBrowser
While at a break level, you can use the Data Browser to examine thestate of any data structure that is currently in scope. To begin,examine P1:
The Data Browser opens and displays a graphical data item for thepoint object called P1. The Workspace indicates that debugging item 2is set. The breakpoint is debugging item 1, and the “display” isdebugging item 2.
Since P1 looks correct, now examine the rectangle *r. To do so, positionthe Main Window so it does not overlap the Data Browser. Then, in theMain Window, type following in the Workspace:
1 Select the text string P1 on line 11.
2 Display the Examine menu and select Display<Selection>.
pdm (break 1) 4 -> display *rCannot access memory at address 0x0.Disabling display 3 to avoid infinite recursion.
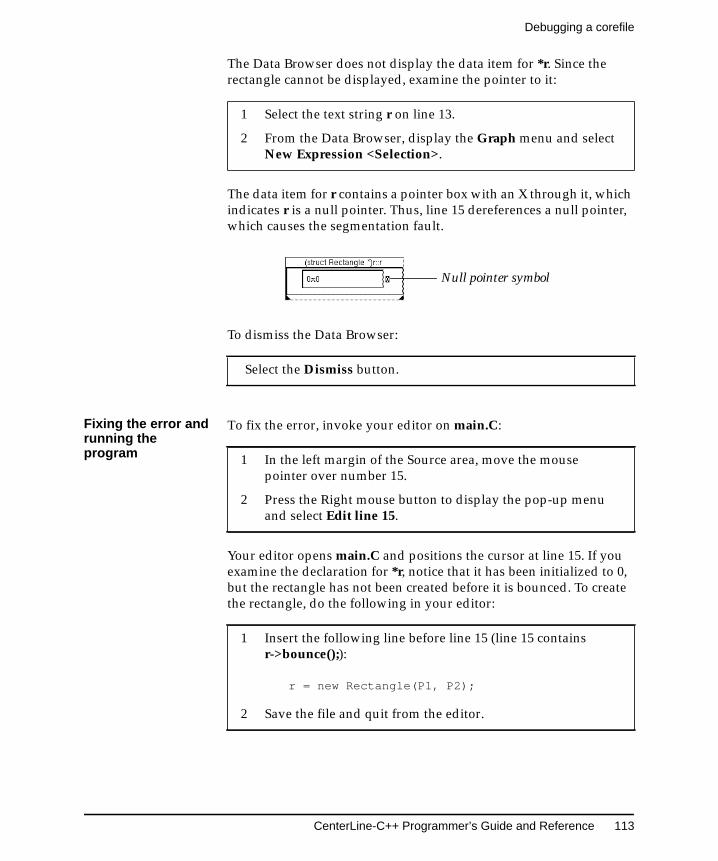
CenterLine-C++ Programmer’s Guide and Reference 113
Debugging a corefile
The Data Browser does not display the data item for *r. Since therectangle cannot be displayed, examine the pointer to it:
The data item for r contains a pointer box with an X through it, whichindicates r is a null pointer. Thus, line 15 dereferences a null pointer,which causes the segmentation fault.
To dismiss the Data Browser:
Fixing the error andrunning theprogram
To fix the error, invoke your editor on main.C:
Your editor opens main.C and positions the cursor at line 15. If youexamine the declaration for *r, notice that it has been initialized to 0,but the rectangle has not been created before it is bounced. To createthe rectangle, do the following in your editor:
1 Select the text string r on line 13.
2 From the Data Browser, display the Graph menu and selectNew Expression <Selection>.
Select the Dismiss button.
1 In the left margin of the Source area, move the mousepointer over number 15.
2 Press the Right mouse button to display the pop-up menuand select Edit line 15.
1 Insert the following line before line 15 (line 15 containsr->bounce();):
r = new Rectangle(P1, P2);
2 Save the file and quit from the editor.
Null pointer symbol
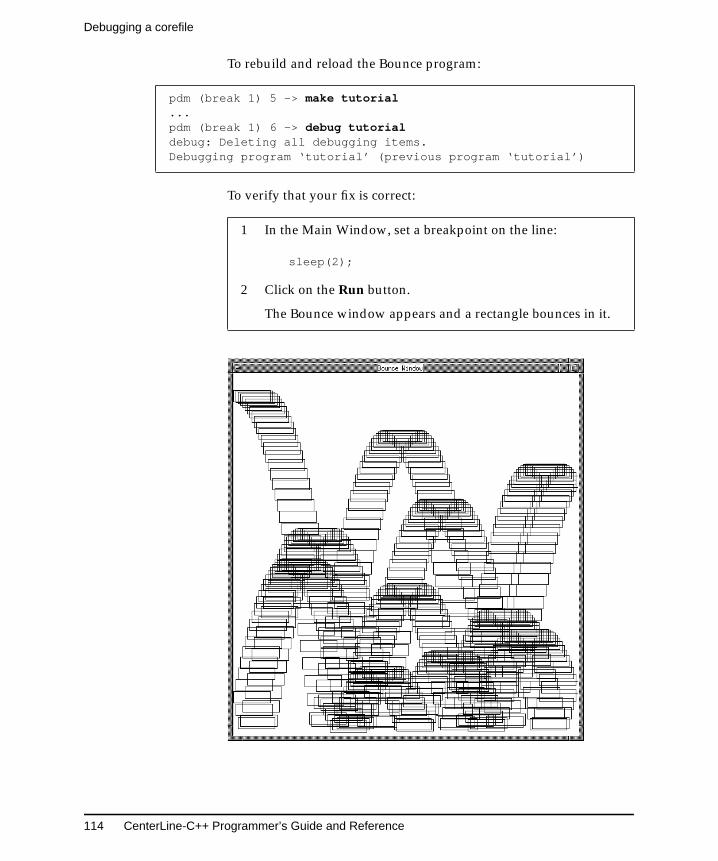
Debugging a corefile
114 CenterLine-C++ Programmer’s Guide and Reference
To rebuild and reload the Bounce program:
To verify that your fix is correct:
pdm (break 1) 5 -> make tutorial...pdm (break 1) 6 -> debug tutorialdebug: Deleting all debugging items.Debugging program ‘tutorial’ (previous program ‘tutorial’)
1 In the Main Window, set a breakpoint on the line:
sleep(2);
2 Click on the Run button.
The Bounce window appears and a rectangle bounces in it.
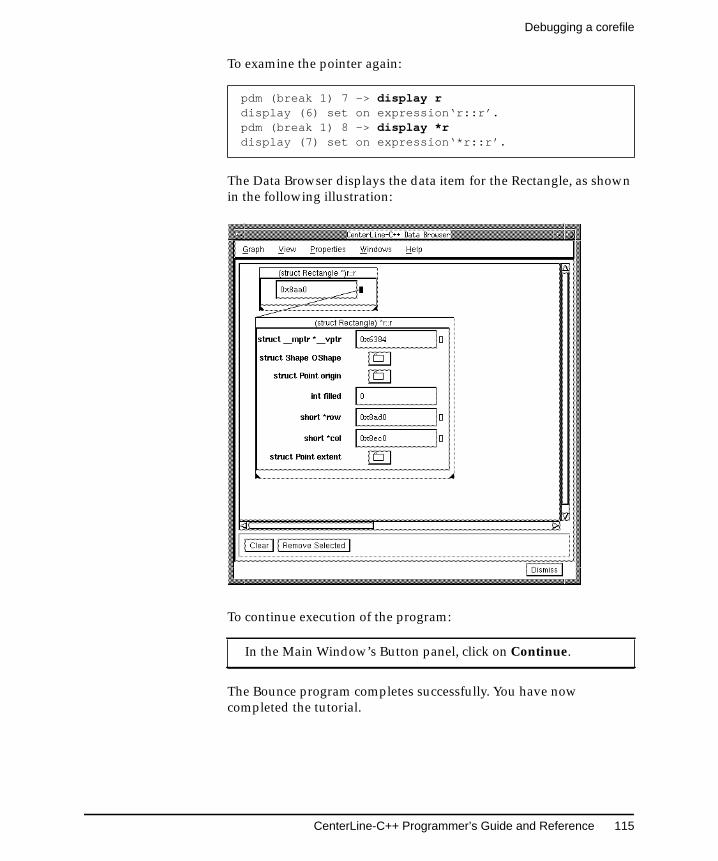
CenterLine-C++ Programmer’s Guide and Reference 115
Debugging a corefile
To examine the pointer again:
The Data Browser displays the data item for the Rectangle, as shownin the following illustration:
To continue execution of the program:
The Bounce program completes successfully. You have nowcompleted the tutorial.
pdm (break 1) 7 -> display rdisplay (6) set on expression‘r::r’.pdm (break 1) 8 -> display *rdisplay (7) set on expression‘*r::r’.
In the Main Window’s Button panel, click on Continue.

6 Debugging withCenterLine-C++
This chapter contains tasks that you can performwith the CenterLine-C++ debugger, pdm.
Some of the tasks refer to the CenterLine-C++online code examples. If you have not yet set up theCenterLine-C++ examples directory, refer to“Setting up the examples directory” on page 9 forinstructions.

CenterLine-C++ Programmer’s Guide and Reference 119
Selecting an editor to use with the debugger
Task: Selecting an editor to use with the debugger
Once you select an editor to use with the debugger, you use it for theduration of your session. You cannot change editors within adebugging session.
The vi editor If you use the vi text editor, you’re all set. By default, the debuggeruses vi.
The GNU emacseditor
If you use the GNU emacs editor, set the EDITOR environmentvariable before you start the debugger:
% setenv EDITOR emacs% centerline-c++
See also "Editing source code" on page 145
edit on page 219
NOTE The debugger supports only GNU emacs, and theversion of GNU emacs must be capable of runningas an X Window System client.
Starting up the debugger
120 CenterLine-C++ Programmer’s Guide and Reference
Task: Starting up the debugger
You start up the debugger by invoking the centerline-c++ commandat the shell:
centerline-c++ [switches] [a.out [core | process_id]]
The centerline-c++ command is installed in a CenterLine/bindirectory, which could be installed anywhere on your system. IfCenterLine/bin is not in your path or if you need to know the absolutepath for CenterLine/bin, see your system administrator.
When the debugger starts, it displays a welcome dialog and then theMain Window.
Specifying files andprocesses to bedebugged
Use one of the following arguments with the centerline-c++command:
executable Loads a fully-linked executable fordebugging.
executable core Loads a fully-linked executable and a corefile generated by the executable.
executable process_id Loads a fully-linked executable andattaches to a process that is running theexecutable.
You can also load a file for debugging after you start the debugger. See"Loading files for debugging" on page 142 for details.
Specifying the userinterface
Use one of the following switches with the centerline-c++ command:
-motif Motif GUI, which is the default on allplatforms except for Sun.
-openlook OPEN LOOK GUI, which is the default onSun systems.
-ascii Nongraphical user interface that has asingle work area, the Workspace.
CenterLine-C++ Programmer’s Guide and Reference 121
Starting up the debugger
If you prefer to use a user interface that differs from the default foryour platform, you can set an X Window System resource to do so. Bysetting an X resource, you don’t need to specify the -motif or-openlook command-line switch with centerline-c++. For example, tochoose Motif as the default user interface, add the following resourceto your X resources file:
CenterLine-C++*Model: Motif
To choose OPEN LOOK as the default, add one of the followingresources to your X resources file:
CenterLine-C++*Model: openlookCenterLine-C++*Model: openlook2dCenterLine-C++*Model: openlook3d
Startup file You can customize the debugger at startup with the .pdminit file.See "Customizing your startup file" on page 191 for moreinformation.
See also centerline-c++ in the Man Browser
debug on page 212
"Loading files for debugging" on page 142
"Customizing your startup file" on page 191
NOTE Before running the Motif or OPEN LOOK versionof the debugger, make sure to set your DISPLAYenvironment variable to the display on which youwant to use the debugger. Otherwise, the debuggermay display on another machine or exit with anerror.
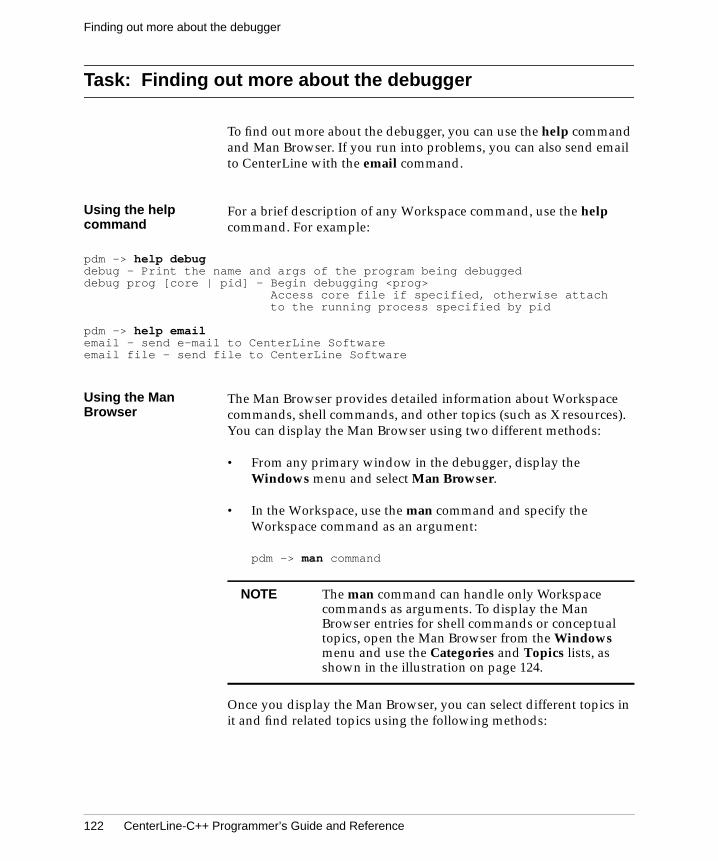
Finding out more about the debugger
122 CenterLine-C++ Programmer’s Guide and Reference
Task: Finding out more about the debugger
To find out more about the debugger, you can use the help commandand Man Browser. If you run into problems, you can also send emailto CenterLine with the email command.
Using the helpcommand
For a brief description of any Workspace command, use the helpcommand. For example:
pdm -> help debugdebug - Print the name and args of the program being debuggeddebug prog [core | pid] - Begin debugging <prog>
Access core file if specified, otherwise attach to the running process specified by pid
pdm -> help emailemail - send e-mail to CenterLine Softwareemail file - send file to CenterLine Software
Using the ManBrowser
The Man Browser provides detailed information about Workspacecommands, shell commands, and other topics (such as X resources).You can display the Man Browser using two different methods:
• From any primary window in the debugger, display theWindows menu and select Man Browser.
• In the Workspace, use the man command and specify theWorkspace command as an argument:
pdm -> man command
Once you display the Man Browser, you can select different topics init and find related topics using the following methods:
NOTE The man command can handle only Workspacecommands as arguments. To display the ManBrowser entries for shell commands or conceptualtopics, open the Man Browser from the Windowsmenu and use the Categories and Topics lists, asshown in the illustration on page 124.
CenterLine-C++ Programmer’s Guide and Reference 123
Finding out more about the debugger
• To select a different topic in the Man Browser, select an item inthe Categories list and an item in the Topics list. You can alsotype the topic name directly into the New Topic text field.
• To find a topic that is related to the currently displayed topic,display the See Also menu in the menu bar and select an itemfrom the menu.
There is also a pop-up See Also menu. To display it, move themouse cursor over the displayed topic and press the Rightmouse button.
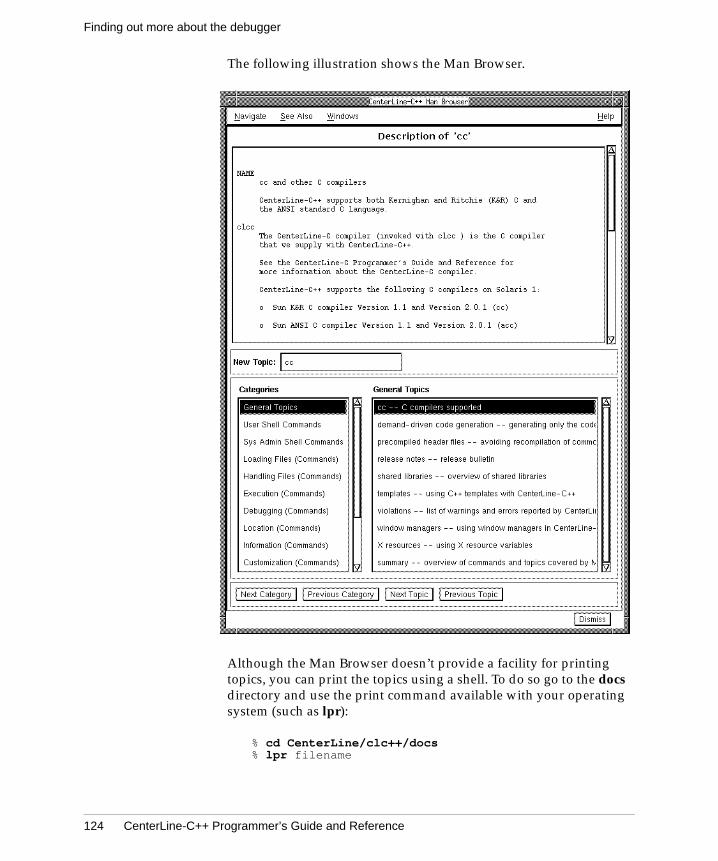
Finding out more about the debugger
124 CenterLine-C++ Programmer’s Guide and Reference
The following illustration shows the Man Browser.
Although the Man Browser doesn’t provide a facility for printingtopics, you can print the topics using a shell. To do so go to the docsdirectory and use the print command available with your operatingsystem (such as lpr):
% cd CenterLine/clc++/docs% lpr filename
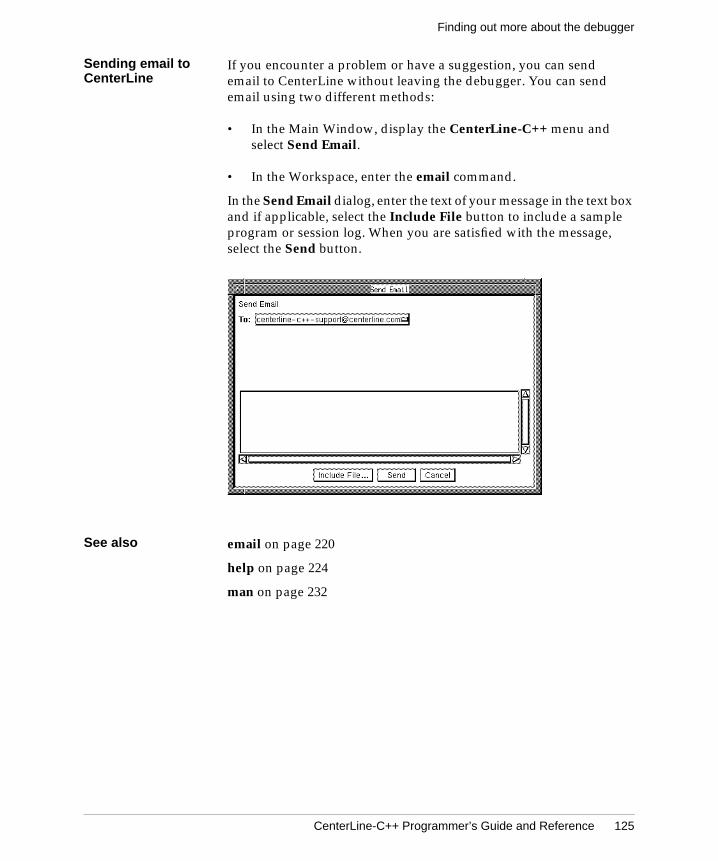
CenterLine-C++ Programmer’s Guide and Reference 125
Finding out more about the debugger
Sending email toCenterLine
If you encounter a problem or have a suggestion, you can sendemail to CenterLine without leaving the debugger. You can sendemail using two different methods:
• In the Main Window, display the CenterLine-C++ menu andselect Send Email.
• In the Workspace, enter the email command.
In the Send Email dialog, enter the text of your message in the text boxand if applicable, select the Include File button to include a sampleprogram or session log. When you are satisfied with the message,select the Send button.
See also email on page 220
help on page 224
man on page 232

Using menus and text fields
126 CenterLine-C++ Programmer’s Guide and Reference
Task: Using menus and text fields
Using thePRIMARY textselection as inputto a command
Any menu command that has <Selection> as part of its name, suchas Display <Selection>, uses the PRIMARY text selection as itsinput argument without prompting you for confirmation. ThePRIMARY text selection is the selection created when you select arange of text by dragging with the Left mouse button.
Before you choose a menu command, be aware of any text that youmay have selected in the debugger or other X application windows.The debugger uses this text as input to the command unless youexplicitly select text to be used instead.
If desired, you can customize the debugger so that it displays thePRIMARY text selection in a dialog box for you to confirm. Once youselect the OK button in the dialog, the debugger uses the text as inputto the menu command. To do so:
1 Add the following line to your .Xdefaults file.
CenterLine-C++*ConfirmSelnUse: True
2 Load your .Xdefaults file into the X resource database with thexrdb command.
% xrdb ~/.Xdefaults
3 Start the debugger with the centerline-c++ command, asdescribed in "Starting up the debugger" on page 120.
Using pop-upmenus
The debugger provides pop-up menus in most of its windows.
Table 7 Pop-up Menus
Location Menu How to Display It
Source code in the Source areaof the Main Window
File Options menu Press the Right mouse button.
Line numbers in the Source areaof the Main Window
Line Number Optionsmenu
Move the mouse pointer over a linenumber and press the Right mousebutton.
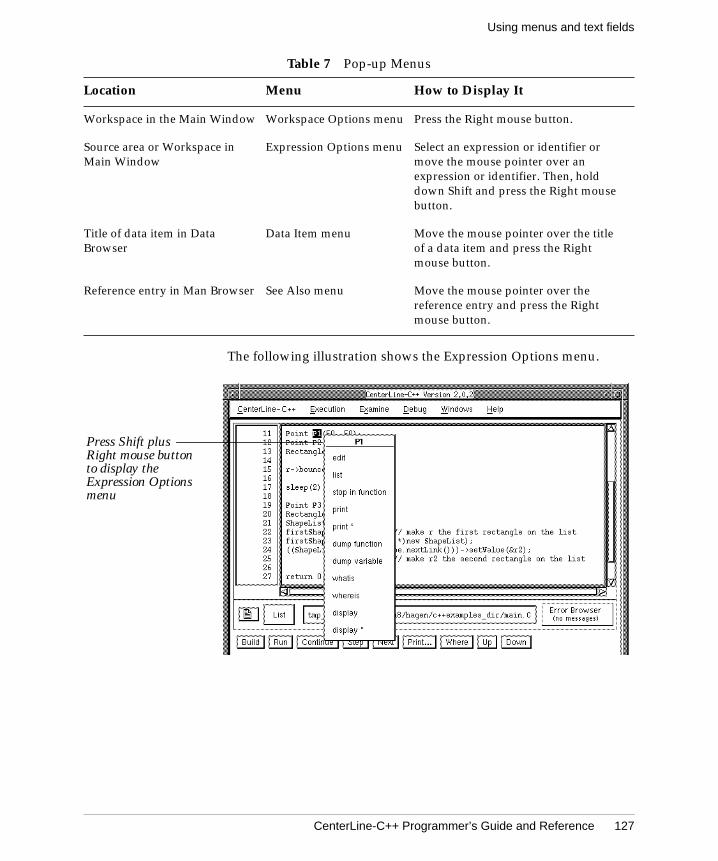
CenterLine-C++ Programmer’s Guide and Reference 127
Using menus and text fields
The following illustration shows the Expression Options menu.
Workspace in the Main Window Workspace Options menu Press the Right mouse button.
Source area or Workspace inMain Window
Expression Options menu Select an expression or identifier ormove the mouse pointer over anexpression or identifier. Then, holddown Shift and press the Right mousebutton.
Title of data item in DataBrowser
Data Item menu Move the mouse pointer over the titleof a data item and press the Rightmouse button.
Reference entry in Man Browser See Also menu Move the mouse pointer over thereference entry and press the Rightmouse button.
Table 7 Pop-up Menus
Location Menu How to Display It
Press Shift plusRight mouse buttonto display theExpression Optionsmenu
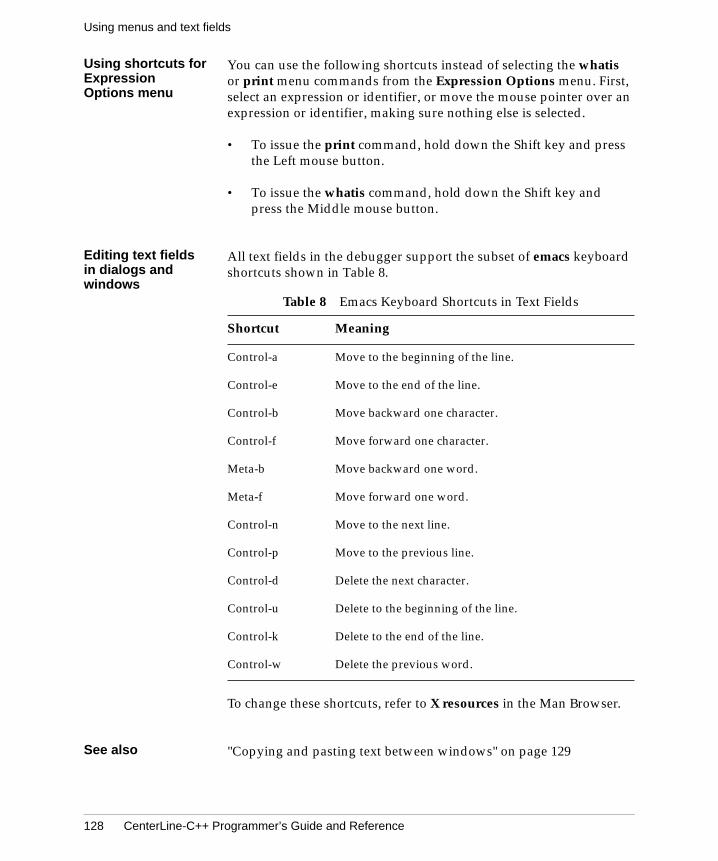
Using menus and text fields
128 CenterLine-C++ Programmer’s Guide and Reference
Using shortcuts forExpressionOptions menu
You can use the following shortcuts instead of selecting the whatisor print menu commands from the Expression Options menu. First,select an expression or identifier, or move the mouse pointer over anexpression or identifier, making sure nothing else is selected.
• To issue the print command, hold down the Shift key and pressthe Left mouse button.
• To issue the whatis command, hold down the Shift key andpress the Middle mouse button.
Editing text fieldsin dialogs andwindows
All text fields in the debugger support the subset of emacs keyboardshortcuts shown in Table 8.
To change these shortcuts, refer to X resources in the Man Browser.
See also "Copying and pasting text between windows" on page 129
Table 8 Emacs Keyboard Shortcuts in Text Fields
Shortcut Meaning
Control-a Move to the beginning of the line.
Control-e Move to the end of the line.
Control-b Move backward one character.
Control-f Move forward one character.
Meta-b Move backward one word.
Meta-f Move forward one word.
Control-n Move to the next line.
Control-p Move to the previous line.
Control-d Delete the next character.
Control-u Delete to the beginning of the line.
Control-k Delete to the end of the line.
Control-w Delete the previous word.
CenterLine-C++ Programmer’s Guide and Reference 129
Copying and pasting text between windows
Task: Copying and pasting text between windows
You can copy and paste between any debugger window in Motif andother Motif applications and between any debugger window in OPENLOOK and other OPEN LOOK applications. To do so, use thestandard copy and paste methods for Motif and OPEN LOOK.
Since Motif applications (and X applications that use the MIT Athenawidget set) use the PRIMARY selection and OPEN LOOK applicationsuse the CLIPBOARD selection, copying and pasting betweendissimilar GUIs can require additional steps.
Copying thePRIMARY selectionfrom OPEN LOOK
To copy and paste the PRIMARY selection from any window in theOPEN LOOK debugger to an xterm:
1 Select the text from the debugger. This copies the text to thePRIMARY selection.
2 Move the mouse pointer into the xterm window and press theMiddle mouse button to paste the PRIMARY selection.
Using theCLIPBOARDselection with xterm
By default, xterm uses the PRIMARY selection rather than theCLIPBOARD selection. To customize xterm so it can use either typeof selection:
1 Define the Copy and Paste keys by adding the following lines toyour .Xdefaults file:
! copy and paste from an xterm to/from CLIPBOARDXTerm*vt100.translations: #override \n\<Key>L6: start-extend() select-end(CLIPBOARD) \n\<Key>L8: insert-selection(CLIPBOARD) \n
This example uses the standard key bindings for Copy andPaste (the L6 and L8 keys on a Sun keyboard), however you cansubstitute different key bindings if desired.
2 Load these definitions into your X resource database with theUNIX xrdb command:
% xrdb ~/.Xdefaults
NOTE This task applies only to users of the OPEN LOOKversion of the debugger.
Copying and pasting text between windows
130 CenterLine-C++ Programmer’s Guide and Reference
To copy text from an xterm to the OPEN LOOK debugger, or from theOPEN LOOK debugger to an xterm:
1 Select the text from the first window, which copies the text tothe PRIMARY selection.
2 Press the Copy key, which copies the PRIMARY selection to theCLIPBOARD selection.
3 Move the mouse pointer into the second window and press thePaste key to paste the CLIPBOARD selection.
Pasting thePRIMARY selectionin OPEN LOOK
By default, the OPEN LOOK version of the debugger uses theCLIPBOARD selection when pasting. If you try to paste anonexistent CLIPBOARD selection, however, the debugger pastesthe PRIMARY selection. To customize the debugger so it can pasteeither type of selection:
1 Add the following lines to your .Xdefaults file:
! copy and paste from PRIMARY selection as in! many X applications*OI*OI_multi_text.Translations:#override\n\Shift <Key>L8:insert_selection(PRIMARY)\n*OI*OI_entry_field.Translations:#override\n\Shift <Key>L8:insert_selection(PRIMARY)\n
This example uses the Shift key and the standard key bindingfor Paste (L8 key), however, you can substitute different keybindings if desired.
2 Load these definitions into your X resource database with theUNIX xrdb command:
% xrdb ~/.Xdefaults
3 To paste the PRIMARY selection into the debugger, press Shiftand the Paste key.
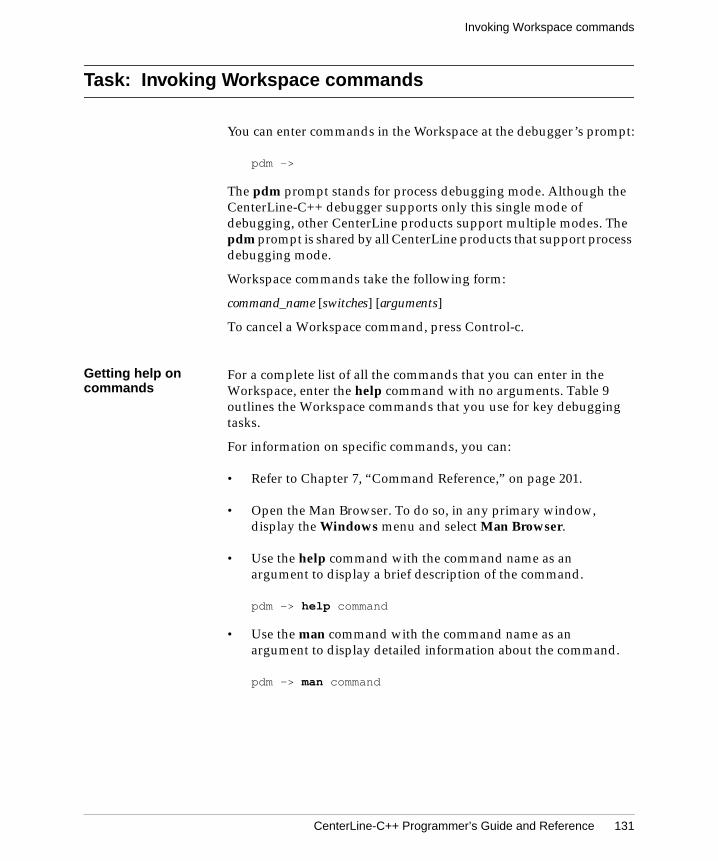
CenterLine-C++ Programmer’s Guide and Reference 131
Invoking Workspace commands
Task: Invoking Workspace commands
You can enter commands in the Workspace at the debugger’s prompt:
pdm ->
The pdm prompt stands for process debugging mode. Although theCenterLine-C++ debugger supports only this single mode ofdebugging, other CenterLine products support multiple modes. Thepdm prompt is shared by all CenterLine products that support processdebugging mode.
Workspace commands take the following form:
command_name [switches] [arguments]
To cancel a Workspace command, press Control-c.
Getting help oncommands
For a complete list of all the commands that you can enter in theWorkspace, enter the help command with no arguments. Table 9outlines the Workspace commands that you use for key debuggingtasks.
For information on specific commands, you can:
• Refer to Chapter 7, “Command Reference,” on page 201.
• Open the Man Browser. To do so, in any primary window,display the Windows menu and select Man Browser.
• Use the help command with the command name as anargument to display a brief description of the command.
pdm -> help command
• Use the man command with the command name as anargument to display detailed information about the command.
pdm -> man command

Invoking Workspace commands
132 CenterLine-C++ Programmer’s Guide and Reference
Invokingcommands from afile
You can use the source command to execute Workspace commandsfrom a file:
pdm -> source file
Using gdbcommands
The GNU Debugger, gdb, is a popular source-level debuggeravailable from the Free Software Foundation. The debuggerprovides access to gdb, but CenterLine does not provide support forthis feature.
You can enter individual gdb commands with the gdb command:
pdm -> gdb command
You can also invoke gdb in the Workspace with the gdb_modecommand:
pdm -> gdb_mode(gdb)
Table 9 Workspace commands by function
Function Commands
Loading files build, debug, make, source, attach, detach
Handling files list, edit, use, cd, file
Execution run, rerun, cont, step, next, stepout, reset
Debugging delete, status, stop, when
Location up, down, where, whereami
Information contents, help, man, print, whatis, whereis, dump, display
Customization alias, unalias
Signals catch, ignore
Session quit, setenv, unsetenv, printenv, gdb, gdb_mode
Miscellaneous sh, shell, email, assign, set
Machine level debugging nexti, stepi, stopi, listi
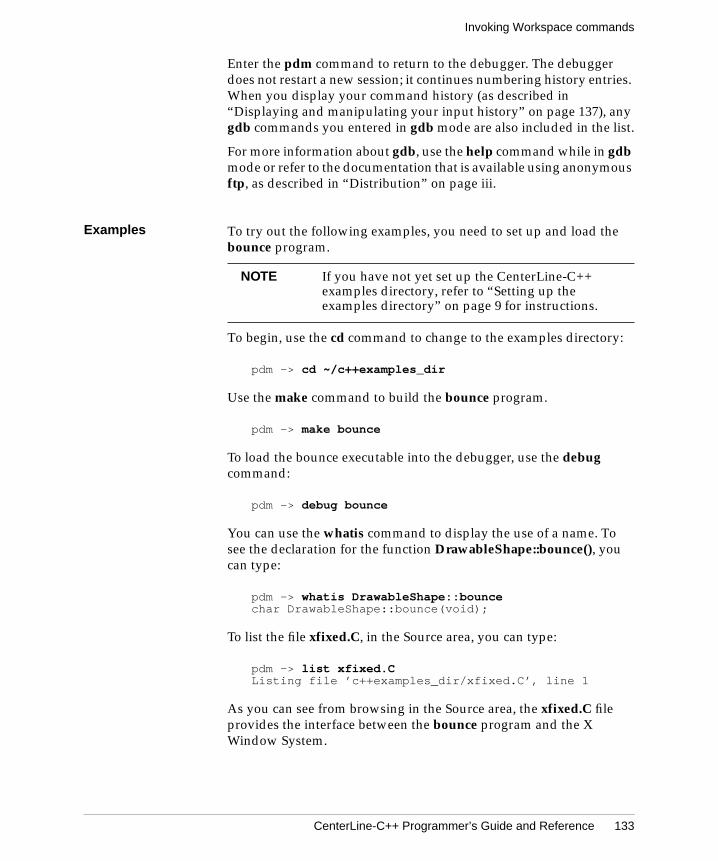
CenterLine-C++ Programmer’s Guide and Reference 133
Invoking Workspace commands
Enter the pdm command to return to the debugger. The debuggerdoes not restart a new session; it continues numbering history entries.When you display your command history (as described in“Displaying and manipulating your input history” on page 137), anygdb commands you entered in gdb mode are also included in the list.
For more information about gdb, use the help command while in gdbmode or refer to the documentation that is available using anonymousftp, as described in “Distribution” on page iii.
Examples To try out the following examples, you need to set up and load thebounce program.
To begin, use the cd command to change to the examples directory:
pdm -> cd ~/c++examples_dir
Use the make command to build the bounce program.
pdm -> make bounce
To load the bounce executable into the debugger, use the debugcommand:
pdm -> debug bounce
You can use the whatis command to display the use of a name. Tosee the declaration for the function DrawableShape::bounce(), youcan type:
pdm -> whatis DrawableShape::bouncechar DrawableShape::bounce(void);
To list the file xfixed.C, in the Source area, you can type:
pdm -> list xfixed.CListing file ’c++examples_dir/xfixed.C’, line 1
As you can see from browsing in the Source area, the xfixed.C fileprovides the interface between the bounce program and the XWindow System.
NOTE If you have not yet set up the CenterLine-C++examples directory, refer to “Setting up theexamples directory” on page 9 for instructions.

Invoking Workspace commands
134 CenterLine-C++ Programmer’s Guide and Reference
See also "Using aliases for Workspace commands" on page 136
"Saving your debugging session" on page 190
"Customizing your startup file" on page 191
gdb on page 222
gdb_mode on page 223
source on page 247
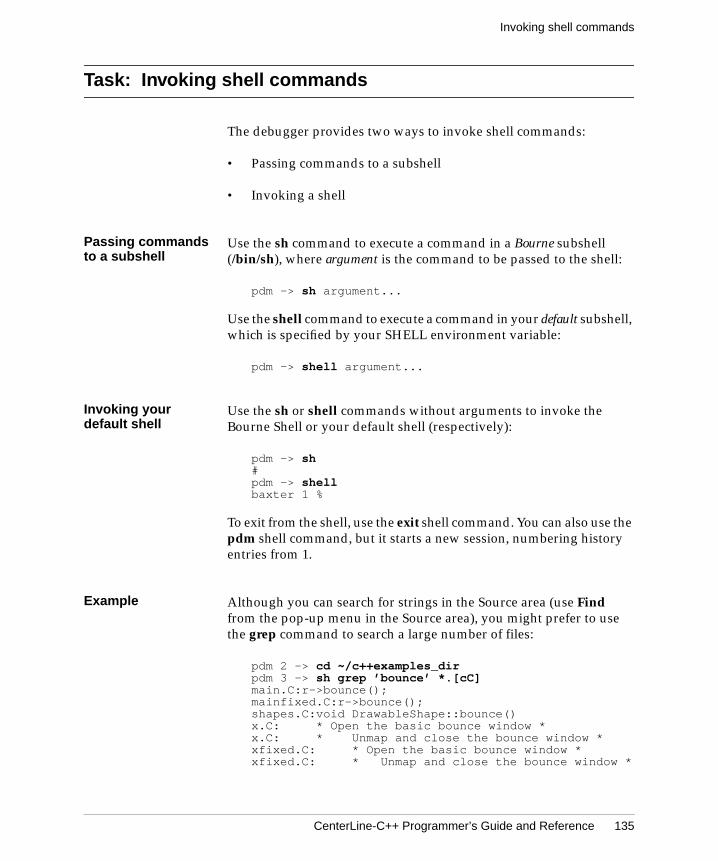
CenterLine-C++ Programmer’s Guide and Reference 135
Invoking shell commands
Task: Invoking shell commands
The debugger provides two ways to invoke shell commands:
• Passing commands to a subshell
• Invoking a shell
Passing commandsto a subshell
Use the sh command to execute a command in a Bourne subshell(/bin/sh), where argument is the command to be passed to the shell:
pdm -> sh argument...
Use the shell command to execute a command in your default subshell,which is specified by your SHELL environment variable:
pdm -> shell argument...
Invoking yourdefault shell
Use the sh or shell commands without arguments to invoke theBourne Shell or your default shell (respectively):
pdm -> sh#pdm -> shellbaxter 1 %
To exit from the shell, use the exit shell command. You can also use thepdm shell command, but it starts a new session, numbering historyentries from 1.
Example Although you can search for strings in the Source area (use Findfrom the pop-up menu in the Source area), you might prefer to usethe grep command to search a large number of files:
pdm 2 -> cd ~/c++examples_dirpdm 3 -> sh grep ’bounce’ *.[cC]main.C:r->bounce();mainfixed.C:r->bounce();shapes.C:void DrawableShape::bounce()x.C: * Open the basic bounce window *x.C: * Unmap and close the bounce window *xfixed.C: * Open the basic bounce window *xfixed.C: * Unmap and close the bounce window *
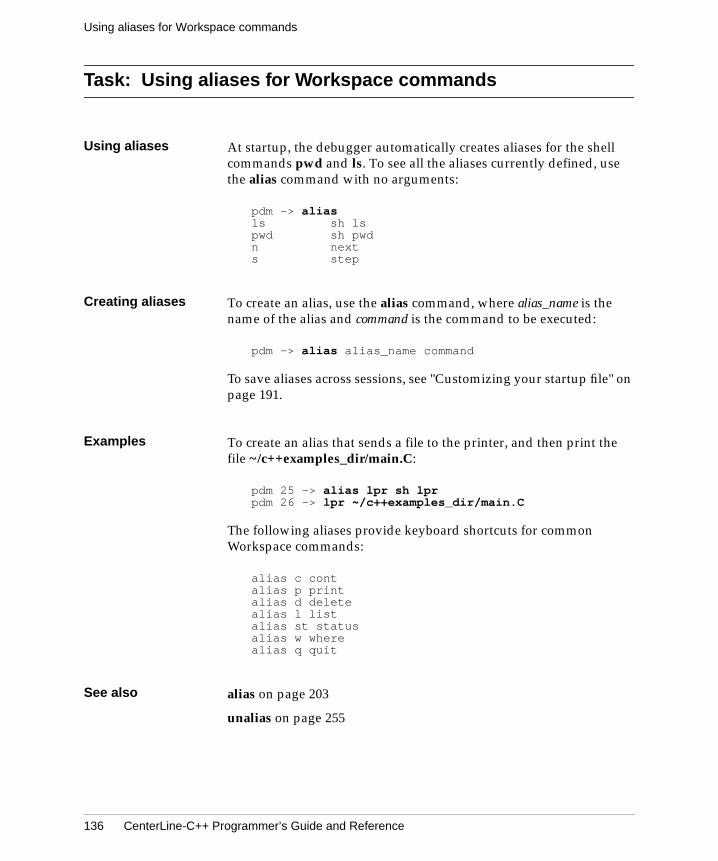
Using aliases for Workspace commands
136 CenterLine-C++ Programmer’s Guide and Reference
Task: Using aliases for Workspace commands
Using aliases At startup, the debugger automatically creates aliases for the shellcommands pwd and ls. To see all the aliases currently defined, usethe alias command with no arguments:
pdm -> aliasls sh lspwd sh pwdn nexts step
Creating aliases To create an alias, use the alias command, where alias_name is thename of the alias and command is the command to be executed:
pdm -> alias alias_name command
To save aliases across sessions, see "Customizing your startup file" onpage 191.
Examples To create an alias that sends a file to the printer, and then print thefile ~/c++examples_dir/main.C:
pdm 25 -> alias lpr sh lprpdm 26 -> lpr ~/c++examples_dir/main.C
The following aliases provide keyboard shortcuts for commonWorkspace commands:
alias c contalias p printalias d deletealias l listalias st statusalias w wherealias q quit
See also alias on page 203
unalias on page 255
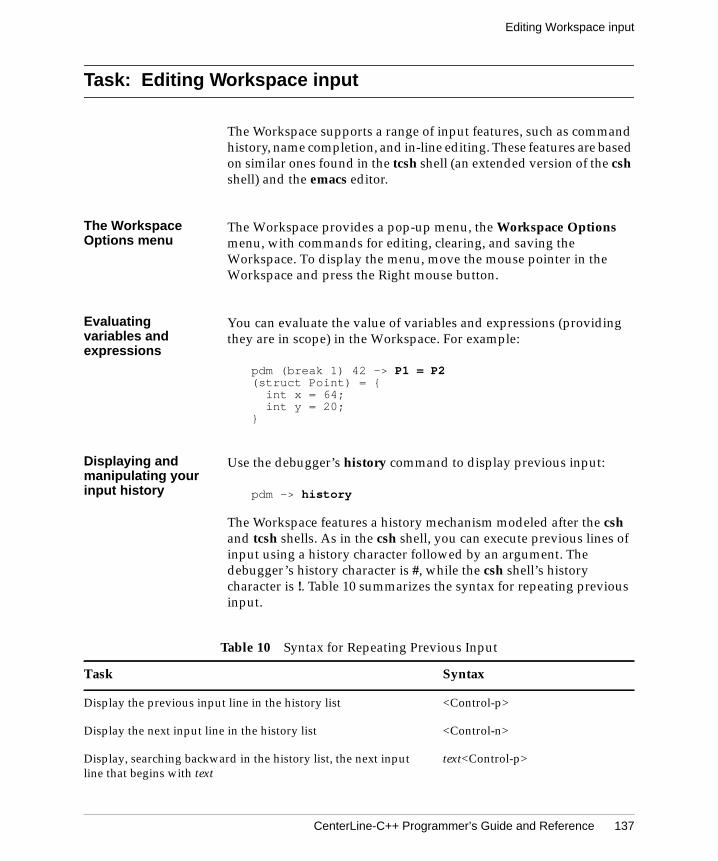
CenterLine-C++ Programmer’s Guide and Reference 137
Editing Workspace input
Task: Editing Workspace input
The Workspace supports a range of input features, such as commandhistory, name completion, and in-line editing. These features are basedon similar ones found in the tcsh shell (an extended version of the cshshell) and the emacs editor.
The WorkspaceOptions menu
The Workspace provides a pop-up menu, the Workspace Optionsmenu, with commands for editing, clearing, and saving theWorkspace. To display the menu, move the mouse pointer in theWorkspace and press the Right mouse button.
Evaluatingvariables andexpressions
You can evaluate the value of variables and expressions (providingthey are in scope) in the Workspace. For example:
pdm (break 1) 42 -> P1 = P2(struct Point) = {
int x = 64;int y = 20;
}
Displaying andmanipulating yourinput history
Use the debugger’s history command to display previous input:
pdm -> history
The Workspace features a history mechanism modeled after the cshand tcsh shells. As in the csh shell, you can execute previous lines ofinput using a history character followed by an argument. Thedebugger’s history character is #, while the csh shell’s historycharacter is !. Table 10 summarizes the syntax for repeating previousinput.
Table 10 Syntax for Repeating Previous Input
Task Syntax
Display the previous input line in the history list <Control-p>
Display the next input line in the history list <Control-n>
Display, searching backward in the history list, the next inputline that begins with text
text<Control-p>
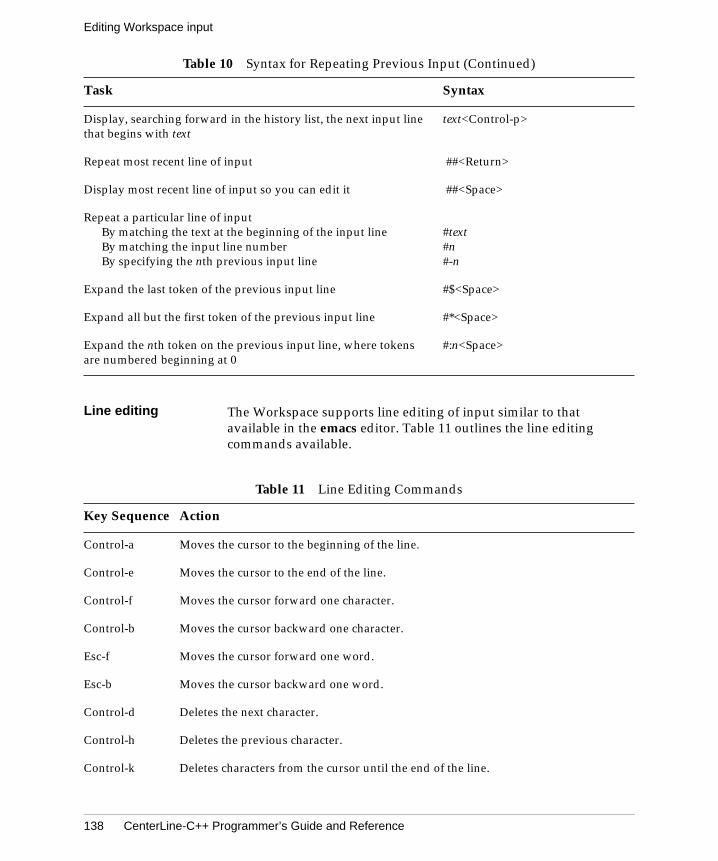
Editing Workspace input
138 CenterLine-C++ Programmer’s Guide and Reference
Line editing The Workspace supports line editing of input similar to thatavailable in the emacs editor. Table 11 outlines the line editingcommands available.
Display, searching forward in the history list, the next input linethat begins with text
text<Control-p>
Repeat most recent line of input ##<Return>
Display most recent line of input so you can edit it ##<Space>
Repeat a particular line of inputBy matching the text at the beginning of the input lineBy matching the input line numberBy specifying the nth previous input line
#text#n#-n
Expand the last token of the previous input line #$<Space>
Expand all but the first token of the previous input line #*<Space>
Expand the nth token on the previous input line, where tokensare numbered beginning at 0
#:n<Space>
Table 11 Line Editing Commands
Key Sequence Action
Control-a Moves the cursor to the beginning of the line.
Control-e Moves the cursor to the end of the line.
Control-f Moves the cursor forward one character.
Control-b Moves the cursor backward one character.
Esc-f Moves the cursor forward one word.
Esc-b Moves the cursor backward one word.
Control-d Deletes the next character.
Control-h Deletes the previous character.
Control-k Deletes characters from the cursor until the end of the line.
Table 10 Syntax for Repeating Previous Input (Continued)
Task Syntax
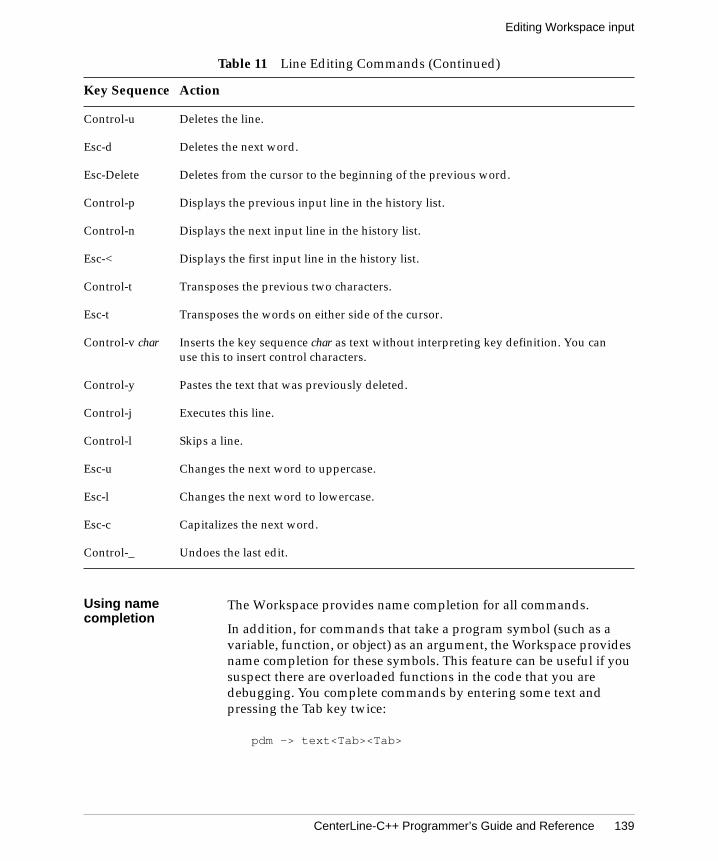
CenterLine-C++ Programmer’s Guide and Reference 139
Editing Workspace input
Using namecompletion
The Workspace provides name completion for all commands.
In addition, for commands that take a program symbol (such as avariable, function, or object) as an argument, the Workspace providesname completion for these symbols. This feature can be useful if yoususpect there are overloaded functions in the code that you aredebugging. You complete commands by entering some text andpressing the Tab key twice:
pdm -> text<Tab><Tab>
Control-u Deletes the line.
Esc-d Deletes the next word.
Esc-Delete Deletes from the cursor to the beginning of the previous word.
Control-p Displays the previous input line in the history list.
Control-n Displays the next input line in the history list.
Esc-< Displays the first input line in the history list.
Control-t Transposes the previous two characters.
Esc-t Transposes the words on either side of the cursor.
Control-v char Inserts the key sequence char as text without interpreting key definition. You canuse this to insert control characters.
Control-y Pastes the text that was previously deleted.
Control-j Executes this line.
Control-l Skips a line.
Esc-u Changes the next word to uppercase.
Esc-l Changes the next word to lowercase.
Esc-c Capitalizes the next word.
Control-_ Undoes the last edit.
Table 11 Line Editing Commands (Continued)
Key Sequence Action
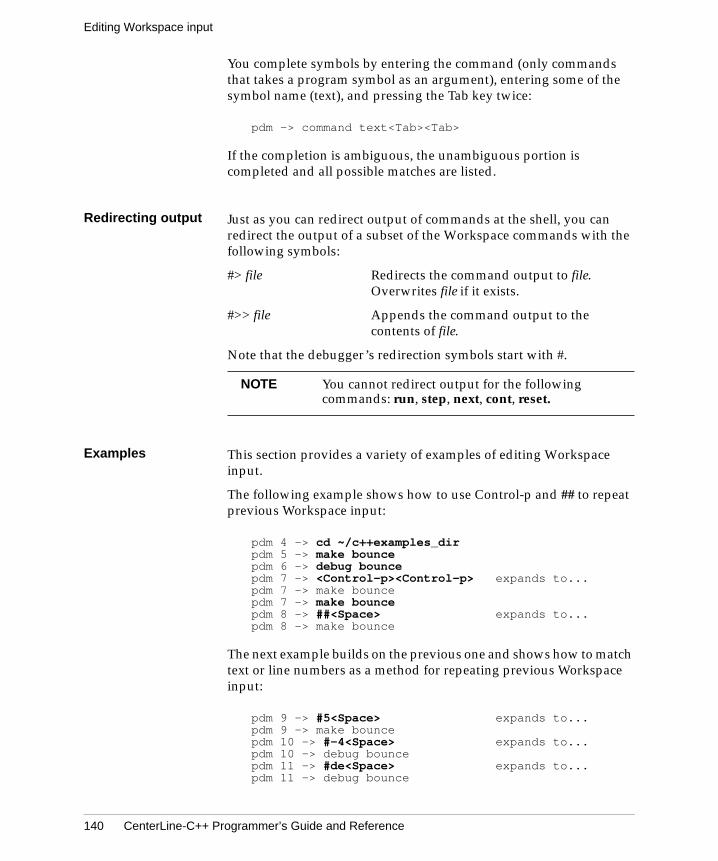
Editing Workspace input
140 CenterLine-C++ Programmer’s Guide and Reference
You complete symbols by entering the command (only commandsthat takes a program symbol as an argument), entering some of thesymbol name (text), and pressing the Tab key twice:
pdm -> command text<Tab><Tab>
If the completion is ambiguous, the unambiguous portion iscompleted and all possible matches are listed.
Redirecting output Just as you can redirect output of commands at the shell, you canredirect the output of a subset of the Workspace commands with thefollowing symbols:
#> file Redirects the command output to file.Overwrites file if it exists.
#>> file Appends the command output to thecontents of file.
Note that the debugger’s redirection symbols start with #.
Examples This section provides a variety of examples of editing Workspaceinput.
The following example shows how to use Control-p and ## to repeatprevious Workspace input:
pdm 4 -> cd ~/c++examples_dirpdm 5 -> make bouncepdm 6 -> debug bouncepdm 7 -> <Control-p><Control-p> expands to...pdm 7 -> make bouncepdm 7 -> make bouncepdm 8 -> ##<Space> expands to...pdm 8 -> make bounce
The next example builds on the previous one and shows how to matchtext or line numbers as a method for repeating previous Workspaceinput:
pdm 9 -> #5<Space> expands to...pdm 9 -> make bouncepdm 10 -> #-4<Space> expands to...pdm 10 -> debug bouncepdm 11 -> #de<Space> expands to...pdm 11 -> debug bounce
NOTE You cannot redirect output for the followingcommands: run, step, next, cont, reset.

CenterLine-C++ Programmer’s Guide and Reference 141
Editing Workspace input
To expand tokens from the previous line of input:
pdm 10 -> make staticpdm 11 -> debug #*<Space> expands to...pdm 11 -> debug staticpdm 12 -> make static bounce bounce_fixedpdm 13 -> debug #:2<Space> expands to...pdm 13 -> debug bounce
To list the C source files in your current working directory using Shellmetacharacter expansion, issue the following Workspace command:
pdm -> ls *.cVector.c table.c
To redirect the output of the printenv command to the file my_vars:
pdm -> printenv #> my_vars
To use command and name completion to list the source filecontaining the doDraw() routine:
pdm -> lis<Tab><Tab> completes to...pdm -> list do<Tab>Tab> ambiguous, completes to...doDraw__13DrawableShapeFv do_ipfx__7istreamFi
do_opfx__7ostreamFvpdm -> list doD<Tab>Tab> completes to...pdm -> list doDraw__13DrawableShapeFvListing file ‘c++examples_dir/shapes.C’, line 89
See also "Invoking Workspace commands" on page 131
"Saving your debugging session" on page 190
Loading files for debugging
142 CenterLine-C++ Programmer’s Guide and Reference
Task: Loading files for debugging
You can load the following files for debugging
• A fully-linked executable
• A fully-linked executable and a corefile generated by it
• A fully-linked executable and a process running that executable
Each time you debug an executable, the debugger unloads thepreviously loaded executable.
Loading anexecutable
Enter the following command, where executable is the name of thefully-linked executable:
pdm -> debug executable
Loading anexecutable with acorefile
Enter the following command, where executable is the name of thefully-linked executable and core is the name of its associated corefile:
pdm -> debug executable core
Loading anexecutable with arunning process
Enter the following command, where executable is the name of thefully-linked executable and process_id is the process ID of theprocess running the executable:
pdm -> debug executable process_id
When you load an executable with a process ID, the debugger attachesto the process. To detach from the process, use the detach Workspacecommand.
See also "Debugging an executable with a corefile" on page 178
"Debugging a running process" on page 182
debug on page 212
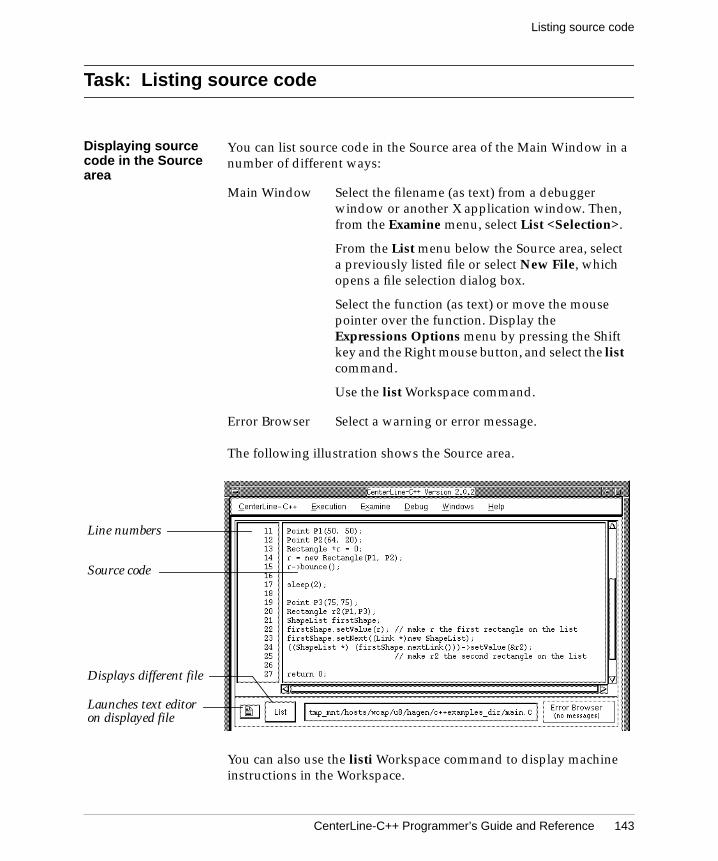
CenterLine-C++ Programmer’s Guide and Reference 143
Listing source code
Task: Listing source code
Displaying sourcecode in the Sourcearea
You can list source code in the Source area of the Main Window in anumber of different ways:
The following illustration shows the Source area.
You can also use the listi Workspace command to display machineinstructions in the Workspace.
Main Window Select the filename (as text) from a debuggerwindow or another X application window. Then,from the Examine menu, select List <Selection>.
From the List menu below the Source area, selecta previously listed file or select New File, whichopens a file selection dialog box.
Select the function (as text) or move the mousepointer over the function. Display theExpressions Options menu by pressing the Shiftkey and the Right mouse button, and select the listcommand.
Use the list Workspace command.
Error Browser Select a warning or error message.
Line numbers
Source code
Launches text editoron displayed file
Displays different file

Listing source code
144 CenterLine-C++ Programmer’s Guide and Reference
Displaying thesource files forcurrent executable
To display all the known source files for the current executable thatis loaded in the debugger, use the contents command with the allargument:
pdm -> contents all
The contents command lists only the files that were compiled withdebugging information (the -g switch).
Displaying thefunctions definedin a source file
You can also display the objects or functions that are declared ordefined in a particular source file. To do so, use the contentscommand and specify the filename as an argument:
pdm -> contents filename
Occasionally, the contents filename command displays only a partiallist of the objects declared or defined in filename.
Example The following example uses the contents command with the Bounceprogram:
pdm -> cd ~/c++examples_dirpdm -> make bouncepdm -> debug bouncepdm 25 -> contents xfixed.CContents of source: xfixed.Cchar __std__xfixed_C_openWindow_();char __sti__xfixed_C_openWindow_();char closeWindow(void);char drawCenterLine(void);char drawCircle(short, short, short, int);char drawRect(int, int, int, int, int);char makeFilled(void);char openWindow(int, int, int, int);
See also contents on page 211
list on page 228
listi on page 230
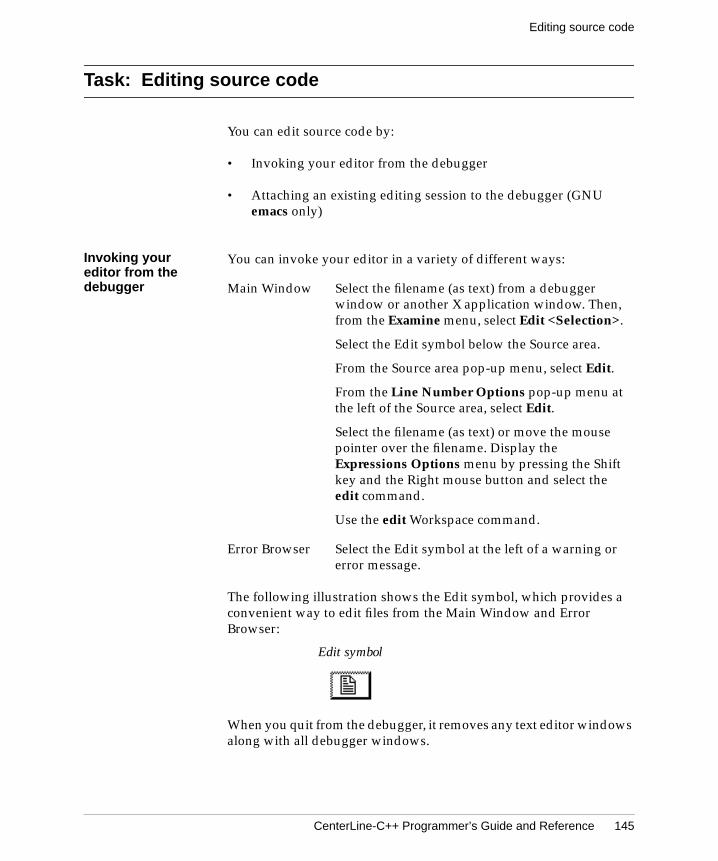
CenterLine-C++ Programmer’s Guide and Reference 145
Editing source code
Task: Editing source code
You can edit source code by:
• Invoking your editor from the debugger
• Attaching an existing editing session to the debugger (GNUemacs only)
Invoking youreditor from thedebugger
You can invoke your editor in a variety of different ways:
The following illustration shows the Edit symbol, which provides aconvenient way to edit files from the Main Window and ErrorBrowser:
When you quit from the debugger, it removes any text editor windowsalong with all debugger windows.
Main Window Select the filename (as text) from a debuggerwindow or another X application window. Then,from the Examine menu, select Edit <Selection>.
Select the Edit symbol below the Source area.
From the Source area pop-up menu, select Edit.
From the Line Number Options pop-up menu atthe left of the Source area, select Edit.
Select the filename (as text) or move the mousepointer over the filename. Display theExpressions Options menu by pressing the Shiftkey and the Right mouse button and select theedit command.
Use the edit Workspace command.
Error Browser Select the Edit symbol at the left of a warning orerror message.
Edit symbol
Editing source code
146 CenterLine-C++ Programmer’s Guide and Reference
If you use the emacs editor and lower or iconify the window betweenedits, the debugger cannot always raise or deiconify the emacswindow.
Connecting GNUEmacs to thedebugger
To connect an existing GNU Emacs session to the debugger:
1 Put the following lines of ELISP code in your .emacs startup file.In this example, replace directories with the absolute path to yourCenterLine directory and arch-os with your platform-specificdirectory, such as sparc-sunos4 or sparc-solaris2.
(setq load-path ( cons "directories/CenterLine/lib/lisp" load-path))(setq exec-path ( cons "directories/CenterLine/arch-os/bin" exec-path))(require ’clipc)
The exec-path line tells Emacs which directories to search whenexecuting a binary. The emacs edit server uses theclms_query -b command to get the correct session ID, and if itcannot locate the clms_query binary, the connection fails.
2 Load the ELISP lines in your current Emacs session. To do so,select these lines of ELISP and evaluate the region in Emacs(M-x eval-region).
3 Establish a connection to the debugger by using the Emacscommand M-x cl-edit.
The next time you invoke Emacs, the ELISP lines are automaticallyloaded from your .emacs startup file. You just need to establish aconnection with M-x cl-edit.
When you quit from the debugger, any Emacs windows that youconnected to it remain open.
See also edit on page 219
"Selecting an editor to use with the debugger" on page 119
CenterLine-C++ Programmer’s Guide and Reference 147
Building and reloading executables
Task: Building and reloading executables
Using make in theWorkspace
For your convenience, you can use the make command in theWorkspace to rebuild your fully linked executable. The makecommand behaves the same way in the Workspace as it does in ashell.
To build your default target:
pdm -> make
To build a specific target:
pdm -> make target...
You can also use other make options. For a complete list of options,refer to the make manual page that was supplied with your operatingsystem.
Loading rebuiltexecutables
To load rebuilt executables into the debugger, you can either:
• Select the Build button in the Button panel of the Main Window
• Use the build command:
pdm -> build
If the executable has not changed since it was last loaded, pdm doesnot reload it.
NOTE The directory containing the make command,which varies from platform to platform, must be inyour PATH environment variable. For example, onthe sparc-solaris2 platform, make is installed in/usr/ccs/bin.
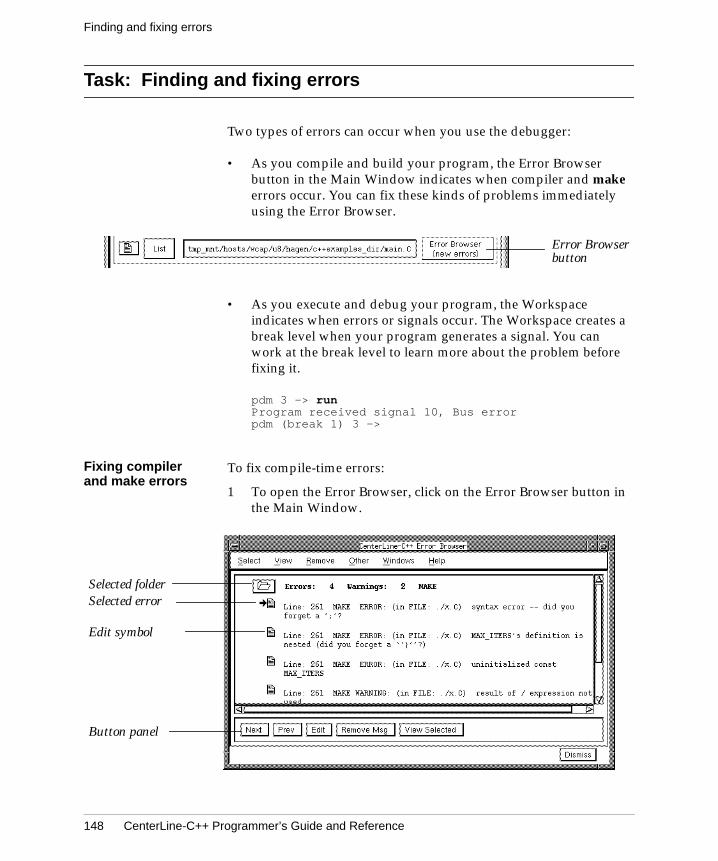
Finding and fixing errors
148 CenterLine-C++ Programmer’s Guide and Reference
Task: Finding and fixing errors
Two types of errors can occur when you use the debugger:
• As you compile and build your program, the Error Browserbutton in the Main Window indicates when compiler and makeerrors occur. You can fix these kinds of problems immediatelyusing the Error Browser.
• As you execute and debug your program, the Workspaceindicates when errors or signals occur. The Workspace creates abreak level when your program generates a signal. You canwork at the break level to learn more about the problem beforefixing it.
pdm 3 -> runProgram received signal 10, Bus errorpdm (break 1) 3 ->
Fixing compilerand make errors
To fix compile-time errors:
1 To open the Error Browser, click on the Error Browser button inthe Main Window.
Error Browserbutton
Button panel
Selected folderSelected error
Edit symbol

CenterLine-C++ Programmer’s Guide and Reference 149
Finding and fixing errors
2 To display the error, select the folder for the file.If the debugger can associate an error with a specific file, thenthe messages appear under the folder for that file. Messages thatare not associated with a particular file are listed under a folderlabeled MAKEn, where n is a unique number.
3 To display the code in the Source area, select the message. Theline causing the error is highlighted in the Source area.
4 To edit the code, select the Edit symbol to the left of the message.
5 Fix the problem in your text editor and save the file.
6 Rebuild your executable with the make command.
7 Click on the Build button to load the new version of theexecutable.
Fixing errors thatoccur duringexecution
To fix run-time errors:
1 Examine your program at the break level. Refer to "UsingWorkspace break levels" on page 160.
2 Edit the code. Refer to "Editing source code" on page 145.
3 Fix the problem in your text editor and save the file.
4 Rebuild your executable with the make command:
pdm -> make target
5 Click on the Build button to load the new version of theexecutable.
Removing errorsfrom the ErrorBrowser
To remove messages from the Error Browser:
1 Open the Error Browser.
2 Select the folder for the file.
3 Select the message.
4 Select the Remove Selected button in the Button panel.
Example “Correcting compiler and make errors” on page 107 provides anexample of using the Error Browser.
See also "Editing source code" on page 145
"Using Workspace break levels" on page 160
"Moving in the execution stack" on page 166
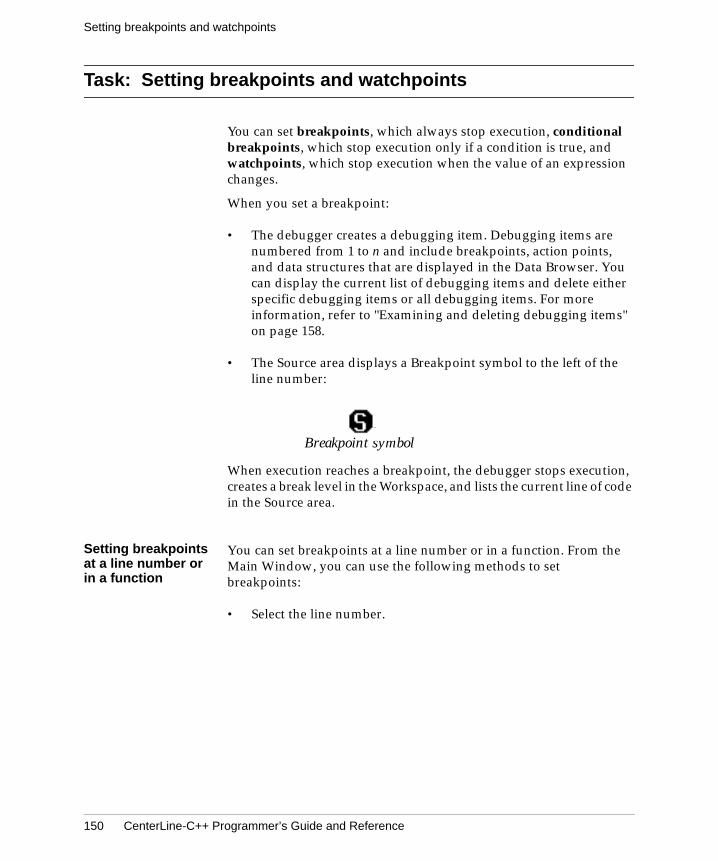
Setting breakpoints and watchpoints
150 CenterLine-C++ Programmer’s Guide and Reference
Task: Setting breakpoints and watchpoints
You can set breakpoints, which always stop execution, conditionalbreakpoints, which stop execution only if a condition is true, andwatchpoints, which stop execution when the value of an expressionchanges.
When you set a breakpoint:
• The debugger creates a debugging item. Debugging items arenumbered from 1 to n and include breakpoints, action points,and data structures that are displayed in the Data Browser. Youcan display the current list of debugging items and delete eitherspecific debugging items or all debugging items. For moreinformation, refer to "Examining and deleting debugging items"on page 158.
• The Source area displays a Breakpoint symbol to the left of theline number:
When execution reaches a breakpoint, the debugger stops execution,creates a break level in the Workspace, and lists the current line of codein the Source area.
Setting breakpointsat a line number orin a function
You can set breakpoints at a line number or in a function. From theMain Window, you can use the following methods to setbreakpoints:
• Select the line number.
Breakpoint symbol
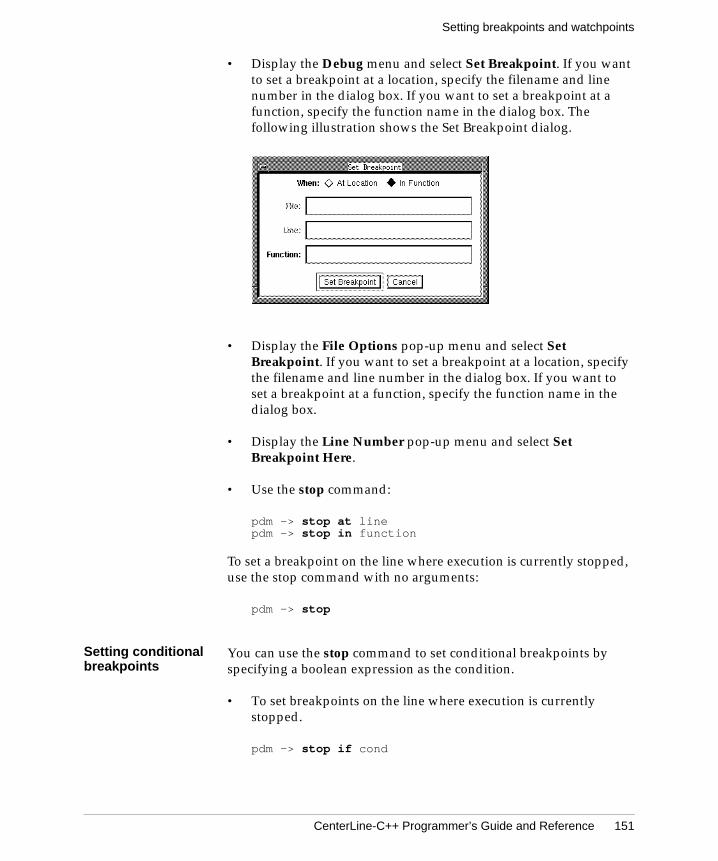
CenterLine-C++ Programmer’s Guide and Reference 151
Setting breakpoints and watchpoints
• Display the Debug menu and select Set Breakpoint. If you wantto set a breakpoint at a location, specify the filename and linenumber in the dialog box. If you want to set a breakpoint at afunction, specify the function name in the dialog box. Thefollowing illustration shows the Set Breakpoint dialog.
• Display the File Options pop-up menu and select SetBreakpoint. If you want to set a breakpoint at a location, specifythe filename and line number in the dialog box. If you want toset a breakpoint at a function, specify the function name in thedialog box.
• Display the Line Number pop-up menu and select SetBreakpoint Here.
• Use the stop command:
pdm -> stop at linepdm -> stop in function
To set a breakpoint on the line where execution is currently stopped,use the stop command with no arguments:
pdm -> stop
Setting conditionalbreakpoints
You can use the stop command to set conditional breakpoints byspecifying a boolean expression as the condition.
• To set breakpoints on the line where execution is currentlystopped.
pdm -> stop if cond
Setting breakpoints and watchpoints
152 CenterLine-C++ Programmer’s Guide and Reference
• To set breakpoints on a specific source line:
pdm -> stop at line if cond
• To set breakpoints in a specific function:
pdm -> stop in func if cond
Setting breakpointsin shared libraries
To set a breakpoint in a C library function, such as printf():
1 Set a breakpoint in main():
pdm -> stop in mainstop (1) set at “main.C”:n, main().
2 Run the executable:
pdm -> runExecuting: program
3 Set the breakpoint in the C library function:
pdm (break 1) -> stop in functionstop (2) set at 0xf76c9514, function().
4 Continue execution to reach the breakpoint:
pdm (break 1) -> contStopped in function: ‘function’. No source file info.
You can then use machine debugging commands to examine the Clibrary function. Refer to "Debugging machine instructions" on page186 for more information.
Once you set a breakpoint in a C library function this way, thedebugger retains the breakpoint in subsequent runs of the program.
Setting breakpointsin machine code
If you are debugging code that has not been compiled with the -gswitch, you can set breakpoints in machine code. With the stopicommand, you set breakpoints on the current line where executionis stopped or at a specific address:
pdm -> stopipdm -> stopi at address
For more information, refer to "Debugging machine instructions" onpage 186.
CenterLine-C++ Programmer’s Guide and Reference 153
Setting breakpoints and watchpoints
Setting breakpointsin inline functions
To set a breakpoint in an inline function, you must compile theexecutable with the +d switch, which does not expand inlinefunctions as inline but as static functions.
Setting watchpoints You can use the watch expr command in gdb to set watchpoints. Formore information about using gdb in the CenterLine-C++ debugger,refer to gdb on page 222 and gdb_mode on page 223.
Example In this example, you set a conditional breakpoint in the Bounceprogram.
1 Build and load the Bounce program:
pdm -> cd ~/c++examples_dirpdm -> make bouncepdm -> debug bounce
2 List shapes.C:
pdm -> list shapes.C
3 In the Source area, scroll to the DrawableShape::drawMovefunction on line 102.
4 In the Workspace, set a breakpoint in this function that occursonly if the value of count is 250:
pdm -> stop in DrawableShape::drawMove if count == 250stop(1) set at “shapes.C”:104, DrawableShape::drawMove(int).
5 Run the Bounce program by selecting the Run button in theButton panel. The Bounce window appears, and the Rectanglebounces. When the breakpoint is reached, the rectangle stopsbouncing and a break level is generated in the Workspace.
6 Check the value of the count variable:
pdm -> print count(int) 250
7 Continue execution of the Bounce program by selecting theContinue button in the Button panel.
NOTE If you have not yet set up the CenterLine-C++examples directory, refer to “Setting up theexamples directory” on page 9 for instructions.
Setting breakpoints and watchpoints
154 CenterLine-C++ Programmer’s Guide and Reference
See also stop on page 252
stopi on page 254
"Setting actions" on page 155
"Examining and deleting debugging items" on page 158
"Using Workspace break levels" on page 160
CenterLine-C++ Programmer’s Guide and Reference 155
Setting actions
Task: Setting actions
You can set an action on a line or in a function with the whencommand. An action performs a set of Workspace commands whenexecution reaches the line or function. To set an action:
1 Enter the when command with the desired arguments in theWorkspace:
pdm -> when ...sets action on current linepdm -> when at line ...sets action on linepdm -> when in func ...sets action in function
2 Optionally, add a boolean condition to the arguments. Thisboolean condition must be met for the action to be carried out:
pdm -> when if condpdm -> when at line if condpdm -> when in func if cond
3 Enter one Workspace command per line at the when prompt:
pdm -> when [arguments]when -> commandwhen -> commandwhen -> ...
4 Since all actions include an implicit breakpoint (stop command),add the cont command as the last command if you want yourprogram to continue execution after carrying out the action:
pdm -> when [arguments]when -> commandwhen -> ...when -> commandwhen -> cont
5 End the action by entering a period (.) or end as the lastcommand or by pressing Control-d.
When you set an action, the debugger creates a debugging item anddisplays the action symbol to the left of the line number in the sourcearea:
Action symbol
Setting actions
156 CenterLine-C++ Programmer’s Guide and Reference
When an action is triggered during execution of your program, thedebugger displays the Execution symbol on the line in the Source area,stops execution of the program, creates a break level, and evaluatesthe commands in the action.
Example In this example, you set two different kinds of actions in the Bounceprogram.
1 Build and load the Bounce program:
pdm -> cd ~/c++examples_dirpdm -> make bouncepdm -> debug bounce
2 List mainfixed.C:
pdm -> list mainfixed.C
3 Set an action on line 15 that prints the value of *r, which is therectangle being bounced.
pdm -> when at 15when (1) set at “mainfixed.C”:15, main().Type commands to be executed (one per line). Finishby typing a single “.” or “end”when -> print rwhen -> contwhen -> .pdm ->
4 Set another action in the DrawableShape::drawMove functionthat increments the count variable when it reaches 300:
pdm -> when in DrawableShape::drawMove if count ==300when (2) set at “mainfixed.C”:15, main().Type commands to be executed (one per line). Finishby typing a single “.” or “end”when -> dumpwhen -> contwhen -> .pdm ->
5 Select the Run button in the Button panel.
As the Bounce program executes, it carries out the action.
NOTE If you have not yet set up the CenterLine-C++examples directory, refer to “Setting up theexamples directory” on page 9 for instructions.
CenterLine-C++ Programmer’s Guide and Reference 157
Setting actions
See also "Examining and deleting debugging items" on page 158
"Using Workspace break levels" on page 160
when on page 260
Examining and deleting debugging items
158 CenterLine-C++ Programmer’s Guide and Reference
Task: Examining and deleting debugging items
Each time you set a breakpoint, set an action point, or display a datastructure, the debugger sets a debugging item.
You can examine debugging items to see everything that affects theexecution of your program. Although you might not think that dataitems affect execution of your program, they actually do. At eachbreak in execution, the debugger updates all data items. For moreinformation, refer to “Updating data items” on page 172.
Examiningdebugging items
You can use two different methods to examine debugging items:
• Display the Examine menu and select Status.
• Enter the status command in the Workspace.
With either method, the Workspace lists all the debugging items:
pdm (break 1) 6 -> status(5) stop at “main.C”:17 /* main() */(6) display r::r(7) display *r::r
Deleting debuggingitems
You can delete debugging items in a variety of different ways:
Main Window From the Debug menu, display the Deletesubmenu, which displays all debugging itemscurrently defined. Select the item to be deleted.
Source area Select the Breakpoint symbol itself.
or
Display the File Options pop-up menu and thenthe Delete submenu. Select the item to be deleted.
Workspace Display the Workspace Options pop-up menuand then the Delete submenu. Select the item youwant to delete.
or
Use the delete command.
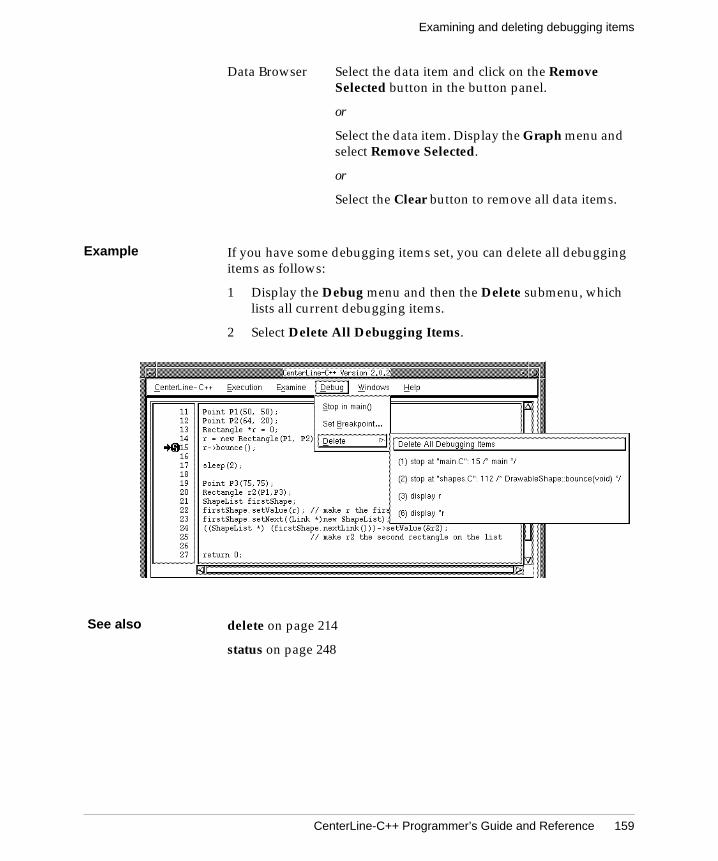
CenterLine-C++ Programmer’s Guide and Reference 159
Examining and deleting debugging items
Example If you have some debugging items set, you can delete all debuggingitems as follows:
1 Display the Debug menu and then the Delete submenu, whichlists all current debugging items.
2 Select Delete All Debugging Items.
See also delete on page 214
status on page 248
Data Browser Select the data item and click on the RemoveSelected button in the button panel.
or
Select the data item. Display the Graph menu andselect Remove Selected.
or
Select the Clear button to remove all data items.

Using Workspace break levels
160 CenterLine-C++ Programmer’s Guide and Reference
Task: Using Workspace break levels
Generating a breaklevel
When your program begins executing in the debugger, it is at thetop level of execution in the Workspace. To create a different level ofexecution, called a break level, you can interrupt your program’sexecution in one of the following ways:
• Press Control-c while your program is executing.
• Set a breakpoint before running your program. When executionreaches a breakpoint in the program, a break level is created.
• Cause a signal to occur while your program is executing. If thesignal is not handled by your program, a break level is created.
The current break level is indicated by the Workspace prompt:
pdm (break 1) 8 ->
Examining yourprogram at a breaklevel
Working at a break level allows you to preserve the flow ofexecution at one point, work with a different flow of execution, andthen return to continue the previous flow of execution.
You can use the following Workspace commands to explore yourprogram at a break level. Many of these commands are available fromthe Examine menu, Execution menu, and Button panel in the MainWindow.
cont Continues execution from a break location.
delete Deletes an existing debugging item on thecurrent line.
down Moves the current scope location down theexecution stack.
dump Displays all local variables.
edit Invokes your editor, positioned at thecurrent line.
file Displays and sets the current list location.
NOTE In the debugger, there is only one break level.
CenterLine-C++ Programmer’s Guide and Reference 161
Using Workspace break levels
next Executes the next line; does not enterfunctions.
print Prints the value of variables or expressions.
step Steps execution by statement, enteringfunctions.
stepout Continues execution until the currentfunction returns.
stop Sets a breakpoint.
up Moves the current scope location up theexecution stack.
whatis Displays all uses of a name for a function,data variable, tag name, enumerator, typedefinition, or macro definition.
when Specifies statements to execute whenexecution triggers the action.
where Displays the execution stack.
whereami Displays the current break and scopelocations.
whereis Lists the defining instance of a symbol. Ifthe symbol is an initialized global variable,whereis also indicates the location at whichit is initialized.
For detailed information on how to use each of these commands, seethe Man Browser or Chapter 7, “Command Reference,” on page 201.
While at a break level, you can examine the state of data structures thatare currently in scope by using the Data Browser. For moreinformation, refer to "Examining data structures" on page 169.
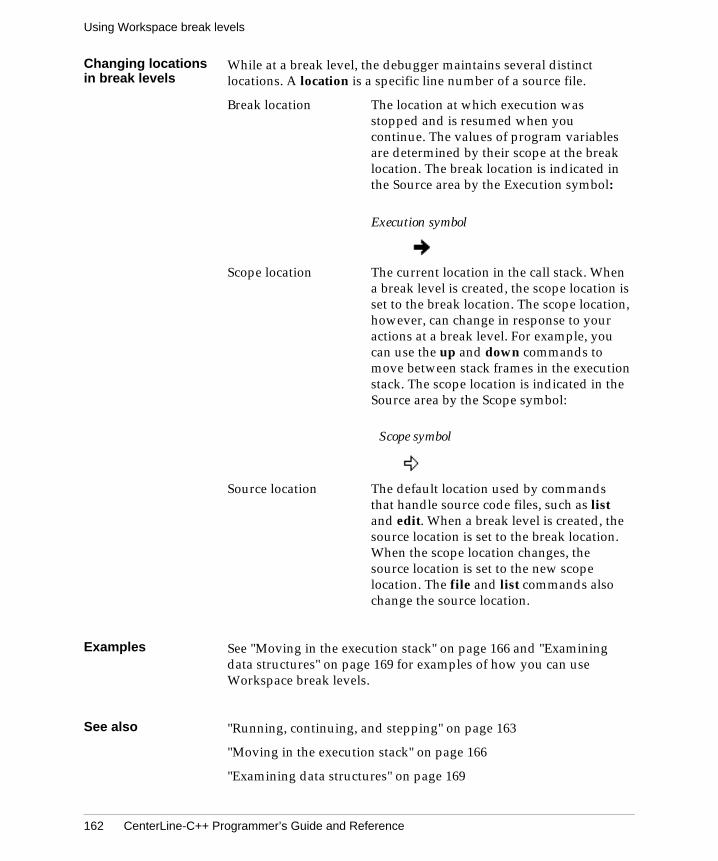
Using Workspace break levels
162 CenterLine-C++ Programmer’s Guide and Reference
Changing locationsin break levels
While at a break level, the debugger maintains several distinctlocations. A location is a specific line number of a source file.
Break location The location at which execution wasstopped and is resumed when youcontinue. The values of program variablesare determined by their scope at the breaklocation. The break location is indicated inthe Source area by the Execution symbol:
Scope location The current location in the call stack. Whena break level is created, the scope location isset to the break location. The scope location,however, can change in response to youractions at a break level. For example, youcan use the up and down commands tomove between stack frames in the executionstack. The scope location is indicated in theSource area by the Scope symbol:
Source location The default location used by commandsthat handle source code files, such as listand edit. When a break level is created, thesource location is set to the break location.When the scope location changes, thesource location is set to the new scopelocation. The file and list commands alsochange the source location.
Examples See "Moving in the execution stack" on page 166 and "Examiningdata structures" on page 169 for examples of how you can useWorkspace break levels.
See also "Running, continuing, and stepping" on page 163
"Moving in the execution stack" on page 166
"Examining data structures" on page 169
Execution symbol
Scope symbol
CenterLine-C++ Programmer’s Guide and Reference 163
Running, continuing, and stepping
Task: Running, continuing, and stepping
Running yourprogram
You can run your program using any of these methods:
• Display the Execution menu and select Run.
• Select the Run button in the Button panel.
• Issue the run command in the Workspace:
pdm -> runpdm -> run arguments
With any of the methods, the debugger executes main() afterinitializing all variables and processing any command-linearguments. If you specify arguments with the run command, thedebugger uses these arguments each subsequent time you use theRun menu command, Run button, or the run command withoutarguments.
You can use the rerun command to run your program with differentarguments instead of passing different arguments to run. Forexample, if you were testing your program with two different files asinput arguments, you could issue run file1 and rerun file2 and thenalternate between run and rerun as needed.
Continuing fromthe break location
If your program is stopped, you can continue execution using one ofthe following methods:
• Display the Execution menu and select Continue.
• Select the Continue button in the Button panel.
• Issue the cont command in the Workspace.
The cont command has additional arguments for continuing from aspecific line number or with a specific signal. For more information,refer to cont on page 210.
Running, continuing, and stepping
164 CenterLine-C++ Programmer’s Guide and Reference
Resetting to the toplevel
To transfer control from the break level to the top level, issue thereset command from the Workspace:
pdm -> resetResetting to top level.
There are two other situations where control is transferred from thebreak level to the top level:
• If you rebuild your executable with the make command, andthen reload the new executable with the build command, thedebugger resets to the top level.
• If you delete all breakpoints and then continue execution withthe cont or run commands, the program runs to completion,and control returns to the top level.
Stepping throughyour program
You can step through your program from a break level by using thestep, next, and stepout commands in the Workspace. The step andnext commands are also available on the Execution menu and in theButton panel.
• The step command continues execution until the next statementis reached. If execution is stopped on a line containing multiplestatements, step executes the next statement only. Also, stepenters functions. To step through more than one statement, youcan pass a numeric argument to the step command:
pdm -> step n
• The next command executes all statements on the current sourcecode line. It does not enter functions with one exception—if thefunction contains a breakpoint that is triggered, next enters thefunction and stops at the breakpoint. To step through more thanone line, you can pass a numeric argument to the nextcommand.
pdm -> next n
• The stepout command continues execution until the currentfunction returns. This command can be useful if youaccidentally entered a function by using step instead of next.
pdm -> stepoutRun till exit from #n function at filename:line
CenterLine-C++ Programmer’s Guide and Reference 165
Running, continuing, and stepping
When you step through your program, the Execution symbol in theSource area shows the current line. In addition, data items in the DataBrowser are automatically updated at every break in execution (see"Examining data structures" on page 169).
See also "Debugging machine instructions" on page 186
cont on page 210
next on page 233
rerun on page 238
reset on page 239
run on page 240
step on page 249
stepout on page 251
NOTE If you are stepping through your code and havemany data items displayed in the Data Browser,the time spent in updating the data items at eachbreak in execution can degrade performance. Youcan improve performance by minimizing thenumber of items you have displayed, or bydismissing the Data Browser.

Moving in the execution stack
166 CenterLine-C++ Programmer’s Guide and Reference
Task: Moving in the execution stack
The execution stack consists of all the functions that are in the processof execution. Each function has a stack frame. Stack frames arenumbered, beginning at 0, as they are placed on the execution stack.
Displaying theexecution stack
To display the stack, use the where command:
pdm (break 1) -> where
The execution stack is displayed starting from the location whereexecution has stopped in the current break level. For example, in thefollowing stack, execution is stopped in makeTable (#0).
#0 makeTable (rows=0x8ae0, cols=0x8ed0, length=500, width=600, height=600, iwidth=64, iheight=20, margin=0) at table.c:45#1 0x3258 in DrawableShape::createTable (this=0x8ab0) at shapes.C:132#2 0x30bc in DrawableShape::doDraw (this=0x8ab0) at shapes.C:89#3 0x31d0 in DrawableShape::bounce (this=0x8ab0) at shapes.C:112#4 0x2b90 in main () at mainfixed.C:15
Moving in theexecution stack
When a break level is generated, the break location and the scopelocation are identical—all variables, types, and macros are scoped tothe point at which execution was interrupted. You can change thescope location to another function on the execution stack with theup and down commands.
When you issue up or down to move in the execution stack, thedebugger displays the scope location (now different from the breaklocation) in the Source area using the Scope symbol.
With the up command, you move to the stack frame with the nexthigher number. If the scope location is currently at #1, issuing upmoves to #2. The converse is true with the down command; it movesthe scope location to the next lower numbered stack frame.
Scope symbol
CenterLine-C++ Programmer’s Guide and Reference 167
Moving in the execution stack
Displaying thecurrent stacklocation
The whereami command shows where you currently are in theexecution stack. The whereami command displays the scopelocation in the Source area (scrolling the display if necessary) and, ifthe scope location is different from the break location, displays thebreak location in the Workspace.
Example In this example, you examine the execution stack of a simpleprogram that contains a static constructor, the static.C program,which is provided in the c++examples_dir directory.
1 Change to the CenterLine-C++ examples directory:
pdm -> cd ~/c++examples_dir
2 Build, load, and list the static.C program by issuing thefollowing commands in the Workspace:
pdm -> make static...pdm -> debug staticDebugging program ‘static’pdm -> list static.CListing file c++_examples/static.C, line 1
3 Select the line number on lines 7 and 8 to set breakpoints onthose lines.
4 Select the Run button in the Button panel.
The static program executes and stops in main on line 8.
5 To examine the stack, use the where command:
pdm (break 1) 20 -> where#0 main () at static.C:8
6 Select the Continue button in the Button panel.
The program stops on line 7 at the static constructor foo.
NOTE If you have not yet set up the CenterLine-C++examples directory, refer to “Setting up theexamples directory” on page 9 for instructions.
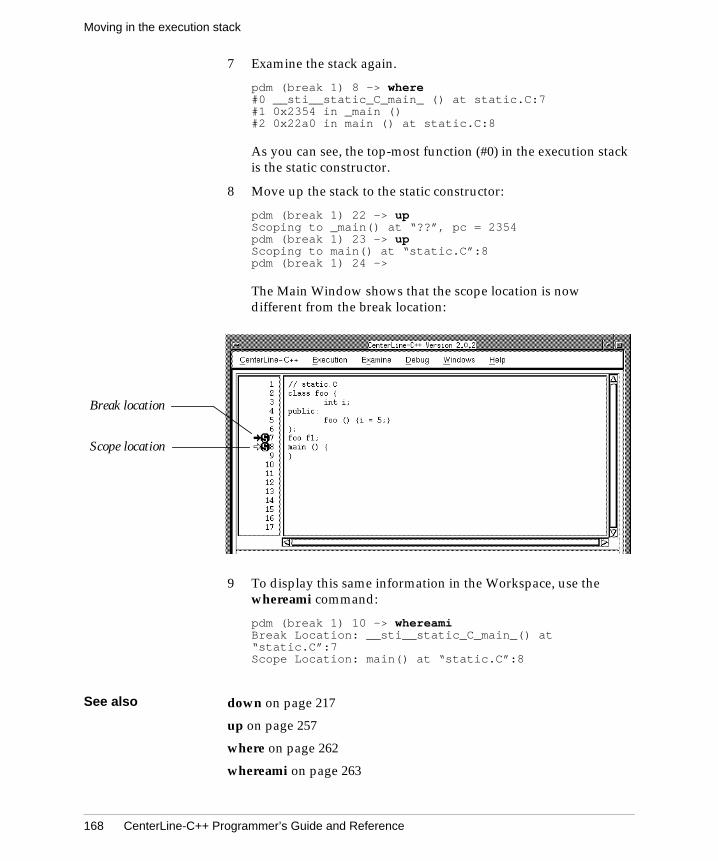
Moving in the execution stack
168 CenterLine-C++ Programmer’s Guide and Reference
7 Examine the stack again.
pdm (break 1) 8 -> where#0 __sti__static_C_main_ () at static.C:7#1 0x2354 in _main ()#2 0x22a0 in main () at static.C:8
As you can see, the top-most function (#0) in the execution stackis the static constructor.
8 Move up the stack to the static constructor:
pdm (break 1) 22 -> upScoping to _main() at “??”, pc = 2354pdm (break 1) 23 -> upScoping to main() at “static.C”:8pdm (break 1) 24 ->
The Main Window shows that the scope location is nowdifferent from the break location:
9 To display this same information in the Workspace, use thewhereami command:
pdm (break 1) 10 -> whereamiBreak Location: __sti__static_C_main_() at“static.C”:7Scope Location: main() at “static.C”:8
See also down on page 217
up on page 257
where on page 262
whereami on page 263
Break location
Scope location
CenterLine-C++ Programmer’s Guide and Reference 169
Examining data structures
Task: Examining data structures
Once you have loaded your executable into the debugger or areexecuting it in the debugger, you can examine data structures. You canonly examine data structures that are currently in scope:
• When your program is at the top level, you can examine onlyglobal data.
• When your program is at a break level, you can examine globaland local data. For example, you can use the whatis command,the print command, the dump command, and the Data Browser.
Each time you display a data structure in the Data Browser, thedebugger sets a debugging item. For more information aboutdebugging items, refer to "Examining and deleting debugging items"on page 158.
Displaying datastructures in theWorkspace
To display all uses of a name for a function, data variable, tag name,enumerator, type definition or macro definition, use the whatiscommand:
pdm -> whatis name
To display the defining instance of a symbol, use the whereiscommand:
pdm -> whereis name
If the symbol is an initialized global variable, whereis also displaysthe location at which the variable is initialized.
To display the name and value of each variable that is local to thecurrent scope location, use the dump command:
pdm -> dump
To print the value of a specific variable, use the print command:
pdm -> print variable
You can improve performance when displaying data structures bysetting the class_as_struct option as described on page 192.
Examining data structures
170 CenterLine-C++ Programmer’s Guide and Reference
Assigning valuesto variables
You can use the assign and set commands, which are functionallyequivalent, to evaluate an expression and assign it to a variable. Byassigning a value to a variable in the Workspace, you can directlymanipulate values in code that you are debugging. The assign andset commands take the following form:
pdm -> assign variable = expressionpdm -> set variable = expression
Displaying datastructures in theData Browser
You use the Data Browser to display a graphical representation ofany data structure. This graphical representation is called a dataitem. To display the data item for a data structure, you can:
Main Window From any debugger window, select a variable thatis currently in scope. Display the Examine menuand select Display<Selection>.
Data Browser Display the Graph menu and select NewExpression. In the dialog box, enter the variable orexpression and select the Data Browse button.
Workspace Use the display command.
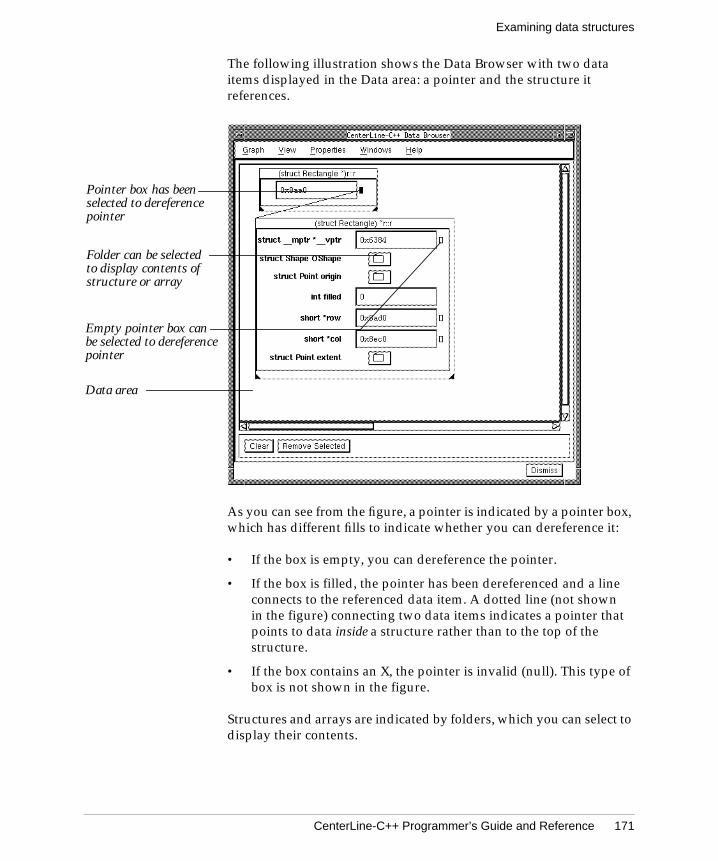
CenterLine-C++ Programmer’s Guide and Reference 171
Examining data structures
The following illustration shows the Data Browser with two dataitems displayed in the Data area: a pointer and the structure itreferences.
As you can see from the figure, a pointer is indicated by a pointer box,which has different fills to indicate whether you can dereference it:
• If the box is empty, you can dereference the pointer.
• If the box is filled, the pointer has been dereferenced and a lineconnects to the referenced data item. A dotted line (not shownin the figure) connecting two data items indicates a pointer thatpoints to data inside a structure rather than to the top of thestructure.
• If the box contains an X, the pointer is invalid (null). This type ofbox is not shown in the figure.
Structures and arrays are indicated by folders, which you can select todisplay their contents.
Pointer box has beenselected to dereference
Folder can be selectedto display contents ofstructure or array
Data area
pointer
Empty pointer box canbe selected to dereferencepointer
Examining data structures
172 CenterLine-C++ Programmer’s Guide and Reference
Updating data items When data has changed, data items are automatically updated atevery break in execution and each time you use the assign and setcommands in the Workspace.
Working with dataitems
You can display as many data structures as you want in the DataBrowser. If you display a number of data items, you can use thescrollbars to view them.
You can select data items and manipulate them with menus. To selecta data item, click the Left mouse button on it. The data item shouldhave a bolder outline when it is selected. In addition to selecting itemsindividually, you can select groups of them by dragging the mousepointer to enclose the desired items with a bounding box. You can alsomove selected items by dragging them where you want them.
The Data Browser provides three menus for manipulating selected dataitems: the Graph menu, the View menu, and the data item pop-upmenu. To display the data item pop-up menu:
1 Move the mouse pointer over the title bar of a data item.
2 Press and hold the Right mouse button.
You can manipulate data items in a number of different ways:
Select Selects one or more data items, dependingon the scope specified (Ancestors, Parents,Children, Descendants).
Unselect Unselects one or more data items,depending on the scope specified(Ancestors, Parents, Children,Descendants).
Iconify Displays only the name and not the contentof the data structure.
Deiconify Reverts to displaying both the name andcontent of the data item (its original sizebefore you iconified it).
NOTE If you are stepping through your code and havemany data items displayed in the Data Browser,the time spent in updating the data items at eachbreak in execution can degrade performance. Youcan improve performance by minimizing thenumber of items you have displayed, or bydismissing the Data Browser.
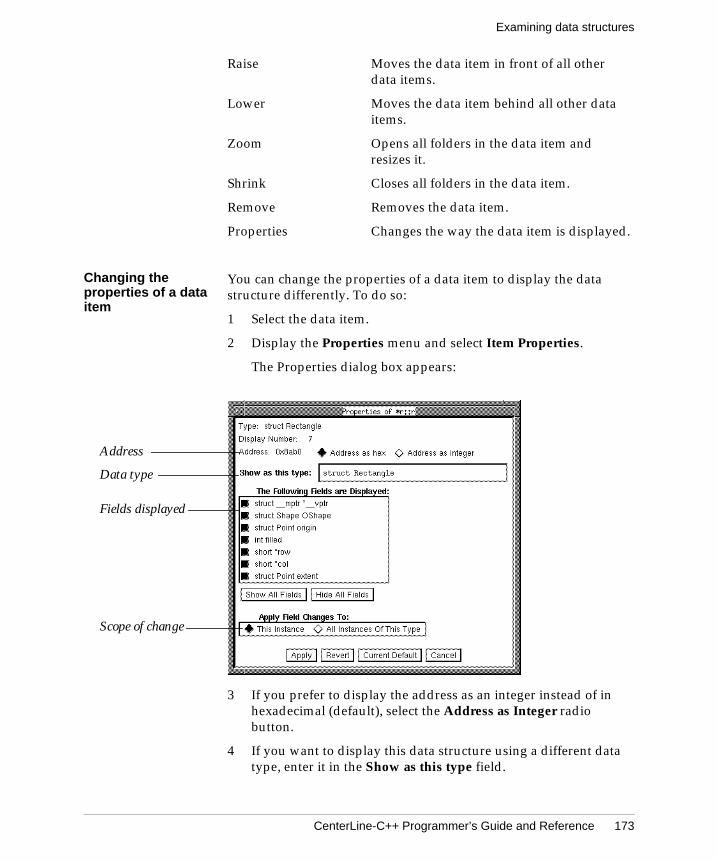
CenterLine-C++ Programmer’s Guide and Reference 173
Examining data structures
Raise Moves the data item in front of all otherdata items.
Lower Moves the data item behind all other dataitems.
Zoom Opens all folders in the data item andresizes it.
Shrink Closes all folders in the data item.
Remove Removes the data item.
Properties Changes the way the data item is displayed.
Changing theproperties of a dataitem
You can change the properties of a data item to display the datastructure differently. To do so:
1 Select the data item.
2 Display the Properties menu and select Item Properties.
The Properties dialog box appears:
3 If you prefer to display the address as an integer instead of inhexadecimal (default), select the Address as Integer radiobutton.
4 If you want to display this data structure using a different datatype, enter it in the Show as this type field.
Scope of change
Fields displayed
Data type
Address
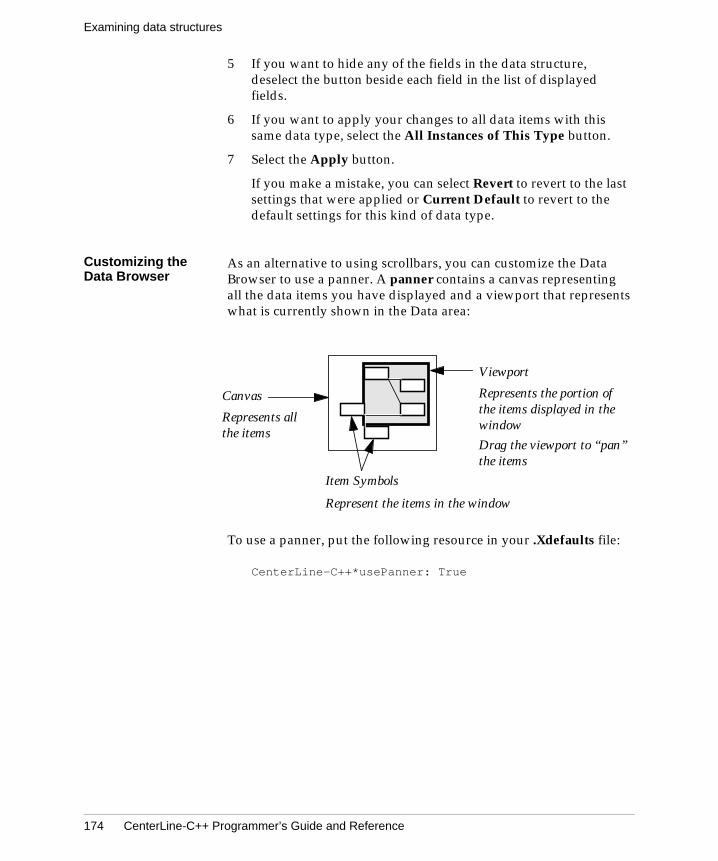
Examining data structures
174 CenterLine-C++ Programmer’s Guide and Reference
5 If you want to hide any of the fields in the data structure,deselect the button beside each field in the list of displayedfields.
6 If you want to apply your changes to all data items with thissame data type, select the All Instances of This Type button.
7 Select the Apply button.
If you make a mistake, you can select Revert to revert to the lastsettings that were applied or Current Default to revert to thedefault settings for this kind of data type.
Customizing theData Browser
As an alternative to using scrollbars, you can customize the DataBrowser to use a panner. A panner contains a canvas representingall the data items you have displayed and a viewport that representswhat is currently shown in the Data area:
To use a panner, put the following resource in your .Xdefaults file:
CenterLine-C++*usePanner: True
Viewport
Canvas
Item Symbols
Represents all
Represents the portion ofthe items displayed in thewindow
Represent the items in the window
the itemsDrag the viewport to “pan”the items
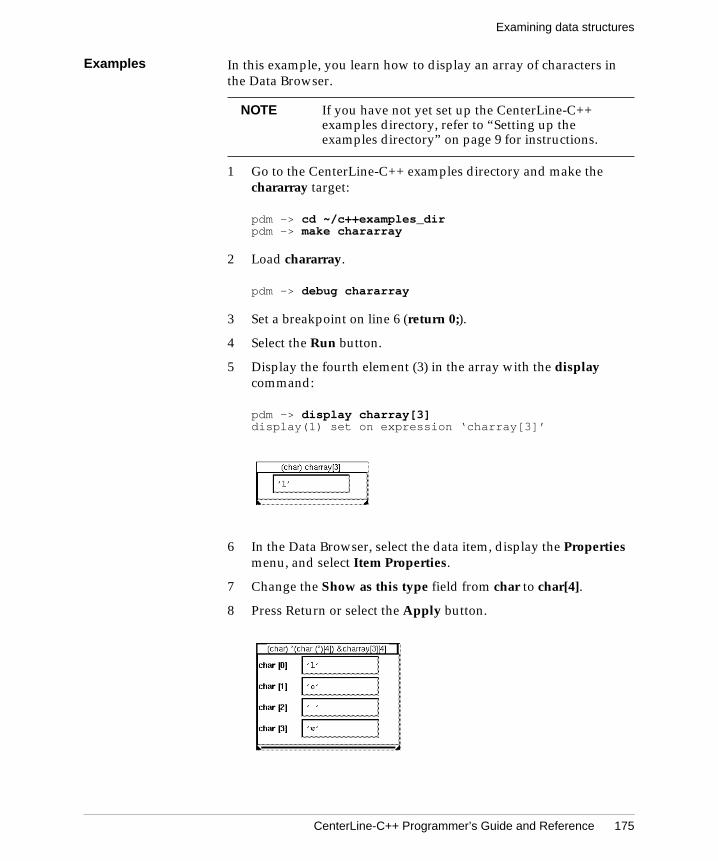
CenterLine-C++ Programmer’s Guide and Reference 175
Examining data structures
Examples In this example, you learn how to display an array of characters inthe Data Browser.
1 Go to the CenterLine-C++ examples directory and make thechararray target:
pdm -> cd ~/c++examples_dirpdm -> make chararray
2 Load chararray.
pdm -> debug chararray
3 Set a breakpoint on line 6 (return 0;).
4 Select the Run button.
5 Display the fourth element (3) in the array with the displaycommand:
pdm -> display charray[3]display(1) set on expression ‘charray[3]’
6 In the Data Browser, select the data item, display the Propertiesmenu, and select Item Properties.
7 Change the Show as this type field from char to char[4].
8 Press Return or select the Apply button.
NOTE If you have not yet set up the CenterLine-C++examples directory, refer to “Setting up theexamples directory” on page 9 for instructions.
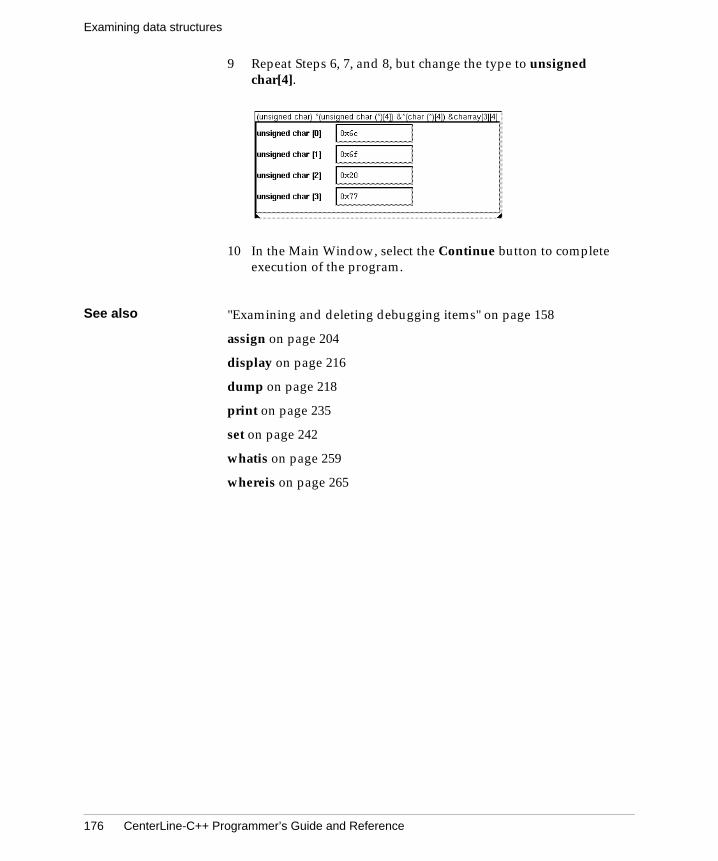
Examining data structures
176 CenterLine-C++ Programmer’s Guide and Reference
9 Repeat Steps 6, 7, and 8, but change the type to unsignedchar[4].
10 In the Main Window, select the Continue button to completeexecution of the program.
See also "Examining and deleting debugging items" on page 158
assign on page 204
display on page 216
dump on page 218
print on page 235
set on page 242
whatis on page 259
whereis on page 265
CenterLine-C++ Programmer’s Guide and Reference 177
Handling signals
Task: Handling signals
By default, the debugger passes the following signals to your programand catches all other signals.
SIGALRMSIGURGSIGCONTSIGCHLDSIGPOLLSIGVTALRMSIGPROFSIGWINCH
Passing signals toyour program
To ignore a signal and pass it to your program:
1 Make sure your program defines a handler for the signal.
2 Issue the ignore command and specify the signal name ornumber.
pdm -> ignore {signal_number | signal_name}
To display the signals currently being ignored, issue ignore withoutarguments.
Catching signals To catch a signal, issue the catch command and specify the signalname or number.
pdm -> catch {signal_number | signal_name}
When the debugger encounters a signal that is currently being caught,it stops execution of your program and generates a break level.
To display the signals currently being caught, issue catch withoutarguments.
See also "Debugging an executable with a corefile" on page 178
catch on page 207
ignore on page 226
Debugging an executable with a corefile
178 CenterLine-C++ Programmer’s Guide and Reference
Task: Debugging an executable with a corefile
Generating corefiles When you run your program with the debugger and a signal occurs,a corefile might or might not be generated, depending on how thedebugger handles the signal. If you run your program from thedebugger and it catches the signal, a corefile is not generated. If thedebugger ignores the signal and passes it to your program, a corefileis generated. For more information on signals, refer to "Handlingsignals" on page 177.
You can also generate a corefile by running your program from theshell.
Loading corefiles You can load a corefile using the debug command or thecenterline-c++ shell command (when you start up the debugger).Refer to "Starting up the debugger" on page 120 and "Loading filesfor debugging" on page 142 for information on loading corefiles.
When you load an executable along with a corefile into the debugger,the Execution symbol in the Source area indicates the source line atwhich execution stopped, and the Workspace indicates the signal thatcaused the program to terminate.
Debugging corefiles When you have loaded a corefile, you can examine all portions ofthe program up to the source line marked by the Execution symbol.You can examine data as well as the execution stack.
You cannot, however, continue execution of the program or singlestep. If you run the program while a corefile is loaded, the debuggerdiscards the corefile and runs the executable instead. To examine thecorefile again, you must reload it along with the executable.
CenterLine-C++ Programmer’s Guide and Reference 179
Debugging an executable with a corefile
Example In this example, you generate a corefile and examine it with thedebugger.
1 Go to the CenterLine-C++ examples directory and make thetutorial_core target:
pdm -> cd ~/c++examples_dirpdm -> make tutorial_core
2 Load tutorial_core and run it.
pdm -> debug tutorial_corepdm -> runExecuting c++examples_dir/tutorial_core
Program received signal 11, Segmentation faultpdm (break 1) ->
Since the debugger generated a break level, it has caught theSIGSEGV signal, and a corefile was not generated.
3 Ignore the SIGSEGV signal and rerun the program to generatethe corefile:
pdm (break 1) -> ignore 11pdm (break 1) -> runRestting to top level.Executing c++examples_dir/tutorial_coreProgram terminated with signal 11, Segmentation faultThe inferior process no longer exists.Resetting to top level.pdm ->
4 Load tutorial_core and the corefile:
pdm -> debug tutorial_core coredebug: Deleting all debugging items.Debugging program ‘tutorial_core’ (previous program ‘tutorial_core’)Core was generated by ‘tutorial_core’.Program terminated with signal 11, Segmentation fault.#0 DrawableShape::bounce (this=0x0) at shapes.C:112
112 doDraw();
The debugger checks the executable against the corefile to makesure that they match, displays the Execution symbol on thesource line that generated the signal, and indicates the signalthat generated the corefile.
NOTE If you have not yet set up the CenterLine-C++examples directory, refer to “Setting up theexamples directory” on page 9 for instructions.
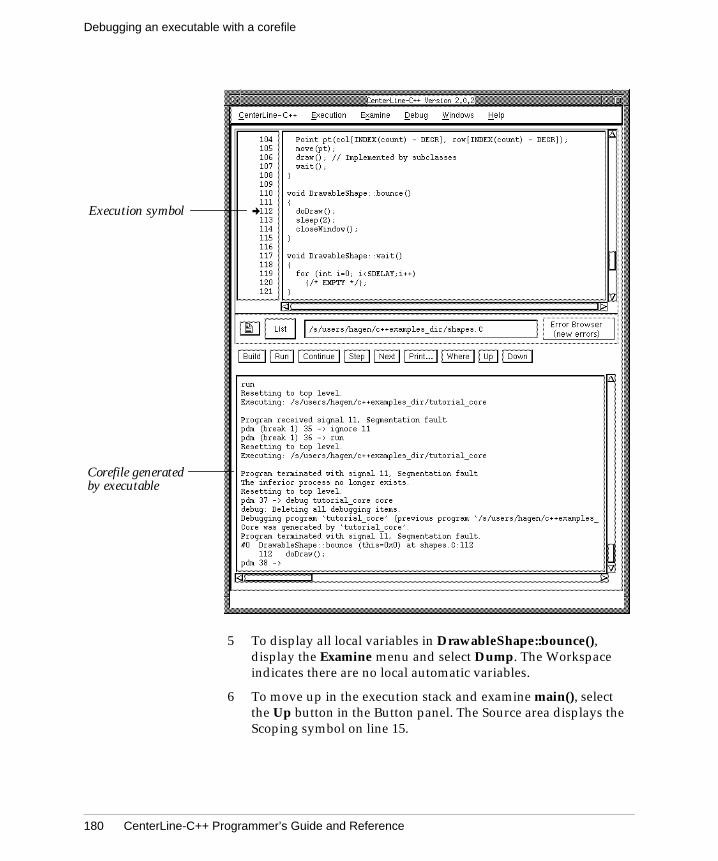
Debugging an executable with a corefile
180 CenterLine-C++ Programmer’s Guide and Reference
5 To display all local variables in DrawableShape::bounce(),display the Examine menu and select Dump. The Workspaceindicates there are no local automatic variables.
6 To move up in the execution stack and examine main(), selectthe Up button in the Button panel. The Source area displays theScoping symbol on line 15.
Execution symbol
Corefile generatedby executable
CenterLine-C++ Programmer’s Guide and Reference 181
Debugging an executable with a corefile
7 To display the execution stack:
pdm -> where#0 DrawableShape::bounce (this=0x0) at shapes.C:112#1 0x2b74 in main () at main.C:15pdm ->
8 To display all local variables in main(), display the Examinemenu and select Dump. The Workspace displays P1, P2, and r:
pdm -> dumpFormals of ‘main’:No FormalsAutomatics of ‘main’:P1 = (struct Point) = { int x = 50; int y = 50; }P2 = (struct Point) = { int x = 64; int y = 20; }r = (struct Rectangle *) 0x0_result = (int) 0
See also "Starting up the debugger" on page 120
"Loading files for debugging" on page 142
"Using Workspace break levels" on page 160
"Examining data structures" on page 169
"Handling signals" on page 177
Debugging a running process
182 CenterLine-C++ Programmer’s Guide and Reference
Task: Debugging a running process
The debugger can run one process under its control. You can run anexecutable that you have loaded with the debug command, or you canattach to a running process. You cannot do both simultaneously.
Attaching toprocesses
You can attach to a running process in several different ways:
• Start the debugger with the centerline-c++ command andspecify the process ID of a running process along with itscorresponding executable. Refer to "Starting up the debugger"on page 120 for information.
• Load an executable for debugging with the debug commandand specify the process ID of a running process along with itscorresponding executable. Refer to "Loading files fordebugging" on page 142 for information.
• Use the attach command and specify the process ID of arunning process. The running process can match the executablethat is loaded or be an unrelated process.
pdm -> attach process_id
When you attach to a process, the debugger suspends its execution, asif the process were at a breakpoint. The kind of debugging you canperform depends on whether the process was compiled with -g andthe point during execution at which you attach to the process.
• If the process was not compiled with -g, you can only usemachine debugging to debug the process. For more information,refer to "Debugging machine instructions" on page 186.
• If you attach to the process at a point where it is executing incode that was not compiled with -g (such as system libraries),you can only use machine debugging techniques until you entera routine that was compiled with -g. Refer to "Moving in theexecution stack" on page 166 and "Debugging machineinstructions" on page 186 for more information.
• If you attach to a process that was compiled with -g, you can useall the features of the debugger to debug it.
CenterLine-C++ Programmer’s Guide and Reference 183
Debugging a running process
If you use the step command after attaching to a program that was notcompiled with -g (or a program that is currently executing in a routinethat was not compiled with -g), execution continues until the currentfunction completes because there is no source line information. Tosingle step an instruction, you must use the stepi command.
If you issue the run command while the debugger is attached to aprocess, the debugger terminates the process and runs a new processwith the executable that was previously loaded with the debugcommand.
Detaching fromprocesses
To detach a process from the debugger’s control, use the detachcommand:
pdm -> detach
The process continues executing until completion. You can nowattach to or run a different process.
Debugging multipleprocesses
The CenterLine-C++ debugger does not have any special supportfor debugging multiple processes. We recommend that you useObjectCenter to debug multiprocess programs. It provides a built-inmacro for invoking an additional ObjectCenter process whenforking a child process.
Example In this example, you run a process from a shell and attach to it withthe debugger.
1 Go to the CenterLine-C++ examples directory and make thetutorial_attach target:
pdm -> cd ~/c++examples_dirpdm -> make tutorial_attach
2 Load tutorial_attach.
pdm -> debug tutorial_attach
NOTE If you have not yet set up the CenterLine-C++examples directory, refer to “Setting up theexamples directory” on page 9 for instructions.
Debugging a running process
184 CenterLine-C++ Programmer’s Guide and Reference
3 From a shell, run the tutorial_attach program in thebackground, and notice the process ID that is assigned to it.
% tutorial_attach &[n] process_id
4 From the debugger, attach to the process ID that was assignedto tutorial_attach.
pdm -> attach process_idAttaching program ‘c++examples_dir/tutorial_attach’, pid process_idReading symbols from libX11.so.4.3...done.Reading symbols from libC.so.2.0...done.Reading symbols from /libc.so.1.6...done.Stopped in function: ‘sigpause’. No source file info.pdm (break 1) ->
The debugger stops the process and creates a break level. In thiscase, tutorial_attach was executing in sigpause, which is alibrary routine that was not compiled with -g.
5 To display the current execution stack:
pdm (break 1) -> where#0 0xf76b2898 in sigpause ()#1 0xf76c965c in sleep ()#2 0x2b90 in main () at mainwait.C:16
The stack shows that execution was stopped in the sigpauseroutine, which was called from the sleep routine. Line 16 ofmainwait.C called the sleep routine.
6 To move the scope location to mainwait.C, use the up command:
pdm (break 1) -> upScoping to sleep() at “??”, pc = f76c965cpdm (break 1) -> upScoping to main() at “mainwait.C”:16
The Source area now displays the source code for mainwait.C,and the Scope symbol points to line 16.
7 To continue execution until sleep returns to main, you can usethe step command. When you use the step command inroutines that were not compiled with -g (and do not have
CenterLine-C++ Programmer’s Guide and Reference 185
Debugging a running process
debugging symbols), the debugger continues execution until thefunction returns.
pdm (break 1) -> stepCurrent function has no line number information.Single stepping until function exit.Stopped in function: ‘sleep’. No source file info.pdm (break 1) -> stepCurrent function has no line number information.Single stepping until function exit.
After a short pause, the Execution symbol appears at line 18 ofmainwait.C.
8 To detach from the process:
pdm (break 1) -> detachDetaching program: c++examples_dir/tutorial_attach pid process_idpdm (break 1) ->
The process continues execution. The bounce window appears,and a rectangle bounces in it.
9 Reset the Workspace:
pdm (break 1) -> resetResetting to top level.pdm ->
See also attach on page 205
detach on page 215

Debugging machine instructions
186 CenterLine-C++ Programmer’s Guide and Reference
Task: Debugging machine instructions
If a program or library was not compiled with -g, you can still debugits machine instructions using the listi, stopi, stepi, and nexticommands.
Listing machineinstructions
Use the listi Workspace command to list machine instructions in theWorkspace. You can list machine instructions for:
• The current program counter (PC) address (if at a break level)
• A hexadecimal or octal address
• A range of hexadecimal or octal addresses
• A line number (if the executable was compiled with -g)
• A range of line numbers (if the executable was compiled with -g)
• A function
• An address expressed as a function name and offset
For example, if execution is stopped on the line that declares the mainroutine in the Bounce program, you can list the Assembler instructionsfor that source line in several different ways:
pdm -> listi (Current PC)0x2b38 9 int main(void)0x2b38 <main+8>: call 0x3430 <_main>0x2b3c <main+12>: noppdm -> listi 0x2b38 0x2b3c (Range of addresses)0x2b38 9 int main(void)0x2b38 <main+8>: call 0x3430 <_main>0x2b3c <main+12>: noppdm -> listi 9 (Source line number)0x2b38 9 int main(void)0x2b38 <main+8>: call 0x3430 <_main>0x2b3c <main+12>: nop
NOTE To debug machine instructions, you need to befamiliar with the Assembler instructions for yourplatform’s CPU as well as the registers used. Referto the “Run-Time Organization” section of yourCenterLine-C++ Platform Guide and theprogramming guide for your CPU.
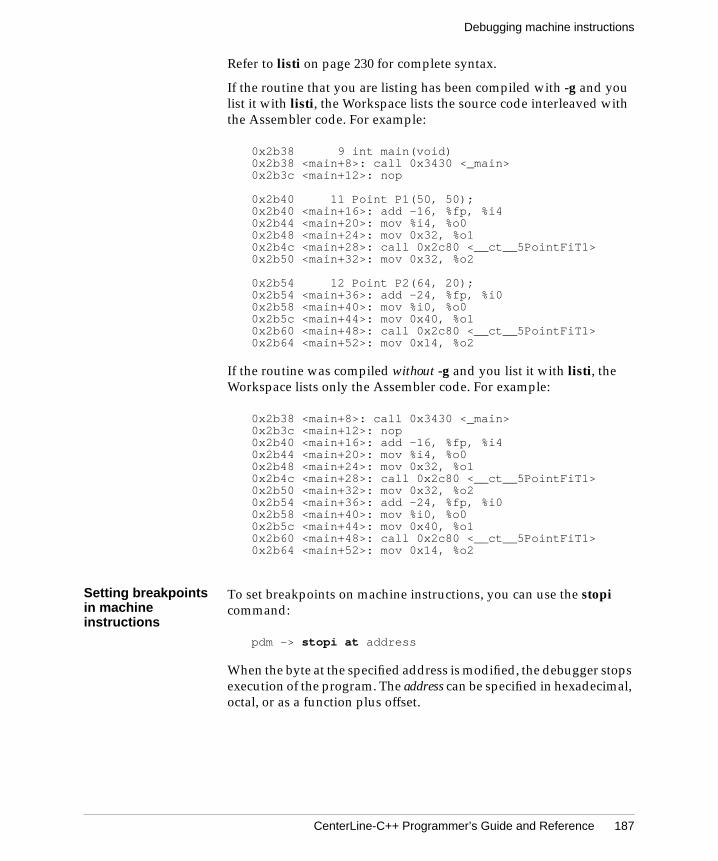
CenterLine-C++ Programmer’s Guide and Reference 187
Debugging machine instructions
Refer to listi on page 230 for complete syntax.
If the routine that you are listing has been compiled with -g and youlist it with listi, the Workspace lists the source code interleaved withthe Assembler code. For example:
0x2b38 9 int main(void)0x2b38 <main+8>: call 0x3430 <_main>0x2b3c <main+12>: nop
0x2b40 11 Point P1(50, 50);0x2b40 <main+16>: add -16, %fp, %i40x2b44 <main+20>: mov %i4, %o00x2b48 <main+24>: mov 0x32, %o10x2b4c <main+28>: call 0x2c80 <__ct__5PointFiT1>0x2b50 <main+32>: mov 0x32, %o2
0x2b54 12 Point P2(64, 20);0x2b54 <main+36>: add -24, %fp, %i00x2b58 <main+40>: mov %i0, %o00x2b5c <main+44>: mov 0x40, %o10x2b60 <main+48>: call 0x2c80 <__ct__5PointFiT1>0x2b64 <main+52>: mov 0x14, %o2
If the routine was compiled without -g and you list it with listi, theWorkspace lists only the Assembler code. For example:
0x2b38 <main+8>: call 0x3430 <_main>0x2b3c <main+12>: nop0x2b40 <main+16>: add -16, %fp, %i40x2b44 <main+20>: mov %i4, %o00x2b48 <main+24>: mov 0x32, %o10x2b4c <main+28>: call 0x2c80 <__ct__5PointFiT1>0x2b50 <main+32>: mov 0x32, %o20x2b54 <main+36>: add -24, %fp, %i00x2b58 <main+40>: mov %i0, %o00x2b5c <main+44>: mov 0x40, %o10x2b60 <main+48>: call 0x2c80 <__ct__5PointFiT1>0x2b64 <main+52>: mov 0x14, %o2
Setting breakpointsin machineinstructions
To set breakpoints on machine instructions, you can use the stopicommand:
pdm -> stopi at address
When the byte at the specified address is modified, the debugger stopsexecution of the program. The address can be specified in hexadecimal,octal, or as a function plus offset.

Debugging machine instructions
188 CenterLine-C++ Programmer’s Guide and Reference
Stepping throughmachineinstructions
Use the stepi and nexti Workspace commands to step throughmachine instructions. stepi enters functions when they are called,but nexti does not enter functions.
If desired, you can step through more than one instruction at a time byspecifying number as an argument to stepi or nexti:
pdm -> stepi numberpdm -> nexti number
Example In the following example, the Bounce program has a bug in it, but ithas not been compiled with -g, so you must debug it at the machinelevel. This example shows the machine instructions for the SunSPARC platform; the machine instructions for other platforms differ.
1 Go to the CenterLine-C++ examples directory and make thetutorial_corenog target:
pdm -> cd ~/c++examples_dirpdm -> make tutorial_corenog
2 Load tutorial_corenog and run it.
pdm -> debug tutorial_corenogpdm -> runResetting to top level.Executing: c++examples_dir/tutorial_corenog
Program received signal 11, Segmentation faultpdm (break 1) ->
Since the debugger generated a break level, it has caught theSIGSEGV signal, and a corefile was not generated.
3 Ignore the SIGSEGV signal and rerun the program to generatethe corefile:
pdm (break 1) -> ignore 11pdm (break 1) -> runRestting to top level.Executing c++examples_dir/tutorial_corenog
Program terminated with signal 11, Segmentation faultThe inferior process no longer exists.Resetting to top level.pdm ->
NOTE If you have not yet set up the CenterLine-C++examples directory, refer to “Setting up theexamples directory” on page 9 for instructions.
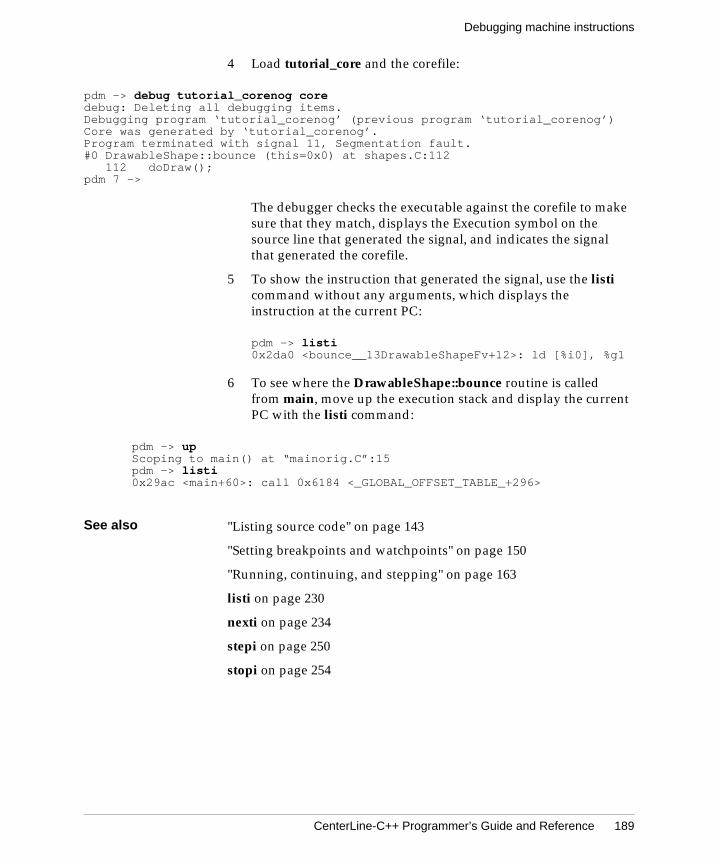
CenterLine-C++ Programmer’s Guide and Reference 189
Debugging machine instructions
4 Load tutorial_core and the corefile:
pdm -> debug tutorial_corenog coredebug: Deleting all debugging items.Debugging program ‘tutorial_corenog’ (previous program ‘tutorial_corenog’)Core was generated by ‘tutorial_corenog’.Program terminated with signal 11, Segmentation fault.#0 DrawableShape::bounce (this=0x0) at shapes.C:112
112 doDraw();pdm 7 ->
The debugger checks the executable against the corefile to makesure that they match, displays the Execution symbol on thesource line that generated the signal, and indicates the signalthat generated the corefile.
5 To show the instruction that generated the signal, use the listicommand without any arguments, which displays theinstruction at the current PC:
pdm -> listi0x2da0 <bounce__13DrawableShapeFv+12>: ld [%i0], %g1
6 To see where the DrawableShape::bounce routine is calledfrom main, move up the execution stack and display the currentPC with the listi command:
pdm -> upScoping to main() at “mainorig.C”:15pdm -> listi0x29ac <main+60>: call 0x6184 <_GLOBAL_OFFSET_TABLE_+296>
See also "Listing source code" on page 143
"Setting breakpoints and watchpoints" on page 150
"Running, continuing, and stepping" on page 163
listi on page 230
nexti on page 234
stepi on page 250
stopi on page 254
Saving your debugging session
190 CenterLine-C++ Programmer’s Guide and Reference
Task: Saving your debugging session
You can save a record of your debugging session in three differentways:
• Save your input history using the history command
• Save your complete debugging session, including input andoutput
• Save the input and output displayed in the Run Window
By default, the Workspace transcript is limited to 2000 lines, whichlimits the size of your input history or session transcript. To change thesize of the Workspace transcript, use theCenterLine-C++*workspaceTranscriptSize resource. See theX resources entry in the Man Browser.
Displaying andsaving your inputhistory
To save your current input history in a file, redirect the output ofhistory to a file:
pdm -> history #> filename
Saving yourdebugging session
To save your debugging session:
1 In the Workspace, display the Workspace Options pop-upmenu and then the Save Session to submenu.
2 Select either clc++.script or Other file. If you select the latter,you specify the file in a file selection dialog box.
Saving thecontents of the RunWindow
To create a log in your current working directory of the contents ofthe Run Window during your debugging session, put the followingresource in your X resources file. The filename of the log file isXtermLog.pid, where pid is the process ID of the clxterm process (theprocess that controls the Run Window).
CenterLine-C++*RunWindow.logging: on
See also history on page 225
centerline-c++ in the Man Browser
X resources in the Man Browser
CenterLine-C++ Programmer’s Guide and Reference 191
Customizing your startup file
Task: Customizing your startup file
The CenterLine-C++ debugger provides system-wide and localstartup files that you can use for setting search paths and aliases atstartup.
Setting up your.pdminit file
You can use the .pdminit startup file to set up aliases and searchpaths to be used across debugging sessions. When you start thedebugger, it searches directories in the following order for a.pdminit file:
• Your current working directory. You can have different.pdminit files for use with different projects, providing theprojects are stored in different directories.
• Your home directory.
To set up your .pdminit file:
1 Create a text file named .pdminit in your current directory oryour home directory.
If desired, you can give the file a different name from .pdminit.If you do, start the debugger with the -s startup_file switch andspecify the pathname of the file. See “Selecting specific startupfiles from the command line” on page 192 for details.
2 Add alias commands for all the aliases you want to use acrossdebugging sessions.
alias name command
For more information on aliases, refer to "Using aliases forWorkspace commands" on page 136.
3 Add a use command for all the directories that the debuggershould search through when loading (debug command), listing(list command), or editing (edit command) an executable.
use directory...
4 Start pdm. It executes the commands in the .pdminit file.

Customizing your startup file
192 CenterLine-C++ Programmer’s Guide and Reference
Selecting specificstartup files fromthe command line
When you start the debugger with the centerline-c++ command,you can use the following switches to select or ignore specificstartup files:
-s[=filename] If filename is supplied, it is read instead ofthe local .pdminit file. If filename is notsupplied, the debugger ignores the local.pdminit file.
-S[=filename] If filename is supplied, it is read instead ofthe system-wide .pdminit file. If filename isnot supplied, the debugger ignores thesystem-wide .pdminit file.
Setting theclass_as_structoption
By default, pdm distinguishes between member functions and datamembers when it processes classes. You can improve performanceby setting the class_as_struct option, which causes pdm to treatmember functions and data members as data fields as in a C struct.
To make this the default behavior, add this line to your .pdminit file:
setopt class_as_struct
You can also use this command in the Workspace; if you do, it will takeeffect the next time you issue the debug command. To list currentoption settings, use the printopt command, and to set theclass_as_struct option to false, enter this command:
unsetopt class_as_struct
Example Here is a sample .pdminit file:
/* Define aliases for common commands. */
alias s stepalias n next
/* Specify search path. */
use . ../test ../src
See also alias on page 203
use on page 258
centerline-c++ in the Man Browser
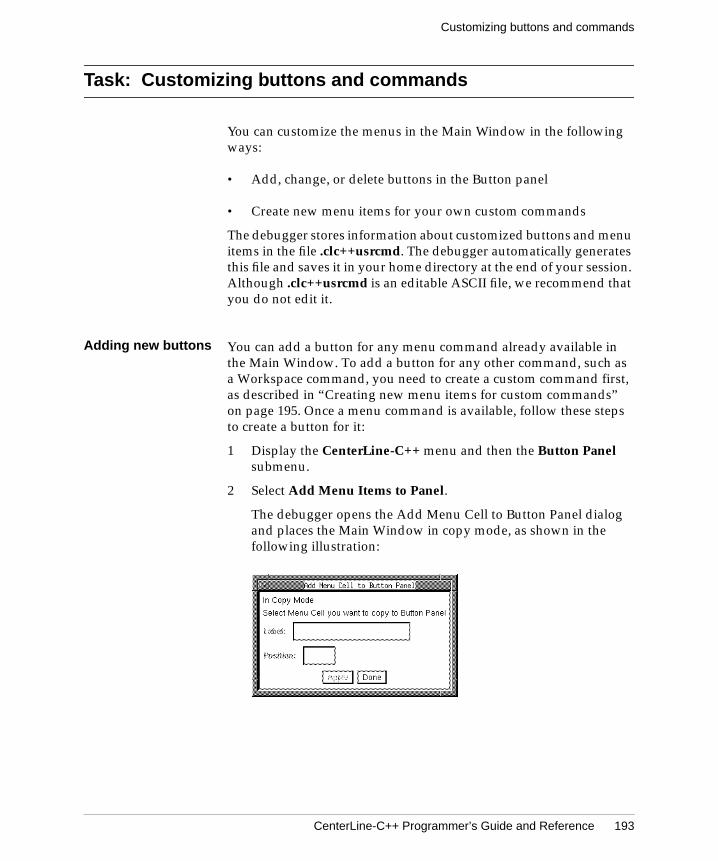
CenterLine-C++ Programmer’s Guide and Reference 193
Customizing buttons and commands
Task: Customizing buttons and commands
You can customize the menus in the Main Window in the followingways:
• Add, change, or delete buttons in the Button panel
• Create new menu items for your own custom commands
The debugger stores information about customized buttons and menuitems in the file .clc++usrcmd. The debugger automatically generatesthis file and saves it in your home directory at the end of your session.Although .clc++usrcmd is an editable ASCII file, we recommend thatyou do not edit it.
Adding new buttons You can add a button for any menu command already available inthe Main Window. To add a button for any other command, such asa Workspace command, you need to create a custom command first,as described in “Creating new menu items for custom commands”on page 195. Once a menu command is available, follow these stepsto create a button for it:
1 Display the CenterLine-C++ menu and then the Button Panelsubmenu.
2 Select Add Menu Items to Panel.
The debugger opens the Add Menu Cell to Button Panel dialogand places the Main Window in copy mode, as shown in thefollowing illustration:
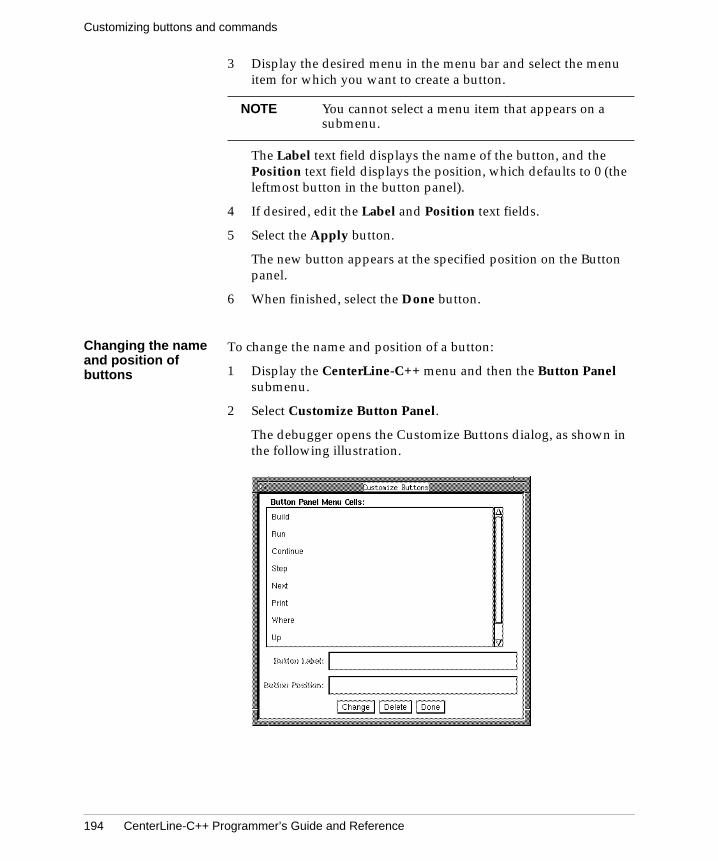
Customizing buttons and commands
194 CenterLine-C++ Programmer’s Guide and Reference
3 Display the desired menu in the menu bar and select the menuitem for which you want to create a button.
The Label text field displays the name of the button, and thePosition text field displays the position, which defaults to 0 (theleftmost button in the button panel).
4 If desired, edit the Label and Position text fields.
5 Select the Apply button.
The new button appears at the specified position on the Buttonpanel.
6 When finished, select the Done button.
Changing the nameand position ofbuttons
To change the name and position of a button:
1 Display the CenterLine-C++ menu and then the Button Panelsubmenu.
2 Select Customize Button Panel.
The debugger opens the Customize Buttons dialog, as shown inthe following illustration.
NOTE You cannot select a menu item that appears on asubmenu.
CenterLine-C++ Programmer’s Guide and Reference 195
Customizing buttons and commands
3 Select the desired button in the scrolling list.
4 Edit the Button Label and Button Position text fields.
5 Select the Change button.
6 When finished, select the Done button.
Deleting buttons To delete a button:
1 Display the CenterLine-C++ menu and then the Button Panelsubmenu.
2 Select Customize Button Panel.
The debugger opens the Modify Buttons in Button Panel dialog.
3 Select the desired button in the scrolling list.
4 Select the Delete button.
5 When finished, select the Done button.
Creating new menuitems for customcommands
You can create custom commands that appear on the User Definedsubmenu of the CenterLine-C++ menu.
1 Display the CenterLine-C++ menu and then the User Definedsubmenu.
2 Select Add/Change/Delete.
The debugger opens the User Defined dialog, as shown in theillustration on the next page. .
3 Enter the name of the custom command in the Label text field.
4 If you want to add a button to the button panel for thiscommand, select the Create Button button. You also need tospecify the row and column position of the button if the default(row 0, column 0) isn’t suitable.
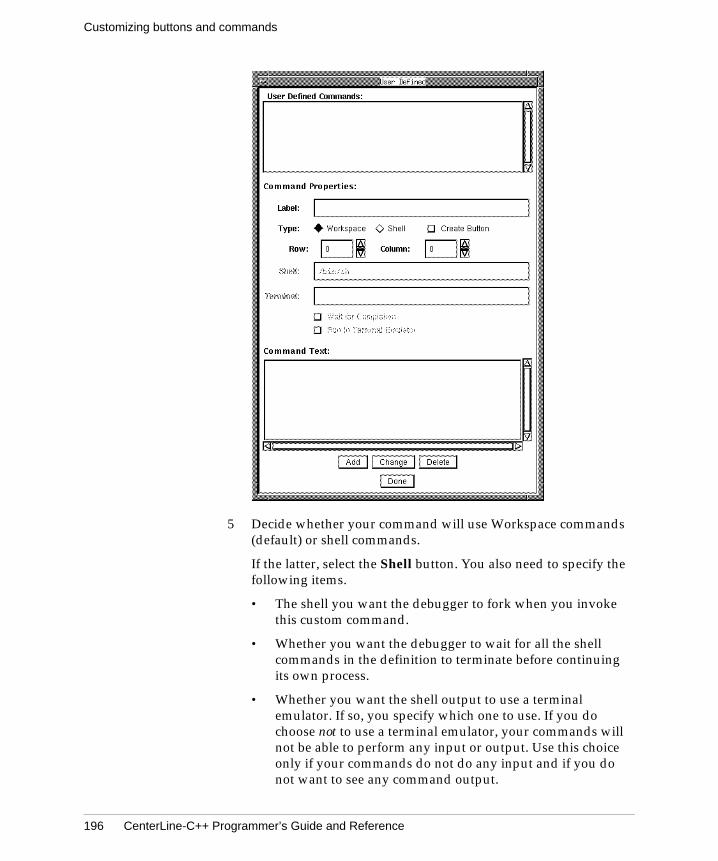
Customizing buttons and commands
196 CenterLine-C++ Programmer’s Guide and Reference
5 Decide whether your command will use Workspace commands(default) or shell commands.
If the latter, select the Shell button. You also need to specify thefollowing items.
• The shell you want the debugger to fork when you invokethis custom command.
• Whether you want the debugger to wait for all the shellcommands in the definition to terminate before continuingits own process.
• Whether you want the shell output to use a terminalemulator. If so, you specify which one to use. If you dochoose not to use a terminal emulator, your commands willnot be able to perform any input or output. Use this choiceonly if your commands do not do any input and if you donot want to see any command output.
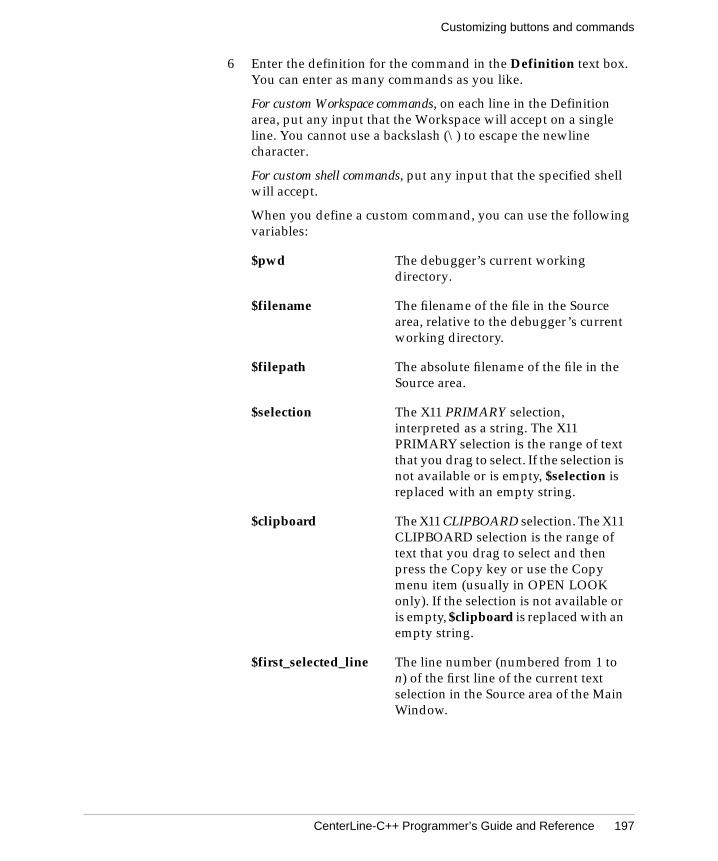
CenterLine-C++ Programmer’s Guide and Reference 197
Customizing buttons and commands
6 Enter the definition for the command in the Definition text box.You can enter as many commands as you like.
For custom Workspace commands, on each line in the Definitionarea, put any input that the Workspace will accept on a singleline. You cannot use a backslash (\) to escape the newlinecharacter.
For custom shell commands, put any input that the specified shellwill accept.
When you define a custom command, you can use the followingvariables:
$pwd The debugger’s current workingdirectory.
$filename The filename of the file in the Sourcearea, relative to the debugger’s currentworking directory.
$filepath The absolute filename of the file in theSource area.
$selection The X11 PRIMARY selection,interpreted as a string. The X11PRIMARY selection is the range of textthat you drag to select. If the selection isnot available or is empty, $selection isreplaced with an empty string.
$clipboard The X11 CLIPBOARD selection. The X11CLIPBOARD selection is the range oftext that you drag to select and thenpress the Copy key or use the Copymenu item (usually in OPEN LOOKonly). If the selection is not available oris empty, $clipboard is replaced with anempty string.
$first_selected_line The line number (numbered from 1 ton) of the first line of the current textselection in the Source area of the MainWindow.
Customizing buttons and commands
198 CenterLine-C++ Programmer’s Guide and Reference
If there is no text selection in the Source area, the$first_selected_line, $first_selected_char, $last_selected_line,and $last_selected_char return 0.
Modifying customcommands
To modify a custom command:
1 Display the CenterLine-C++ menu and then the User Definedsubmenu.
2 Select Add/Change/Delete.
The debugger opens the User Defined dialog.
3 Select the command from the scrolling list.
4 Make the changes desired.
5 Select the Change button.
6 When finished, select the Done button.
$first_selected_char The character position (numbered from1 to n, with tabs being a singlecharacter) of the first character that isselected in $first_selected_line.
$last_selected_line The line number (numbered from 1 ton) of the last line of the current textselection in the Source area of the MainWindow.
$last_selected_char The character position (numbered from1 to n, with tabs being a singlecharacter) of the last character that isselected in $last_selected_line.
NOTE If the current X11 selection contains newlines, the$clipboard and $selection variables expand tomultiple lines. You cannot use multiple lines forcustomized Workspace commands. Multiple linesmight also interfere with customized shellcommands.
CenterLine-C++ Programmer’s Guide and Reference 199
Customizing buttons and commands
Deleting customcommands
To delete a custom command:
1 Display the CenterLine-C++ menu and then the User Definedsubmenu.
2 Select Add/Change/Delete.
The debugger opens the User Defined dialog.
3 Select the command from the scrolling list.
4 Select the Delete button.
5 When finished, select the Done button.
Example To add a button for the Quit menu command:
1 Display the CenterLine-C++ menu and then the Button Panelsubmenu.
2 Select Add Menu Items to Panel.
The debugger opens the Add Menu Cell to Button Panel dialogand places the Main Window in copy mode.
3 Display the CenterLine-C++ menu and select the QuitCenterLine-C++ menu item.
The Label text field displays the name of the button, and thePosition text field displays the position, which defaults to 0 (theleftmost button in the button panel).
4 Change the button label in the Label field to Quit.
5 Select the Apply button.
6 Select the Done button to close the dialog.
7 Select the Quit button in the Button panel to test the new button.
See also X resources in the Man Browser
Customizing environment variables
200 CenterLine-C++ Programmer’s Guide and Reference
Task: Customizing environment variables
To display, set, and unset the environment variables that are used byyour program, you can use the printenv, setenv, and unsetenvcommands in the debugger. They are analogous to the similarlynamed csh commands.
These commands affect only your program’s environment variables;they do not affect the environment variables used by the debugger.
printenv Displays the values of environmentvariables.
setenv Sets the value of an environment variable.
unsetenv Unsets an environment variable.
printenv displays the default values of the environment variables,which are the values that your program inherits each time it starts. Ifyour program alters an environment variable with the putenv()library function, the change is not shown by the printenv command.
For example, you can display and set the current setting for theSHELL environment variable in the following way:
pdm -> printenv SHELLSHELL=/usr/local/bin/tcshpdm -> setenv SHELL /bin/shpdm -> printenv SHELLSHELL=/bin/sh
See also printenv on page 236
setenv on page 243
unsetenv on page 256
CenterLine-C++ Programmer’s Guide and Reference 201
Quitting from the debugger
Task: Quitting from the debugger
You can exit from the debugger using one of the following methods:
• Display the CenterLine-C++ menu in the Main Window andselect Quit. In the dialog box, select Quit to exit.
• Enter the quit command in the Workspace.
7 Command Reference
This chapter contains an alphabetical reference tocommands available in pdm, the CenterLine-C++symbolic debugger.

CenterLine-C++ Programmer’s Guide and Reference 203
alias
aliascreates an alias for a command
Command syntax aliasalias namealias name text
Description << none >> Lists all aliases currently set.
name Lists the text value for the specified aliasname.
name text Sets the name string to the value of the textstring.
Usage Use the alias command to create an alternative name forCenterLine-C++ commands. When an alias is detected at thebeginning of a command line, its text is used in place of the name.Use aliases to create shortcuts for frequently used commands.
Default aliases In addition to aliases that you can create, CenterLine-C++ comeswith several default aliases, such as ls and pwd. When you issue thealias command without arguments, the default aliases are displayedalong with any that you have defined. For example:
-> alias s step
-> alias
ls sh ls
pwd sh pwd
s step
See also unalias
“Using aliases for Workspace commands” on page 136
“Customizing your startup file” on page 191
NOTE To save an alias permanently, place itsdefinition in your .pdminit file.
assign
204 CenterLine-C++ Programmer’s Guide and Reference
assignassigns a value to a variable
Command syntax assign variable = expression
Description variable = expression Evaluates an expression (second argument)and assigns the value of the expression to avariable (first argument).
Usage Use the assign command to evaluate an expression and assign itsvalue to a variable. Assigning a value to a variable in the Workspaceallows you to either directly manipulate values in code that you aredebugging or to set values for code you are creating in theWorkspace. The assign and set commands are functionally identical.
See also print, set
“Examining data structures” on page 169
CenterLine-C++ Programmer’s Guide and Reference 205
attach
attachattaches to a running process
Command syntax attach process_id
Description process_id Attaches CenterLine-C++ to the runningprocess identified by process_id. You canattach to only one process at a time.
Usage When you attach to a running process, CenterLine-C++ stops theprocess. You can then examine and modify the process with anyCenterLine-C++ command. If you want the process to continuerunning, use the cont command. Use the detach command to releasea process from CenterLine-C++’s control.
If you try to attach a process while you are already attached toanother process, CenterLine-C++ prompts you to detach beforeattaching.
You can use the attach command in combination with debug to attachan executable file to an already running process. That is, you can usethe following two commands:
(pdm) 1 -> debug my_a.out(pdm) 2 -> attach my_process_id
instead of the following:
(pdm) 2 -> debug my_a.out my_process_id
See also debug, detach
“Debugging a running process” on page 182
NOTE If you use the run command while you havean attached process, you kill that process.
build
206 CenterLine-C++ Programmer’s Guide and Reference
buildreloads the program currently being debugged if it is outof date
Command syntax build
Description << none >> Reloads the executable (for instance, a.out)if the executable is newer than the currentone.
Usage Use the build command to reload the file that you are debuggingafter you have recompiled it.
See also debug, make
“Building and reloading executables” on page 147
CenterLine-C++ Programmer’s Guide and Reference 207
catch
catchtraps signals before they reach the program
Command syntax catchcatch signal_namecatch signal_number
Description << none >> Lists the unprefixed names of the signalsthat are currently caught.
signal-name Enables trapping for the designated signaland generates a break level whenever thesignal is generated.
signal-number Enables trapping for the designated signaland generates a break level whenever thesignal is generated.
Usage Use the catch command to trap signals before they reach theprogram; each signal is either caught or ignored by CenterLine-C++.Once a signal is trapped, CenterLine-C++ generates a break level.
You can use the cont command to pass the signal number to yourprogram.
Signal numbers To obtain the number for a signal, consult the UNIX referencemanuals for your system.
Signals caught To view a list of the signals caught for your platform, use the catchcommand without any arguments.
Signal name With the catch command, the signal name can be in uppercase orlowercase letters, and it can be used with or without the prefix“SIG”. For example, the following commands are equivalent:
-> catch SIGALRM-> catch sigalrm-> catch ALRM-> catch alrm
catch
208 CenterLine-C++ Programmer’s Guide and Reference
Restrictions Control-z during execution or in the Run Window is alwayshandled as a signal-deliver, generating an error if not trapped by theuser program.
Ignoring SIGINT causes SIGQUIT to perform interruption duties.Ignoring both of them interferes with stopping execution.
The signals SIGTTIN and SIGTTOU will never suspend execution; ifnot trapped and ignored they will generate an error.
See also cont, ignore
“Handling signals” on page 177
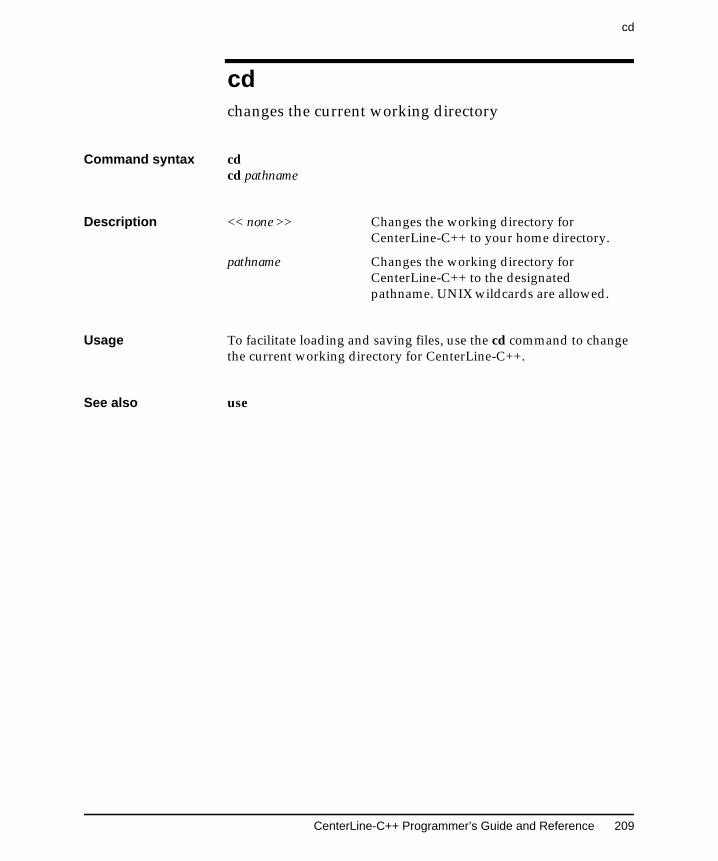
CenterLine-C++ Programmer’s Guide and Reference 209
cd
cdchanges the current working directory
Command syntax cdcd pathname
Description << none >> Changes the working directory forCenterLine-C++ to your home directory.
pathname Changes the working directory forCenterLine-C++ to the designatedpathname. UNIX wildcards are allowed.
Usage To facilitate loading and saving files, use the cd command to changethe current working directory for CenterLine-C++.
See also use
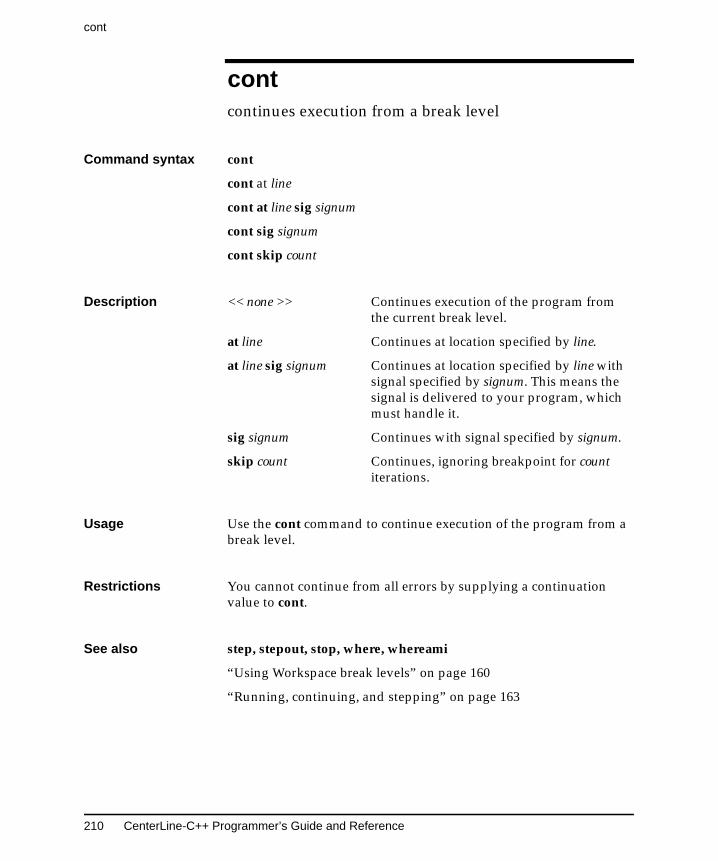
cont
210 CenterLine-C++ Programmer’s Guide and Reference
contcontinues execution from a break level
Command syntax cont
cont at line
cont at line sig signum
cont sig signum
cont skip count
Description << none >> Continues execution of the program fromthe current break level.
at line Continues at location specified by line.
at line sig signum Continues at location specified by line withsignal specified by signum. This means thesignal is delivered to your program, whichmust handle it.
sig signum Continues with signal specified by signum.
skip count Continues, ignoring breakpoint for countiterations.
Usage Use the cont command to continue execution of the program from abreak level.
Restrictions You cannot continue from all errors by supplying a continuationvalue to cont.
See also step, stepout, stop, where, whereami
“Using Workspace break levels” on page 160
“Running, continuing, and stepping” on page 163
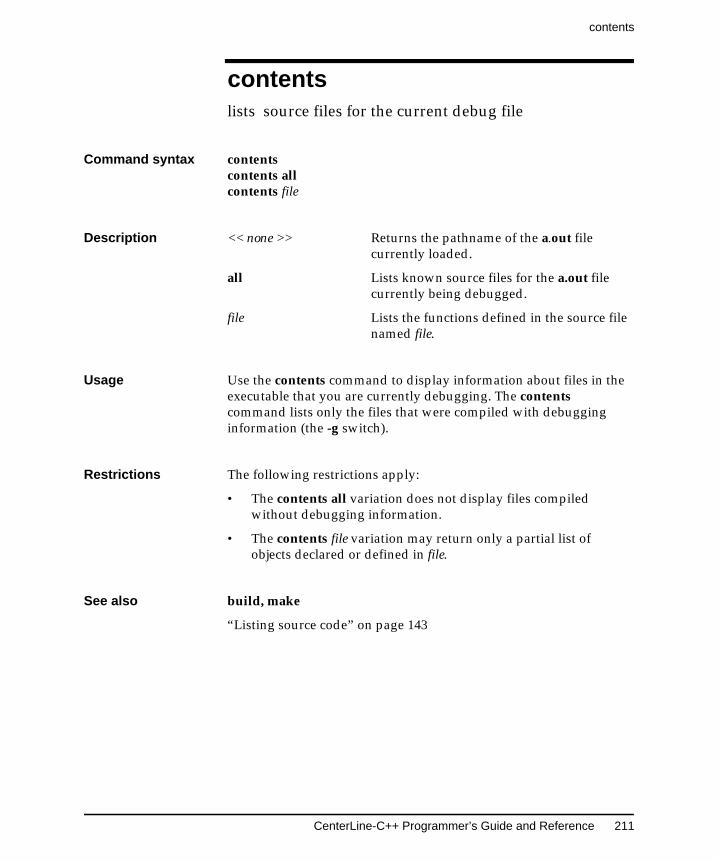
CenterLine-C++ Programmer’s Guide and Reference 211
contents
contentslists source files for the current debug file
Command syntax contentscontents allcontents file
Description << none >> Returns the pathname of the a.out filecurrently loaded.
all Lists known source files for the a.out filecurrently being debugged.
file Lists the functions defined in the source filenamed file.
Usage Use the contents command to display information about files in theexecutable that you are currently debugging. The contentscommand lists only the files that were compiled with debugginginformation (the -g switch).
Restrictions The following restrictions apply:
• The contents all variation does not display files compiledwithout debugging information.
• The contents file variation may return only a partial list ofobjects declared or defined in file.
See also build, make
“Listing source code” on page 143
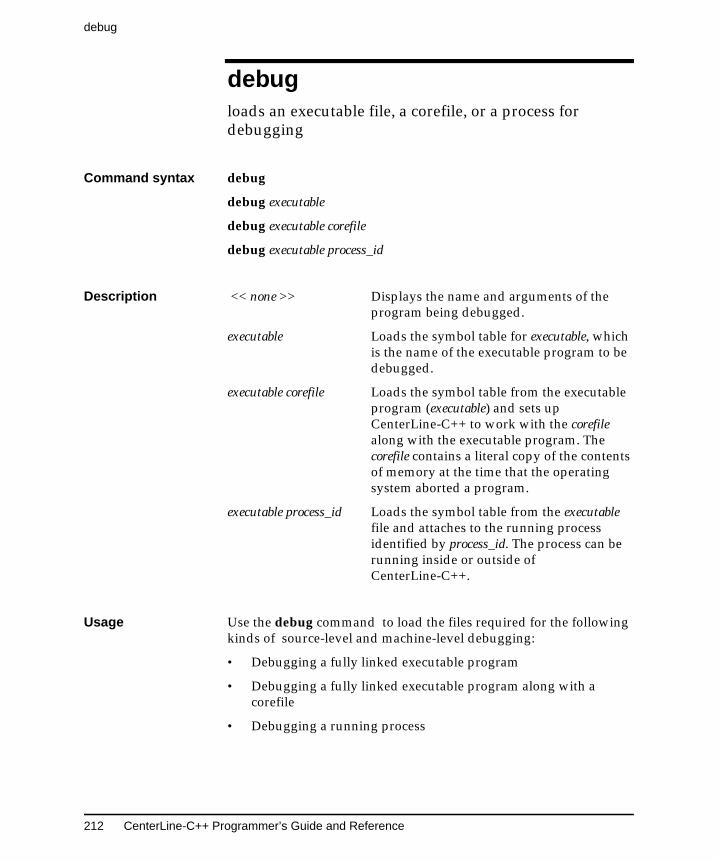
debug
212 CenterLine-C++ Programmer’s Guide and Reference
debugloads an executable file, a corefile, or a process fordebugging
Command syntax debug
debug executable
debug executable corefile
debug executable process_id
Description << none >> Displays the name and arguments of theprogram being debugged.
executable Loads the symbol table for executable, whichis the name of the executable program to bedebugged.
executable corefile Loads the symbol table from the executableprogram (executable) and sets upCenterLine-C++ to work with the corefilealong with the executable program. Thecorefile contains a literal copy of the contentsof memory at the time that the operatingsystem aborted a program.
executable process_id Loads the symbol table from the executablefile and attaches to the running processidentified by process_id. The process can berunning inside or outside ofCenterLine-C++.
Usage Use the debug command to load the files required for the followingkinds of source-level and machine-level debugging:
• Debugging a fully linked executable program
• Debugging a fully linked executable program along with acorefile
• Debugging a running process
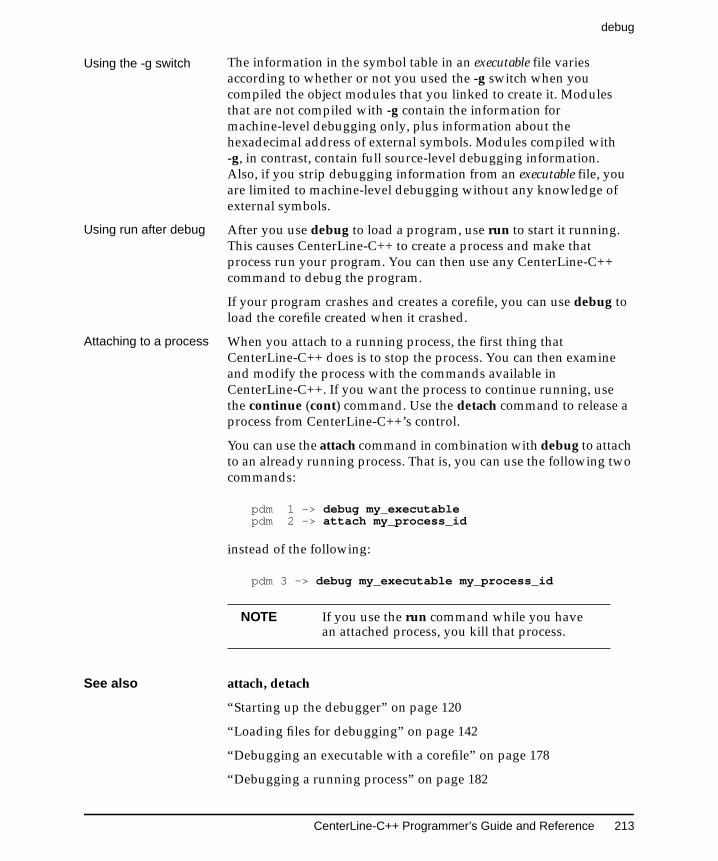
CenterLine-C++ Programmer’s Guide and Reference 213
debug
Using the -g switch The information in the symbol table in an executable file variesaccording to whether or not you used the -g switch when youcompiled the object modules that you linked to create it. Modulesthat are not compiled with -g contain the information formachine-level debugging only, plus information about thehexadecimal address of external symbols. Modules compiled with-g, in contrast, contain full source-level debugging information.Also, if you strip debugging information from an executable file, youare limited to machine-level debugging without any knowledge ofexternal symbols.
Using run after debug After you use debug to load a program, use run to start it running.This causes CenterLine-C++ to create a process and make thatprocess run your program. You can then use any CenterLine-C++command to debug the program.
If your program crashes and creates a corefile, you can use debug toload the corefile created when it crashed.
Attaching to a process When you attach to a running process, the first thing thatCenterLine-C++ does is to stop the process. You can then examineand modify the process with the commands available inCenterLine-C++. If you want the process to continue running, usethe continue (cont) command. Use the detach command to release aprocess from CenterLine-C++’s control.
You can use the attach command in combination with debug to attachto an already running process. That is, you can use the following twocommands:
pdm 1 -> debug my_executablepdm 2 -> attach my_process_id
instead of the following:
pdm 3 -> debug my_executable my_process_id
See also attach, detach
“Starting up the debugger” on page 120
“Loading files for debugging” on page 142
“Debugging an executable with a corefile” on page 178
“Debugging a running process” on page 182
NOTE If you use the run command while you havean attached process, you kill that process.
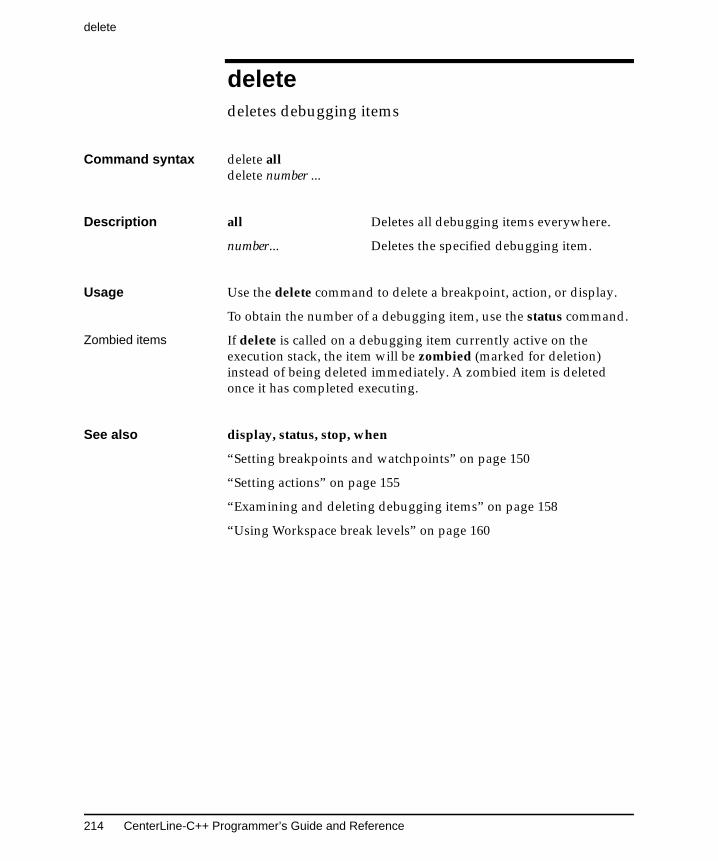
delete
214 CenterLine-C++ Programmer’s Guide and Reference
deletedeletes debugging items
Command syntax delete alldelete number ...
Description all Deletes all debugging items everywhere.
number... Deletes the specified debugging item.
Usage Use the delete command to delete a breakpoint, action, or display.
To obtain the number of a debugging item, use the status command.
Zombied items If delete is called on a debugging item currently active on theexecution stack, the item will be zombied (marked for deletion)instead of being deleted immediately. A zombied item is deletedonce it has completed executing.
See also display, status, stop, when
“Setting breakpoints and watchpoints” on page 150
“Setting actions” on page 155
“Examining and deleting debugging items” on page 158
“Using Workspace break levels” on page 160
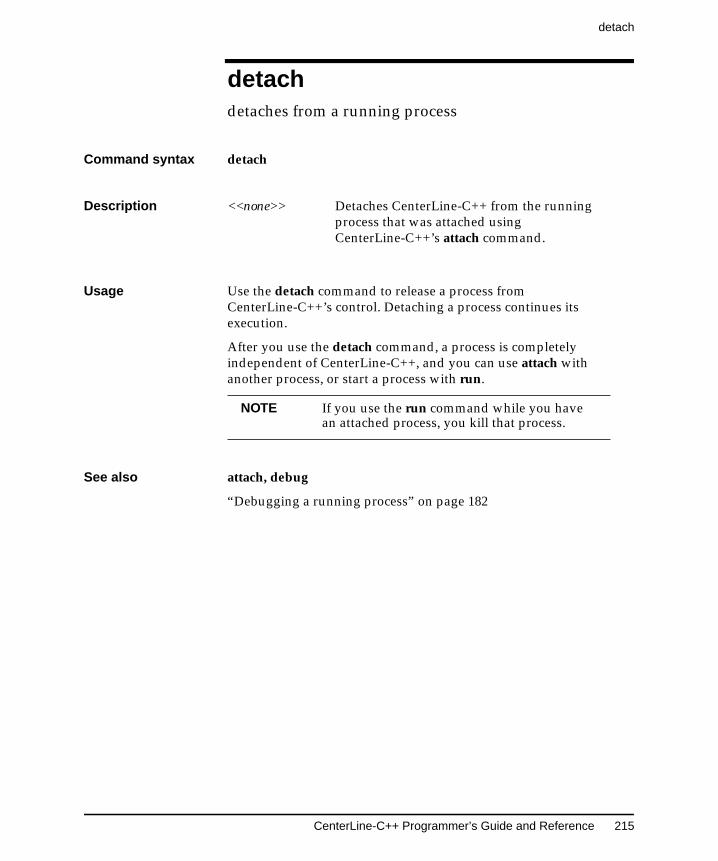
CenterLine-C++ Programmer’s Guide and Reference 215
detach
detachdetaches from a running process
Command syntax detach
Description
Usage Use the detach command to release a process fromCenterLine-C++’s control. Detaching a process continues itsexecution.
After you use the detach command, a process is completelyindependent of CenterLine-C++, and you can use attach withanother process, or start a process with run.
See also attach, debug
“Debugging a running process” on page 182
<<none>> Detaches CenterLine-C++ from the runningprocess that was attached usingCenterLine-C++’s attach command.
NOTE If you use the run command while you havean attached process, you kill that process.
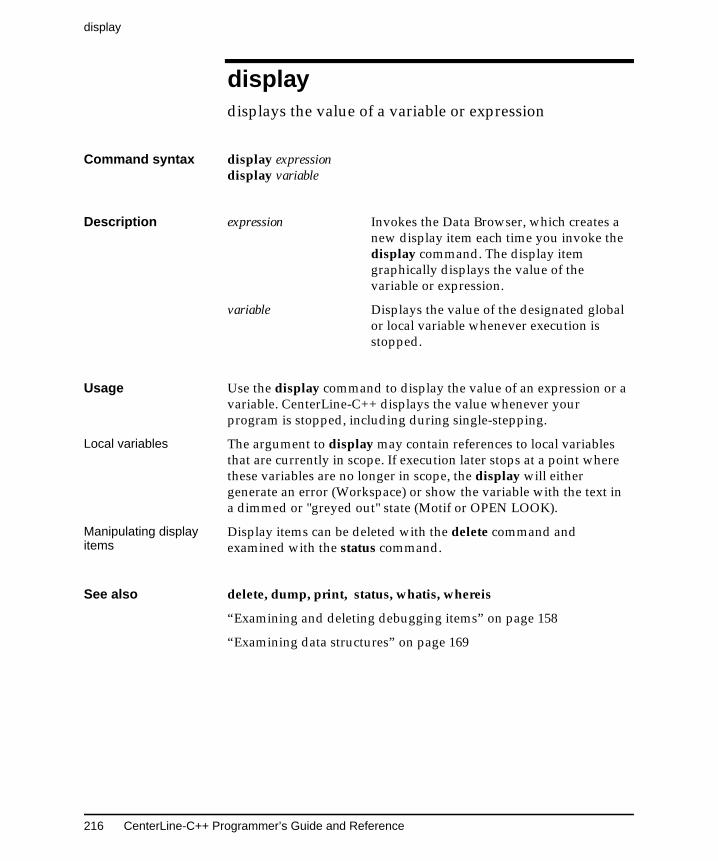
display
216 CenterLine-C++ Programmer’s Guide and Reference
displaydisplays the value of a variable or expression
Command syntax display expressiondisplay variable
Description expression Invokes the Data Browser, which creates anew display item each time you invoke thedisplay command. The display itemgraphically displays the value of thevariable or expression.
variable Displays the value of the designated globalor local variable whenever execution isstopped.
Usage Use the display command to display the value of an expression or avariable. CenterLine-C++ displays the value whenever yourprogram is stopped, including during single-stepping.
Local variables The argument to display may contain references to local variablesthat are currently in scope. If execution later stops at a point wherethese variables are no longer in scope, the display will eithergenerate an error (Workspace) or show the variable with the text ina dimmed or "greyed out" state (Motif or OPEN LOOK).
Manipulating displayitems
Display items can be deleted with the delete command andexamined with the status command.
See also delete, dump, print, status, whatis, whereis
“Examining and deleting debugging items” on page 158
“Examining data structures” on page 169
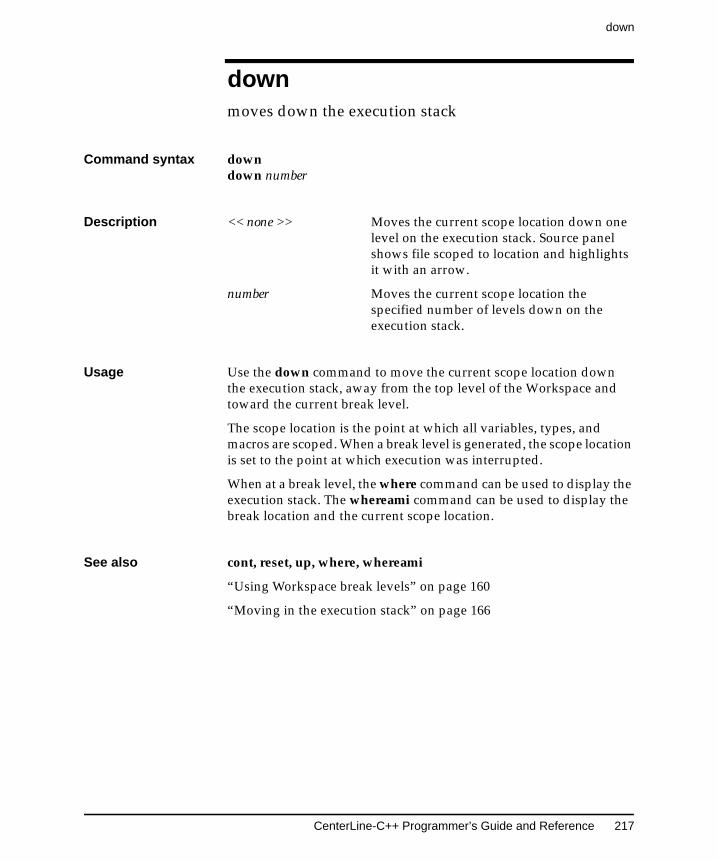
CenterLine-C++ Programmer’s Guide and Reference 217
down
downmoves down the execution stack
Command syntax downdown number
Description << none >> Moves the current scope location down onelevel on the execution stack. Source panelshows file scoped to location and highlightsit with an arrow.
number Moves the current scope location thespecified number of levels down on theexecution stack.
Usage Use the down command to move the current scope location downthe execution stack, away from the top level of the Workspace andtoward the current break level.
The scope location is the point at which all variables, types, andmacros are scoped. When a break level is generated, the scope locationis set to the point at which execution was interrupted.
When at a break level, the where command can be used to display theexecution stack. The whereami command can be used to display thebreak location and the current scope location.
See also cont, reset, up, where, whereami
“Using Workspace break levels” on page 160
“Moving in the execution stack” on page 166
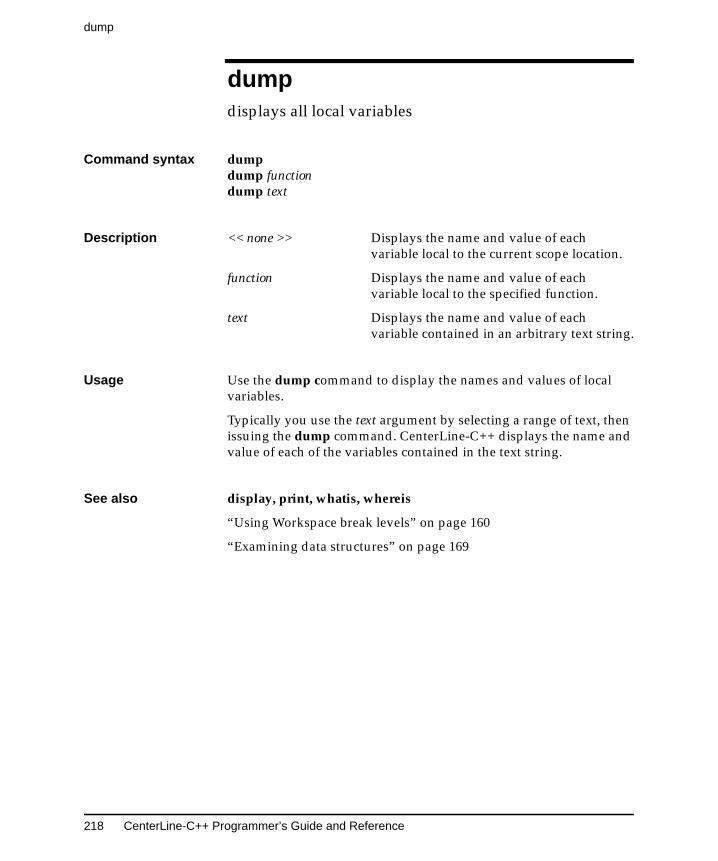
dump
218 CenterLine-C++ Programmer’s Guide and Reference
dumpdisplays all local variables
Command syntax dumpdump functiondump text
Description << none >> Displays the name and value of eachvariable local to the current scope location.
function Displays the name and value of eachvariable local to the specified function.
text Displays the name and value of eachvariable contained in an arbitrary text string.
Usage Use the dump command to display the names and values of localvariables.
Typically you use the text argument by selecting a range of text, thenissuing the dump command. CenterLine-C++ displays the name andvalue of each of the variables contained in the text string.
See also display, print, whatis, whereis
“Using Workspace break levels” on page 160
“Examining data structures” on page 169
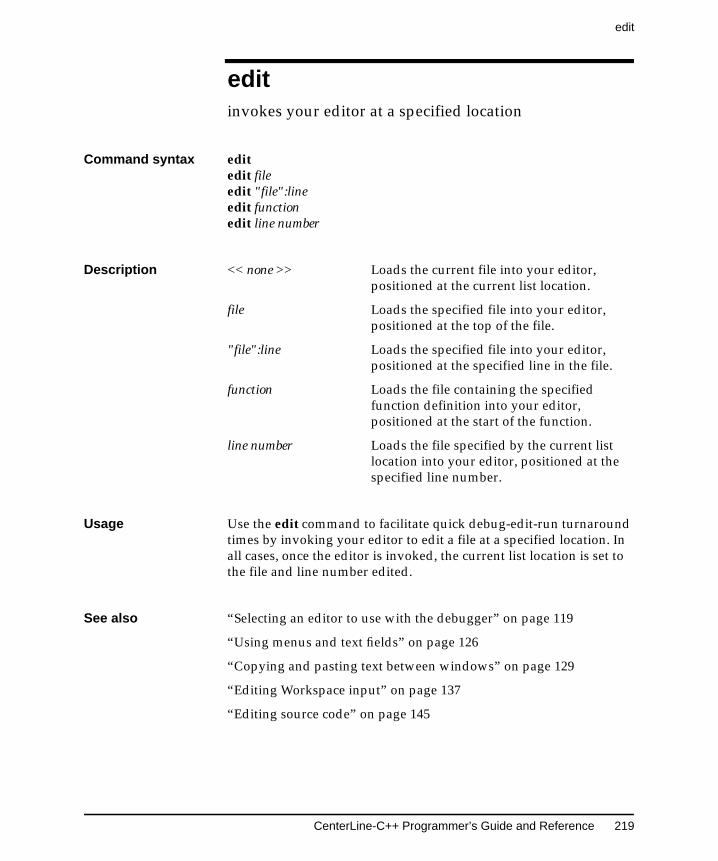
CenterLine-C++ Programmer’s Guide and Reference 219
edit
editinvokes your editor at a specified location
Command syntax editedit fileedit "file":lineedit functionedit line number
Description << none >> Loads the current file into your editor,positioned at the current list location.
file Loads the specified file into your editor,positioned at the top of the file.
"file":line Loads the specified file into your editor,positioned at the specified line in the file.
function Loads the file containing the specifiedfunction definition into your editor,positioned at the start of the function.
line number Loads the file specified by the current listlocation into your editor, positioned at thespecified line number.
Usage Use the edit command to facilitate quick debug-edit-run turnaroundtimes by invoking your editor to edit a file at a specified location. Inall cases, once the editor is invoked, the current list location is set tothe file and line number edited.
See also “Selecting an editor to use with the debugger” on page 119
“Using menus and text fields” on page 126
“Copying and pasting text between windows” on page 129
“Editing Workspace input” on page 137
“Editing source code” on page 145
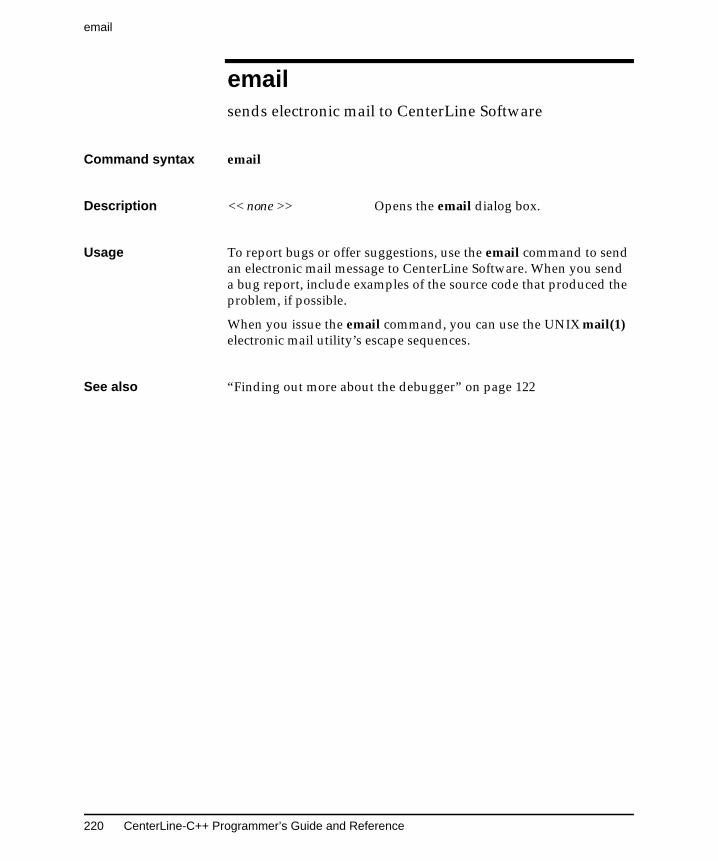
220 CenterLine-C++ Programmer’s Guide and Reference
emailsends electronic mail to CenterLine Software
Command syntax email
Description << none >> Opens the email dialog box.
Usage To report bugs or offer suggestions, use the email command to sendan electronic mail message to CenterLine Software. When you senda bug report, include examples of the source code that produced theproblem, if possible.
When you issue the email command, you can use the UNIX mail(1)electronic mail utility’s escape sequences.
See also “Finding out more about the debugger” on page 122
CenterLine-C++ Programmer’s Guide and Reference 221
file
filedisplays and sets the current list location
Command syntax filefile filename
Description << none >> Displays the name of the file containing thecurrent list location.
filename Sets the current list location to the top of thespecified file.
Usage Use the file command to display and set the current list location.Commands such as edit, list, and stop use the list location as thedefault location unless specifically overridden by an argument.
The file command changes which static variables are visible at the toplevel in the Workspace.
See also edit, list, stop
“Using Workspace break levels” on page 160
gdb
222 CenterLine-C++ Programmer’s Guide and Reference
gdbexecutes a gdb command
Command syntax gdb gdb_command [ argument ] ...
Description gdb_command [argument] Executes gdb_command [argument] as if itwere typed to a gdb command prompt.
Usage The gdb command allows you to stay in CenterLine-C++ andexecute gdb commands. For instance, the following invokes break, agdb command, with 20 as the argument:
pdm 1 -> gdb break 20
For more information on gdb commands, you can use the gdb helpcommand:
pdm 1 -> gdb help
Documentation on gdb is available from CenterLine by usinganonymous ftp. For information, refer to “Distribution” on page iii.
See also gdb_mode
“Invoking Workspace commands” on page 131
NOTE Although we provide access to native gdbcommands as a convenience, we do notprovide any additional support for native gdbcommands.

CenterLine-C++ Programmer’s Guide and Reference 223
gdb_mode
gdb_modeinvokes gdb
Command syntax gdb_mode
Description << none >> Invokes gdb.
Usage Use the gdb_mode command when you want to issue a series ofgdb commands without prefacing every command with the gdbcommand.
To use gdb along with pdm, issue the gdb_mode command in theCenterLine-C++ Workspace:
pdm 1 -> gdb_mode(gdb)
At the (gdb) prompt, you can use only the gdb command set:
(gdb) break 20(gdb) whenUndefined command: "when". Try ”help”.
You can get back to the pdm debugger by typing the followingcommand:
(gdb) pdmpdm 2 ->
For more information on gdb commands, you can use the helpcommand while in gdb mode.
Documentation on gdb is available from CenterLine by usinganonymous ftp. For information, refer to “Distribution” on page iii.
See also gdb
“Invoking Workspace commands” on page 131
NOTE Although we provide the gdb_modecommand as a convenience, we do not provideany technical support for gdb.
help
224 CenterLine-C++ Programmer’s Guide and Reference
helpdisplays usage information about commands
Command syntax helphelp command
Description << none >> Lists the names of CenterLine-C++commands by category.
command Displays a summary of syntax and usageinformation for the specified command.
Usage Use the help command for quick online help for CenterLine-C++commands.
See also man
“Finding out more about the debugger” on page 122
CenterLine-C++ Programmer’s Guide and Reference 225
history
historylists previously entered input
Command syntax historyhistory number
Description << none >> Displays all input lines previously enteredfrom the Workspace.
number Displays the specified number of input linesentered from the Workspace.
Usage Use the history command for easy recall of previously issuedcommands and to monitor the debugging sequence leading to agiven state.
Use ## to repeat the immediately previous command, and use#history_line_number to repeat the command specified byhistory_line_number.
Pressing Control-p scrolls backward through the history list. PressingControl-n scrolls forward through the history list.
To save the list of input lines entered from the Workspace in a file, usethe following command:
-> history #> file_name
See also “Saving your debugging session” on page 190
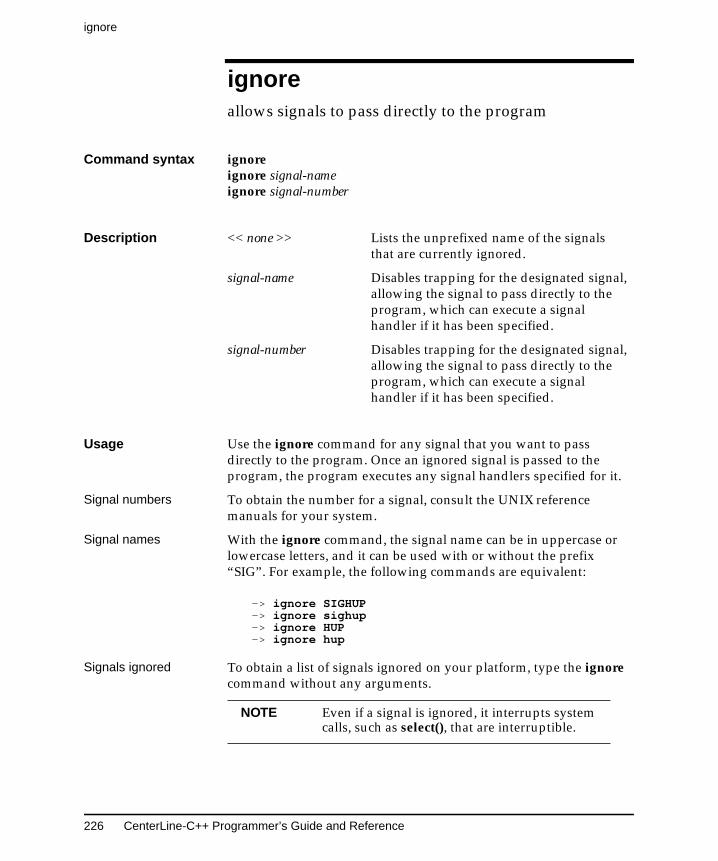
ignore
226 CenterLine-C++ Programmer’s Guide and Reference
ignoreallows signals to pass directly to the program
Command syntax ignoreignore signal-nameignore signal-number
Description << none >> Lists the unprefixed name of the signalsthat are currently ignored.
signal-name Disables trapping for the designated signal,allowing the signal to pass directly to theprogram, which can execute a signalhandler if it has been specified.
signal-number Disables trapping for the designated signal,allowing the signal to pass directly to theprogram, which can execute a signalhandler if it has been specified.
Usage Use the ignore command for any signal that you want to passdirectly to the program. Once an ignored signal is passed to theprogram, the program executes any signal handlers specified for it.
Signal numbers To obtain the number for a signal, consult the UNIX referencemanuals for your system.
Signal names With the ignore command, the signal name can be in uppercase orlowercase letters, and it can be used with or without the prefix“SIG”. For example, the following commands are equivalent:
-> ignore SIGHUP-> ignore sighup-> ignore HUP-> ignore hup
Signals ignored To obtain a list of signals ignored on your platform, type the ignorecommand without any arguments.
NOTE Even if a signal is ignored, it interrupts systemcalls, such as select(), that are interruptible.
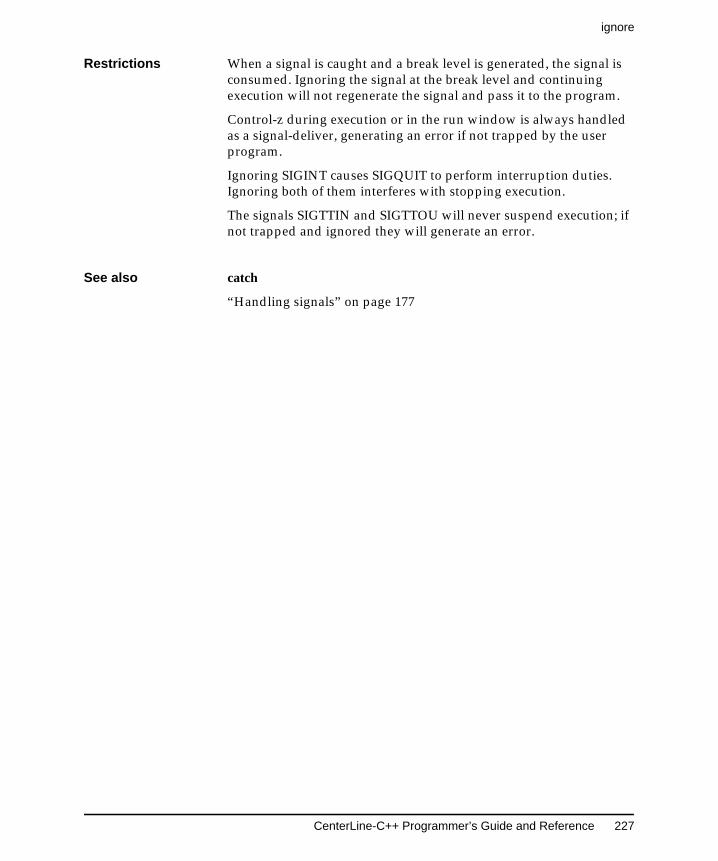
CenterLine-C++ Programmer’s Guide and Reference 227
ignore
Restrictions When a signal is caught and a break level is generated, the signal isconsumed. Ignoring the signal at the break level and continuingexecution will not regenerate the signal and pass it to the program.
Control-z during execution or in the run window is always handledas a signal-deliver, generating an error if not trapped by the userprogram.
Ignoring SIGINT causes SIGQUIT to perform interruption duties.Ignoring both of them interferes with stopping execution.
The signals SIGTTIN and SIGTTOU will never suspend execution; ifnot trapped and ignored they will generate an error.
See also catch
“Handling signals” on page 177
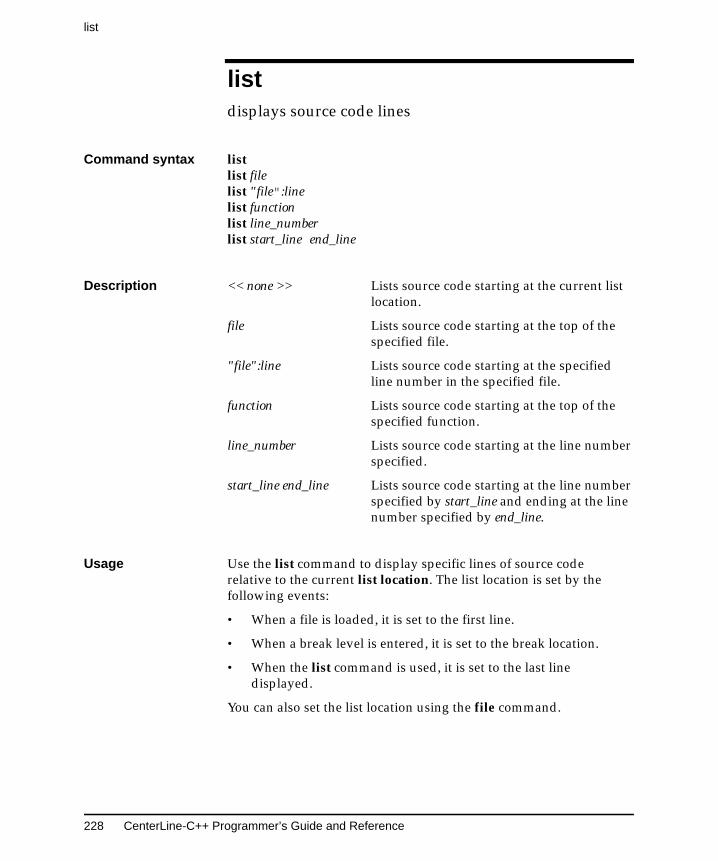
list
228 CenterLine-C++ Programmer’s Guide and Reference
listdisplays source code lines
Command syntax listlist filelist "file":linelist functionlist line_numberlist start_line end_line
Description << none >> Lists source code starting at the current listlocation.
file Lists source code starting at the top of thespecified file.
"file":line Lists source code starting at the specifiedline number in the specified file.
function Lists source code starting at the top of thespecified function.
line_number Lists source code starting at the line numberspecified.
start_line end_line Lists source code starting at the line numberspecified by start_line and ending at the linenumber specified by end_line.
Usage Use the list command to display specific lines of source coderelative to the current list location. The list location is set by thefollowing events:
• When a file is loaded, it is set to the first line.
• When a break level is entered, it is set to the break location.
• When the list command is used, it is set to the last linedisplayed.
You can also set the list location using the file command.

CenterLine-C++ Programmer’s Guide and Reference 229
list
If you use the list command and specify a static function for thefunction argument, you may receive an error in certain situations.However, if you first use the whatis command and specify the staticfunction as an argument, the debugger loads additional symbols.Then, you can use the list command with the static function to loadthe source code in the Source area.
See also display, edit, whatis, whereis
“Listing source code” on page 143
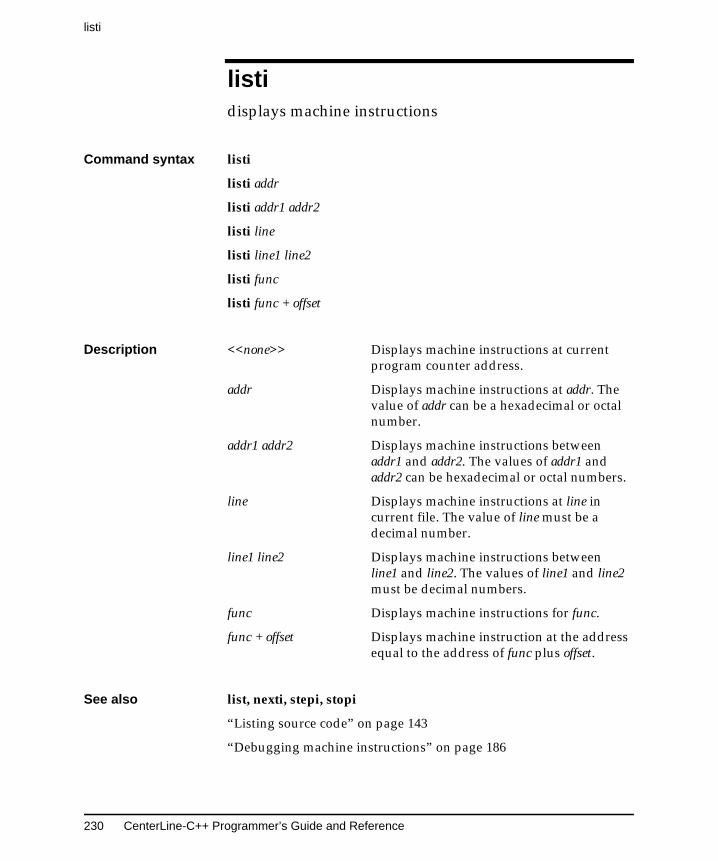
listi
230 CenterLine-C++ Programmer’s Guide and Reference
listidisplays machine instructions
Command syntax listi
listi addr
listi addr1 addr2
listi line
listi line1 line2
listi func
listi func + offset
Description <<none>> Displays machine instructions at currentprogram counter address.
addr Displays machine instructions at addr. Thevalue of addr can be a hexadecimal or octalnumber.
addr1 addr2 Displays machine instructions betweenaddr1 and addr2. The values of addr1 andaddr2 can be hexadecimal or octal numbers.
line Displays machine instructions at line incurrent file. The value of line must be adecimal number.
line1 line2 Displays machine instructions betweenline1 and line2. The values of line1 and line2must be decimal numbers.
func Displays machine instructions for func.
func + offset Displays machine instruction at the addressequal to the address of func plus offset.
See also list, nexti, stepi, stopi
“Listing source code” on page 143
“Debugging machine instructions” on page 186
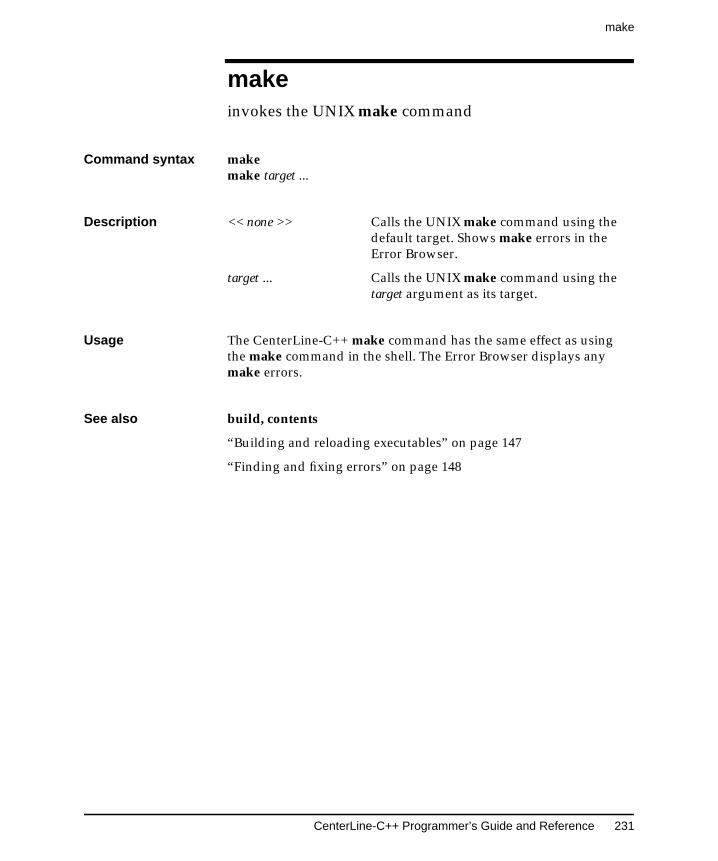
CenterLine-C++ Programmer’s Guide and Reference 231
make
makeinvokes the UNIX make command
Command syntax makemake target ...
Description << none >> Calls the UNIX make command using thedefault target. Shows make errors in theError Browser.
target ... Calls the UNIX make command using thetarget argument as its target.
Usage The CenterLine-C++ make command has the same effect as usingthe make command in the shell. The Error Browser displays anymake errors.
See also build, contents
“Building and reloading executables” on page 147
“Finding and fixing errors” on page 148
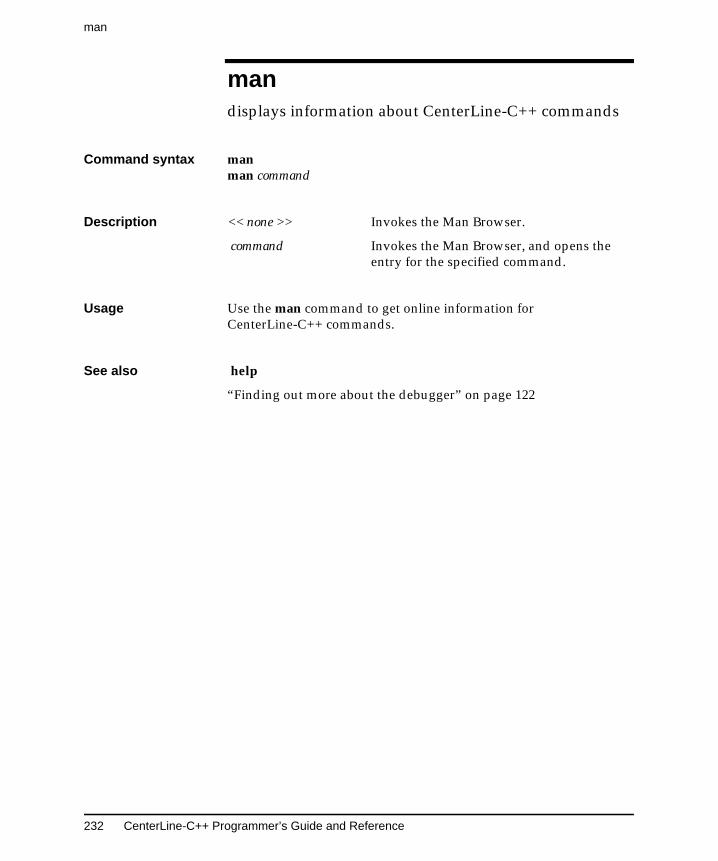
man
232 CenterLine-C++ Programmer’s Guide and Reference
mandisplays information about CenterLine-C++ commands
Command syntax manman command
Description << none >> Invokes the Man Browser.
command Invokes the Man Browser, and opens theentry for the specified command.
Usage Use the man command to get online information forCenterLine-C++ commands.
See also help
“Finding out more about the debugger” on page 122

CenterLine-C++ Programmer’s Guide and Reference 233
next
nextexecutes source code by line; does not enter functions
Command syntax nextnext number
Description << none >> Executes an entire line, regardless of thenumber of statements on the line, and thenstops execution. Displays a solid arrowpointing to the current execution line in theSource area.
number Executes the specified number of lines, andthen stops execution.
Usage Use the next command to execute your code line by line withoutgoing into functions that are called.
The next command does not stop inside object code functions thatdo not have debugging information (functions compiled without the-g switch).
See also nexti, step, stepout
“Using Workspace break levels” on page 160
“Running, continuing, and stepping” on page 163
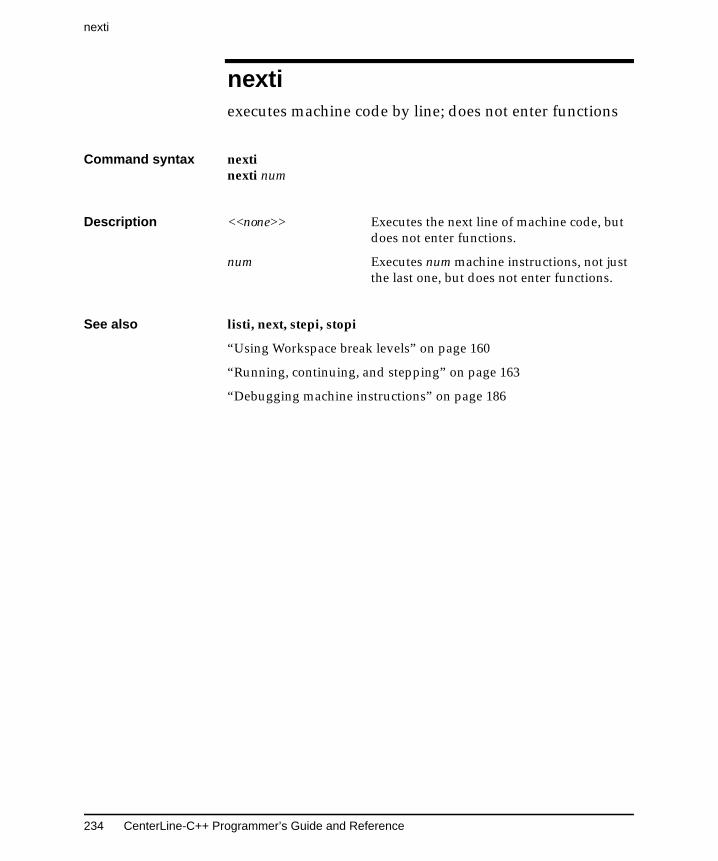
nexti
234 CenterLine-C++ Programmer’s Guide and Reference
nextiexecutes machine code by line; does not enter functions
Command syntax nextinexti num
Description <<none>> Executes the next line of machine code, butdoes not enter functions.
num Executes num machine instructions, not justthe last one, but does not enter functions.
See also listi, next, stepi, stopi
“Using Workspace break levels” on page 160
“Running, continuing, and stepping” on page 163
“Debugging machine instructions” on page 186
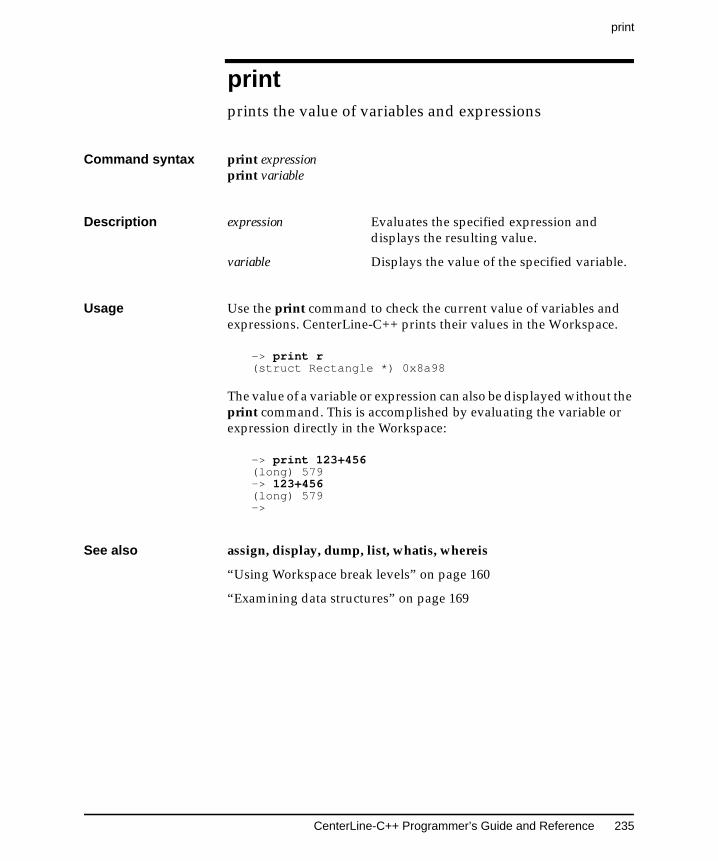
CenterLine-C++ Programmer’s Guide and Reference 235
printprints the value of variables and expressions
Command syntax print expressionprint variable
Description expression Evaluates the specified expression anddisplays the resulting value.
variable Displays the value of the specified variable.
Usage Use the print command to check the current value of variables andexpressions. CenterLine-C++ prints their values in the Workspace.
-> print r(struct Rectangle *) 0x8a98
The value of a variable or expression can also be displayed without theprint command. This is accomplished by evaluating the variable orexpression directly in the Workspace:
-> print 123+456(long) 579-> 123+456(long) 579->
See also assign, display, dump, list, whatis, whereis
“Using Workspace break levels” on page 160
“Examining data structures” on page 169
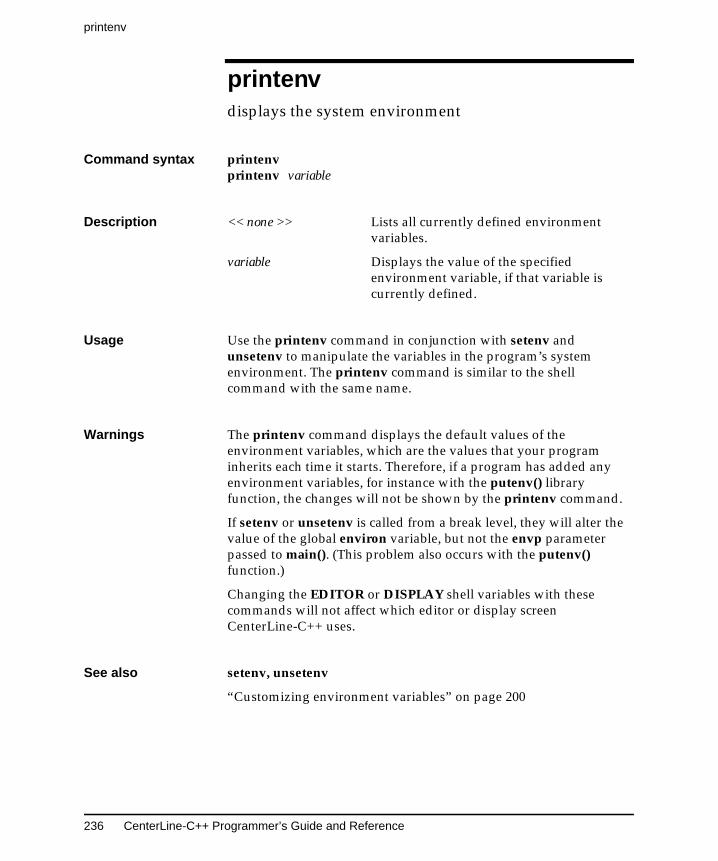
printenv
236 CenterLine-C++ Programmer’s Guide and Reference
printenvdisplays the system environment
Command syntax printenvprintenv variable
Description << none >> Lists all currently defined environmentvariables.
variable Displays the value of the specifiedenvironment variable, if that variable iscurrently defined.
Usage Use the printenv command in conjunction with setenv andunsetenv to manipulate the variables in the program’s systemenvironment. The printenv command is similar to the shellcommand with the same name.
Warnings The printenv command displays the default values of theenvironment variables, which are the values that your programinherits each time it starts. Therefore, if a program has added anyenvironment variables, for instance with the putenv() libraryfunction, the changes will not be shown by the printenv command.
If setenv or unsetenv is called from a break level, they will alter thevalue of the global environ variable, but not the envp parameterpassed to main(). (This problem also occurs with the putenv()function.)
Changing the EDITOR or DISPLAY shell variables with thesecommands will not affect which editor or display screenCenterLine-C++ uses.
See also setenv, unsetenv
“Customizing environment variables” on page 200
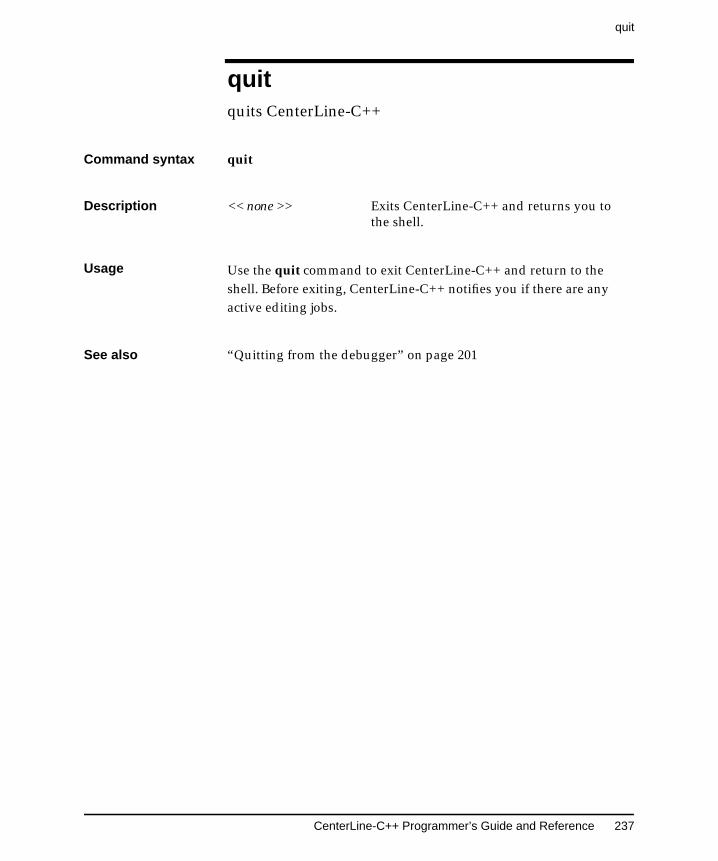
CenterLine-C++ Programmer’s Guide and Reference 237
quit
quitquits CenterLine-C++
Command syntax quit
Description << none >> Exits CenterLine-C++ and returns you tothe shell.
Usage Use the quit command to exit CenterLine-C++ and return to theshell. Before exiting, CenterLine-C++ notifies you if there are anyactive editing jobs.
See also “Quitting from the debugger” on page 201
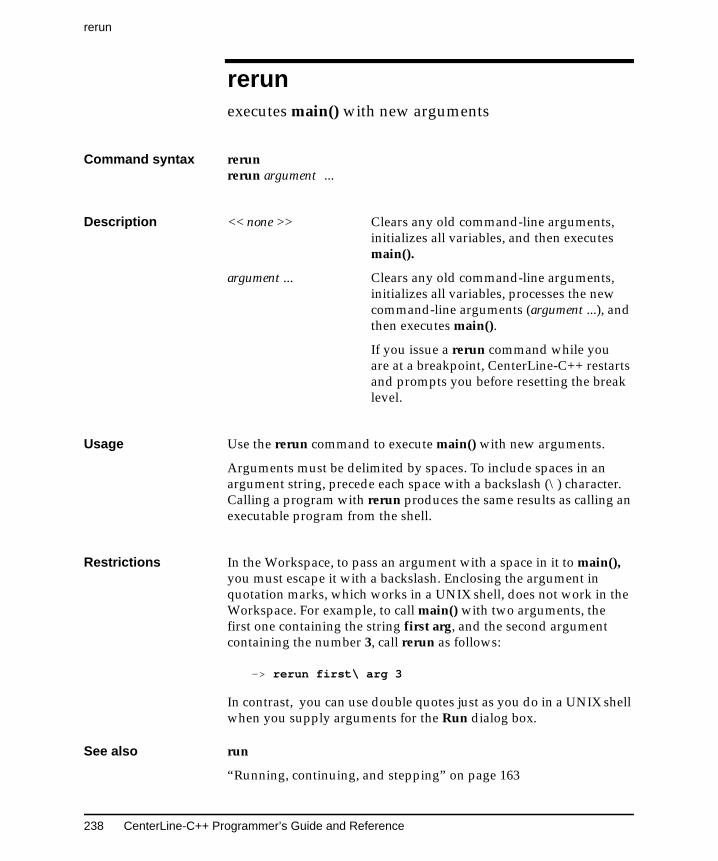
rerun
238 CenterLine-C++ Programmer’s Guide and Reference
rerunexecutes main() with new arguments
Command syntax rerunrerun argument ...
Description << none >> Clears any old command-line arguments,initializes all variables, and then executesmain().
argument ... Clears any old command-line arguments,initializes all variables, processes the newcommand-line arguments (argument ...), andthen executes main().
If you issue a rerun command while youare at a breakpoint, CenterLine-C++ restartsand prompts you before resetting the breaklevel.
Usage Use the rerun command to execute main() with new arguments.
Arguments must be delimited by spaces. To include spaces in anargument string, precede each space with a backslash (\) character.Calling a program with rerun produces the same results as calling anexecutable program from the shell.
Restrictions In the Workspace, to pass an argument with a space in it to main(),you must escape it with a backslash. Enclosing the argument inquotation marks, which works in a UNIX shell, does not work in theWorkspace. For example, to call main() with two arguments, thefirst one containing the string first arg, and the second argumentcontaining the number 3, call rerun as follows:
-> rerun first\ arg 3
In contrast, you can use double quotes just as you do in a UNIX shellwhen you supply arguments for the Run dialog box.
See also run
“Running, continuing, and stepping” on page 163
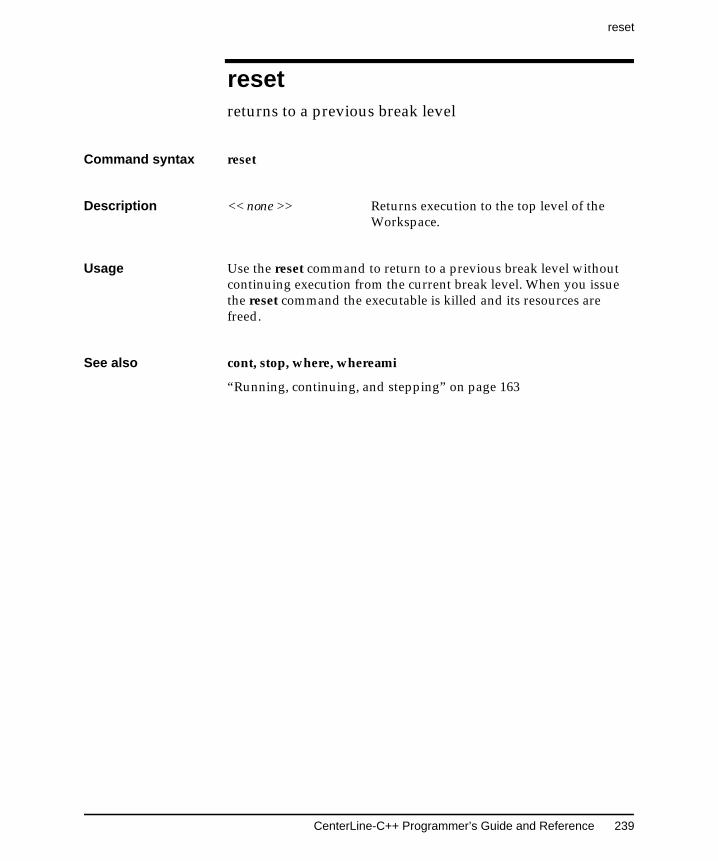
CenterLine-C++ Programmer’s Guide and Reference 239
reset
resetreturns to a previous break level
Command syntax reset
Description << none >> Returns execution to the top level of theWorkspace.
Usage Use the reset command to return to a previous break level withoutcontinuing execution from the current break level. When you issuethe reset command the executable is killed and its resources arefreed.
See also cont, stop, where, whereami
“Running, continuing, and stepping” on page 163
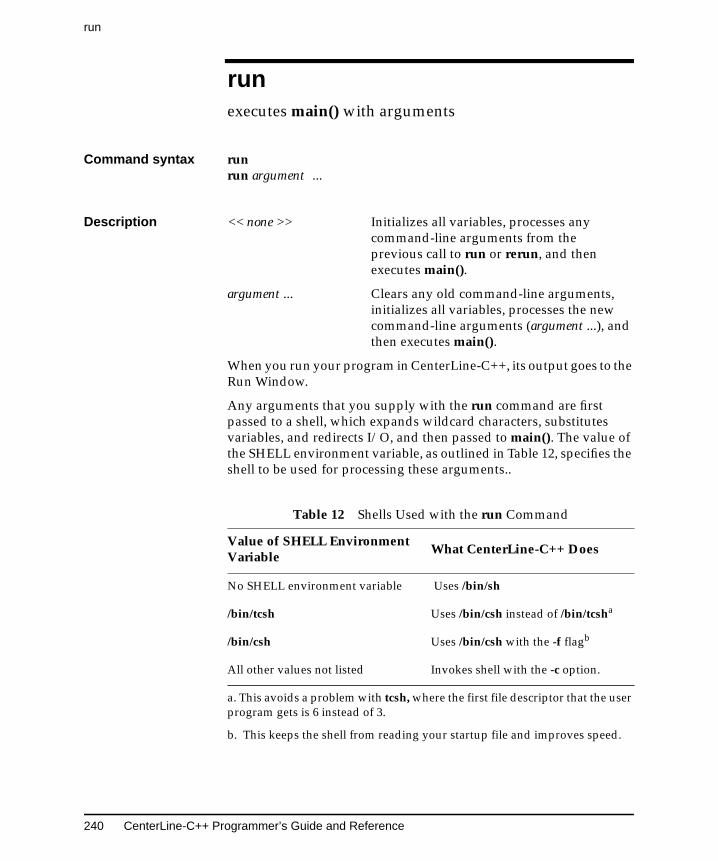
run
240 CenterLine-C++ Programmer’s Guide and Reference
runexecutes main() with arguments
Command syntax runrun argument ...
Description << none >> Initializes all variables, processes anycommand-line arguments from theprevious call to run or rerun, and thenexecutes main().
argument ... Clears any old command-line arguments,initializes all variables, processes the newcommand-line arguments (argument ...), andthen executes main().
When you run your program in CenterLine-C++, its output goes to theRun Window.
Any arguments that you supply with the run command are firstpassed to a shell, which expands wildcard characters, substitutesvariables, and redirects I/O, and then passed to main(). The value ofthe SHELL environment variable, as outlined in Table 12, specifies theshell to be used for processing these arguments..
a. This avoids a problem with tcsh, where the first file descriptor that the userprogram gets is 6 instead of 3.
b. This keeps the shell from reading your startup file and improves speed.
Table 12 Shells Used with the run Command
Value of SHELL EnvironmentVariable
What CenterLine-C++ Does
No SHELL environment variable Uses /bin/sh
/bin/tcsh Uses /bin/csh instead of /bin/tcsha
/bin/csh Uses /bin/csh with the -f flagb
All other values not listed Invokes shell with the -c option.
CenterLine-C++ Programmer’s Guide and Reference 241
run
Usage Use the run command to execute main() after initializing allvariables and processing any command-line arguments.
If you issue a run command while you are at a breakpoint,CenterLine-C++ restarts and informs you that it is resetting the breaklevel.
How CenterLine-C++interprets thecommand
Both run and rerun construct arguments for main() from thecommand line. If run is called without any arguments, it uses thecommand-line arguments from the most recent call to either run orrerun. If rerun is called without any arguments, it calls main()without any arguments.
Passing argumentscontaining spaces
In the Workspace, in order to pass an argument with a space in it tomain(), you must precede the space with a backslash. Enclosing theargument in quotation marks, which works in a UNIX shell, doesnot work in CenterLine-C++.
For example, to call main() with two arguments, the first onecontaining the string first arg, and the second argument containingthe number 3, call run as follows:
-> run first\ arg 3
In contrast, you can use quotation marks just as you do in a UNIX shellwhen you supply arguments for the Run dialog box.
See also rerun
“Running, continuing, and stepping” on page 163
set
242 CenterLine-C++ Programmer’s Guide and Reference
setassigns a value to a variable
Command syntax set variable = expression
Description variable = expression Evaluates expression and assigns its value tovariable.
Usage Use the set command to assign a value to a variable. The specifiedvariable can be a variable defined in either the program or theWorkspace.
See also assign
“Examining data structures” on page 169
CenterLine-C++ Programmer’s Guide and Reference 243
setenv
setenvadds a variable to the system environment
Command syntax setenvsetenv variablesetenv variable value
Description << none >> Lists all defined environment variables andgives their current values. This is equivalentto calling printenv without an argument.
variable Defines variable and sets its value to theempty string. If the specified variablealready exists, its value is reset to the emptystring.
variable value Defines variable and sets it to the valuespecified by value. If variable already exists,its value is reset to value.
Usage Use the setenv command to manipulate the variables in theprogram’s system environment. The setenv command is analogousto the shell command of the same name.
These commands affect only your program’s environment variables.They do not affect the environment variables used by CenterLine-C++to control its own operations.
The environment is an array of strings that is made available to theprogram through the global environ variable and the envp parameter,which is passed as the third argument to the main() function. Byconvention, each string has the format name=value, where the valuepart is optional.
Warnings Be careful when checking the current values for environmentvariables. The printenv and setenv commands, when issued with noargument, display the default values of the environment variables,which are the values that your program will inherit each time itstarts.
setenv
244 CenterLine-C++ Programmer’s Guide and Reference
If setenv or unsetenv are called from a break level, they will alter thevalue of the global environ variable, but not the envp parameterpassed to main(). This problem also occurs with the putenv() function.
Changing the EDITOR or DISPLAY shell variables with thesecommands will not affect which editor or display screenCenterLine-C++ uses.
See also printenv, unsetenv
“Customizing environment variables” on page 200
CenterLine-C++ Programmer’s Guide and Reference 245
sh
shexecutes a Bourne subshell
Command syntax shsh argument ...
Description << none >> Executes a Bourne subshell, setting noswitches and passing no arguments.
argument ... Executes a Bourne subshell, setting the -cswitch and passing the specified arguments.
Usage Use the sh command to execute a Bourne subshell. This can be usedto execute UNIX commands from the Workspace:
-> sh rm my_file
See also shell
“Invoking shell commands” on page 135
shell
246 CenterLine-C++ Programmer’s Guide and Reference
shellexecutes a subshell
Command syntax shellshell argument ...
Description << none >> Executes the default shell specified by theSHELL environment variable. Sets noswitches and passes no arguments.
argument ... Executes the default shell specified by theSHELL environment variable. Sets the -cswitch and passes argument to the shell. Youcan have more than one argument.
Usage Use the shell command to execute the shell specified by the shelloption. This can be used to execute UNIX commands in theWorkspace.
See also sh
“Invoking shell commands” on page 135
CenterLine-C++ Programmer’s Guide and Reference 247
source
sourcereads CenterLine-C++ commands from a file
Command syntax source file
Description file Reads CenterLine-C++ commands from thespecified file.
Usage Use the source command to read CenterLine-C++ commands from afile.
CenterLine-C++ uses source to read the system-wide startup file andthe .pdminit file in your home or current directory when you startCenterLine-C++.
Example The following example indicates how to use source with a filecontaining aliases:
% cat aliasesalias p printalias s stepalias n nextalias ls sh ls% centerline-c++...-> source aliases-> p 123+456(long) 579->
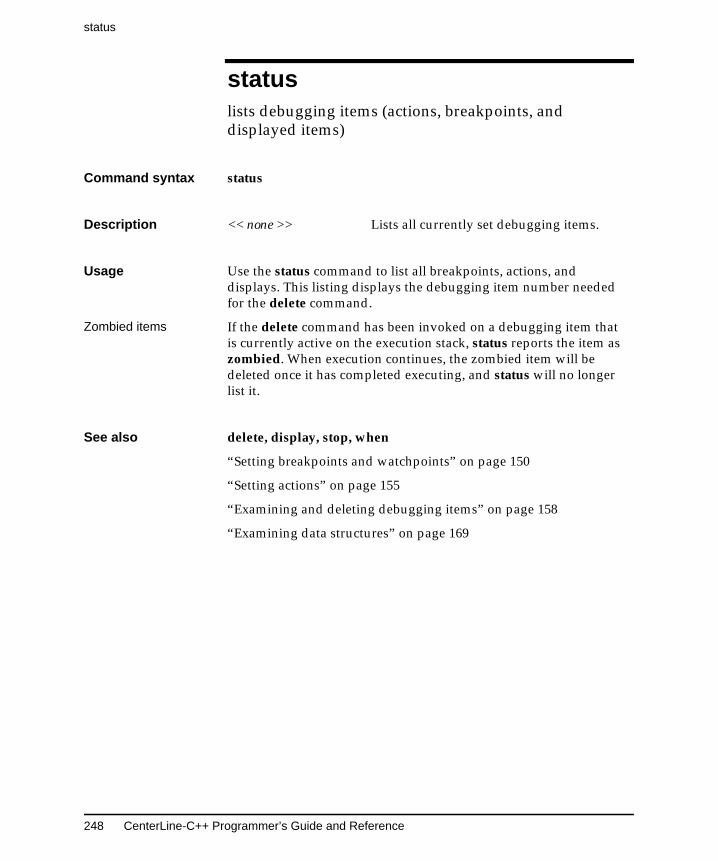
status
248 CenterLine-C++ Programmer’s Guide and Reference
statuslists debugging items (actions, breakpoints, anddisplayed items)
Command syntax status
Description << none >> Lists all currently set debugging items.
Usage Use the status command to list all breakpoints, actions, anddisplays. This listing displays the debugging item number neededfor the delete command.
Zombied items If the delete command has been invoked on a debugging item thatis currently active on the execution stack, status reports the item aszombied. When execution continues, the zombied item will bedeleted once it has completed executing, and status will no longerlist it.
See also delete, display, stop, when
“Setting breakpoints and watchpoints” on page 150
“Setting actions” on page 155
“Examining and deleting debugging items” on page 158
“Examining data structures” on page 169
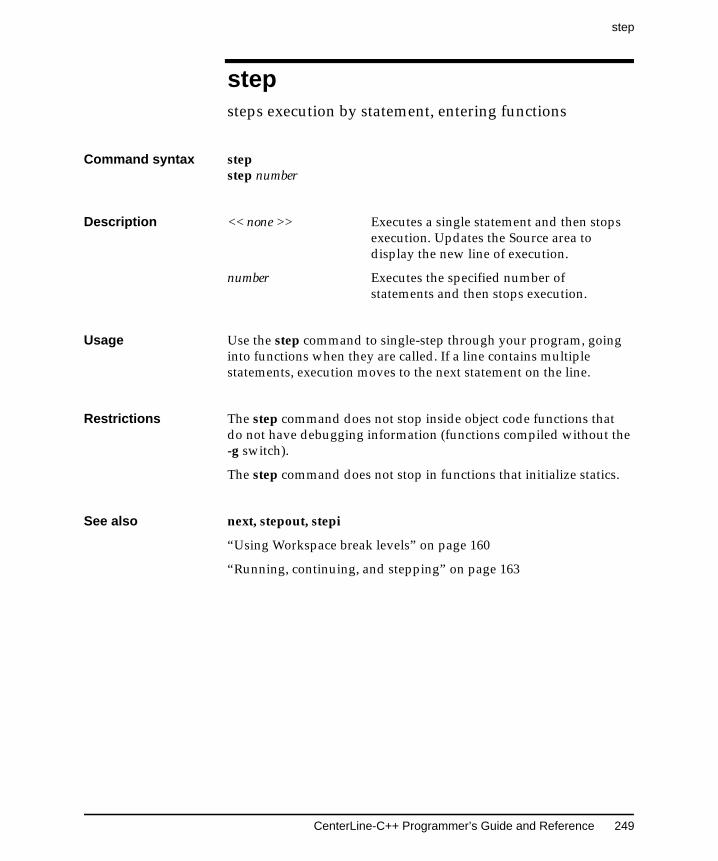
CenterLine-C++ Programmer’s Guide and Reference 249
step
stepsteps execution by statement, entering functions
Command syntax stepstep number
Description << none >> Executes a single statement and then stopsexecution. Updates the Source area todisplay the new line of execution.
number Executes the specified number ofstatements and then stops execution.
Usage Use the step command to single-step through your program, goinginto functions when they are called. If a line contains multiplestatements, execution moves to the next statement on the line.
Restrictions The step command does not stop inside object code functions thatdo not have debugging information (functions compiled without the-g switch).
The step command does not stop in functions that initialize statics.
See also next, stepout, stepi
“Using Workspace break levels” on page 160
“Running, continuing, and stepping” on page 163
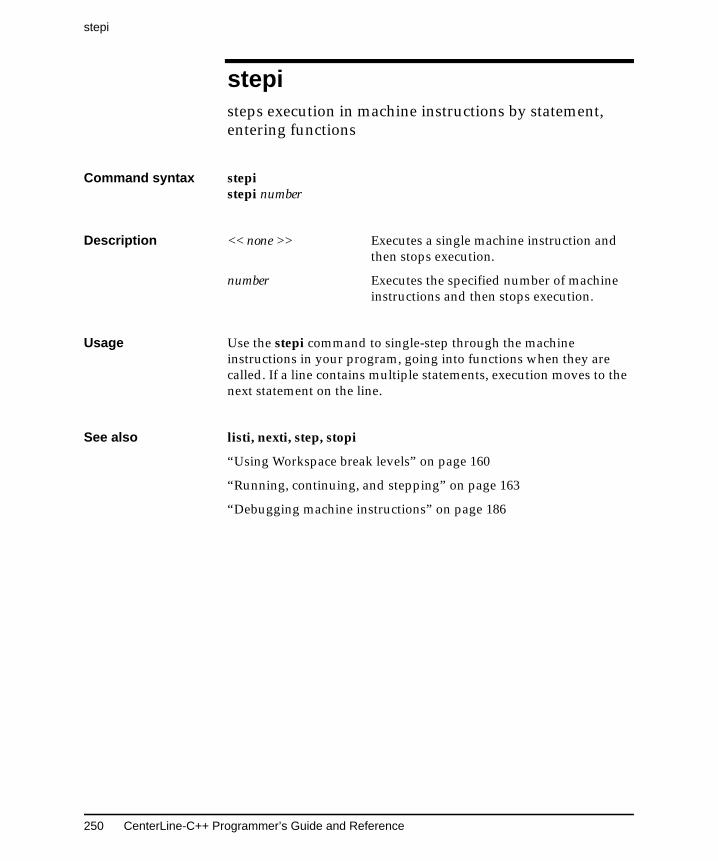
stepi
250 CenterLine-C++ Programmer’s Guide and Reference
stepisteps execution in machine instructions by statement,entering functions
Command syntax stepistepi number
Description << none >> Executes a single machine instruction andthen stops execution.
number Executes the specified number of machineinstructions and then stops execution.
Usage Use the stepi command to single-step through the machineinstructions in your program, going into functions when they arecalled. If a line contains multiple statements, execution moves to thenext statement on the line.
See also listi, nexti, step, stopi
“Using Workspace break levels” on page 160
“Running, continuing, and stepping” on page 163
“Debugging machine instructions” on page 186
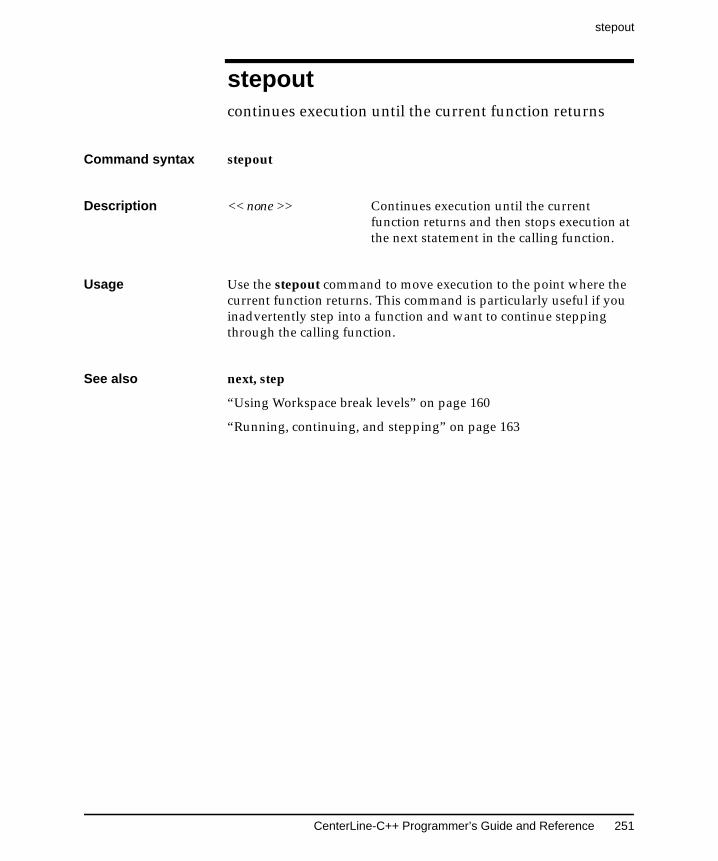
CenterLine-C++ Programmer’s Guide and Reference 251
stepout
stepoutcontinues execution until the current function returns
Command syntax stepout
Description << none >> Continues execution until the currentfunction returns and then stops execution atthe next statement in the calling function.
Usage Use the stepout command to move execution to the point where thecurrent function returns. This command is particularly useful if youinadvertently step into a function and want to continue steppingthrough the calling function.
See also next, step
“Using Workspace break levels” on page 160
“Running, continuing, and stepping” on page 163
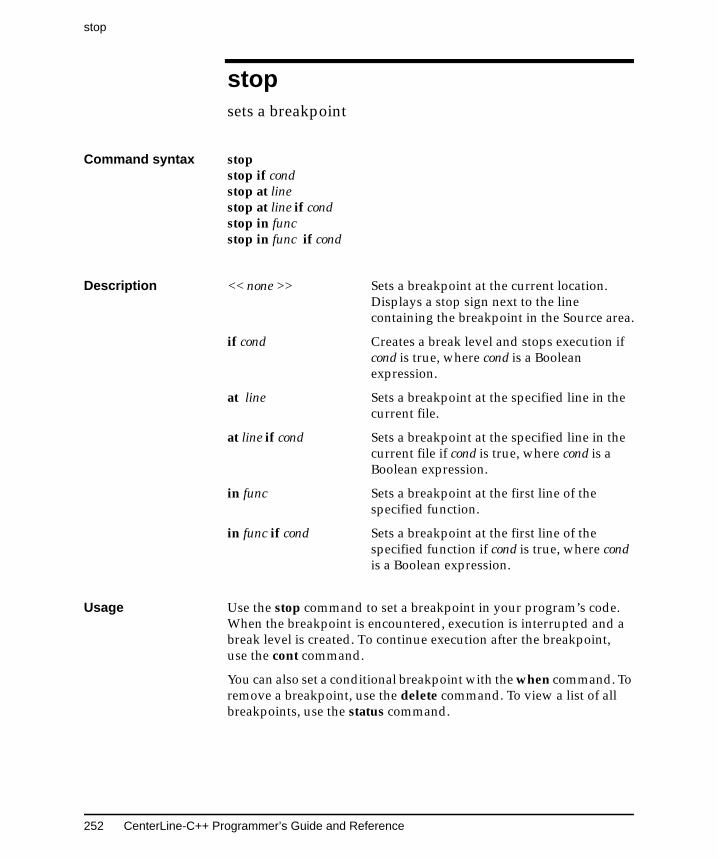
stop
252 CenterLine-C++ Programmer’s Guide and Reference
stopsets a breakpoint
Command syntax stopstop if condstop at linestop at line if condstop in funcstop in func if cond
Description << none >> Sets a breakpoint at the current location.Displays a stop sign next to the linecontaining the breakpoint in the Source area.
if cond Creates a break level and stops execution ifcond is true, where cond is a Booleanexpression.
at line Sets a breakpoint at the specified line in thecurrent file.
at line if cond Sets a breakpoint at the specified line in thecurrent file if cond is true, where cond is aBoolean expression.
in func Sets a breakpoint at the first line of thespecified function.
in func if cond Sets a breakpoint at the first line of thespecified function if cond is true, where condis a Boolean expression.
Usage Use the stop command to set a breakpoint in your program’s code.When the breakpoint is encountered, execution is interrupted and abreak level is created. To continue execution after the breakpoint,use the cont command.
You can also set a conditional breakpoint with the when command. Toremove a breakpoint, use the delete command. To view a list of allbreakpoints, use the status command.
CenterLine-C++ Programmer’s Guide and Reference 253
stop
See also cont, delete, status, stopi, when
“Setting breakpoints and watchpoints” on page 150
“Setting actions” on page 155
“Examining and deleting debugging items” on page 158
“Using Workspace break levels” on page 160
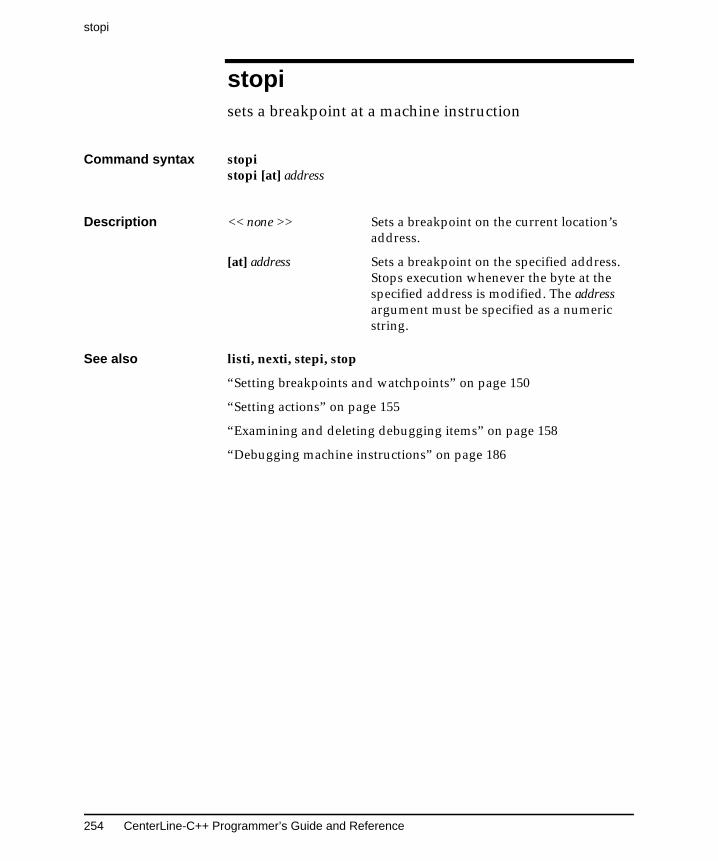
stopi
254 CenterLine-C++ Programmer’s Guide and Reference
stopisets a breakpoint at a machine instruction
Command syntax stopistopi [at] address
Description << none >> Sets a breakpoint on the current location’saddress.
[at] address Sets a breakpoint on the specified address.Stops execution whenever the byte at thespecified address is modified. The addressargument must be specified as a numericstring.
See also listi, nexti, stepi, stop
“Setting breakpoints and watchpoints” on page 150
“Setting actions” on page 155
“Examining and deleting debugging items” on page 158
“Debugging machine instructions” on page 186
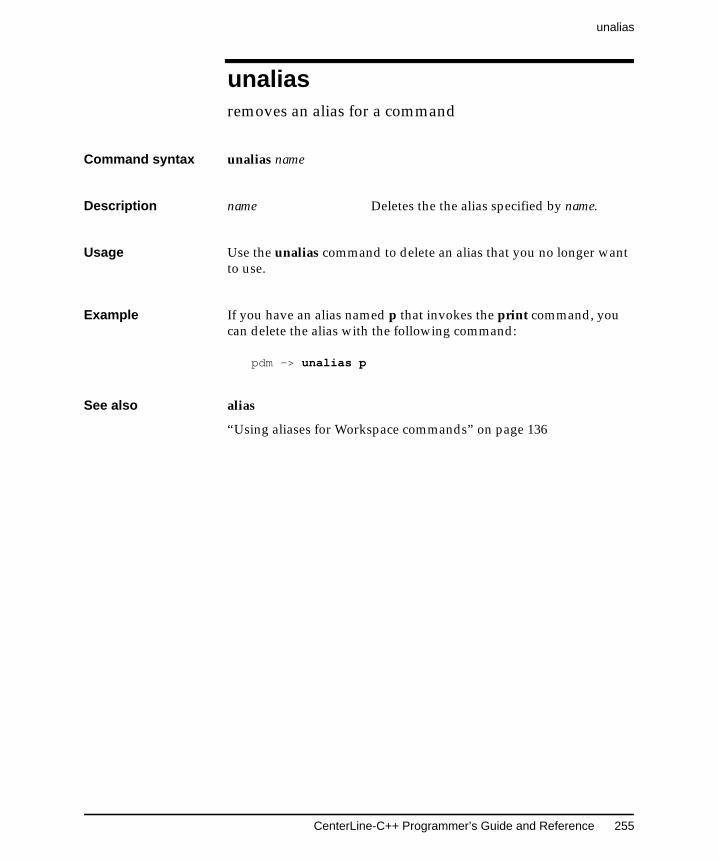
CenterLine-C++ Programmer’s Guide and Reference 255
unalias
unaliasremoves an alias for a command
Command syntax unalias name
Description name Deletes the the alias specified by name.
Usage Use the unalias command to delete an alias that you no longer wantto use.
Example If you have an alias named p that invokes the print command, youcan delete the alias with the following command:
pdm -> unalias p
See also alias
“Using aliases for Workspace commands” on page 136
unsetenv
256 CenterLine-C++ Programmer’s Guide and Reference
unsetenvremoves a variable from the program’s environment
Command syntax unsetenv variable
Description variable Removes the definition of variable from thesystem environment.
Usage Use the unsetenv command to remove a variable from theprogram’s system environment. The unsetenv command isanalogous to the similarly named shell command.
The unsetenv command affects only your program’s environmentvariables. It does not affect the environment variables used byCenterLine-C++ to control its own operations.
The environment is an array of strings that is made available to theprogram through the global environ variable and the envp parameter,which is passed as the third argument to the main() function. Byconvention, each string has the format name=value, where the valuepart is optional.
Warnings If unsetenv is called from a break level, it will alter the value of theglobal environ variable, but not the envp parameter passed tomain(). This problem also occurs with the putenv() function.
Changing the EDITOR or DISPLAY shell variables with unsetenvdoes not affect which editor or display screen CenterLine-C++ uses.
See also printenv, setenv
“Customizing environment variables” on page 200
CenterLine-C++ Programmer’s Guide and Reference 257
up
upmoves up the execution stack
Command syntax upup number
Description << none >> Moves the current scope location up onelevel on the execution stack. The Sourcearea shows file scoped to location andhighlights it with an arrow.
number Moves the current scope location thespecified number of levels up the executionstack.
Usage Use the up command to move the current scope location up theexecution stack, toward the top level of the Workspace and awayfrom the current break level.
The scope location is the point at which all variables, types, andmacros are scoped. When a break level is generated, the scope locationis set to the point at which execution was interrupted.
When at a break level, use the where command to display theexecution stack. Use the whereami command to display the breaklocation and the current scope location.
The cont command can be used to continue execution, and the resetcommand can be used to return to a previous break level or to the toplevel of the Workspace without continuing execution.
See also cont, down, reset, where, whereami
“Using Workspace break levels” on page 160
“Moving in the execution stack” on page 166

use
258 CenterLine-C++ Programmer’s Guide and Reference
usedisplays or sets the directory search path
Command syntax useuse pathname ...
Description << none >> Displays the current directory search path.
pathname ... Sets the list of directories to be searched tothe specified pathname. If more than onepathname is listed, they must be separatedby spaces. The directories can be specifiedas absolute or relative pathnames.
Usage Use the use command to set the list of directories to be searchedwhen a filename is given to the debug, edit, and list commands.
The use command does not provide a search path for loading#include files.
See also cd, debug, edit, list
“Customizing your startup file” on page 191
CenterLine-C++ Programmer’s Guide and Reference 259
whatis
whatislists all uses of a name
Command syntax whatis name
Description name Displays all uses of the specified name as afunction, variable, class/struct/union tagname, enumerator, type definition, ormacro definition.
Usage Use the whatis command to display all uses of an identifier name.An identifier name is a name for a function, variable, enumerator,class/struct/union tag name, type definition, or macro definition.
CenterLine-C++ first displays all uses of the name within scope at thecurrent scope location, followed by all uses of the name not withinscope. The order of the listing represents the order in which thespecified name is resolved when it is used.
Example In the following example, Rectangle is a struct:
pdm 8 -> whatis Rectanglestruct Rectangle {struct __mptr *__vptr;struct Shape OShape;struct Point origin;int filled;short *row;short *col;struct Point extent;
};
See also dump, display, help, list, man, print, whereis
“Using Workspace break levels” on page 160
“Examining data structures” on page 169
when
260 CenterLine-C++ Programmer’s Guide and Reference
whenexecutes specified commands
Command syntax whenwhen if condwhen [at] linewhen [at] line if condwhen in funcwhen in func if cond
Description << none >> Executes commands at current location.
if cond Executes commands at current location ifcond is true, where cond is a Booleanexpression.
[at] line Executes commands when the specified linein the current file is reached.
[at] line if cond Executes commands when the specified linein the current file is reached if cond is true,where cond is a Boolean expression.
in func Executes commands at the first line in thespecified function.
in func if cond Executes commands at the first line in thespecified function if cond is true, where condis a Boolean expression.
Usage Use the when command to set debugging actions.
After you issue the when command, CenterLine-C++ prompts youfor the commands to be executed. These commands can includecalls to functions that are defined in the program.
By default, CenterLine-C++ remains stopped after executing thecommands specified with when. If you want your program tocontinue after executing the commands, you must specify the contcommand as the last one.
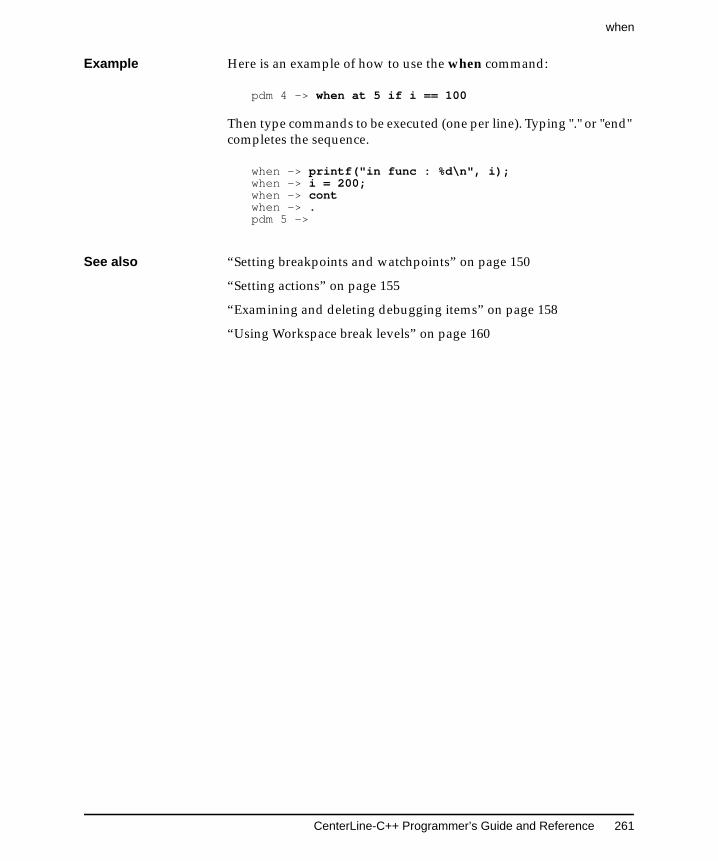
CenterLine-C++ Programmer’s Guide and Reference 261
when
Example Here is an example of how to use the when command:
pdm 4 -> when at 5 if i == 100
Then type commands to be executed (one per line). Typing "." or "end"completes the sequence.
when -> printf("in func : %d\n", i);when -> i = 200;when -> contwhen -> .pdm 5 ->
See also “Setting breakpoints and watchpoints” on page 150
“Setting actions” on page 155
“Examining and deleting debugging items” on page 158
“Using Workspace break levels” on page 160
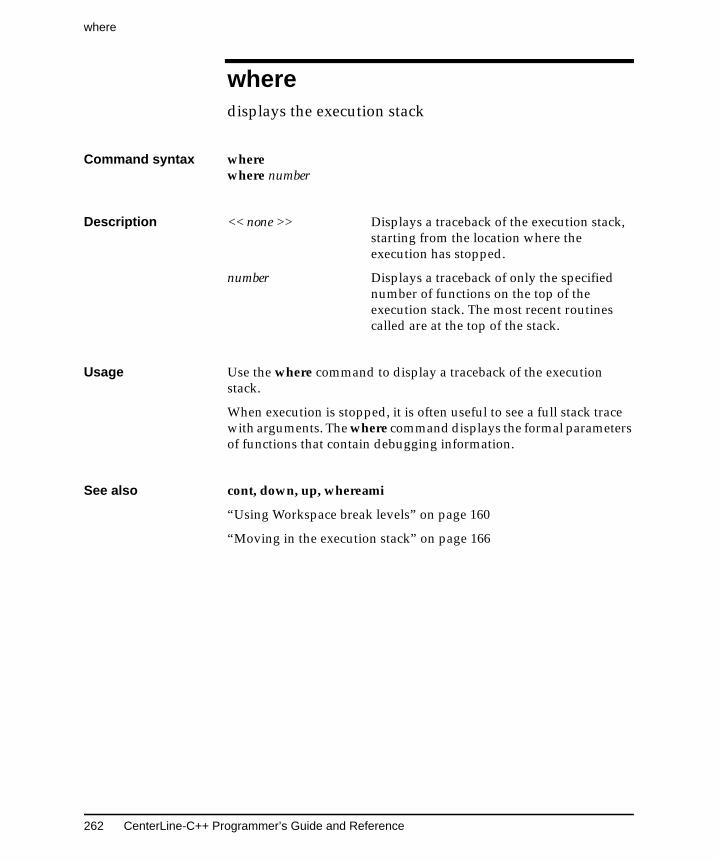
where
262 CenterLine-C++ Programmer’s Guide and Reference
wheredisplays the execution stack
Command syntax wherewhere number
Description << none >> Displays a traceback of the execution stack,starting from the location where theexecution has stopped.
number Displays a traceback of only the specifiednumber of functions on the top of theexecution stack. The most recent routinescalled are at the top of the stack.
Usage Use the where command to display a traceback of the executionstack.
When execution is stopped, it is often useful to see a full stack tracewith arguments. The where command displays the formal parametersof functions that contain debugging information.
See also cont, down, up, whereami
“Using Workspace break levels” on page 160
“Moving in the execution stack” on page 166
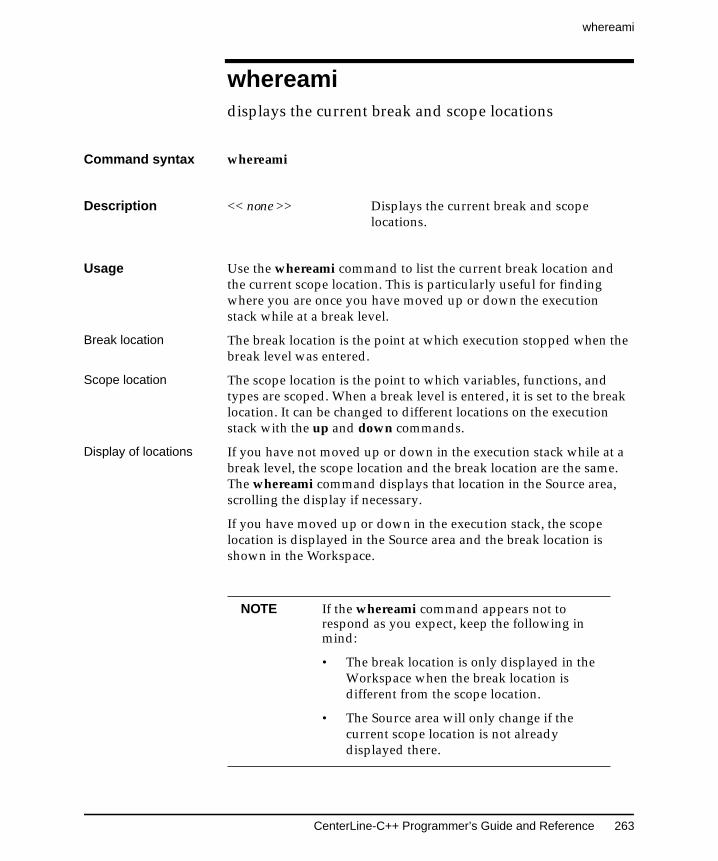
CenterLine-C++ Programmer’s Guide and Reference 263
whereami
whereamidisplays the current break and scope locations
Command syntax whereami
Description << none >> Displays the current break and scopelocations.
Usage Use the whereami command to list the current break location andthe current scope location. This is particularly useful for findingwhere you are once you have moved up or down the executionstack while at a break level.
Break location The break location is the point at which execution stopped when thebreak level was entered.
Scope location The scope location is the point to which variables, functions, andtypes are scoped. When a break level is entered, it is set to the breaklocation. It can be changed to different locations on the executionstack with the up and down commands.
Display of locations If you have not moved up or down in the execution stack while at abreak level, the scope location and the break location are the same.The whereami command displays that location in the Source area,scrolling the display if necessary.
If you have moved up or down in the execution stack, the scopelocation is displayed in the Source area and the break location isshown in the Workspace.
NOTE If the whereami command appears not torespond as you expect, keep the following inmind:
• The break location is only displayed in theWorkspace when the break location isdifferent from the scope location.
• The Source area will only change if thecurrent scope location is not alreadydisplayed there.
whereami
264 CenterLine-C++ Programmer’s Guide and Reference
See also cont, down, up, where
“Using Workspace break levels” on page 160
“Moving in the execution stack” on page 166
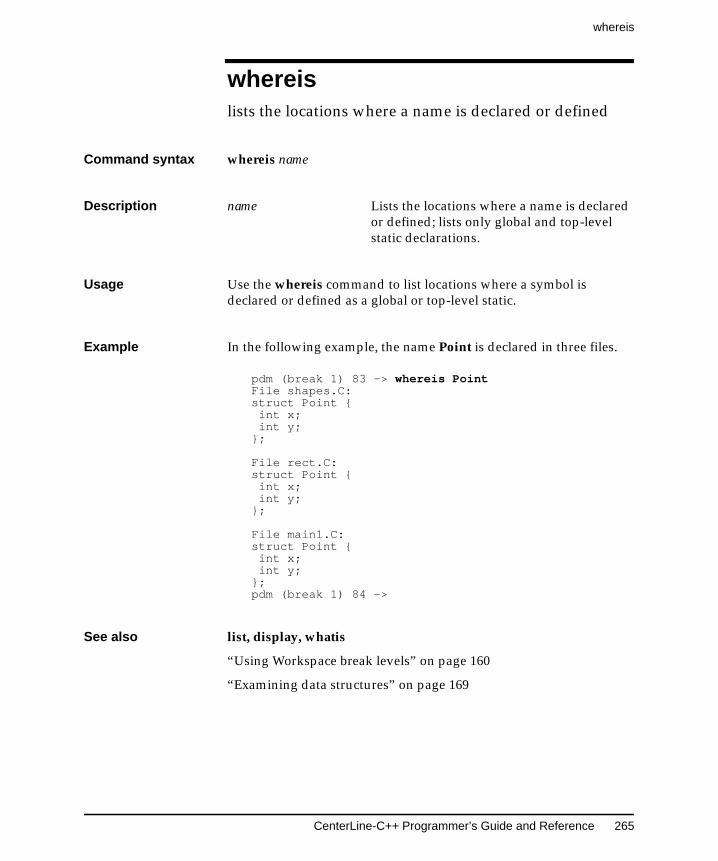
CenterLine-C++ Programmer’s Guide and Reference 265
whereis
whereislists the locations where a name is declared or defined
Command syntax whereis name
Description name Lists the locations where a name is declaredor defined; lists only global and top-levelstatic declarations.
Usage Use the whereis command to list locations where a symbol isdeclared or defined as a global or top-level static.
Example In the following example, the name Point is declared in three files.
pdm (break 1) 83 -> whereis PointFile shapes.C:struct Point { int x; int y;};
File rect.C:struct Point { int x; int y;};
File main1.C:struct Point { int x; int y;};pdm (break 1) 84 ->
See also list, display, whatis
“Using Workspace break levels” on page 160
“Examining data structures” on page 169

Appendix A
GNU General Public License
This appendix contains the GNU General PublicLicense, which applies to the CenterLine GNUDebugger (pdm) and the CenterLine Cpreprocessor (clpp).

CenterLine-C++ Programmer’s Guide and Reference 269
GNU General Public License
GNU General Public License GNU GENERAL PUBLIC LICENSE Version 2, June 1991
Copyright (C) 1989, 1991 Free Software Foundation, Inc. 675 MassAve, Cambridge, MA 02139, USA Everyone is permitted to copy anddistribute verbatim copies of this license document, but changing it isnot allowed.
Preamble
The licenses for most software are designed to take away yourfreedom to share and change it. By contrast, the GNU General PublicLicense is intended to guarantee your freedom to share and changefree software--to make sure the software is free for all its users. ThisGeneral Public License applies to most of the Free SoftwareFoundation’s software and to any other program whose authorscommit to using it. (Some other Free Software Foundation software iscovered by the GNU Library General Public License instead.) You canapply it to your programs, too.
When we speak of free software, we are referring to freedom, notprice. Our General Public Licenses are designed to make sure that youhave the freedom to distribute copies of free software (and charge forthis service if you wish), that you receive source code or can get it ifyou want it, that you can change the software or use pieces of it in newfree programs; and that you know you can do these things.
To protect your rights, we need to make restrictions that forbid anyoneto deny you these rights or to ask you to surrender the rights. Theserestrictions translate to certain responsibilities for you if you distributecopies of the software, or if you modify it.
For example, if you distribute copies of such a program, whethergratis or for a fee, you must give the recipients all the rights that youhave. You must make sure that they, too, receive or can get the sourcecode. And you must show them these terms so they know their rights.
We protect your rights with two steps: (1) copyright the software, and(2) offer you this license which gives you legal permission to copy,distribute and/or modify the software.
Also, for each author’s protection and ours, we want to make certainthat everyone understands that there is no warranty for this freesoftware. If the software is modified by someone else and passed on,we want its recipients to know that what they have is not the original,so that any problems introduced by others will not reflect on theoriginal authors’ reputations.

GNU General Public License
270 CenterLine-C++ Programmer’s Guide and Reference
Finally, any free program is threatened constantly by software patents.We wish to avoid the danger that redistributors of a free program willindividually obtain patent licenses, in effect making the programproprietary. To prevent this, we have made it clear that any patentmust be licensed for everyone’s free use or not licensed at all.
The precise terms and conditions for copying, distribution andmodification follow.
GNU GENERAL PUBLIC LICENSE TERMS AND CONDITIONSFOR COPYING, DISTRIBUTION AND MODIFICATION
1 This License applies to any program or other work whichcontains a notice placed by the copyright holder saying it maybe distributed under the terms of this General Public License.The “Program”, below, refers to any such program or work, anda “work based on the Program” means either the Program orany derivative work under copyright law: that is to say, a workcontaining the Program or a portion of it, either verbatim orwith modifications and/or translated into another language.(Hereinafter, translation is included without limitation in theterm “modification”.) Each licensee is addressed as “you”.
Activities other than copying, distribution and modification arenot covered by this License; they are outside its scope. The act ofrunning the Program is not restricted, and the output from theProgram is covered only if its contents constitute a work basedon the Program (independent of having been made by runningthe Program). Whether that is true depends on what theProgram does.
2 You may copy and distribute verbatim copies of the Program’ssource code as you receive it, in any medium, provided that youconspicuously and appropriately publish on each copy anappropriate copyright notice and disclaimer of warranty; keepintact all the notices that refer to this License and to the absenceof any warranty; and give any other recipients of the Program acopy of this License along with the Program.
You may charge a fee for the physical act of transferring a copy,and you may at your option offer warranty protection inexchange for a fee.
3 You may modify your copy or copies of the Program or anyportion of it, thus forming a work based on the Program, andcopy and distribute such modifications or work under the termsof Section 1 above, provided that you also meet all of theseconditions:
CenterLine-C++ Programmer’s Guide and Reference 271
GNU General Public License
a) You must cause the modified files to carry prominent noticesstating that you changed the files and the date of any change.
b) You must cause any work that you distribute or publish, thatin whole or in part contains or is derived from the Program orany part thereof, to be licensed as a whole at no charge to allthird parties under the terms of this License.
c) If the modified program normally reads commandsinteractively when run, you must cause it, when started runningfor such interactive use in the most ordinary way, to print ordisplay an announcement including an appropriate copyrightnotice and a notice that there is no warranty (or else, saying thatyou provide a warranty) and that users may redistribute theprogram under these conditions, and telling the user how toview a copy of this License. (Exception: if the Program itself isinteractive but does not normally print such an announcement,your work based on the Program is not required to print anannouncement.)
These requirements apply to the modified work as a whole. Ifidentifiable sections of that work are not derived from theProgram, and can be reasonably considered independent andseparate works in themselves, then this License, and its terms,do not apply to those sections when you distribute them asseparate works. But when you distribute the same sections aspart of a whole which is a work based on the Program, thedistribution of the whole must be on the terms of this License,whose permissions for other licensees extend to the entirewhole, and thus to each and every part regardless of who wroteit.
Thus, it is not the intent of this section to claim rights or contestyour rights to work written entirely by you; rather, the intent isto exercise the right to control the distribution of derivative orcollective works based on the Program.
In addition, mere aggregation of another work not based on theProgram with the Program (or with a work based on theProgram) on a volume of a storage or distribution medium doesnot bring the other work under the scope of this License.
4 You may copy and distribute the Program (or a work based onit, under Section 2) in object code or executable form under theterms of Sections 1 and 2 above provided that you also do one ofthe following:
a) Accompany it with the complete correspondingmachine-readable source code, which must be distributed under
GNU General Public License
272 CenterLine-C++ Programmer’s Guide and Reference
the terms of Sections 1 and 2 above on a medium customarilyused for software interchange; or,
b) Accompany it with a written offer, valid for at least threeyears, to give any third party, for a charge no more than yourcost of physically performing source distribution, a completemachine-readable copy of the corresponding source code, to bedistributed under the terms of Sections 1 and 2 above on amedium customarily used for software interchange; or,
c) Accompany it with the information you received as to theoffer to distribute corresponding source code. (This alternativeis allowed only for noncommercial distribution and only if youreceived the program in object code or executable form withsuch an offer, in accord with Subsection b above.)
The source code for a work means the preferred form of thework for making modifications to it. For an executable work,complete source code means all the source code for all modulesit contains, plus any associated interface definition files, plus thescripts used to control compilation and installation of theexecutable. However, as a special exception, the source codedistributed need not include anything that is normallydistributed (in either source or binary form) with the majorcomponents (compiler, kernel, and so on) of the operatingsystem on which the executable runs, unless that componentitself accompanies the executable.
If distribution of executable or object code is made by offeringaccess to copy from a designated place, then offering equivalentaccess to copy the source code from the same place counts asdistribution of the source code, even though third parties arenot compelled to copy the source along with the object code.
5 You may not copy, modify, sublicense, or distribute theProgram except as expressly provided under this License. Anyattempt otherwise to copy, modify, sublicense or distribute theProgram is void, and will automatically terminate your rightsunder this License. However, parties who have received copies,or rights, from you under this License will not have theirlicenses terminated so long as such parties remain in fullcompliance.
6 You are not required to accept this License, since you have notsigned it. However, nothing else grants you permission tomodify or distribute the Program or its derivative works. Theseactions are prohibited by law if you do not accept this License.Therefore, by modifying or distributing the Program (or any
CenterLine-C++ Programmer’s Guide and Reference 273
GNU General Public License
work based on the Program), you indicate your acceptance ofthis License to do so, and all its terms and conditions forcopying, distributing or modifying the Program or works basedon it.
7 Each time you redistribute the Program (or any work based onthe Program), the recipient automatically receives a license fromthe original licensor to copy, distribute or modify the Programsubject to these terms and conditions. You may not impose anyfurther restrictions on the recipients’ exercise of the rightsgranted herein. You are not responsible for enforcingcompliance by third parties to this License.
8 If, as a consequence of a court judgment or allegation of patentinfringement or for any other reason (not limited to patentissues), conditions are imposed on you (whether by court order,agreement or otherwise) that contradict the conditions of thisLicense, they do not excuse you from the conditions of thisLicense. If you cannot distribute so as to satisfy simultaneouslyyour obligations under this License and any other pertinentobligations, then as a consequence you may not distribute theProgram at all. For example, if a patent license would not permitroyalty-free redistribution of the Program by all those whoreceive copies directly or indirectly through you, then the onlyway you could satisfy both it and this License would be torefrain entirely from distribution of the Program.
If any portion of this section is held invalid or unenforceableunder any particular circumstance, the balance of the section isintended to apply and the section as a whole is intended toapply in other circumstances.
It is not the purpose of this section to induce you to infringe anypatents or other property right claims or to contest validity ofany such claims; this section has the sole purpose of protectingthe integrity of the free software distribution system, which isimplemented by public license practices. Many people havemade generous contributions to the wide range of softwaredistributed through that system in reliance on consistentapplication of that system; it is up to the author/donor to decideif he or she is willing to distribute software through any othersystem and a licensee cannot impose that choice.
This section is intended to make thoroughly clear what isbelieved to be a consequence of the rest of this License.
9 If the distribution and/or use of the Program is restricted incertain countries either by patents or by copyrighted interfaces,
GNU General Public License
274 CenterLine-C++ Programmer’s Guide and Reference
the original copyright holder who places the Program under thisLicense may add an explicit geographical distribution limitationexcluding those countries, so that distribution is permitted onlyin or among countries not thus excluded. In such case, thisLicense incorporates the limitation as if written in the body ofthis License.
10 The Free Software Foundation may publish revised and/or newversions of the General Public License from time to time. Suchnew versions will be similar in spirit to the present version, butmay differ in detail to address new problems or concerns.
Each version is given a distinguishing version number. If theProgram specifies a version number of this License whichapplies to it and “any later version”, you have the option offollowing the terms and conditions either of that version or ofany later version published by the Free Software Foundation. Ifthe Program does not specify a version number of this License,you may choose any version ever published by the FreeSoftware Foundation.
11 If you wish to incorporate parts of the Program into other freeprograms whose distribution conditions are different, write tothe author to ask for permission. For software which iscopyrighted by the Free Software Foundation, write to the FreeSoftware Foundation; we sometimes make exceptions for this.Our decision will be guided by the two goals of preserving thefree status of all derivatives of our free software and ofpromoting the sharing and reuse of software generally.
NO WARRANTY
12 BECAUSE THE PROGRAM IS LICENSED FREE OF CHARGE,THERE IS NO WARRANTY FOR THE PROGRAM, TO THEEXTENT PERMITTED BY APPLICABLE LAW. EXCEPT WHENOTHERWISE STATED IN WRITING THE COPYRIGHTHOLDERS AND/OR OTHER PARTIES PROVIDE THEPROGRAM “AS IS” WITHOUT WARRANTY OF ANY KIND,EITHER EXPRESSED OR IMPLIED, INCLUDING, BUT NOTLIMITED TO, THE IMPLIED WARRANTIES OFMERCHANTABILITY AND FITNESS FOR A PARTICULARPURPOSE. THE ENTIRE RISK AS TO THE QUALITY ANDPERFORMANCE OF THE PROGRAM IS WITH YOU.SHOULD THE PROGRAM PROVE DEFECTIVE, YOUASSUME THE COST OF ALL NECESSARY SERVICING,REPAIR OR CORRECTION.
CenterLine-C++ Programmer’s Guide and Reference 275
GNU General Public License
13 IN NO EVENT UNLESS REQUIRED BY APPLICABLE LAWOR AGREED TO IN WRITING WILL ANY COPYRIGHTHOLDER, OR ANY OTHER PARTY WHO MAY MODIFYAND/OR REDISTRIBUTE THE PROGRAM AS PERMITTEDABOVE, BE LIABLE TO YOU FOR DAMAGES, INCLUDINGANY GENERAL, SPECIAL, INCIDENTAL ORCONSEQUENTIAL DAMAGES ARISING OUT OF THE USEOR INABILITY TO USE THE PROGRAM (INCLUDING BUTNOT LIMITED TO LOSS OF DATA OR DATA BEINGRENDERED INACCURATE OR LOSSES SUSTAINED BY YOUOR THIRD PARTIES OR A FAILURE OF THE PROGRAM TOOPERATE WITH ANY OTHER PROGRAMS), EVEN IF SUCHHOLDER OR OTHER PARTY HAS BEEN ADVISED OF THEPOSSIBILITY OF SUCH DAMAGES.
END OF TERMS AND CONDITIONS
Applying These Terms to Your New Programs
If you develop a new program, and you want it to be of the greatestpossible use to the public, the best way to achieve this is to make it freesoftware which everyone can redistribute and change under theseterms.
To do so, attach the following notices to the program. It is safest toattach them to the start of each source file to most effectively conveythe exclusion of warranty; and each file should have at least the“copyright” line and a pointer to where the full notice is found.
ONE LINE TO GIVE THE PROGRAM’S NAME AND AN IDEA OF WHAT IT DOESCopyright (C) 19YY NAME OF AUTHOR
This program is free software; you can redistribute it and/or modifyit under the terms of the GNU General Public License as publishedby the Free Software Foundation; either version 2 of the License, or(at your option) any later version.
This program is distributed in the hope that it will be useful, butWITHOUT ANY WARRANTY; without even the implied warrantyof MERCHANTABILITY or FITNESS FOR A PARTICULARPURPOSE. See the GNU General Public License for more details.
You should have received a copy of the GNU General Public Licensealong with this program; if not, write to the Free SoftwareFoundation, Inc., 675 Mass Ave, Cambridge, MA 02139, USA.
Also add information on how to contact you by electronic and papermail.
GNU General Public License
276 CenterLine-C++ Programmer’s Guide and Reference
If the program is interactive, make it output a short notice like thiswhen it starts in an interactive mode:
Gnomovision version 69, Copyright (C) 19yy name of authorGnomovision comes with ABSOLUTELY NO WARRANTY; fordetails type ‘show w’. This is free software, and you are welcome toredistribute it under certain conditions; type ‘show c’ for details.
The hypothetical commands ‘show w’ and ‘show c’ should show theappropriate parts of the General Public License. Of course, thecommands you use may be called something other than ‘show w’ and‘show c’; they could even be mouse-clicks or menu items--whateversuits your program.
You should also get your employer (if you work as a programmer) oryour school, if any, to sign a “copyright disclaimer” for the program,if necessary. Here is a sample; alter the names:
Yoyodyne, Inc., hereby disclaims all copyright interest in theprogram ‘Gnomovision’ (which makes passes at compilers) writtenby James Hacker.
SIGNATURE OF TY COON, 1 April 1989Ty Coon, President of Vice
This General Public License does not permit incorporating yourprogram into proprietary programs. If your program is a subroutinelibrary, you may consider it more useful to permit linking proprietaryapplications with the library. If this is what you want to do, use theGNU Library General Public License instead of this License.
CenterLine-C++ Programmer’s Guide and Reference 277
Index
Index
Symbols
# characterin numbering of stack frames 165in Workspace history mechanism 136
# operator 44## character in Workspace 137, 225## operator 45#> redirection character in Workspace 139, 225#>> redirection character in Workspace 139\ character, with arguments to main() 238
A
+a switch 18about this manual vactions
deleting 157, 214listing 157, 248setting 154, 260See also breakpoints
Add Menu Items to Panel command 192addresses
displaying in Data Browser 172listing machine instructions at 185setting breakpoints on 151, 186, 254
advantagesof demand-driven code generation 28of using CenterLine-C++ 4
alias command 135, 190, 203aliases
creating 135default 203in startup file 190removing 255
ANSI CC compiler 5comments in conditional directives 49macro expansion 45preprocessing features available 14
AON environment variable 34application files, specifying in map files 77appVector.C example 63ar, archiving repository object files with 82, 96argument declaration files for templates 70arguments
changing, and precompiled headers 24clearing, with run 241new, with rerun 162, 238retaining, with run 162, 241spaces in 241
arrays, representation in Data Browser 170Ascii CenterLine-C++ 120assign command 169, 204AT&T translator compatibility 4attach command 181, 205attaching, to processes 120, 141, 181, 205, 212audience, for manual vautomatic instantiation, See templatesautomatic tools provided with templates 85
B
backslash character ( \ ), with arguments tomain() 238
bank example and template classes 59Bounce program
actions 155conditional breakpoints 152debugging a running process 182debugging corefile 178debugging machine code 187tutorial 99–115
Bourne subshell, executing 134, 245

Index
278 CenterLine-C++ Programmer’s Guide and Reference
break levels 147, 149continuing from 162creating 159examining data at 160, 168returning to previous 163, 239using 159
break locationdefinition 161displaying 161, 263
breakpointsdeleting 157, 214listing 157, 248setting in machine code 186, 254setting in source code 111, 149, 252See also actions
build command 146, 206Button panel, definition 103buttons
adding 192changing name and position 193customizing 192deleting 194
C
..c files, saving a copy 15C compiler 5
changing with ccC 34-c switch, and template specializations 85C++
books about vinew features 4—5templates, See templatesversion supported 4
C++ translator compatibility 4c++examples command 9c++filt
and diagnostic messages 15restoring names in gmon.out 21
-C, preprocessor switch 52c_plusplus macro 46, 47
cache, of headers for templates 83cancelling Workspace commands 130catch command 176, 207CC
environment variables 34invoking 13template instantiation 85
ccC environment variable 34, 36CCLIBDIR environment variable 34CCROOTDIR environment variable 34cd command 209CenterLine
directory 120Engine 8GNU debugger license 267Message Server 8preprocessor 39preprocessor license 267usage 39
CenterLine-C++advantages 4compiler switches 16components 3compiling 11debugger command reference 201debugging with 117phases 14preprocessing 37using templates with 55
centerline-c++ command 102, 120cfront, what it does 14cfrontC environment variable 36changing
current working directory 209custom commands 197default environment settings 34
chararray.c example program 174CENTERLINE_CC_VERBOSE environment
variable 34CL_REPOS_LOCK_MAX_WAIT environment
variable 34
CenterLine-C++ Programmer’s Guide and Reference 279
Index
CL_REPOS_LOCK_STALE_TIME environmentvariable 34
classstatic data members 87templates 58See also templates
class_as_struct option 191clc++.script file 189.clc++usrcmd file 192clcc
features 5what it does 14
CLCCDIR environment variable 34CLcleanR environment variable 35clearing the Workspace 136CLIPBOARD text selection 128, 196$clipboard variable 196clms process 8clpp 39
commands 40switches 52usage 39
code, obsolete, retaining 50command-line switches
CC 16concatenating 19preprocessor 52
commandsalphabetic reference 203–275centerline-c++ 102conditionalizing execution in pdm 260creating aliases for 135gdb 131help 105help on 130invoking from file 131not supporting redirection of output 139quit 106shell commands 134text as input to 125Workspace 130
in actions 154
customizing 192, 195displaying information about 232reading from a file 247requesting help about 224
-Comment[s], preprocessor switch 54comments in conditional directives 49compatibility, C++ translator 4compilation, separate, and templates 88compilation time
reducing with -ispeed 17reducing with +k 22
compilerCenterLine-C compiler 5changing default C compiler 34errors, fixing 147phases 14
completion of names in Workspace 138complex mathematics library 31complex.h header file 31computed #include 41concatenating
switches 19tokens 45
conditional breakpointsdefinition 149setting 150, 154See also actions
conditional compilation 46, 48–50conditional directives
comments in 49limitations 49syntax 48
const, using instead of macro 43constructors, static 166cont command 162, 210
in actions 154contents command 143, 211continuing execution 162, 210Control-c
for cancelling Workspace entries 130for creating break level 159
Index
280 CenterLine-C++ Programmer’s Guide and Reference
conventionsfor template files 70typographic, in this manual vii
copying text 128corefile
debugging a 110, 177generating 177specifying as debugging target 120, 141, 177,
212CPLUS environment variable 35cPLUS environment variable 36cplusfiltC environment variable 36__cplusplus macro 47, 46cppC environment variable 36CPPFLAGS environment variable 35current working directory, changing 209custom commands
deleting 198modifying 197
customizingbuttons and commands 192command for a shell command 195Data Browser 173dialog boxes that use PRIMARY text
selection as input 125environment variables 199Workspace commands 195
D
+d switch 18-D switch
shown in template header cache 83-D, preprocessor switch 52data
examining 168updating in the Data Browser 171
Data Browserchanging properties of data items 172customizing 173dereferencing pointers 113, 170
following linked lists 170manipulating structures in 171navigating in the Data area 171null pointers in 170opening 112, 216pop-up menus 126removing items 172structures, representation in 170using 169
data itemschanging properties of 172definition 169deleting 158, 172, 214listing 157, 248representation of pointers in 170
__DATE__macro 47and precompiled header files 26
date, See timestamps-dD, preprocessor switch 53-dd=off, -dd=on switches 16, 27debug command 212debugging
and binary size with templates 95an executable with a corefile 177machine instructions 185producing symbol table information
with -g 17a running process 181
debugging itemscreation 154definition 149deleting 214listing 157, 248
@dec, @def entries in map file 74declaration file, See template declaration file 71default map file, overriding 77#define directive 43defmap file 67
defined 97don’t edit 91for Vector example 75
delete command 157, 214
CenterLine-C++ Programmer’s Guide and Reference 281
Index
deletingbreakpoints and actions 157buttons 194custom commands 198data items 158debugging items 157, 214environment variables 199
demand-driven code generation 27advantages 28in makefile target rules 28
DEMANGLE environment variable 35dependencies
compiling 85templates 83, 85
dereferencing pointers, in the Data Browser 113,170
detach command 141, 182, 215directories
changing 209displaying search path 258setting search path 190, 258
display command 169, 216DISPLAY environment variable 102, 121displaying
a menu viiclasses as structs 191environment variables 199, 236execution stack 165machine instructions 230source code 142
interleaved with machine code 186source files 143static constructors and destructors 166
-dM, preprocessor switch 53documentation
conventions viirelated v
down command 165, 217-dryrun switch 16dump command 168, 218dynamic extension lookup, and templates 73dynamic libraries, See shared libraries
E
+e switch 18-E switch 16-ec switch 16edit command 144, 219editing
Edit Server 8EDITOR environment variable 101, 119invoking your editor 109, 144selecting an editor 101, 119source code 219text fields 127
-el switch 16emacs
editing source code 144keyboard shortcuts available in Workspace
137selecting to use with CenterLine-C++ 101,
119shortcuts supported in text fields 127
email command 124, 220encoding, of functions in template map files 77environment variables
AON 34, 35changing default 34creating 243DISPLAY 102, 121displaying 199, 236EDITOR 101, 119LD_LIBRARY_PATH 29LD_OPTIONS 29LD_PATH 29LDOPTS 29PATH 146removing 199, 256setting and exporting 34setting values of 199used by CC 34
#error directive 51
Index
282 CenterLine-C++ Programmer’s Guide and Reference
Error BrowserEdit symbol 144opening 108removing errors from 148using 147
errorsfinding and fixing 147removing from Error Browser 148and templates 92
evaluatingactions 155expressions 242expressions and variables 136
examplesBounce program
actions 155conditional breakpoints 152debugging a running process 182debugging corefile 178debugging machine code 187
chararray.c program 174installing 9installing with different host than when
using 102precompiled header files 25skipping 25static.C program 166template examples
separate compilation 88separate compilation and specialization
90specialization 86Vector 63
tutorial 99–115Vector example 63
executablesattaching to a running executable 120, 141building and reloading 146displaying source files for 143reloading 206specifying as debugging target 120, 141, 212viewing contents of 211
executioncontinuing 162, 163, 210
until function returns 251displaying location in 263specifying arguments 241specifying new arguments 238stepping 163, 233, 249
through machine code 234with arguments 240
Execution icon 161execution stack
definition 165displaying 165, 262moving in 165, 217, 257
exiting CenterLine-C++, See quit commandexpressions
displaying values of 216, 235evaluating 136, 204, 242
F
-F switch 17__FILE__ macro
and precompiled header files 26file command 221file suffixes, accepted by CC 13__FILE__ macro 47, 51$filename variable 196filenames, conventions for template files 70$filepath variable 196files
clc++.script 189.clc++usrcmd 192displaying files associated with executable
143editing 219invoking Workspace commands from 131listing
source code 228source files for an executable 211
CenterLine-C++ Programmer’s Guide and Reference 283
Index
.pdminit 191reloading 206setting list location 221
findingerrors 147header files 41manual pages 39
$first_selected_char variable 197$first_selected_line variable 196-flags_cc switch 17-flags_cpp switch 17forward declarations for function templates 71FS environment variable 35__FUNC__ macro 47function templates
declaring 71defined 61troubleshooting 93
functionsdisplaying
all local variables 168, 218all uses of 168those defined in source file 143
editing 219entering when single stepping 163, 187, 249listing machine code for 185, 230listing source code for 228not entering when single stepping 187, 233on execution stack 165returning from 163, 251setting
actions in 154, 260breakpoints in 149, 152, 252conditional breakpoints in 151, 252
G
-g switch 17gdb command 131, 222gdb_mode command 131, 223-gdem switch 17
generic.h 31gmon.out file 20, 21GNU Debugger
license 267using 131, 222, 223watchpoints in 152
GNU Emacsconnecting to pdm 145editing source code 144selecting to use with CenterLine-C++ 119
GNU Preprocessor license 267gprof and profiling 20GUI
customizing, See X resourcesselecting 102, 120
H
-H, preprocessor switch 53-hdrepos switch 17, 21
and nested header files 27header cache, for templates 83header files
including 41locating 41nested, and -hdrepos 27precompiled 21provided 6save-and-restore mechanism 22skipping See precompiled header filessystem 30using correct, and templates 93
help command 105, 122, 131, 224history command 136, 189, 225
I
+i switch 19I environment variable 35
Index
284 CenterLine-C++ Programmer’s Guide and Reference
-I, preprocessor switch 53modifying search path 29shown in template header cache 83
-I-, preprocessor switch 53icons, in Source area 161#if defined directive 50#ifdef, #ifndef directives 50ignore command 176, 226#include directive 41
computed #include 41nested
level supported 42and templates 83
and precompiled headers 23include guards 71
source file replaying 93-include, preprocessor switch 53#include_next directive 42including same file twice, avoiding with include
guards 71information file for precompiled headers
specifying 22supplying 23using +k without 23
initializationstatic data members 94
inline cutoffdecreasing with -ispace 17increasing with -ispeed 17
inline functionsand demand-driven generation 28how handled when loaded 152setting breakpoints in 152in templates 73using instead of macro 44
input historydisplaying 225displaying and saving 189moving through 225
input, Workspaceediting 137repeating previous 136
installing examples 9instantiation
class, definition 58function template 61repository 67separating from linking 85See also templates
invokingCC 13centerline-c++ 102
iostream.h 30including 32
iostreams header files 32-ispace switch 17-ispeed switch 17
K
+k switch 19, 21using without information file 23
L
L_PATH environment variable 29$last_selected_char variable 197$last_selected_line variable 197lazy generation, See demand-driven code
generationLD_LIBRARY_PATH environment variable 29LD_OPTIONS environment variable 29LDOPTS environment variable 29LIB_ID environment variable 35libc.a 20, 33
finding reference information 6location 6provided with CenterLine-C++ 30, 31
libC_p.a 20, 33provided with CenterLine-C++ 30
libcomplex.a, provided with CenterLine-C++ 30,31
CenterLine-C++ Programmer’s Guide and Reference 285
Index
librarieslinking to 33locating 29making, of templates 82profiling 20, 33provided with CenterLine-C++ 6shared 31, 151system 30
LIBRARY environment variable 35license, product, for more information vilimitations
level of nested #include directives 42name length and templates 92on content of conditional expressions 49precompiled header files 24
#line directive 51line control 51line editing in Workspace 137__LINE__ macro 47LINE_OPT environment variable 35link simulation, templates 83linked lists, following in the Data Browser 170linking to libraries 33list command 142, 228list location, setting 221, 228List template class 59listi command 142, 185, 230listing
debugging items 248locations where a name is declared or
defined 265machine code 185, 230source code 142
__LINE__ macro 51loading, executables and corefiles with debug
command 141, 212locating
header files 41libraries 29manual pages 39
logging, a record of your debugging session 189
lookup schemes, templatesdynamic extension 73type lookup 73
LOPT environment variable 35LPPEXPAND environment variable 35ls command 135
M
-M, preprocessor switch 53machine code
debugging 185, 212displaying 142, 230interleaved with source code 186listing 185setting breakpoints 186, 254setting breakpoints in 151stepping 187, 234, 250
macrosexpansion 43predefined 46referring to another 43simple 43with arguments 44
-macros, preprocessor switch 53mail, sending to CenterLine Software 124, 220Main Window
components of 103displaying data structures from 169displaying source code 142Edit symbol 144Error Browser button 108, 147pop-up menus 125
make command 146, 231errors 107, 147and templates 85
Man Browseropening 232pop-up menus 126using 105, 122
man command 105, 122, 131, 232
Index
286 CenterLine-C++ Programmer’s Guide and Reference
mangling names in template map files 77manual pages, finding 13, 39manual, about this vmap files 75–77
name mangling 77overriding default 77problems 92user-defined 77
menuscustomizing 194Help 105using 125
messageserrors with templates 92See also Error Browser
missing template arguments 66-MM, preprocessor switch 54-motif command-line switch 120Motif GUI, specifying as GUI for pdm 102, 120multiple processes, debugging 182munchC environment variable 36
N
name completion in Workspace 138name mangling in template map files 77name mapping file
contents 67defined 97See also map files
namesdisplaying all uses of 168, 259listing where declared 265
-ncksysincl switch 17, 21nested #include directives, limit 42new C++ features 4next command 163, 233nexti command 187, 234NM environment variable 35
nmap filescreating 77order searched 77
NMFLAGS environment variable 35-nostdinc, preprocessor switch 54null pointers, in Data Browser 113, 170
O
object filenames, in map files 95objects, displaying objects defined in source file
143obsolete code, retaining 50one definition rule violation 92OPEN LOOK GUI
copying and pasting text 128custom commands for CLIPBOARD
selection 196specifying as GUI for pdm 102, 120
-openlook command-line switch 120options, See customizingoutput in Workspace, redirecting 139overriding
default environment settings 34default map file 77
P
+p switch 19-P, preprocessor switch 54panner, definition 173parameterized types, See templatespasting text 128patch, what it does 15patchC environment variable 36PATH environment variable 146pdm
basics 101–106debug command 141, 212help on 122
CenterLine-C++ Programmer’s Guide and Reference 287
Index
path for startup command 103quitting 200starting 102, 120tutorial 99–115
.pdminit file 191-pedantic, preprocessor switch 54-pedantic-errors, preprocessor switch 54performance
advantages of demand-driven codegeneration 28
improving when stepping through code 164-pg switch 18
and profiling 20phases of compiler 14pointers, representation in Data Browser 170pop-up menus, using 125, 136precompiled header files 21
and __DATE__ 26and __FILE__ 26and __TIME__ 26and lock time 34changing arguments 24example 25information file 22restrictions 24switches valid only with clpp 22using global not local files 25
predefined macros 46preprocessing 37–54
commands 40switches 52
PRIMARY text selection 125, 128, 196print command 127, 168, 235printenv command 199, 236printing
Man Browser documents 124values of variables 127, 235
processes, attaching to 120, 141, 181, 205, 212profiling
and libC_p.a 20information, generating 20versions of libraries 33
programspassing signals to 176rerunning without arguments 241running 240
See also executionstepping through 163
properties, of data items 172-pta command-line switch 78
and type checking template members 95ptcomp, what it does 14ptcompC environment variable 36-ptd command-line switch 78
separating instantiation from linking 85-ptf command-line switch 78
and function templates 94and type checking template members 95
-pth command-line switch 78PTHDR environment variable 35, 74-pti command-line switch 78
separating instantiation from linking 85-ptk command-line switch 78ptlink
dumping a link map 78file lookup 73forcing to continue on error 78link-simulation algorithm 83viewing messages from 65what it does 14
ptlinkC environment variable 36-ptm command-line switch 78-ptn command-line switch 79
problems with multi-file applications 94PTOPTS environment variable 35, 36-ptr command-line switch 79ptrepository 67-pts command-line switch 79PTSRC environment variable 35, 74-ptv command-line switch 79-ptx switches 18pwd command 135$pwd variable 196
Index
288 CenterLine-C++ Programmer’s Guide and Reference
Q
quit command 106, 200, 237
R
reading, suggested viredirecting output from Workspace 139reducing compile time, See precompiled header
filesreinstantiation, of templates, forcing 84related documentation vreleasing a process 215reloading, executables 146, 206removing
environment variables 199, 256errors from Error Browser 148See also deleting 214
renaming object files 95repository
defined 97filename length 83multiple 81permissions 80sharing 80template, contents 67
repository, See also precompiled header files,templates
rerun command 162, 238reset command 163, 239restrictions
precompiled header files 24retaining obsolete code 50run command 162, 240
arguments to main(), spaces in 241using the \ character with 241
Run Windowsaving contents of 189using 106
running programs 162a step at a time 163after attaching to a process 182using command-line arguments 241
running programs, See also execution
S
-s switch, of centerline-c++ command 190Save Session To command 189save-and-restore mechanism, and header files 22saving
aliases 203contents of Run Window 189copy of generated C file 15generated C file 15transcript of a session 189Workspace input 189
scope locationchanging 165, 217, 257definition 161displaying 160, 166, 263
all local variables 168script file, reading 247search paths
displaying and setting 258for header files 29for libraries 29
selecting menu items, buttons, or text vii$selection variable 196Send Email command 124separate compilation and templates 88set command 169, 242-set_lib_id switch 18setenv command 199, 243setting
actions 154, 260breakpoints 111, 149breakpoints in machine code 186, 254conditional breakpoints 150, 154
CenterLine-C++ Programmer’s Guide and Reference 289
Index
value of a variable with assign command 204values of environment variables 34, 199watchpoints 152, 260
setting up examples 9sh command 134, 245shared libraries 31
and ptlink 83setting breakpoints in 151
sharing code, and templates 82sharing template repositories 80shell command 134, 246shell commands
customizing 195, 196using 134
shortcutsfor pop-up menus 127using alias command 203
signalscontinuing execution with 210creating break levels 159generating corefile 177ignoring 176, 226in Workspace 147trapping 176, 207
size of program, decreasing with -ispace 17skipping header files, See precompiled header
files 25skippp environment variable 36Source area
definition 103displaying source code 142pop-up menu 125
source codeediting 144, 219interleaved with machine code 186listing 228setting actions in 154setting breakpoints in 149setting conditional breakpoints in 151
source command 131, 247source file replaying, and templates 93
source location, definition 161spaces, in arguments to main() 241specialization 85–87
defined 97link time, example 90and function templates, troubleshooting 94
specifyingapplication files in map files 77
speed, increasingwith demand-driven generation 28with -ispeed 17with +k 22
spot help, using 104stack frames 165starting pdm 102, 120startup files, customizing local 191static constructors, example of 166static template class data members 87
initialization 94specialization 87
static.C example program 166statics, initialized 249status command 157, 248__STDC__ macro 47step command 163, 249stepi command 187stepout command 163, 251stepping 162, 163
and attaching to processes 182and entering functions 249improving performance when 164machine code 187, 250without entering functions 233
stop command 150, 252stopi command 151, 186, 254streams header files 32string literals, specifying 44string table, in template map file 76stringizing operator 44structures, representation in Data Browser 170
Index
290 CenterLine-C++ Programmer’s Guide and Reference
subshell, executing 134Bourne 245for user-defined commands 195specified by SHELL environment variable
246-.suffix switch 18suffixes
for template files 70used for template lookup 74
suffixes, accepted by CC 13suggested reading viswitches
command-line switches 11concatenating 19for centerline-c++ command 120preprocessor 52used with template instantiation 78
symbol table 213symbols
displaying all uses of 259in Source area 161listing where declared 265
syntaxof conditional directives 48templates 58
T
@tab in template map file 76Tab-Tab sequence for completing commands and
names 138template declaration
defined 98examples 63, 71, 88file not included in template
definition file 71, 91template definition
contents of file 72defined 98definition and application in same file 87don’t include file in application 72
examples 64, 72, 89naming 72
template implementation, See template definitiontemplates 57–98
argument declaration files 70avoiding problems 91bank class example 59basic concepts and syntax 58class 58coding conventions 70common pitfalls 91conventions for filenames 70declaration See template declarationdefinition, See template definitiondependency checking 83, 85dynamic extension lookup 73examples 87filenames 70
length restriction 83files suffixes 73for more information 58forcing reinstantiation 84function
declaring 71defined 61instantiation 61troubleshooting 93
header cache 83implementation, See template definitioninline functions 73instance, defined 98instantiation 58
defined 98detailed description 67–69
libraries of 82link-simulation algorithm 83lookup schemes 73multiple repositories 81problems, avoiding 91repository 67repository permissions 80single file example 87
CenterLine-C++ Programmer’s Guide and Reference 291
Index
specialization 85–87specialization at link time 90static data members 87suffixes 73summary of usage 63–98switches affecting 78template function, using instead of macro 44terminology 97–98tools provided with 95type checking 95type lookup 73usage scenarios 80–90usage, detailed description 63–66
temporary files generated by CC,changing directory 16
terminal emulator, inuser-defined commands 195
terminology, templates 97–98text fields, editing 127text selection 125, 196–197__TIME__ macro, and precompiled
header files 26, 47timestamps
and instantiation system 83and template troubleshooting 92
tips, using templates 91TMPDIR environment variable 16, 36tokens, concatenating 45tools, used with templates 95top level
definition 163examining data structures 168returning to 239
-traditional, preprocessor switch 54translator, what it does 14trapping signals, See catch-trigraphs, preprocessor switch 54troubleshooting
avoid multiple-line selections for customizedcommands 197
finding and fixing errors 147
improving performance when steppingthrough code 171
using templates 91type checking template members 95type lookup, and templates 73types, parameterized, See templatestypographic conventions vii
U
-U, preprocessor switch 54UI, customizing, See X resourcesunalias command 255-undef, preprocessor switch 54unmangling names, with -gdem 17unsetenv command 199, 256up command 165, 257updating data, in the Data Browser 171usage, templates 63–66, 80–90use command 190, 258user-defined
commands and menus 194map files for templates 77
using +k without information file 23
V
+V switch 19-v switch 18variables
assigning values 169, 242displaying all uses of 168, 259displaying values of 216, 218, 235environment, used by CC 34evaluating 136in user-defined commands 196printing value of 127, 168setting with assign command 204See also environment variables
Index
292 CenterLine-C++ Programmer’s Guide and Reference
Vector example 63defmap file for 75specialization 86
viediting source code 144selecting to use with
CenterLine-C++ 101, 119violation, one definition rule 92
W
+w switch 19-Wall, preprocessor switch 54#warning directive 51watch command 152watchpoints
definition 149setting 152, 260
whatis command 127, 168, 259when command 154, 260where command 165, 262whereami command 166, 263whereis command 168, 265Windows menu, definition 104Workspace
clearing 136commands
aliases 135customizing 195displaying information about 232list of, by function 130specifying in actions 154using 130
completing names in 138definition 103displaying data structures in 168displaying input history 225number of lines in transcript 189pop-up menu 126, 136redirecting output in 139repeating previous input 136
requesting help about 105, 224saving input history 189saving transcript of session 189signals 147using break levels 159using make in 146
-Wtraditional, preprocessor switch 54-Wtrigraphs, preprocessor switch 54
X
X resourcesfor changing number of lines in Workspace
189for panner in Data Browser 173for saving contents of Run Window 189
X11 header files and libraries, in Bounce program107
xterm, customizing for use with CLIPBOARDselection 128
Z
zombied debugging items 214, 248