changing from i - cottrill & co · t.b.t. operator instructions changing from capto to gun...
TRANSCRIPT

T.B.T. Operator Instructions Changing from Capto to Gun Drilling
Created by andersa Page 1 of 30 Created on 20/02/2004 1:00 PM
NOTE:- If returning to Capto after Gun drilling, skip to the text at
the bottom of page 2.
Remove the Capto spindle.
1. Ensure that the tool conventional clamp is active.
a) Machine.
b) Menu Select.
c) T.B.T.
d) Auto.
e) Semi-functions
f) Cursor to tool conventional clamp.
g) OK.
2. Unscrew and remove 14-off cap screws stamped 12.9.
1. Machine.
2. Menu Select.
3. T.B.T.
4. Auto.
5. Machine setup.
6. Semi-functions.
7. Tool conventional release.
8. – Action. (Unlocks tool).
9. Leave the control on this screen.
10. Jog. (to allow doors to be opened)

T.B.T. Operator Instructions Changing from Capto to Gun Drilling
Created by andersa Page 2 of 30 Created on 20/02/2004 1:00 PM
Remove Capto end.
1. Close doors.
2. Auto.
3. Tbt.
4. Machine setup.
5. Semi functions.
6. Cursor to: - Tool conventional clamp.
7. + Action (Skip if already active)
8. ‘W’ axis docking position.
9. – Action
10. W’ axis re-tooling position.
11. + Auto action.

T.B.T. Operator Instructions Changing from Capto to Gun Drilling
Created by andersa Page 3 of 30 Created on 20/02/2004 1:00 PM
Now skip to page 5, if following instructions from the note on page 1 , Use the brass tool to knock out the Capto spindle.

T.B.T. Operator Instructions Changing from Capto to Gun Drilling
Created by andersa Page 4 of 30 Created on 20/02/2004 1:00 PM

T.B.T. Operator Instructions Changing from Capto to Gun Drilling
Created by andersa Page 5 of 30 Created on 20/02/2004 1:00 PM
Remove the Capto drive shaft from the driver.
1. Take both grub screws fully out and remove.
T.B.T. Operator Instructions Changing from Capto to Gun Drilling
Created by andersa Page 6 of 30 Created on 20/02/2004 1:00 PM
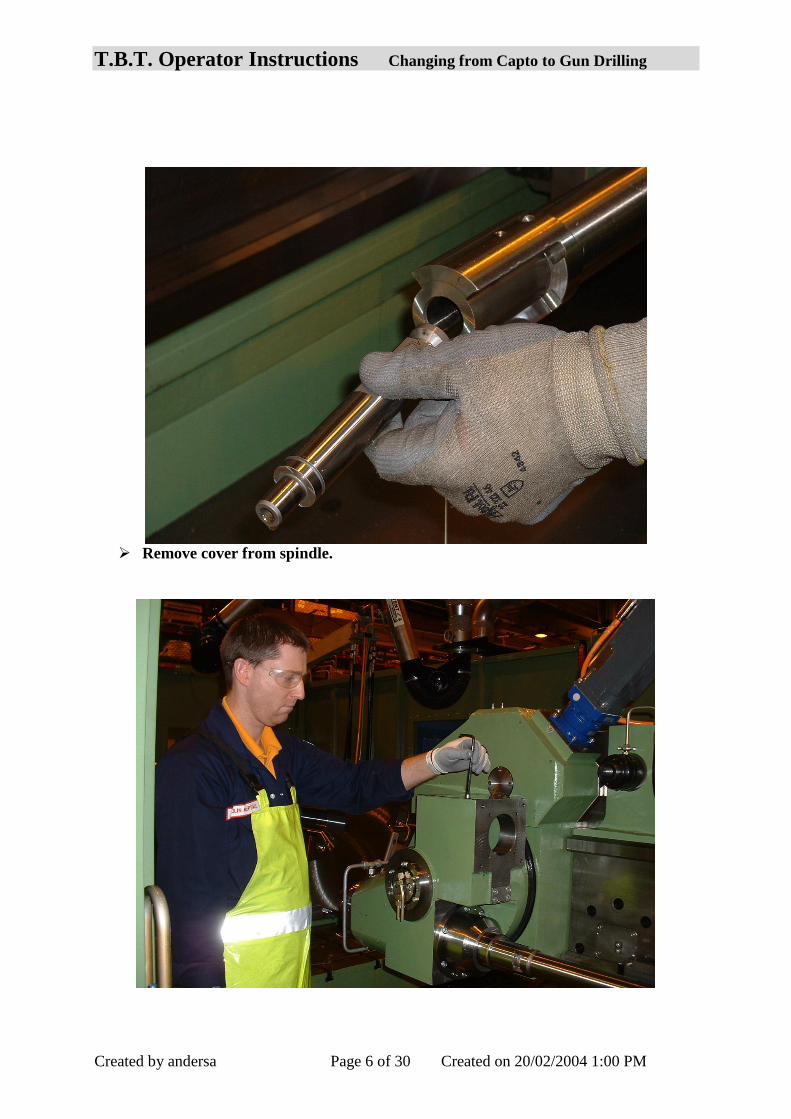
Remove cover from spindle.
T.B.T. Operator Instructions Changing from Capto to Gun Drilling
Created by andersa Page 7 of 30 Created on 20/02/2004 1:00 PM
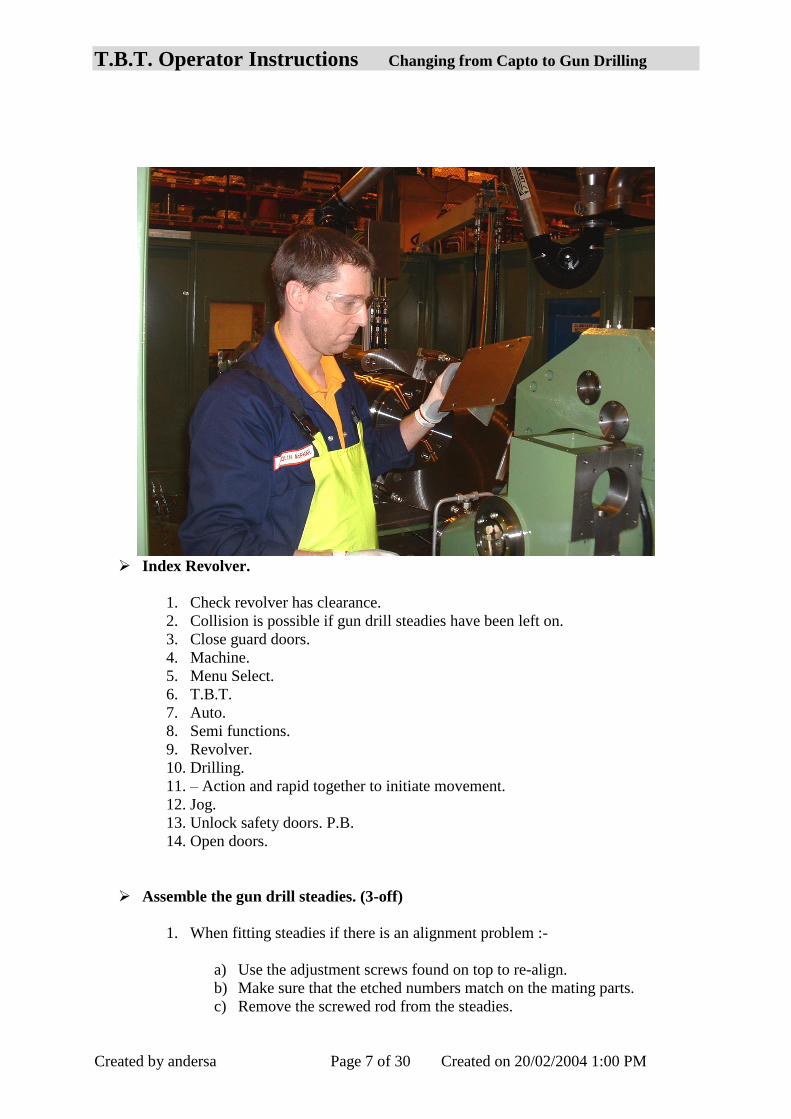
Index Revolver.
1. Check revolver has clearance.
2. Collision is possible if gun drill steadies have been left on.
3. Close guard doors.
4. Machine.
5. Menu Select.
6. T.B.T.
7. Auto.
8. Semi functions.
9. Revolver.
10. Drilling.
11. – Action and rapid together to initiate movement.
12. Jog.
13. Unlock safety doors. P.B.
14. Open doors.
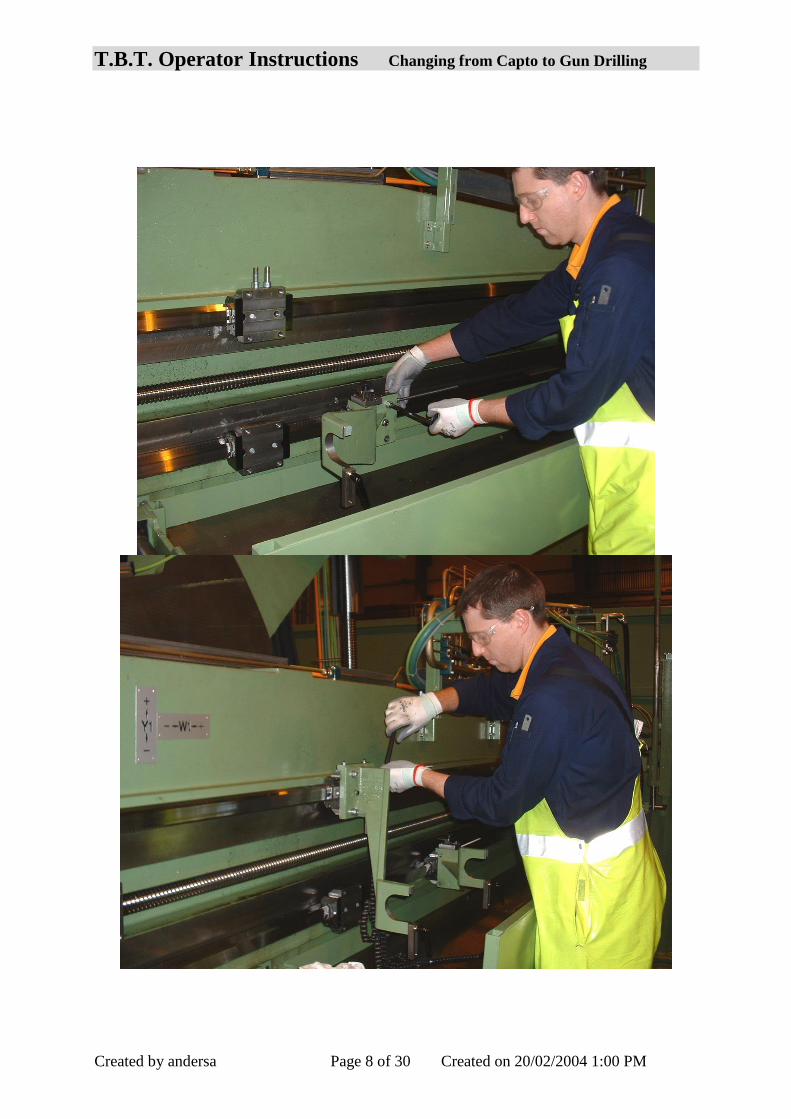
Assemble the gun drill steadies. (3-off)
1. When fitting steadies if there is an alignment problem :-
a) Use the adjustment screws found on top to re-align.
b) Make sure that the etched numbers match on the mating parts.
c) Remove the screwed rod from the steadies.
T.B.T. Operator Instructions Changing from Capto to Gun Drilling
Created by andersa Page 8 of 30 Created on 20/02/2004 1:00 PM

T.B.T. Operator Instructions Changing from Capto to Gun Drilling
Created by andersa Page 9 of 30 Created on 20/02/2004 1:00 PM
Check the driver is clear of the gun drill steadies.
1. Use the remote.
2. Switch the key on.
3. W1.

T.B.T. Operator Instructions Changing from Capto to Gun Drilling
Created by andersa Page 10 of 30 Created on 20/02/2004 1:00 PM
4. Hand wheel. P.B.
5. Rapid P.B.
6. Hold in one of the safety buttons.
7. The two green lights on the remote must be on.
8. –W.
1. Jog driver back. (+W.)
2. Replace remote.
3. Ensure that the key is switched off.
4. Replace the screwed rod to the steadies.
5. Longer piece to the top.
Assemble the housing for the sealing unit.

T.B.T. Operator Instructions Changing from Capto to Gun Drilling
Created by andersa Page 11 of 30 Created on 20/02/2004 1:00 PM
Assemble drill bush holder to the spindle housing. (4-off cap screws)

T.B.T. Operator Instructions Changing from Capto to Gun Drilling
Created by andersa Page 12 of 30 Created on 20/02/2004 1:00 PM
T.B.T. Operator Instructions Changing from Capto to Gun Drilling
Created by andersa Page 13 of 30 Created on 20/02/2004 1:00 PM
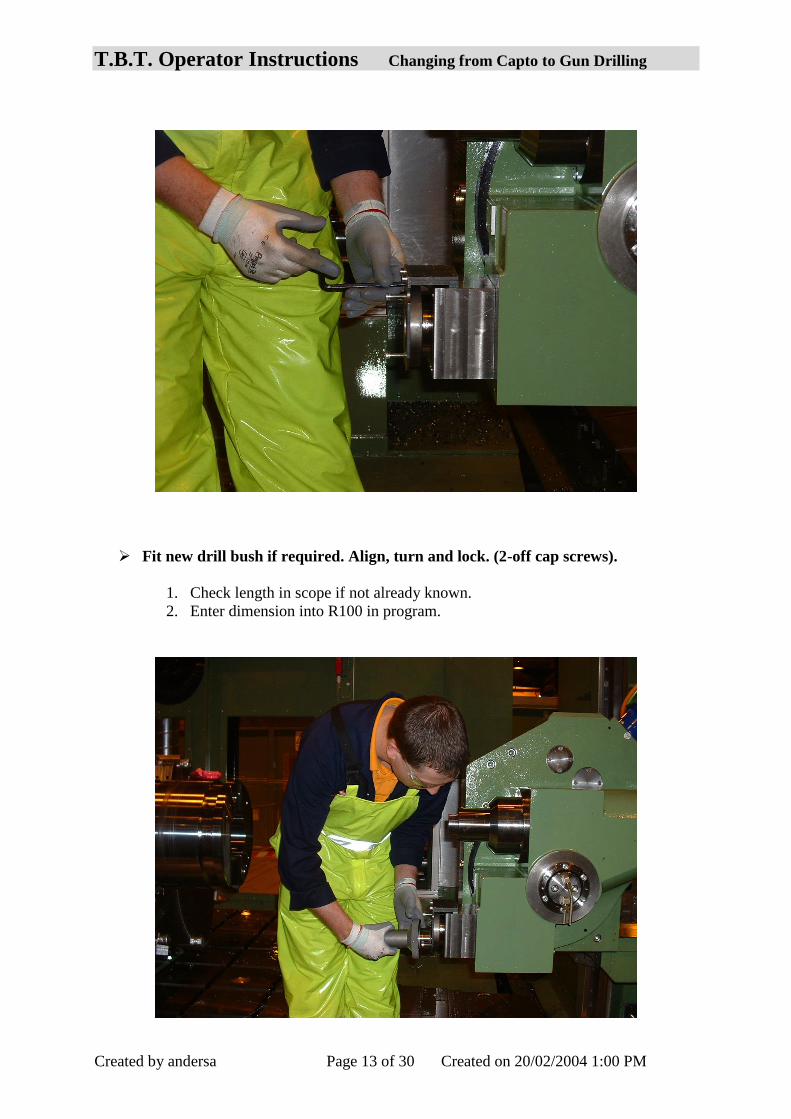
Fit new drill bush if required. Align, turn and lock. (2-off cap screws).
1. Check length in scope if not already known.
2. Enter dimension into R100 in program.

T.B.T. Operator Instructions Changing from Capto to Gun Drilling
Created by andersa Page 14 of 30 Created on 20/02/2004 1:00 PM

T.B.T. Operator Instructions Changing from Capto to Gun Drilling
Created by andersa Page 15 of 30 Created on 20/02/2004 1:00 PM
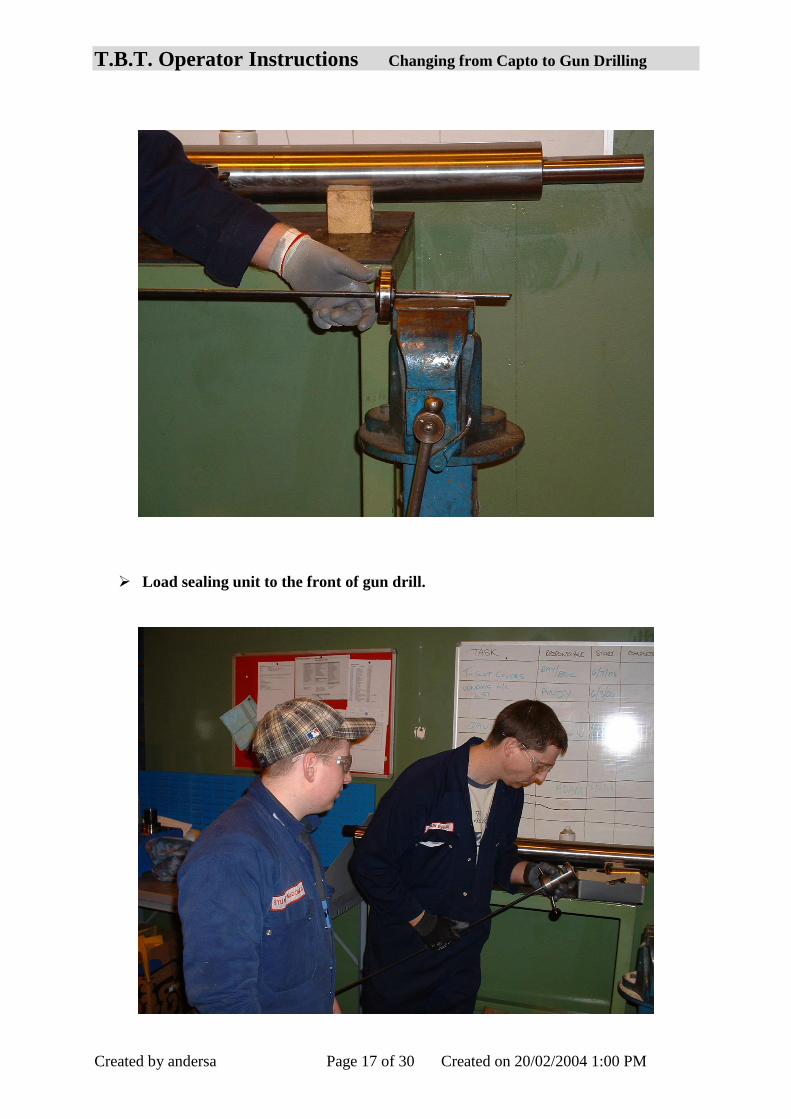
Load gun drill support bearings. (3-off)

T.B.T. Operator Instructions Changing from Capto to Gun Drilling
Created by andersa Page 16 of 30 Created on 20/02/2004 1:00 PM
T.B.T. Operator Instructions Changing from Capto to Gun Drilling
Created by andersa Page 17 of 30 Created on 20/02/2004 1:00 PM
Load sealing unit to the front of gun drill.

T.B.T. Operator Instructions Changing from Capto to Gun Drilling
Created by andersa Page 18 of 30 Created on 20/02/2004 1:00 PM
T.B.T. Operator Instructions Changing from Capto to Gun Drilling
Created by andersa Page 19 of 30 Created on 20/02/2004 1:00 PM
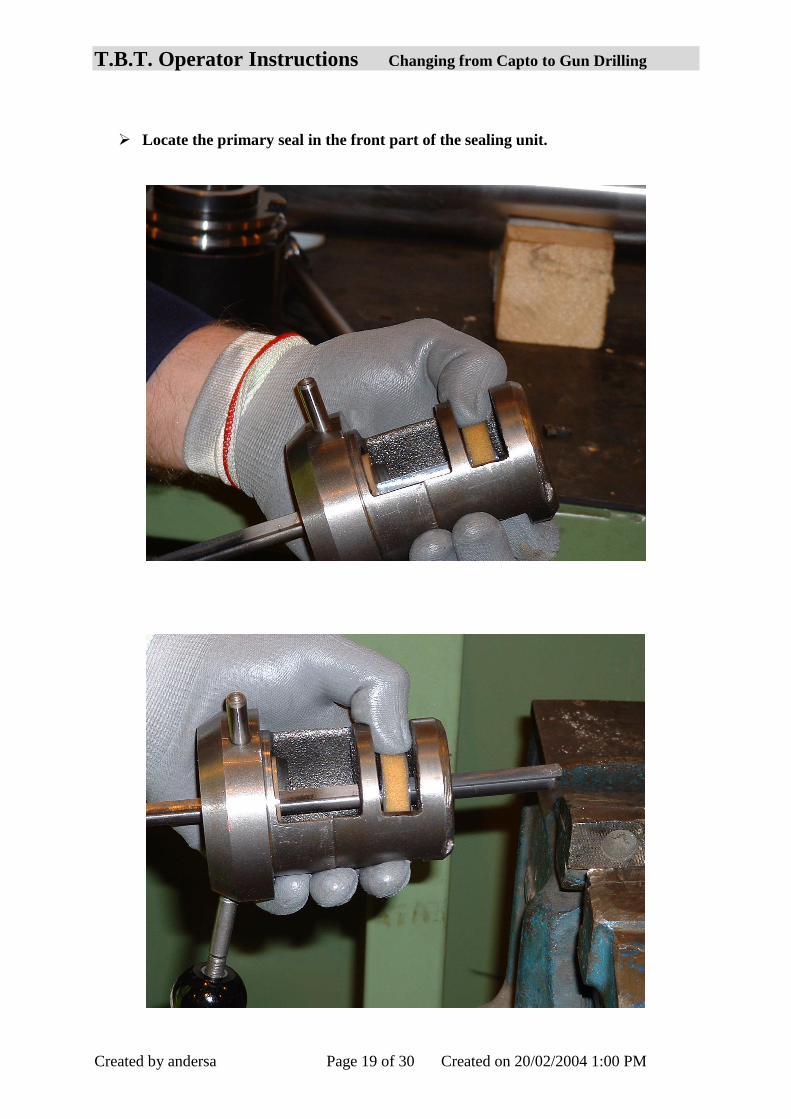
Locate the primary seal in the front part of the sealing unit.

T.B.T. Operator Instructions Changing from Capto to Gun Drilling
Created by andersa Page 20 of 30 Created on 20/02/2004 1:00 PM
Attach / check the pull stud is attached to the back of the gun drill and that the
‘O’ ring is in the pull stud.

T.B.T. Operator Instructions Changing from Capto to Gun Drilling
Created by andersa Page 21 of 30 Created on 20/02/2004 1:00 PM
Before loading the gun drill :-
1. Measure the point of the gun drill to the full cutting diameter.
2. Input this value into R114 in the program.
3. Remember to put your oil proof suit back on before re-entering the machine.

T.B.T. Operator Instructions Changing from Capto to Gun Drilling
Created by andersa Page 22 of 30 Created on 20/02/2004 1:00 PM
Load gun drill with support bearings and sealing unit to the machine.
Insert the back of the gun drill into the drive unit (flat facing grub screws).
And locate guide bearings into the support guides.

T.B.T. Operator Instructions Changing from Capto to Gun Drilling
Created by andersa Page 23 of 30 Created on 20/02/2004 1:00 PM
Tighten the two off grub screws into the driver unit.
1. Align gun drill using the left hand grub screw. (Nip up only)
2. Fully tighten the right hand grub screw, then the left hand one.
3. Note: the longer grub screw goes to the right.
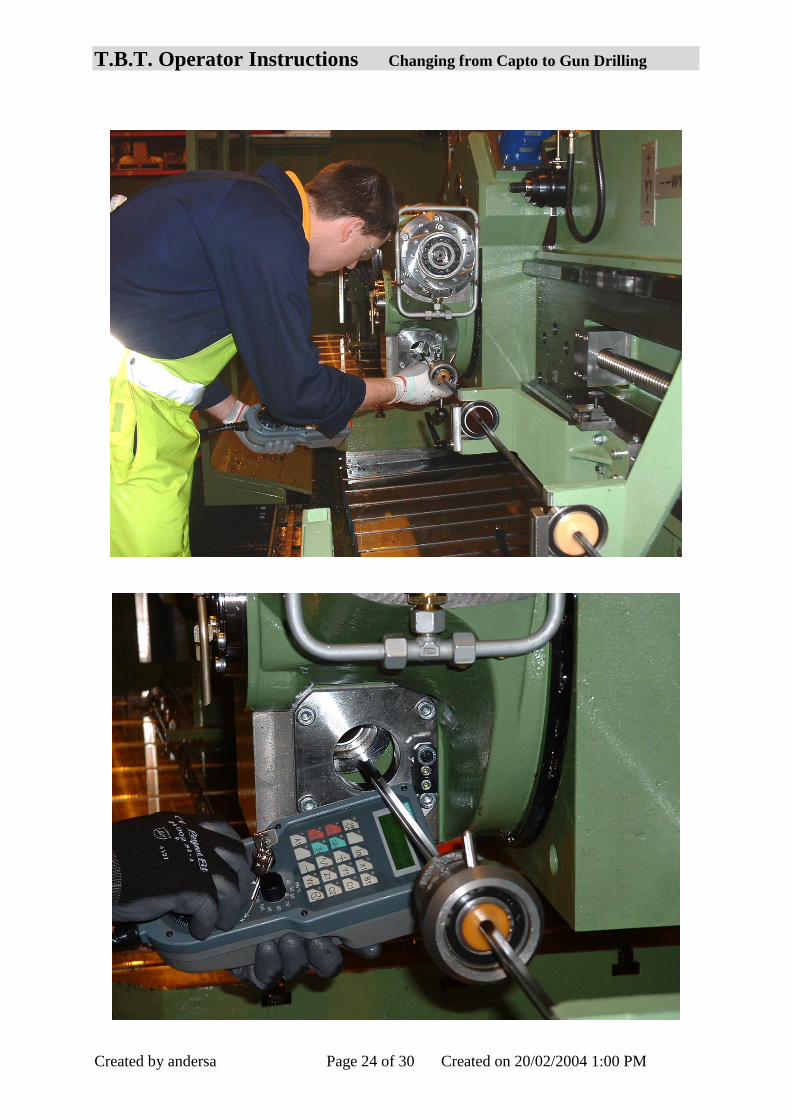
Use the remote control to guide the gun drill thru’ the drill bush carrier.
1. Look thru’ from the housing end.
T.B.T. Operator Instructions Changing from Capto to Gun Drilling
Created by andersa Page 24 of 30 Created on 20/02/2004 1:00 PM

T.B.T. Operator Instructions Changing from Capto to Gun Drilling
Created by andersa Page 25 of 30 Created on 20/02/2004 1:00 PM
When the gun drill has entered the drill bush ensure it is taken all the way
through.
T.B.T. Operator Instructions Changing from Capto to Gun Drilling
Created by andersa Page 26 of 30 Created on 20/02/2004 1:00 PM
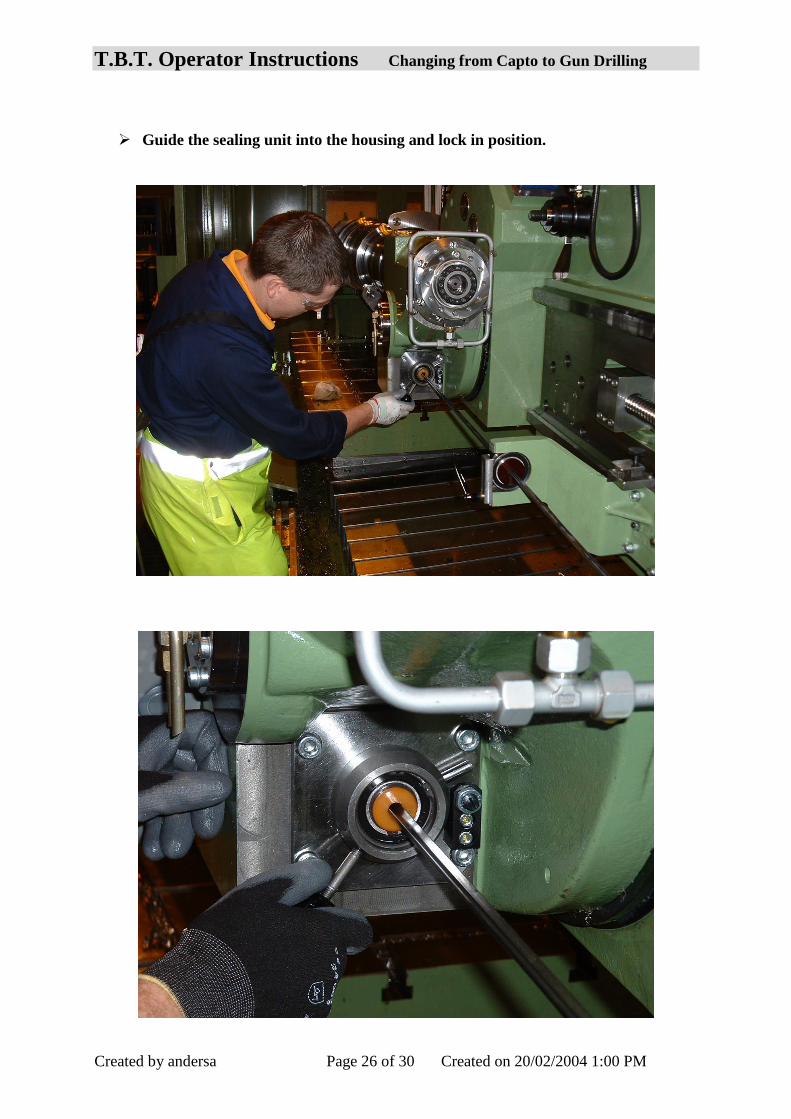
Guide the sealing unit into the housing and lock in position.
T.B.T. Operator Instructions Changing from Capto to Gun Drilling
Created by andersa Page 27 of 30 Created on 20/02/2004 1:00 PM
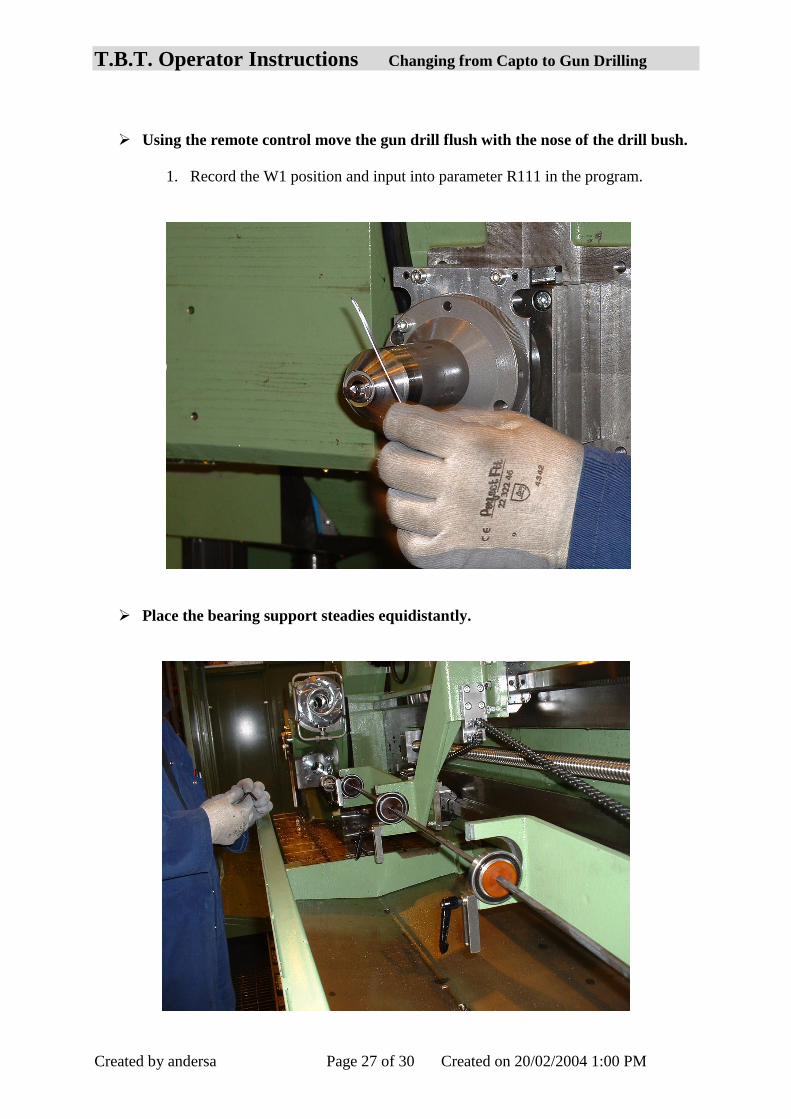
Using the remote control move the gun drill flush with the nose of the drill bush.
1. Record the W1 position and input into parameter R111 in the program.
Place the bearing support steadies equidistantly.
T.B.T. Operator Instructions Changing from Capto to Gun Drilling
Created by andersa Page 28 of 30 Created on 20/02/2004 1:00 PM
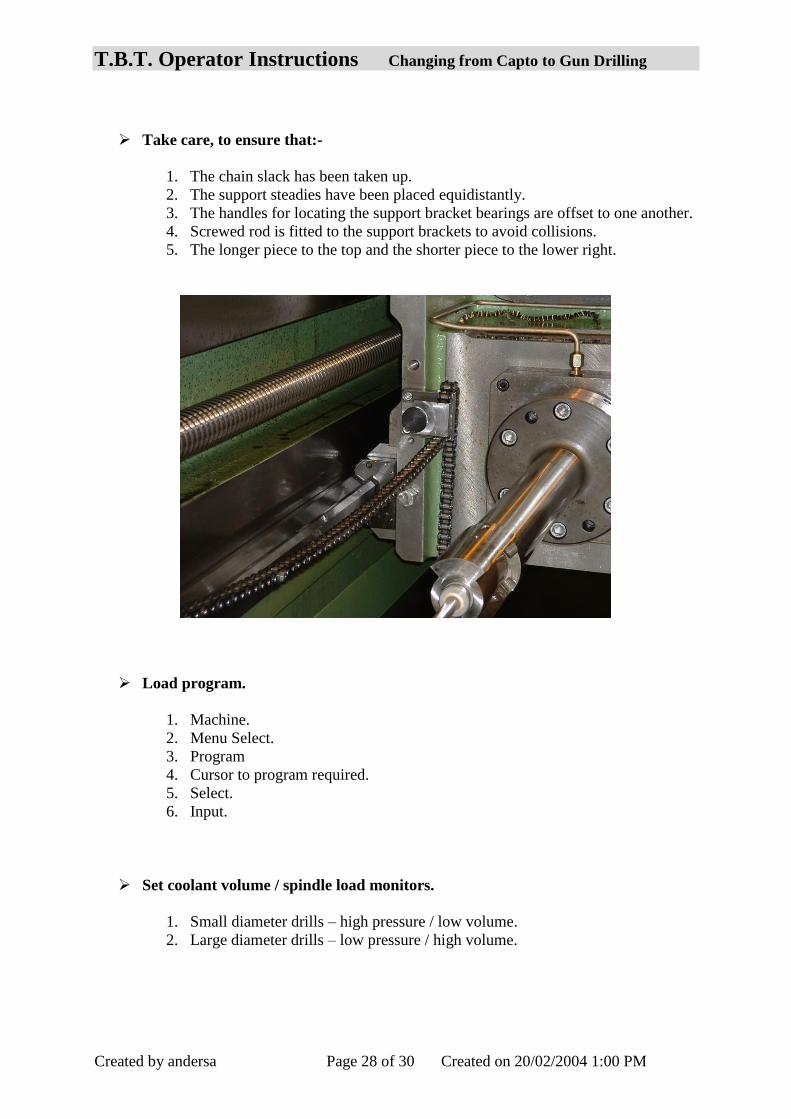
Take care, to ensure that:-
1. The chain slack has been taken up.
2. The support steadies have been placed equidistantly.
3. The handles for locating the support bracket bearings are offset to one another.
4. Screwed rod is fitted to the support brackets to avoid collisions.
5. The longer piece to the top and the shorter piece to the lower right.
Load program.
1. Machine.
2. Menu Select.
3. Program
4. Cursor to program required.
5. Select.
6. Input.
Set coolant volume / spindle load monitors.
1. Small diameter drills – high pressure / low volume.
2. Large diameter drills – low pressure / high volume.
T.B.T. Operator Instructions Changing from Capto to Gun Drilling
Created by andersa Page 29 of 30 Created on 20/02/2004 1:00 PM
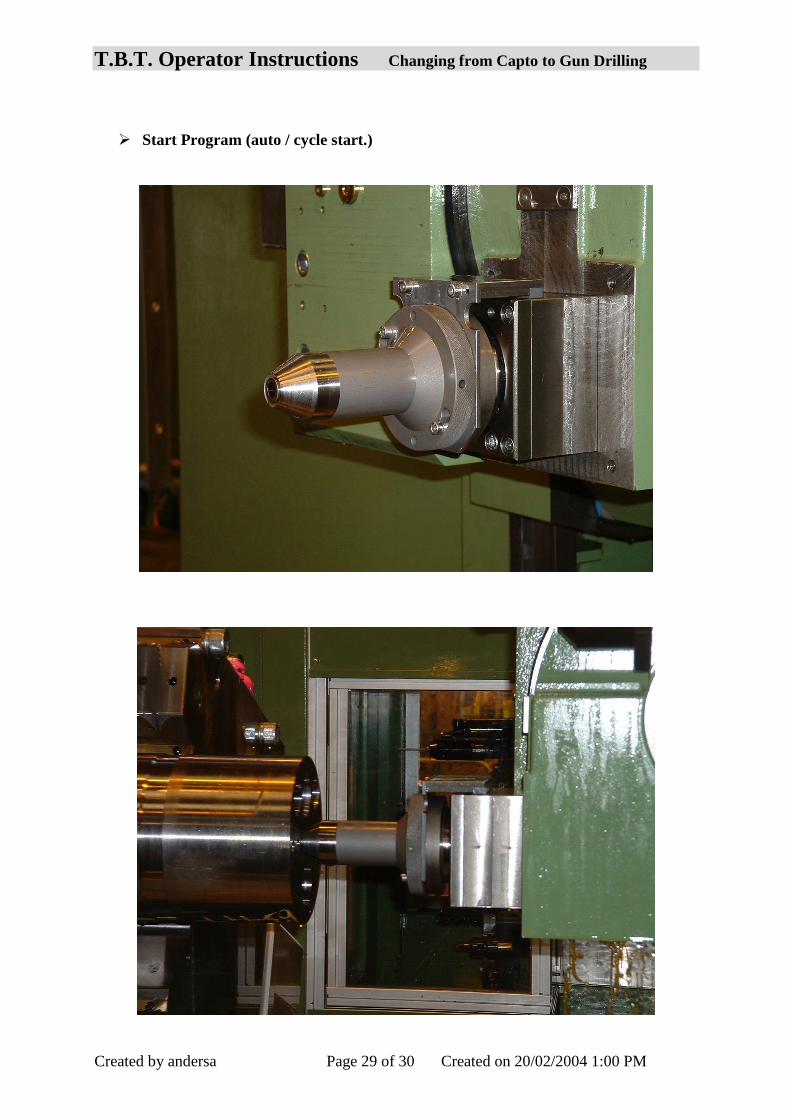
Start Program (auto / cycle start.)

T.B.T. Operator Instructions Changing from Capto to Gun Drilling
Created by andersa Page 30 of 30 Created on 20/02/2004 1:00 PM
To restart drilling on 1st hole after trial cut to check depth :-
1. Change R1 parameter to 1 .
.
To stop during the drilling cycle press the yellow P.B.
To restart at the interrupt position :-
1. Machine.
2. Menu Select.
3. T.B.T.
4. Machine Setup.
5. Jog.
6. Reset.
7. Cursor to drilling start interrupts position.
8. + Action.
9. Auto.
10. Cycle start.
11. Change back to – Action, once drilling has restarted.
12. This is necessary as drilling a subsequent hole will cause a rapid in movement
to the interrupt position.