chapter 1 dreamweaver tutorial - odsa homepage · dreamweaver tutorial 29 • dreamweaver provides...
TRANSCRIPT
1
CHAPTER 1
. . . . . . . . . . . . . . . . . . . . . . . . . . . . . . . . . . . . . . . . . . . . . . . . . . . . . . . .. . . . . . . . . . . . . . . . . . . . . . . . . . . . . . . . . . . . . . . . . . . . . . . . . . . . .Dreamweaver Tutorial
The Dreamweaver tutorial walks you through the steps of building Web pages. You’ll learn how to use Macromedia Dreamweaver to define a local site, and you’ll use Dreamweaver panels and tools to create and edit Web documents.
In this tutorial, you’ll create Web pages for Compass, a fictitious company that specializes in adventure travel. If you’re new to Dreamweaver, start at the beginning of the tutorial and work your way through the end. If you’re already familiar with Dreamweaver, you may want to start at “Use the Assets panel” on page 56; this section and those that follow it focus on new or changed features in Dreamweaver such as the Assets panel, Flash buttons and text, using a template, running a site report and adding a Design Note.
The tutorial takes approximately one to two hours to complete, depending on your experience, and focuses on the following Dreamweaver tasks:
• Defining a local site
• Creating a page in Layout view
• Inserting an image and a rollover image
• Working with tables in Standard view
• Creating a link to another document
• Inserting assets from the Assets panel
• Inserting Flash Text and Flash Button objects
• Creating and applying a template
• Running a site report
• Adding a Design Note
Note: This tutorial demonstrates some features that are supported only in 4.0 or later browsers.
27
Take a guided tour of DreamweaverBefore you get started, watch the Guided Tour movies to familiarize yourself with the Web development process and with Dreamweaver features.
1 In Dreamweaver, choose Help > Guided Tour.
2 Click a movie title.
3 Close the movie when you finish.
The Dreamweaver work areaLet’s start with a brief overview of the Dreamweaver work area.
• If you haven’t already launched Dreamweaver, double-click the Dreamweaver icon to launch it.
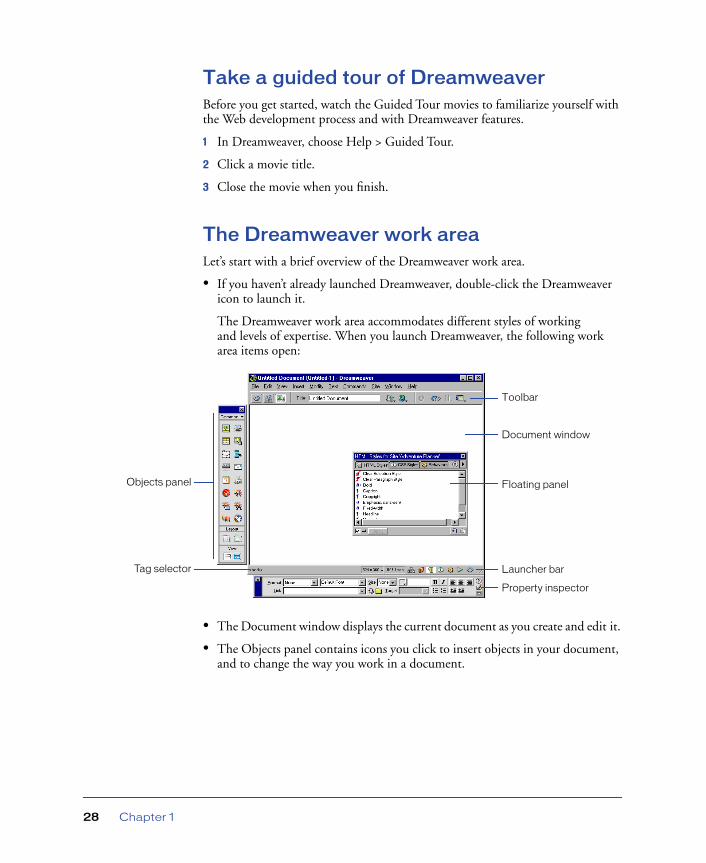
The Dreamweaver work area accommodates different styles of working and levels of expertise. When you launch Dreamweaver, the following work area items open:
• The Document window displays the current document as you create and edit it.
• The Objects panel contains icons you click to insert objects in your document, and to change the way you work in a document.
Objects panel
Property inspector
Document window
Launcher barTag selector
Toolbar
Floating panel
Chapter 128
• Dreamweaver provides many floating panels, such as the HTML Styles panel and the Code inspector, which enable you to work with other Dreamweaver elements.
• The Launcher bar contains buttons for opening and closing your most frequently used inspectors and panels.
• The Property inspector displays properties for the selected object or text, and lets you modify those properties. (Which properties appear in the inspector depend on the object actively selected in the document.)
To open Dreamweaver windows, inspectors, and panels, use the Window menu. A check mark next to an item in the Window menu indicates that the named item is currently open (though it may be hidden behind other windows). To display an item that isn’t currently open, choose the item name from the menu or use its keyboard shortcut.
Working in Dreamweaver
Dreamweaver can display a document in three ways: in Design view, in Code view, and in a split view that shows both the design and code. (To change the view in which you’re working, select a view in the Dreamweaver toolbar.) By default, Dreamweaver displays the Document window in Design view.
In addition, you can work with the Dreamweaver Design view in two different ways—in Layout view and Standard view. (You select these views in the View category of the Objects panel.) In Layout view you can design a page layout, insert graphics, text, and other media; in Standard view, in addition to inserting graphics text and media, you can also insert layers, create frame documents, create tables, and apply other changes to your page—options that aren’t available in Layout view.
How the tutorial files are arranged
Both the completed and partially completed HTML files used in this tutorial are in the Compass_Site folder in the Tutorial folder. Images and other associated files for the site are also in the Compass_Site folder.
Each tutorial file has a meaningful name—for example, the HTML file that contains travel destination information is named Destinations.html. The partially completed files—which you’ll be working on—have names similar to their completed file counterparts, except they begin with DW4_; the partially completed version of Destinations.html, for example, is called DW4_Destinations.html.
Dreamweaver Tutorial 29
Preview the completed Web site
Next, view pages in the completed Web site to get an idea of what you’ll be working toward.
1 If you haven’t already done so, launch Dreamweaver.
2 In Dreamweaver, choose File > Open. In the file browsing dialog box, navigate to the Dreamweaver 4 folder (where you installed Dreamweaver); then navigate to Tutorial/Compass_Site.
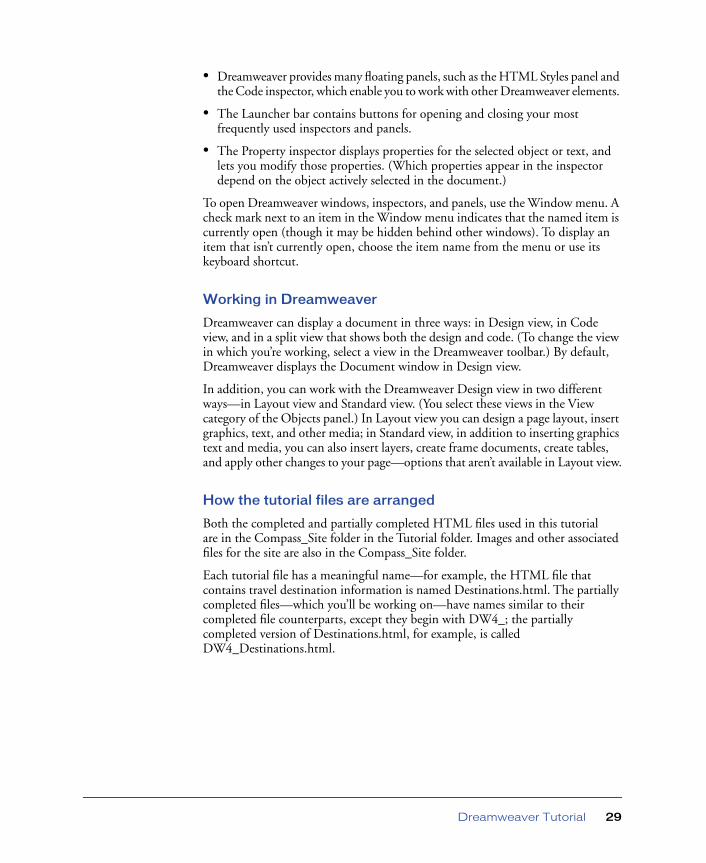
3 In the Compass_Site folder, select CompassHome.html, and then click Open to open the Compass home page in the Document window.
Do not edit this page; you will create your own version of this page.
4 Choose File > Preview in Browser and select a browser in which to view the Compass home page. (Use a version 4.0 or later browser to view this site.)
5 Move the pointer over the navigation buttons to see rollover image effects.
Click the navigation buttons to explore the site.
6 Close the browser when you’re finished looking at the site.
7 Open a new blank document in Dreamweaver, choose File > Open.
8 Close the CompassHome.html file, which is open in Dreamweaver.
Chapter 130
Set up the site structure for the tutorialThere are two ways you can work with the tutorial files—use a predefined local site or define a local site.
• If you’re new to Dreamweaver, you may want to define the local site for the tutorial so you’ll know how to set up a local site when you’re ready to work on your own sites.
• If you’re already familiar with defining a site using Dreamweaver, you may want to use the predefined tutorial site. From the Dreamweaver main menu choose Site > Open Site, then select Tutorial - Dreamweaver. The Tutorial - Dreamweaver site links to the Compass_Site files located in the Dreamweaver 4/Tutorial folder. After selecting the local site, skip to the “Create the site home page” on page 34 section of the tutorial.
Note: If you select the predefined site, the site name displayed in the tutorial screenshots will not match; instead of seeing my_tutorial, you’ll see Tutorial - Dreamweaver as the site name in your screens.
Define a local siteWhen you define a local site, you tell Dreamweaver where you plan to store all the files for a particular site. To work effectively in Dreamweaver, always define a local site for each Web site you create.
For this tutorial, you’ll specify the Compass_Site folder as the local site folder.
1 If it isn’t already open, launch Dreamweaver.
A blank document opens.
2 Choose Site > New Site.
3 In the Site Definition dialog box, make sure Local Info is selected in the Category list.
4 In the Site Name field, type my_tutorial.
The site name lets you easily identify and select a site from a list of sites you’ve defined.
5 Click the folder icon to the right of the Local Root Folder field.
Dreamweaver Tutorial 31
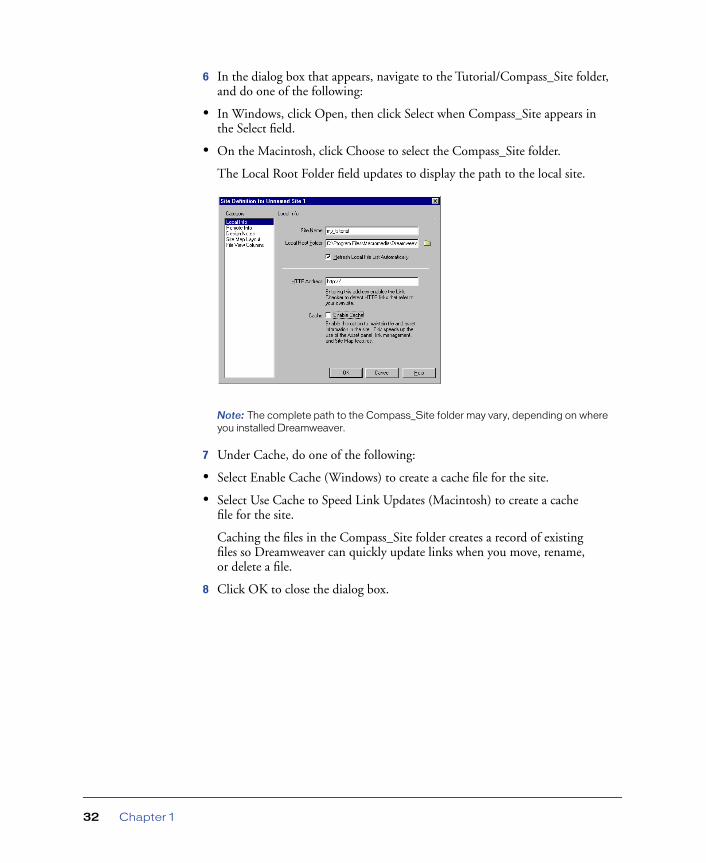
6 In the dialog box that appears, navigate to the Tutorial/Compass_Site folder, and do one of the following:
• In Windows, click Open, then click Select when Compass_Site appears in the Select field.
• On the Macintosh, click Choose to select the Compass_Site folder.
The Local Root Folder field updates to display the path to the local site.
Note: The complete path to the Compass_Site folder may vary, depending on where you installed Dreamweaver.
7 Under Cache, do one of the following:
• Select Enable Cache (Windows) to create a cache file for the site.
• Select Use Cache to Speed Link Updates (Macintosh) to create a cache file for the site.
Caching the files in the Compass_Site folder creates a record of existing files so Dreamweaver can quickly update links when you move, rename, or delete a file.
8 Click OK to close the dialog box.
Chapter 132
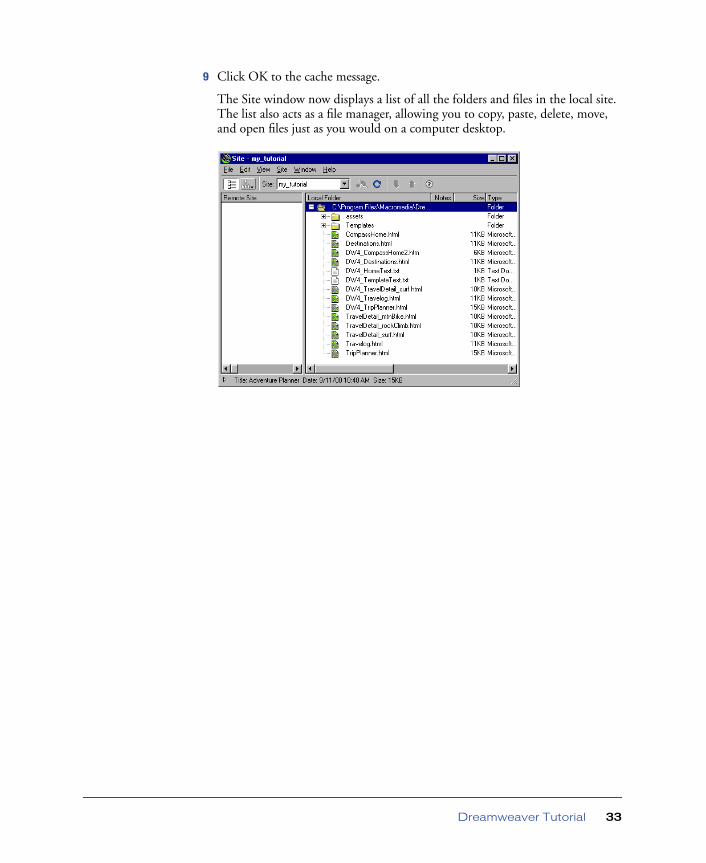
9 Click OK to the cache message.
The Site window now displays a list of all the folders and files in the local site. The list also acts as a file manager, allowing you to copy, paste, delete, move, and open files just as you would on a computer desktop.
Dreamweaver Tutorial 33
Create the site home pageNow that a site structure is set up for storing pages and assets for the Compass site, you’ll create the first page—a home page for the site. As you build this page, you’ll add images, text, and Flash assets; your document will contain the same design components as the completed Compass home page.
Save your document
Begin by saving the document you’re working in.
1 Leave the Site window open, and click the Document window to make it active.
The Site window remains open in the background.
2 Choose File > Save.
3 In the Save As dialog box, select the Compass_Site folder as the location for this document.
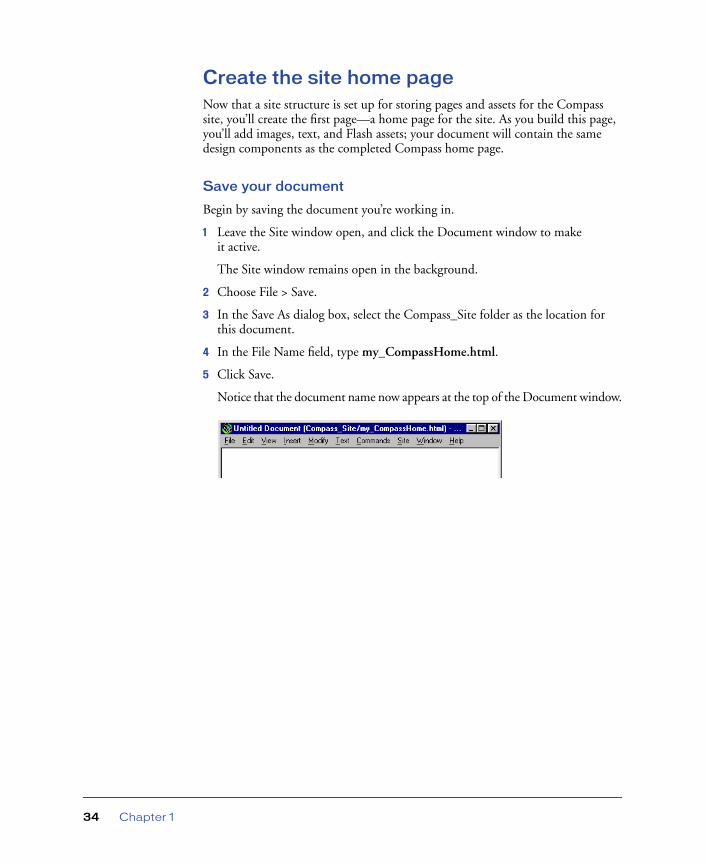
4 In the File Name field, type my_CompassHome.html.
5 Click Save.
Notice that the document name now appears at the top of the Document window.
Chapter 134
Define the document page title
Though the document has a file name, notice it is still labelled Untitled Document; that’s because it needs an HTML document name, or page title. Defining a page title helps site visitors identify the page they’re browsing: the page title appears in the browser title bar and in the bookmark list. If you create a document without a page title, the document appears in the browser with the title Untitled Document.
In this part of the tutorial, you’ll title your page.
1 With the Document window active, choose View > Toolbar if the toolbar isn’t already visible.
The Dreamweaver toolbar appears above the Document window
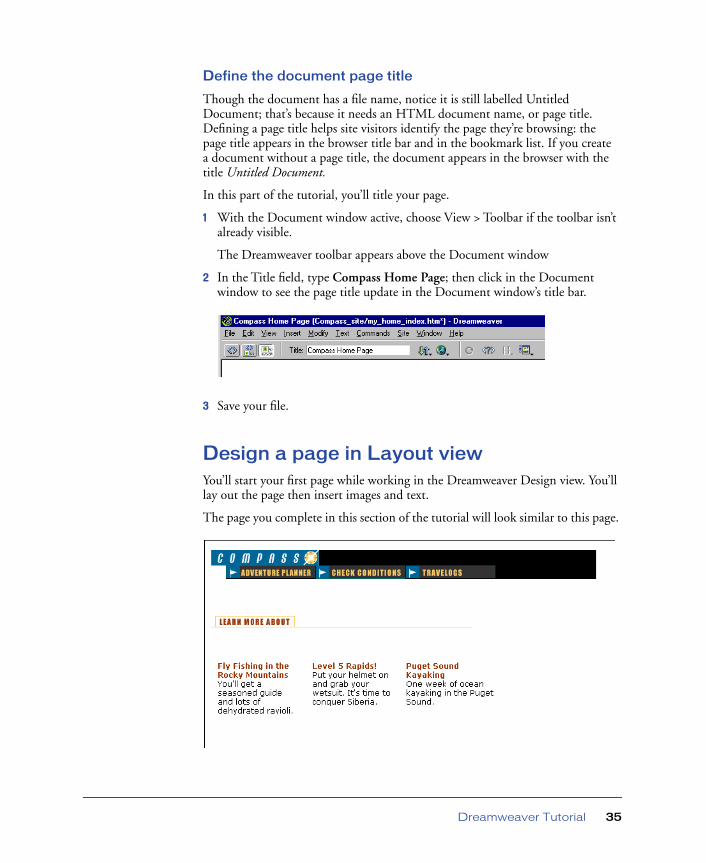
2 In the Title field, type Compass Home Page; then click in the Document window to see the page title update in the Document window’s title bar.
3 Save your file.
Design a page in Layout viewYou’ll start your first page while working in the Dreamweaver Design view. You’ll lay out the page then insert images and text.
The page you complete in this section of the tutorial will look similar to this page.
Dreamweaver Tutorial 35

Work in Layout view
Dreamweaver has two visual design views—Standard view and Layout view. You’ll start by working in Layout view, which allows you to draw layout cells or layout tables into which you can add content such as images, text, or other media.
In this part of the tutorial, you’ll lay out the page; in the next section you’ll add content. (Once you’re comfortable with these two tasks, you may find it easier to add layout and content together.)
1 In the Objects panel, click the Layout View icon if it isn’t already selected.
The Getting Started in Layout View dialog box appears and describes the Layout view options.
2 Review the options, then click OK to close the dialog box.
3 In the Objects panel under Layout notice the Layout options—Draw Layout Cell and Draw Layout Table—are now available; these options aren’t available in Standard view.
Layout View icon
Draw Layout Cell icon
Draw Layout Table icon
Chapter 136
Draw layout cells
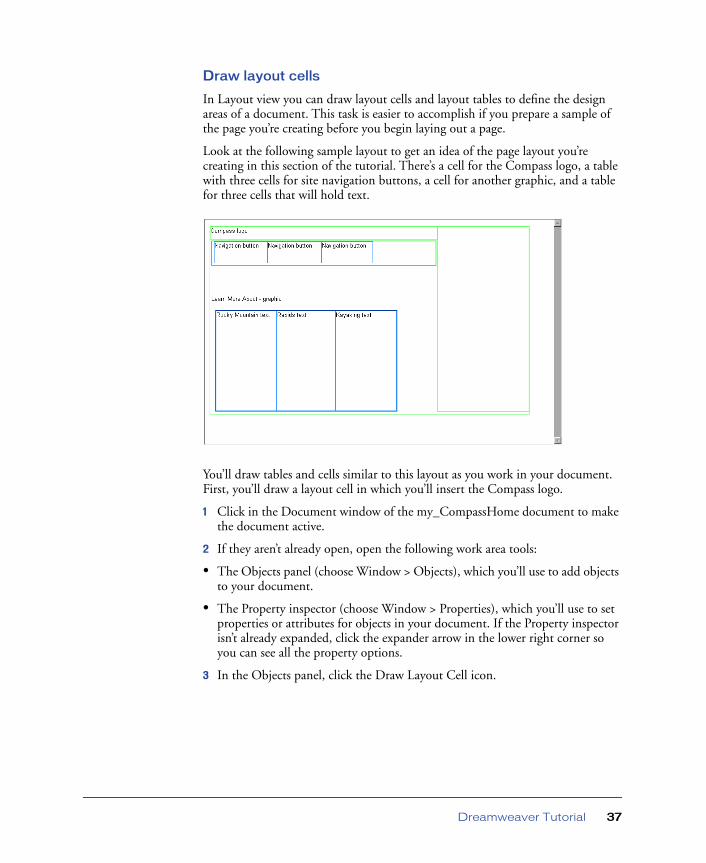
In Layout view you can draw layout cells and layout tables to define the design areas of a document. This task is easier to accomplish if you prepare a sample of the page you’re creating before you begin laying out a page.
Look at the following sample layout to get an idea of the page layout you’re creating in this section of the tutorial. There’s a cell for the Compass logo, a table with three cells for site navigation buttons, a cell for another graphic, and a table for three cells that will hold text.
You’ll draw tables and cells similar to this layout as you work in your document. First, you’ll draw a layout cell in which you’ll insert the Compass logo.
1 Click in the Document window of the my_CompassHome document to make the document active.
2 If they aren’t already open, open the following work area tools:
• The Objects panel (choose Window > Objects), which you’ll use to add objects to your document.
• The Property inspector (choose Window > Properties), which you’ll use to set properties or attributes for objects in your document. If the Property inspector isn’t already expanded, click the expander arrow in the lower right corner so you can see all the property options.
3 In the Objects panel, click the Draw Layout Cell icon.
Dreamweaver Tutorial 37
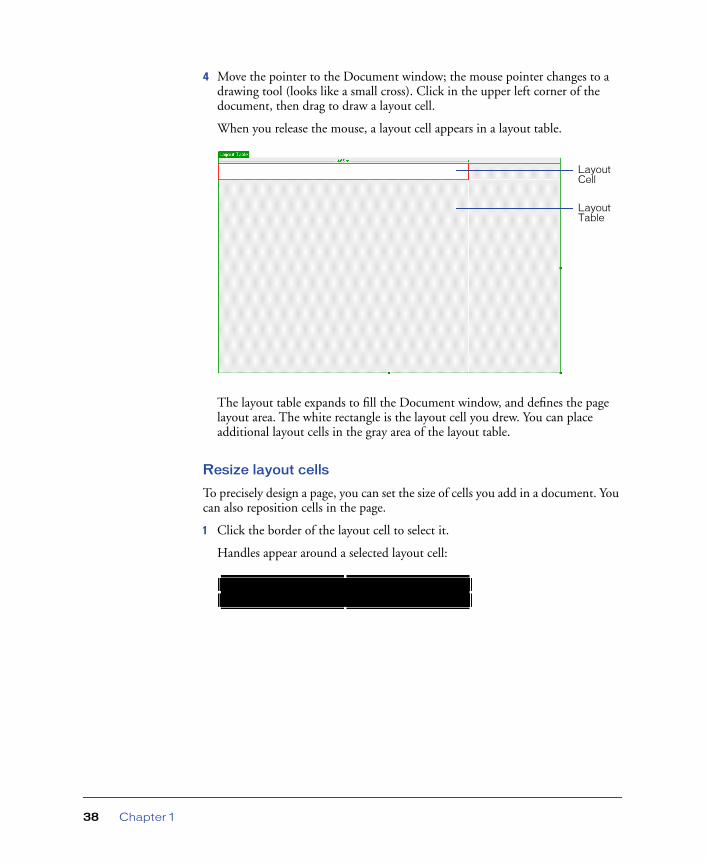
4 Move the pointer to the Document window; the mouse pointer changes to a drawing tool (looks like a small cross). Click in the upper left corner of the document, then drag to draw a layout cell.
When you release the mouse, a layout cell appears in a layout table.
The layout table expands to fill the Document window, and defines the page layout area. The white rectangle is the layout cell you drew. You can place additional layout cells in the gray area of the layout table.
Resize layout cells
To precisely design a page, you can set the size of cells you add in a document. You can also reposition cells in the page.
1 Click the border of the layout cell to select it.
Handles appear around a selected layout cell:
Layout Table
Layout Cell
Chapter 138
2 To resize this layout cell, do one of the following:
• In the Property inspector for the layout cell, type 510 in the Fixed field to set the cell’s width to 510 pixels, then click in the document to see the cell width change.
Note: If you enter a pixel width that is larger than the width of the layout table, or that causes the cell to overlap another cell in a layout table, Dreamweaver alerts you and adjusts the cell width to a valid width.
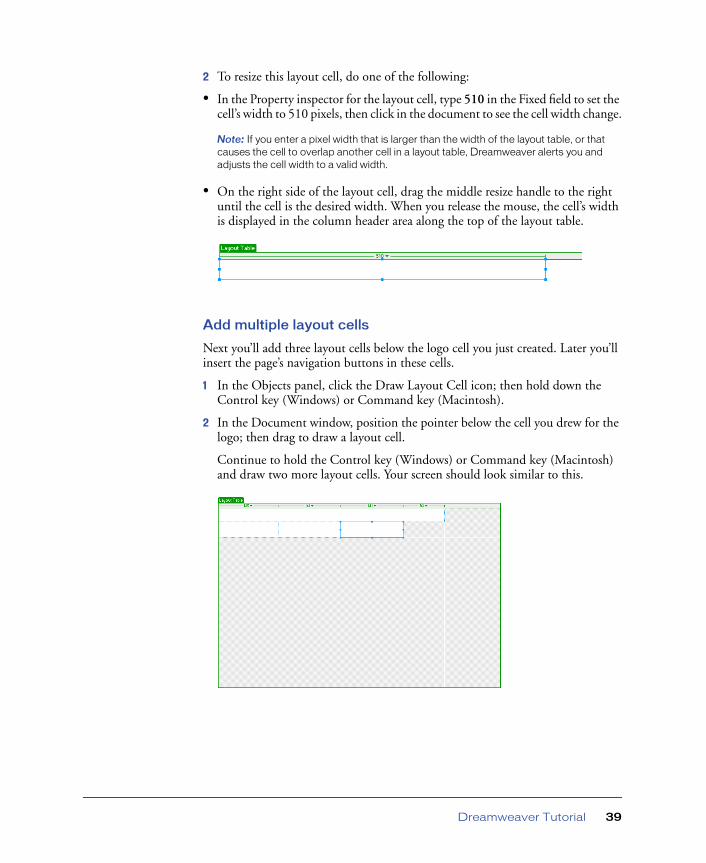
• On the right side of the layout cell, drag the middle resize handle to the right until the cell is the desired width. When you release the mouse, the cell’s width is displayed in the column header area along the top of the layout table.
Add multiple layout cells
Next you’ll add three layout cells below the logo cell you just created. Later you’ll insert the page’s navigation buttons in these cells.
1 In the Objects panel, click the Draw Layout Cell icon; then hold down the Control key (Windows) or Command key (Macintosh).
2 In the Document window, position the pointer below the cell you drew for the logo; then drag to draw a layout cell.
Continue to hold the Control key (Windows) or Command key (Macintosh) and draw two more layout cells. Your screen should look similar to this.
Dreamweaver Tutorial 39
Move a layout cell
If you need to line up the cells next to each other you can resize and move the layout cells as you need. You change the size of a layout cell by using one of its resize handles.
You cannot click and drag a cell to move it to a new position. If you need to move a layout cell to reposition it in a document, follow these steps.
1 Click the border of a layout cell to select it.
2 To move the layout cell, do one of the following:
• Use the arrow keys.
• Hold down Shift and use the arrow keys to move a layout cell 5 pixels at a time.
Group cells in a layout table
Now you’ll create a table of the navigation button cells you just created. Grouping the cells in a table enables you to control the cell spacing and to easily move the cells as a group if you want change the page layout. You’ll create a table for the navigation buttons that is the same width as the logo cell above it.
Use Draw Layout Table to group the navigation button images.
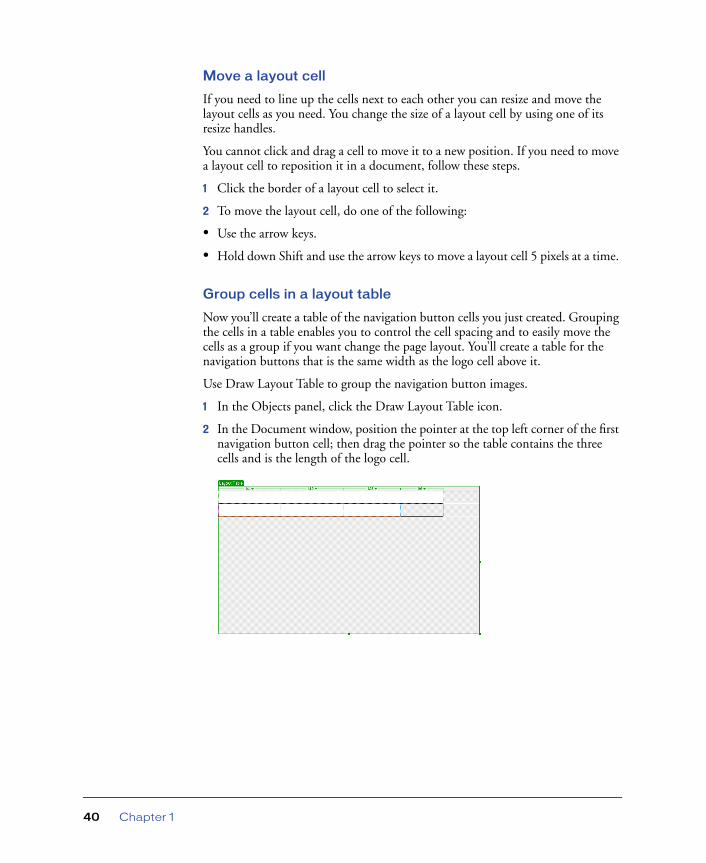
1 In the Objects panel, click the Draw Layout Table icon.
2 In the Document window, position the pointer at the top left corner of the first navigation button cell; then drag the pointer so the table contains the three cells and is the length of the logo cell.
Chapter 140
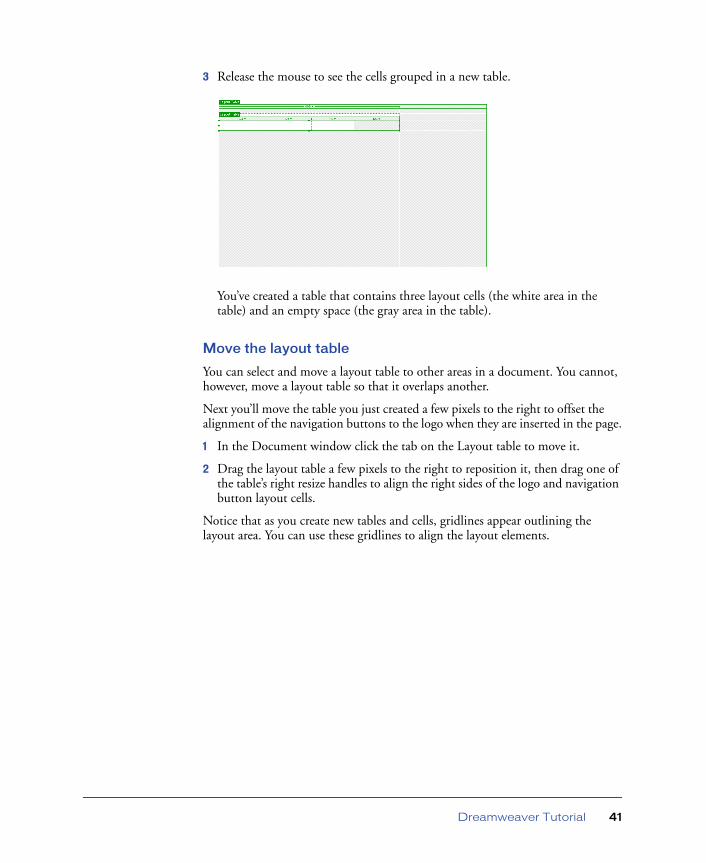
3 Release the mouse to see the cells grouped in a new table.
You’ve created a table that contains three layout cells (the white area in the table) and an empty space (the gray area in the table).
Move the layout table
You can select and move a layout table to other areas in a document. You cannot, however, move a layout table so that it overlaps another.
Next you’ll move the table you just created a few pixels to the right to offset the alignment of the navigation buttons to the logo when they are inserted in the page.
1 In the Document window click the tab on the Layout table to move it.
2 Drag the layout table a few pixels to the right to reposition it, then drag one of the table’s right resize handles to align the right sides of the logo and navigation button layout cells.
Notice that as you create new tables and cells, gridlines appear outlining the layout area. You can use these gridlines to align the layout elements.
Dreamweaver Tutorial 41
Add another layout cell
Next add a layout cell for the Learn More About graphic.
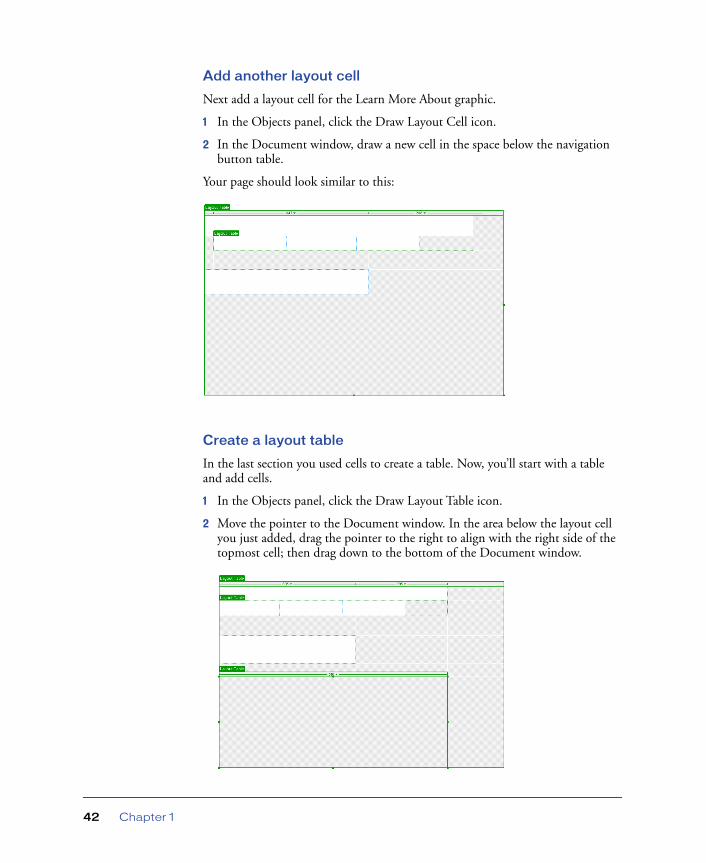
1 In the Objects panel, click the Draw Layout Cell icon.
2 In the Document window, draw a new cell in the space below the navigation button table.
Your page should look similar to this:
Create a layout table
In the last section you used cells to create a table. Now, you’ll start with a table and add cells.
1 In the Objects panel, click the Draw Layout Table icon.
2 Move the pointer to the Document window. In the area below the layout cell you just added, drag the pointer to the right to align with the right side of the topmost cell; then drag down to the bottom of the Document window.
Chapter 142
Draw layout cells in a table
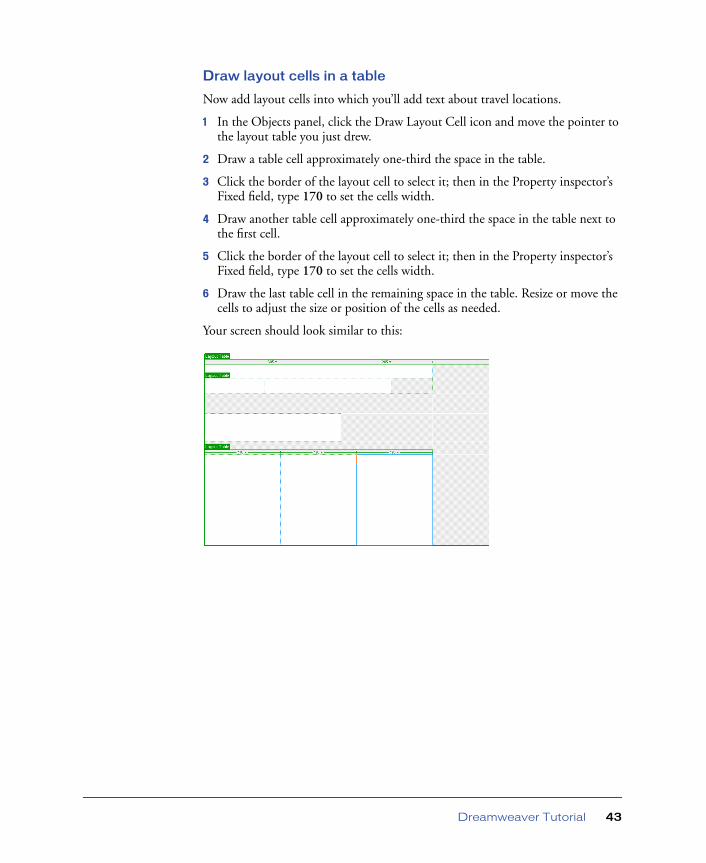
Now add layout cells into which you’ll add text about travel locations.
1 In the Objects panel, click the Draw Layout Cell icon and move the pointer to the layout table you just drew.
2 Draw a table cell approximately one-third the space in the table.
3 Click the border of the layout cell to select it; then in the Property inspector’s Fixed field, type 170 to set the cells width.
4 Draw another table cell approximately one-third the space in the table next to the first cell.
5 Click the border of the layout cell to select it; then in the Property inspector’s Fixed field, type 170 to set the cells width.
6 Draw the last table cell in the remaining space in the table. Resize or move the cells to adjust the size or position of the cells as needed.
Your screen should look similar to this:
Dreamweaver Tutorial 43
Add content to the pageNow that you’ve laid out the areas of the page, you’ll add the graphical content, such as the logo, and rollover images.
Insert images
You’ll learn two ways to insert images in Dreamweaver—using Dreamweaver’s main menu and using the Objects panel.
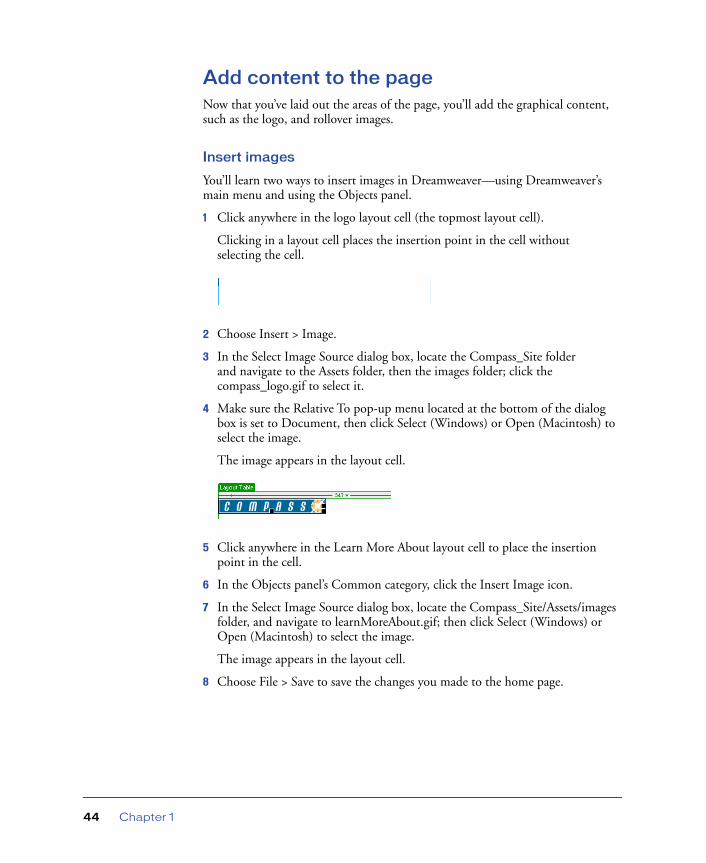
1 Click anywhere in the logo layout cell (the topmost layout cell).
Clicking in a layout cell places the insertion point in the cell without selecting the cell.
2 Choose Insert > Image.
3 In the Select Image Source dialog box, locate the Compass_Site folder and navigate to the Assets folder, then the images folder; click the compass_logo.gif to select it.
4 Make sure the Relative To pop-up menu located at the bottom of the dialog box is set to Document, then click Select (Windows) or Open (Macintosh) to select the image.
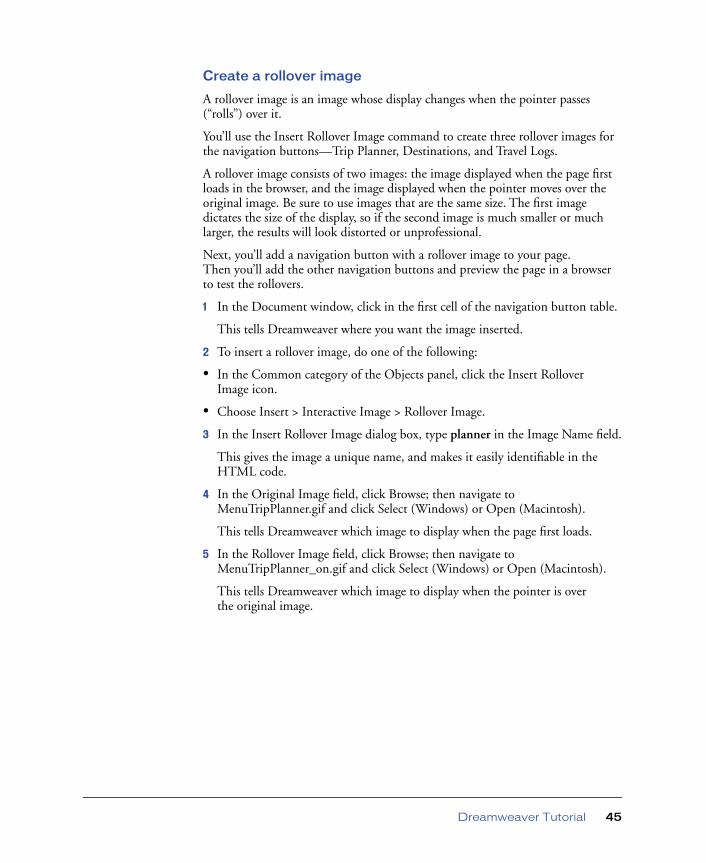
The image appears in the layout cell.
5 Click anywhere in the Learn More About layout cell to place the insertion point in the cell.
6 In the Objects panel’s Common category, click the Insert Image icon.
7 In the Select Image Source dialog box, locate the Compass_Site/Assets/images folder, and navigate to learnMoreAbout.gif; then click Select (Windows) or Open (Macintosh) to select the image.
The image appears in the layout cell.
8 Choose File > Save to save the changes you made to the home page.
Chapter 144
Create a rollover image
A rollover image is an image whose display changes when the pointer passes (“rolls”) over it.
You’ll use the Insert Rollover Image command to create three rollover images for the navigation buttons—Trip Planner, Destinations, and Travel Logs.
A rollover image consists of two images: the image displayed when the page first loads in the browser, and the image displayed when the pointer moves over the original image. Be sure to use images that are the same size. The first image dictates the size of the display, so if the second image is much smaller or much larger, the results will look distorted or unprofessional.
Next, you’ll add a navigation button with a rollover image to your page. Then you’ll add the other navigation buttons and preview the page in a browser to test the rollovers.
1 In the Document window, click in the first cell of the navigation button table.
This tells Dreamweaver where you want the image inserted.
2 To insert a rollover image, do one of the following:
• In the Common category of the Objects panel, click the Insert Rollover Image icon.
• Choose Insert > Interactive Image > Rollover Image.
3 In the Insert Rollover Image dialog box, type planner in the Image Name field.
This gives the image a unique name, and makes it easily identifiable in the HTML code.
4 In the Original Image field, click Browse; then navigate to MenuTripPlanner.gif and click Select (Windows) or Open (Macintosh).
This tells Dreamweaver which image to display when the page first loads.
5 In the Rollover Image field, click Browse; then navigate to MenuTripPlanner_on.gif and click Select (Windows) or Open (Macintosh).
This tells Dreamweaver which image to display when the pointer is over the original image.
Dreamweaver Tutorial 45
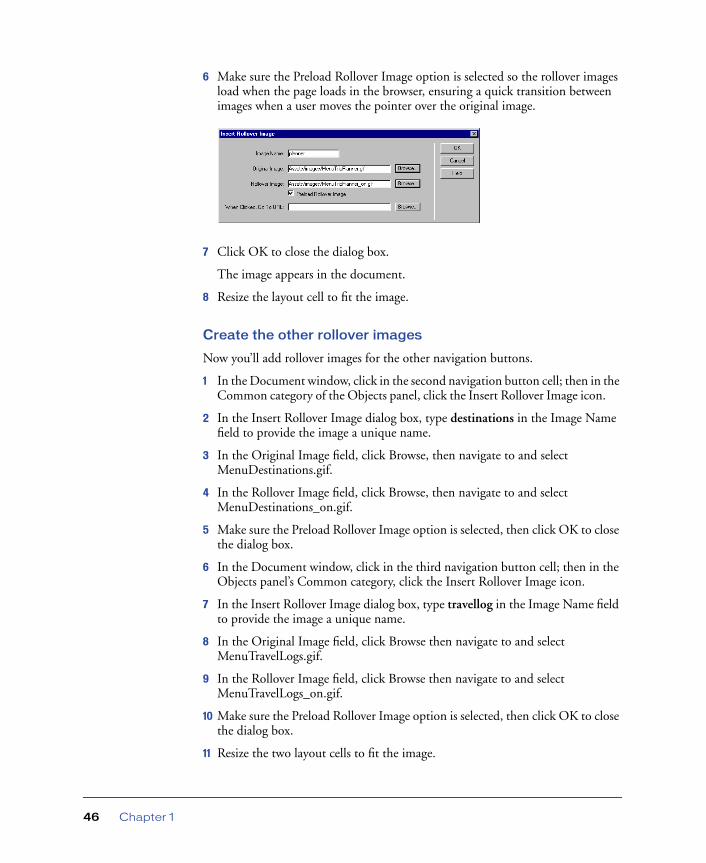
6 Make sure the Preload Rollover Image option is selected so the rollover images load when the page loads in the browser, ensuring a quick transition between images when a user moves the pointer over the original image.
7 Click OK to close the dialog box.
The image appears in the document.
8 Resize the layout cell to fit the image.
Create the other rollover images
Now you’ll add rollover images for the other navigation buttons.
1 In the Document window, click in the second navigation button cell; then in the Common category of the Objects panel, click the Insert Rollover Image icon.
2 In the Insert Rollover Image dialog box, type destinations in the Image Name field to provide the image a unique name.
3 In the Original Image field, click Browse, then navigate to and select MenuDestinations.gif.
4 In the Rollover Image field, click Browse, then navigate to and select MenuDestinations_on.gif.
5 Make sure the Preload Rollover Image option is selected, then click OK to close the dialog box.
6 In the Document window, click in the third navigation button cell; then in the Objects panel’s Common category, click the Insert Rollover Image icon.
7 In the Insert Rollover Image dialog box, type travellog in the Image Name field to provide the image a unique name.
8 In the Original Image field, click Browse then navigate to and select MenuTravelLogs.gif.
9 In the Rollover Image field, click Browse then navigate to and select MenuTravelLogs_on.gif.
10 Make sure the Preload Rollover Image option is selected, then click OK to close the dialog box.
11 Resize the two layout cells to fit the image.
Chapter 146

Preview your document
You cannot view rollover behavior in the Dreamweaver Document window; rollover images work only in a browser. However, you can preview the document in Dreamweaver to see its browser-related functions. You do not have to save the document before you preview it.
1 Press F12 to see your document in a Web browser.
Move the mouse pointer over the rollover images you created to see them change.
2 When you finish previewing the file, close the browser window.
3 Return to the Dreamweaver Document window and choose File > Save to save the changes you made to the home page.
Dreamweaver Tutorial 47
Insert text
Now you’ll add text in the cells of the bottom layout table.
In Dreamweaver, you can type content directly into a layout cell, or you can cut and paste content from another document into a layout cell. In this tutorial, you’ll add text to the layout cell by copying and pasting content from an existing text file to a layout cell.
1 Choose File > Open; then, in the Compass_Site folder, open DW4_HomeText.txt.
The DW4_HomeText.txt document opens in a new Dreamweaver Document window.
2 In DW4_HomeText.txt select the first two lines of text, “Fly Fishing” through “ravioli.”
3 Choose Edit > Copy to copy the text.
4 In the my_CompassHome document, click in the first layout cell in the text-description layout table.
5 Choose Edit > Paste to paste the text into the layout cell.
6 In DW4_HomeText.txt select the next two lines of text, “Level 5 Rapids” through “Siberia.”
7 Choose Edit > Copy to copy the text.
8 In the my_CompassHome document, click in the second cell in the text description layout table.
9 Choose Edit > Paste to paste the text into the layout cell.
10 In DW4_HomeText.txt select the last two lines of text, “Puget Sound Kayaking” through “Puget Sound.”
11 Copy the text, then paste it in the third cell in the layout table.
12 Close DW4_HomeText.txt, then click in the my_CompassHome.html to make it the active document.
Format text
You can format text in the Document window by setting properties in the Property inspector. First, select the text you want to format, then apply the changes. You’ll change the font type and size of the text.
1 If the Property inspector isn’t open, choose Window > Properties.
2 In the first text description layout cell, select all the text from the word “Fly,” through the last word “ravioli.”
Chapter 148

3 In the Property inspector’s second Format pop-up menu, which currently reads Default Font, select Verdana, Arial, Helvetica, sans-serif.
4 In the Size pop-up menu, select 2.
The text in your document automatically updates to reflect the changes.
5 Repeat the above steps to select and format the text in the other two text-description layout cells.
Apply color and style
Now you’ll apply additional formatting changes to the text; you’ll apply color and style to create heading text.
1 In the first text description layout cell, select the heading text from the word “Fly,” through the word “Mountains.”
2 In the Property inspector, click the color picker; then move the eyedropper to the Learn More About image in the document window and select the brown color of the text in the image.
3 Still in the Property inspector, click the B icon to apply bold style to the text.
4 Repeat the above steps to apply color and style to the heading text in the other text description layout cells.
5 Press F12 to preview your page in a browser.
Your page should look similar to the page below.
Notice the text. There is little separation between text in one layout cell and the next. You’ll fix that in the upcoming tutorial steps.
6 Close the browser window, then click in the Document window to make it active.
Dreamweaver Tutorial 49
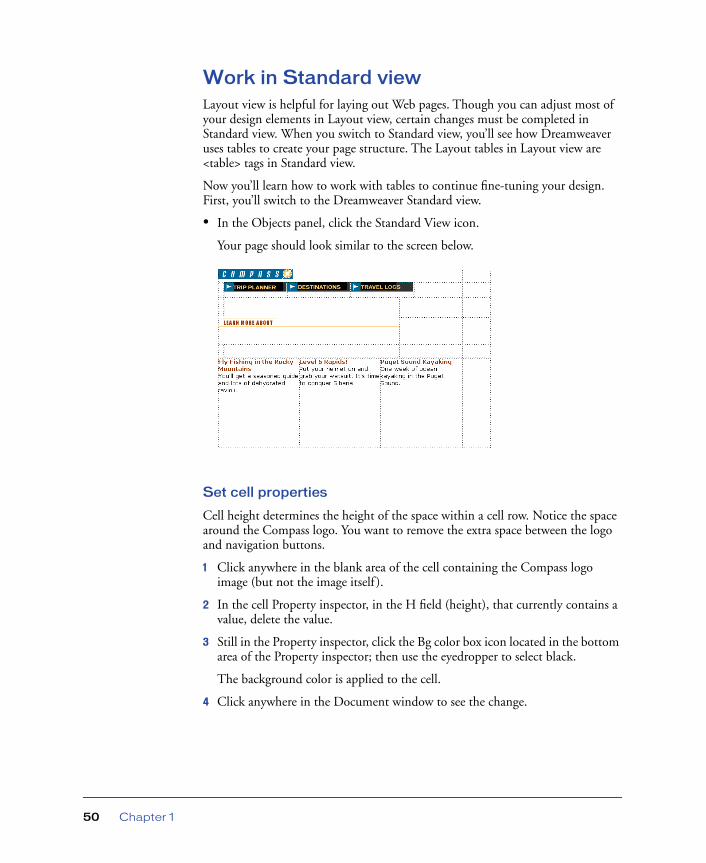
Work in Standard viewLayout view is helpful for laying out Web pages. Though you can adjust most of your design elements in Layout view, certain changes must be completed in Standard view. When you switch to Standard view, you’ll see how Dreamweaver uses tables to create your page structure. The Layout tables in Layout view are <table> tags in Standard view.
Now you’ll learn how to work with tables to continue fine-tuning your design. First, you’ll switch to the Dreamweaver Standard view.
• In the Objects panel, click the Standard View icon.
Your page should look similar to the screen below.
Set cell properties
Cell height determines the height of the space within a cell row. Notice the space around the Compass logo. You want to remove the extra space between the logo and navigation buttons.
1 Click anywhere in the blank area of the cell containing the Compass logo image (but not the image itself ).
2 In the cell Property inspector, in the H field (height), that currently contains a value, delete the value.
3 Still in the Property inspector, click the Bg color box icon located in the bottom area of the Property inspector; then use the eyedropper to select black.
The background color is applied to the cell.
4 Click anywhere in the Document window to see the change.
Chapter 150
Selecting a table
Next you’ll adjust the space in the navigation button table. The easiest way to select a table in Standard view is by using the tag selector, which displays HTML tags of elements in the document.
You’ll use the tag selector to select the table containing the navigation buttons.
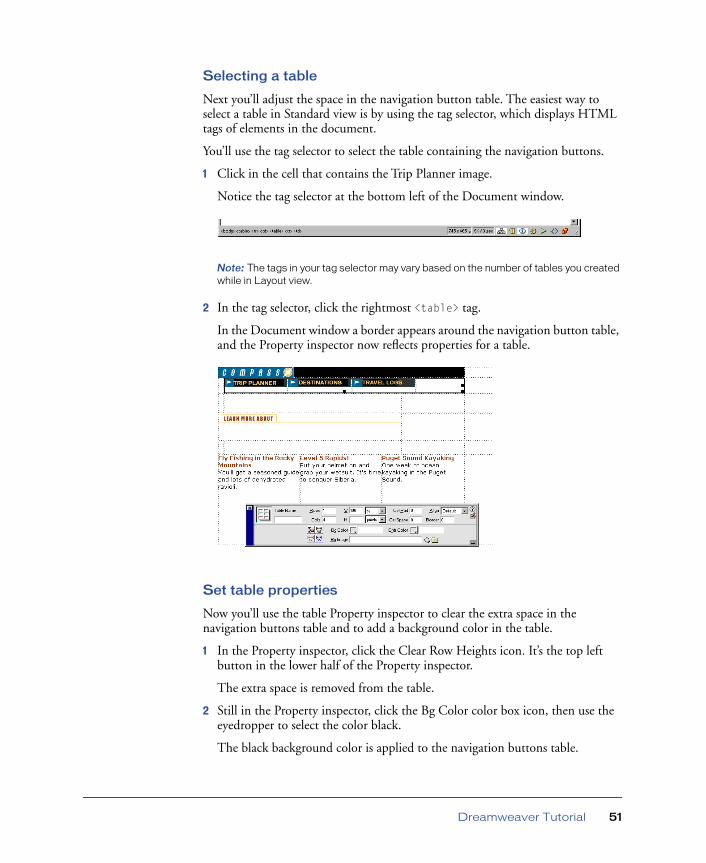
1 Click in the cell that contains the Trip Planner image.
Notice the tag selector at the bottom left of the Document window.
Note: The tags in your tag selector may vary based on the number of tables you created while in Layout view.
2 In the tag selector, click the rightmost <table> tag.
In the Document window a border appears around the navigation button table, and the Property inspector now reflects properties for a table.
Set table properties
Now you’ll use the table Property inspector to clear the extra space in the navigation buttons table and to add a background color in the table.
1 In the Property inspector, click the Clear Row Heights icon. It’s the top left button in the lower half of the Property inspector.
The extra space is removed from the table.
2 Still in the Property inspector, click the Bg Color color box icon, then use the eyedropper to select the color black.
The black background color is applied to the navigation buttons table.
Dreamweaver Tutorial 51
Add cell padding
Next, you’ll make changes to the cells that contain text. As you can see, the text is too close the edges of the cells. You’ll add padding to the cells to leave room between the text and cells.
1 Click in the first cell in the text description table.
2 In the tag selector, click the rightmost <table> tag to select the table.
3 In the Property inspector’s CellPad field, type 10 to add 10 pixels of space between the text and the table cells.
4 Click anywhere in the Document window to see the changes.
5 Save your document.
View the site files
To see a high-level representation of the structure of a local site, you use the Dreamweaver Site Map view. You can also use the site map to add new files to the site; to add, remove, and change links; and to create a graphic file of the site that you can export to and print from an image-editing application.
The site map always displays the home page for a site at the top of the map; below the home page you can see which files the home page links to.
There are a number of ways to define a site’s home page. The easiest way to set a home page is by using the context menu within the Site window.
1 Click the title bar of the Site window to make it active. (If the Site window is not visible, choose Window > Site Files.)
2 In the Site window’s Local Folder list, right-click (Windows) or Control-click (Macintosh) the my_CompassHome.html document; then in the context menu, choose Set as Home Page.
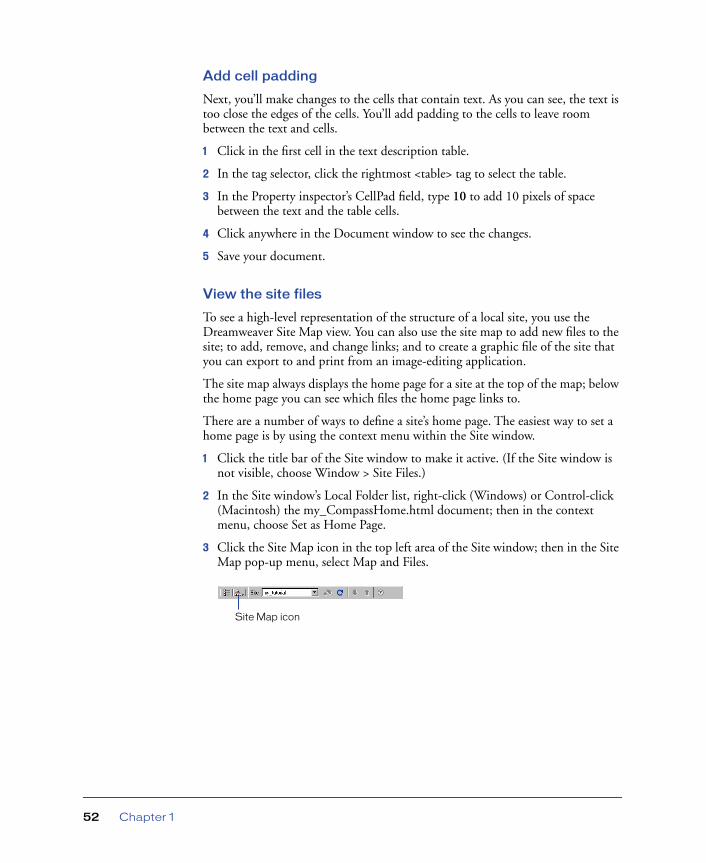
3 Click the Site Map icon in the top left area of the Site window; then in the Site Map pop-up menu, select Map and Files.
Site Map icon
Chapter 152
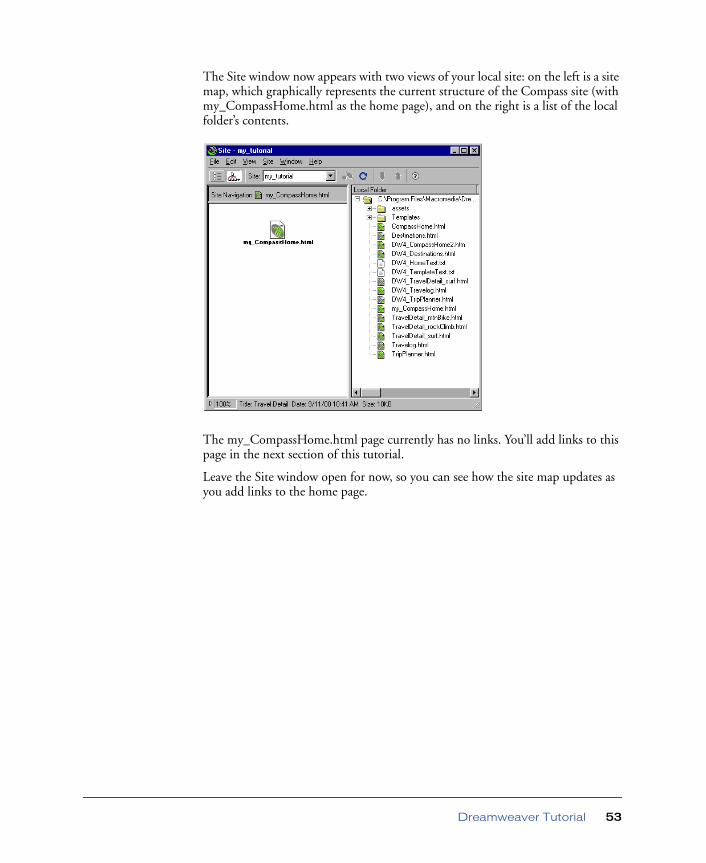
The Site window now appears with two views of your local site: on the left is a site map, which graphically represents the current structure of the Compass site (with my_CompassHome.html as the home page), and on the right is a list of the local folder’s contents.
The my_CompassHome.html page currently has no links. You’ll add links to this page in the next section of this tutorial.
Leave the Site window open for now, so you can see how the site map updates as you add links to the home page.
Dreamweaver Tutorial 53
Link your documents
Images in the top area of the Compass home page guide visitors to specific pages in the site. Now you’ll add links for the navigation buttons.
You’ll see that there are a number of ways to create links using Dreamweaver. First, you’ll add a link from the Trip Planner image to the TripPlanner.html page using the Property inspector.
1 In the Site window, double-click the icon for the my_CompassHome.html file in either pane.
The my_CompassHome.html file becomes the active window.
2 In the Document window, click the Trip Planner image once to select it.
3 Choose Window > Properties to open the Property inspector if it isn’t already open.
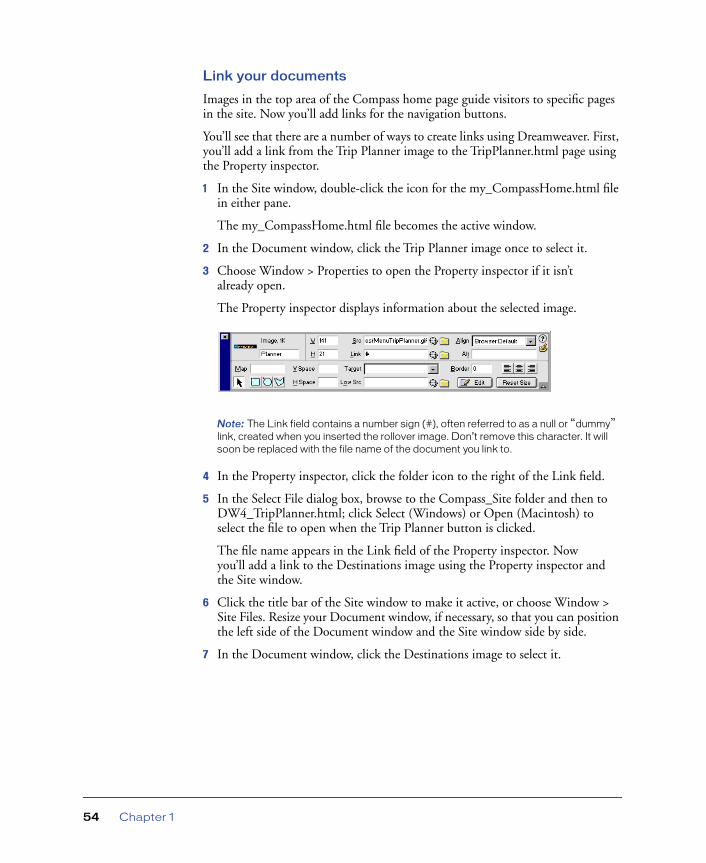
The Property inspector displays information about the selected image.
Note: The Link field contains a number sign (#), often referred to as a null or “dummy” link, created when you inserted the rollover image. Don’t remove this character. It will soon be replaced with the file name of the document you link to.
4 In the Property inspector, click the folder icon to the right of the Link field.
5 In the Select File dialog box, browse to the Compass_Site folder and then to DW4_TripPlanner.html; click Select (Windows) or Open (Macintosh) to select the file to open when the Trip Planner button is clicked.
The file name appears in the Link field of the Property inspector. Now you’ll add a link to the Destinations image using the Property inspector and the Site window.
6 Click the title bar of the Site window to make it active, or choose Window > Site Files. Resize your Document window, if necessary, so that you can position the left side of the Document window and the Site window side by side.
7 In the Document window, click the Destinations image to select it.
Chapter 154
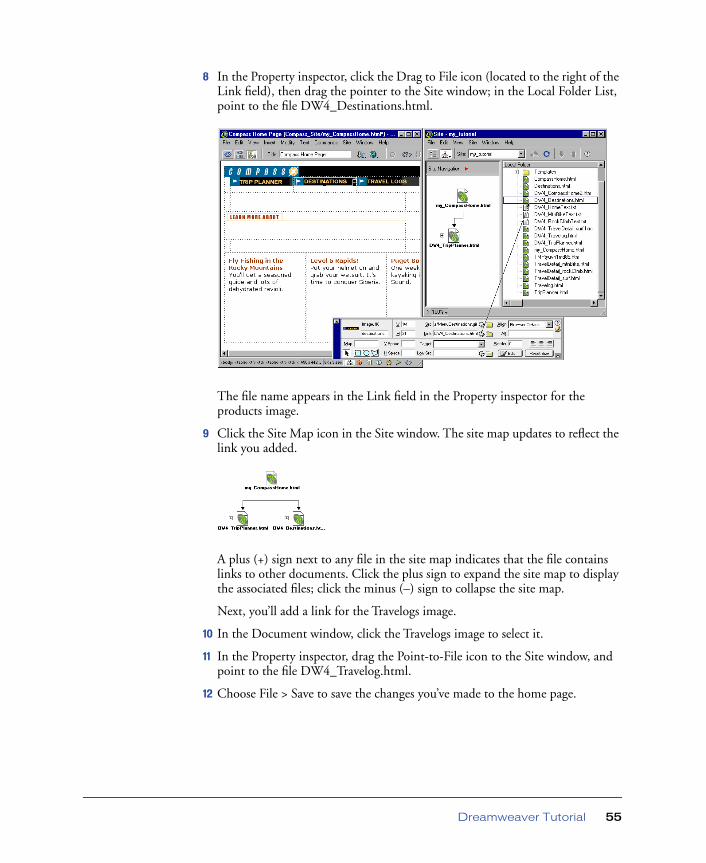
8 In the Property inspector, click the Drag to File icon (located to the right of the Link field), then drag the pointer to the Site window; in the Local Folder List, point to the file DW4_Destinations.html.
The file name appears in the Link field in the Property inspector for the products image.
9 Click the Site Map icon in the Site window. The site map updates to reflect the link you added.
A plus (+) sign next to any file in the site map indicates that the file contains links to other documents. Click the plus sign to expand the site map to display the associated files; click the minus (–) sign to collapse the site map.
Next, you’ll add a link for the Travelogs image.
10 In the Document window, click the Travelogs image to select it.
11 In the Property inspector, drag the Point-to-File icon to the Site window, and point to the file DW4_Travelog.html.
12 Choose File > Save to save the changes you’ve made to the home page.
Dreamweaver Tutorial 55
Test your page
You can’t test your links in Dreamweaver, you must check your links in a browser to make sure the pages operate as you expect.
1 Press F12 to preview the page in a browser.
Click the navigation buttons to check your links. Click your browser’s back button to return to your home page.
2 When you’re finished testing your page, choose File > Close to close the page.
Use the Assets panelThe Assets panel lets you view your site assets such as images, HTML colors, links, Flash movies, other types of movies, scripts, templates, and library items. You can view all your site assets in one place and then easily add content to your page directly from the panel.
Now you’ll learn how to use the Assets panel to add assets to a page.
Select a new document
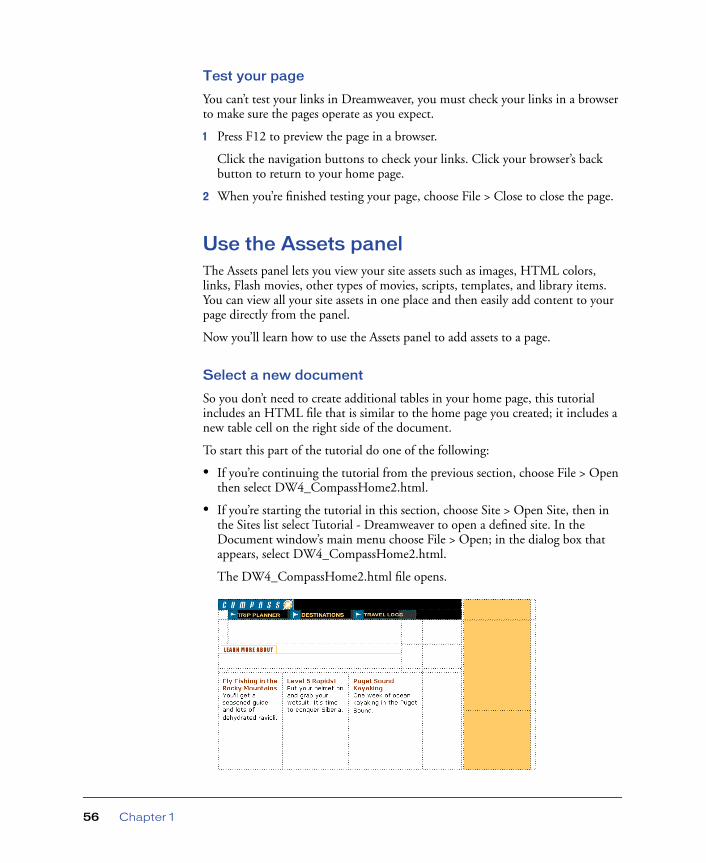
So you don’t need to create additional tables in your home page, this tutorial includes an HTML file that is similar to the home page you created; it includes a new table cell on the right side of the document.
To start this part of the tutorial do one of the following:
• If you’re continuing the tutorial from the previous section, choose File > Open then select DW4_CompassHome2.html.
• If you’re starting the tutorial in this section, choose Site > Open Site, then in the Sites list select Tutorial - Dreamweaver to open a defined site. In the Document window’s main menu choose File > Open; in the dialog box that appears, select DW4_CompassHome2.html.
The DW4_CompassHome2.html file opens.
Chapter 156
View site assets
Begin by opening the Assets panel.
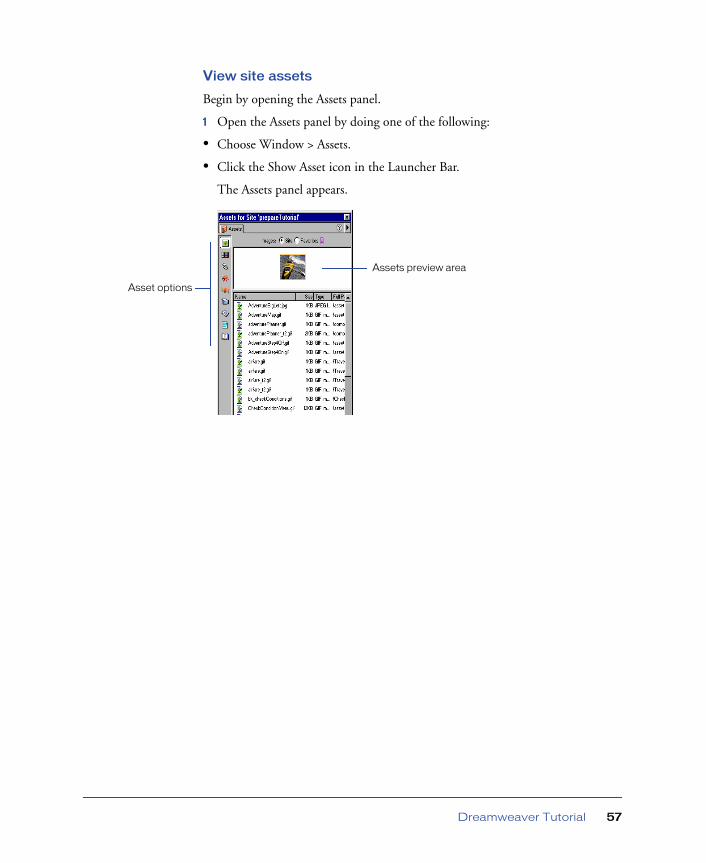
1 Open the Assets panel by doing one of the following:
• Choose Window > Assets.
• Click the Show Asset icon in the Launcher Bar.
The Assets panel appears.
Assets preview area
Asset options
Dreamweaver Tutorial 57
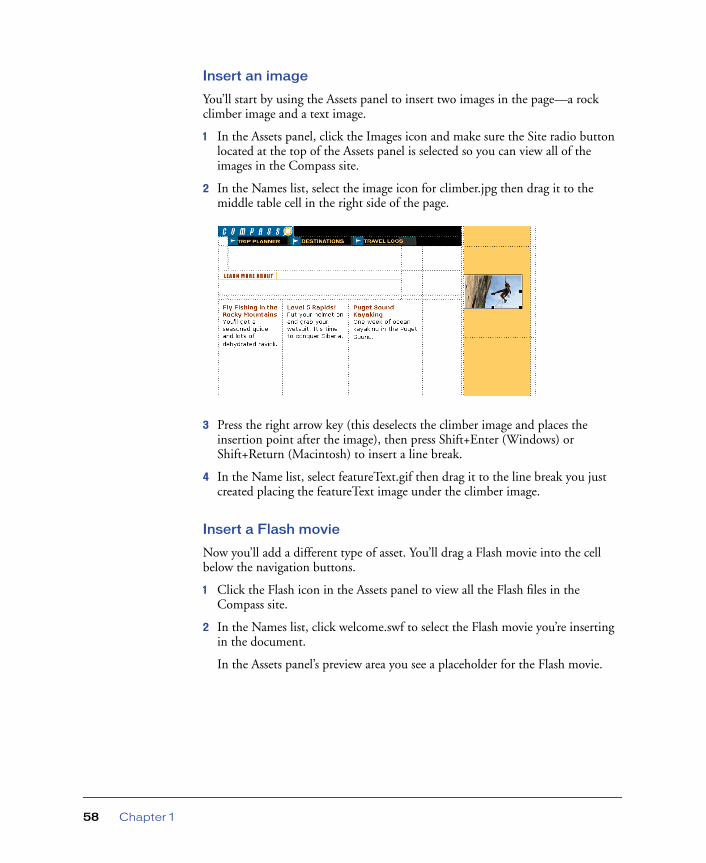
Insert an image
You’ll start by using the Assets panel to insert two images in the page—a rock climber image and a text image.
1 In the Assets panel, click the Images icon and make sure the Site radio button located at the top of the Assets panel is selected so you can view all of the images in the Compass site.
2 In the Names list, select the image icon for climber.jpg then drag it to the middle table cell in the right side of the page.
3 Press the right arrow key (this deselects the climber image and places the insertion point after the image), then press Shift+Enter (Windows) or Shift+Return (Macintosh) to insert a line break.
4 In the Name list, select featureText.gif then drag it to the line break you just created placing the featureText image under the climber image.
Insert a Flash movie
Now you’ll add a different type of asset. You’ll drag a Flash movie into the cell below the navigation buttons.
1 Click the Flash icon in the Assets panel to view all the Flash files in the Compass site.
2 In the Names list, click welcome.swf to select the Flash movie you’re inserting in the document.
In the Assets panel’s preview area you see a placeholder for the Flash movie.
Chapter 158
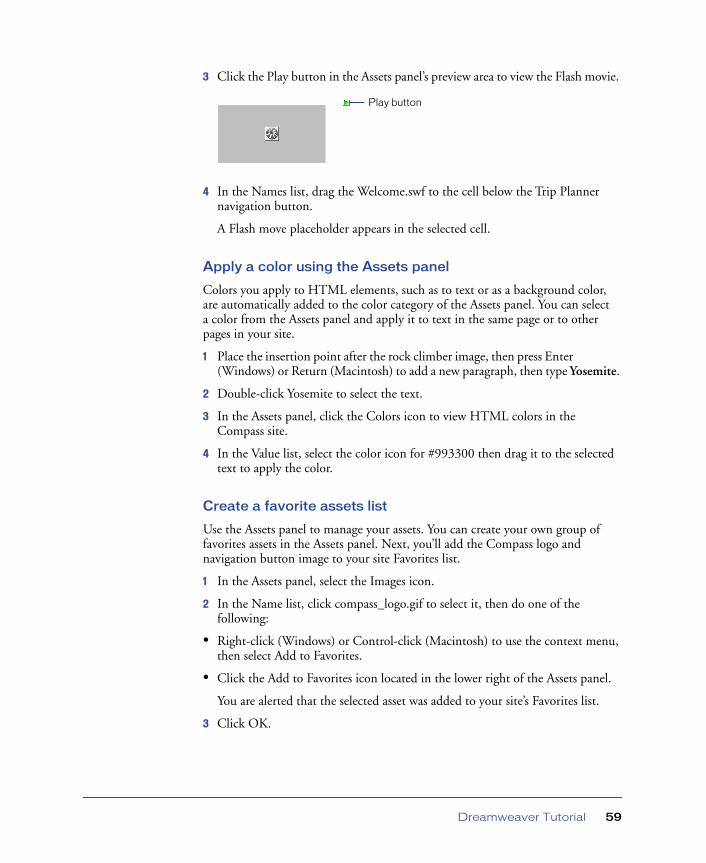
3 Click the Play button in the Assets panel’s preview area to view the Flash movie.
4 In the Names list, drag the Welcome.swf to the cell below the Trip Planner navigation button.
A Flash move placeholder appears in the selected cell.
Apply a color using the Assets panel
Colors you apply to HTML elements, such as to text or as a background color, are automatically added to the color category of the Assets panel. You can select a color from the Assets panel and apply it to text in the same page or to other pages in your site.
1 Place the insertion point after the rock climber image, then press Enter (Windows) or Return (Macintosh) to add a new paragraph, then type Yosemite.
2 Double-click Yosemite to select the text.
3 In the Assets panel, click the Colors icon to view HTML colors in the Compass site.
4 In the Value list, select the color icon for #993300 then drag it to the selected text to apply the color.
Create a favorite assets list
Use the Assets panel to manage your assets. You can create your own group of favorites assets in the Assets panel. Next, you’ll add the Compass logo and navigation button image to your site Favorites list.
1 In the Assets panel, select the Images icon.
2 In the Name list, click compass_logo.gif to select it, then do one of the following:
• Right-click (Windows) or Control-click (Macintosh) to use the context menu, then select Add to Favorites.
• Click the Add to Favorites icon located in the lower right of the Assets panel.
You are alerted that the selected asset was added to your site’s Favorites list.
3 Click OK.
Play button
Dreamweaver Tutorial 59
Add multiple images to favorites
Now, you’ll add the navigation button images to the favorites list. You can select multiple images in the Assets panel, then add them to your favorites at one time.
1 In the Assets panel’s Images list click the first navigation button image (MenuDestinations.gif ).
2 Select the other navigation buttons by doing one of the following:
• Press Shift (Windows) and in the Images list click MenuTripPlanner_on.gif (the last navigation button in the list) to select all of the navigation button images.
• Press Shift (Macintosh) and hold it while you select each of the navigation button images.
3 Click the Add to Favorites icon.
4 Click OK to the alert message.
View favorite assets
You can view the assets you’ve added to your Favorites list, and use this view for inserting assets in your document.
To view images you’ve added to the Favorites list, click the Favorites radio button at the top of the Assets panel.
Insert Flash objectsFlash objects are small graphic SWF (Shockwave) files you can create while working in Dreamweaver. You can create Flash Text and Flash Button objects. Using Flash Text allows you to design Web pages that use nonstandard fonts without worrying about which fonts visitors to your site have available on their computers. Flash buttons are created from Flash templates that ship with Dreamweaver. You can easily customize a template button and add it to your Web pages.
Chapter 160
Create a Flash Text object
Now you’ll create a Flash Text object to use as a title in your home page.
1 In the Document window, place the insertion point above the image of the rock climber.
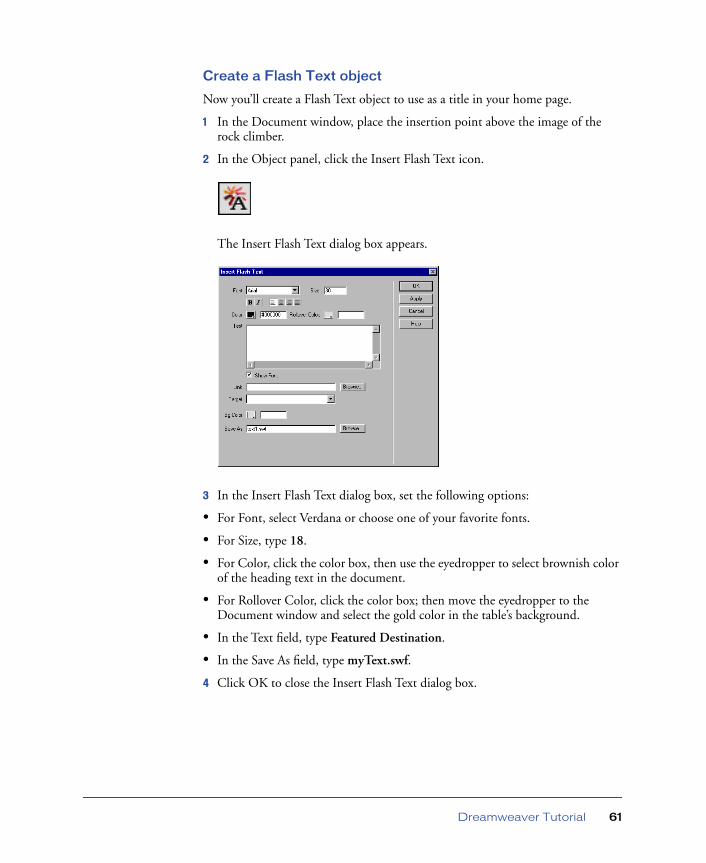
2 In the Object panel, click the Insert Flash Text icon.
The Insert Flash Text dialog box appears.
3 In the Insert Flash Text dialog box, set the following options:
• For Font, select Verdana or choose one of your favorite fonts.
• For Size, type 18.
• For Color, click the color box, then use the eyedropper to select brownish color of the heading text in the document.
• For Rollover Color, click the color box; then move the eyedropper to the Document window and select the gold color in the table’s background.
• In the Text field, type Featured Destination.
• In the Save As field, type myText.swf.
4 Click OK to close the Insert Flash Text dialog box.
Dreamweaver Tutorial 61
View the Flash Text object in the document
The Flash Text object appears in the document. You must play the Flash object to see the text with its rollover effect.
1 If it isn’t already expanded, in the Property inspector click the expander arrow to see all.
2 In the Flash Text Property inspector, click Play.
3 In the Document window, roll the pointer over the Flash Text object.
4 To stop playing the object, click Stop in the Property inspector.
Create a Flash button object
Now you’ll see how easy it is to add a Flash button to a document. You’ll create a Flash button, and add it below the climber image.
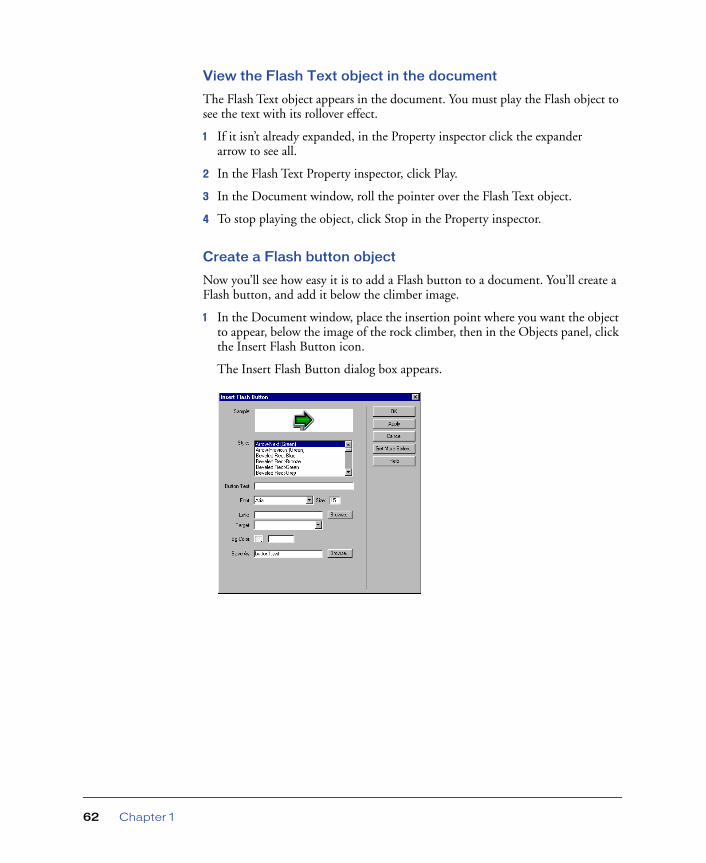
1 In the Document window, place the insertion point where you want the object to appear, below the image of the rock climber, then in the Objects panel, click the Insert Flash Button icon.
The Insert Flash Button dialog box appears.
Chapter 162
2 In the Insert Flash Button dialog box, set the following options:
• In the Style list, select Beveled Rect-Bronze.
• For Button Text, type More Details.
• For Font, select Verdana, or choose one of your favorite fonts.
• For Size, type 11.
• Click Apply to see the Flash button in the document.
• In Save As, type myButton.swf
3 Click OK to close the dialog box.
The Flash Button object appears in the document.
View the Flash button in the document
The Flash button you inserted has a rollover effect, now you’ll play the button to see how it looks.
1 In the Flash button Property inspector, click Play to play the button in the document.
2 In the Document window, roll the pointer over the object to see the Flash button’s rollover effect.
3 To stop playing the object, click Stop in the Property inspector.
Create a templateYou can use templates to create documents that have a common structure and appearance. Templates are useful when you want to make sure that all of the pages in a site share certain characteristics.
Once you apply a single template to a group of pages, you can change information on the group of pages by editing the template and then reapplying it to those pages. While elements unique to each page (such as text describing an item for sale) remain unchanged, common template elements (such as navigation bars) are updated on all of the pages that use the template.
The Compass trip destination page links to several travel detail pages that describe places site viewers may be interested in traveling to. You’ll use the design of an existing travel detail page to create a template. Using a template ensures that your travel information pages will have an identical layout and format.
Dreamweaver Tutorial 63
Create a template from an existing page
In this section, you’ll create a template from an existing travel page and then use the template to create a new travel page.
1 In the Site window’s Local Folder list, double-click the icon for DW4_TravelDetail_surf.html to open the file.
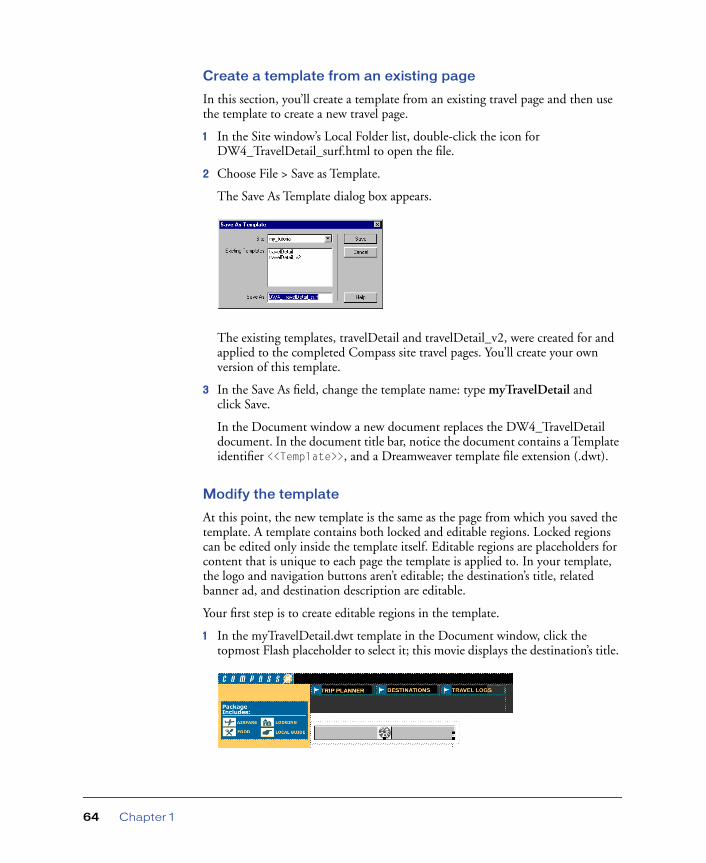
2 Choose File > Save as Template.
The Save As Template dialog box appears.
The existing templates, travelDetail and travelDetail_v2, were created for and applied to the completed Compass site travel pages. You’ll create your own version of this template.
3 In the Save As field, change the template name: type myTravelDetail and click Save.
In the Document window a new document replaces the DW4_TravelDetail document. In the document title bar, notice the document contains a Template identifier <<Template>>, and a Dreamweaver template file extension (.dwt).
Modify the template
At this point, the new template is the same as the page from which you saved the template. A template contains both locked and editable regions. Locked regions can be edited only inside the template itself. Editable regions are placeholders for content that is unique to each page the template is applied to. In your template, the logo and navigation buttons aren’t editable; the destination’s title, related banner ad, and destination description are editable.
Your first step is to create editable regions in the template.
1 In the myTravelDetail.dwt template in the Document window, click the topmost Flash placeholder to select it; this movie displays the destination’s title.
Chapter 164
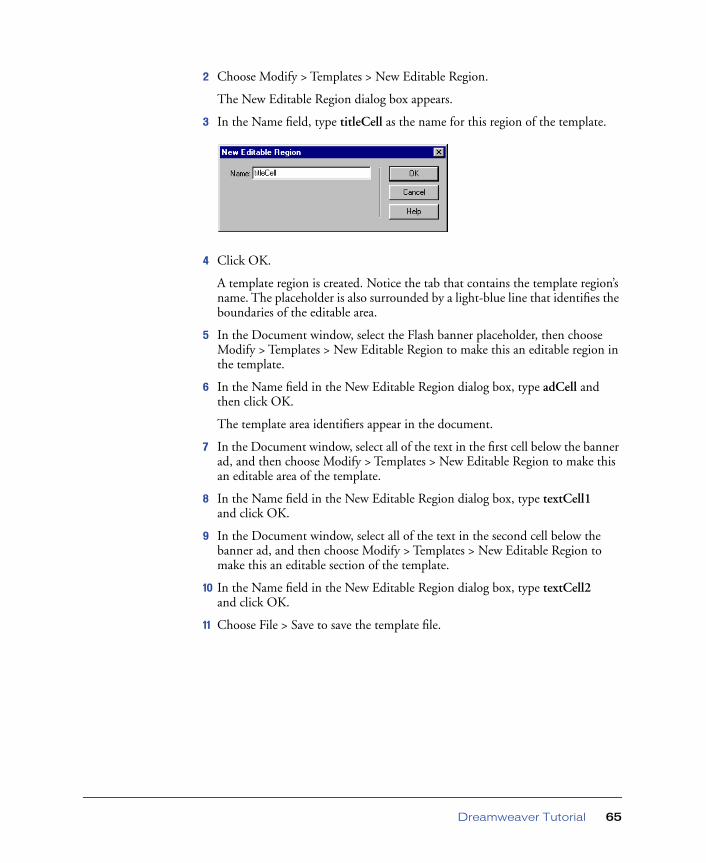
2 Choose Modify > Templates > New Editable Region.
The New Editable Region dialog box appears.
3 In the Name field, type titleCell as the name for this region of the template.
4 Click OK.
A template region is created. Notice the tab that contains the template region’s name. The placeholder is also surrounded by a light-blue line that identifies the boundaries of the editable area.
5 In the Document window, select the Flash banner placeholder, then choose Modify > Templates > New Editable Region to make this an editable region in the template.
6 In the Name field in the New Editable Region dialog box, type adCell and then click OK.
The template area identifiers appear in the document.
7 In the Document window, select all of the text in the first cell below the banner ad, and then choose Modify > Templates > New Editable Region to make this an editable area of the template.
8 In the Name field in the New Editable Region dialog box, type textCell1 and click OK.
9 In the Document window, select all of the text in the second cell below the banner ad, and then choose Modify > Templates > New Editable Region to make this an editable section of the template.
10 In the Name field in the New Editable Region dialog box, type textCell2 and click OK.
11 Choose File > Save to save the template file.
Dreamweaver Tutorial 65
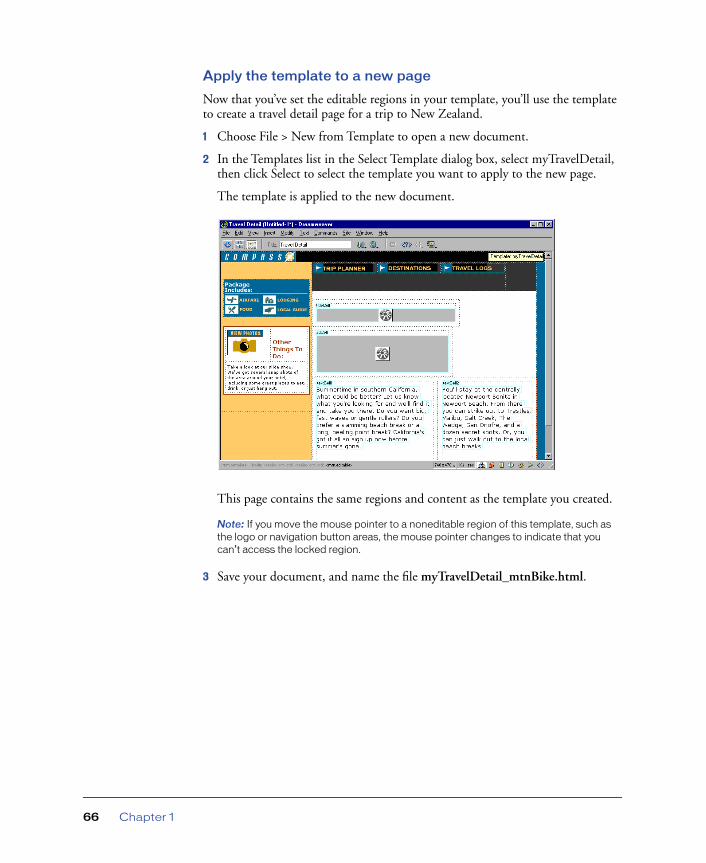
Apply the template to a new page
Now that you’ve set the editable regions in your template, you’ll use the template to create a travel detail page for a trip to New Zealand.
1 Choose File > New from Template to open a new document.
2 In the Templates list in the Select Template dialog box, select myTravelDetail, then click Select to select the template you want to apply to the new page.
The template is applied to the new document.
This page contains the same regions and content as the template you created.
Note: If you move the mouse pointer to a noneditable region of this template, such as the logo or navigation button areas, the mouse pointer changes to indicate that you can’t access the locked region.
3 Save your document, and name the file myTravelDetail_mtnBike.html.
Chapter 166
Editing a template-based page
Now you’ll update the myTravelDetail_mtnBike.html document, updating the editable regions with assets and text that refer to travel details about mountain biking in New Zealand.
1 In the Document window, click the Flash placeholder in the titleCell region to select the object you want to replace.
2 In the Property inspector’s File field, click the folder icon; then in the dialog box that appears, navigate to Assets/swfs and select text_mtnBike.swf.
3 In the adCell region, click the Flash placeholder to select the object you want to replace.
4 In the Property inspector’s File field, click the folder icon; then in the dialog box that appears, navigate to Assets/swfs then select bikeAd.swf.
5 Choose File > Open, then navigate to DW4_MtnBikeText.txt to open a document that contains the text for this destination.
6 In DW4_MtnBikeText.txt, copy the paragraph of text under Cell 1; in the myTravelDetail_mtnBike document replace the current text in the textCell1 region by selecting it, then pasting the copied text.
7 In DW4_MtnBikeText.txt, copy the paragraph of text under Cell 2; in the myTravelDetail_mtnBike document replace the current text in the textCell2 region by selecting that text then pasting the copied text.
The travel details information is updated.
8 Close DW4_MtnBikeText.text.
9 In the Title field of the toolbar, type New Zealand biking.
10 Save your document.
Dreamweaver Tutorial 67
Check your siteBefore posting your pages to a remote server you should always check your files. So far you’ve learned how to test your pages by previewing them in a browser, now you’ll learn about other Dreamweaver tools available for creating a follow-up for a file and for testing your pages.
First, you’ll learn how to add a Design Note to a file, and then you’ll see how to run a report on files in your site.
Create a Design Note
Design Notes are a great way to manage your site by inserting comments in your document’s Site window. Use Design Notes to schedule production work, place follow-ups on files, or to communicate file or site details with team members. Next you’ll create a Design Note to follow-up on making a change to one of your site pages.
1 In the Dreamweaver Site Window (Site > Site Files), in the Local Folder pane select DW4_Destinations.html.
2 In the main menu choose File > Design Notes.
The Design Notes dialog box appears.
3 In the Basic Info tab, in the Status pop-up menu select Needs Attention.
4 Click the calendar icon to add the date in the Notes field.
5 Click in the Notes field, then type Need to create Devil’s Tower page and add links to documents.
6 Select the Show When File Is Opened option so the Design Note automatically opens when this page is opened.
Chapter 168
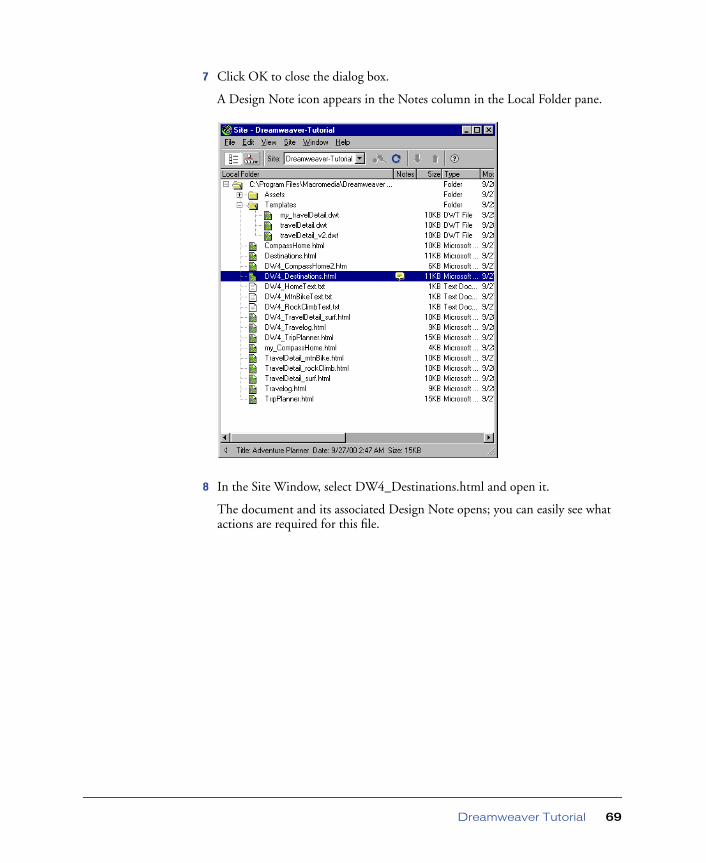
7 Click OK to close the dialog box.
A Design Note icon appears in the Notes column in the Local Folder pane.
8 In the Site Window, select DW4_Destinations.html and open it.
The document and its associated Design Note opens; you can easily see what actions are required for this file.
Dreamweaver Tutorial 69
Sitewide reports
You can run site reports to check HTML file conditions and to manage workflow. Run reports at the document, folder, or site level. You’ll run a report to see if you have any untitled documents in your site.
1 Choose Site > Reports.
The Reports dialog box appears.
2 In the Reports dialog in the Report On pop-up menu, select Entire Local Site; then under HTML Reports, select Untitled Document.
3 Click Run to run a report.
A Results dialog box appears listing any documents without a page title.
4 In the File list click the file to select it.
The Detailed Description field updates with detailed warning information.
5 Click Open File to open the file and correct the problem.
The file opens.
6 In the Title field of the toolbar, type Featured Destinations.
7 Save and close the file when you’re done.
8 Close the Results dialog box.
The next stepsCongratulations, you’ve completed the Dreamweaver tutorial. You know how to design pages, add content, and test your pages. If you want, you can continue creating pages and links for the Compass site. You know how to do everything required to complete the pages (or you can use the completed pages as a reference). After you’ve updated the pages, preview your pages to test the rollovers and links to make sure they work.
If you want to learn more about using Dreamweaver, try the Dreamweaver lessons; in the Dreamweaver main menu choose Help> Lessons then select one of the lessons.
If you have a copy of both Dreamweaver and Fireworks, and want to learn how to work with these tools together, see the Dreamweaver and Fireworks tutorials.
If you’re interested in learning more about using HTML code, JavaScript code, or cascading style sheets, check out the Reference materials that ship with Dreamweaver. Choose Windows > Reference.
Chapter 170