chemlock® pfa housings · install the filter install a filter in the housing bowl and tighten the...
TRANSCRIPT
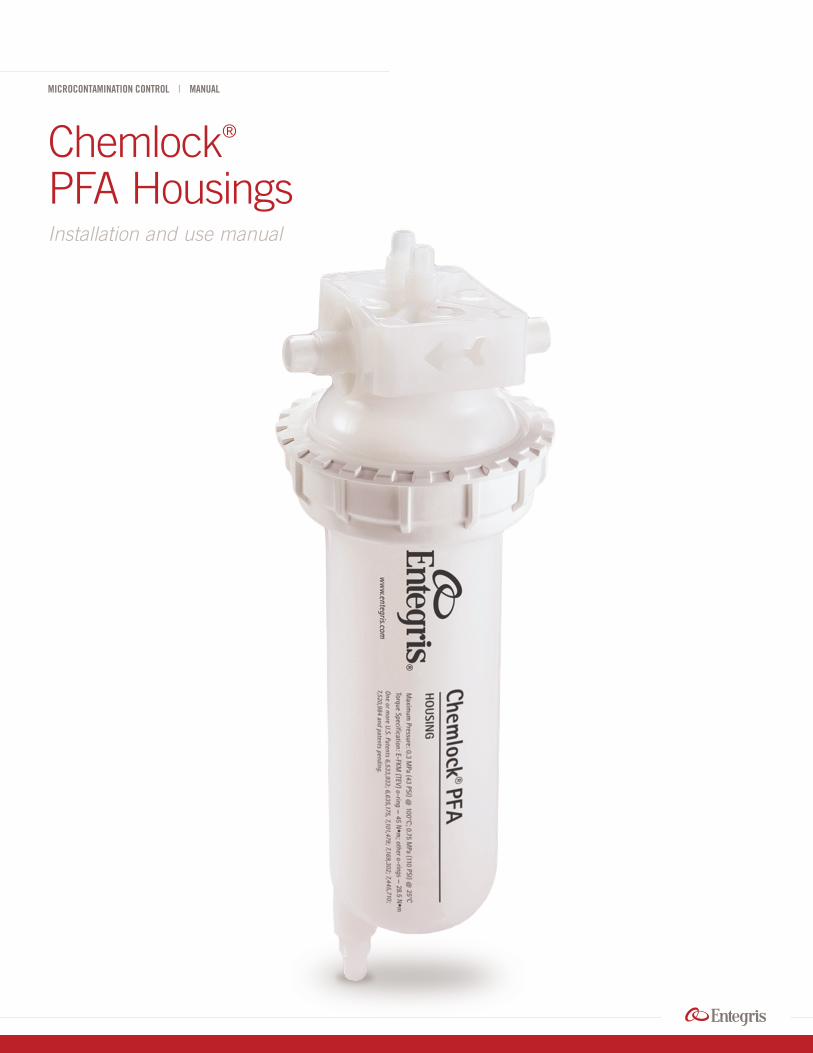
MICROCONTAMINATION CONTROL | MANUAL
Chemlock® PFA HousingsInstallation and use manual

1
CHEMLOCK PFA HOUSINGS
Installation and Use Manual | P/N 91012 Rev. G | Entegris, Inc.
TABLE OF CONTENTS—Introduction ................................................................... 2
Safety ............................................................................... 2
Facility Requirements ................................................... 2
Dimensions ..................................................................... 3
Minimum Space Requirements ........................... 4
Cartridge Installation ................................................... 4
Mounting Procedure ............................................. 4
Install the O-ring .................................................... 5
Install the Filter ....................................................... 6
Housing Integrity Testing ..................................... 7
Cartridge Removal ....................................................... 8
Ordering Information .................................................. 9
For More Information .................................................. 9
Terms and Conditions of Sale .................................... 9
Limited Warranty .......................................................... 9

2
CHEMLOCK PFA HOUSINGS
Installation and Use Manual | P/N 91012 Rev. G | Entegris, Inc.
INTRODUCTION—Entegris’ Chemlock® PFA housing offers a space-
saving solution like no other cartridge filter housing
available today. This revolutionary housing locks
the cartridge into the bowl, allowing the bowl and
cartridge to be removed as a single unit.
SAFETY—Special considerations and precautions are included
in the manual, as described below. Contact Entegris
with any questions regarding the safe and proper use
of your equipment.
DANGER! Indicates a hazardous situation that, if not avoided, could result in death or serious injury.
WARNING: Indicates a potential hazardous situation that, if not avoided, could result in death or serious injury as well as irreparable damage to the equipment.
CAUTION: Indicates a potential hazardous situation that, if not avoided, could result in minor to moderate injury as well as minor to moderate damage to the equipment.
WARNING: Only technically qualified personnel should install the housing.
WARNING: CHEMICAL HAZARDS. DOUBLE-CONTAINMENT is required when used with toxic and hazardous chemicals. All filter housings, filters and other pressurized vessels must be double-contained to prevent serious personal injury.
SAFETY CLOTHING, eye protection and safety apparatus appropriate for the liquids in use must be worn during component changeout and startup. Perform all operations with standard liquid handling procedures in accordance with all local codes for safety and ventilation.
FACILITY REQUIREMENTS—Housing should be plumbed with ability to isolate
both upstream and downstream flows as required
for filter changeout.

CHEMLOCK PFA HOUSINGS
3Installation and Use Manual | P/N 91012 Rev. G | Entegris, Inc.
DIMENSIONS—
Inlet/outlet Vent/drain
DIMENSIONS
A (11" filter) A (20" filter) B
3⁄4” Flaretek® 1⁄2” Flaretek 434 mm (17.1”) 681 mm (26.8”) 156 mm (6.2”)
1” Flaretek 1⁄2” Flaretek 434 mm (17.1”) 681 mm (26.8”) 168 mm (6.6”)
3⁄4” Pipe 1⁄4” Pipe 416 mm (16.4”) 663 mm (26.1”) 201 mm (7.9”)
3⁄4” Pipe None 398 mm (15.7”) 644 mm (25.4”) 201 mm (7.9”)
3⁄4” NPT 1⁄4” NPT 378 mm (15.0”) 622 mm (24.5”) 134 mm (5.3”)
3⁄4” Super Type Pillar® fitting
1⁄2” Super Type Pillar fitting
431 mm (17.0”) 683 mm (26.9”) 178 mm (7.0”)
1” Super Type Pillar fitting
1⁄2” Super Type Pillar fitting
431 mm (17.0”) 683 mm (26.9”) 156 mm (6.1”)
3⁄4” Super 300 Type Pillar fitting
1⁄2” Super 300 Type Pillar fitting
431 mm (17.0”) 678 mm (26.7”) 170 mm (6.7”)
B
A
Downstream outlet/vent
Upstream inlet/vent

4
CHEMLOCK PFA HOUSINGS
Installation and Use Manual | P/N 91012 Rev. G | Entegris, Inc.
MINIMUM SPACE REQUIREMENTS
A minimum installation clearance of dimension
“A” plus an additional 50.8 mm (2.0") is required for
removal and installation of Chemlock cartridges.
CARTRIDGE INSTALLATION—
MOUNTING PROCEDURE
Components are double-wrapped for cleanroom use.
Handle components according to your cleanroom
procedures.
Suggested Mounting Method #1: Customer-supplied Mounting Plate
1. Use supplied screws and nuts to secure the housing
head to your equipment or facility mounting
bracket (Figure 1).
2. The Chemlock housing can be installed either bowl
UP or bowl DOWN.
Mounting Bracket Template
Use Figure 2 as a guide for drilling holes into
a customer-supplied mounting plate, when
mounting the Chemlock head.
Figure 1.
Figure 2. Not shown to scale.
See Chemlock dimension drawing “A”
50.8 mm (2”)
Shown assembled with customer-supplied mounting plate. If the mounting bracket is >12.7 mm (0.5”)thick, longer screws must be used.
Mounting plate (NOT supplied)<12.7 mm (0.5”) thick for use withsupplied screws
34.93 mm(1.38”)
4X clearance holes for 3⁄8” screws
Ø 12.70 mm (0.50”)
87.63 mm(3.45”)
2 places
31.75 mm(1.25”)
69.85 mm (2.75”)
2 places
Ø 38.10 mm(1.50”)
thru 2 places
12.07 mm(0.48”)

CHEMLOCK PFA HOUSINGS
5Installation and Use Manual | P/N 91012 Rev. G | Entegris, Inc.
Suggested Mounting Method #2: L-Bracket Mounting
1. Use supplied screws and nuts to secure the housing
head to the L-Bracket #YY46 10 190, available from
Entegris. The Chemlock housing can be installed
either bowl UP or bowl DOWN.
INSTALL THE O-RING
CAUTION: Replace the o-ring every time the housing is opened.
1. Verify that the o-ring is installed in the housing.
If not, properly seat an o-ring into the housing
bowl, as described below.
2. Prewet the housing o-ring with a fluid compatible
with your process chemical (such as DI water, IPA,
etc.) to aid in installation and ensure a proper seal.
3. For best results, heat the o-ring to 60°C prior to
installation. Heat the o-ring by immersing in hot
water for 2 minutes, or by placing the o-ring 25 mm
(1") below a 250-watt heat lamp for 1 minute. Install
the o-ring while it is still warm.
4. For all housings, handle the o-ring with care. Insert
the o-ring into the groove and push the o-ring
securely and evenly in place. DO NOT roll or twist
the o-ring.
Install the o-ring onto the Chemlock housing using clean gloves to minimize the possibility of contamination.
4X Ø 10.36 mm(0.41")
50.80 mm (2.00”)
188.72 mm (7.43")
101.60 mm (4.00")
31.75 mm (1.25”)
31.75 mm (1.25”)
4X supplied PVDF bolts, 3⁄8”-16 × 2 1⁄2”
L-mounting bracket
Supplied PVDF nuts, 3⁄8”-16
Supplied PVDF nuts, 3⁄8”-16

6
CHEMLOCK PFA HOUSINGS
Installation and Use Manual | P/N 91012 Rev. G | Entegris, Inc.
5. To remove the old o-ring, slide the hook end of
the housing wrench tool under the o-ring, then
slide the tool around the bowl.
O-ring removal from Chemlock housing using the hook on the housing wrench.
CAUTION: Use caution when removing the o-ring. Contacting the o-ring seal areas with the removal tool can damage the sealing surface.
To view a video showing correct procedures for
o-ring replacement and housing installation, go to
https://youtu.be/S-44aPfOWpQ.
INSTALL THE FILTER
Install a filter in the housing bowl and tighten the
bowl to the housing head:
1. Cut open the bottom of the bag only.
2. To ensure cleanliness, hold the cartridge by the bag,
and insert it into the housing bowl.
.
3. Using the end of the bag, the two finger tabs on the
key can be used to turn the cartridge 1⁄4 turn; then
lock the cartridge in place.
NOTE: Lock the cartridge in place by turning it clockwise.
4. Attach and tighten the bowl to the housing head.
The housing can be mounted in either a bowl UP
or bowl DOWN position.
.

CHEMLOCK PFA HOUSINGS
7Installation and Use Manual | P/N 91012 Rev. G | Entegris, Inc.
5. Adjust the torque setting to 45 N•m if using an
E-FKM o-ring. For other o-ring types, 28.5 N•m.
.
Once set, twist the lever at the end of the
wrench clockwise to LOCK the setting in place.
6. Tighten the housing ring until the torque wrench
clicks. Stop and retighten until another click
is heard.
.
7. Wait 5 minutes before continuing. After waiting 5
minutes, retighten the locking ring according to the
previous step (#6.) You may see the locking ring
move again. This is normal.
8. Reset the torque setting to 10 N•m for storage.
.
HOUSING INTEGRITY TESTING
Prior to usage, the piping system should be tested
to check for leaks. Follow your facility leak checking
protocols.
WARNING: IF SYSTEM IS SHUT DOWN, IT IS NECESSARY TO RETIGHTEN THE HOUSING (see previous steps) IN ORDER TO PREVENT LEAKS.
CAUTION: DO NOT tighten or adjust the plumbing at elevated temperatures (>100°C) as you may overtighten the fittings and create excessive stress and leakage either at elevated temperatures or during changes in system temperature.
NOTE: Yearly wrench calibration is recommended.
Include periodic seal integrity testing in your system’s
preventive maintenance schedule.

8
CHEMLOCK PFA HOUSINGS
Installation and Use Manual | P/N 91012 Rev. G | Entegris, Inc.
CARTRIDGE REMOVAL—
WARNING: Wear chemically resistant garments and eye protection during cartridge changeout and startup.
1. Isolate and drain the housing. If necessary,
allow the housing to cool to a workable
temperature.
2. Use the housing wrench to loosen the
housing ring.
.
3. Remove the bowl from the head.
.
4. Turn the cartridge key to unlock the cartridge
from the bowl.
.
5. Lift the cartridge out of the bowl or tip the bowl
to gently slide the cartridge out of the bowl.
.
To view a video showing correct procedures for
o-ring replacement and housing installation, go to
https://youtu.be/S-44aPfOWpQ.

CHEMLOCK PFA HOUSINGS
9Installation and Use Manual | P/N 91012 Rev. G | Entegris, Inc.
ORDERING INFORMATION—Chemlock cartridges are compatible with the
Chemlock PFA and Chemlock PP housings. Car-
tridges can be ordered by adding either a “K” or a “Y”
to the end of a standard cartridge catalog number,
depending on the product family. Standard cartridges
(without the key) are still available under their usual
catalog number.
Any standard 10" Code 0 cartridge can be used
with the universal Chemlock housing. Only Entegris’
Chemlock cartridges can utilize the cartridge locking
mechanism. Use of a Chemlock key or any other key
with a third party cartridge shall void the warranty of
the housing and may infringe one or more of Entegris’
pending or issued U.S. and foreign patents. Such
patents and warranty do not apply to use of third
party cartridge without any key.
Refer to entegris.com for ordering information.
Chemlock bowls are easily retrofitted to Chemgard® housings.
PFA Chemlock bowls are designed to fit with
Entegris T-line PFA Chemgard heads. An installed
Chemgard housing may be retrofitted with a
Chemlock bowl and cartridge.
Chemlock bowl
Chemgard housing head

129 Concord RoadBillerica, MA 01821 USA
Tel +1 952 556 4181Fax +1 952 556 8022Toll Free 800 394 4083
Corporate Headquarters Customer Service
LIMITED WARRANTY
Entegris' products are subject to the Entegris, Inc. General Limited Warranty. To view and print this information, visit entegris.com and select the Legal & Trademark Notices link in the footer. Entegris does not warrant any failure in the case of customers using unapproved foreign components.
FOR MORE INFORMATION
Please call your Regional Customer Service Center today to learn what Entegris can do for you. Visit entegris.com and select the Contact Us link to find the customer service center nearest you.
TERMS AND CONDITIONS OF SALE
All purchases are subject to Entegris’ Terms and Conditions of Sale. To view and print this information, visit entegris.com and select the Terms & Conditions link in the footer.
www.entegris.comInstallation and Use Manual | P/N 91012 Rev. G.
Entegris®, the Entegris Rings Design®, and other product names are trademarks of Entegris, Inc. as listed on entegris.com/trademarks. All third-party product names, logos, and company names are trademarks or registered trademarks of their respective owners. Use of them does not imply any affiliation, sponsorship, or endorsement by the trademark owner.
©2001-2019 Entegris, Inc. | All rights reserved. | Printed in the USA | 4411-6205ENT-0419