citizenforester check list - phoenix
TRANSCRIPT

CITIZEN
FORESTERSafety, Tool and Planting Checklist
check list

HOW TO USE THIS CHECK LIST
INTRO
This check list is structured to follow a flow of preparation and execution of stewardship work,
tree planting and maintenance in particular. Use it as it is or mark it up to fit your needs.
PARTNERSHIPS
2

BEFORE MEETING CREW
BEFORE MEETING CREW
• REHEARSE Safety talk• REVIEW Event fact sheet to determine schedule and arrangements• PREPARE & SECURE ITEMS on tool list• PACK My own gear for event -Gloves, Hat, Water, Snack• PACK EXTRA WATER & SNACKS for crew
-Esp. in warm weather• SECURE Waivers/Sign-in forms
3
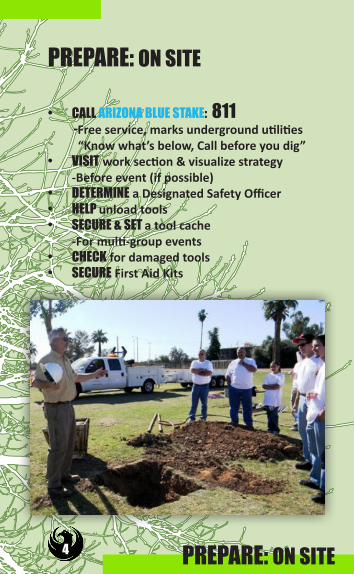
PREPARE: ON SITE
PREPARE: ON SITE
• CALL ARIZONA BLUE STAKE: 811 -Free service, marks underground utilities “Know what’s below, Call before you dig”• VISIT work section & visualize strategy
-Before event (if possible)• DETERMINE a Designated Safety Officer• HELP unload tools• SECURE & SET a tool cache -For multi-group events• CHECK for damaged tools• SECURE First Aid Kits
4

WELCOME:AT CREW STAGING AREA• VERIFY Sign-in of each volunteer• VERIFY ALL VOLUNTEERS HAVE FOLLOWING:
-Proper foot wear -Layered clothing (weather appropriate) -Name tag -Gloves -Water (Bring Extra) -Snacks/Food -Sun protection
• “WELCOME” & “THANK YOU” • TODAY’S GOALS
-Safety/Fun/Quality -Specific objectives
• INTRODUCTIONS -Interests, relevant prior experience -Bathroom access/Waste Disposal -Additional drinking water• LEAVE NO TRACE -Minimize impact on landscape beyond what is necessary to complete work -Remove what you bring to the site• WALK THROUGH THE WORK AREAS
-Discuss objectives, user needs and how we will complete the work
5 WELCOME
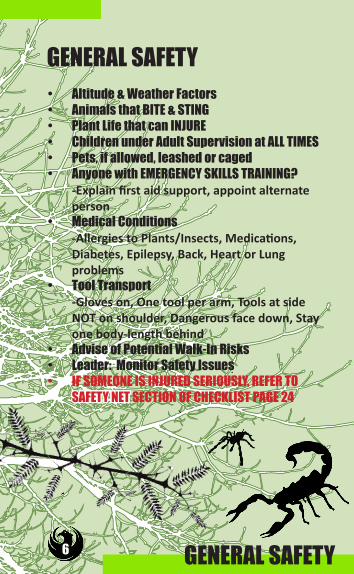
GENERAL SAFETY
GENERAL SAFETY• Altitude & Weather Factors• Animals that BITE & STING• Plant Life that can INJURE• Children under Adult Supervision at ALL TIMES• Pets, if allowed, leashed or caged• Anyone with EMERGENCY SKILLS TRAINING?
-Explain first aid support, appoint alternate person
• Medical Conditions -Allergies to Plants/Insects, Medications, Diabetes, Epilepsy, Back, Heart or Lung problems
• Tool Transport -Gloves on, One tool per arm, Tools at side NOT on shoulder, Dangerous face down, Stay one body-length behind
• Advise of Potential Walk-In Risks• Leader: Monitor Safety Issues• IF SOMEONE IS INJURED SERIOUSLY, REFER TO
SAFETY NET SECTION OF CHECKLIST PAGE 24
6

CRITICAL SAFETY
CRITICAL SAFETY• Tool Storage at Work Site
-Lay tools FACE DOWN (in case stepped on) -Do Not drop or toss tools -Think of the safety of others at ALL TIMES
• Alerts -”Coming Through,” “On Your Left,” “Behind You,” “Heads Up”
• Lifting -BEND at knees, ASK for help, LOOK around you, MAKE SURE drop off site is CLEAR of both people and debris
• Dehydration (SEE SAFETY NET) -DRINK BEFORE thirsty (the NIGHT BEFORE), know location of nearest water station, etc
• Heat Exhaustion: Signs (SEE SAFETY NET) -Heavy sweating, cool, pale, moist skin, nausea, weakness, dizziness -(Hypothermia) confusion, violent shivering RESPONSE: REMOVE FROM HEAT ASAP, place water or ice on pressure points (back of neck, under wrists), HYDRATE, and LIE DOWN with FEET ABOVE HEART LEVEL
• Over-exertion -Pace yourself, pay attention to breathing, rest as needed/when directed, sit away from work area/workers
7

TOOL SAFETY
TOOL SAFETY
• LOPPERS, HAND SAWS, AND HAND PRUNERS -Don’t stress loppers; 3-Cut large limbs
• MATTOCK & PULASKI -Used for grubbing, loosening materials -Modest swing, accuracy over power -Angle stroke to start
• SHOVELS -Spade Shovel: For digging holes -Flathead Shovel For moving around loose material
• KEEP TOOLS CLEAN & SHARP • NOTE: One tool per
arm, not on shoulder, dangerous face down if laying tool on ground
Mattock
Spade Shovel
Flathead Shovel
Hand PrunersLoppers
Fine-toothed Hand Saw
Pulaski
8
“Right Tool for the Right Task”
TIME TO PLANT & PRUNE
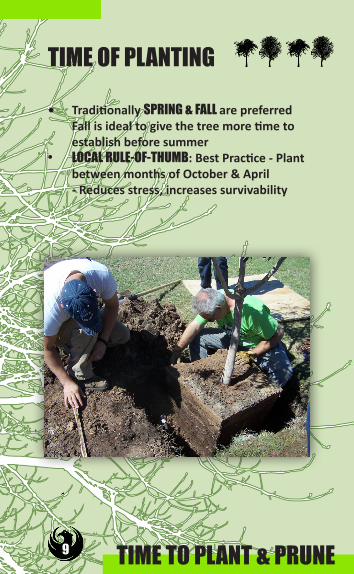
TIME OF PLANTING
• Traditionally SPRING & FALL are preferred Fall is ideal to give the tree more time to establish before summer
• LOCAL RULE-OF-THUMB: Best Practice - Plant between months of October & April
- Reduces stress, increases survivability
9
SITE SELECTION
SITE SELECTION
• SUNLIGHT: seasonal angles, daily high and low temperatures, sun exposures (full, part sun, reflected, shade, heavy shade)
• AIR: circulation, prevailing wind direction, nearby sources of pollution
• WATER: rainfall (when, where & how much), type/source of irrigation, drainage patterns
• SOIL: texture, fertility, pH, depth, drainage, composition
• SPECIAL CONDITIONS: caliche, flood irrigation, underground utilities, local conditions, if under power lines (limit trees to 15’-20’ tall)
• ENERGY SAVINGS: place shade trees on South and West sides of home/buildings
• BARRIERS: buildings, sidewalks, pathways, driveways, roads, overhangs, right-of-ways
• GROWTH HABITS: know which species you are planting, the mature height and canopy width, provide adequate room for growth of BRANCHES and ROOTS
• FUNCTION: decide the function(s) the tree should have: shade, windbreak, accent, block views, frame views, frame a space
Right Tree for the Right PlaceWhen evaluating a planting location it is essential to consider the following site conditions:
10

TREE SELECTION
TREE SELECTIONNative or Well-Adapted Trees: Choice of tree is critical to the success of the tree, native trees are the best but low-water use, well-adapted trees are suitable substitutes
• FORM - taper, multi vs single trunk, root flare• HEALTH - no evidence of insects or disease• BROKEN BRANCHES• INJURY to main trunk• LOCALLY GROWN or similar climate grown
plants (establish quicker)• ROOTS - AVOID PLANTS with ROOT DEFECTS
INSPECTION OF PLANTS
• Gently ROCK trunk at soil surface - look for a firm response; PULL soil away from trunk; LOCATE the root flare; INSPECT the root crown; INSPECT for root defects (girdling, kinked, root bound)
INSPECTION OF ROOTS
When considering purchasing a tree it is critical to consider the following:
• What is the tree’s mature width and height?• What is the tree’s growth habit?• What is the tree’s maintenance needs?
11

PLANTING
TREE PLANTINGHole Dimensions and Preparation• Dig hole 3-5 times the diameter of rootball
and equal to it’s depth. • Plant in shallow hole; avoids pests/diseases• PLANT TREES AT PROPER DEPTH - 1-2” above
grade (this compensates for settling)• Scar the sides of the hole to allow for ease of
root growth into new soil• Ensure good drainage
Removing Trees from Containers• Have a partner for larger trees• DO NOT USE PLANT STEM AS A HANDLE!
DO NOT PULL PLANT OUT BY STEM! -Cut the container or lay on side and gently roll to loosen
• Break up or tease roots, cut girdling or bounded roots
Backfill• Backfill soil should be native soil to the
planting area, free of rocks, debris & caliche• Add loose soil around tree root ball as well
as surface mulching (local compost)• Use extra soil to create a well around the
plant to retain irrigation water. After first or second irrigation, use this soil to fill in where soil has settled
12
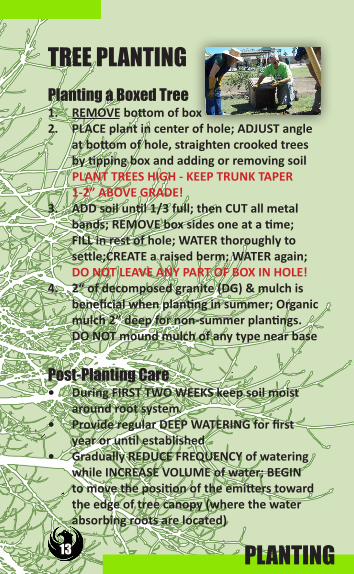
PLANTING
TREE PLANTINGPlanting a Boxed Tree1. REMOVE bottom of box2. PLACE plant in center of hole; ADJUST angle
at bottom of hole, straighten crooked trees by tipping box and adding or removing soil
PLANT TREES HIGH - KEEP TRUNK TAPER 1-2” ABOVE GRADE!3. ADD soil until 1/3 full; then CUT all metal
bands; REMOVE box sides one at a time; FILL in rest of hole; WATER thoroughly to settle;CREATE a raised berm; WATER again; DO NOT LEAVE ANY PART OF BOX IN HOLE!
4. 2“ of decomposed granite (DG) & mulch is beneficial when planting in summer; Organic mulch 2” deep for non-summer plantings. DO NOT mound mulch of any type near base
13
Post-Planting Care• During FIRST TWO WEEKS keep soil moist
around root system• Provide regular DEEP WATERING for first
year or until established• Gradually REDUCE FREQUENCY of watering
while INCREASE VOLUME of water; BEGIN to move the position of the emitters toward the edge of tree canopy (where the water absorbing roots are located)
PLANTING DETAILS
PLANTING DETAILS
Single Trunk Tree Planting Detail
1
2
3
4
5
6
7
8
10
9
Place Stakes Outside of Root BallUnder Lowest Permanent Branches
Rough Up Edges of Root Ball(Teasing Roots)
Finished Grade
Arbor Tape (Preferred)Tied to Main Trunk
Rubber Hose, if using Arbor Tape, no hose needed
Root Flare SlightlyAbove Grade (1-2”)
1
2
3
4
5
6
8
9
10Soil Berm to Hold WaterFlatten Out After 1 Year
7
Loose Backfill Soil, Water Settle Only, Do Not Tamp or Compact
2-3” Mulch Top Layer, not around base1” DG Top Layer acceptable for non-turf areas
Hard (Firm) Undisturbed Soil Base
14

PLANTING DETAILS
PLANTING DETAILS
Multi-Trunk Tree Planting Detail
Place Stakes Outside of Root BallUnder Lowest Permanent Branches
Rough Up Edges of Root Ball(Teasing Roots)
Soil Berm to Hold WaterFlatten Out After 1 Year
Finished Grade
Arbor Tape (Preferred)Tied to Main Trunk(s)
Root Flare SlightlyAbove Grade (1-2”)
2-3” Mulch Top Layer, not around base1” DG Top Layer acceptable for non-turf areas
Hard (Firm) Undisturbed Soil Base
1
2
3
4
5
6
78
910
1
2
3
4
5
6
8
9
10
Loose Backfill Soil, Water Settle Only, Do Not Tamp or Compact
Rubber Hose, if using Arbor Tape, no rubber hose needed
7
15

TREE STAKING
TREE STAKINGSteps of Properly Staking a Tree
• REMOVE the NURSERY STAKE!!!! EXTREMELY IMPORTANT to LONG-TERM SUCCESS of tree
• PLACE stakes in OPPOSITE direction of the prevailing winds, in Phoenix, winds typically west to east; PLACE stakes on North & South side of plant; 3 stakes for multi-trunk (see detail)
• INSERT STAKES STRAIGHT into firm ground, BELOW the level of the bottom of the hole, OUTSIDE of the root ball
• INSERT STAKES BELOW the LEVEL of the LOWEST PERMANENT BRANCH (see detail)
• COVER wire with rubber hose, no hose is needed if using Arbor Tape, or use a similar material to protect trunk from injury
• ATTACH tape or wire at LOWEST point necessary to keep tree straight and upright
• NOTE: Staking should allow tree to move in the wind, which encourages the tree to increase caliper & stem taper to better support itself
• NOTCH outer sides of stakes-reduce slippage• REMOVE debris, SHORTEN excess wires• CHECK STAKES/WIRES/TAPE periodically for
breakage, shifting (Preferably ARBOR TAPE and/or fabric)
16

SINGLE TRUNK STAKING
TREE STAKING• REMOVE stakes ASAP, within one or two
years (two growing seasons)• WATER thoroughly to settle the soil, adding
additional soil as needed then water again• NOTE: Taller trees may require 2 WIRES:
Stakes 10-12’ tall NEED 2 WIRES for support
Single Trunk Tree Staking Plan View
4
5
6
1
2
3
Root Ball Zone
Arbor Tape or Plastic Coated Wire Tied to Stake
Tree Canopy Extent
Tree Trunk
Tree Stake, Outside of Root Ball Rubber Hose
1
2
3
4
5
6
17

TREE STAKING
Tree Canopy Extent
Root Ball Zone
Tree Trunks
Tree Stakes Outside Root Zone
3 Separate Hoses/Trunks bound to Each Other with Plastic Coated Wire or Arbor Tape
2
3
1
654
Rubber Hoses with Wire Ran Through & Tied to Stakes; No Hose needed if using Arbor Tape
Multi-Trunk Tree Staking Plan View
41
2
3
5
6
7
7
Arbor Tape (preferred) or Plastic Coated Wire
18 MULTI-TRUNK STAKING
PRUNING FACTORS
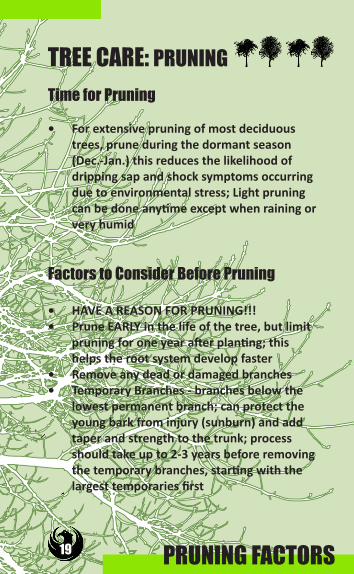
TREE CARE: PRUNINGTime for Pruning
• For extensive pruning of most deciduous trees, prune during the dormant season (Dec.-Jan.) this reduces the likelihood of dripping sap and shock symptoms occurring due to environmental stress; Light pruning can be done anytime except when raining or very humid
Factors to Consider Before Pruning
• HAVE A REASON FOR PRUNING!!!• Prune EARLY in the life of the tree, but limit
pruning for one year after planting; this helps the root system develop faster
• Remove any dead or damaged branches• Temporary Branches - branches below the
lowest permanent branch; can protect the young bark from injury (sunburn) and add taper and strength to the trunk; process should take up to 2-3 years before removing the temporary branches, starting with the largest temporaries first
19

CrossingBranches
Hanger
Dead/Damaged Branch
Stub
Sucker
Low Branch
Branch withNarrow Crotch
CrowdedBranches
Watersprout
PRUNING BASICS
PRUNING BASICSWhat to Prune: 3 D’s, 2 C’s & 1 B
• Remove ALL DEAD, DISEASED, DAMAGED CROSSING, CROWDED & BROKEN branches
• Prune NO MORE than 25% of tree at once• Cut at NODES: DO NOT LEAVE SHORT STUBS:
Make SMOOTH, EVEN CUTS• Remove WATERSPOUTS & SUCKERS
20
Drawing by Matthew Thomas

PRUNING DETAILS
PRUNING DETAILSThree-Cut Method
• Prevents bark from peeling, tearing and exposing tissue to diseases
• Reduces the amount of weight to manage for the final cut
• DO NOT LEAVE SHORT STUBS: Helps prevent dieback and helps to controls pests
2 TOP CUT
BRANCH BARK RIDGE
BRANCH BARK COLLAR
1 UNDER CUT3 FINAL CUT
21

MONITOR
MONITORING DURING WORK
• Interact with ALL crew members• Coach, demonstrate, assist, praise• Hydrate, troubleshoot, give breaks• DO NOT get absorbed in doing the work at
the expense of your crew• Contact a technical advisor to resolve any
technical problems or issues• Take note of prospective crew leaders in
your group
22

WRAP UP & EXIT
WRAPPING UP WORK & EXITAt Last Area or Tree of the Day• Review construction notes and set up a work
strategy for the available time remaining
Completion of Work• Clear with Event Leaders• Walk through and review with crew, give
more praise
On Site• Begin shutdown 20 minutes before ending• Clean Tools (Very Important)• Volunteer Evaluations• “Thank You” and treats• Ask any prospective crew leaders if you may
recommend them for additional Citizen Forester training
• Review and note remaining work• Gather all tools, clean up sites• Return tools to main tool cache grouped by
type and assist in loading• Return construction notes or sign-in sheets• Thank everyone for their time and support
of our urban forest• Review evaluations (if any)
23

SAFETY NETIs Injury or Illness Serious?If so, do the following:
• Stop all work in crew• Ensure others not at risk, including yourself
(never create a 2nd victim)• Maintain calm within crew• Send runners (walking) to adjacent crews for
additional assistance & inform Safety Officer• CALL 911• Stay with injured/ill person until EMS arrival• DO NOT MOVE INJURED PERSON: Only EMS
should move an injured person• Obtain permission from conscious injured
person before assisting• IF HEAT EXHAUSTED or DEHYDRATED:
REMOVE FROM HEAT, place water or ice on pressure points (back of neck, under wrists), HYDRATE, and LIE DOWN with FEET ABOVE HEART LEVEL
Emergency ExitIf the Safety Officer determines an Emergency Exit is required due to extreme weather or other circumstances:• Gather crew, explain situation and how to
exit, gather tools, calmly walk to destination
24 SAFETY NET

BENEFITS OF TREES
BENEFITS OF TREES• Reduce energy use and costs• Reduce noise pollution• Lower air temperatures• Reduce storm water run-off• Reduce Urban Heat Island (UHI) • Provide Shade• Beautify our surroundings• Absorb Carbon Dioxide (Co2)• Supply oxygen• Helps environment• Conserve water• Reduce soil erosion• Wildlife habitat• Increase property values
Stresses Endured by Urban Street Trees• Heat reflected off cars, pavement, buildings• Vandalism• Air pollution, dust• Low soil fertility, high pH• Compacted soil, limited soil volume due to
underground utilities and caliche• Extensive pavement inhibits air/water move-
ment into the soil• Power lines, improper places to plant• MOST COMMON STRESS: POOR MAINTANENCE PRACTICES
25

RESEARCH
RESEARCH: BENEFITS OF TREESUrban Forests provide a myriad of essential services to the more that 220 million people who live in urban areas in the US (US Census Bureau 2001) - including reduced energy use, improved water quality, diverse wildlife habitat, and increased human health and well-being (Nowak et al. 2010).
Sacramento’s urban forest, consisting of six million trees, removed approximately 335 thousand tons of atmospheric CO2 annually, with an implied value of $3.3 million (McPherson 1998).
The increased crown area of both street trees and trees on residential lots is associated with decreased crime. Nice trees give a notion that the area is well cared for and socially sta-ble, whereas signs of neighborhood disorder give impression that the area is not well cared for and not subject to effective authority. Residents living in greener surroundings reported lower levels of fear, fewer incivilities and less aggressive and violent behavior. (Eaton & Sullivan, 2011).
Trees with a 16” caliper (width of trunk) are able to capture 1468 gallons of storm water runoff, capture 328 pounds of CO2 from the atmosphere, and able to save 220 kwh of en-ergy per year when planted near buildings (itree-eco).
Shade and lower air temperatures from three 25’ tall trees was estimated to save $100 annually for cooling, a 25% reduction (1,350 kWh) (McPherson, 1998).
Trees have a positive effect on people’s mood, reduce stress and anger. Plants have the ability to moderate noise and reduce wind flow. Trees are effective at soil erosion control and reducing dust emissions (Leung et al, 2011).
26

Parks & Recreation DepartmentCity of Phoenix
200 Washington, 16th FloorPhoenix, Arizona 85003
602-262-4925 | www.phoenix.gov/Parkswww.phoenix.gov/Parks/urbanforest
THANK YOUFunds for this project were provided in part by the Urban and Community Forestry Financial Assistance Program administered through the State of Arizona Forestry Division - Urban and Community Forestry, and the USDA Forest Service.
CITIZEN FORESTER PROGRAM
CREDITSLayout: Matthew A. ThomasPhotos: Richard Adkins (18,21)Lysistrata Hall (3)Eileen Kane (1,4)Matthew A. Thomas (9,13,22)
RESOURCESThis checklist is a compilation of concepts, strategies and proven actions neccessary for the proper and safe selection, installation and care of newly planted trees, taken from the following sources: Desert Botanical Garden’s Desert Landscape School Textbook, International Society of Arborculture’s Best Management Practices Tree Planting, Volunteers for Outdoor Arizona’s Crew Leader Safety & Tool Check List, Arizona Community Tree Council’s Arizona Tree Planting Guide and the City of Phoenix Forestry section.

NOTES
NOTES

INDEX
INDEX
HOW TO USE CHECK LISTBEFORE MEETING CREWPREPARE: ON SITEWELCOME: AT STAGING AREAGENERAL SAFETY: WELCOMECRITICAL SAFETYTOOL SAFETYTIME OF PLANTING/PRUNINGSITE SELECTION TREE SELECTIONTREE PLANTING PLANTING DETAILS: single trunkPLANTING DETAILS: multi-trunkTREE STAKINGSINGLE TRUNK TREE STAKING MULTI-TRUNK TREE STAKINGTREE CARE: PRUNING FACTORSTREE CARE: PRUNING BASICSPRUNING DETAILSMONITORING DURING WORKWRAP UP & EXITSAFETY NETBENEFITS OF TREESRESEARCH: BENEFITS OF TREESCREDITS
234567891011121415161718192021222324252627

CITIZENFORESTERPROGRAM
PLANT A SOLUTION